I painted my van over the summer, outside myhouse with no problems what so ever, it was so simple I don't know why people don't do it. So if that sounds interesting to you then read on......i'll try not to ramble on too much! (and use some pictures too!)
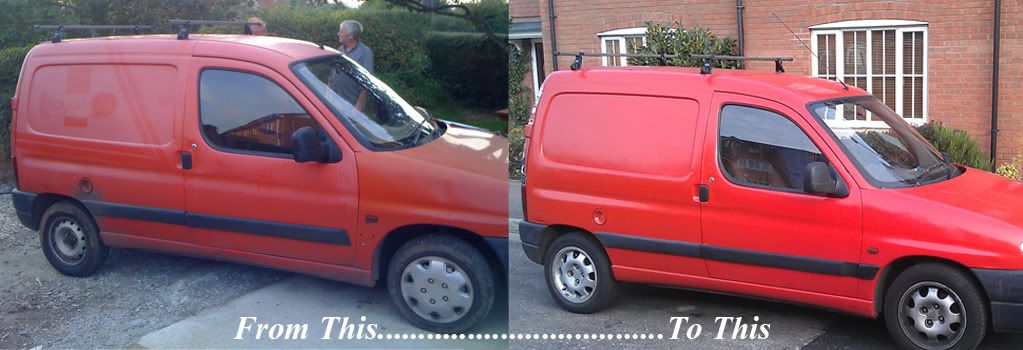
Now around six months ago I was playing with the idea of painting my van on the cheap, and after looking into it I decided to go ahead and give it a go.
Now I am no technical whizz kid, yes I can change and oil filter and maybe the back exhaust box, but anything more technical than changing headlight bulbs then I have to see help.....normally in my brother (zomerzet on here) or local back street garage!
Anyways I said that I would produce a guide for those who were themselves unsure of how to go about rollering, as it seems quite daunting but actually is pretty easy (and I'm an idiot so I should know!)
So this is how I did it, with a bit of research on the internet, and some helpful pokes from the always brilliant members on here I decided to go for it, and now comes the write up!
I herd about Rustoleum, and sure there is other ways out there, but its available really cheaply.
Firstly, you'll need some stuff!
Shopping List
Not extensive, but just to give you an idea.
Sand paper I used 600 & 800 grit (Halfords or similar retailer)
Newspaper (free through the door!)
Masking Tape (Homebase)
Cleaning Stuff (already had it!)
Methylated Spirits (Homebase)
Roller Tray & Handle (Homebase)
Roller Heads - Get Gloss Ones. I Managed with 3 but bought 10!
oh, and paint. I got mine online (linky www.lawson-his.co.uk/scripts/products.php?cat=CombiColor#RUSTOLEUMCOMBI%202.5LTR)
Total cost.......£60 ish.
So ordered up 2.5 litres of chosen colour.....
So firstly, I experimented on a spare door that I had to break into....thats another story...
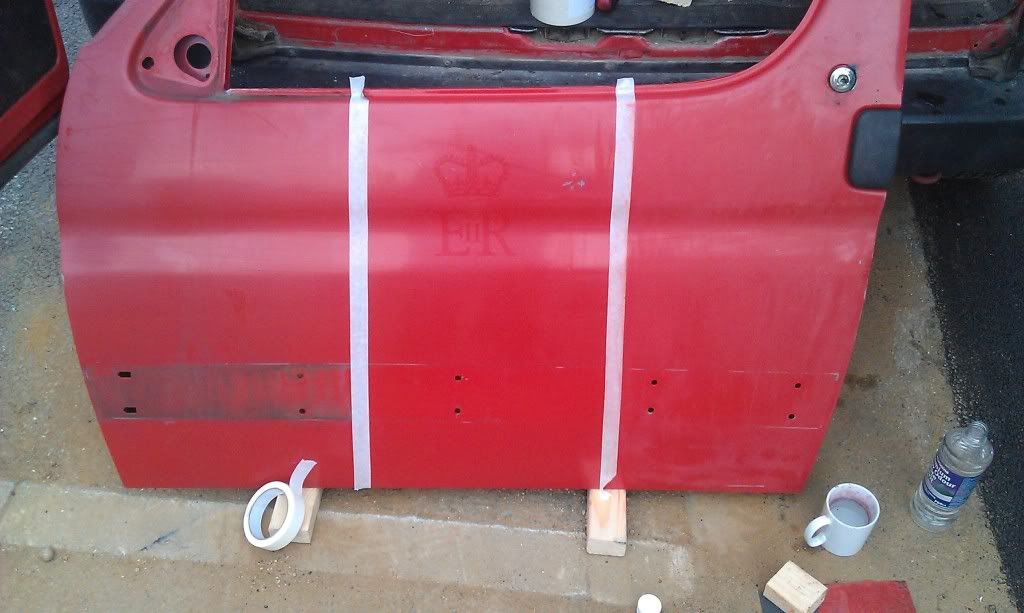
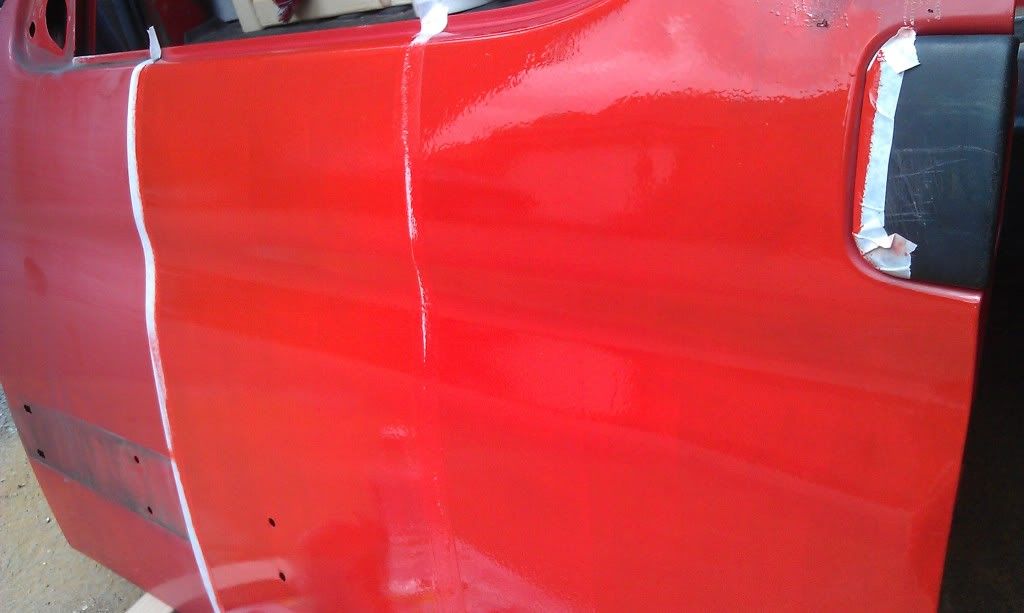
So the door came up ok. I didn't really do any prep as it was just a test to see what it would come up like. The middle section was Keyed in first (this is where you rub the paintwork down with sandpaper which gives the new paint something to grip onto, and not peel off when dry)
Preparation
Ideally you want to remove as much of the trim, window rubbers and external parts as possible. I painted the van in stages, so took me longer, as I was still using it in-between coats! But if you have the time or space to keep it off the road for a few days then you can fully strip everything off and give yourself a blank canvas so to speak. (I know a project goes from everyday runner to full restoration so your car might already be in bits!)
Preparation Sanding
I used 600 grit to prep my paintwork. And used it wet to reduce the mess of dust everywhere.
Keying in and preparation is the most important stage, really spend time on getting out chips and smoothing down the surface, I was a bit scared to go too far with the sanding, but you can go back to bare metal, remember your putting paint back on in the next stage!
Just make sure the edges are smooth. I don't know how to go about body filling and all that, but get all that done, have a nice smooth surface ready for your paint and then its easy. I wasn't too fussed about getting a showroom finish, but the more time you put in the better the results you get for sure.
I did mine by hand, but you could use a machine to help you, a sanding mouse or similar with fine paper would save lots of time and elbow grease but remember I was on a budget!
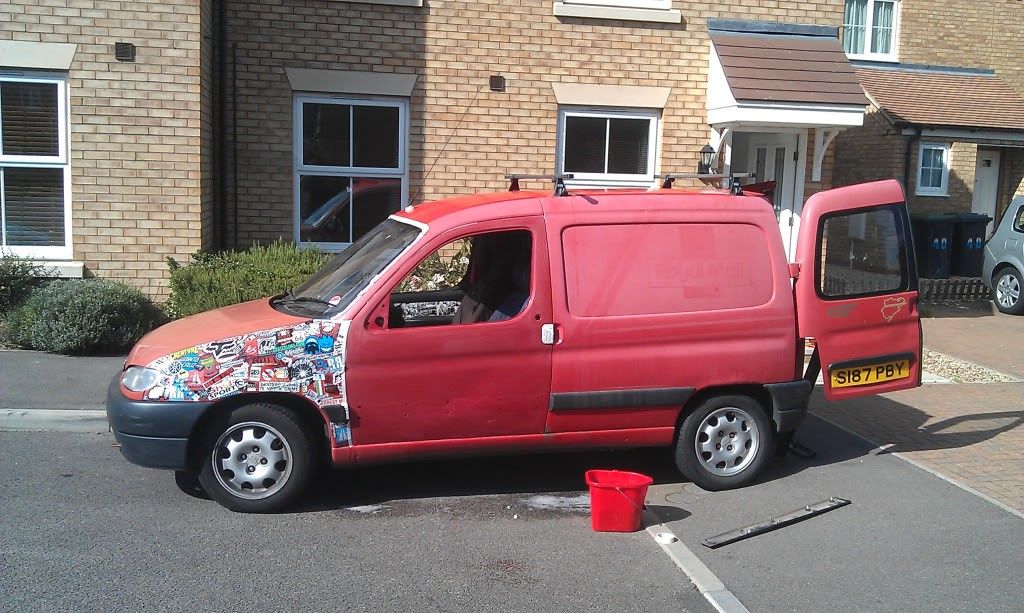
Preparation Masking
So when you finished sanding give it all a good wash. Gets rid of any dust and you can feel where you might have missed.
Because your not spraying, its not nearly as messy, and you have mush more control of where the paint goes.
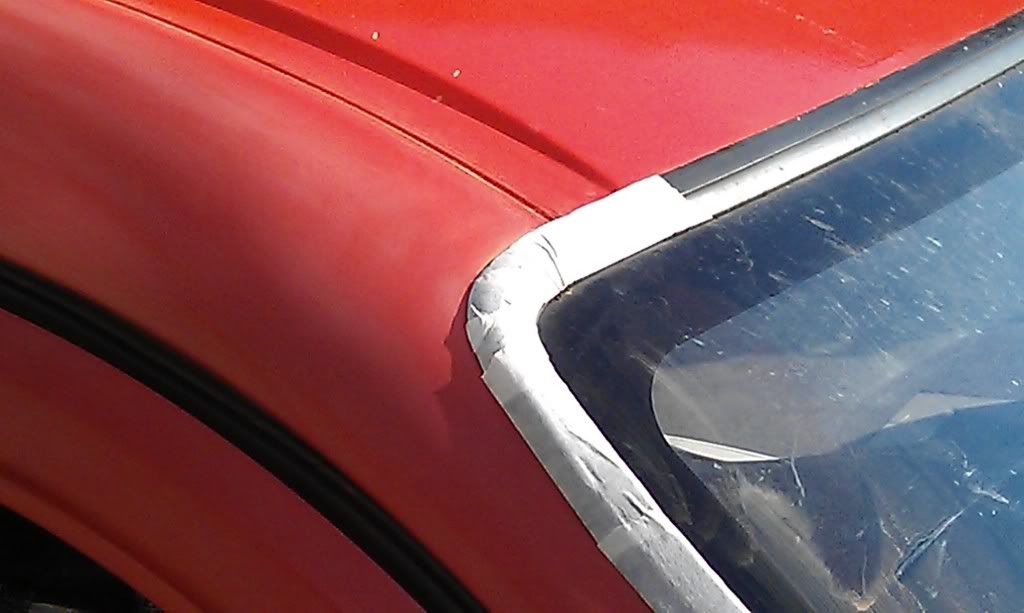
I've already mentioned about stripping all the bits off, but those bits you cant remove, cant figure out how too or are just too lazy to bother then mask them right up, I wasn't about to remove the windscreen for example, but had managed to strip the doors off pretty well.
Painting
Now its not tricky, and have seen a couple different ways of doing this. I did it the lazy way and it still worked out fine. If you want the best finish, then thin your paint with cellulose thinners, around 1 part thinners to 9 parts I found worked best. (that's 10% thinners to paint or something!)
I did that for my first coat, but then didn't bother thinning at all for the second coat. Personally I don't see the difference (being an idiot), but I understand that the thinners gives you a better coverage and easier application.
Try to load the roller without too much paint on it, drips are not good, take longer to dry, have to sand them and do it again, and is generally just rubbish!
I did it in sections, starting with the roof, I had the luxury of being able to sit on-top of the van, as this could be quite an awkward job, and then turned my attention to the rest of the van.
Take your time. The paint will stay tacky for about 3/4 hours depending on the weather. I was blessed buy only two bugs deciding to land on the paint, but that's the only real pain I had.
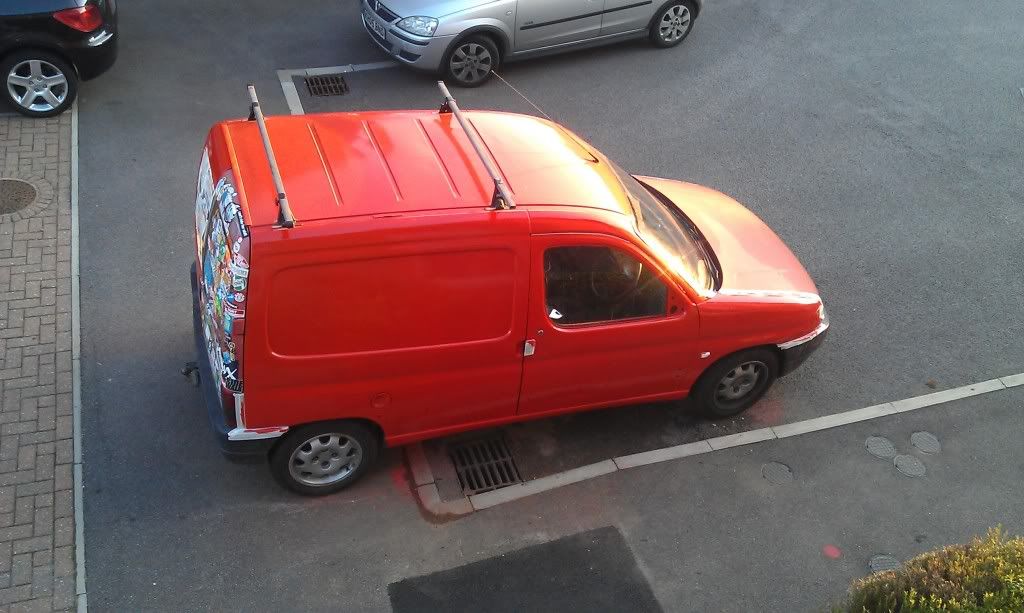
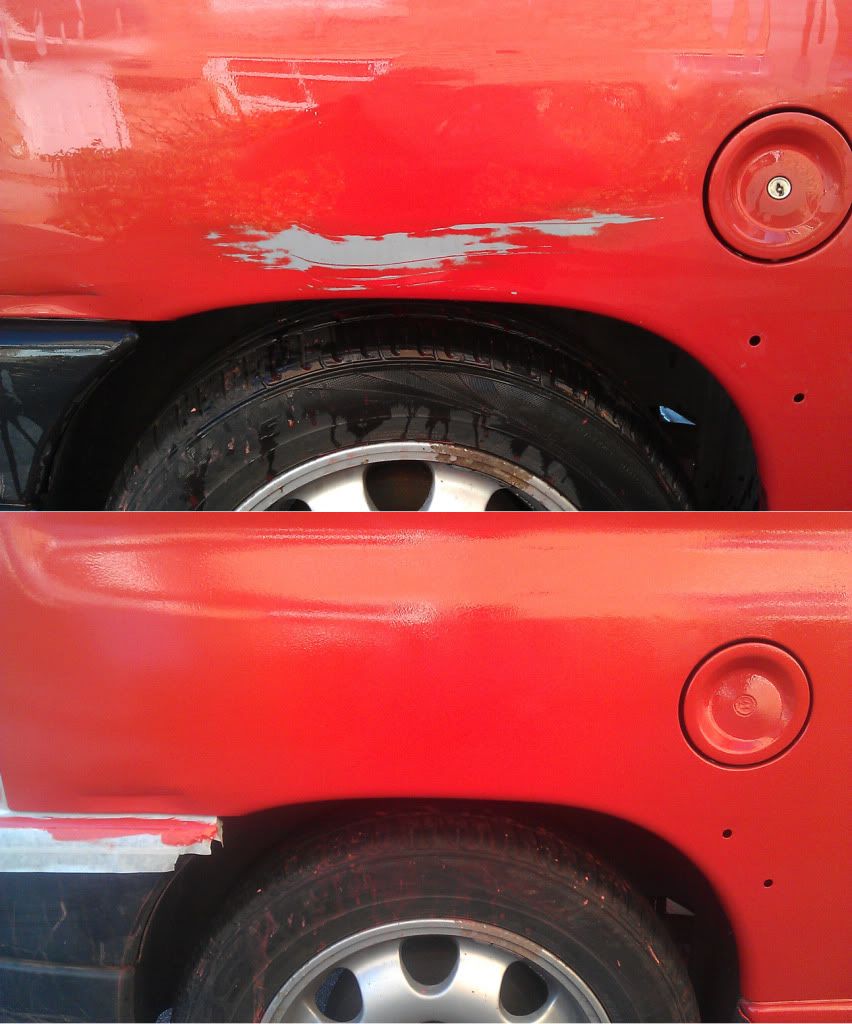
Between coats I didn't re-key the paint I just put another layer of un-tinned paint straight ontop of the previous layer. I found one coat looks very patchy, but after too a much more even coverage was produced.
After two full coats I was left with over half the original tin of 2.5 litre paint, which is waiting in the cupboard now for when I have time and weather to go about another 2 coats.
My understanding is that after 3-4 coats you can smooth back the paint using a very fine grade paper, 800 or finer 1200, and this should remove the orange peel type effect. I have yet to do this but will in the summer to see if I can get a smooth style finish, as I have seen it is achievable, and you can actually get some amazing results (see the links below!)
So there you have it, it really is as easy as that. The more time you spend on it the better finish you can achieve. I haven't looked into getting a nice shiny finish yet, but I have seen what can be done so I will update this thread when I get around to it with some more useful idiots information!
Another useful side effect of painting, is now the rain beads on the paintwork rather than filming, which shows the metal underneath is protected from water getting through the paint, and as the paint is originally for protecting industrial metalwork, this fills me with a warm glow inside!
Good luck, now go paint!
Further reading.....and useful links
wiki.club8090.co.uk/index.php/Bodywork_and_Glass_Roller_painting
Has a bit more in depth info, and also a really handy colour chart to give a better idea of paint codes and colours.
www.lawson-his.co.uk/scripts/products.php?cat=CombiColor#RUSTOLEUMCOMBI%202.5LTR
Buy your paint here.....
www.tools-paint.com/product/CombiColor_7300_for_metal_2.5_Litre._Any_colour_mixed_to_your_specification._7300MC25
This site also sells paint that they will mix colours to your specification, but costs a little bit more.
s1230.photobucket.com/albums/ee485/morns84/Painting%20Van/
More photos of the various stages of rollering
retrorides.proboards.com/index.cgi?board=techni&action=display&thread=108473
The thread that started it all
retrorides.proboards.com/index.cgi?board=readersrides&action=display&thread=93702
My Van Project build page

Now around six months ago I was playing with the idea of painting my van on the cheap, and after looking into it I decided to go ahead and give it a go.
Now I am no technical whizz kid, yes I can change and oil filter and maybe the back exhaust box, but anything more technical than changing headlight bulbs then I have to see help.....normally in my brother (zomerzet on here) or local back street garage!
Anyways I said that I would produce a guide for those who were themselves unsure of how to go about rollering, as it seems quite daunting but actually is pretty easy (and I'm an idiot so I should know!)
So this is how I did it, with a bit of research on the internet, and some helpful pokes from the always brilliant members on here I decided to go for it, and now comes the write up!
I herd about Rustoleum, and sure there is other ways out there, but its available really cheaply.
Firstly, you'll need some stuff!
Shopping List
Not extensive, but just to give you an idea.
Sand paper I used 600 & 800 grit (Halfords or similar retailer)
Newspaper (free through the door!)
Masking Tape (Homebase)
Cleaning Stuff (already had it!)
Methylated Spirits (Homebase)
Roller Tray & Handle (Homebase)
Roller Heads - Get Gloss Ones. I Managed with 3 but bought 10!
oh, and paint. I got mine online (linky www.lawson-his.co.uk/scripts/products.php?cat=CombiColor#RUSTOLEUMCOMBI%202.5LTR)
Total cost.......£60 ish.
So ordered up 2.5 litres of chosen colour.....
So firstly, I experimented on a spare door that I had to break into....thats another story...


So the door came up ok. I didn't really do any prep as it was just a test to see what it would come up like. The middle section was Keyed in first (this is where you rub the paintwork down with sandpaper which gives the new paint something to grip onto, and not peel off when dry)
Preparation
Ideally you want to remove as much of the trim, window rubbers and external parts as possible. I painted the van in stages, so took me longer, as I was still using it in-between coats! But if you have the time or space to keep it off the road for a few days then you can fully strip everything off and give yourself a blank canvas so to speak. (I know a project goes from everyday runner to full restoration so your car might already be in bits!)
Preparation Sanding
I used 600 grit to prep my paintwork. And used it wet to reduce the mess of dust everywhere.
Keying in and preparation is the most important stage, really spend time on getting out chips and smoothing down the surface, I was a bit scared to go too far with the sanding, but you can go back to bare metal, remember your putting paint back on in the next stage!
Just make sure the edges are smooth. I don't know how to go about body filling and all that, but get all that done, have a nice smooth surface ready for your paint and then its easy. I wasn't too fussed about getting a showroom finish, but the more time you put in the better the results you get for sure.
I did mine by hand, but you could use a machine to help you, a sanding mouse or similar with fine paper would save lots of time and elbow grease but remember I was on a budget!

Preparation Masking
So when you finished sanding give it all a good wash. Gets rid of any dust and you can feel where you might have missed.
Because your not spraying, its not nearly as messy, and you have mush more control of where the paint goes.
I've already mentioned about stripping all the bits off, but those bits you cant remove, cant figure out how too or are just too lazy to bother then mask them right up, I wasn't about to remove the windscreen for example, but had managed to strip the doors off pretty well.

Painting
Now its not tricky, and have seen a couple different ways of doing this. I did it the lazy way and it still worked out fine. If you want the best finish, then thin your paint with cellulose thinners, around 1 part thinners to 9 parts I found worked best. (that's 10% thinners to paint or something!)
I did that for my first coat, but then didn't bother thinning at all for the second coat. Personally I don't see the difference (being an idiot), but I understand that the thinners gives you a better coverage and easier application.
Try to load the roller without too much paint on it, drips are not good, take longer to dry, have to sand them and do it again, and is generally just rubbish!
I did it in sections, starting with the roof, I had the luxury of being able to sit on-top of the van, as this could be quite an awkward job, and then turned my attention to the rest of the van.
Take your time. The paint will stay tacky for about 3/4 hours depending on the weather. I was blessed buy only two bugs deciding to land on the paint, but that's the only real pain I had.


Between coats I didn't re-key the paint I just put another layer of un-tinned paint straight ontop of the previous layer. I found one coat looks very patchy, but after too a much more even coverage was produced.
After two full coats I was left with over half the original tin of 2.5 litre paint, which is waiting in the cupboard now for when I have time and weather to go about another 2 coats.
My understanding is that after 3-4 coats you can smooth back the paint using a very fine grade paper, 800 or finer 1200, and this should remove the orange peel type effect. I have yet to do this but will in the summer to see if I can get a smooth style finish, as I have seen it is achievable, and you can actually get some amazing results (see the links below!)
So there you have it, it really is as easy as that. The more time you spend on it the better finish you can achieve. I haven't looked into getting a nice shiny finish yet, but I have seen what can be done so I will update this thread when I get around to it with some more useful idiots information!
Another useful side effect of painting, is now the rain beads on the paintwork rather than filming, which shows the metal underneath is protected from water getting through the paint, and as the paint is originally for protecting industrial metalwork, this fills me with a warm glow inside!
Good luck, now go paint!
Further reading.....and useful links
wiki.club8090.co.uk/index.php/Bodywork_and_Glass_Roller_painting
Has a bit more in depth info, and also a really handy colour chart to give a better idea of paint codes and colours.
www.lawson-his.co.uk/scripts/products.php?cat=CombiColor#RUSTOLEUMCOMBI%202.5LTR
Buy your paint here.....
www.tools-paint.com/product/CombiColor_7300_for_metal_2.5_Litre._Any_colour_mixed_to_your_specification._7300MC25
This site also sells paint that they will mix colours to your specification, but costs a little bit more.
s1230.photobucket.com/albums/ee485/morns84/Painting%20Van/
More photos of the various stages of rollering
retrorides.proboards.com/index.cgi?board=techni&action=display&thread=108473
The thread that started it all
retrorides.proboards.com/index.cgi?board=readersrides&action=display&thread=93702
My Van Project build page


