|
|
|
Mar 17, 2024 19:58:24 GMT
|
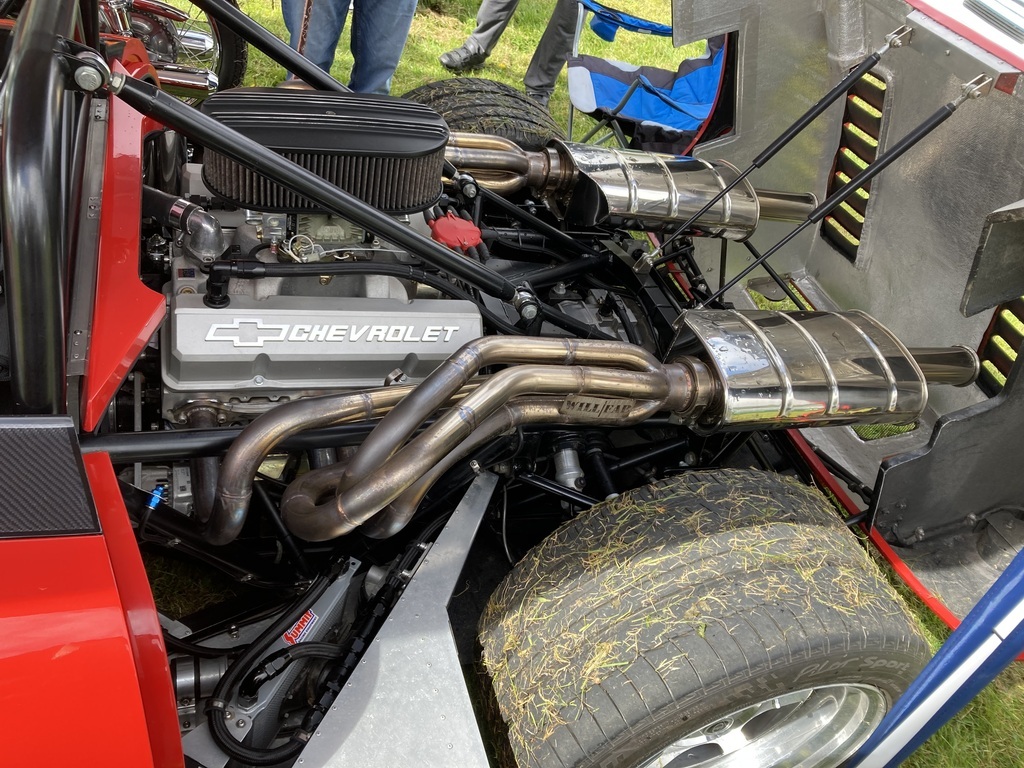
So today’s task is to make the bell hosing “quick release”. Usually, the bell housing is attached to the type 9 gearbox with 4x m12 bolts from the bellhousing, through into the front of the gearbox. With a quick release bellhousing, it is mounted with bolts from the gearbox, into the bellhousing. This means you can now leave the bell housing attached to the engine and remove the gearbox on its own. In a rally, this should speed up a gearbox change. I want this system as I think it may be easier to fit the bell housing and box separately. The blank holes that the bolts usually go through to thread into the gearbox  Threaded bosses that need to be fitted into these holes after they’ve been drilled out to 14mm  I had to grind some of the shoulders off the inserts to get them to fit  The inserts are then drilled and roll pinned to the bell housing to stop them falling out / turning.  See that hole in the centre. The selector shaft protrudes into that hole so it has to be oil tight when fitted. There is a gasket between the bell housing and box to seal it. I took the bell housing over my brother’s to drill the holes to 14mm. My brother pointed out that the oil is now going to come out of the gap between the bellhousing and 5mm spacer plate that I welded on yesterday 😡 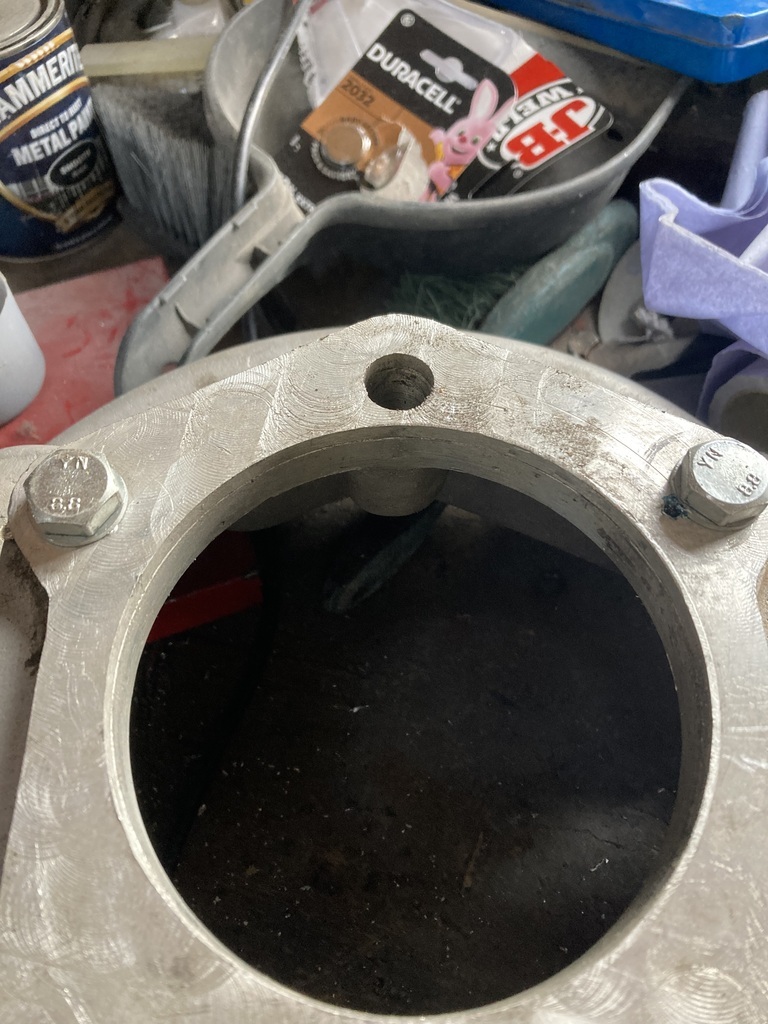 So to seal this gap, I used a counter sink bit to open the hole up past the gap 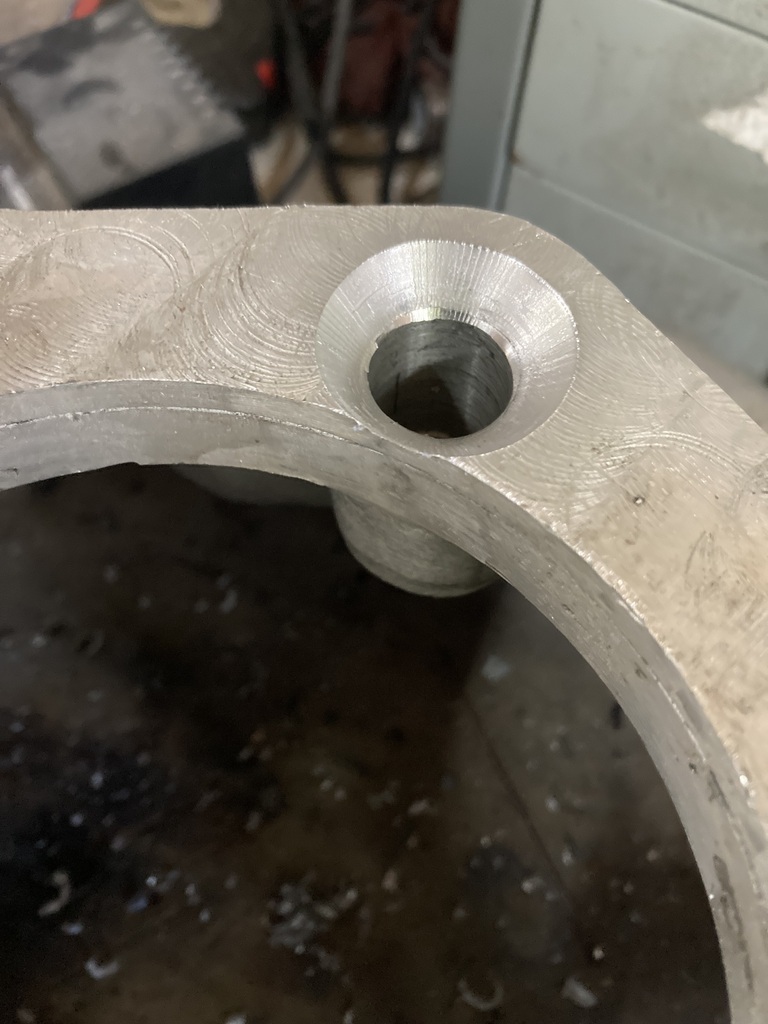 I then welded the gap up 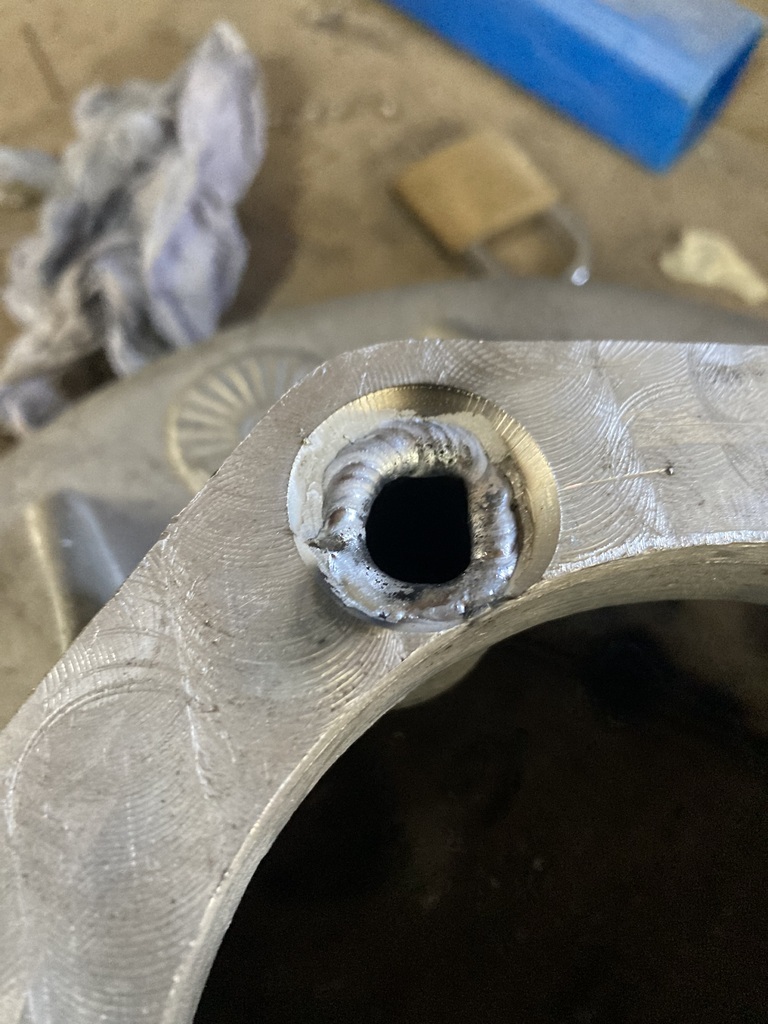 Next I filled the rest of the counter sink 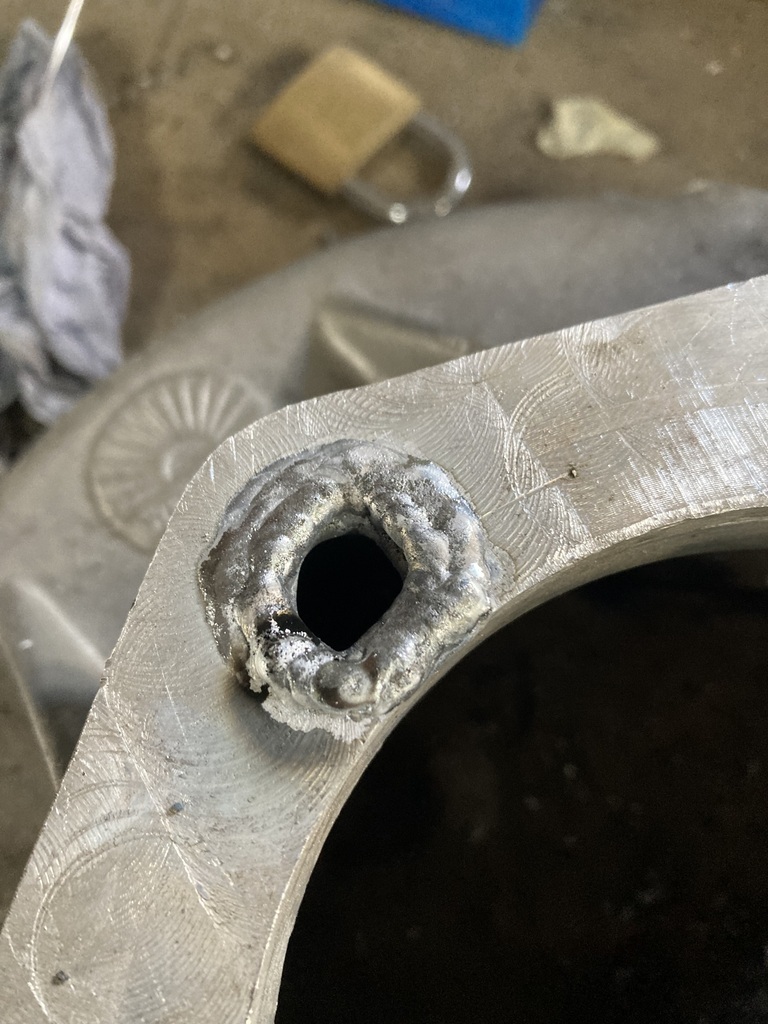 And finally ground it back and burred out the hole. 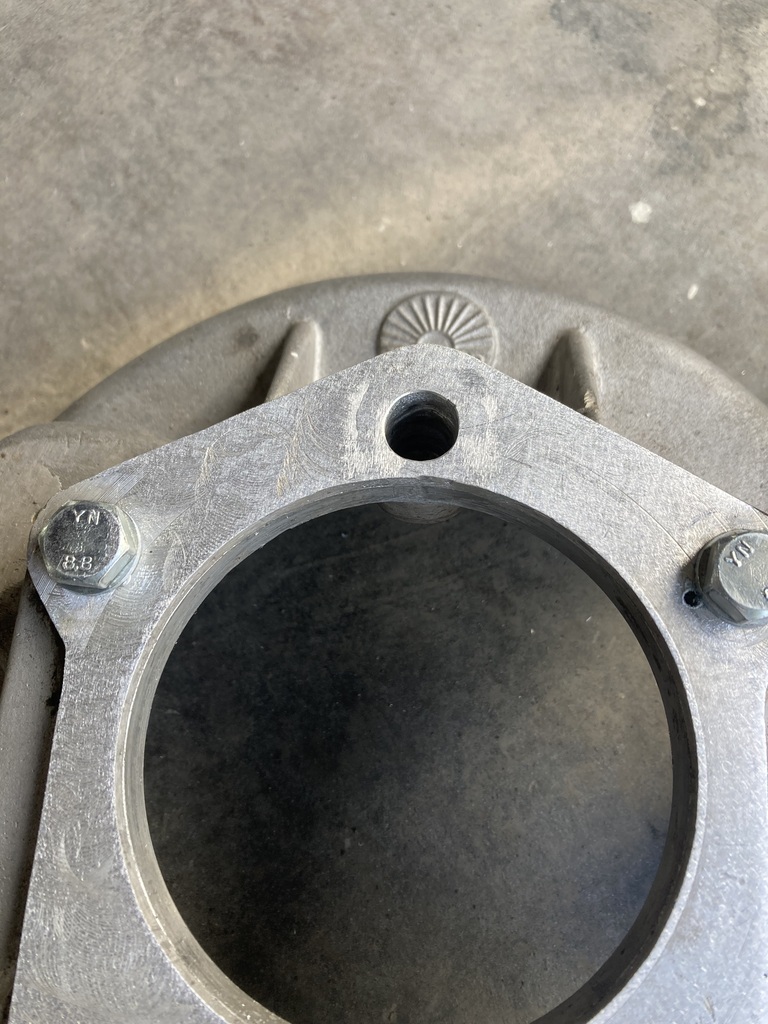 I had to tickle the gearbox casing with the power file to get the bolts to fit in from the other side. 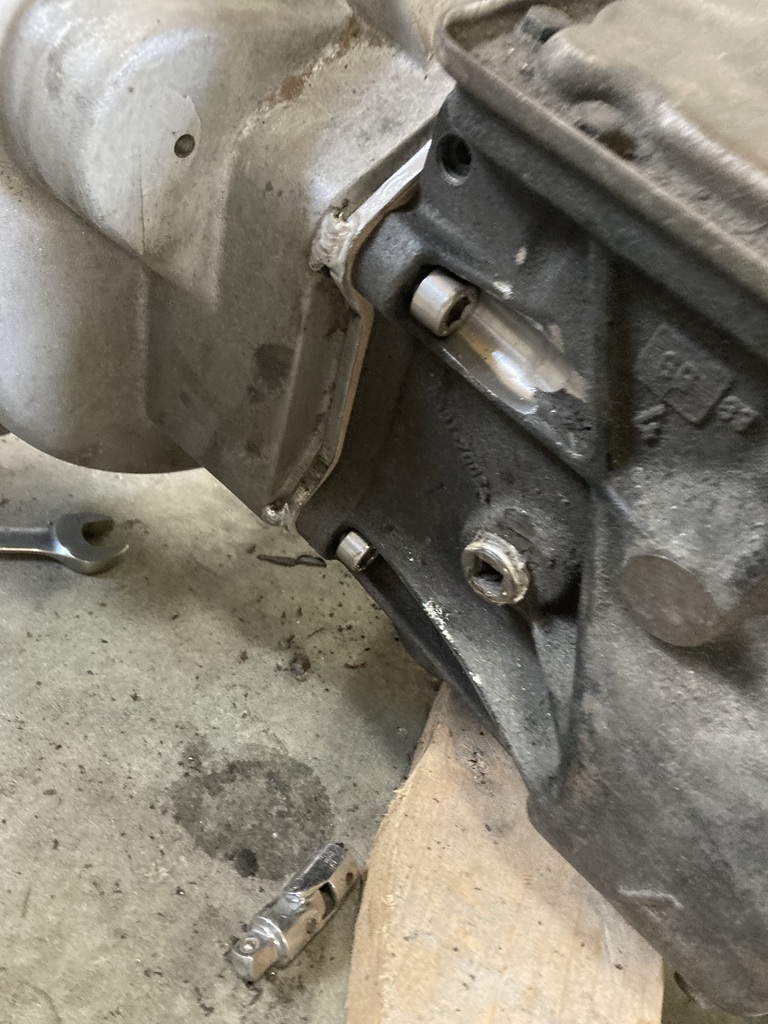 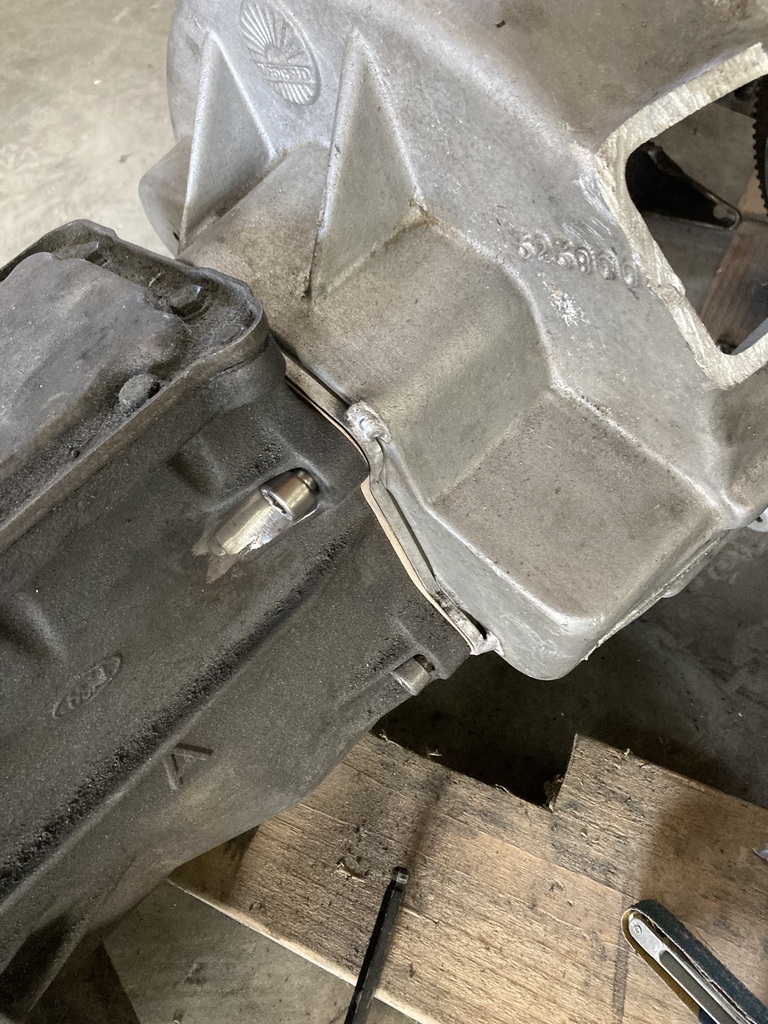 You can see that the bolt has not tightened up all the way. This is because the casing is not flat, holding the bolt off. I’ve borrowed a pointy burr to remove this next time I’m out the garage. |
| |
|
|
|
|
|
|
|
|
|
|
Looking Excellent. It’s lovely when you get to see your project finally in paint after all the hard work that has gone into it.
|
| |
|
|
|
|
|
Mar 16, 2024 16:45:45 GMT
|
It’s been a couple of weeks since I’ve done anything out the garage. Work, life, the boys doing a motorkhana in the MGZR are all to blame. So today after a quick shopping trip with Mrs Jonsey to get some lights for the shepherd’s hut, I managed to get a few hours in. After the struggle to get the correct clutch cover, I managed to get the right one. The flywheel is in fact a 14xe item and not a 16xe. Apparently a popular mod as it is lighter. 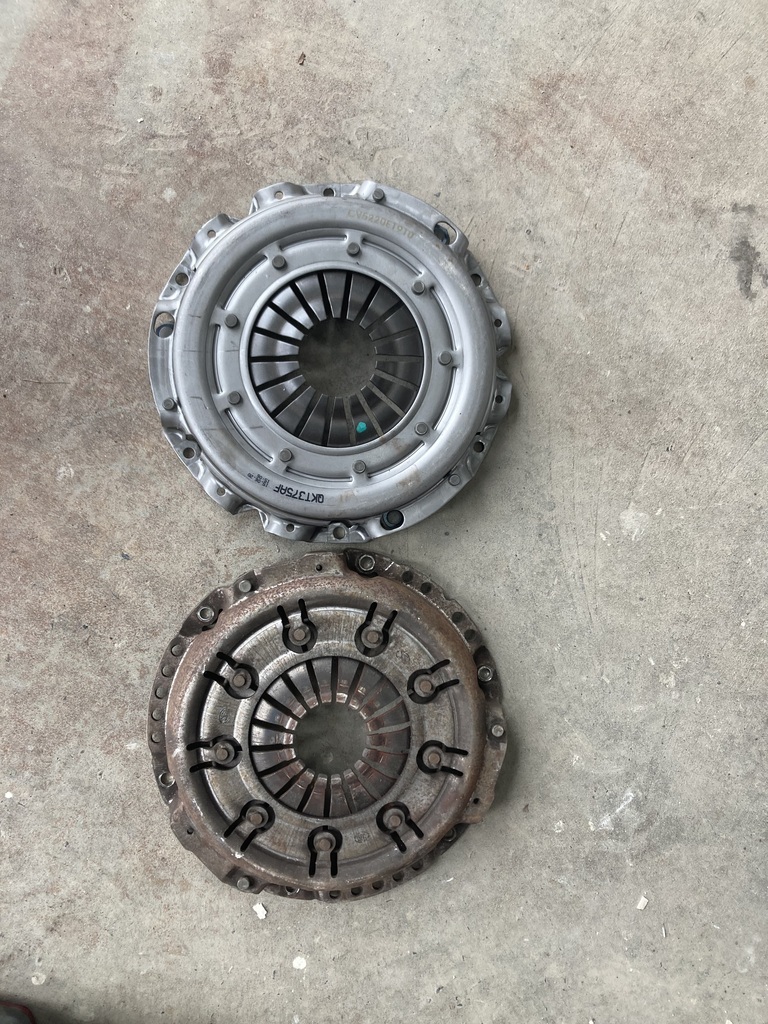 So armed with my shiny new paddle clutch and an old gearbox input shaft, 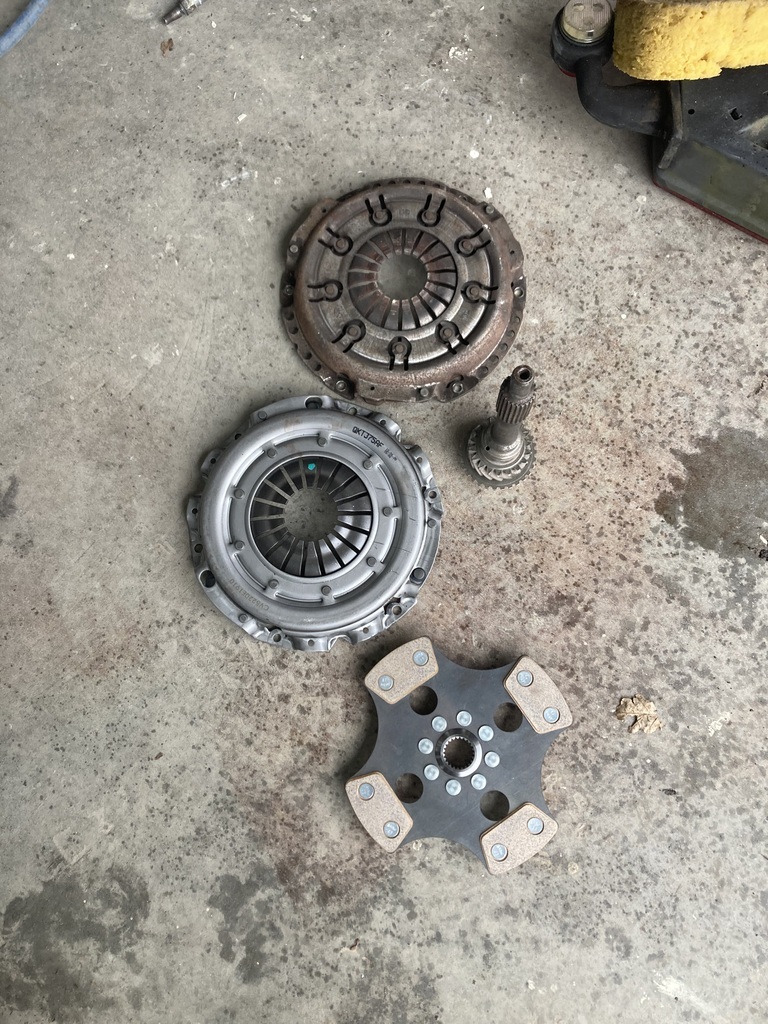 the cover got fitted to the flywheel. 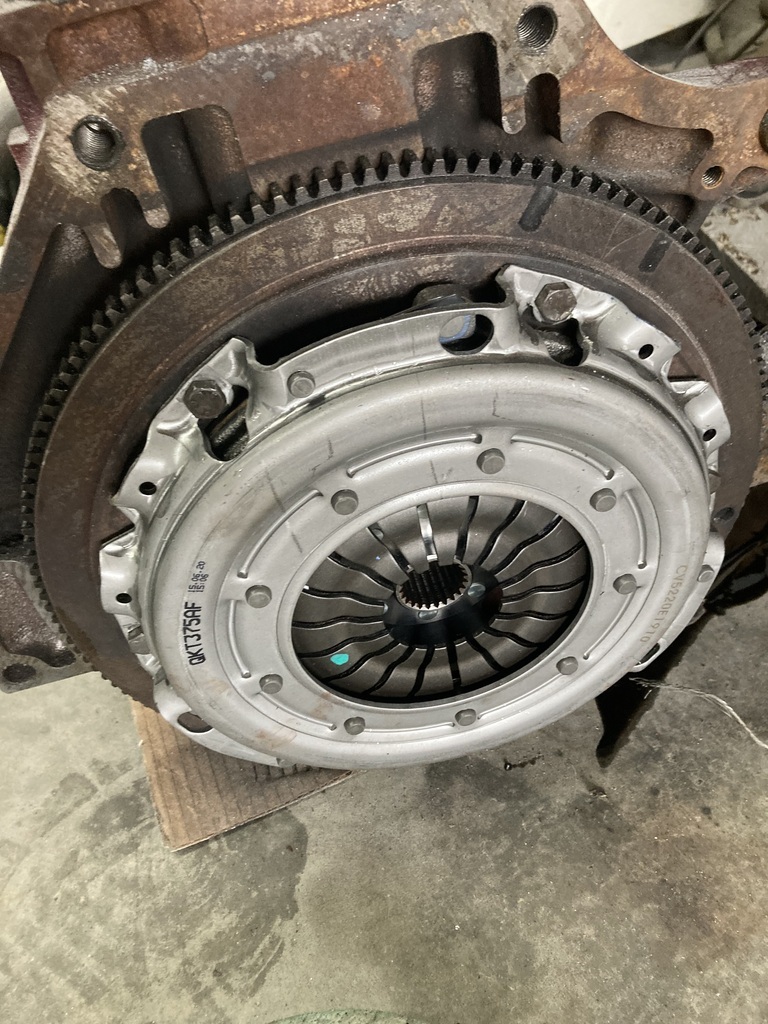 The 5mm spacer plate got welded to the Westfield bellhousing. 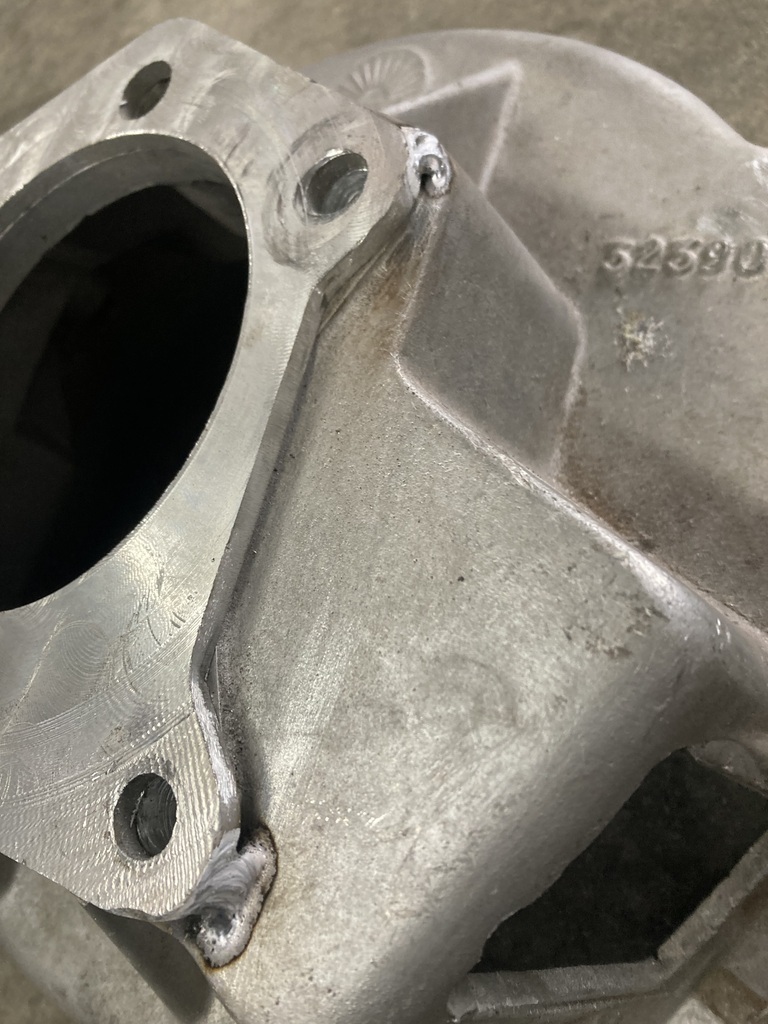 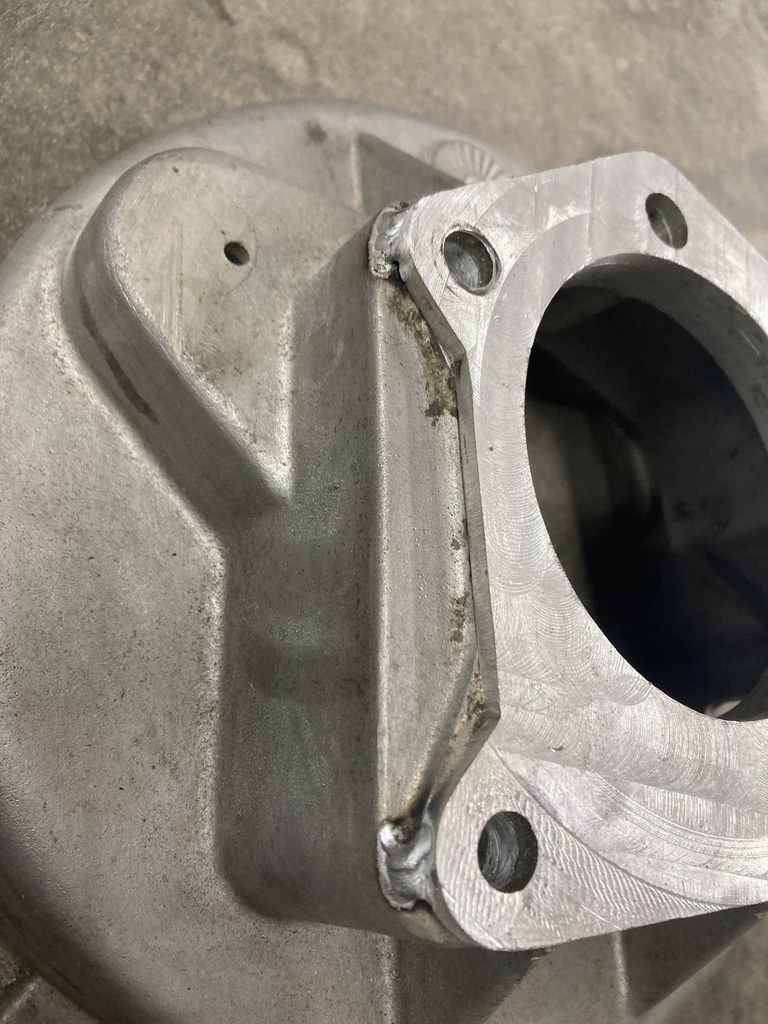 It’s only tacked on for location. The bolts actually hold it in place. I then fitted the clutch fork and release bearing 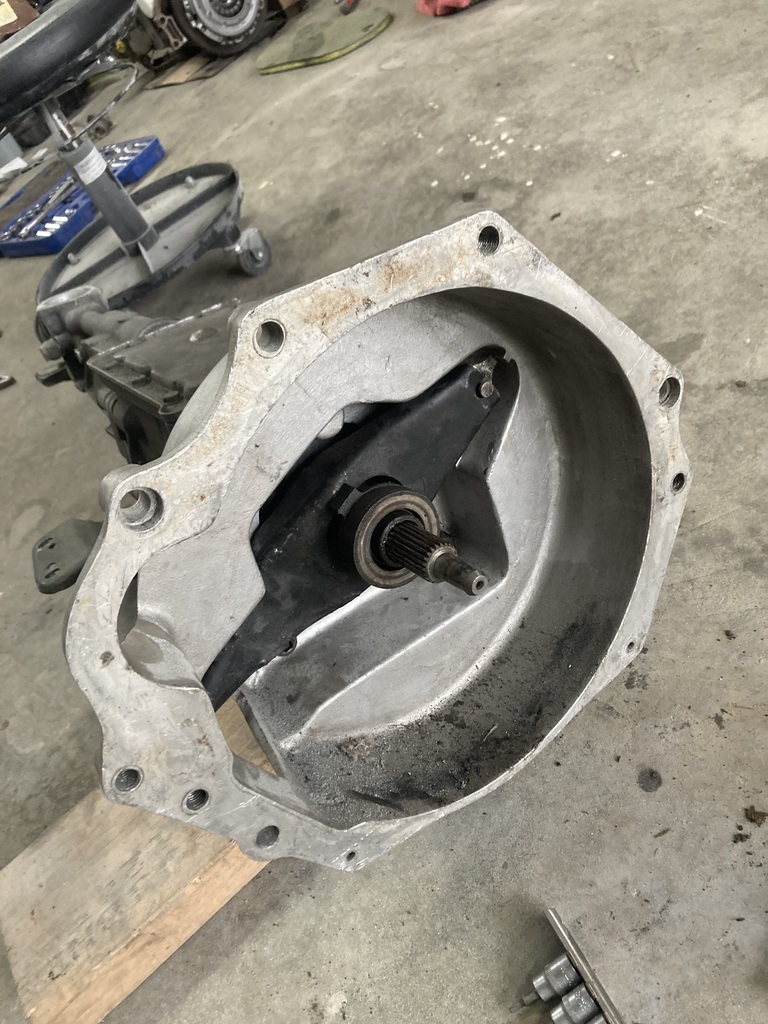 This is so I could check if there is free play between the realease bearing and clutch fingers. I don’t have the correct Westfield fork. This is a Sierra item I modified years ago with a mk3 Cortina bearing. So was unsure if it would work. Luckily it did and I’ve got 5mm free play 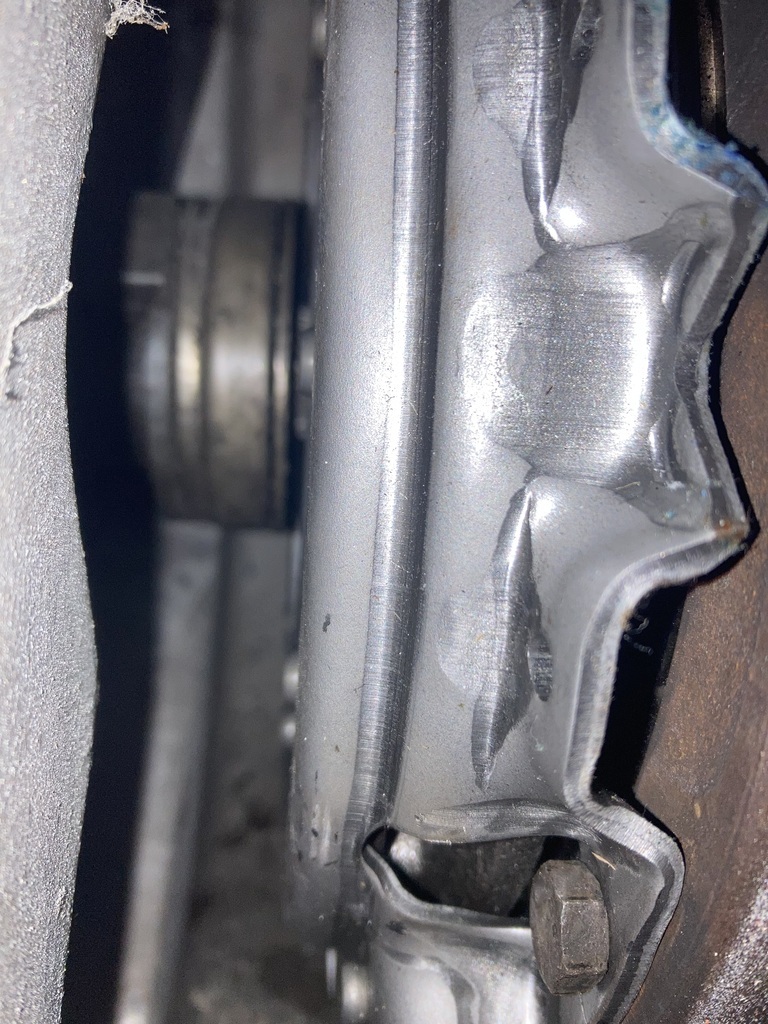 All bolted up. 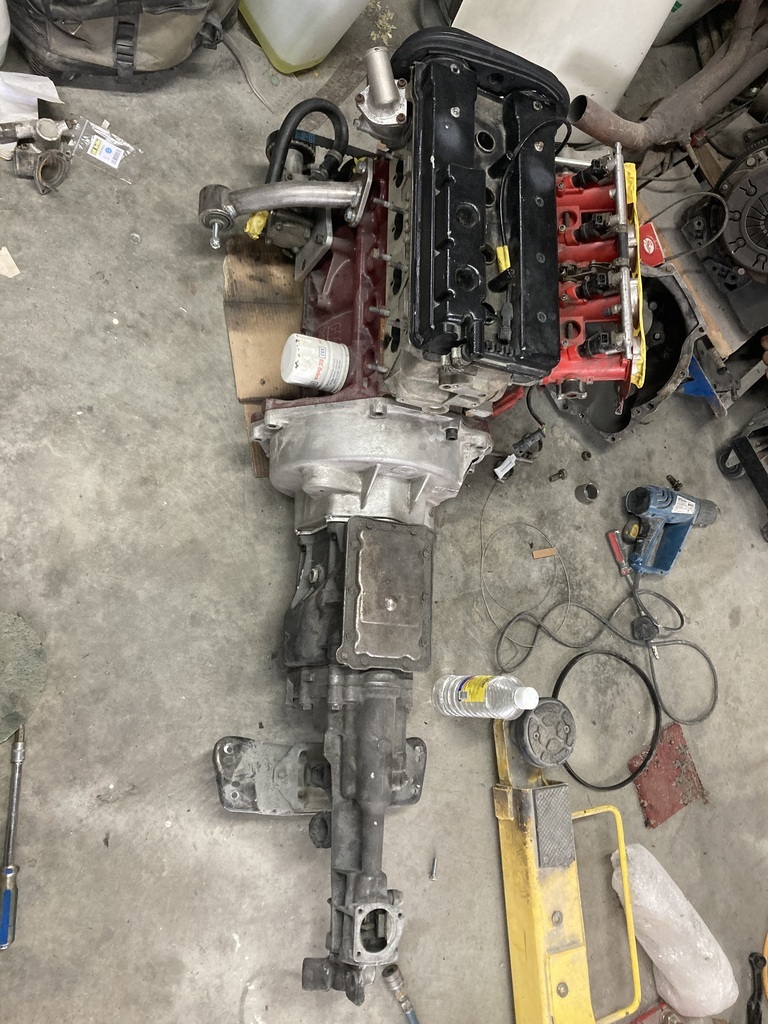 While I remembered, I cut off the bit of the engine block around the starter as it was close to the steering shaft. 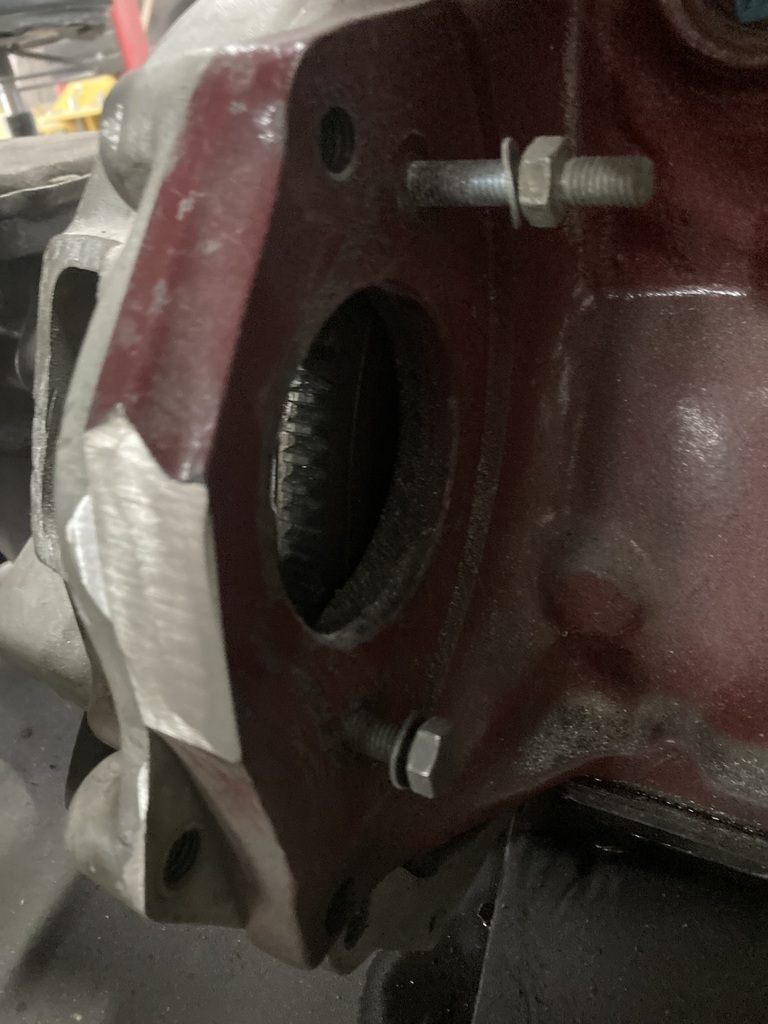 There is still plenty of meat left. Tomorrow I’ll take the bellhousing back off as I need to convert it to quick release. |
| |
|
|
|
|
|
Mar 14, 2024 17:46:04 GMT
|
|
I have double roll pins on the selector shaft on my type 9 gearbox as they do like to snap when there is only one. I think you’re supposed to fit them with the splits 180° opposing each other.
|
| |
|
|
|
|
|
Mar 13, 2024 19:08:49 GMT
|
Darkspeed I’ve had to fit the 30mm seamless tube mounts, where a threaded boss is welded into the centre of the tube to mount the seat in order to log book my Escort. You are still allowed to bolt straight through the floor (through 3mm plates) which is what both my brother’s have done on their Gilberns (the 3mm plates being welded to the chassis in this case). This is lighter and also not such a pain when your seats go out of date in 5 years time and the new seats are guaranteed not fit the original mounting bosses.
|
| |
Last Edit: Mar 13, 2024 19:10:58 GMT by jonsey
|
|
|
|
|
Mar 13, 2024 14:45:02 GMT
|
|
|
| |
|
|
|
|
|
Mar 13, 2024 13:49:24 GMT
|
|
Are you going to have to redo the seat mounts to current MSUK spec too?
|
| |
|
|
|
|
|
|
|
So, a few bits and bobs from the last couple of visits to the garage. Sean’s drilling guide was used to sort the new locations for the pulley roll pins, an 4.7mm bit used to drill them out. And the slot made bigger to avoid the key way on the cam belt pulley. 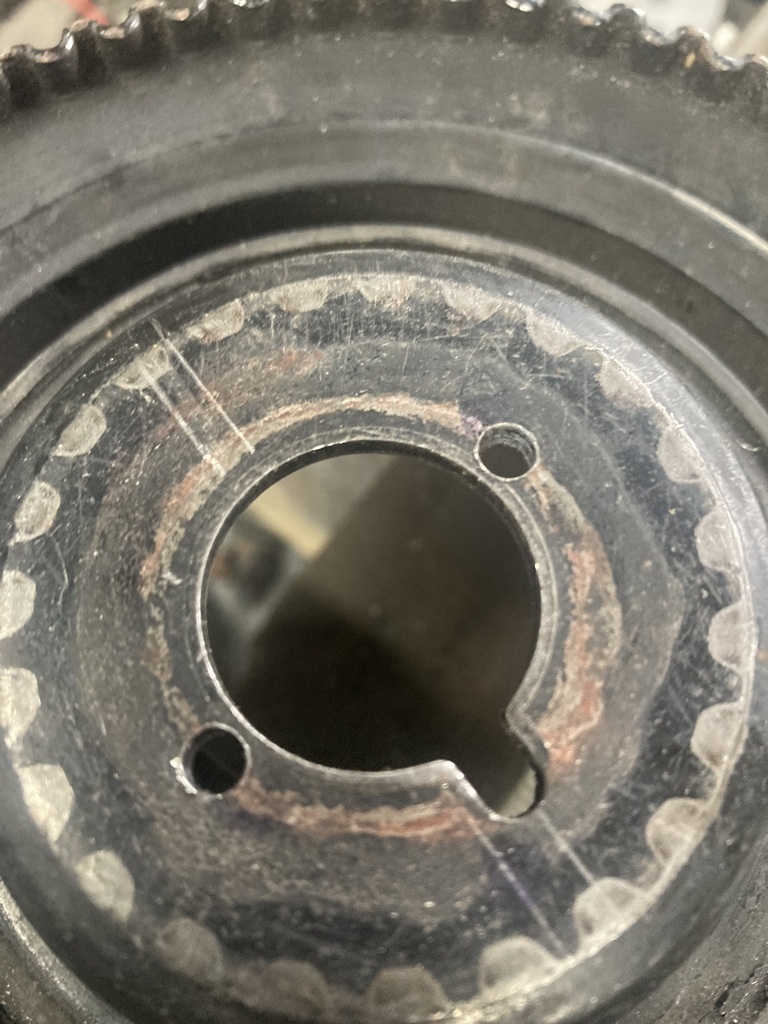 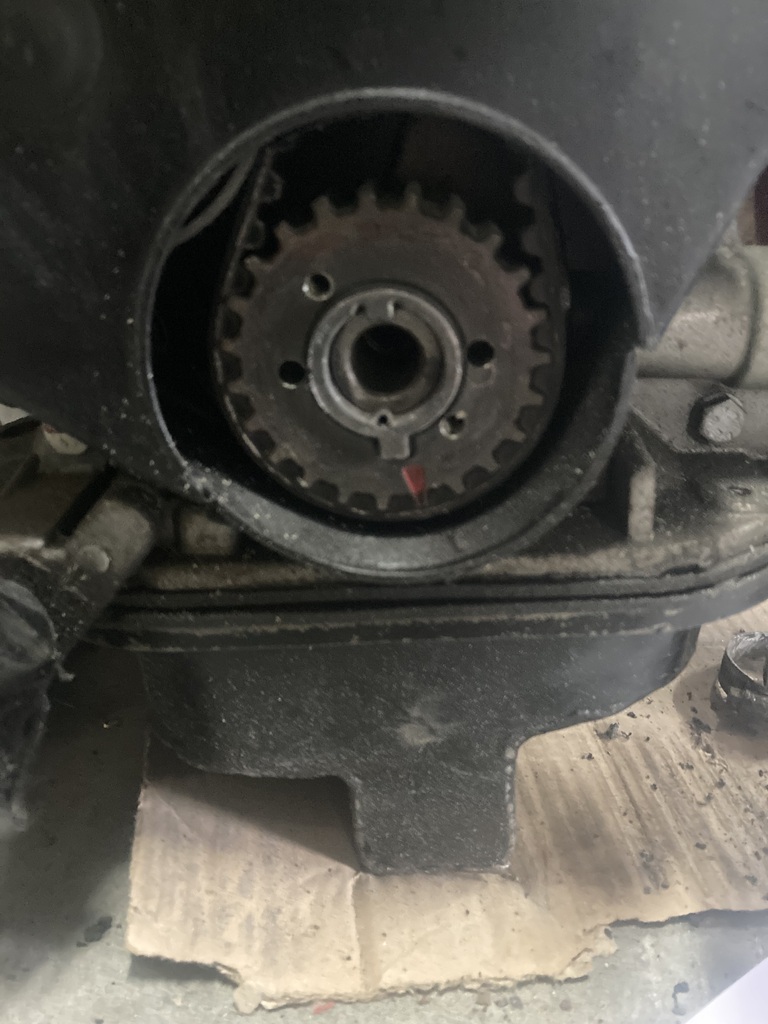 So the roll pins could be refitted along with the alternator pulley, new spacer and dry sump pulley. 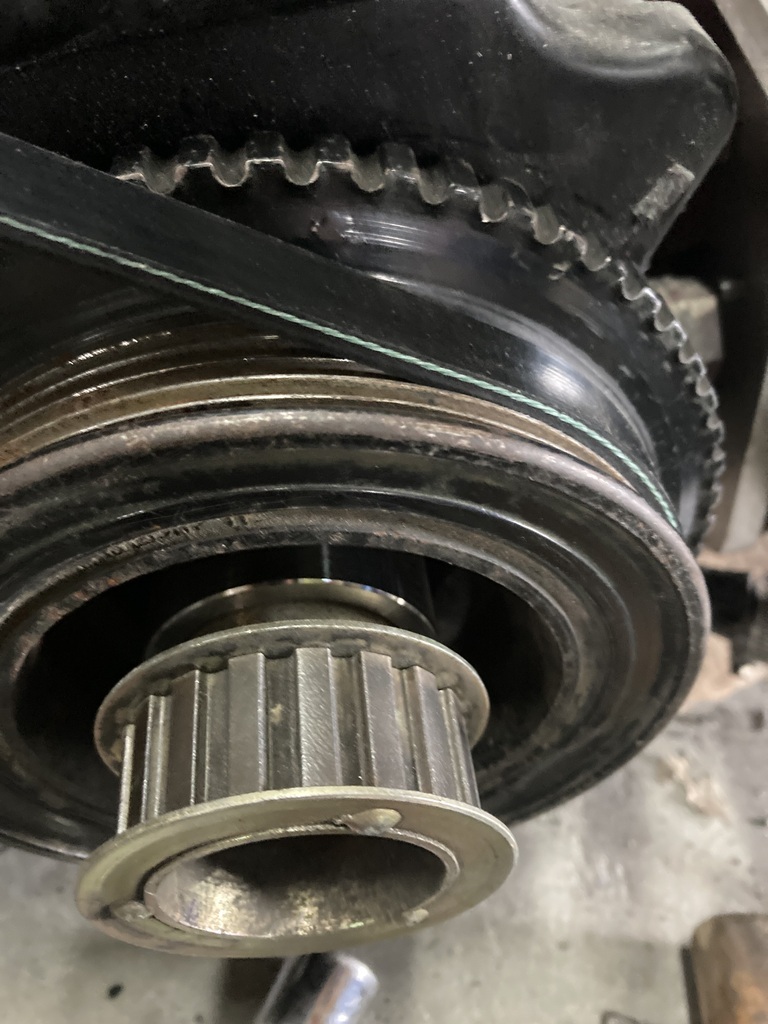 The turn buckle tensioner I bought did not fit as it hit the alternator before lining up with the bolt hole. I used a bit of 8mm plate that bolts to the alternator to lift the mounting point a tad and the adjuster now fits. 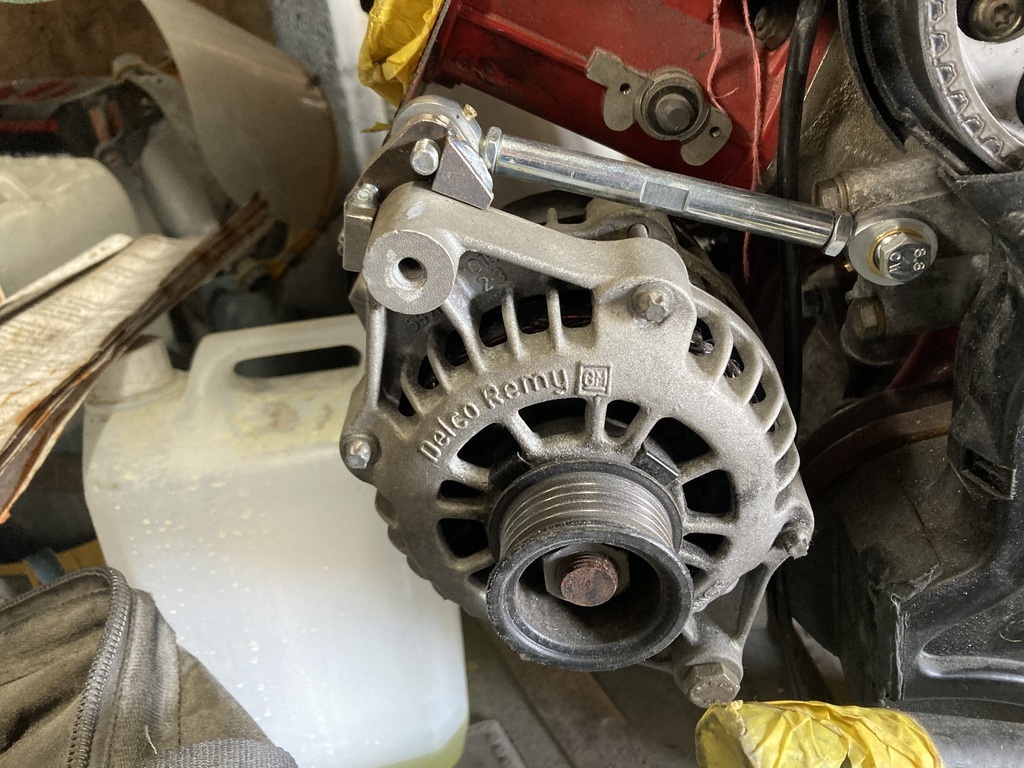 This means I could now measure up for a belt. I cut an old shorter belt, pulled it tight on the pulleys and used a ruler to measure the gap. 913mm was my first choice. Lots of slack and only tightened with the turnbuckle at max length. So I tried a 900mm and that was to tight. Couldn’t even get it over the pulley, the Goldilocks length was 905mm that fitted just right. 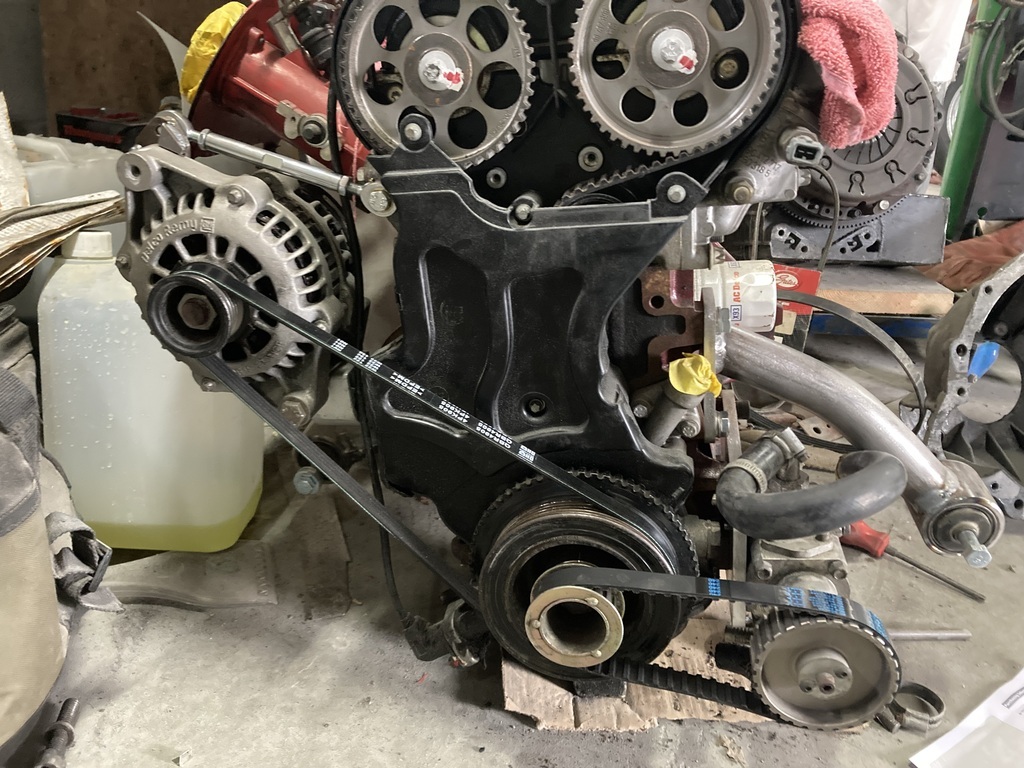 Thanks goes to the young gentleman on here with 4door mk2 Escort with MX5 engine (His name escapes me now). He works in my local motor factors and ordered the right size in for me. In other news, I’m struggling to sort a clutch cover. My flywheel is flat. I ordered a kit for a Tigra as that is what I believe the engine is from, and the cover that arrived is for a recessed flywheel. So that needs to go back. |
| |
|
|
|
|
|
|
|
|
What a machine. A little bit more radical than my mk1. Looking forward to the progress
|
| |
|
|
|
|
|
Feb 22, 2024 22:47:17 GMT
|
Snapped taps are a nuisance. It did raise my temperature a tad😡 |
| |
|
|
|
|
|
Feb 22, 2024 12:19:23 GMT
|
|
Looking forward to the updates. I’m only down the road near Pontyberem
|
| |
|
|
|
|
|
Feb 22, 2024 12:09:49 GMT
|
Another call shift, another couple of hours done. I had bought a 6”x6” piece of aluminum plate that was slightly thicker than the original at 9.5mm. Using the drill guide, I used a 3mm drill to get a pilot in each hole. Then a drilled the mounting holes to the engine to 10.5 and chamfered for the counter sunk bolts. Next I drilled the pump mount holes out to 5mm. These were then taped to 1/4unc. Everything was going great until I snapped the tap in the last hole. We tried welding on a nut to wind it out but the tap just broke up. So as needs must, I used a drift to knock the tap out, used the countersink bit on both sides of the plate, welded up the hole and finally (after getting a new tap from eBay) tapped the last hole. No photos of any of this, but here it is completed. 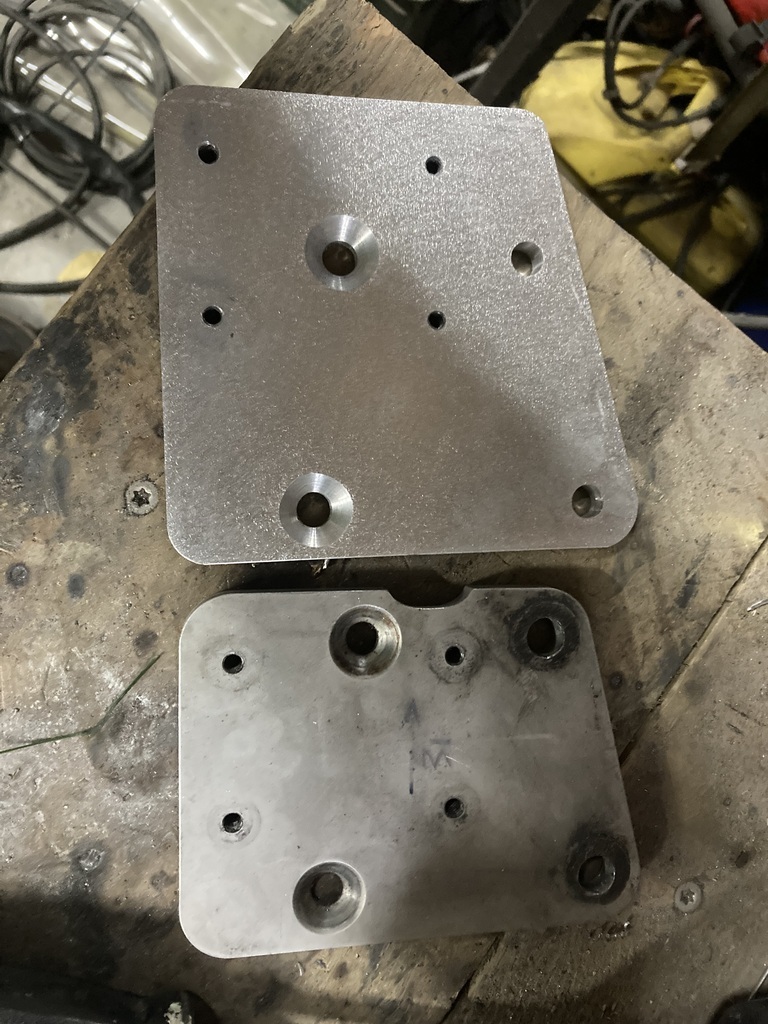 I could then try it on the engine 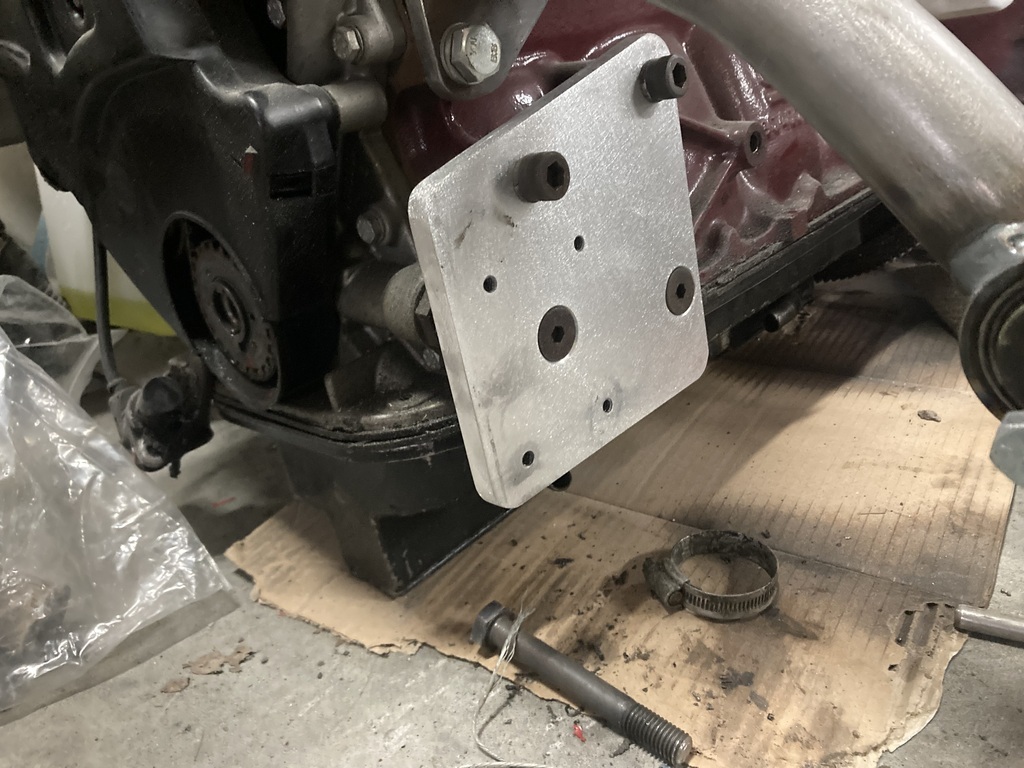 And finally mount the oil pump 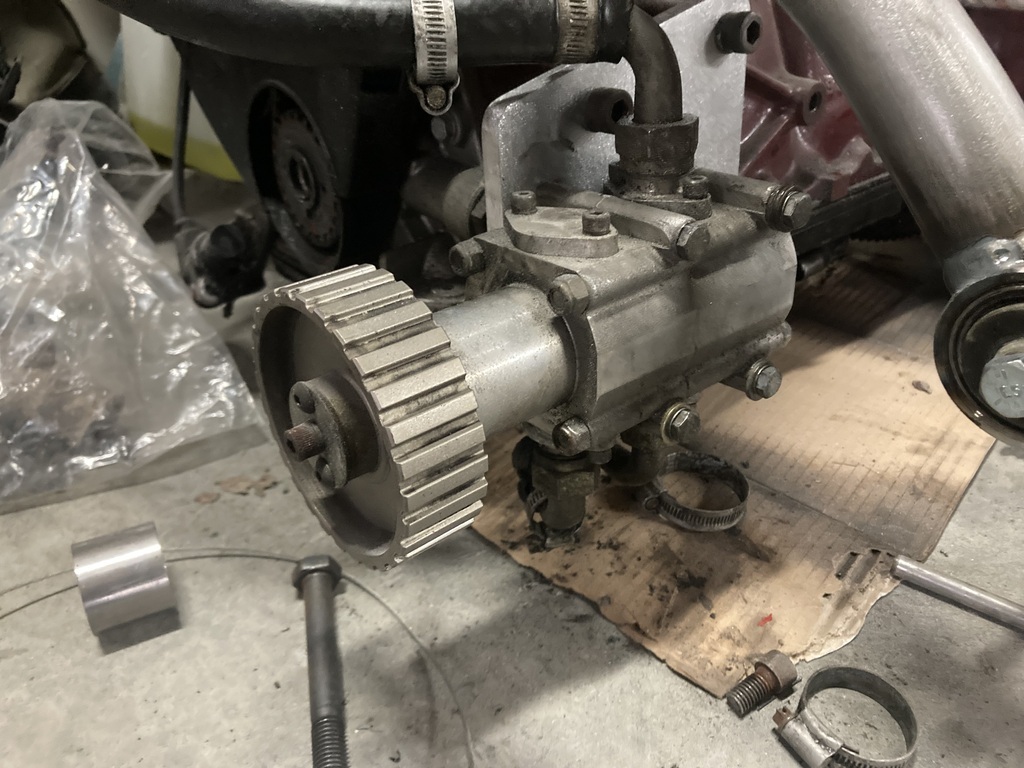 Sorted. The pulley spacer turned up too 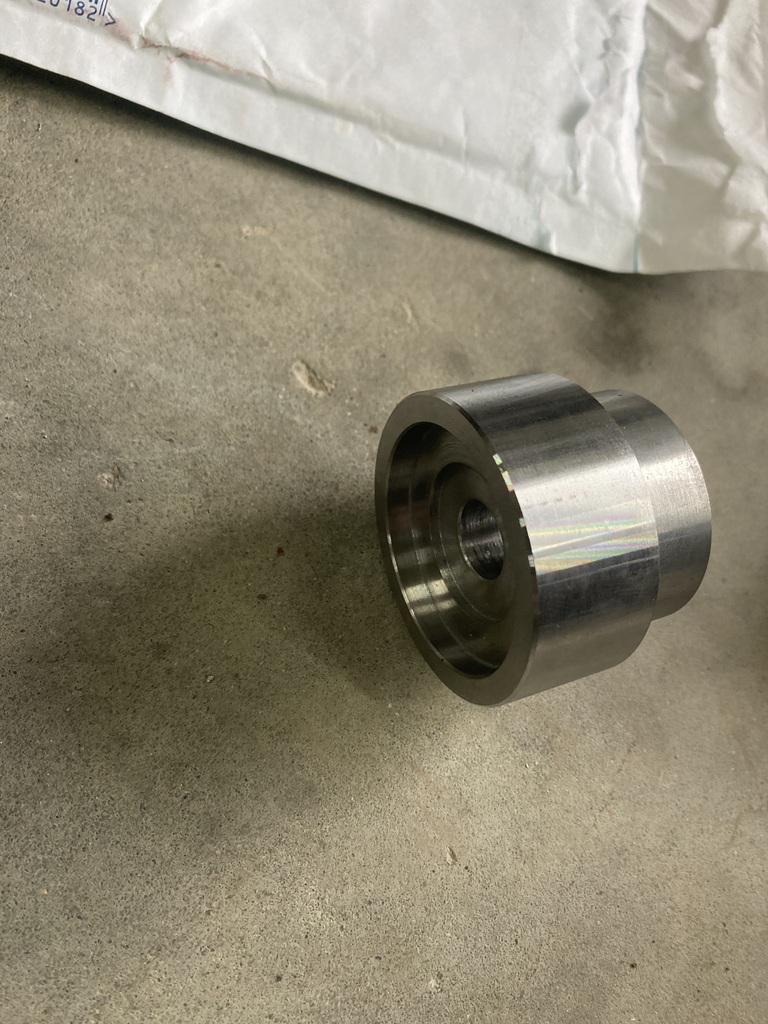 And Sean has also 3D printed a couple of bits for me to both drill the 2 roll pin holes in the crank pulley and at the same time move the “space” in the trigger wheel by the required 11°, to match the race car trigger wheel. 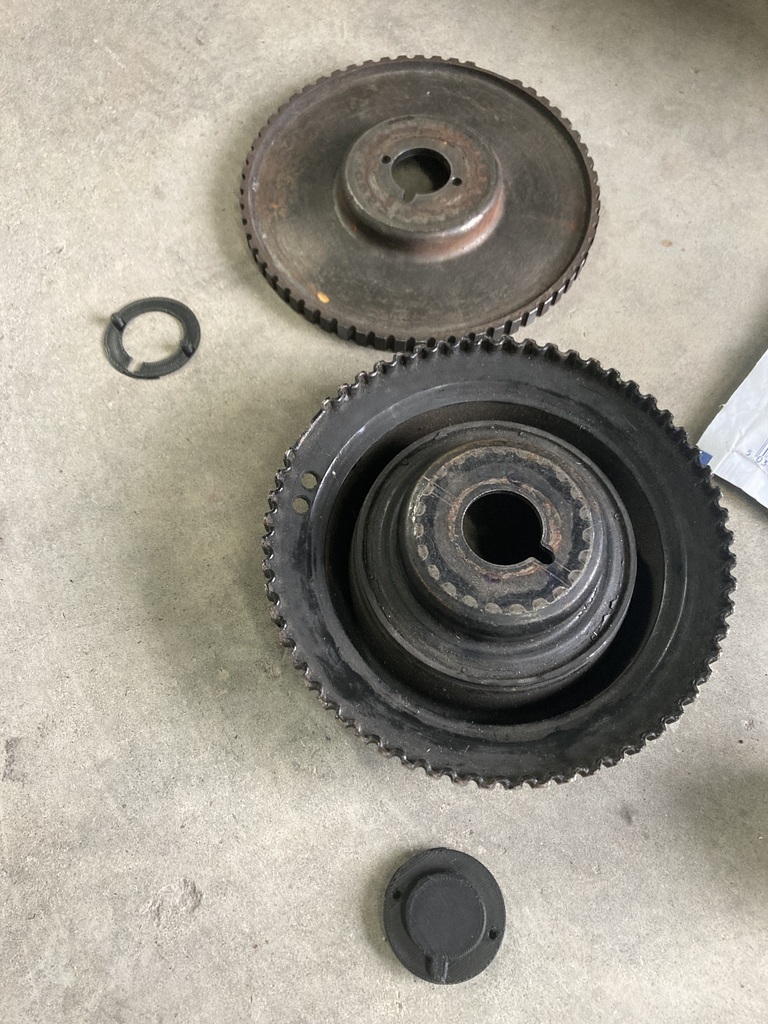 |
| |
|
|
|
|
|
Feb 17, 2024 21:57:49 GMT
|
|
They do look cool though
|
| |
|
|
|
|
|
Feb 17, 2024 18:31:30 GMT
|
Dry sump pump continued. My nephew has used some witchcraft to produce some plastic parts. A spacer to move the crank pump drive out past the alternator pulley. And a plate to move the dry sump pump forward by the same amount 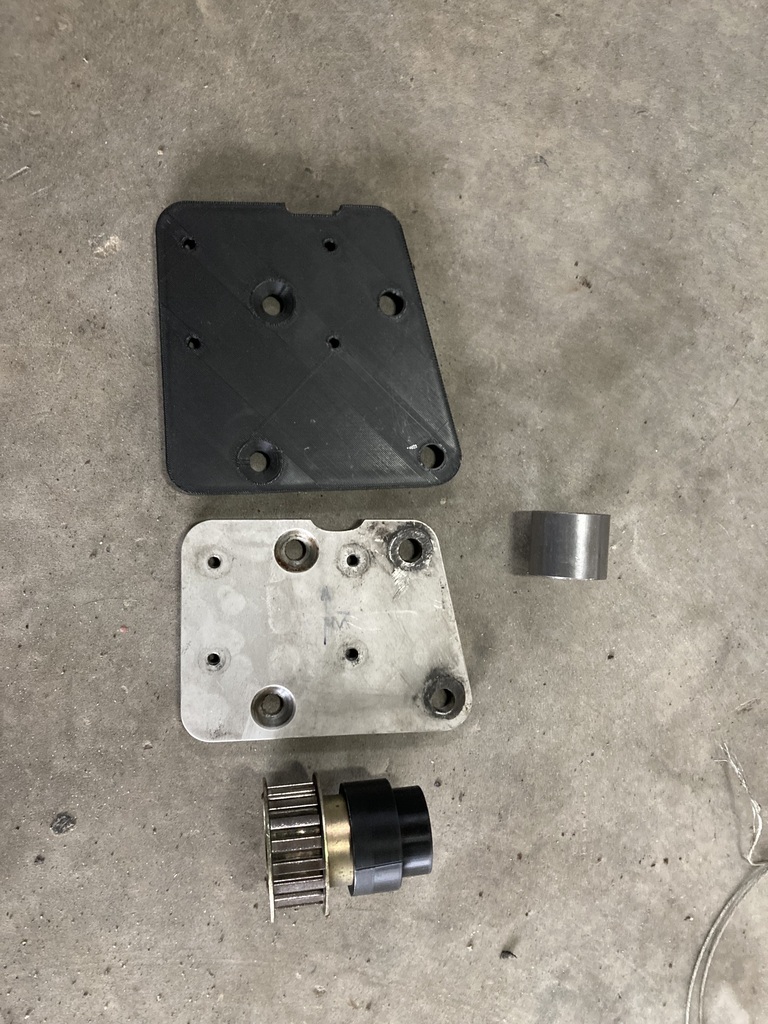  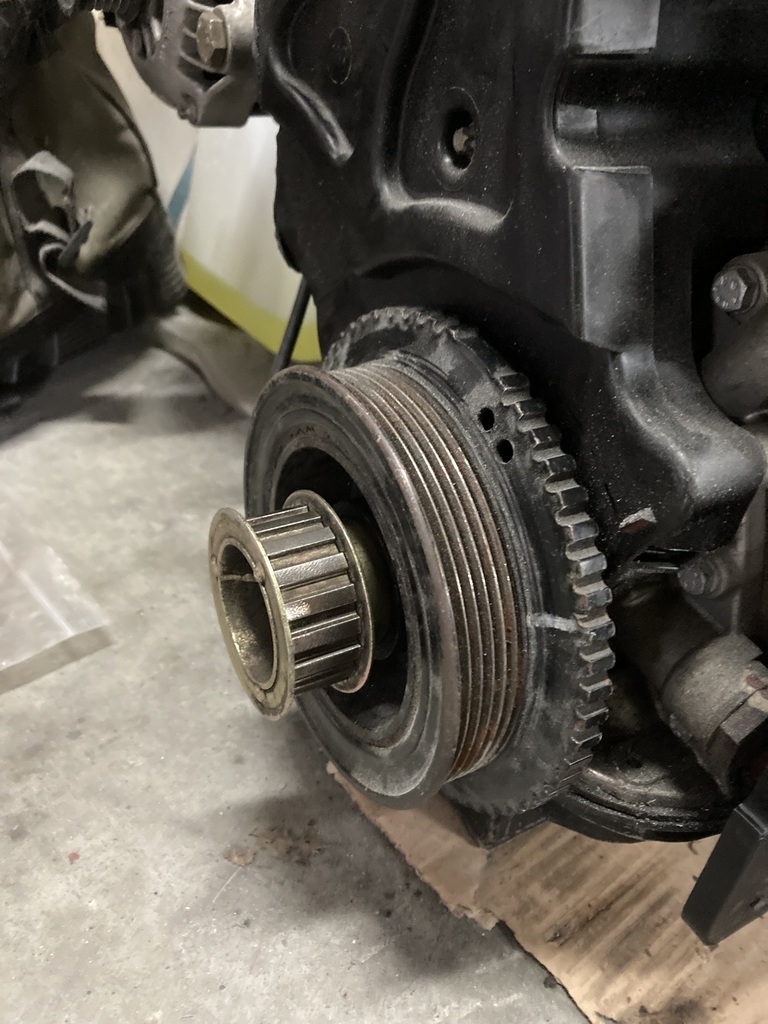 And all mocked up. 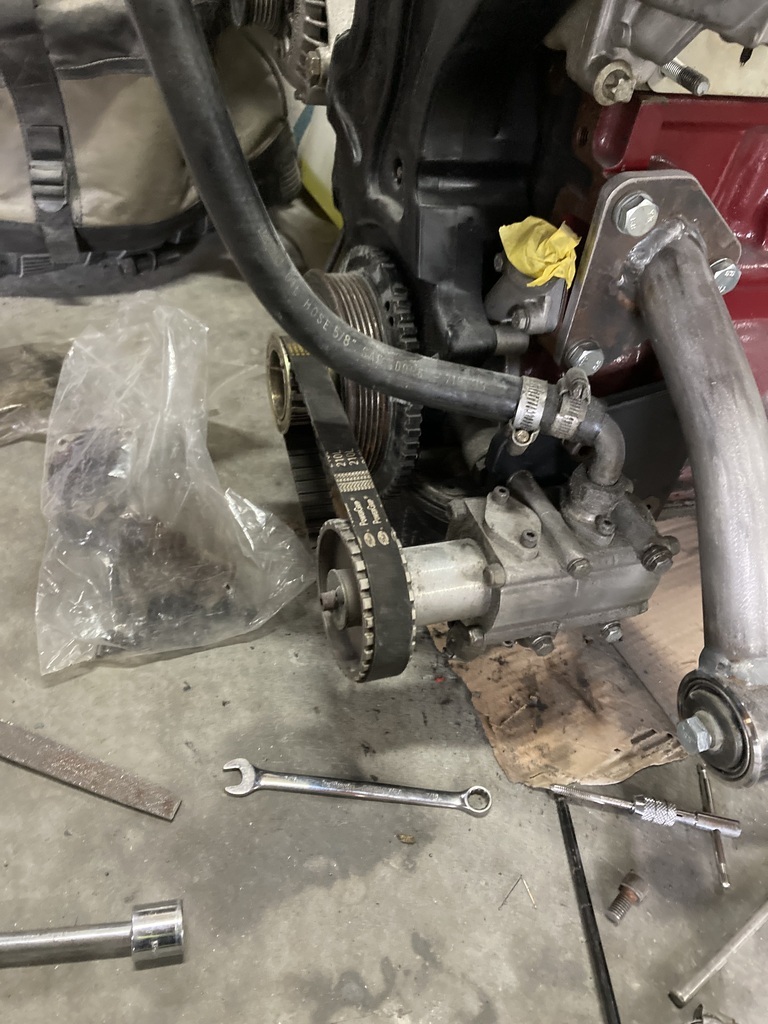 He has also made me a drill jig to mark the holes in a new bit of aluminum plate 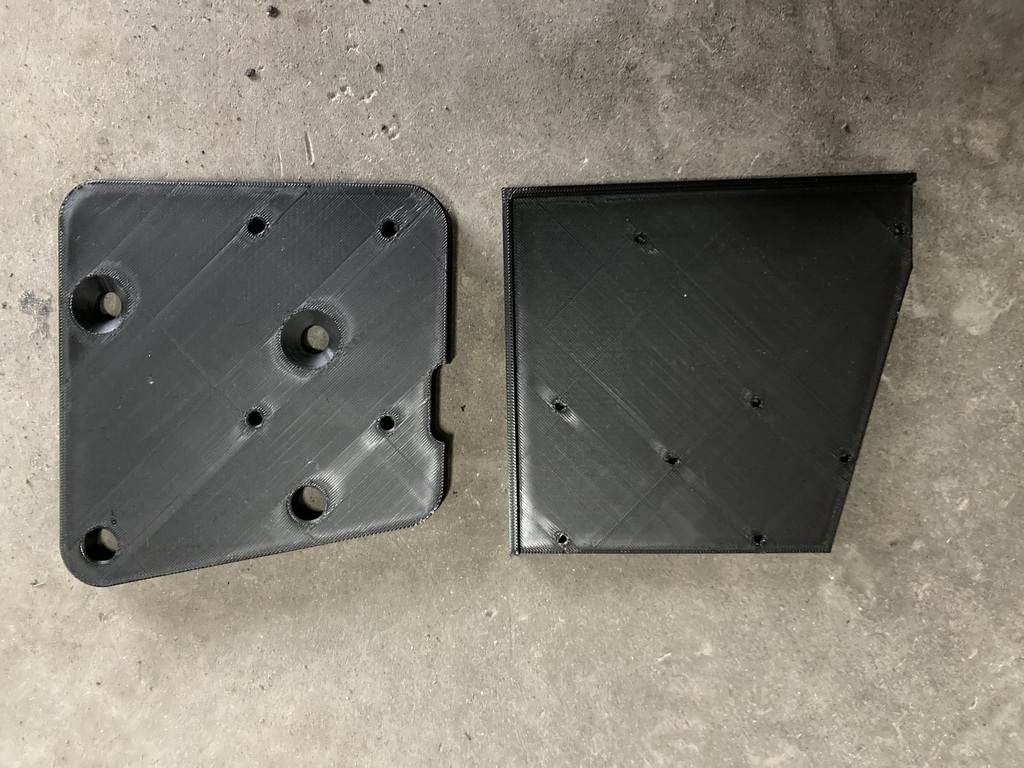 These fit a treat, so I can now make the aluminum plate and Sean is going to get his mate to CNC the crank spacer. It’s all magic |
| |
|
|
|
|
|
Feb 17, 2024 18:16:41 GMT
|
That's a tidy wiper motor swap. I don't know how different the escort is to the Cortina but there's a column support behind the dash binnacle on the mk1 cortina that was right in the way of the Volvo Bosch motor I used so I had to rotate the motor 10degrees from 12 o clockl. Just thought I'd mention it if you wanted to copy that for your mk2 Edit: I managed to wire 1 and 2 speeds in fine but never managed to sort the intermittent or wash wipe (it seems to do 1 rotation, park, then go again) If you want the wiring diagram I made I'll fire it over to you Thanks for the info Jim. I doubt I’ll change the motor on the Cortina. It doesn’t get used enough in the dry, never mind in the wet😁. I’m putting the Mazda stalks on the Escort too. When you’re strapped in it is a pain to reach the switch on the dish. The bonus is the Mazda stalks have the relays for the intermittent in them, which makes wiring a doddle. Just give he stalks 12v. I’ve not checked if the motor fowls anything yet but hopefully it won’t be to much of an issue |
| |
Last Edit: Feb 17, 2024 18:18:21 GMT by jonsey
|
|
|
|
|
Feb 12, 2024 15:52:24 GMT
|
Another call shift, so another couple of hours in the garage. Clocks as they stand 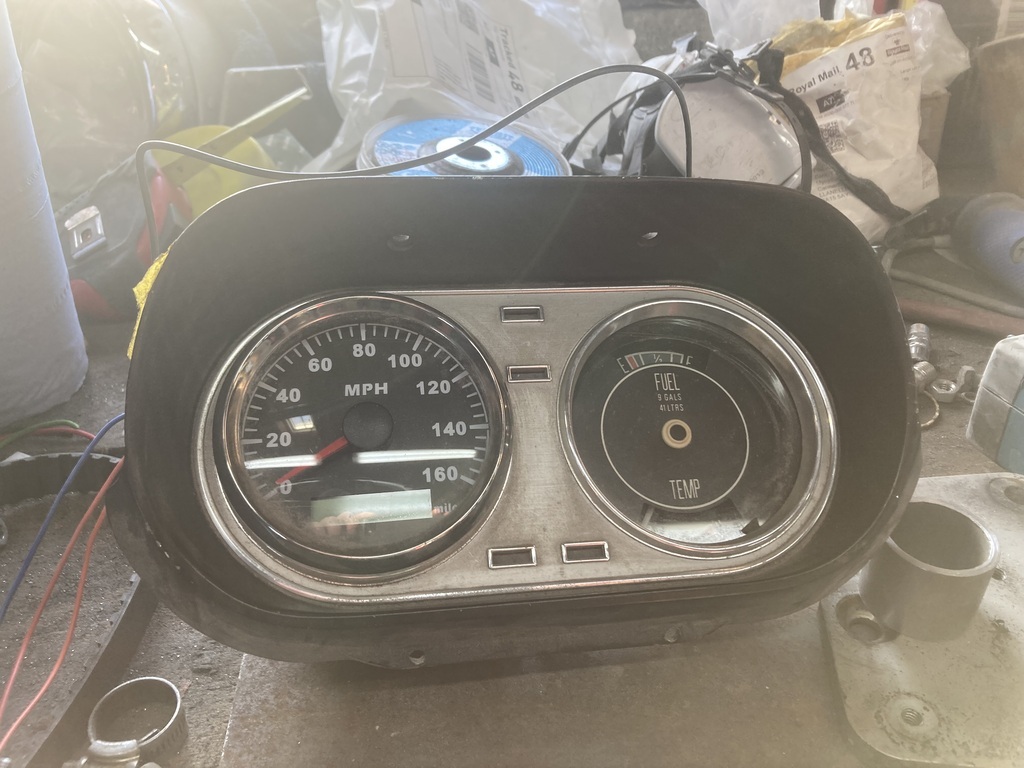 Temp and fuel gauge have never worked so can go. To fit this instead that came with the single seater 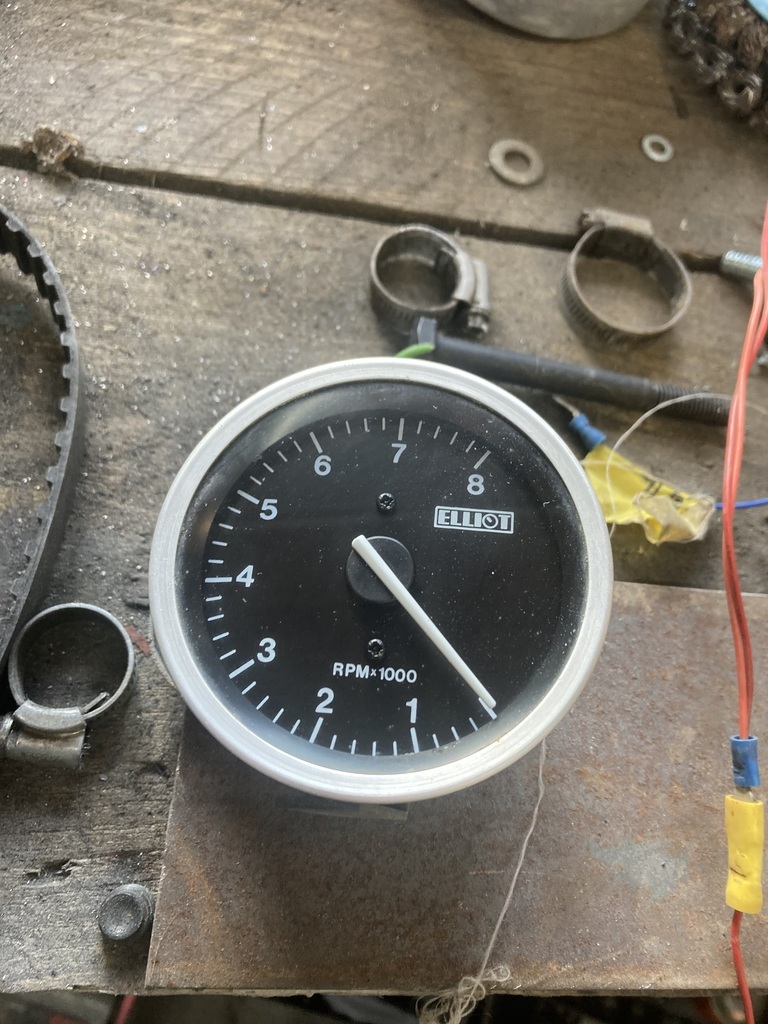 I cut a section of the rear of the binnacle out and bolted in the gauge. 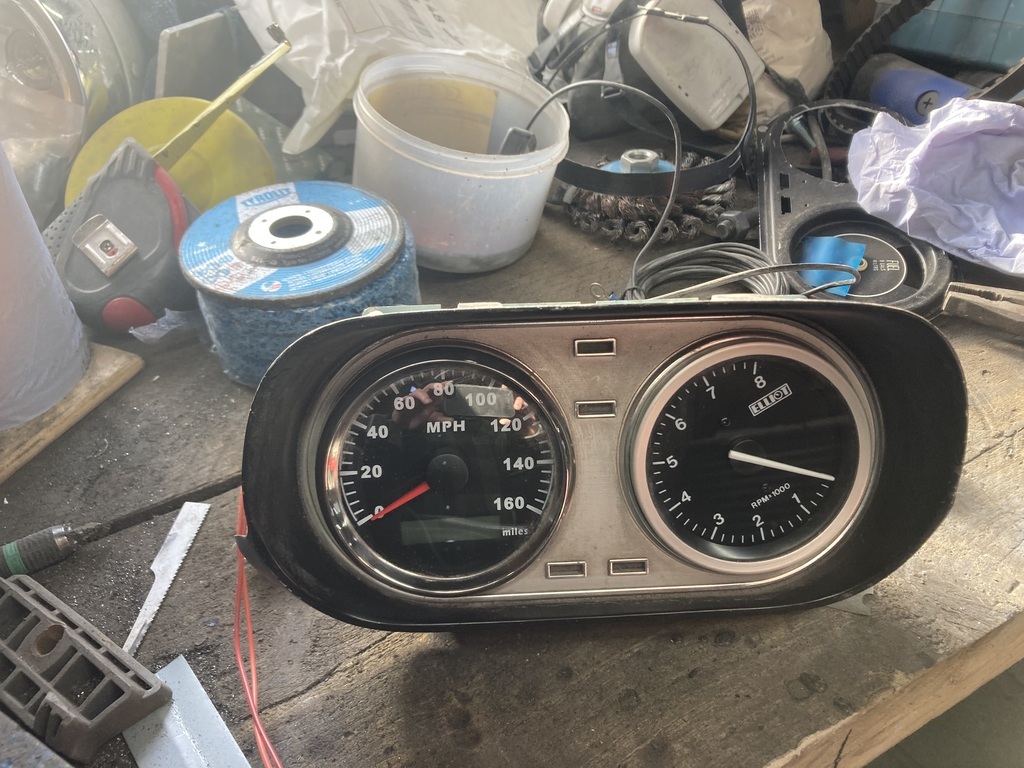 I think 7800 rpm is the max so I’ve put that straight up. Next it was onto the wiper mx5 motor conversion Holes don’t line up  So got welded up 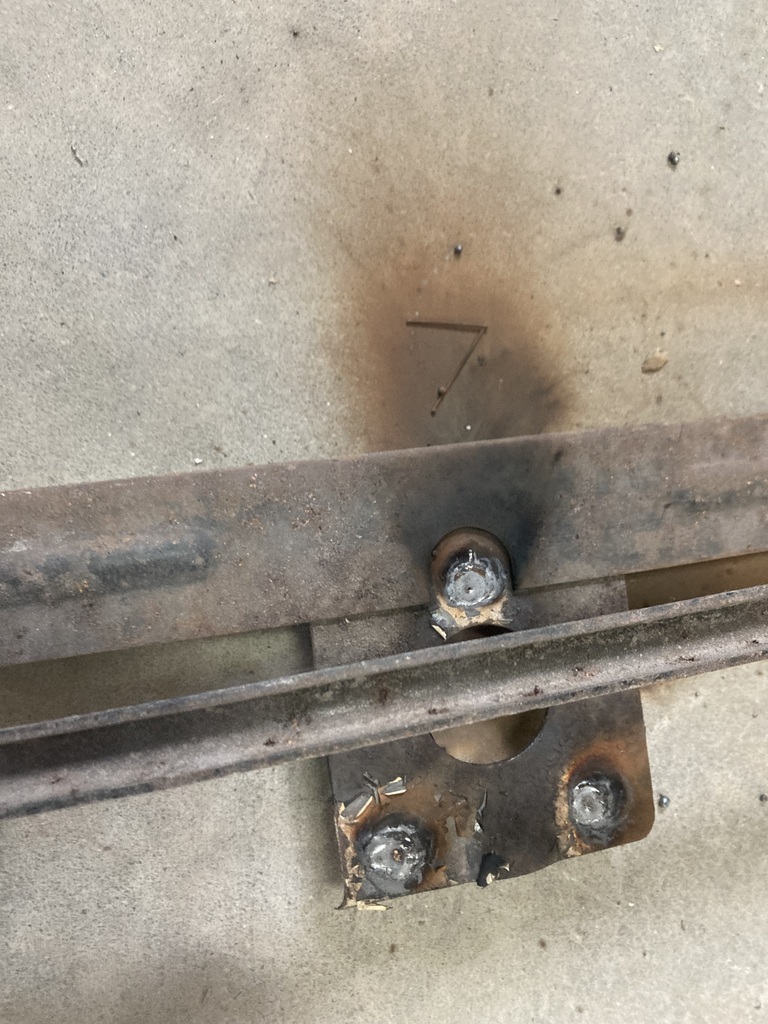 And ground back 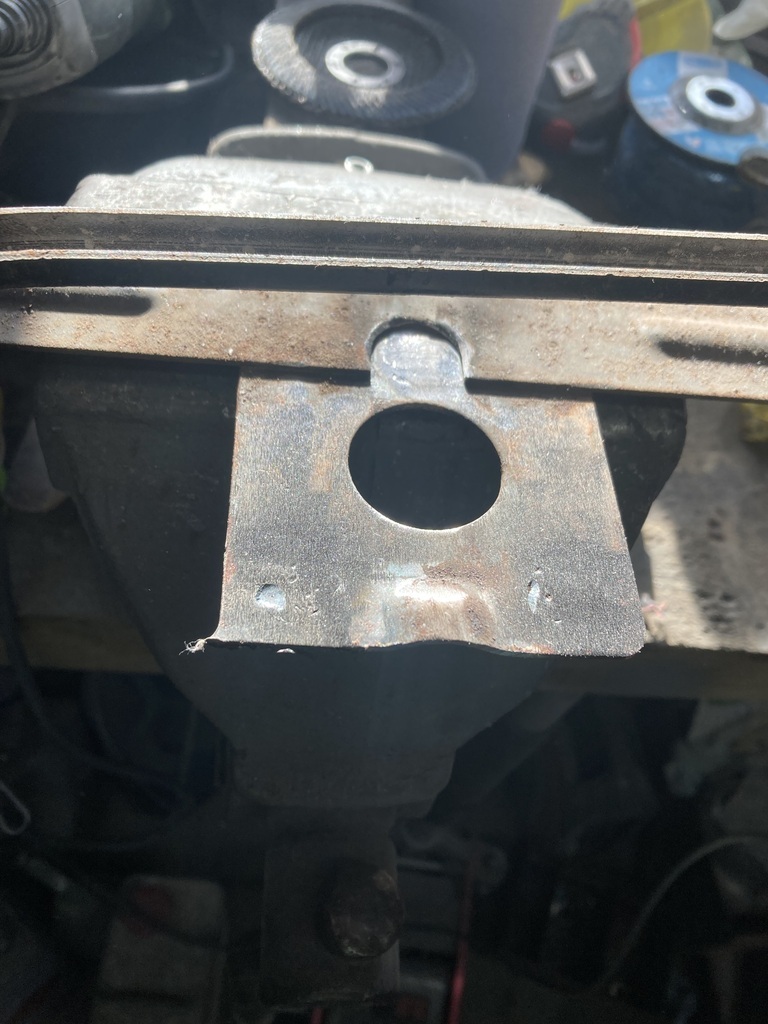 Then redrilled. The spindle was sitting too high so I made some spacers to lower the motor (may needed more) and cut and welded together the Escort and MX5 drive arms. 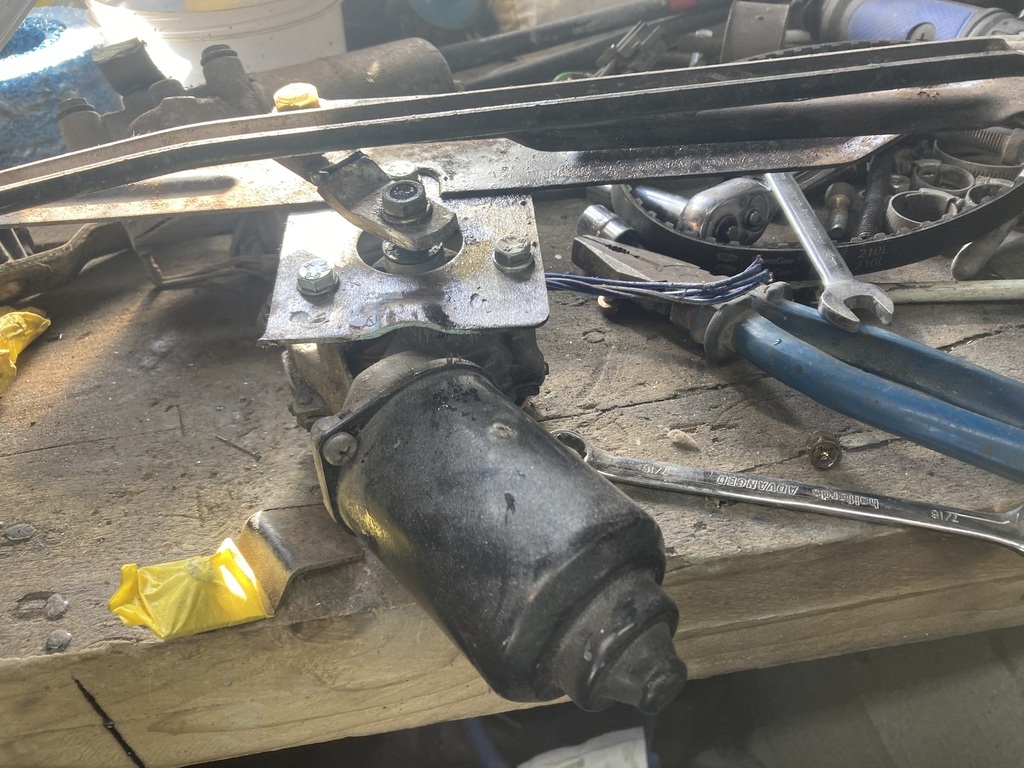 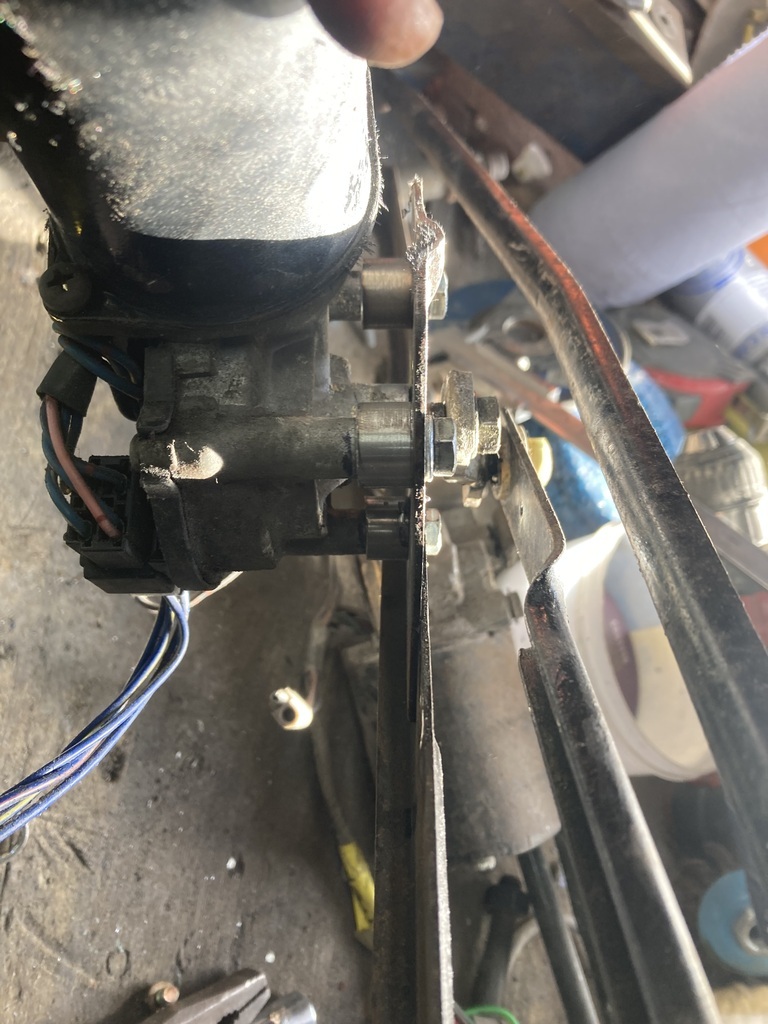 It’s all just tacked together at the moment as I don’t have the car to hand to make sure it all fits, but it’s looking promising. |
| |
|
|
|
|
|
Feb 10, 2024 19:28:19 GMT
|
So the Escort has been over my brother’s for a week and the body filler work has commenced . The boot lid fit across the rear scuttle panel is out so I took the lid home to weld on the edge to reshape. It was then I noticed the that where there had been the heavy rust patches, rust was coming through the epoxy. I took the bootlid and front scuttle panel to the blasters as the rust eater liquid stuff hadn’t been as successful as hoped. After a blast the front scuttle panel came out ok, but the bootlid still had deep rust spots. A new boot lid is £550. I’m not spending that. I could get a set of cams for that amount. The painter has hit the rust with spots with an angle grinder so hopefully this will be enough. If rust does come through, then I will have to source a new lid. No photos of any of this. The engine, whilst in the single seater, did not run a heater or thermostat. It only had top and bottom hose outlets. I will need a heater. To run the stat, an external bypass hose is required to connect the bottom hose / pump inlet. So this morning I went to pick up an outlet from the guy i bought the alternator from last week. This outlet also doubles up as the alternator adjuster mount. 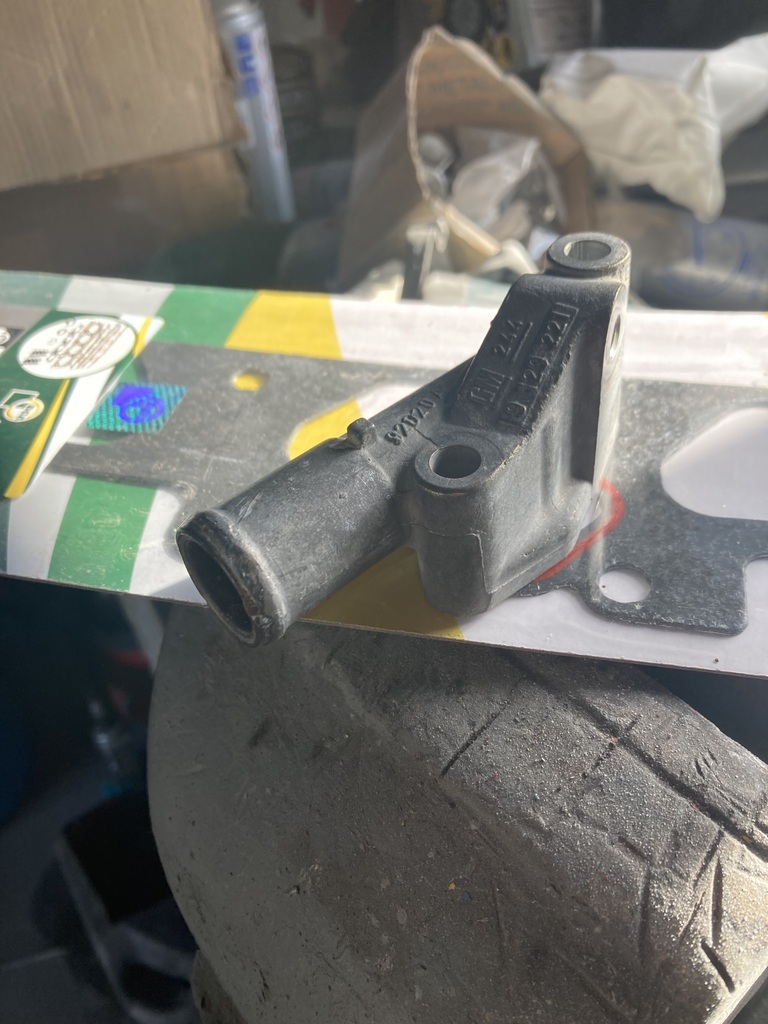 This sits here on the inlet manifold so I will need to drill a hole. 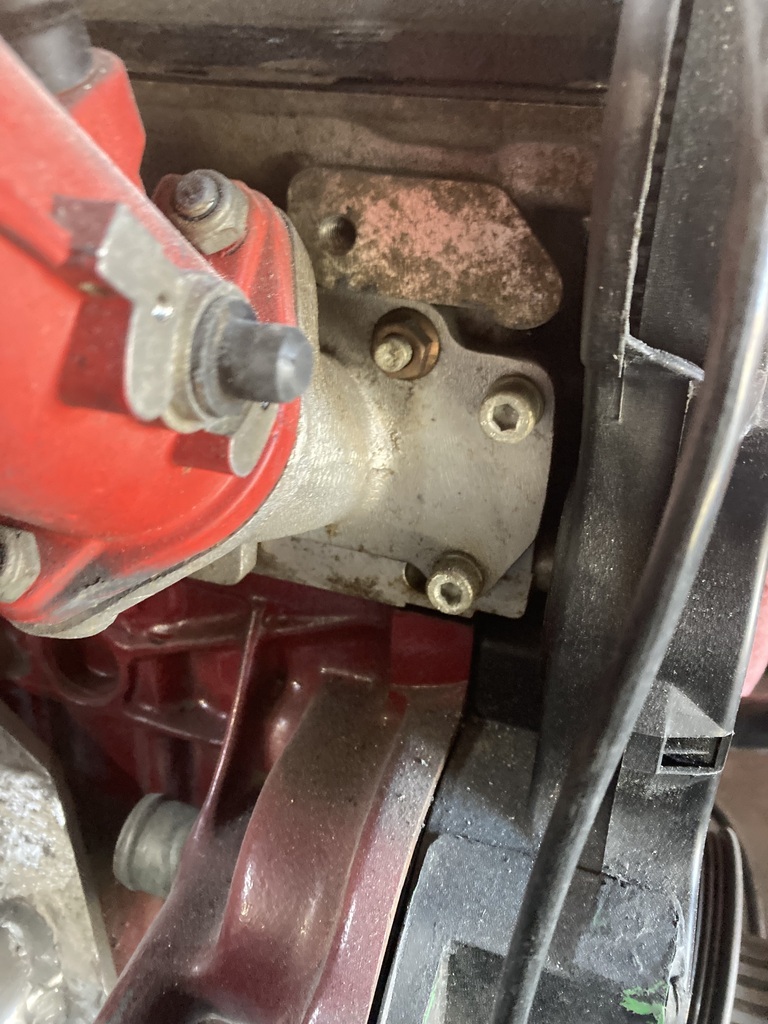 Some people with Tigras and Corsa report over heating as to much coolant flows around the bypass instead of the rad ( the stat should cut off this bypass so not sure if this is correct), so I’ll drill the hole smaller to “jet” it down a bit. Mocked up,  so I could measure for an alternator adjuster. I’ve ordered a rose jointed turnbuckle for this. The thermostat housing on the single seater is a fabricated item that is in the wrong orientation and the diameter of the outlet is too small 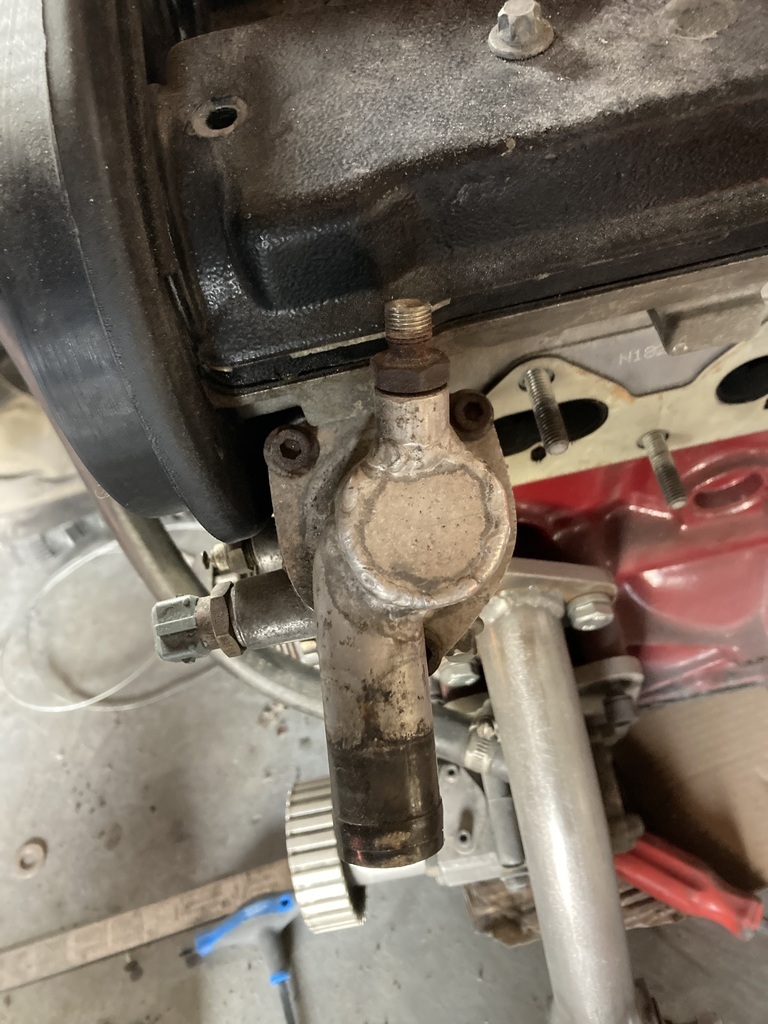 So I bought a standard item  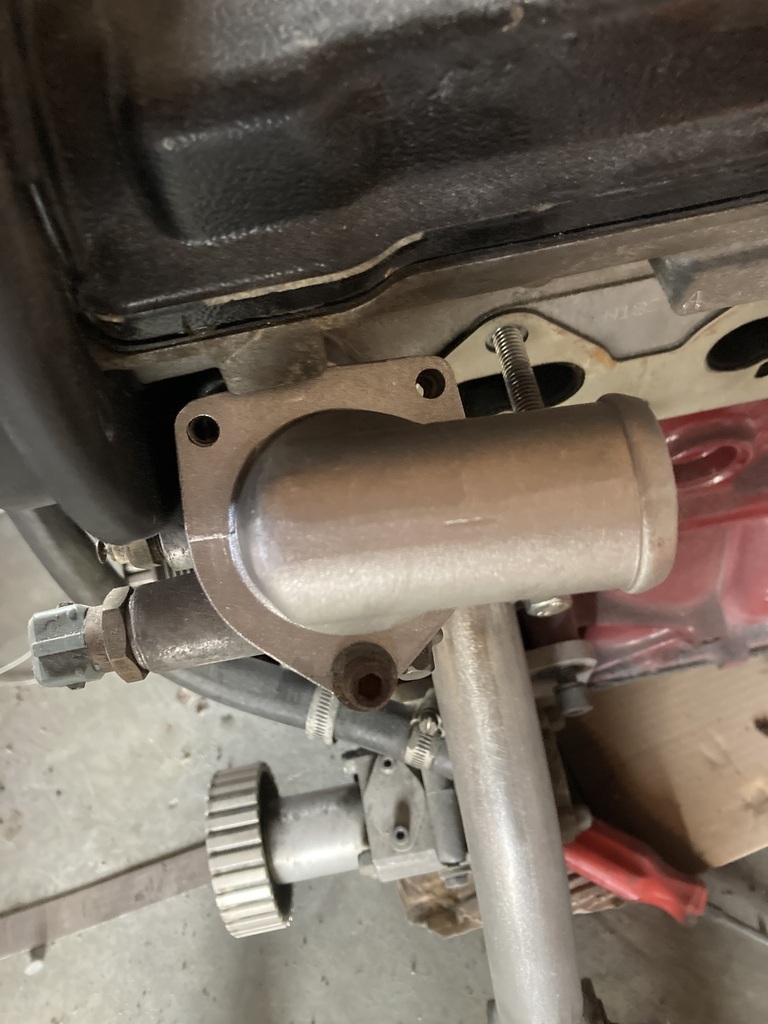 That points to the rear of the engine and not the front. So I cut it up and tacked it in the orientation I needed. 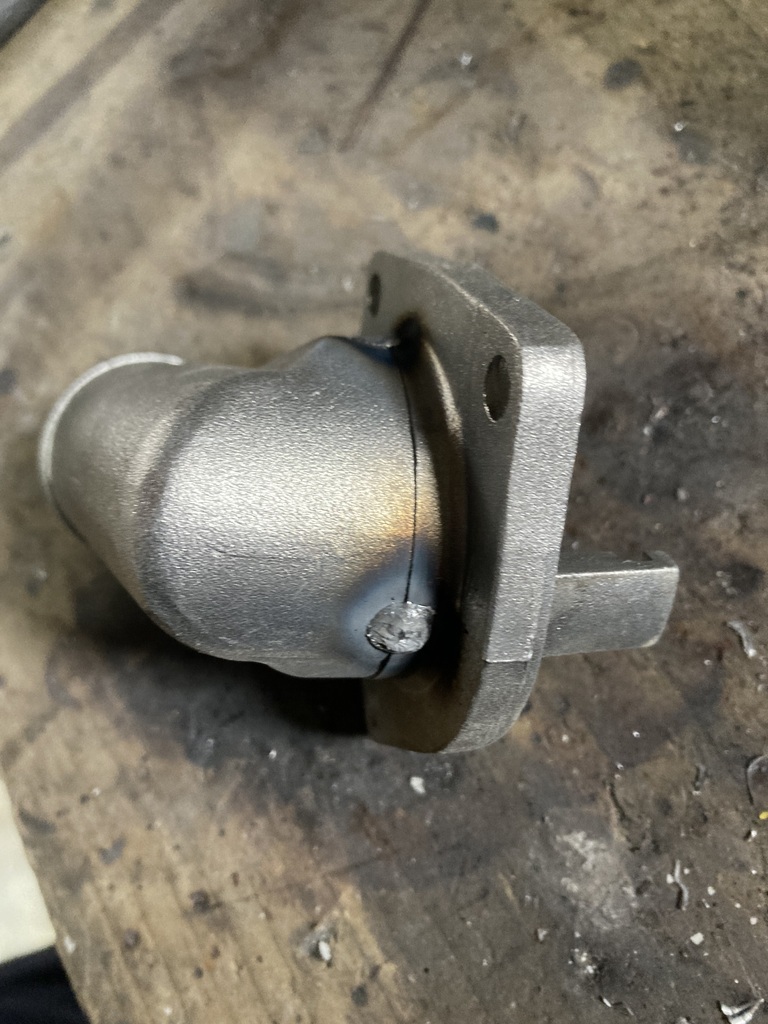 It tacked poorly so I thought there may be some lacquer or something on the aluminum. So I belt sanded it and wire brushed it and it was no different. On welding it was leaving holes and General crappyness. I guess the aluminum is full of impurities, so I just badly welded it in and out. 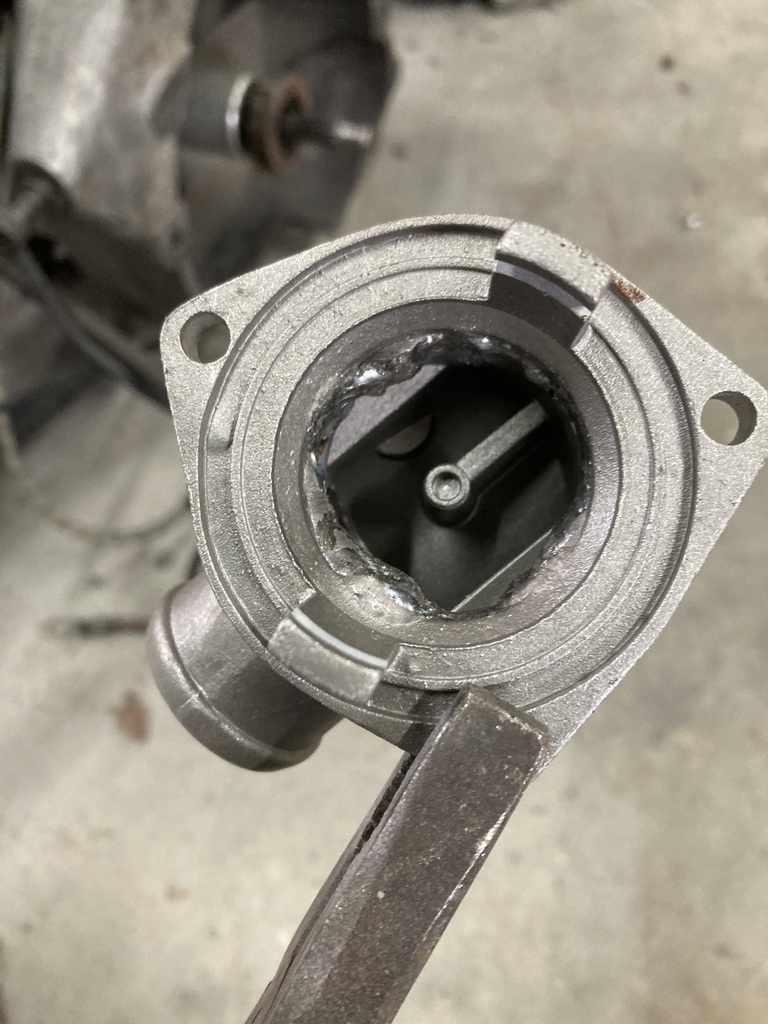 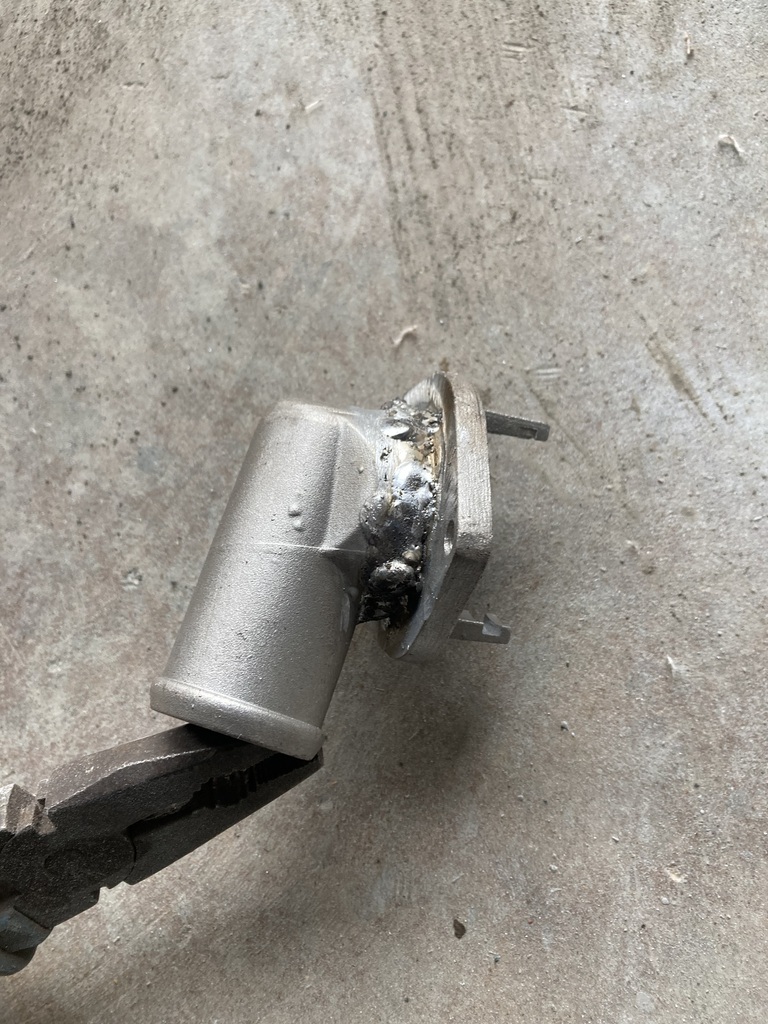 And then ground it back neat-ish 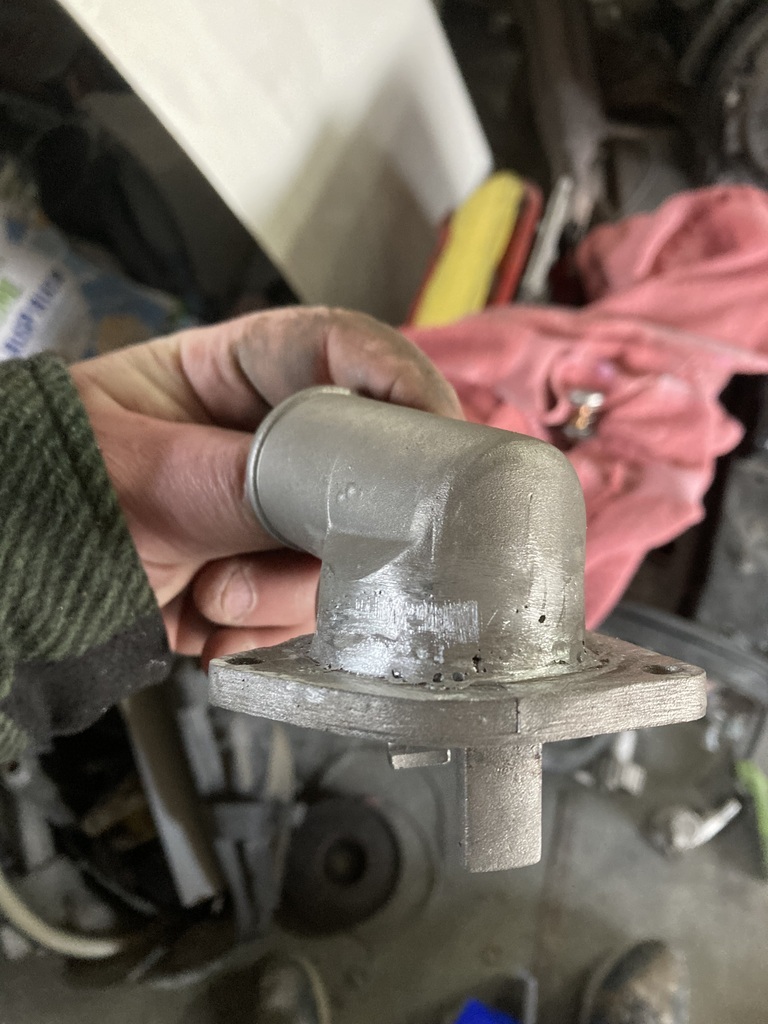 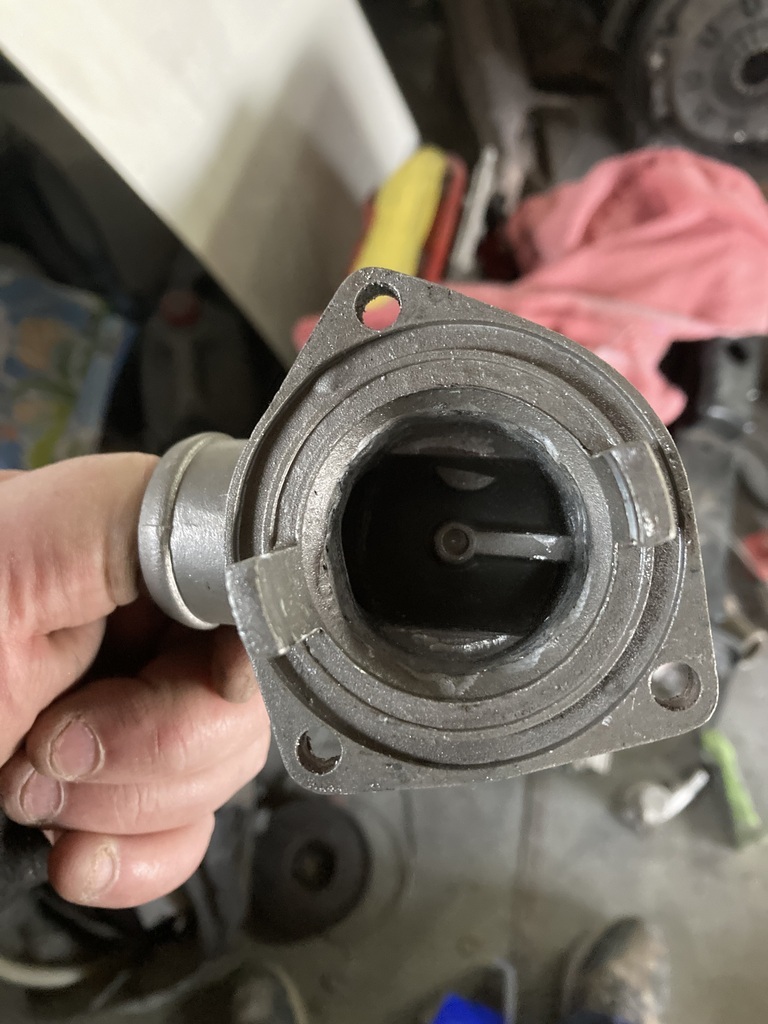 And then fitted 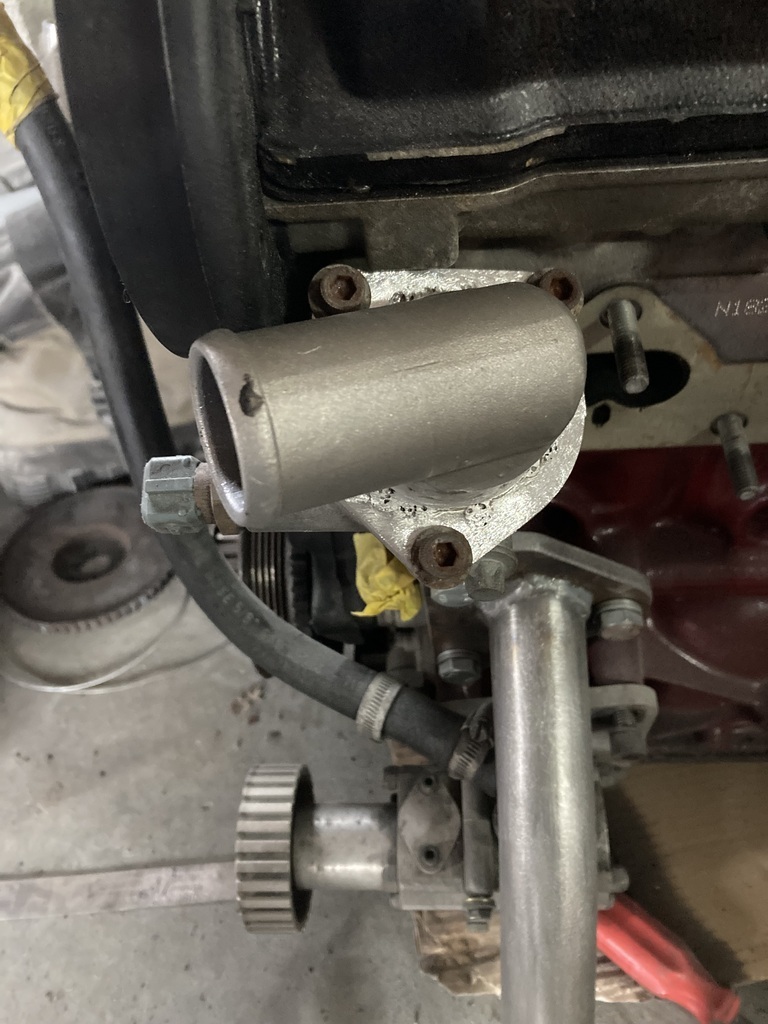 |
| |
|
|
|
|
|
|
|
|
|
The last update was me waiting to see if my brother was going to pick up the Escort. Well, yesterday, he phoned to say drop it off today. This is no real issue, it’s only about 2 miles or so away. Before hand though, I had to go to Llandeilo to pick up an alternator and mounting bracket for the new engine. 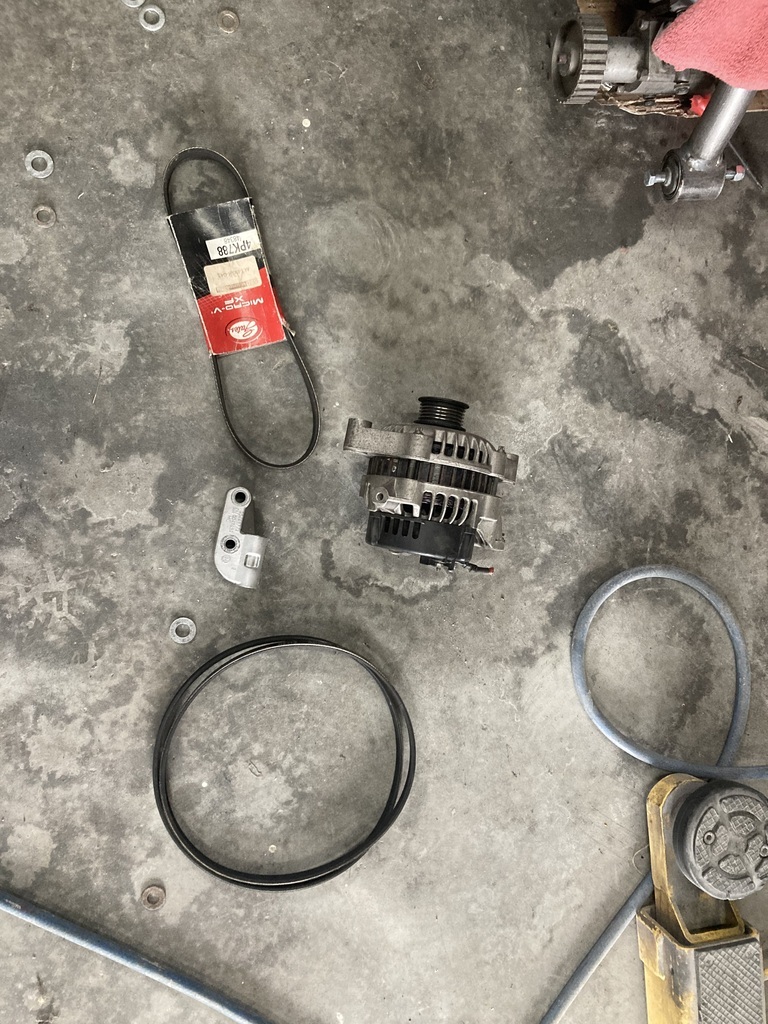 The nice gentleman also gave me a few belts to try, but as I’m using the standard crank pulley which is bigger than the alternative race pulley, and I’ve not had to lower the alternator as my throttle bodies a quite high, they were all too small. I cut down a couple of m10 bolts, and mocked it all up with a bit of pipe as a spacer for the dry sump pulley. 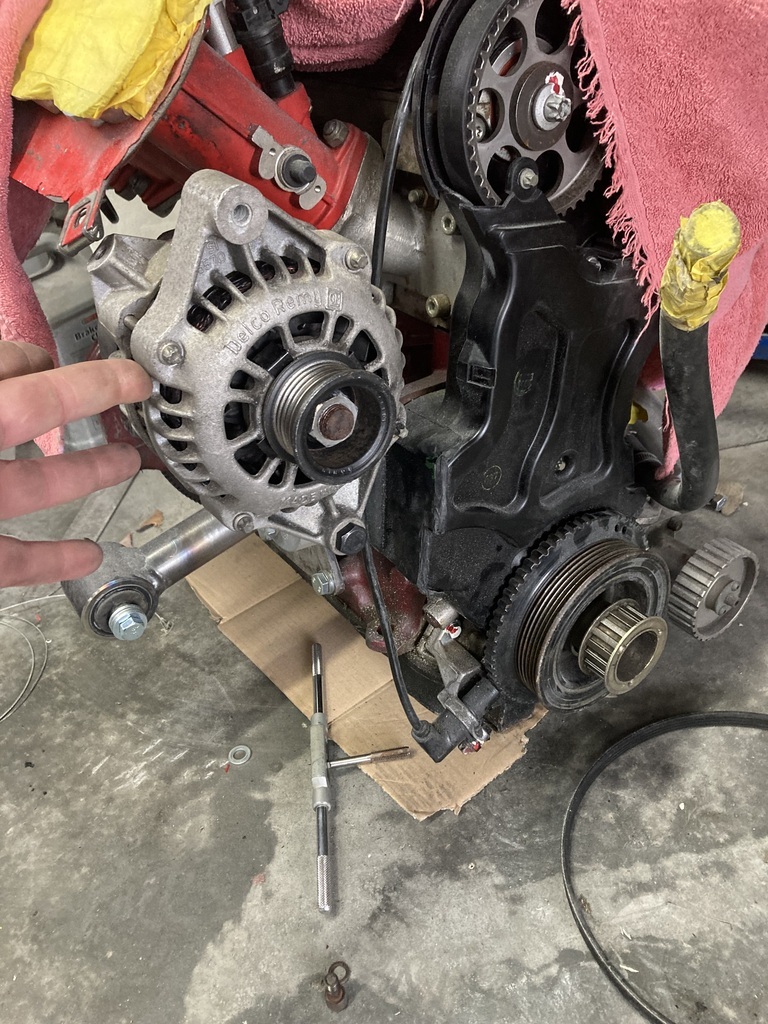 I need to purchase a turnbuckle to use as a tensioner and space out the dry sump pump to match. 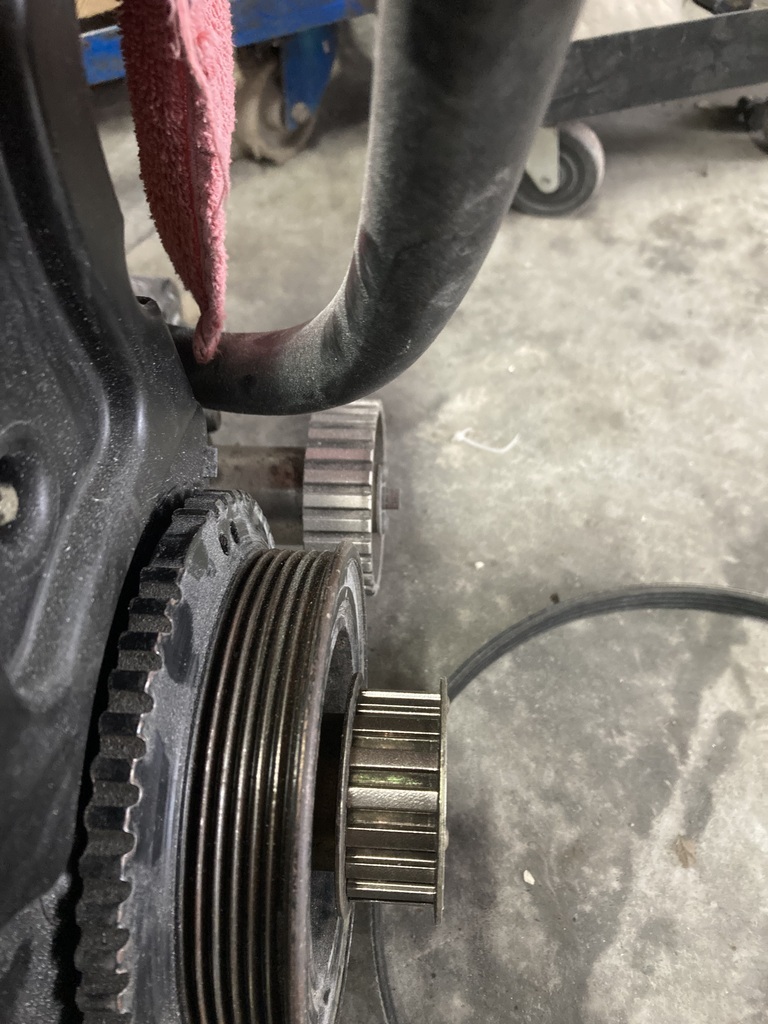 I then dropped off the Escort at my brother’s place  After posting this pic last week 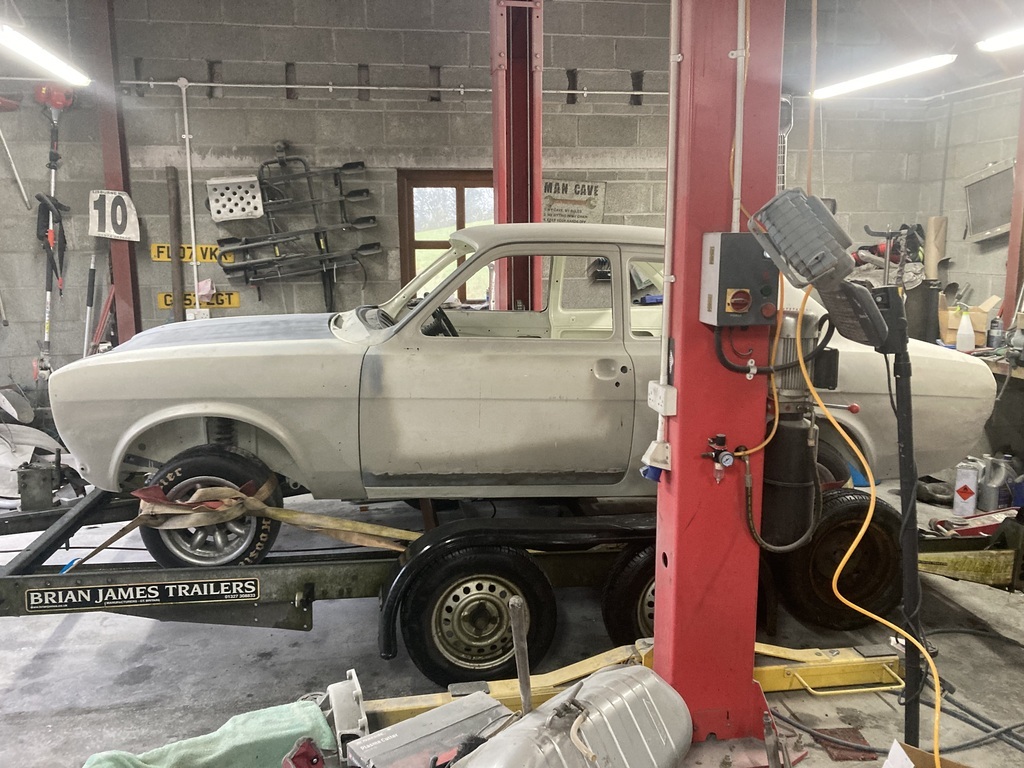 I realised that I had not taken the old paint off the passenger door. The blaster didn’t bother doing the skin as he deemed the door not worth saving. He did not realise I was not about to pay £600+ for a new door. So I brought that home and used the angle grinder and stripping disc to remove all the paint and filler. Any rust spots got a going over with the belt sander. 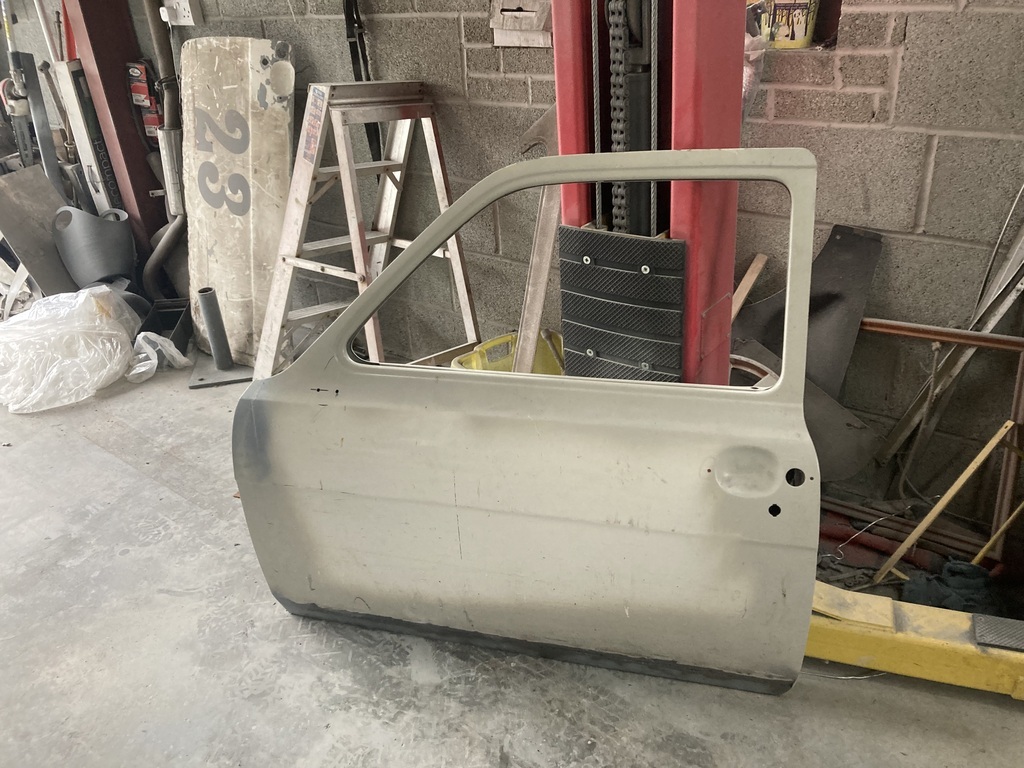 Later I called back round to his garage and refitted the door 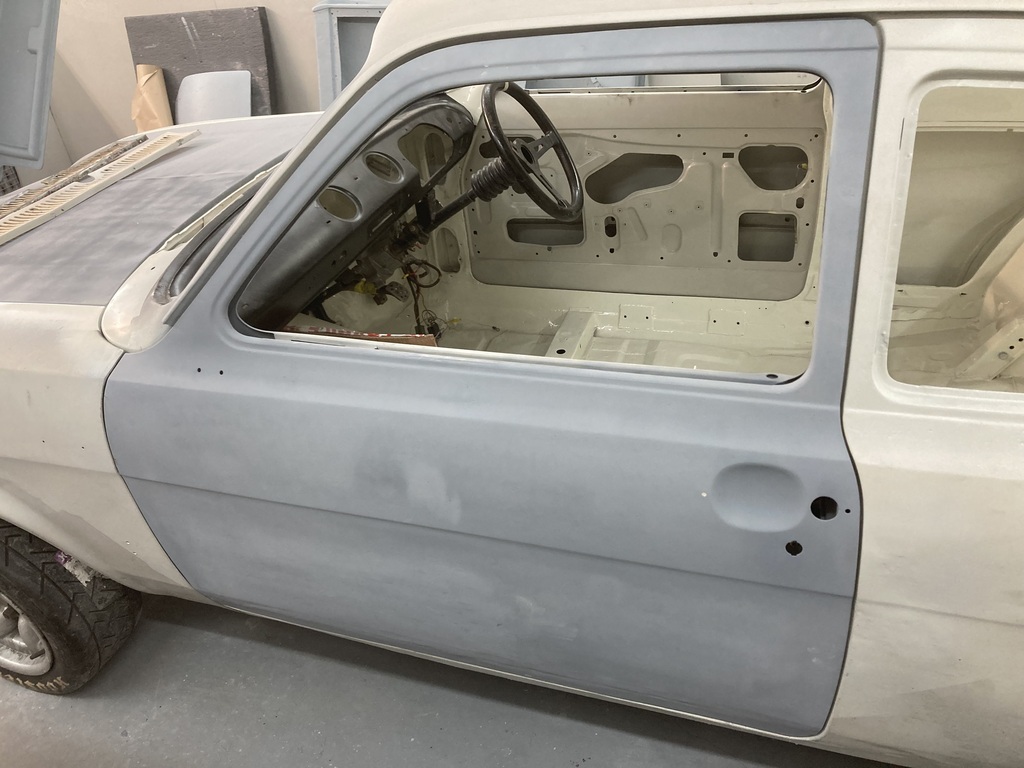 I’m dreading to think what his painter will think of it when he sees it tomorrow |
| |
|
|
|
|
|
|
|
|
It’s finally being welded on!👏👏
|
| |
|
|