|
|
|
Feb 14, 2024 14:44:45 GMT
|
Progress has slowed a little the last few weeks as we're removing the kitchen in preparation for a new one and have found some other issues that need sorting as soon as possible - the joys of a 1930's house! I had a few hours spare I headed into the garage to trial fit the Mazda clutch to the Cortina's "running" engine with the adaptor plate and gearbox. this is so that I can check that the clutch works the way it should. In all of this I haven't actually measured the clutch/ flywheel height or the depth/ stroke of the Mazda clutch arm. It just seemed easier to throw the lot together and see what happens! Fortunately the whole lot fits together under the bell house which is a nice start.  Using an adjustable spanner I can use the clutch but when the clutch isn't being pressed the bearing is right on the pressure plate. There isn't any free play which is a little concerning as I believe there should be some. A test for this was to put some 2mm washers between the engine and box to see if this would be enough which it is. I'd rather remake the plate in 8mm (currently 6). Having less flex in the plate and keeping the clutch arm, release bearing standard Mazda means it'll work.    The plan is to get the engine back in there with the gearbox on the 6mm plate etc so I can test the starter and the hydraulic clutch before pulling it all out again so I can paint stuff and generally make it all look pretty! Before that though I need to finish the welding underneath and install a kitchen... |
| |
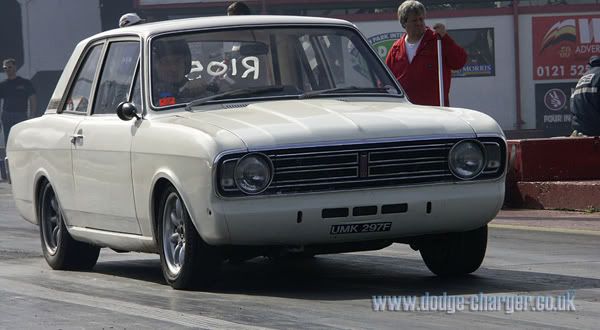
1966 Ford Cortina GT
2018 Ford Fiesta ST
Full time engineer, part time waffler on Youtube - see Jim_Builds
|
|
|
|
|
|
|
Feb 13, 2024 10:28:06 GMT
|
|
I've just discovered the thread, it's been a great read
|
| |
1966 Ford Cortina GT
2018 Ford Fiesta ST
Full time engineer, part time waffler on Youtube - see Jim_Builds
|
|
|
|
|
|
|
|
That's annoying about the pump, but glad you've got it sorted.
The switch looks great!
|
| |
1966 Ford Cortina GT
2018 Ford Fiesta ST
Full time engineer, part time waffler on Youtube - see Jim_Builds
|
|
|
|
|
Jan 25, 2024 13:25:36 GMT
|
|
Good call! a blanket will make it very comfortable
|
| |
1966 Ford Cortina GT
2018 Ford Fiesta ST
Full time engineer, part time waffler on Youtube - see Jim_Builds
|
|
|
|
|
Jan 25, 2024 13:22:31 GMT
|
If you want some Recaro's I have a pair stripped down in my loft. I'm interested! |
| |
1966 Ford Cortina GT
2018 Ford Fiesta ST
Full time engineer, part time waffler on Youtube - see Jim_Builds
|
|
|
|
|
Jan 23, 2024 19:06:59 GMT
|
|
That's good to know that you managed to get it all to work with the previous rails. I'll have a look at the 9-3 seats as my dad had a gm 900 which I remember being comfortable
|
| |
1966 Ford Cortina GT
2018 Ford Fiesta ST
Full time engineer, part time waffler on Youtube - see Jim_Builds
|
|
|
|
|
Jan 23, 2024 14:18:32 GMT
|
|
I don't know a cracker about them but they do look cool
|
| |
1966 Ford Cortina GT
2018 Ford Fiesta ST
Full time engineer, part time waffler on Youtube - see Jim_Builds
|
|
|
|
|
Jan 23, 2024 13:42:39 GMT
|
|
I'll bear that in mind, I have had a look at MX5 tombstones as I know they're used in triumphs etc and have heated seat pads which is something I am a fan of
|
| |
1966 Ford Cortina GT
2018 Ford Fiesta ST
Full time engineer, part time waffler on Youtube - see Jim_Builds
|
|
|
|
|
Jan 23, 2024 10:12:55 GMT
|
As I am making changes to the floor and interior in general I figured I'd go all in and change the seats to the ones I purchased a few months ago. They're 60's style bucket seats usually found in minis which is where these had come from. I had been on the fence about whether I should use them as they're quite tight but if I don't like them I can put the originals back in. These seats can be purchased with universal runners which I managed to find a set. The runners however do not simply bolt to the seat and away you go - I had to fabricate a small frame to go between the two.   The frame is a combination of 25x25x3 box section and 20mm wide 3mm the flat bar, it took some time to get the fame square as the central handle doesn't run parallel. I assume that's so that when you mount something to the rails so they are aligned the handle is compressed into the tabs . The problem was making sure that everything ran true and somehow I got it to within 1mm which I was happy about. Taking some reference dimensions from the original seat I found the height and angle of 15 degrees from horizontal which I replicated by stuffing whatever I had to hand in the gap till the angle was correct!   Conveniently the height was 50mm exactly and the bandsaw was quickly set up and giving a clean cut   Trial fitting in the Cortina was harder than I expected, the first attempt gave me a seating position similar to an early 2000's Alfa GTV! Incredibly offset and very uncomfortable, moving the seat towards the centre of the Cortina soon sorted the problem and with 4 holes drilled and bolted the seat was in.  To get to this point had taken about 3 days of trial and error throughout the process but it was finished, to make and fit the passengers seat took 6hrs - it's much. easier to make when you have one in front of you!  Mrs. Jim hasn't tried these seats yet and thinking back to when I had a M7/8 fiesta ST's she wasn't a fan of the Recaro seats so I might have made a mistake but given the original seats aren't the best for cornering or bolted down front and back I think she'll accept the compromise! |
| |
1966 Ford Cortina GT
2018 Ford Fiesta ST
Full time engineer, part time waffler on Youtube - see Jim_Builds
|
|
|
|
|
Jan 23, 2024 10:09:56 GMT
|
As if you got a visit from Chody Shifter! It gets cold in the garage! |
| |
1966 Ford Cortina GT
2018 Ford Fiesta ST
Full time engineer, part time waffler on Youtube - see Jim_Builds
|
|
|
|
|
|
|
Jan 23, 2024 10:09:34 GMT
|
Keep up the good work, your head looks well pleased 😂 I hadn't noticed that face!  |
| |
1966 Ford Cortina GT
2018 Ford Fiesta ST
Full time engineer, part time waffler on Youtube - see Jim_Builds
|
|
|
|
|
Jan 18, 2024 15:00:37 GMT
|
With the gear selector position sorted I could finish off the tunnel work, when I put the gearbox back into the Cortina a few weeks back I realised I had a clash on part of the tunnel I had put in. When I made this part of the tunnel I needed to keep it at that height as the centre console sits directly on it and moving it up to clear the gearbox would mean that the console would then clash with the heater and the parcel shelf - none of which I wanted to modify. The simplest thing to cut another hole that's just enough for the gearbox to sit correctly but also allows the centre console to stay as it should  After an arts and crafts session I had the concept made up   It's a fairly simple pattern which I folded using hammers and my large Record vice - tin bashing is good for stress relief if anyone needs to vent!  Placed on the tunnel the fitment looks pretty good  Next up was the selector housing, a little trickier as I wanted to maintain decent clearance but again fit inside of the centre console. Some more arts and crafts gave me something to work from and as luck would have it used up the last of my sheet steel.   The first test went poorly as I hadn't folded the steel as well as I had hoped. It was too wide, so some careful cutting meant I could use what was there. Moving the sides further in towards the gearbox and then trimming off the excess on the top section. Once that was sorted I seam welded the top to the sides and put it back on the tunnel with a few tack welds so that I could make the end pieces.  Happy with the fitment, the tack welds were cut allowing me to weld the lot up on the bench in relative comfort. I also added a vertical lip where the gearstick is so that I can put a gaiter on it for weather proofing (I may 3D print one from TPU). For additional style points I tidied the welds and gave it a quick sanding even though I'll cover it with sound deadening and a centre console!   |
| |
1966 Ford Cortina GT
2018 Ford Fiesta ST
Full time engineer, part time waffler on Youtube - see Jim_Builds
|
|
|
|
|
Jan 15, 2024 12:10:35 GMT
|
|
I'm glad you got the sump sorted, the exhaust manifold looks good too even if it does need a bit of modifying it's better than having to do the lot from scratch!
|
| |
1966 Ford Cortina GT
2018 Ford Fiesta ST
Full time engineer, part time waffler on Youtube - see Jim_Builds
|
|
|
|
|
|
|
Starting to come together, My Pet hate, gearbox cross members...... URGHHHHH Thanks Ian, I couldn't think of a better way of doing it. |
| |
1966 Ford Cortina GT
2018 Ford Fiesta ST
Full time engineer, part time waffler on Youtube - see Jim_Builds
|
|
|
|
|
|
|
|
It looks like there's a great mix of cars there, I must admit I have a soft sport for the Citroen CX
|
| |
1966 Ford Cortina GT
2018 Ford Fiesta ST
Full time engineer, part time waffler on Youtube - see Jim_Builds
|
|
|
|
|
|
|
|
You've made some amazing progress Jonsey, it's a pure win if you can maintain power and torque along with dropping some weight from the front end.
Can you dogleg the gear selector to compensate for the moving of the gearbox and keep everything as it is?
|
| |
1966 Ford Cortina GT
2018 Ford Fiesta ST
Full time engineer, part time waffler on Youtube - see Jim_Builds
|
|
|
|
|
|
|
I've had some time on the Cortina over Christmas as Mrs Jim had to work over the holidays, this gave me some time to finish the tunnel panelling I had started (albeit takes in still).  Before getting starting any more panelling I wanted to sort the gearstick position, when I decided to use the MX5 gearbox I went with a mk1 as the whole gear selector housing is separate to the main casing which means it can be moved. There are a few videos online of people moving them forward which is a process of making brackets to support the housing, drilling the selector shaft and cutting off the excess and then put it all together in time for tea and biscuits! Nobody has extended one and the more I watched these videos my concern for alignment and how I would extend the shaft without compromising gear selection or longevity for 20mm seemed overkill at best.   That is how the stick sits within the centre console which I'm adamant on keeping as it's a big part of the GT interior as I keep my sunglasses in it, a quick trawl on eBay showed that I could replace the gearstick for another used item for £12 so why not modify this one and if it all goes wrong I can replace it rather than messing up the gearbox internals and writing it off. With the gearstick on the bench I could have a proper look at it, at first I thought the stick was 2 pieces that have been pressed or welded together and filled to give it a nice weighted feel. As it turns out they are 2 pieces but the bulbous bit is filled with rubber and that's what gives it the weight and bonds it all together. This was found after I started to grind the bulbous bit down with the angle grinder and the heat build up started to melt an evil black material forced it's way out! A quick change of plan to use a blowtorch, my heavy duty air filter mask and extreme prejudice soon had it split.  Back in the Cortina I placed the lower part back into the gearbox with the centre console to take some measurements and using some flat bar I had left over and the threaded part of the stick I welded the lot together and made this...  [Imgur](https://imgur.com/yf3yjuG) The reason for the chody shifter wasn't for a cheap gag, it was so that I could use an aluminium gearstick extension that would make the whole lot look like the original GT selector. This is purely for appeasing the rivet counters but I quite like it too!   The best part is that I can get all 5 gears and reverse, it's far more precise than the 2000e and has a shorter throw! Before I remove the gearbox for a lengthy weldathon I figured I would get the bucket seats in and positioned, I purchased a pari of universal runners which sit under a little bit of tension to get parallel but I should have this sorted fairly quickly.  |
| |
1966 Ford Cortina GT
2018 Ford Fiesta ST
Full time engineer, part time waffler on Youtube - see Jim_Builds
|
|
|
|
|
|
|
With the gearbox mounted I still had the problem of the hole I had made in the floor, I thought I'd make a start on the tunnel rather than the selector because I need to modify the gearbox to get it to the position of the original selector which is a job for another day!  After some time and many pieces of roughly cut card I started to make a tangible tunnel which is roughly how I had imagined it, I would have preferred to make it from fewer pieces but I don't have the tools/ experience to do so   Whilst tidying the folds I had made my hammer decided to break - fortunately nothing was harmed and I have a drawer of hammers waiting to go but I've never seen something like this happen before!  Moving on from the demise of the hammer I managed to get the last few pieces finished, I have only tacked it for now knowing I need to try the gearbox back in there just to confirm what I have done is correct. |
| |
1966 Ford Cortina GT
2018 Ford Fiesta ST
Full time engineer, part time waffler on Youtube - see Jim_Builds
|
|
|
|
|
|
|
Thanks chaps, I've had some problems logging in but I have been beavering away on the Cortina in the meantime and made a decent amount of progress! I've had a grid few hours/ days of thinking how I would mount the gearbox to the chassis in a way that is: accessible, strong enough for the job, not overly complex to fabricate and works  Having seen other attempts in an escort that essentially was a flat plate and bolted through the floor didn't seem ideal to me. If I needed to remove the gearbox once all this was finished i.e. a clutch swap I wanted the mount to be accessible from underneath and not having to remove the seats/carpet. A measure of the chassis rail made seemed like a good place to start, it's essentially 50x50 box and surprisingly in line given that it has had sections replaced! For a starting point I decided to use 50x50x3 right angle steel - it's easy to acquire and work with and would use the chassis to align with.  The gearbox side of the mount is further forward than the rail but for this I thought I would use another angle section that sits over the 50x50, essentially making a box with enough room to access the nut for the rubber mount. Some time was taken getting the height correct! I'll also point out that using pink tools enhances all work...    I used an offset from the 6mm plate I used for the adaptor plate which unfortunately wasn't long enough for the job but enough to test height etc, jigged up into the chassis and aligned meant I could start working on the chassis legs. As they are now load bearing for the gearbox I didn't want to just drill through and use a bigger washer on the back side of it. To support the leg where it would be drilled I decided to use some 10mm ID tube to act as a crush tube, this will support the fasteners for alignment/ prevent the leg from being pinched if over torqued. As a belts and braces job I also welded a 1.5mm thick fish plate on the back side.   I must admit that drilling the leg took some building up to! It all paid off as the mount aligns perfectly and the bolts just slide though the tube without any issue  When I sat down to draw all this out I had anticipated the exhaust being slightly closer to the N/S of the tunnel but as it turns out it's closer to the centre than expected. cutting this section out made the 50x50 so close to the mount saddle tricky as I didn't want to weaken anything or ruin the alignment. After careful cutting and filing the exhaust could be tucked up into the tunnel where it had been before, I then bent a piece of steel plate (4mm I believe) which I will seam weld in once I've finished the mount. Even with some tacks an a seam underneath it doesn't flex so I'm happy that it will more than make up for what I have removed.     The gearbox mount was mocked up using card then transferred to 6mm plate steel which again I'll make look fancy before it's put on for the last time.   I was relieved when I removed the trolley jack and the gearbox stayed where I'd mounted it - especially as I was laying under the thing at the time! Next up is to start re-panelling the tunnel I removed which will be a series of plates rather than a 1 swooping curve of steel as I can't fabricate stuff like that! |
| |
1966 Ford Cortina GT
2018 Ford Fiesta ST
Full time engineer, part time waffler on Youtube - see Jim_Builds
|
|
|
|
|
Nov 28, 2023 18:19:15 GMT
|
|
I've just discovered this, it's shaping up to be a cool rod
|
| |
1966 Ford Cortina GT
2018 Ford Fiesta ST
Full time engineer, part time waffler on Youtube - see Jim_Builds
|
|
|
|