Enbloc
Part of things
 
Posts: 398
|
|
|
|
Ok, enough holiday snaps! After being in and around the car for 2 weeks I thought I would have a break. Well, this lasted 4 days! 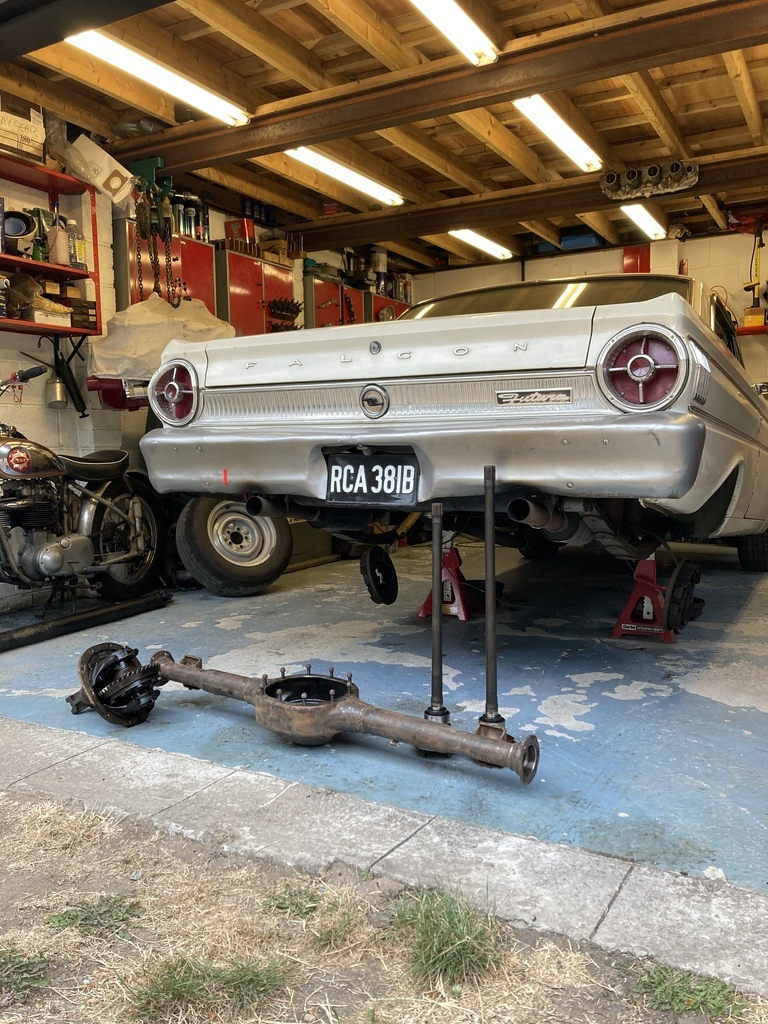 The rear axle was the only part of car that hadn’t been gone through by me or anyone else it seems as it still had its original ID tag and factory Ford halfshaft seals! 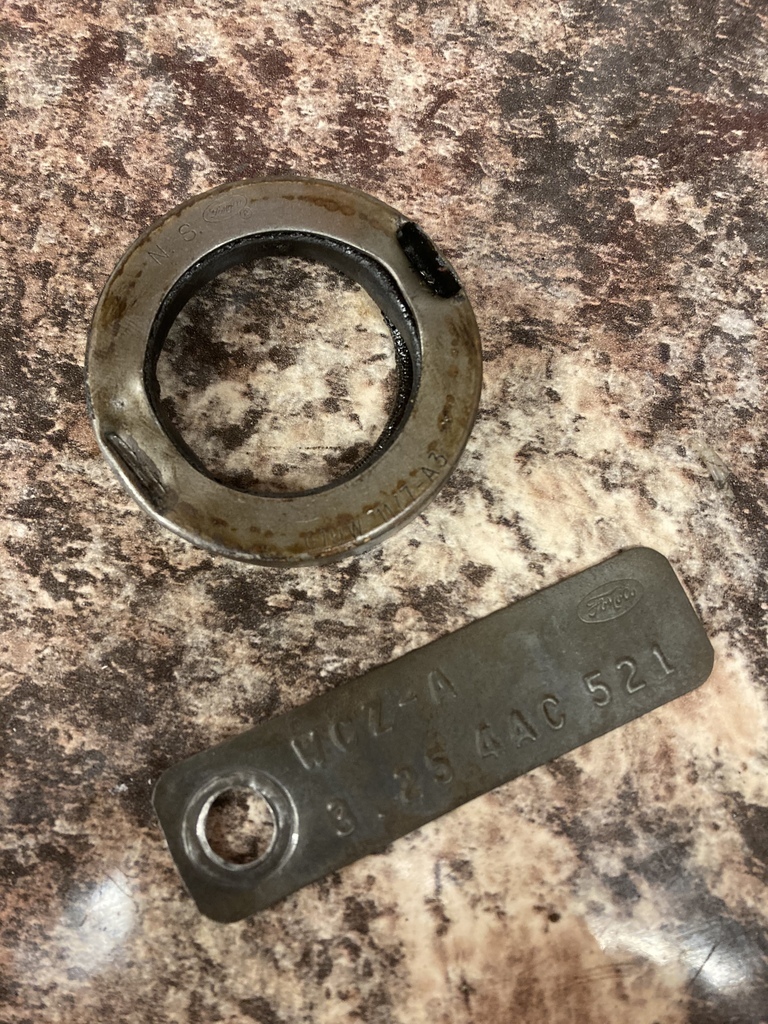 The reason for this was it just worked. It wasn’t noisey and never leaked a drop of oil but saying that one halfshaft seal had started to weep by the time we returned from Italy. I was becoming increasingly frustrated with both the open diff and the gear ratio. It had 3.25 which isn’t terrible for a factory ratio but with the 15” wheels and 70 profile tyre it struggled to pull 5th at anything below 70mph and there was always this nagging feeling of it being sluggish through the gears. I’d heard great things about Hauser Racing for axle rebuilds but I really wanted to do the job myself. After speaking to them on the phone it was a no brainer to just give them the whole thing. They had all the parts in stock and a quick turnaround which would set me up nicely for the getting the axle back in for the Quick60 in September. I received the axle back a few weeks later. I now had a plate-style limited slip diff and 3.55 gears. 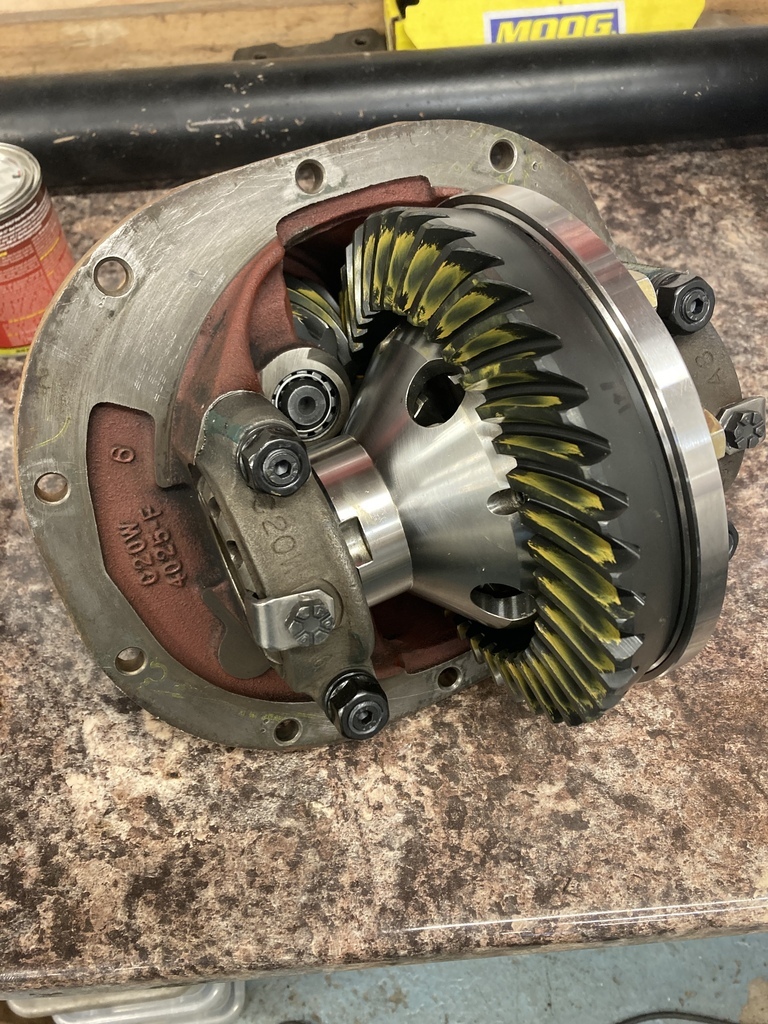 Uprated half shafts. New in front, old toothpicks in back. 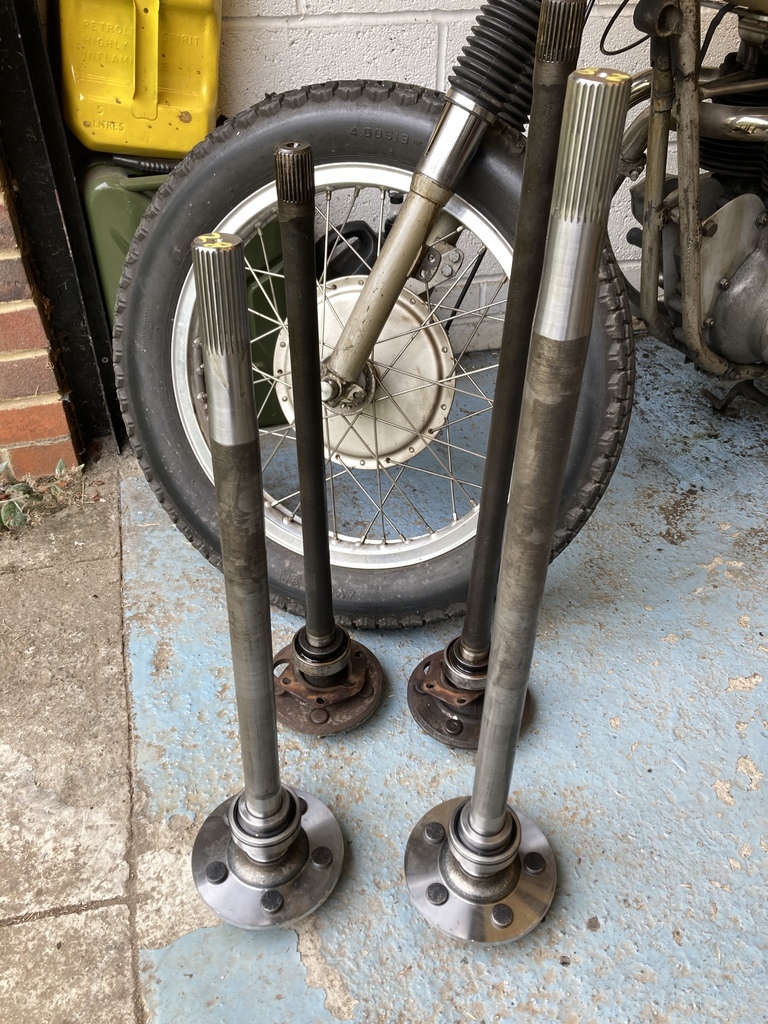 Then I just starting ticking all the option boxes! Casing checked for straightness and corrected, oil drain fitted and internal baffles fitted inside. 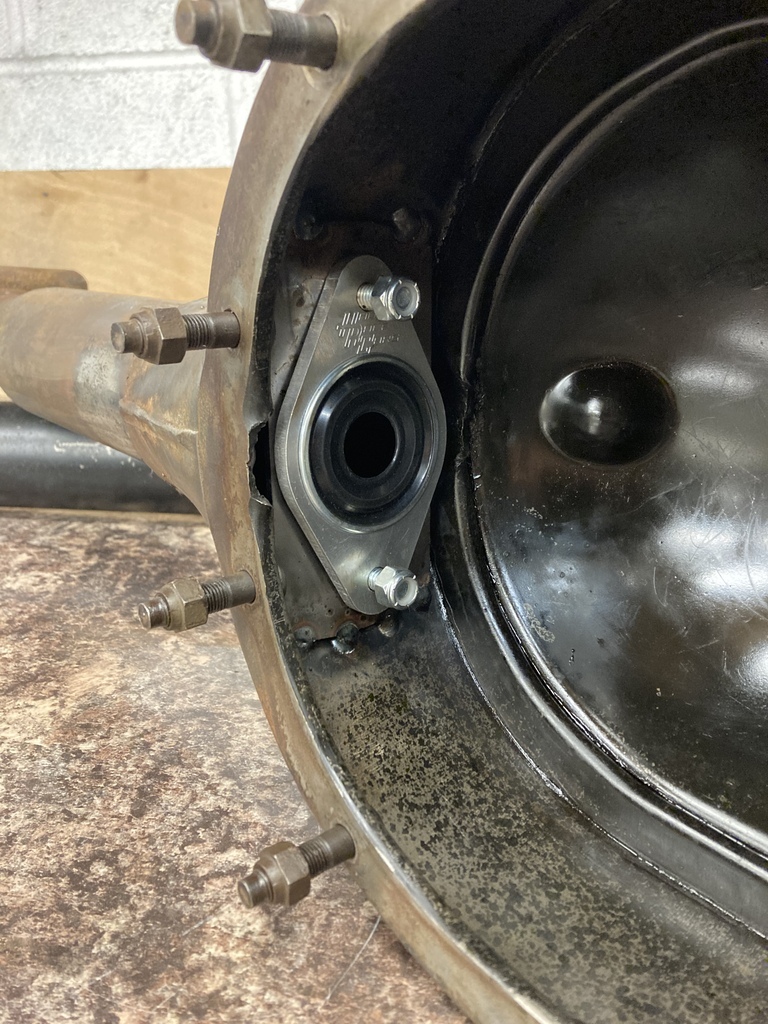 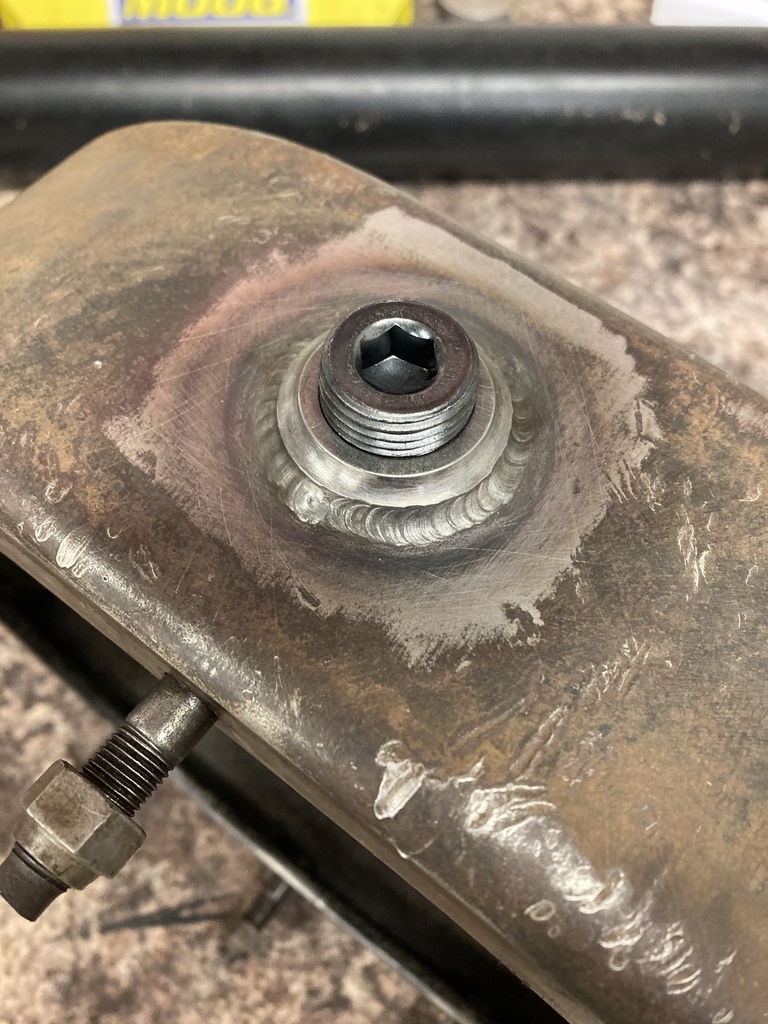 Reassembly was straight forward with no issues. No more one wheel peels and picked up a couple hundred rpm in each gear which was enough to lose the sluggishness through the gears but the 5th gear cruise is still comfortable at motorway speeds. |
| |
|
|
|
|
Enbloc
Part of things
 
Posts: 398
|
|
|
|
The whole trip the car had been faultless. The first time I had done anything was when I llifted the bonnet in Senigallia to check the oil level for our 1100 miles back home. That was until our last night in France before the tunnel back home. First incident was getting stopped by the local Gendarmerie at a road side check point. They wanted to see every piece of paperwork there was from drivers licence to logbook to MOT and they checked all of it. This came as a bit of a shock as in previous trips I had been a little lax with this sort of thing. All was fine. We had a short discussion in broken English regarding the V8 and was sent on our way with a cheery smile. No pictures unfortunately. A little later on, 30 minutes or so from our cabin for the night I noticed the temp gauge a little higher than normal. Bare in mind we’re fully laden, spent weeks in 35+ degree weather, heavy city traffic, mountain passes and the gauge had barely moved from the normal position. I thought maybe it’s lost some coolant over the trip and it’s starting to catch up with itself. We stopped for dinner and it was hissing and spitting and sounding rather hot but we were so close to our destination I decided to take the decision to do absolutely nothing. Getting back in the car for the last 10 miles had the temp gauge completely pegged off the scale! Mmm. A mildly stressful journey had me wondering what damage could become of the engine going nuclear. Bonnet up. 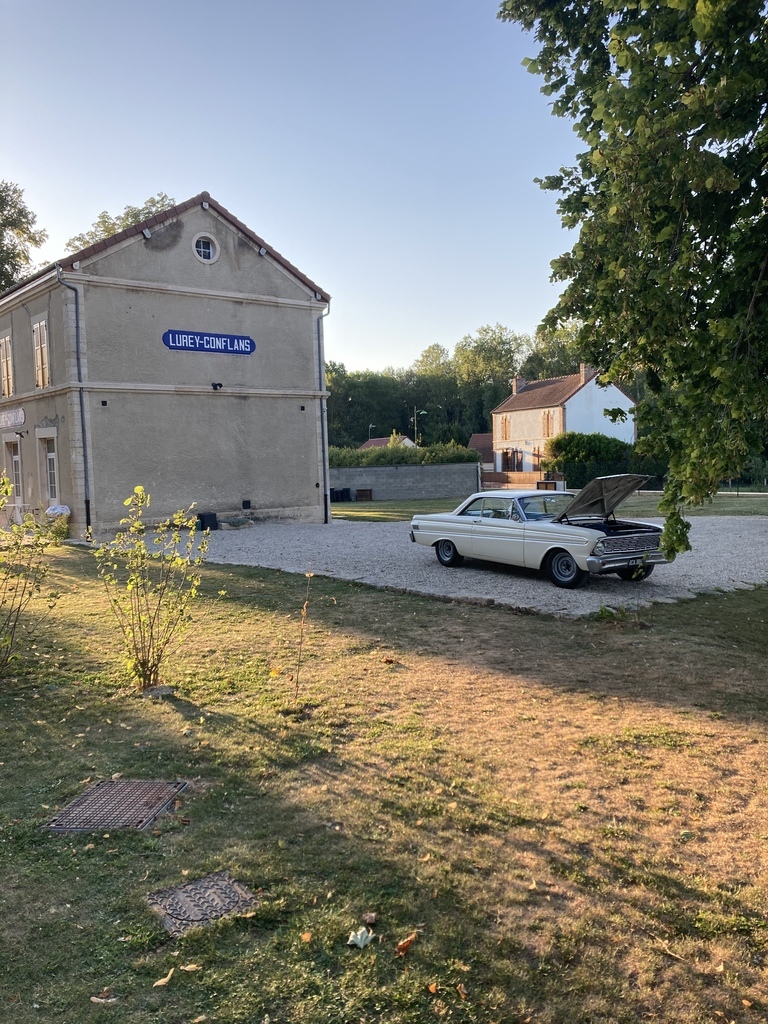 I was greeted by a jet of steam coming out the side of the header tank. The weld had split. 😞 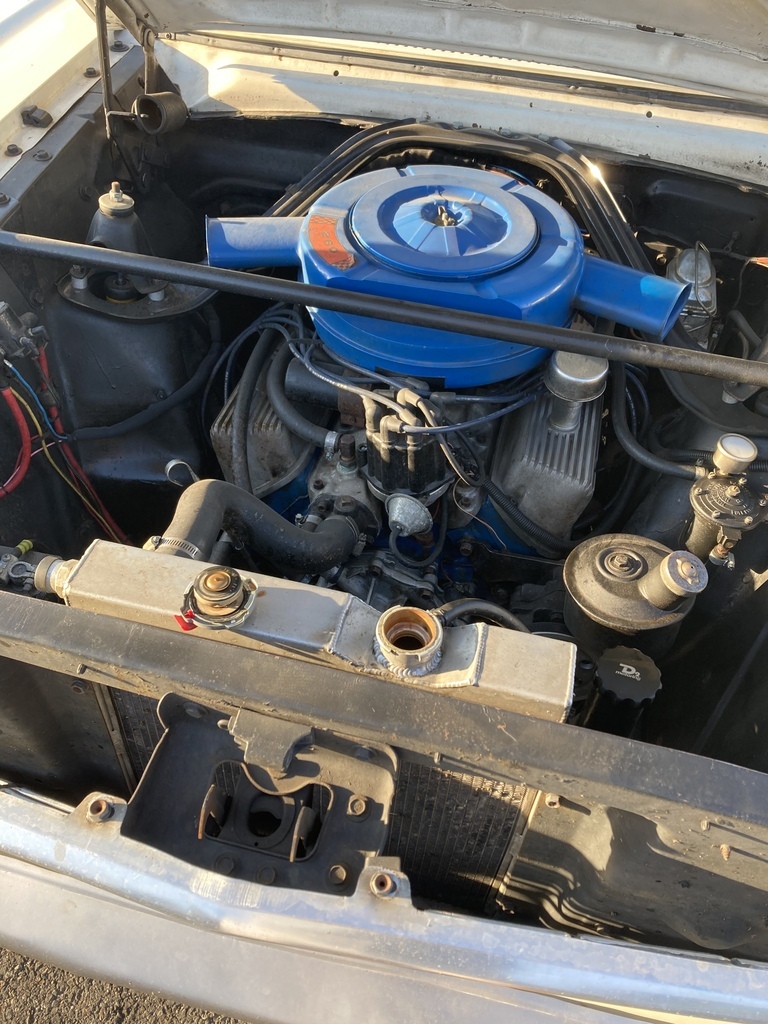 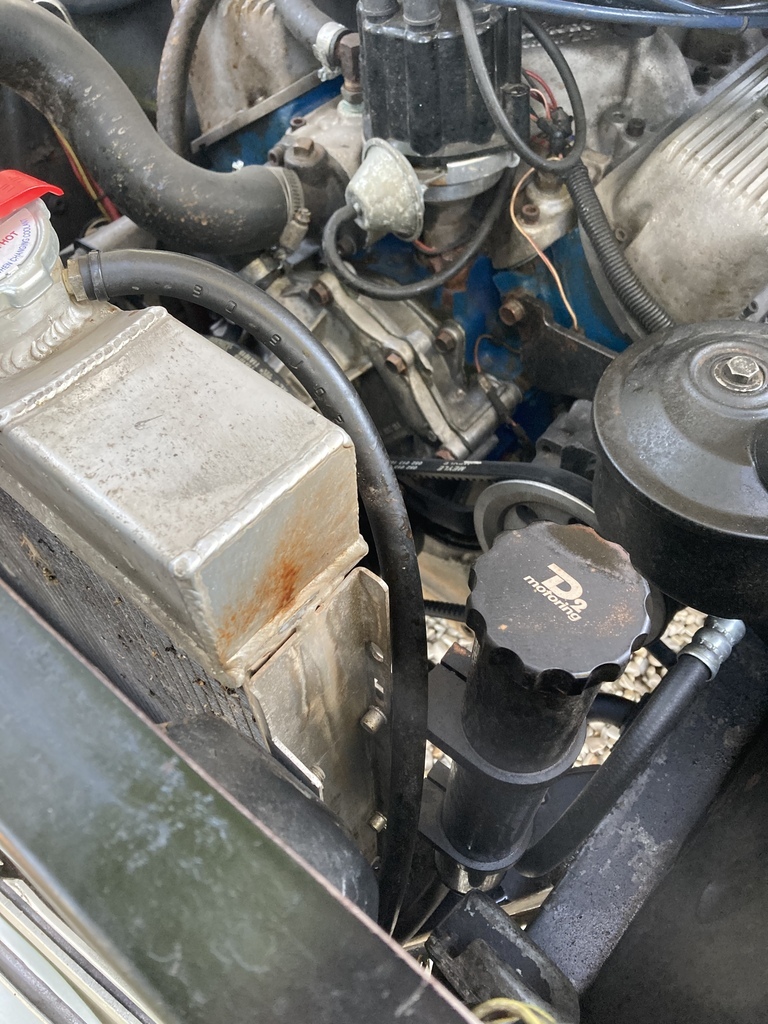 It’s 9pm, we’re in the middle of nowhere, we’ve not seen a soul and car is DOA. The only option was to limp the car 10 miles back into town and find a fix. We didn’t stay in the old railway station. We were in the hobbit shed in the garden. 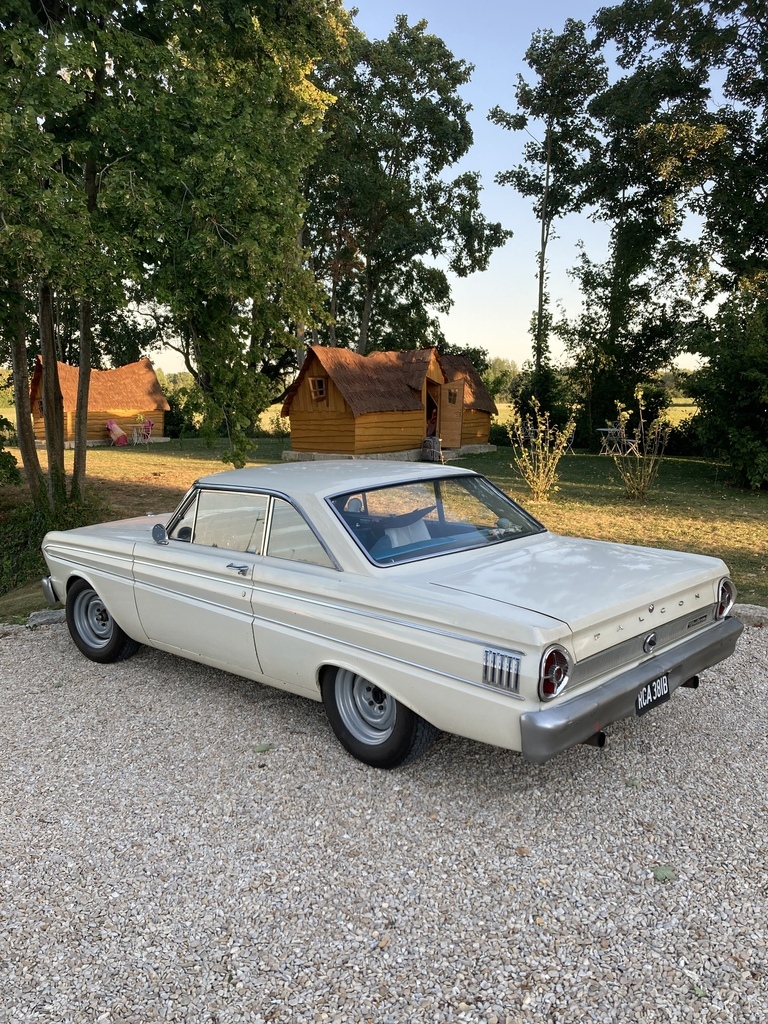 The next morning there was a plan. Filled up the rad with water, back to town to find the Brico Marche (French B&Q equivalent), find the JB Weld (other brands available), bodge it and run! The first couple of miles back into town were great, then the thermostat opened, pulled all the water out the rad and the temp gauge pegged nuclear again. Dammit. In my haste I’d only filled the rad with water completely forgetting the engine was completely empty as well. Made it the Brico Marche just after 8am, it didn’t open till 9am. Dammit. First one in the store at 9am. Sand paper, metal repair putty and a bottle of rad weld for good luck. 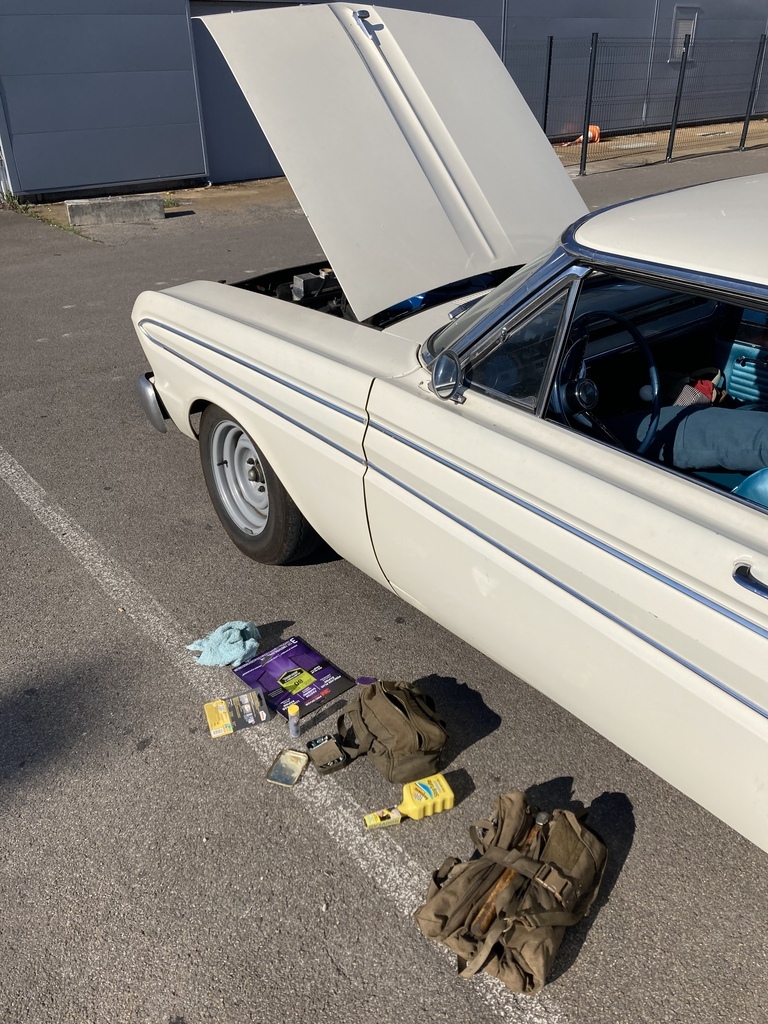 Fixed. 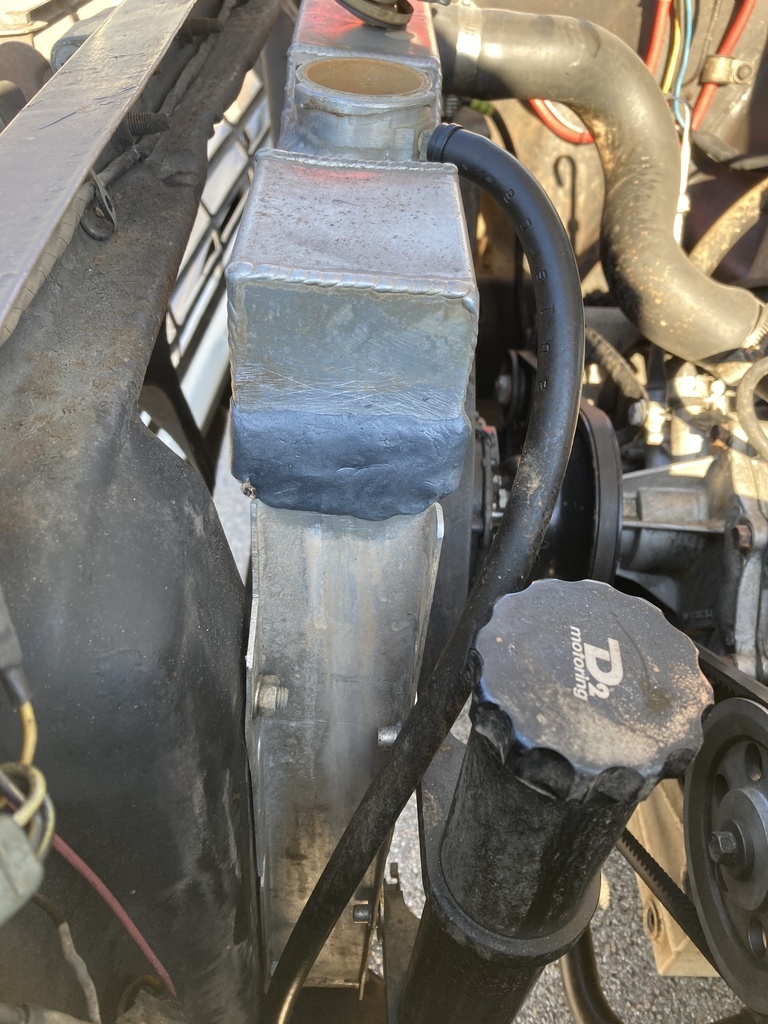 Filled up a load of bottles from the stores hose in the garden centre and properly bleed the cooling this time. It didn’t leak and I hadn’t had to use the rad weld. We got back on the road 4 hours later than planned and went on to do over 400 miles by the time we got home. 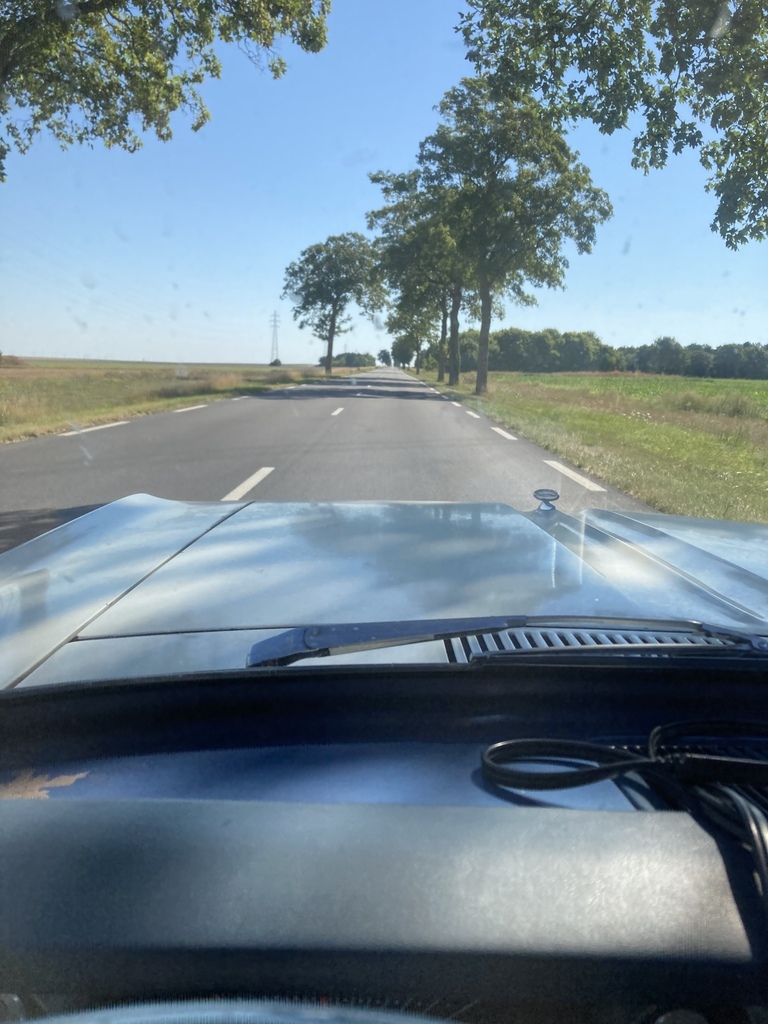 |
| |
|
|
Enbloc
Part of things
 
Posts: 398
|
|
|
|
We started with our long journey home by heading back towards Milan. This route includes Modena and Maranello. Modena has some amazing car museums, especially the private ones but most are pre-book only and we just couldn’t spare the time to wait for a slot, so we ended up here…  All I can say is, don’t waste your time. It was the most boring, soulless, overcrowded and overpriced place I have ever been. Ugly picture postcard of the museum, €15. Bland key ring , €70! This was the only picture I took. F1 clutch pack. Thumb for reference. 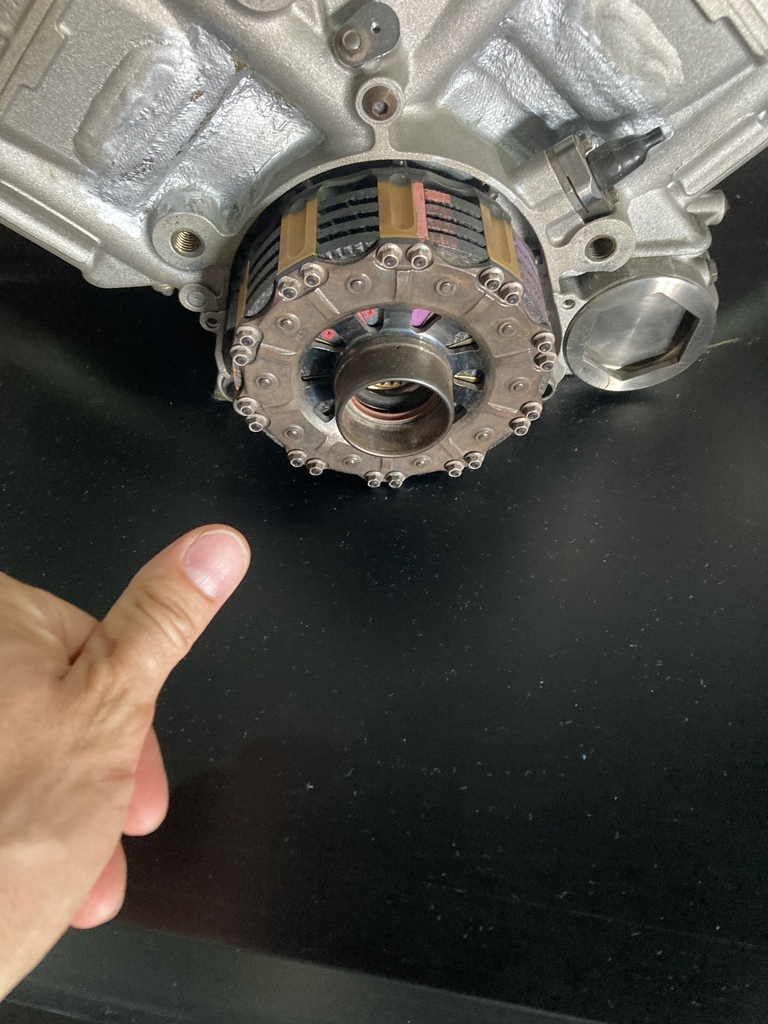 We had dropped a day for our return journey and this really bit us hard as we were struggling to do the extra mileage each day. From Milan we cut west towards Turin bringing us back into France rather than cutting across Switzerland again. This meant we got to do a different pass over the Alps. We stopped at a little local Italian cafe one morning and a British expat introduced himself on hearing our English accents. He gave us the heads up on taking the Mont-Cenis pass to take us back into France. Our approach was on the Italian side, which was wonderful with no traffic to hold us back and fresh tarmac the whole way up to the summit where we stopped for lunch at the summit. The bluest lake I ever seen on one side and the peaks on our other side. The return trip down on the French side was a miserable experience of a pot holes and being constantly held up by tourists slamming on the brakes at every little kink in the road. 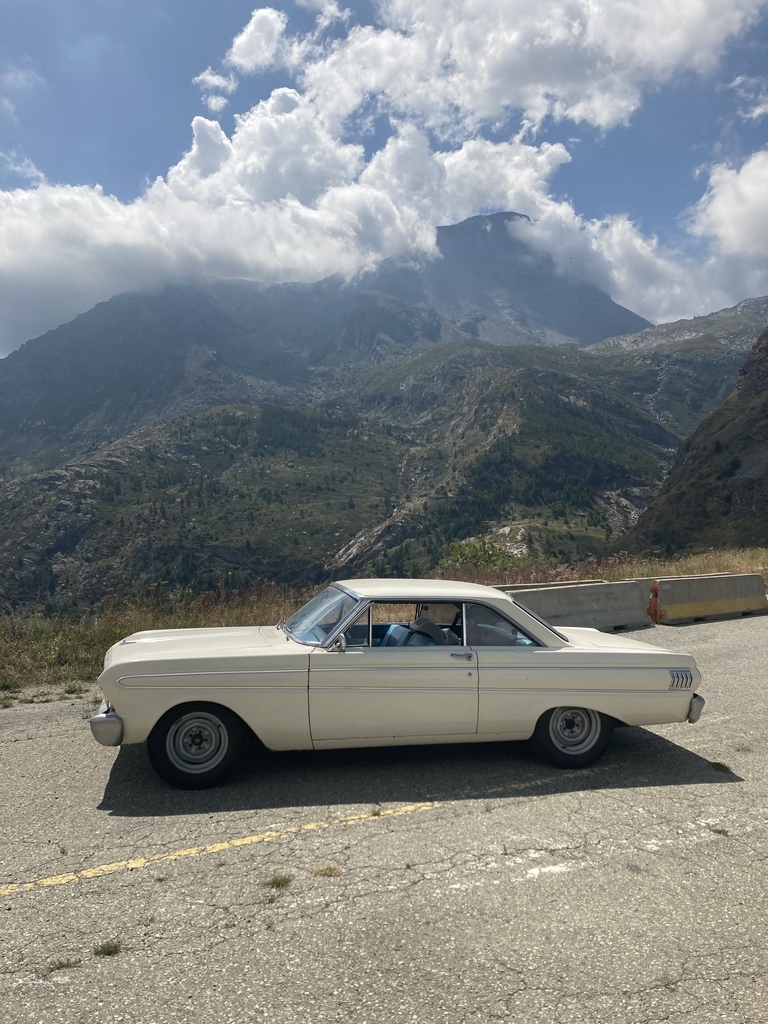 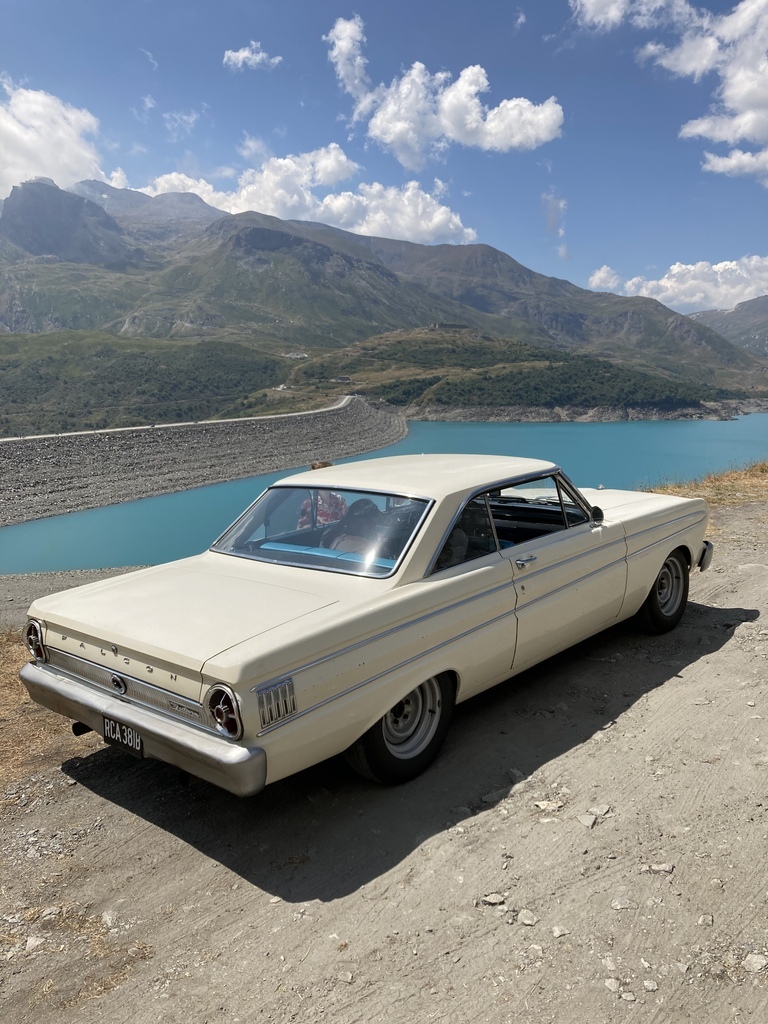 |
| |
|
|
Enbloc
Part of things
 
Posts: 398
|
|
|
|
The next couple of days were uneventful travel wise as it was just a matter of clocking up many motorway miles in 40 degree heat. 🥵 Shortly after leaving Lugano we crossed over the border into the public race track that is Italy and skirted the bottom of Lake Como where we stopped for lunch. Lake Como was bonkers busy as you’d expect but we did hit the jack pot with this parking space! 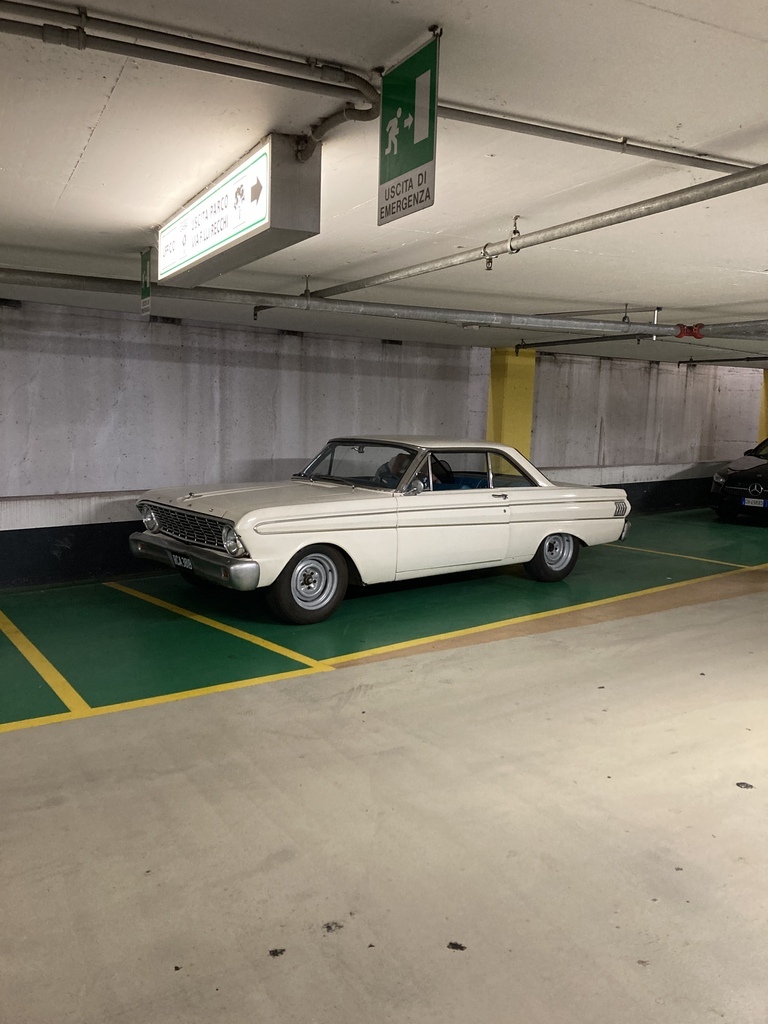 Our midway stop over was another pool equipped hotel on the outskirts of Milan. We swerved Milan itself but did make it to a bucket list destination. 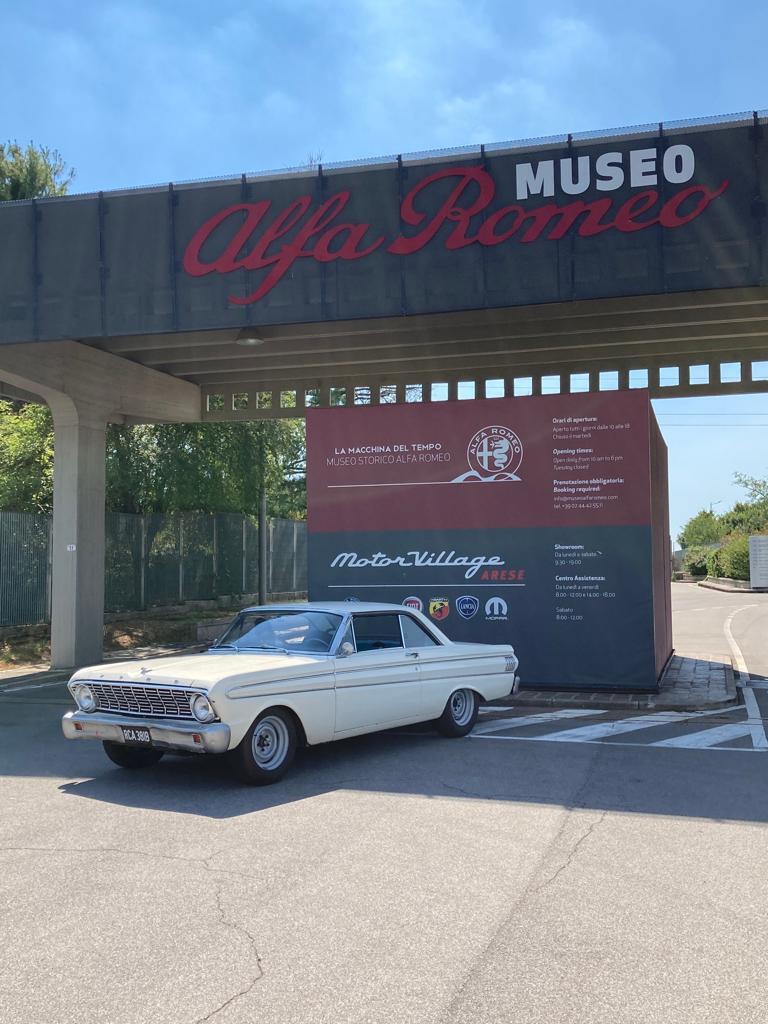 I’m a huge closet Alfa Romeo fan and have wanted to visit here for as long as I can remember and it didn’t disappoint. From the building to the layout and the exhibits it was pure class and style. Simply the best car museum I ever been to and that includes the Porsche museum in Stuttgart!  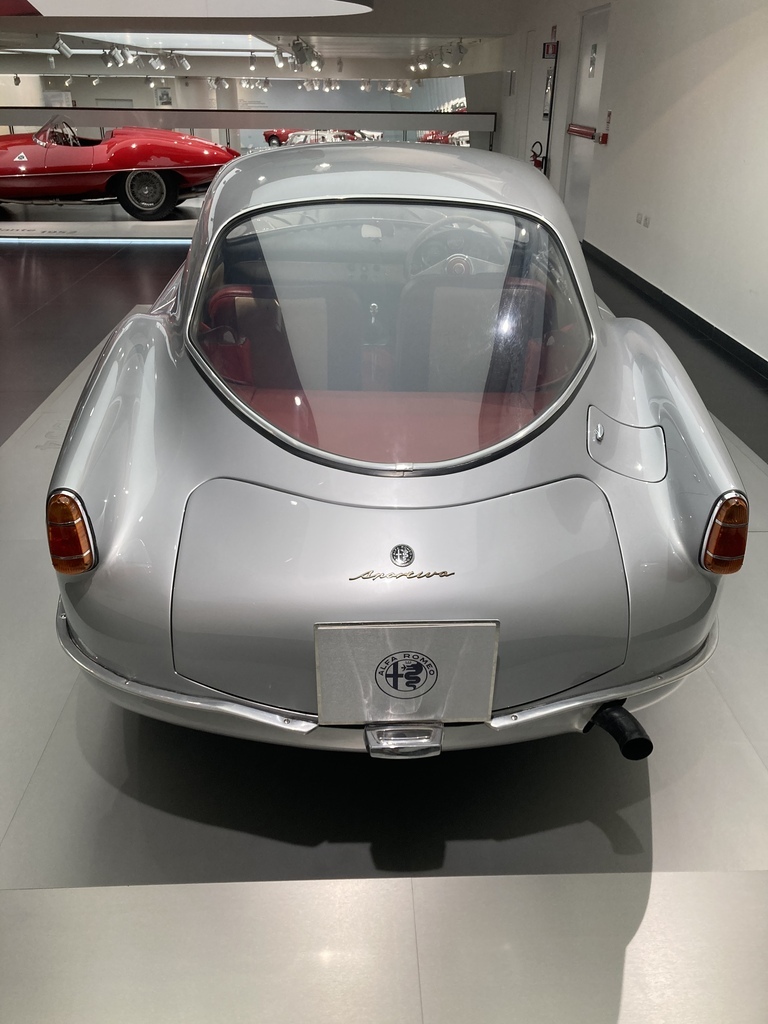 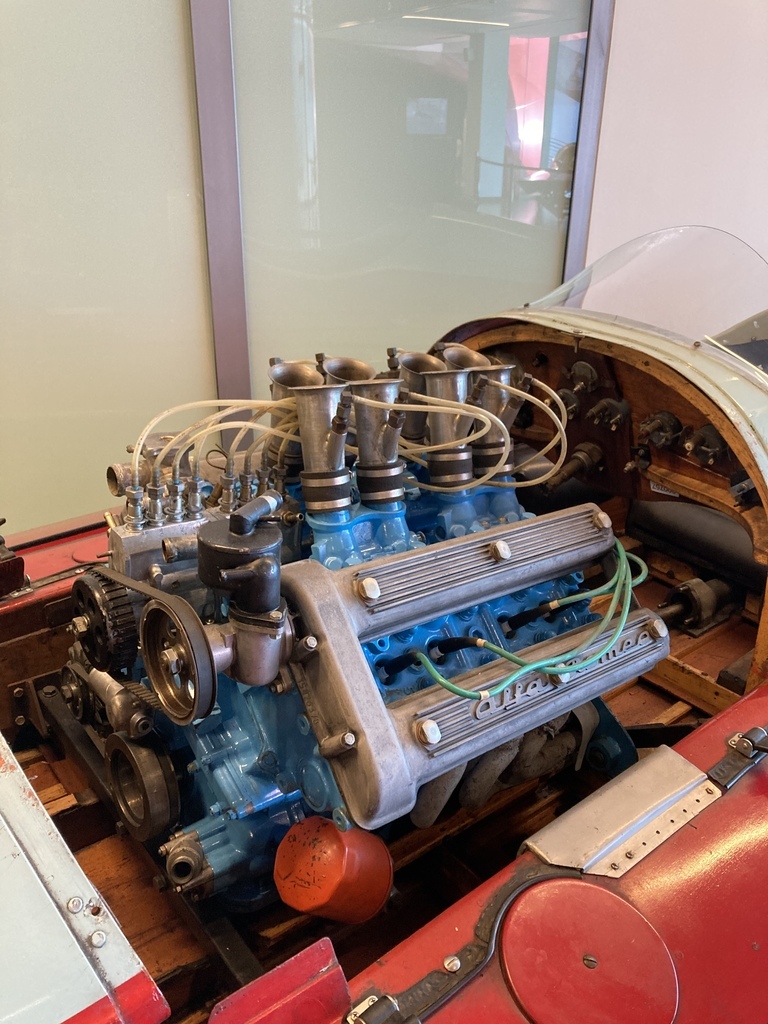 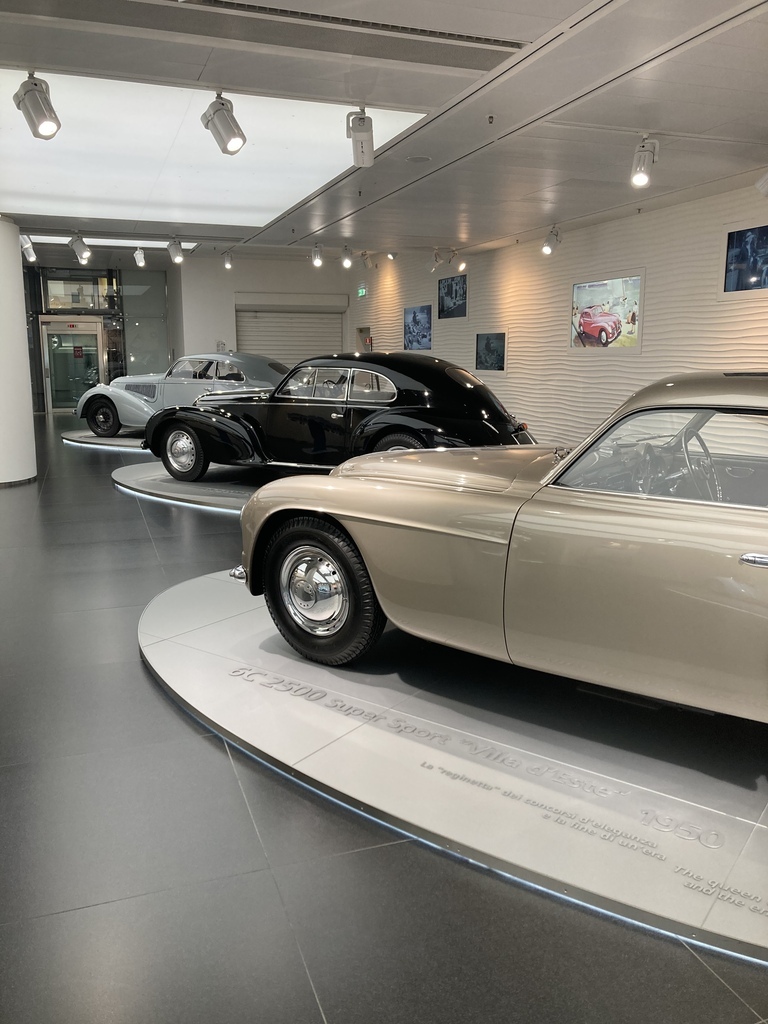  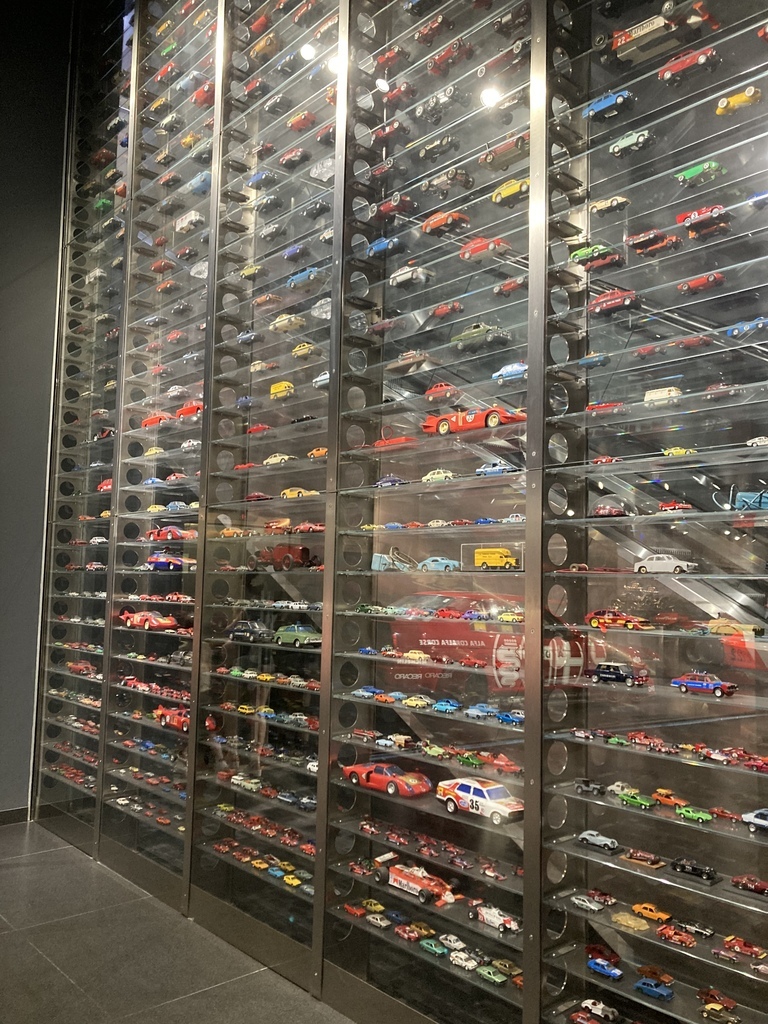 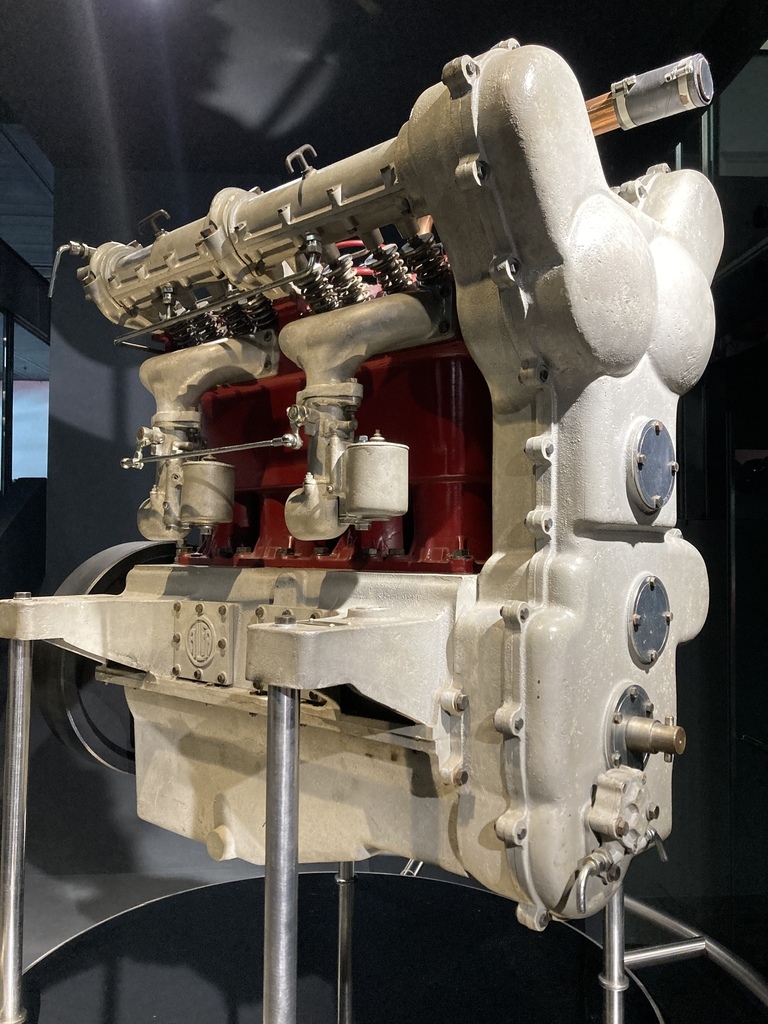 From Milan it on to our destination in senigalia were ee spent the next 4 days. 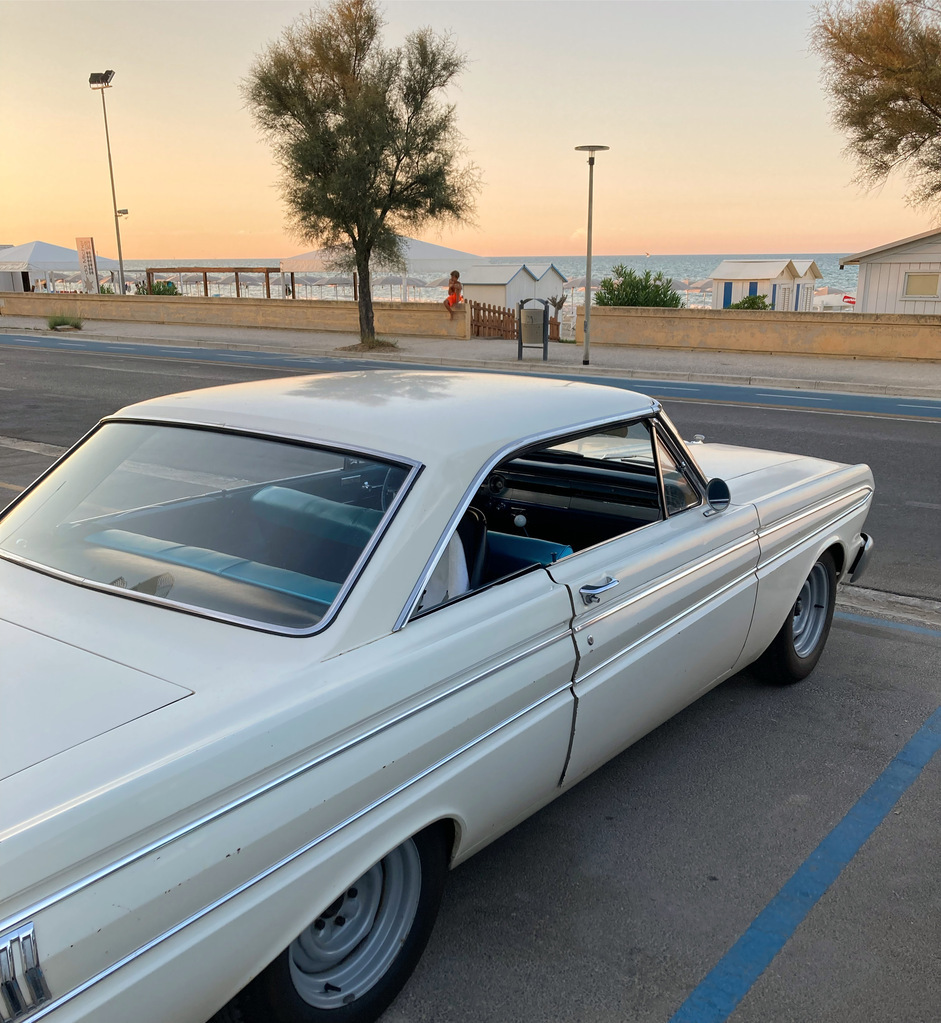 |
| |
|
|
Enbloc
Part of things
 
Posts: 398
|
|
|
|
Great trip! Remembers me of our trips over the Alps with our Giulia Amazing. Love it! |
| |
|
|
Enbloc
Part of things
 
Posts: 398
|
|
|
|
We had been travelling in early August. This was the tail end of the 35+ degree heat wave that had been sweeping across Europe. We were heading south and it was getting hot, really hot. Luckily our next stop had a pool! Our third stop was an absolute gem. Hotel Vezia in Lugano, Switzerland is a restored motel originally opened in 1956. 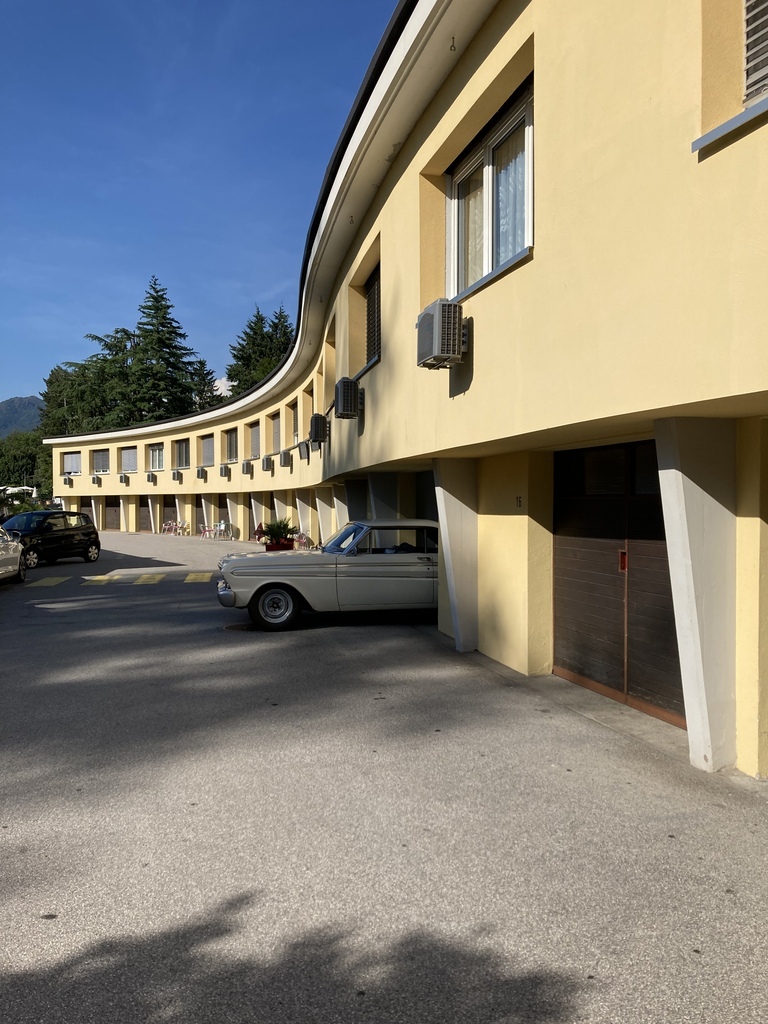 If that wasn’t cool enough you got your own garage underneath the room! 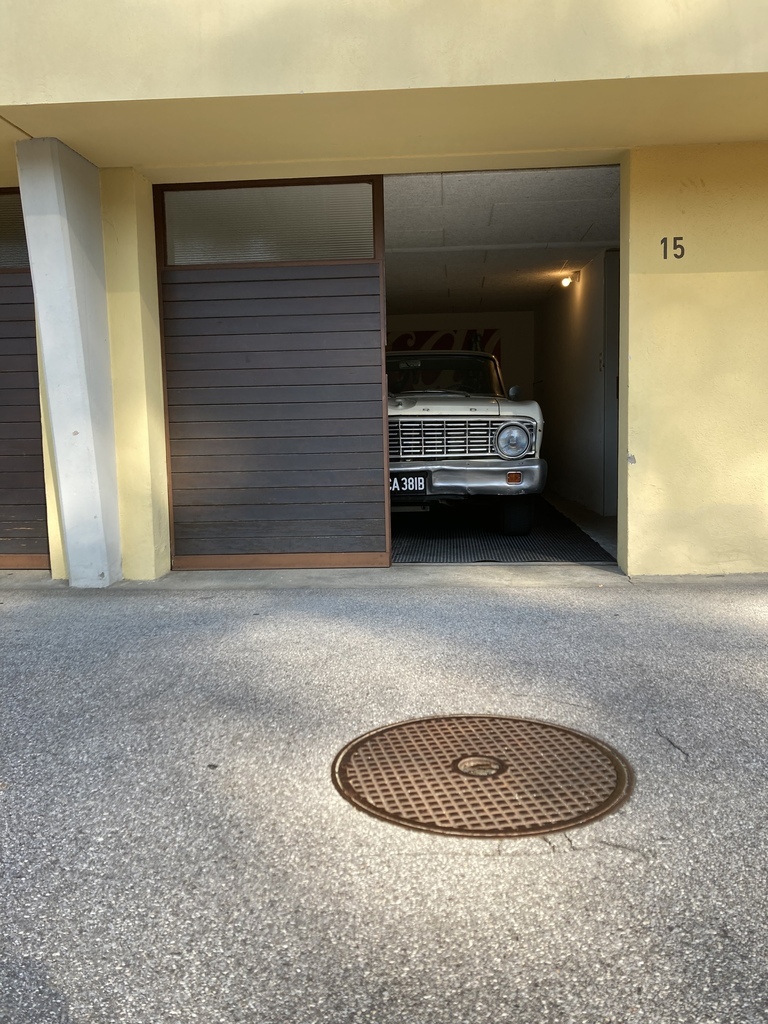 When in the garage there was a staircase that led directly into the room. 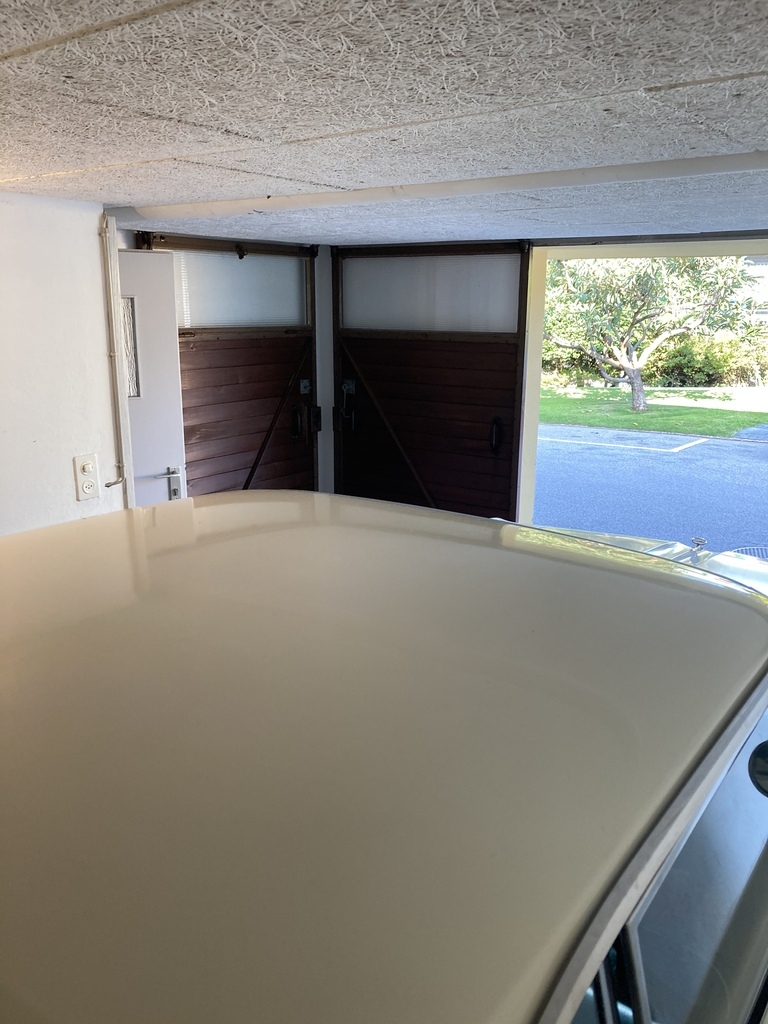 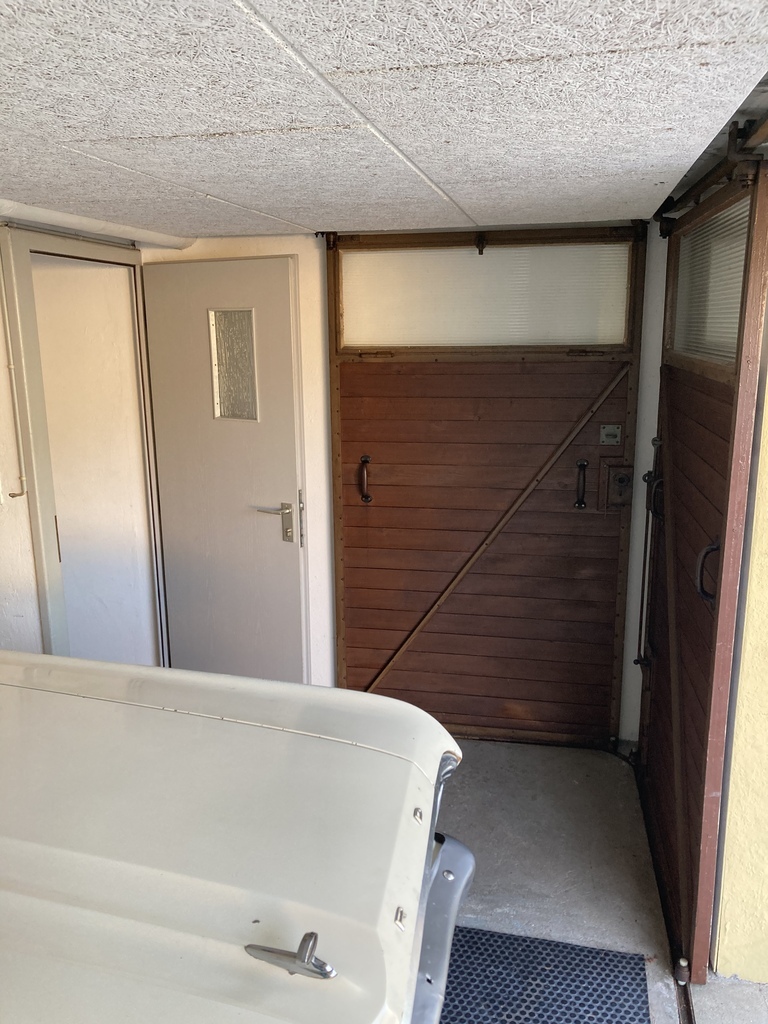 There was a great framed photo on the wall in the reception showing the motel in period. 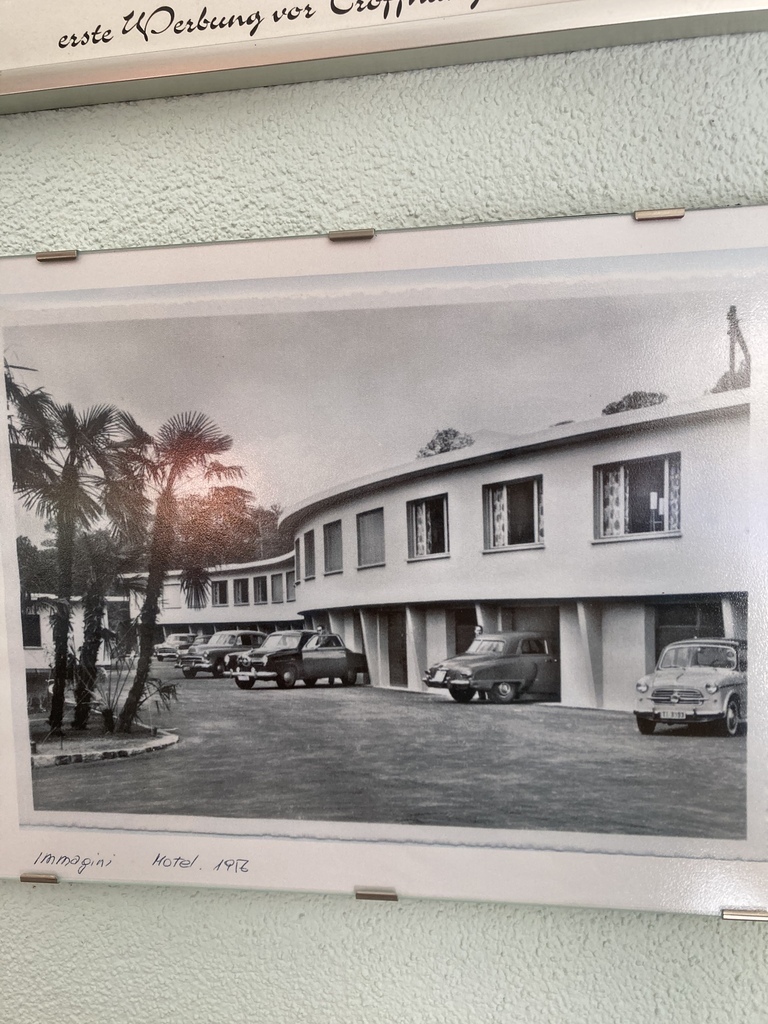 |
| |
|
|
Enbloc
Part of things
 
Posts: 398
|
|
Nov 29, 2022 22:08:25 GMT
|
I think I had it for a couple of years then got talked into selling it when it was in my mates garage for a couple of small jobs. One of his mates bought it and he had a hotel up in Port Patrick near Stranraer at the time. I know he had to sell it a few years later. I did try to track it down when I heard he'd sold it but I didn't have any luck. I had another go about 3 years ago but failed again. Shame. I guess its out there somewhere! |
| |
|
|
Enbloc
Part of things
 
Posts: 398
|
|
Nov 29, 2022 21:17:54 GMT
|
Man, Beetle guy is an optimist. Or he didn't want to hold up traffic. The Beetle was on German plates from memory so had travelled a fair distance already. I love a good road trip, clearly you are a man after my own heart! Great photographs - I hope we are going to see the rest of the trip. Your trip to Cortina was great. It brought back many memories from previous trips. |
| |
|
|
Enbloc
Part of things
 
Posts: 398
|
|
Nov 29, 2022 15:21:40 GMT
|
I bought this one quite a number of years ago, not a full blown Woody as such but as soon as I saw the pics I was off  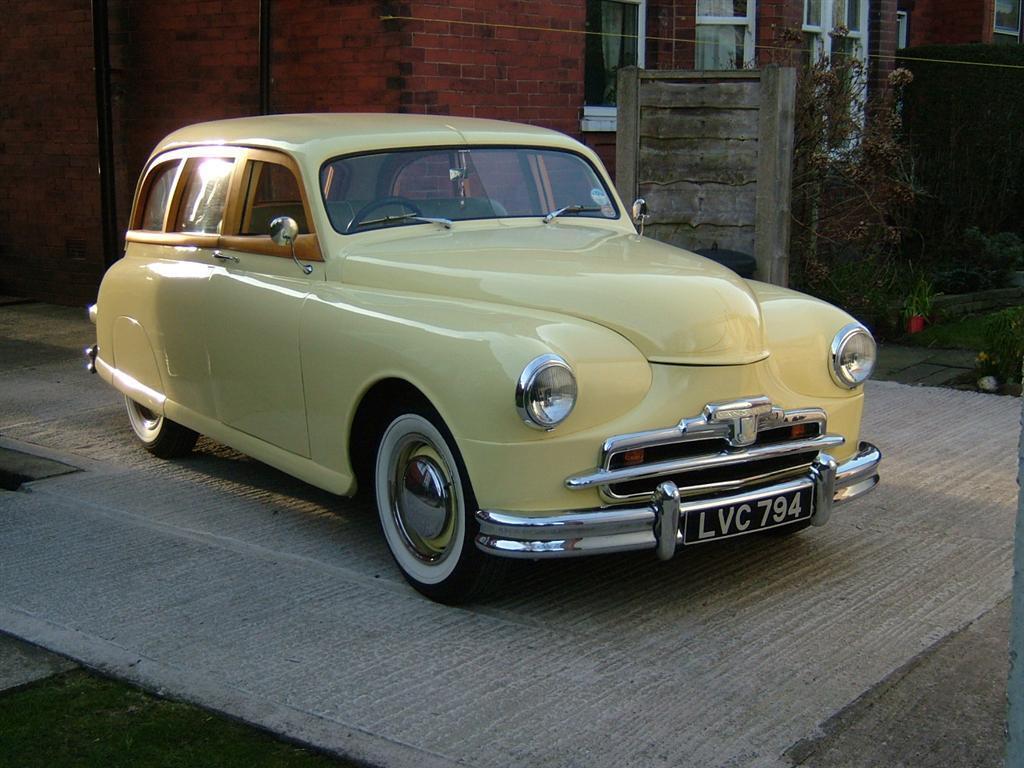 This was my dads. He built it. Do you know what happened to it? Last we saw it was with a dealer up North. |
| |
|
|
Enbloc
Part of things
 
Posts: 398
|
|
|
|
As mentioned the Falcon was being prepped for our trip to Italy. The destination was a 50’s music/lifestyle festival called the Summer Jamboree held in Senigallia on the Adriatic coast. It was to be a 2200 mile round trip.  We’re no strangers to big road trips having traveled all over Europe going as far south as the Mediterranean and as far north as Sweden. Most of the bigger trips were done in the ‘36 coupe. When we drove to Sweden my son was 2 y/o, he’s now 8. This time we thought we’d add to the challenge by including our new 5 month old! As they say, there’s nothing more boring than some else’s holiday snaps, so I’ll just post the highlights. All packed and ready to go. This is where American cars come into their own, the boot size. That’s 3 suitcase, various bags of ‘stuff’, a full-size buggy, tools, spares, a full size spare tyre and a stunt scooter. 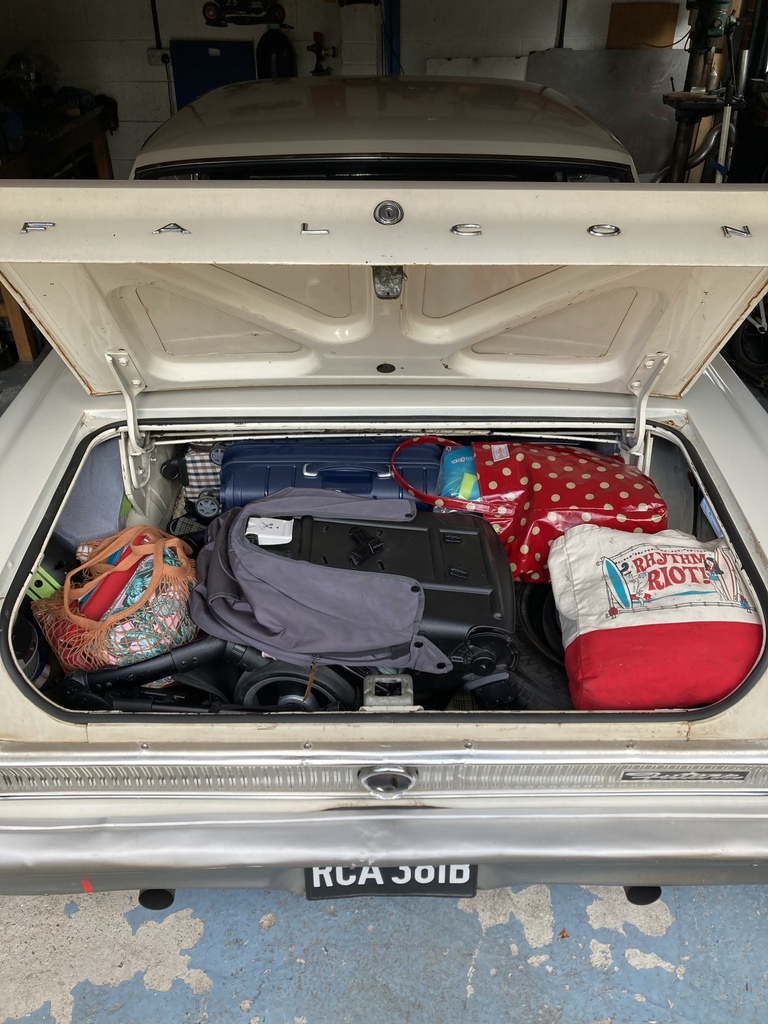 Somewhere in France. 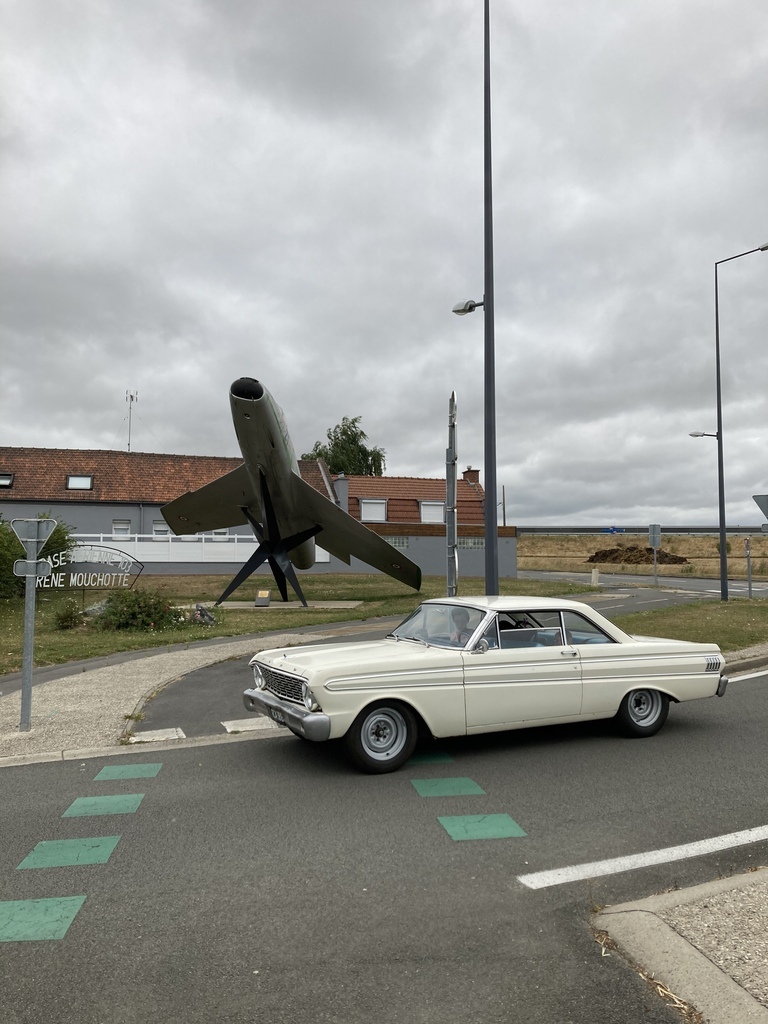 We always aim to be realistic with daily mileage, aiming for 150-200miles a day. This allows time to stop, see stuff, tourist attractions etc. As we were to find out a baby sets the schedule, who knew!? Rest stops became a leisurely affair. 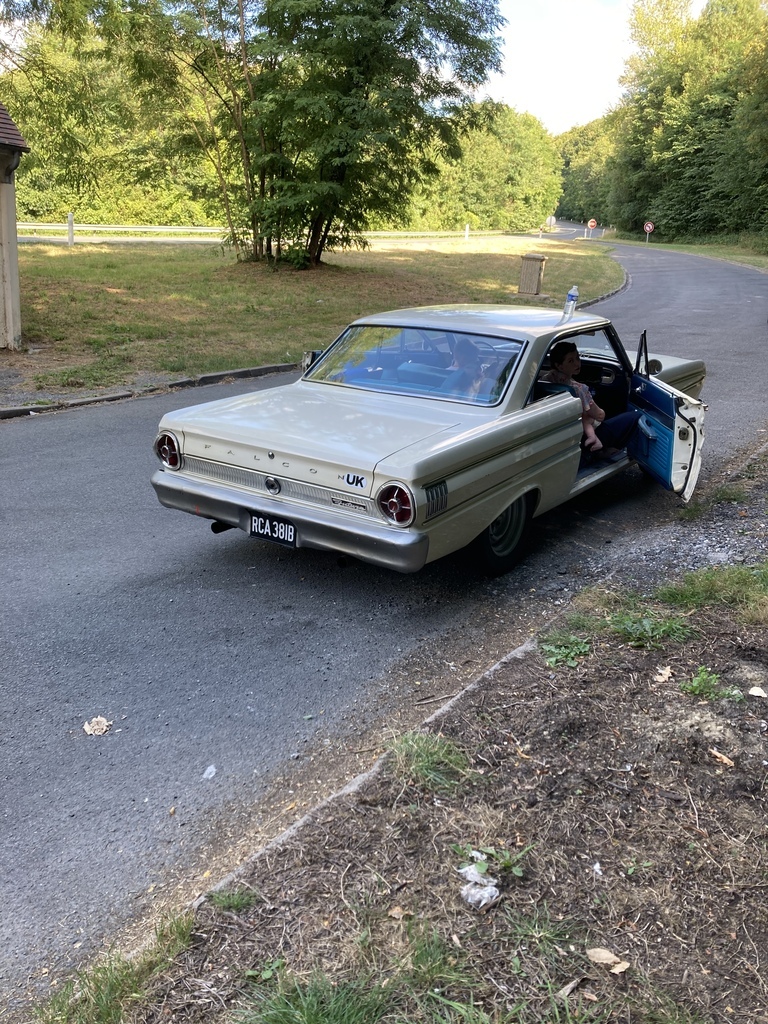 Our first stop over was Reims. Of course when in Reims you have to stop at the abandoned pit straight of the old road circuit. 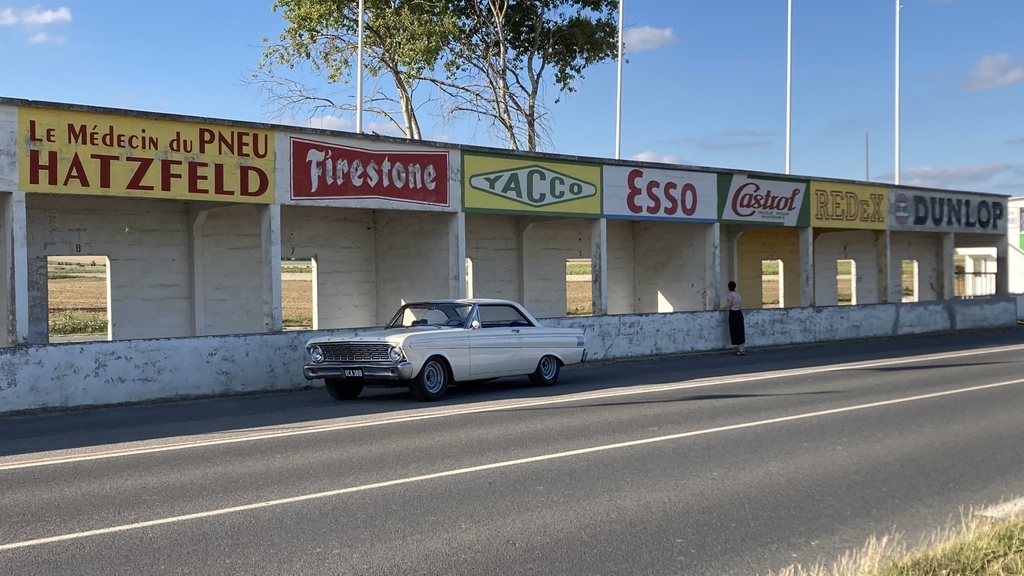 My significant other hadn’t driven the Falcon since I binned the slush box for a proper gearbox. I finally got around to making some adaptations before we left to get her back in the hot seat.  Second stop over was Colmar on the French/Swiss border. This is where the driving really starts to get good as you’re getting into the Alps. 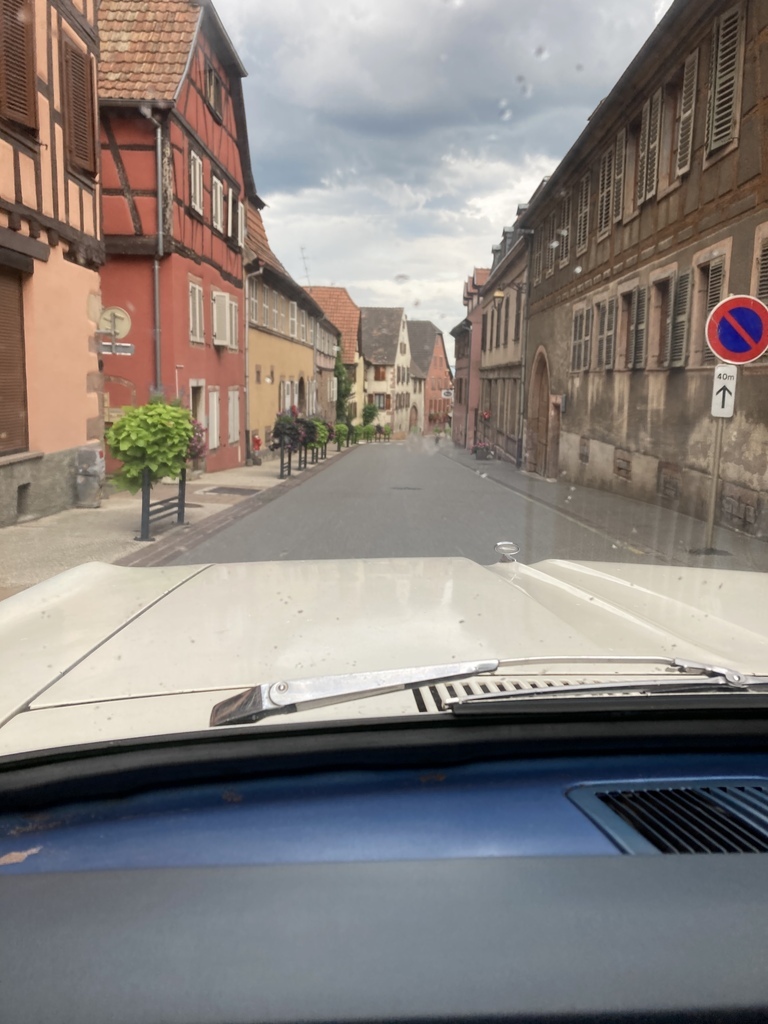 Saw the Statue of Liberty. Thought it would be bigger in real life.  Somewhere in Switzerland. 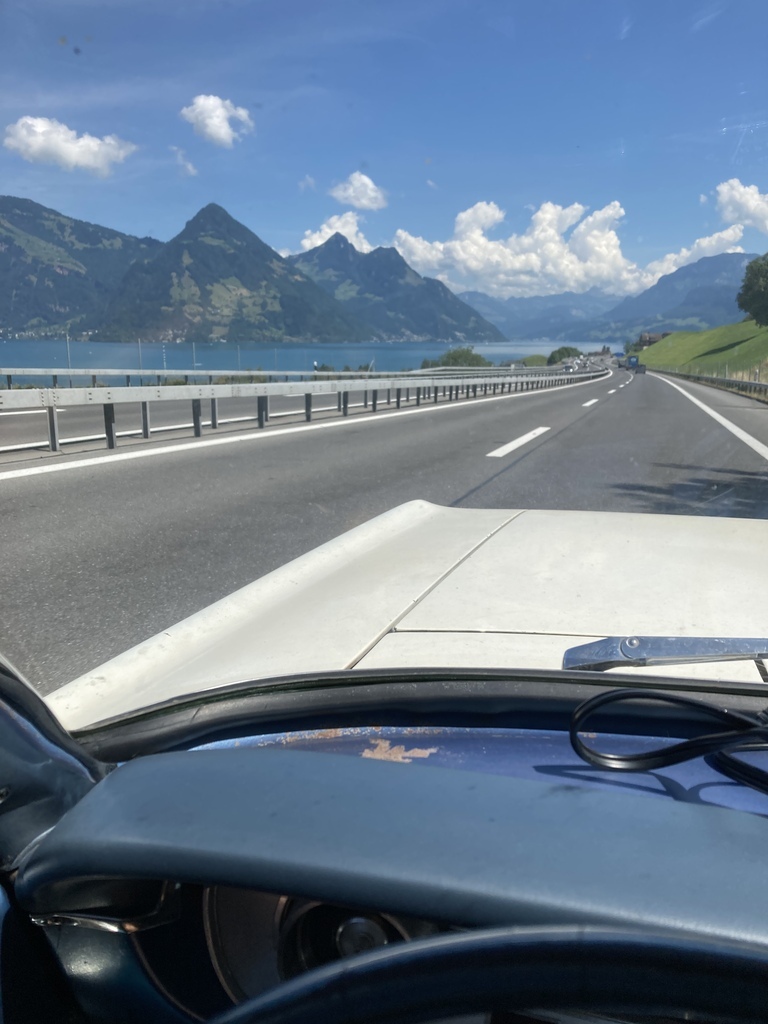 We decided to take the Gotthard pass when crossing the Alps. The Gotthard pass is interesting in that their are actually 3 versions. The toll road, which was gridlocked with traffic and roadworks, the old pass which was ok but busy probably because of the toll road issues and the true original pass. We got to the summit and couldn’t find the start of the original pass. A few loops back and forth eventually found a barely sign posted side turning. I think this was intentional. 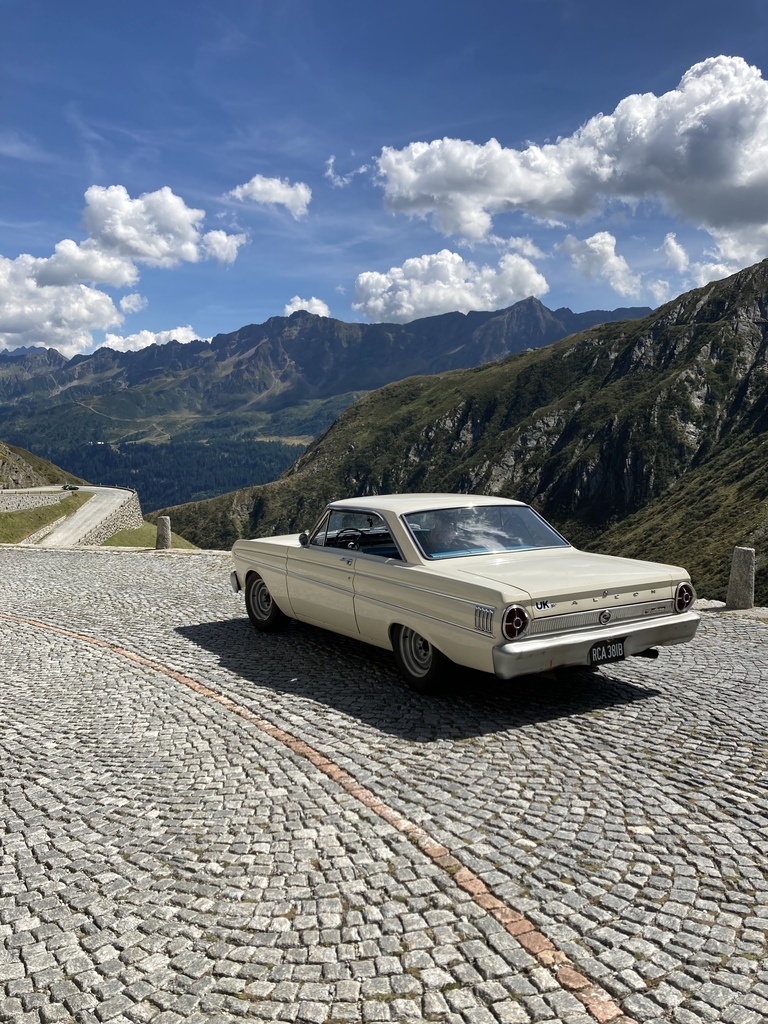 It was cobbled for most of its length with barely any traffic. An utter joy. We stopped for lunch half way down. Total Italian Job vides. 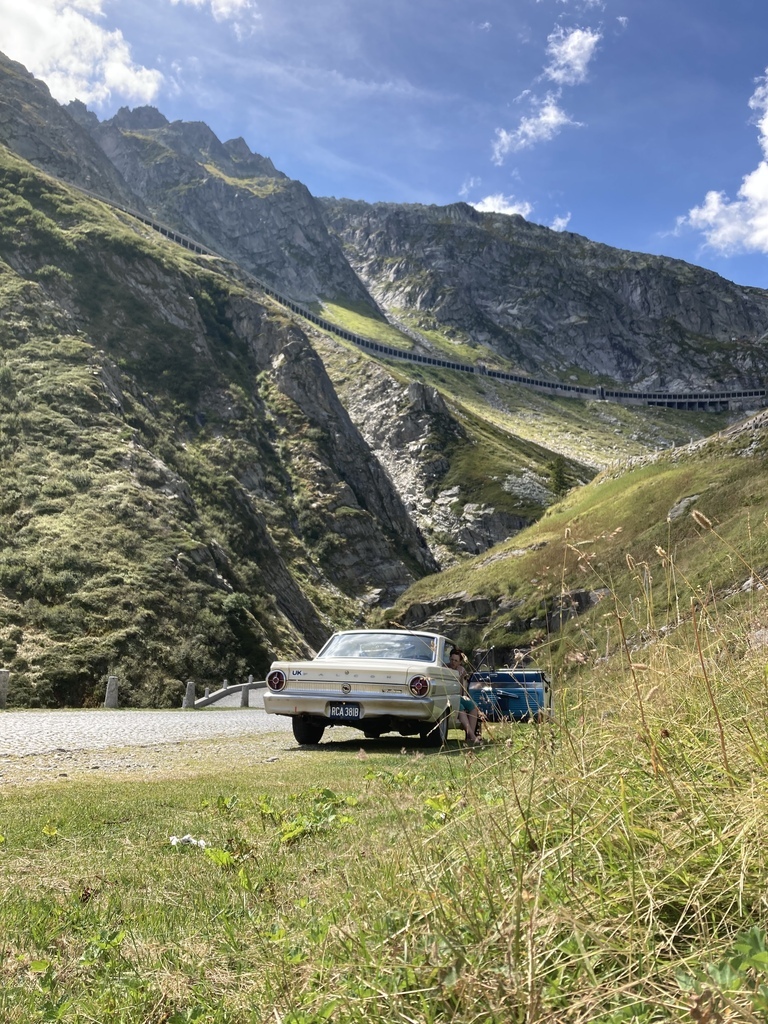 A fellow traveler. 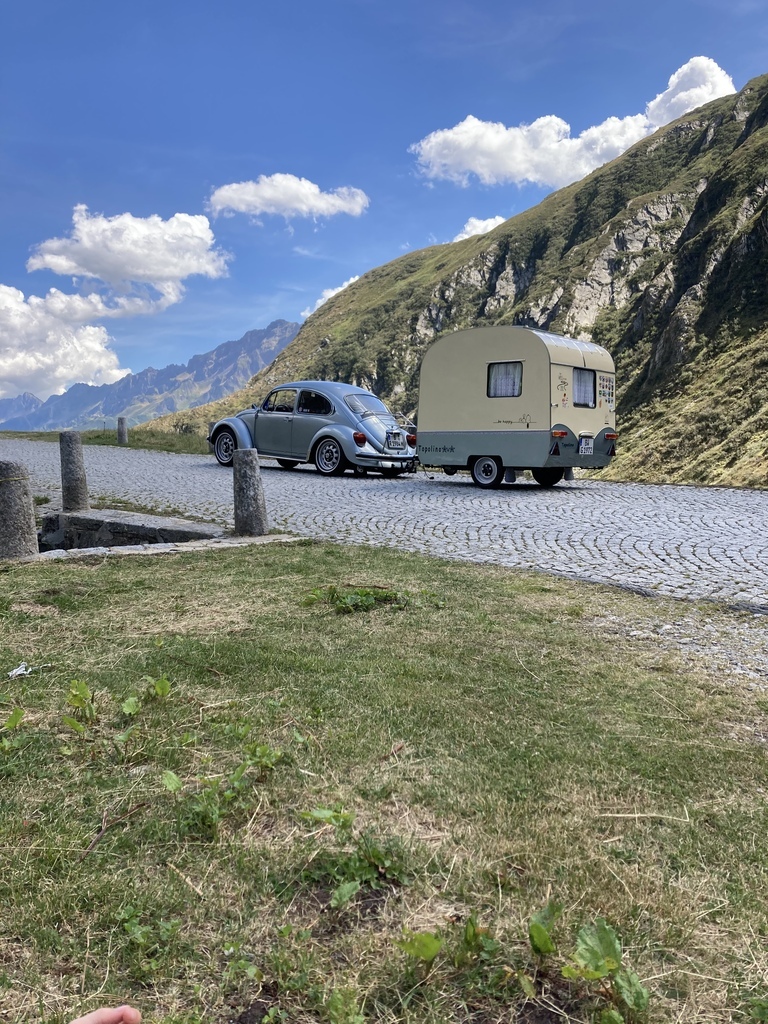 |
| |
|
|
|
|
Enbloc
Part of things
 
Posts: 398
|
|
|
|
Saw this car at RR Mallory Park and loved it. Sounded amazing too. What was done to the front suspension to match the rear? We (I) need plenty more updates on this car!  Thanks! I hope to cover in more detail but basically it’s modified stock components and the Falcon/Mustang front suspension is an absolute disaster from the factory! |
| |
|
|
Enbloc
Part of things
 
Posts: 398
|
|
Nov 24, 2022 20:53:58 GMT
|
I may be mistaken but some Mustangs, I think, had shocks mounted different sides of the perch Ie 1 fwd of the perch on one side one aft on the other side in an attempt to stop wind up Relatively short lived option on some high performance Mustangs. Maybe Camaro as well? I don't know the science behind staggering the shocks to improve traction? |
| |
|
|
Enbloc
Part of things
 
Posts: 398
|
|
Nov 24, 2022 14:30:05 GMT
|
It seems so odd that loading the spring with another spring, acting against it, should make it firmer! Its not so much making it firmer but giving the main leaf extra support to be able resist the axle twist under acceleration which causes the axle tramp. 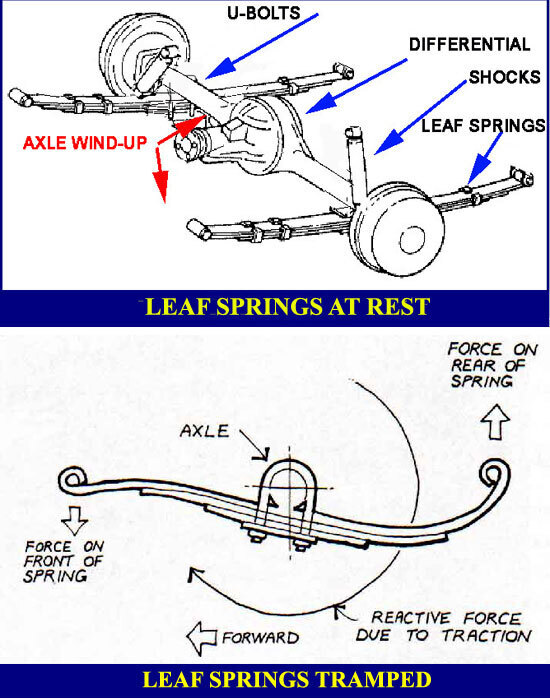 |
| |
|
|
Enbloc
Part of things
 
Posts: 398
|
|
Nov 24, 2022 14:21:47 GMT
|
I quite like leaf springs, but they're definitely a bit of a dark art to get exactly as you want them if that's anything other than stock. Years ago I had a mate that had a very tidy 1600E Mk2 Cortina. That got lowered with blocks at the back and the axle-tramp had to be experienced to be believed once he started doing some serious engine work. In the end he had the springs recambered to give the ride height he wanted without the blocks, and that alone pretty much transformed things, although it could still be quite lively if poked hard. For that reason alone, I have always considered lowering blocks a bit of a "show not go" cosmetic trick rather than serious mod. Looks like you've engineered a proper solution now. We need a side profile pic.  Yeh, lowering blocks are all sorts wrong but their cheap and quick for a dramatic change and thats hard to say no to! Plenty of glamour shots coming soon. |
| |
|
|
Enbloc
Part of things
 
Posts: 398
|
|
Nov 23, 2022 13:14:35 GMT
|
The problem now is how do I add height to the suspension without touching the leaf spring? How about the 70’s customisers favourite the extended shackle?  There is actually a secondary advantage to the extended shackle and this is to do with something called roll understeer. When the leaf spring mounts are placed in certain positions you can induce a small amount of toe-in or toe-out in a solid rear axle when the vehicle rolls on it suspension in a corner. The manufacturers like to do this as it makes for a safer, softer handling vehicle for the great unwashed. The same reason cars from the factory are typically setup to understeer in extreme situations. The way it’s introduced into the rear suspension movement is by mounting the leaf springs lower in front than the rear as it is on the Falcon. This means adding extended shackles gets the pivot points of the leaf spring closer to level making for more neutral handling as well as giving that needed added height. But how long to make them? It seems with extended shackles that the rule is 2:1 ratio. 2” of shackle extension give 1” of actual lift. I didn’t need a lot and I couldn’t decide between 1/2” and 1” of shackle extension so thought I’d hedge my bets and go for 3/4”! I dug out some 3mm plate and marked out the new, longer shackle plates. 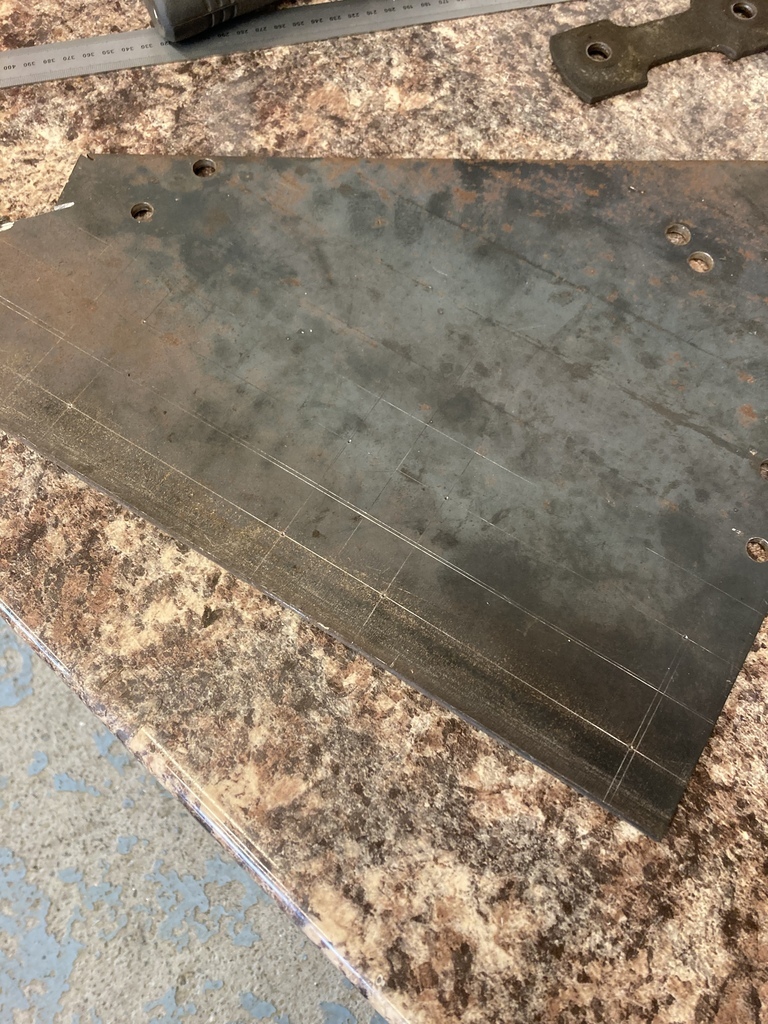 My first thought was to use some high tensile cap head bolts for the shackle pins so I could leave the original shackles untouched in case it all went wrong as we were now days from leaving for Italy. This idea was scuppered as the original pins weren’t a ‘standard’ size. I could have turned some up in the lathe but that Would have taken too long. I looked back at the originals and realised that the pins were a push fit on serrations, like a wheel stud. These were easily pushed out. 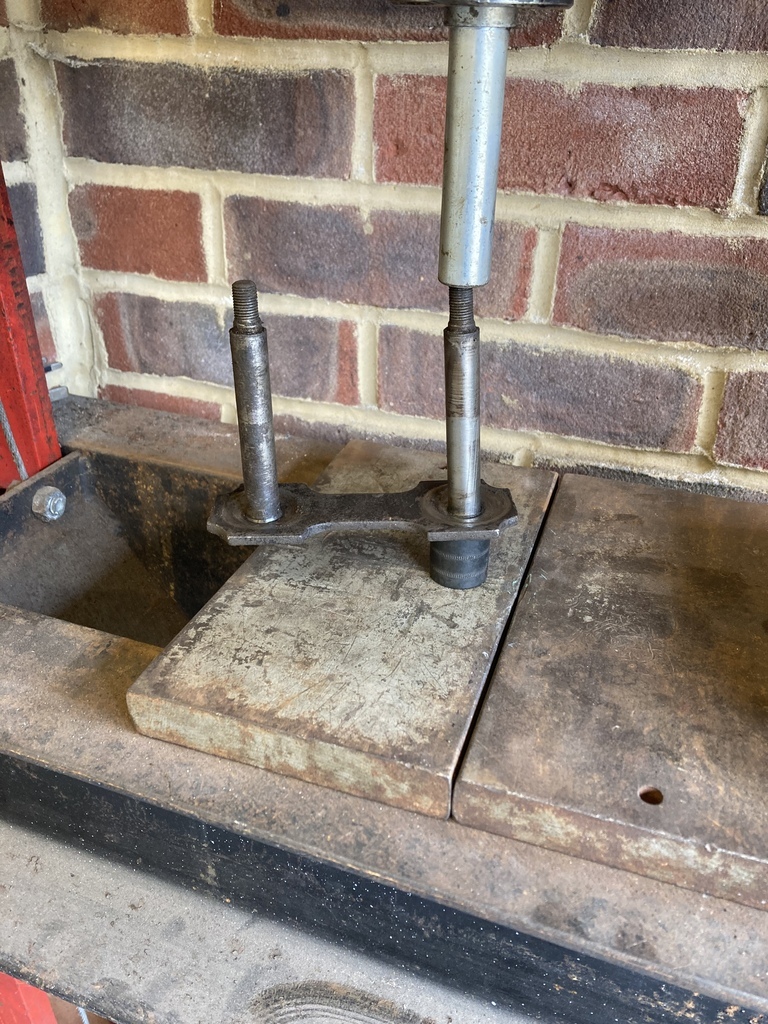 Knowing the pin diameters I could now drill the plates. 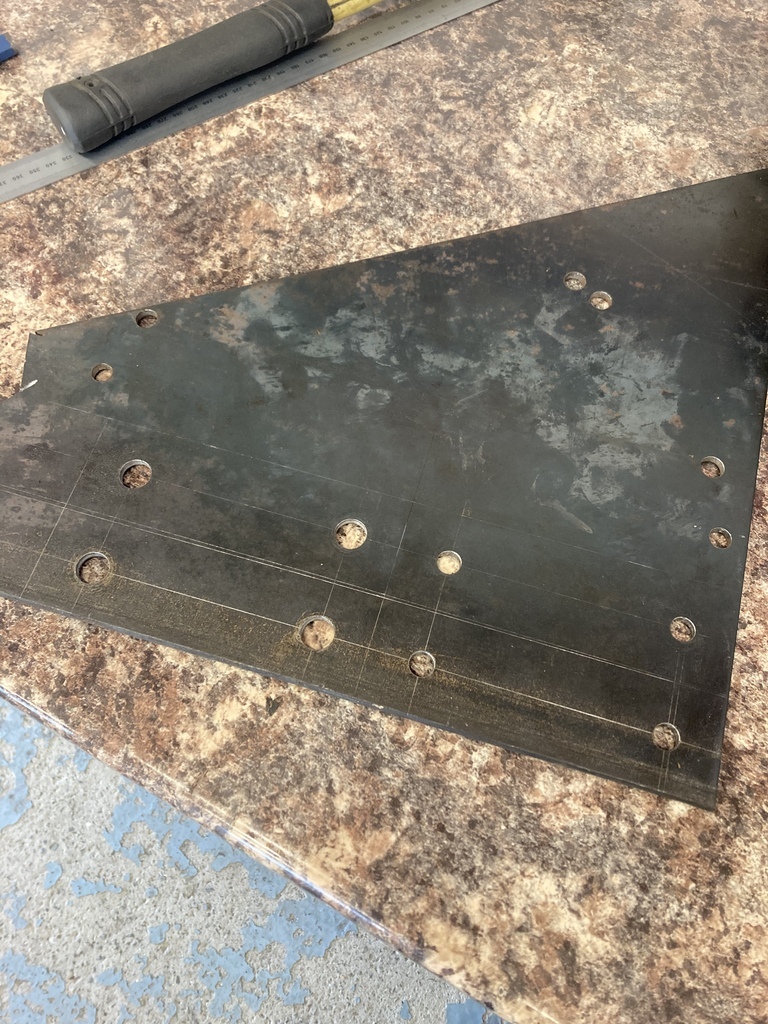 Cut and shaped. 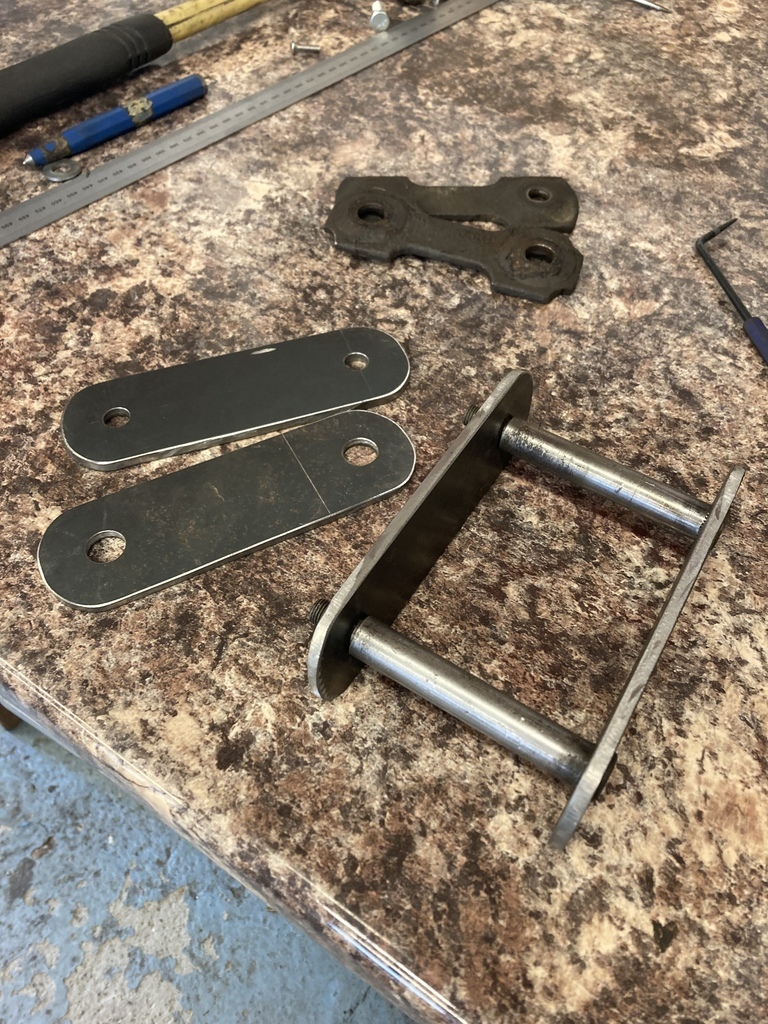 And fitted up giving me that much needed lift. 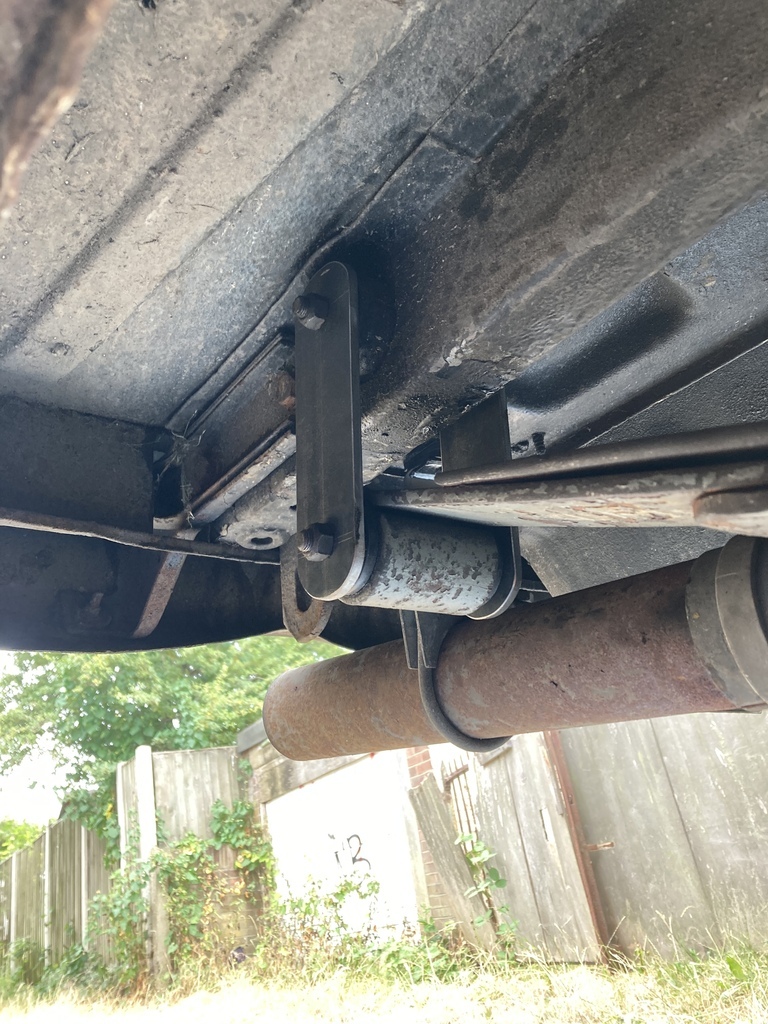 Only about 3 years to get a satisfactory spring and ride height. 😆 |
| |
|
|
Enbloc
Part of things
 
Posts: 398
|
|
Nov 23, 2022 11:43:24 GMT
|
There is an old hotrod trick, which dubiously, I Tried many moons ago on my cortina, and worked surprisingly well, it consisted of 2 clamps made from 12x25 steel stock, drilled with 12mm holes just so they would clear the width of the spring, then bolted to the spring on the fwd side of the spring about half way up close to an end of a leaf, Or fit Slappers or Caltracs, Caltracs not being the wonderful new method of stopping windup, the very idea was used by Koni in the 60s with the "floating fwd shackle" these also work very well in stopping tramp. I may even have a set of Koni locators? for a 105e somewhere, Spring clamps were my back up plan! Fortunately I didn't need them in the end. Slappers and Caltracs were the sort of traction aids I was trying to avoid as they effectively put the spring into bind to work. I've heard good things about spring sliders but apparently they are very noisey and wear out fast on a road car and the conversion can start adding up real fast. |
| |
|
|
Enbloc
Part of things
 
Posts: 398
|
|
|
|
The springs were refitted but it was all a little disappointing. There was a very, very small improvement in wheel hop but the rear of the car now sat high due to the stiffer rear springs. A lose, lose situation. As now may becoming clear leaf springs can be very tunable. It’s just that making changes is a complete pain in the rear and one change always effects something. It was back to researching ways of limiting axle hop. This is where you need be careful as a lot of traction aids come from drag racing. Drag racing traction aids and tricks usually destroy the vehicles ability to go around corners as they effectively bind up the suspension. Something I came across was something called “negative arch” the spring. I didn’t know what this meant and it took much Google-Foo to find an explanation that made sense. The new extra-long 2nd leaf I’d made was right but I’d put it in the wrong place! The extra leaf needed to go on the opposite side of the main leaf, sandwiching the main. No problem. Pull the leaf springs off the car again and strip them down. Move the 2nd over and bolt it back it back together. Eeerr.. no. The 2nd leave doesn’t match the arch of the main leaf and even if it did it wouldn’t be doing anything. This where the negative arch comes into it. I got myself a length of quality M8 all thread and crossed my fingers. 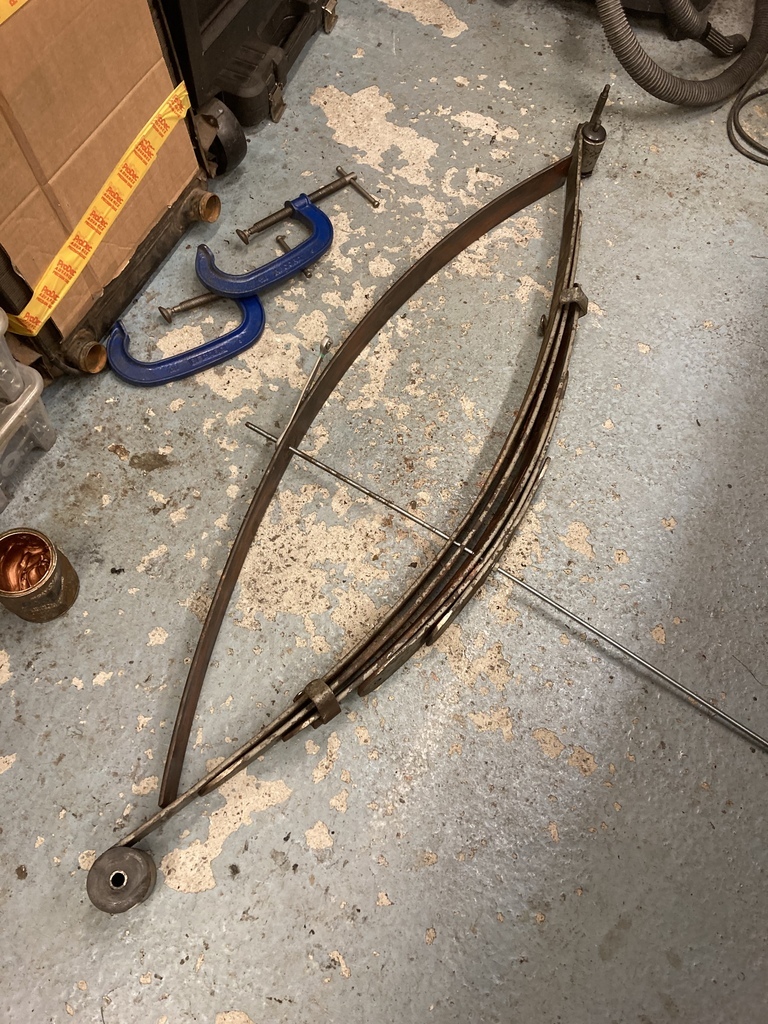 Yep, you put the curves opposing each other and start winding them together until you have this. 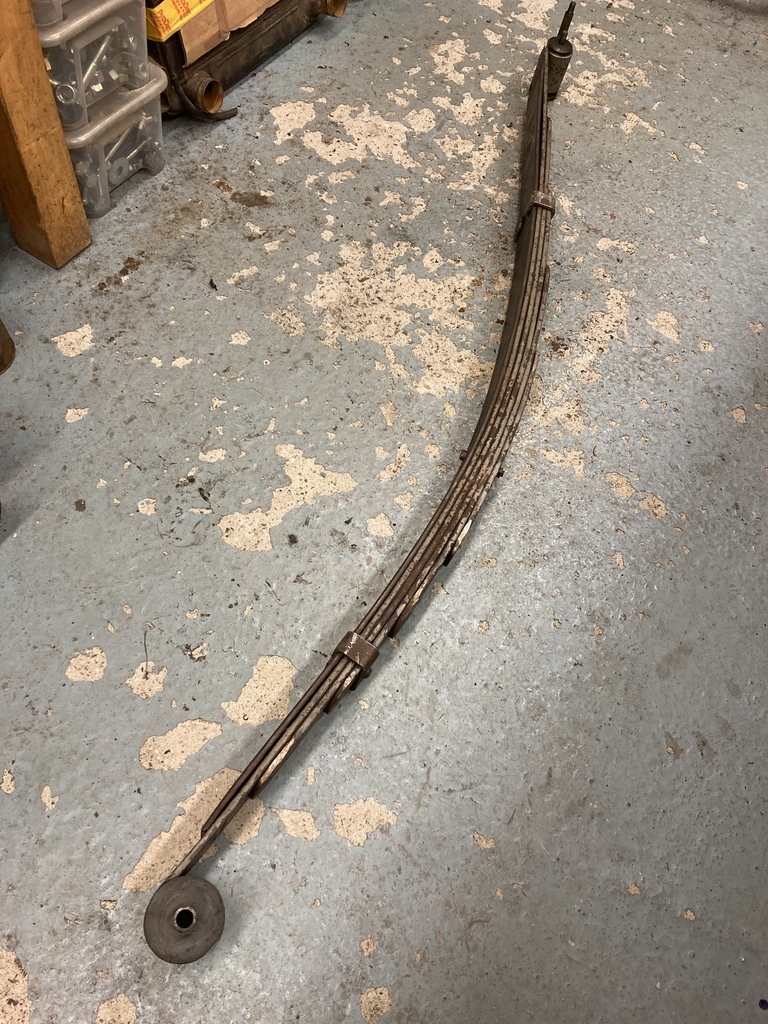 This is the magic part. The main leaf ,where the bulk of the wheel hop is created, is now clamped between two opposing forces making it much stronger but still flexible. 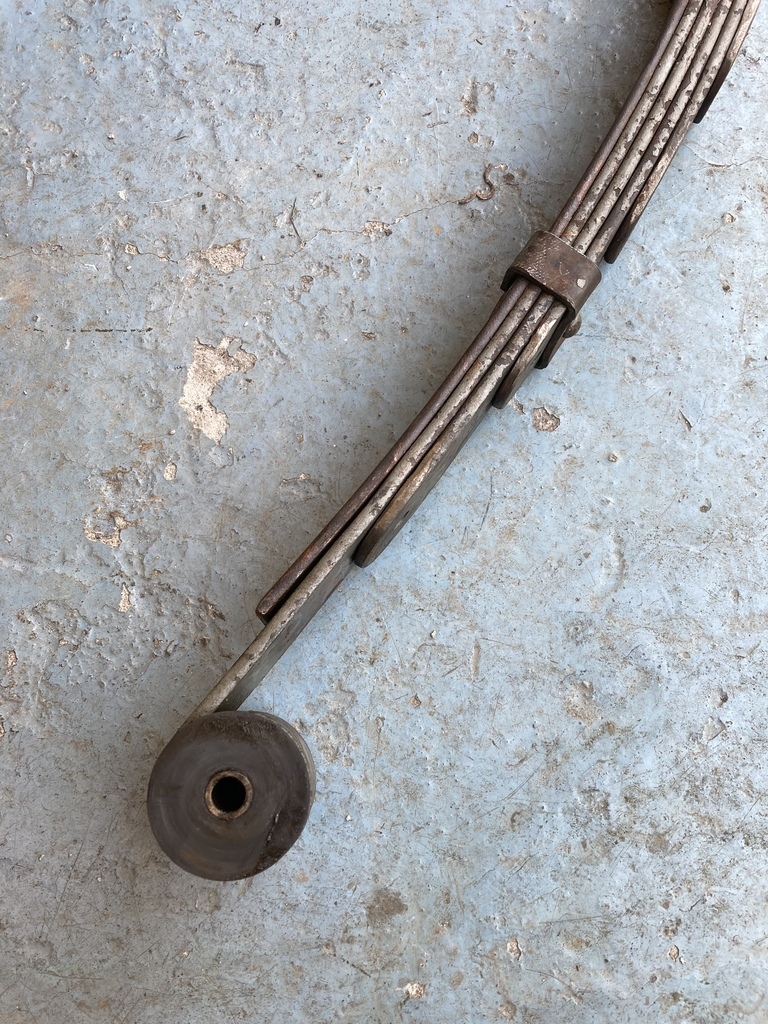 Back on the car they went, still with the 1” lowering blocks and I couldn’t get the wheels back on! The axle was so far up in the arch the wheel wouldn’t clear the arch lip. Oh… Every action on a leaf spring has a secondary reaction. It seems that when you negative arch it also flattens the arch of the leaf spring as a whole. A quick fix was to drop the lowering blocks out. This is no bad thing as lowering blocks are another cause of wheel hop. Back on its wheels it was time for another test run. Wow-wee, what a transformation. Wheel hop was now completely eliminated with absolutely no changes to ride quality. I’m a complete convert, just one thing the car was now sitting too low in the back again.  |
| |
|
|
Enbloc
Part of things
 
Posts: 398
|
|
Nov 22, 2022 21:47:00 GMT
|
The new leaf springs were a major improvement over the knackered originals that had now been replaced. But as already mentioned they weren’t exactly what I’d call performance, even though are marketed as such. The issue I was now having was axle hop or wheel hop when leaving from a standing start in a spirited manner. This really came to a head when I competed at the first Quick60 at Shelsley in ‘21. 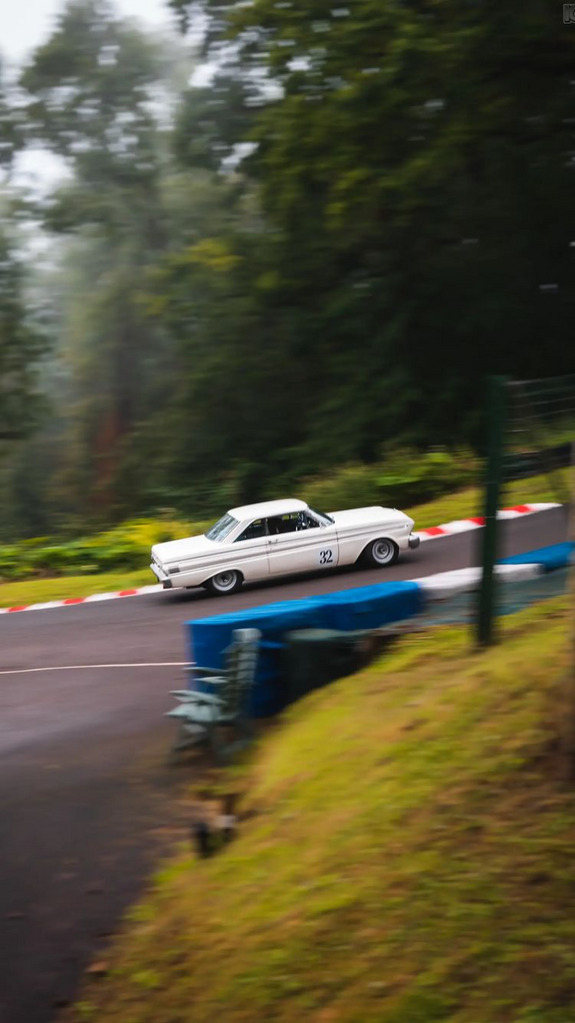 The appalling conditions and a greasy start line that is also on an incline meant attempting to leave on the green produced the most violent wheel hop I’ve ever experienced. The frustration caused from the amount of time be lost on track and the fear of breaking something in a car I had to drive back home at the end of day finally pushed me into taking action with the springs…. Again. I actually ended up dropping out of competition early anyway as my power steering hose fractured. That’s another issue that will reappear later on. Back home the leaf springs came out and were stripped down again. The first job was to bin the nylon insulators between each leaf. These can be seen in the above picture of the stripped spring, the round black circles. Their only real job is to stop squeaks. In doing so they split each leaf so they don’t touch along their length which causes the spring to become “soft”. With them the gone the pack can now be bolted back together making a more rigid spring. Also, each leaf also had its raw end rounded and tapered on the underside for smoother movement. 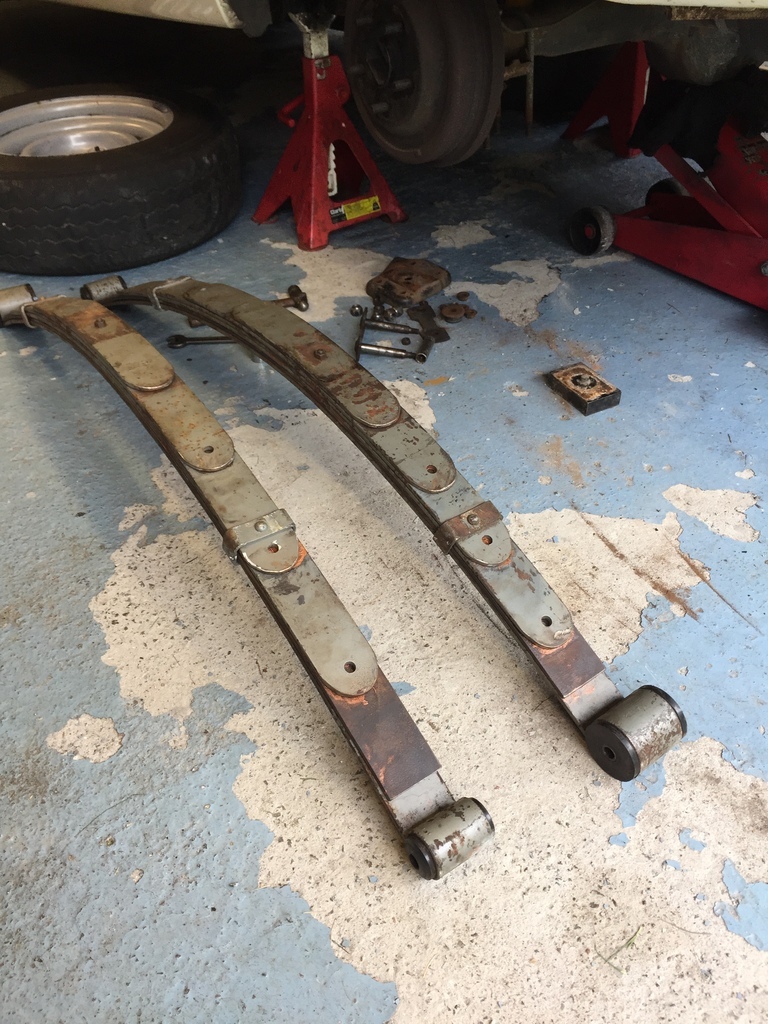 You may notice in the picture above a rusty leaf has appeared in the pack. With the nylon isolators removed it meant that a gap had now opened up in the spring clips because the pack height had now become shorter. This gap worked out a nice 1/4” which happened to be the thickness of an individual leaf, so… 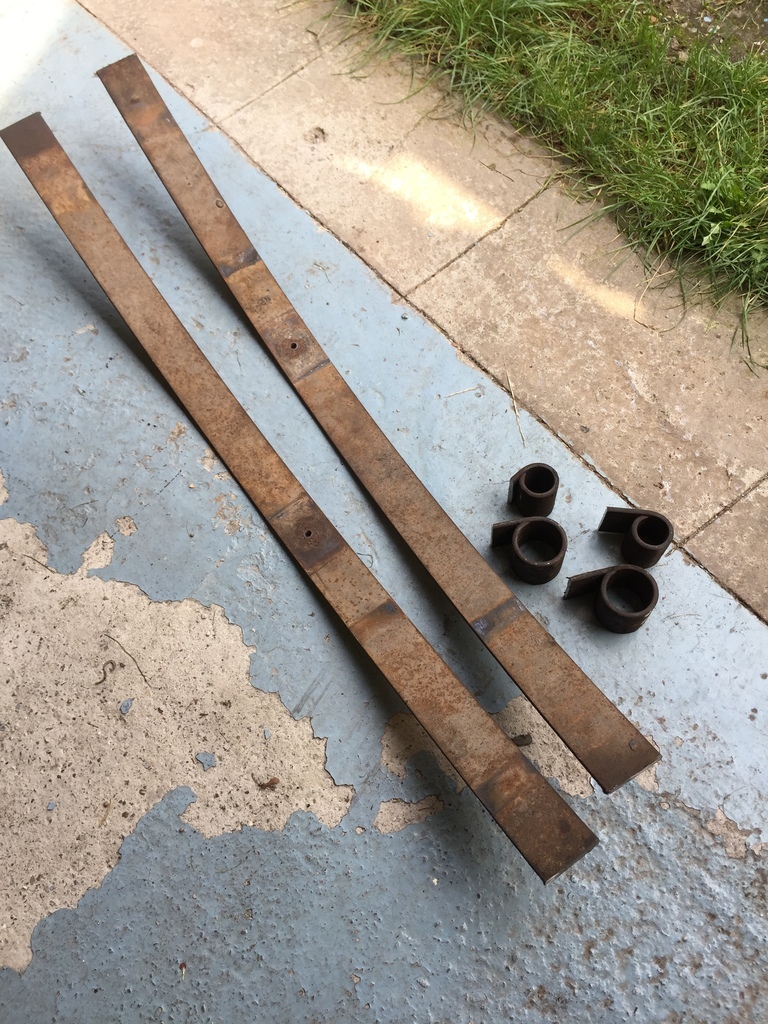 I cut up the original main leaf to give me a much longer 2nd leaf, which I could slip in the pack now giving me a 6-leaf spring. |
| |
|
|
Enbloc
Part of things
 
Posts: 398
|
|
|
|
As the lock down kicked in I found I was running out of projects to keep myself busy and so thought I’ll get on top of the rear leaf springs. You can buy new leaf springs off the shelf and luckily they were stocked by Mustang Maniac who is only 40min up the road to me. Leaf springs are always hideously expensive to ship from the US as they are very heavy and oversized. These would be Falcon specific Springs as again Mustang ones fit but they don’t. Which ones? Available are stock 4-leaf, HD stock 5-leaf and HD 5-leaf mid eye. The mid eye is what the Mustang/Falcon world calls a lowered spring. It’s basically a kink in the main leaf to give a 1” ish drop.  The car was sitting right with a 3-4” drop on the knackered original leafs with lowering blocks. A 1” drop wasn’t going to cut it and the mid eye style main leaf could potentially cause further issues. The decision was made to go with a stock style 5 leaf replacement which would give me a blank canvas to work with to get the required ride height. Doing some research (old forum threads) on these HD 5 leafs the general opinion from mainly Americans were that they were a “race spring” and were “undriveable” on the road. Having fitted and used them I can say they would be on par with an acceptable factory road spring! 😆 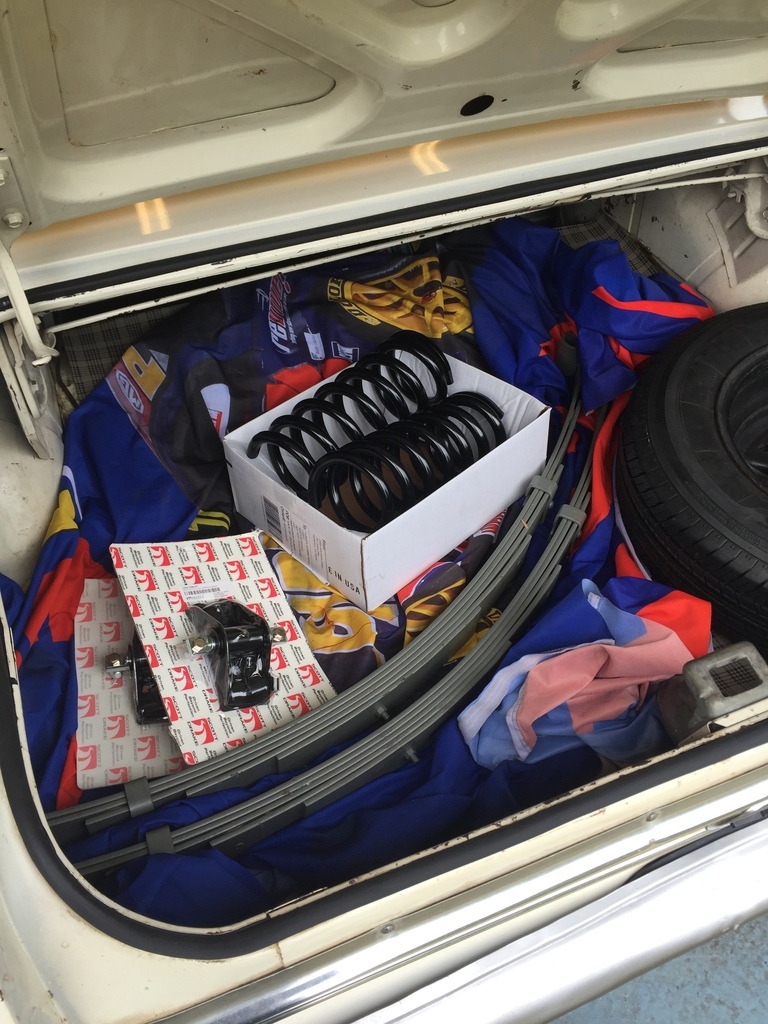 First job on getting them home was to pull them apart! I needed to get the spring pack apart to leave me with a bare main leaf. The reason for this was so I could “reverse the eyes”. Reversing the eyes is basically flipping the arch of the main leaf the opposite way so the eyes fold into the leaf pack rather than away which lowers the physical overall height of the leaf spring by about 2”. 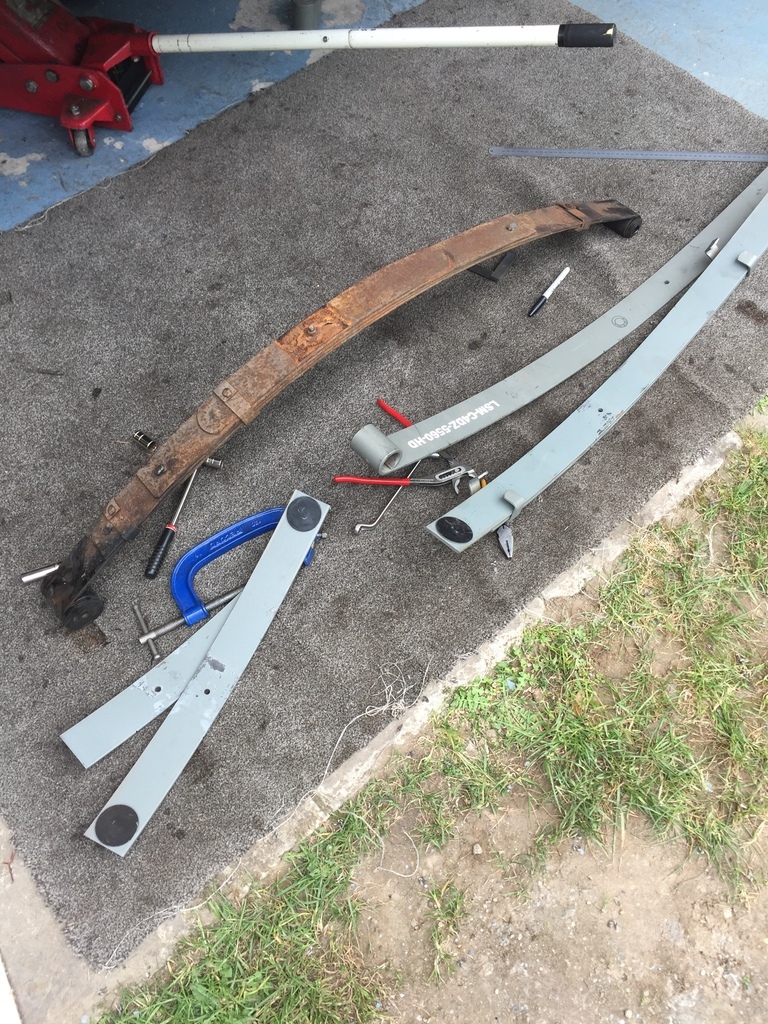 The main leaf is marked at equal intervals along its length. 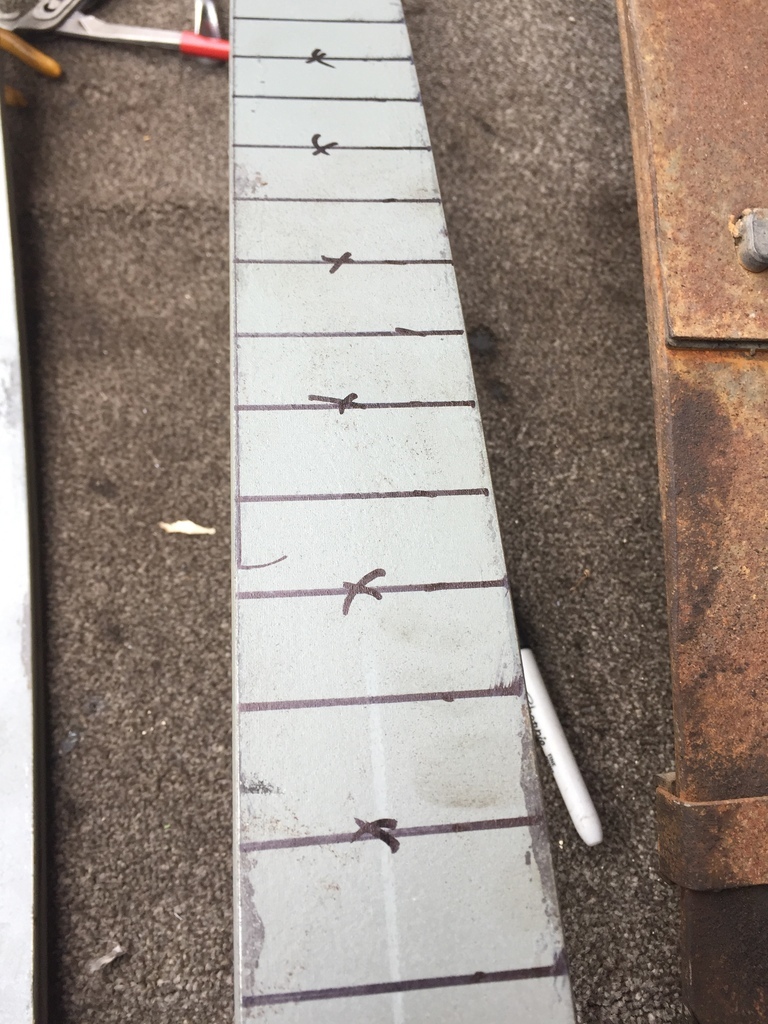 The idea is to start bending the leaf back to flat and then to its new reverse position. Working from one end to the other in small increments at each mark. I used a press but the same thing can be achieved in a decent vice. You’ll be surprised how little force is needed. 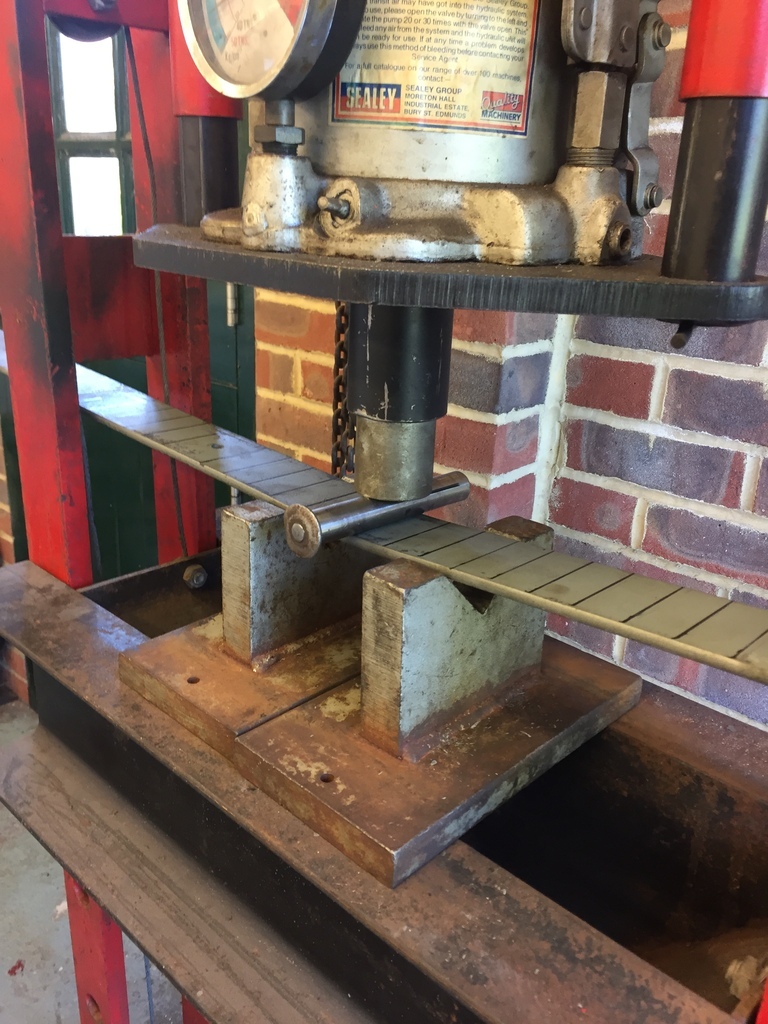 Here it is after a single pass through the press. The original arch is marked out on the board so I know where I need to return to. 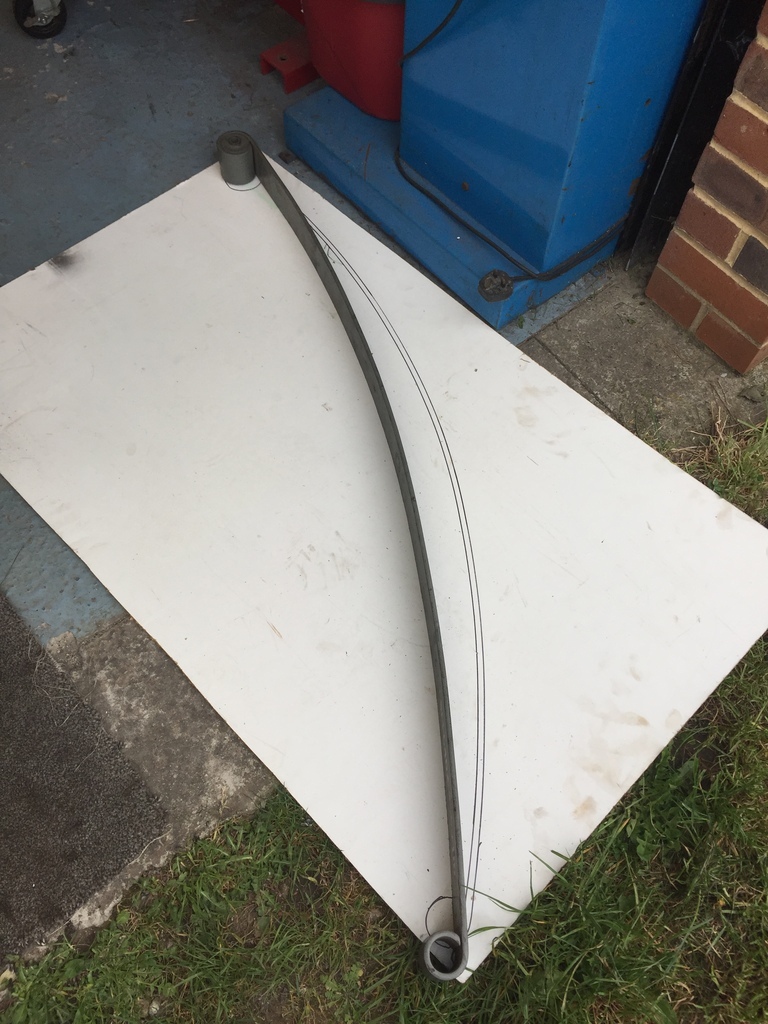 A second pass and so on and so on. 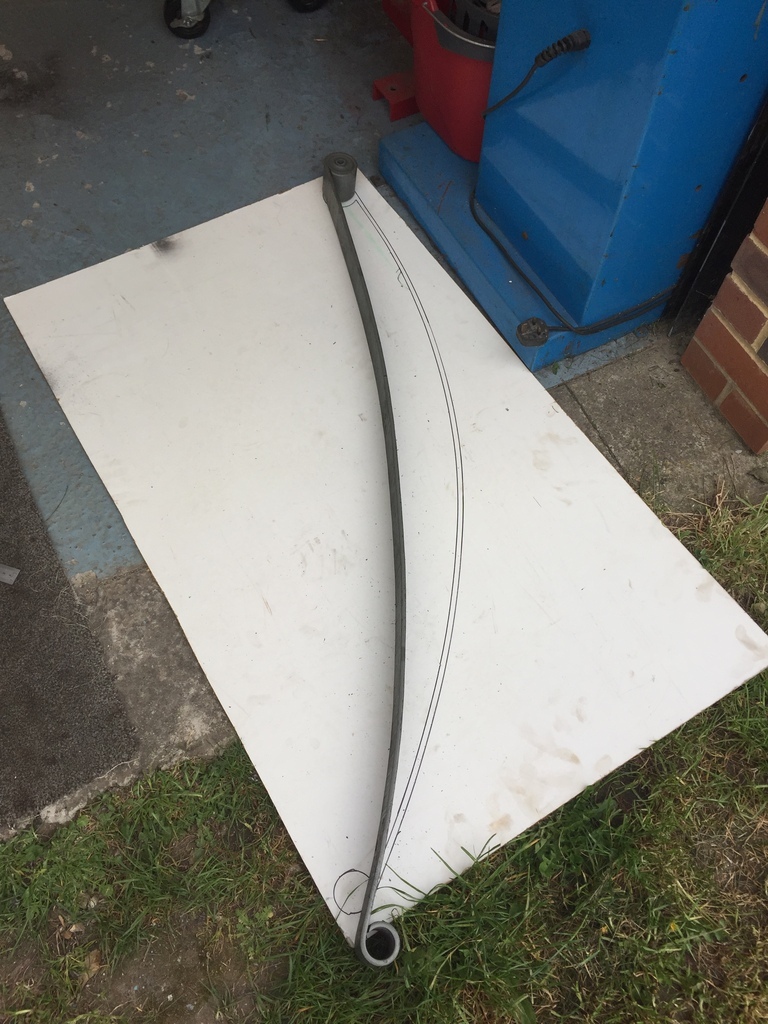 The finished process. The arch is back to where it started but as can be seen the leaf eyes are now above their original position. 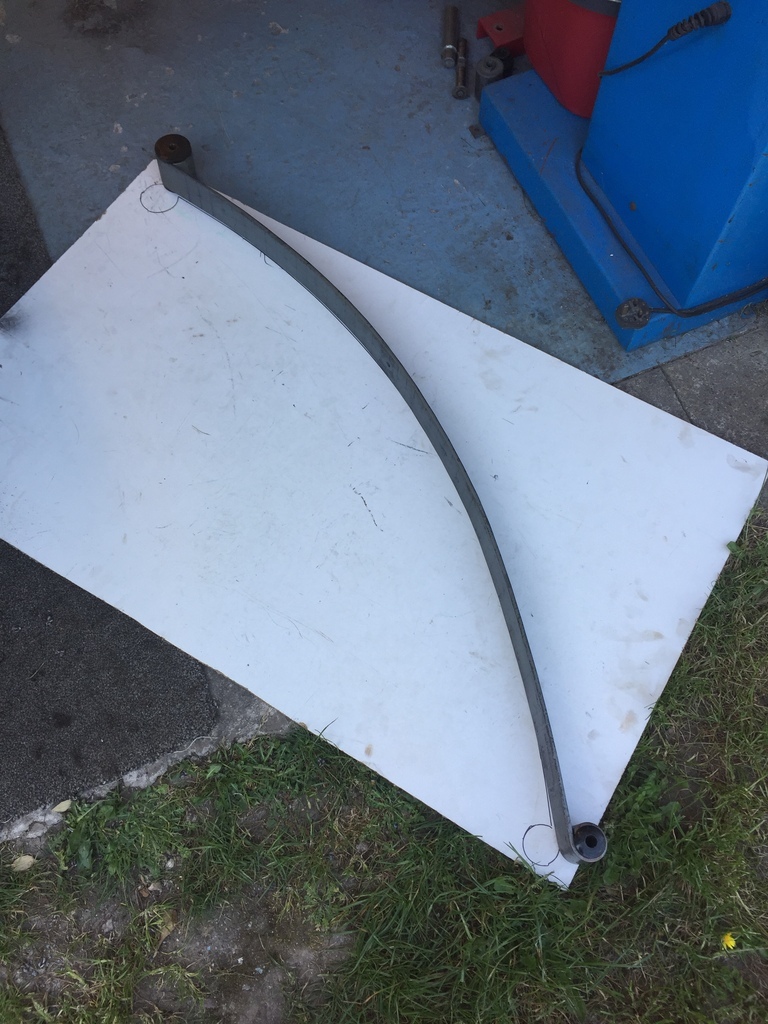 With the spring pack built back up here is your 2” drop. 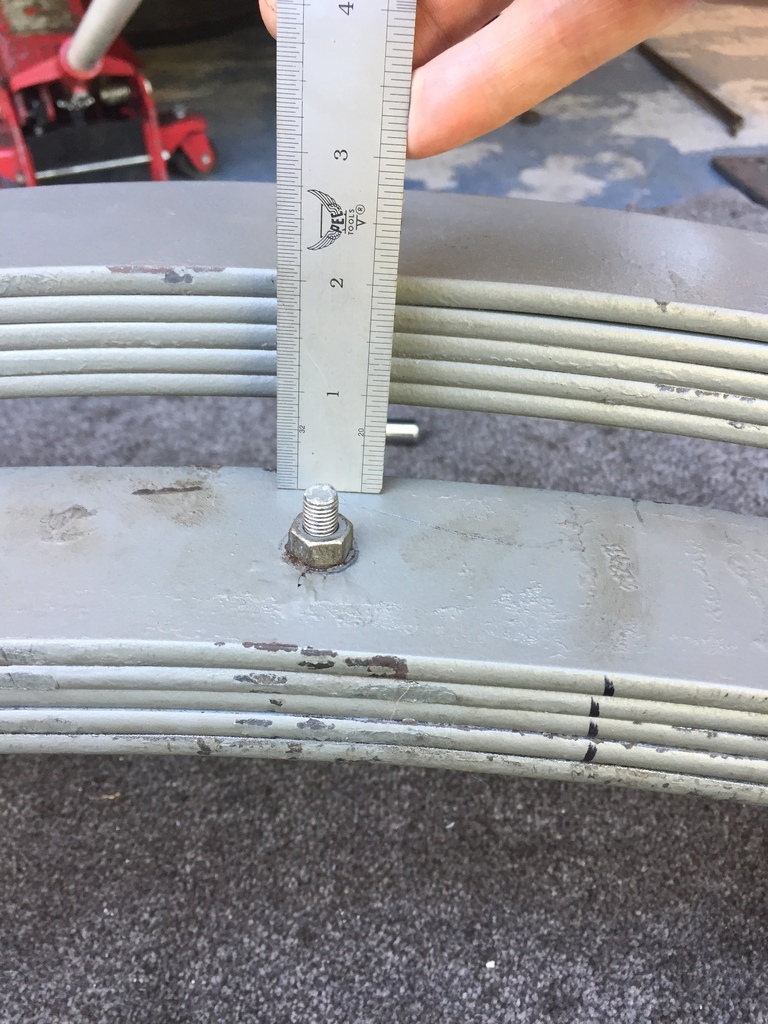 The new springs were fitted with the old lowering blocks for, on paper, a 3” drop over stock. I think I ended up 1/2” higher than previous but after a couple of journeys the new springs settled I ended right where I wanted it. Win. 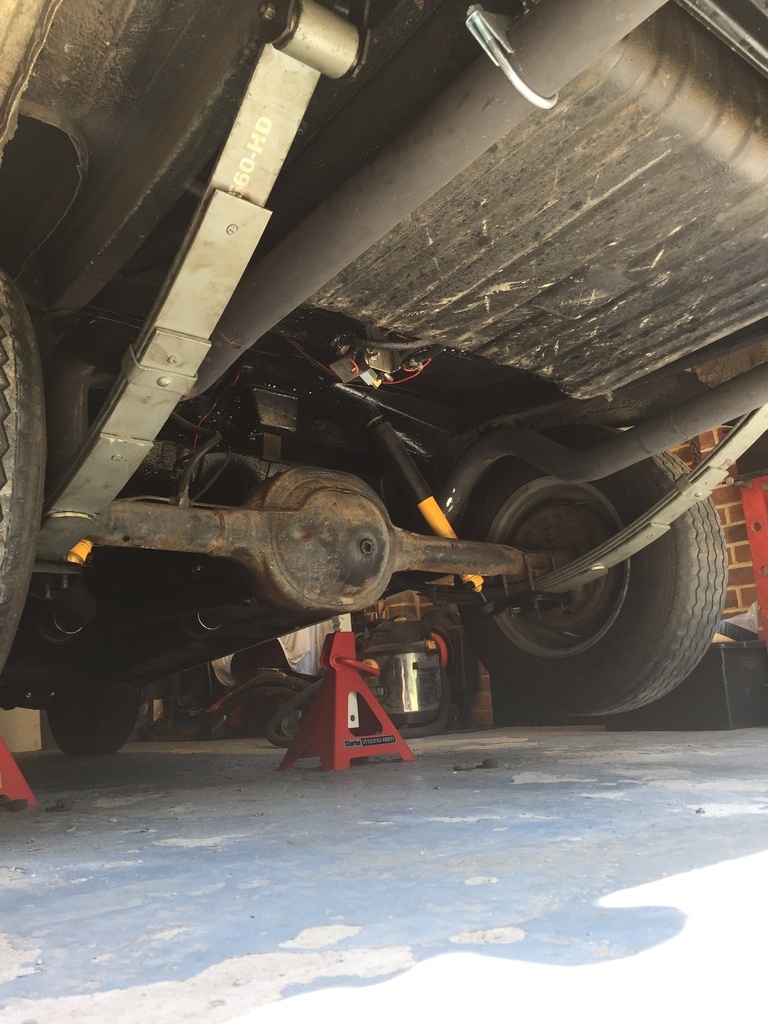 |
| |
Last Edit: Nov 22, 2022 2:54:39 GMT by Enbloc
|
|
Enbloc
Part of things
 
Posts: 398
|
|
|
|
I try and keep this thread to a vague chronological order, more for my own sanity than anything else! With that being said it’s time to give the Falcon some air time. I very briefly mentioned it on the first page. It’s actually the car I’ve been most active with in the last few years being on track at the Retro Rides Weekender and competing at the Quick60/Gathering. It’s pretty much the sole reason the ‘36 got mothballed. Not my finest moment on the Weekender Autosolo course. After the ‘36 was back together it got driven straight back into storage again as I needed to get back on the Falcon in preparation for our family trip to Italy. That’s 2 adults, a 7y/o, a 5 m/o, driving, in the Falcon, 2000 miles… Not including general maintenance the area I wanted to address was the rear leaf springs. The back was too low, lower than the front, which meant it was constantly bottoming out without any weight in it and it just looked wrong. The leaf springs have been a battle since I bought the car in ‘17. A story which I will relay now. When purchased the car was still on its factory 4-leaf leaf springs. As these are US spec springs they have the poundage rating of a biro pen spring and nearly 60 years of use meant they had also sagged a good 2”. They were so ridiculous that if someone sat in the rear or anything with weight was placed in the boot the rear would noticeably sag and the suspension would hit the bump stops. 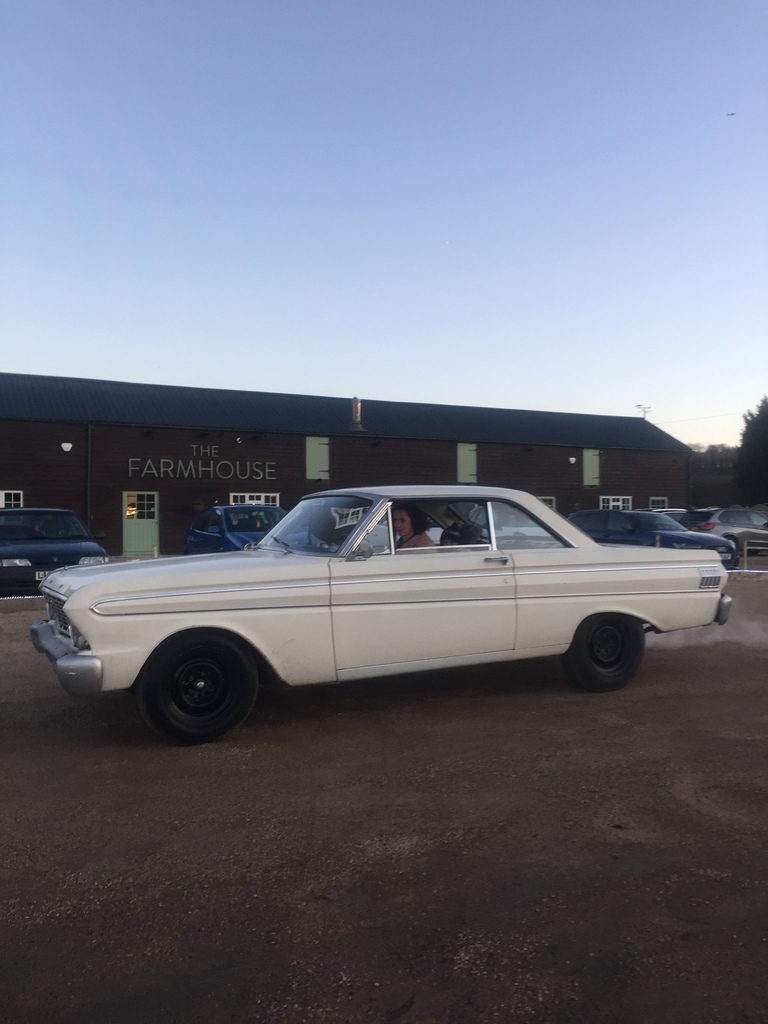 So I did the right thing to cure the situation and fitted some 1” lowering blocks! 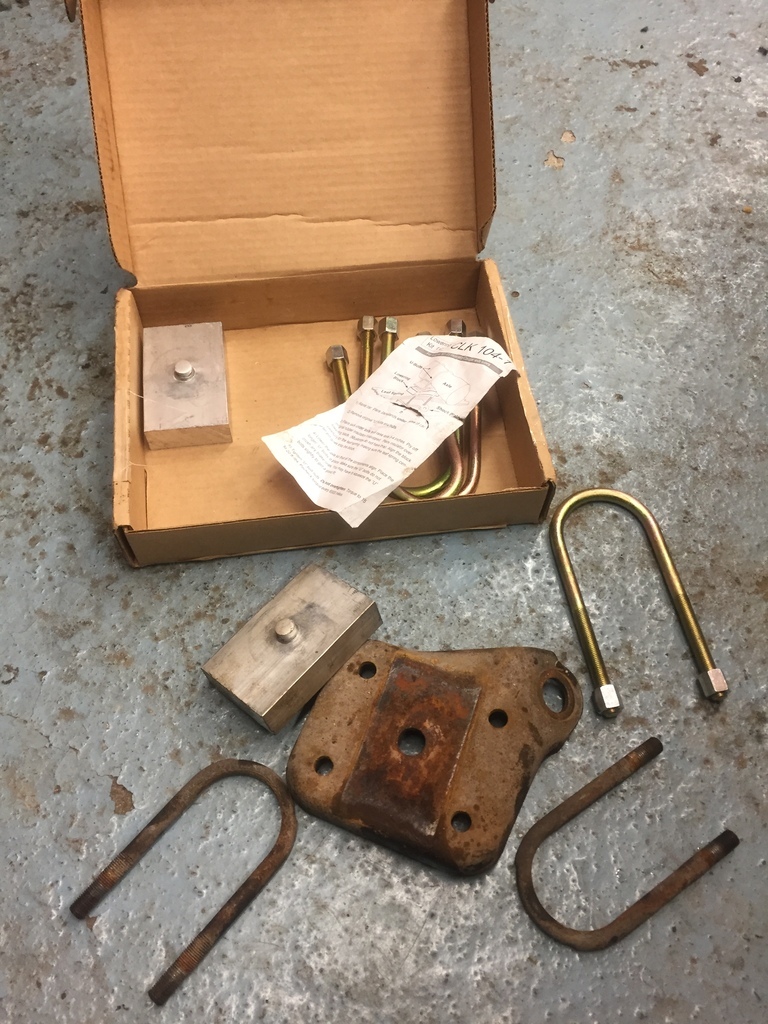 I also fitted some poly bushes in the front spring eye and to the shackles at the rear while I was in the area. Replacing the original factory rubber bushes which were still like brand new, the beauty of a low mileage, California car. I small part of me felt bad binning them. I bought Mustang ones because they were cheap and available off the shelf. Of course they didn’t fit because everything Mustang fits the Falcon but doesn’t. Thay stayed like that for about a 2 years, while the car got loads of work to the front suspension, new interior and converted to a manual ‘box. If I ever catch up I’ll go back over what was done. Then the 'rona hit. |
| |
Last Edit: Nov 22, 2022 2:55:54 GMT by Enbloc
|
|
|
|


