|
|
Anyone breaking a BMW e10?BenzBoy
@benzboy
Club Retro Rides Member 7
|
May 10, 2023 15:50:44 GMT
|
|
I'm looking for a rear view mirror mounting bracket - the plate that bolts to the roof that the mirror clips into. I believe all e10 02 models are the same in this regard.
Please let me know if you have one! Thanks
|
| |
|
|
|
|
|
|
|
|
|
Oof, that windscreen surround. I know that one! If you can dig out my thread on my old Bond I documented how I replaced the entire surround from the top of the bulkhead upwards. Apparently the Equipes rust worse than Heralds there because they stripped all the rustproofing out at the factory to aid fibreglass bonding when installing the roof. I'm going to replace the whole bulkhead, the floorplans are soft to. At the moment I plan to sikaflex the fiberglass to Epoxy primered steel. Dan That's a much better solution, you'll know it's all solid then! |
| |
|
|
|
|
|
|
|
|
Oof, that windscreen surround. I know that one! If you can dig out my thread on my old Bond I documented how I replaced the entire surround from the top of the bulkhead upwards.
Apparently the Equipes rust worse than Heralds there because they stripped all the rustproofing out at the factory to aid fibreglass bonding when installing the roof.
|
| |
|
|
|
|
|
Dec 29, 2021 19:31:09 GMT
|
|
Great memories! I can't believe it was so long ago. My Mercedes made some show appearances after this, in 2008, then it came off the road for a "quick bit of welding" which I still haven't finished...
Can't wait for RRG '22!
|
| |
|
|
|
|
RetroRides Gathering '21 BenzBoy
@benzboy
Club Retro Rides Member 7
|
Nov 11, 2021 18:42:23 GMT
|
I love a late Gathering pic thread! It brings back memories of a great show. Nice to see you briefly at Shelsley, mk14dr. Great photos as always. |
| |
|
|
|
|
|
|
|
|
Wow! That's a project and a half you've got yourself there! Glad you've joined the Bond Owner's Club and got in touch with Guy - what he doesn't know about Equipes isn't worth knowing!
I'd definitely go for the Vitesse six-pot, mine had the 1.6 inline six and sounded glorious on twin Strombergs! Once I'd got it running, that is.
What a strange set-up with the blanked off grille... that can't have stayed cool on a hot summer's day in traffic!
Good luck with the project, I sometimes wish I still had mine (but without the rotten chassis)
|
| |
|
|
|
|
GeorgeBBenzBoy
@benzboy
Club Retro Rides Member 7
|
Oct 29, 2021 17:40:28 GMT
|
|
Such sad news, I always enjoyed his positive contributions. I dipped in and out of his Letter from Manila thread always intending to read it more fully. It's really sad that there will be no more updates. Rest in peace, GeorgeB.
|
| |
|
|
|
|
om606 ???BenzBoy
@benzboy
Club Retro Rides Member 7
|
Oct 21, 2021 16:35:25 GMT
|
You'll have the electronic pump on your OM606, so you'll need a mechanical pump from an OM603 found in the W124, W126 and non-UK W140. My friend did on OM606 conversion into a Rangie, although he used a Mercedes auto box. From memory I think he used a rear-bowl sump (W210 OM606 comes with front bowl). There are various other bits you'll need to do to make the 606 work in the Rangie, such as converting the turbo actuator, but once you delve into the world of conversions you'll figure out a list. I'm converting my Nissan Patrol to OM606, but I made my own adaptor as there's not one off the shelf. Diesel Pump UK (www.dieselpumpuk.com) are a great resource for conversion parts and have quite a few helpful videos on Youtube. www.k2designandfabrication.co.uk also have various conversion parts. I've seen adaptor kits for the manual R380, but not the auto box... might require some investigation, I'm certain it has been done before! If you do Facebook there are various groups including one specifically for Land/Range Rover OM606 conversions which has a lot of helpful members. It's definitely worth doing - I know at least 5 people with OM606s in various retros and they're fantastic! |
| |
Last Edit: Oct 21, 2021 16:37:20 GMT by BenzBoy
|
|
|
|
Leather seat refreshBenzBoy
@benzboy
Club Retro Rides Member 7
|
Sept 17, 2021 16:15:53 GMT
|
|
Are you certain it's real suede and not something like Alcantara (synthetic suede-like material)?
|
| |
|
|
|
|
|
Sept 12, 2021 18:51:45 GMT
|
I bolted up the flywheel, clutch, CSC and bellhousing to test whether we have any snags. The good news is that the flywheel and clutch all come together beautifully and the bearing sits in the cavity just fine! The bad news is that the shaft of the CSC hits the friction disk splined boss on the original Patrol clutch friction plate (thanks for the heads up vitesseefi!). The Skyline plate has a slightly shorter boss, but seeing as these are essentially the same parts (just different manufacturers) if I went with the Skyline disk I could have a headache when I replace the clutch. The contact is minor, so shaving 2mm off the adaptor ought to do it. I still need to ascertain whether the back of the CSC needs a support ring to stop the back of the cylinder popping out, but when I've got it apart for adjusting the adaptor I'll make a proper investigation. A few little steps forwards (and one backwards!) |
| |
Last Edit: Sept 12, 2021 18:53:02 GMT by BenzBoy
|
|
|
|
|
|
|
Sept 9, 2021 16:49:26 GMT
|
Well I'm really grateful to you guys pointing this out at this stage of proceedings! When I machined the recess in the adaptor, my only aim was to clear the oil seal at the back of the CSC to allow the mounting tabs to sit flush, so there might be a need for a metal ring behind the cylinder that keeps the assembly together in use. I made what is basicaly a washer that sits inside the back of the slave and is a couple of thou thicker than the recess in the carrier, seems to work Ok. Sounds like a nice simple solution, I'll investigate at the weekend. The other thing I would suggest is that you absolutely do a full assembly on the bench with all parts fitted including the friction plate you are actually going to use...... This to make sure that the en of the central tube of the slave is short enough not to make contact with the splined boss in the centre of the friction plate. If it isn't.... you will get some really scary noises  and an apparent failure to disengage..... Guess how I know this  I had done a dry build but with a different clutch plate that must have had a much narrower boss...... It was only by about 1mm as the ghetto fix of a 2mm spacer plate around the bell housing fixed it (couldn't face hauling the 'box out yet again!) Nick That sounds like a right pain. I've set the CSC quite far back from the clutch fingers so that when it's in the mounted position it compresses 20mm. I figured that will allow for 10mm of operating travel (that's a bit of an estimate, from research it seems 8mm is usual) and then another 10mm until it reaches the end of its travel, so even when the clutch is totally worn there should be more travel in the cylinder before it tops out. I'm thinking the CSC will be operating towards the end of its travel, but within its limits. And I didn't have to have a really thick adaptor. I can always space it further towards the clutch if necessary. I'm undecided on the clutch friction disk. I've got the fairly unworn original Patrol one, and a knackered Skyline one for reference in case I want to get a fancy clutch. Seeing as I'm going with the standard pump to start with, there's not much need for a high performance clutch, but putting one in now will avoid the need for taking the gearbox out once I start upping the power. We'll see... Good to come back after years away and see this is coming together at last! Nice work Dean.... Welcome back! Thanks for the kind words! |
| |
|
|
|
|
|
Sept 7, 2021 16:16:45 GMT
|
Really cracking to see progress on this, you will beat me to having mine ready! Thanks! I've got a way to go yet... the engine and 'box bolting together will be a big milestone though! OM606-powered UMM and Patrol at RRG22?! |
| |
|
|
|
|
Roof lining BenzBoy
@benzboy
Club Retro Rides Member 7
|
Sept 6, 2021 20:13:52 GMT
|
|
I take it it's the brushed nylon stuff that you glue to headliner board, rather than a suspended headliner?
Steaming it with an upholstery steamer would be the ideal solution, but failing that you can iron it on a very low temperature and it should be OK (test a piece first though!) or put some damp towels on top and iron it on a higher setting through the towels. Again, test a bit first and don't let the towels dry out.
I would avoid using a heat gun as it can scorch the fibres quite easily.
Gluing it on and stretching out the creases might work but if not, you'll be left with a creased headliner permanently glued in plac!e
|
| |
|
|
|
|
|
|
|
|
Well I'm really grateful to you guys pointing this out at this stage of proceedings!
When I machined the recess in the adaptor, my only aim was to clear the oil seal at the back of the CSC to allow the mounting tabs to sit flush, so there might be a need for a metal ring behind the cylinder that keeps the assembly together in use.
|
| |
|
|
|
|
|
Sept 5, 2021 19:37:08 GMT
|
|
Thanks for the heads up! I'll double check. Yes it will definitely be a long job getting the gearbox out again!!
|
| |
Last Edit: Sept 5, 2021 19:37:49 GMT by BenzBoy
|
|
|
|
|
Sept 5, 2021 19:07:22 GMT
|
|
Ah I think I see what you mean now... Are you saying that the shaft moved backwards towards the gearbox when it was operated, and pee'd fluid everywhere?
I'll have a look next time I'm at the workshop and see if that is the case with mine. You could have saved me a big headache there!
|
| |
|
|
|
|
|
Sept 5, 2021 18:21:18 GMT
|
Great progress I'm sure you have considered these but there are a couple of things I learn't the hard way you might want to consider Is the centre of the cylinder on the gearbox side supported? If it isn't when you press the clutch pedal for the first time you get a pop and all the fluid poors out of the clutch housing. In my case follwed by a tirade of bad language! To bleed the cylinder fill it before fitting the engine to gearbox, easiest way is to put a bit of rubber vacuum hose on the feed line dunk it in a bottle of brake fluid and compress the cylinder with your hand, let it go slowly and it virtually fills the cylinder then when you bolt it to the engine it pushes any remaining air out. From what I can see, the cylinder runs on its own internal shaft. Certainly in applications like the Astra and Corsa gearboxes there's nothing supporting the CSC. I'll need to trim down the shaft sleeve on my gearbox as it's bigger than the bore of the CSC. Seems like it should work like that... Unless I've overlooked something? Thanks for the tips on getting the air out. As I said in the post, I would have gone for a different CSV had I known about the bleed nipple but I'd already bought 2 different cylinders and just figured I'd go with it! |
| |
|
|
|
|
|
Sept 5, 2021 15:28:48 GMT
|
Time for a little update, as I've been chipping away at this little project bit by bit. The updates aren't as frequent as I'd like, but I have very little time to spend on the project so each update is the culmination of an hour here and an afternoon there! Anyway, we're inching closer to the union of Mercedes and Nissan oily bits. Last time, I left off having selected the concentric clutch slave for the project. I then had to somehow get it to mount to a Mercedes automatic bellhousing! By my calculations, the slave needed to sit 30mm further towards the clutch fingers so that it will be adequately engaged. So I ordered a 6 inch disc of aluminium of the appropriate thickness and got busy on the lathe... 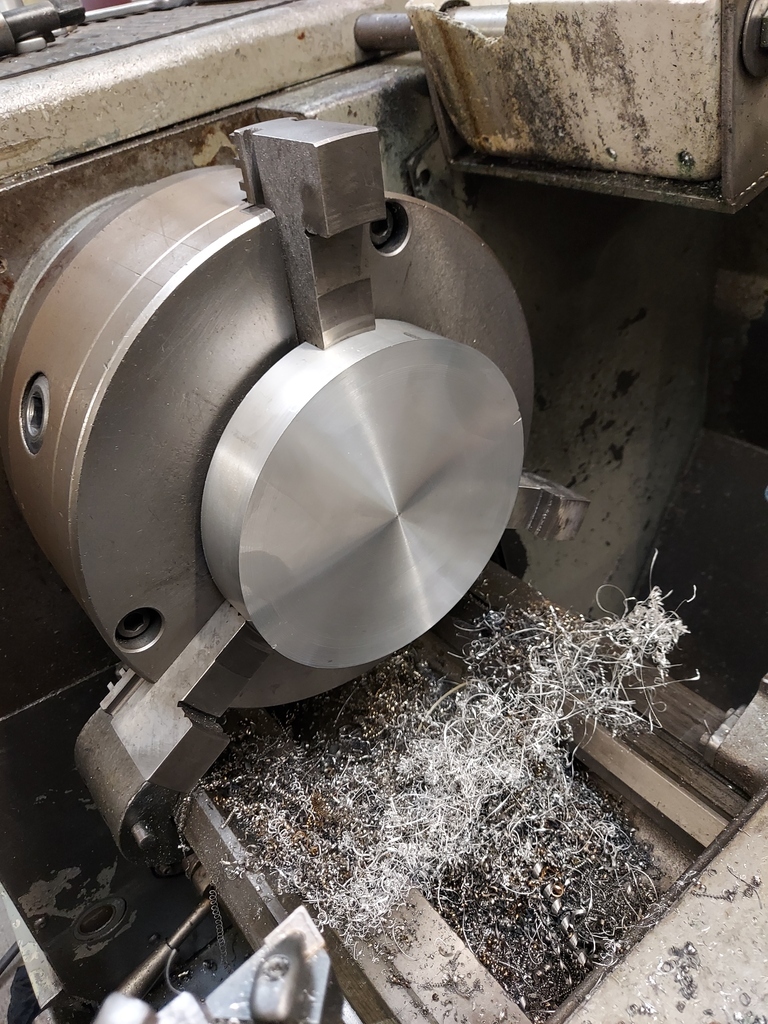 This project is the first time I've done any lathe work, so I'm learning as I go with it. I first faced up both surfaces, then reduced the diameter by a few mm so it fit nice and snug within a circular recess in the bellhousing. I then put a hole in the centre in order for it to fit concentrically over the input shaft sleeve. I planned to adapt the centering pin, which I'd made previously to centralise the adaptor and bellhousing, to align the slave cylinder. As the cyliner internal bore is smaller than the input shaft sleeve I needed to reduce this diameter. I also machined a recess into the adaptor as the cylinder I'm using also had an built in gearbox oil seal for the original application. I don't need this, but without the recess it won't sit flush with the adaptor. 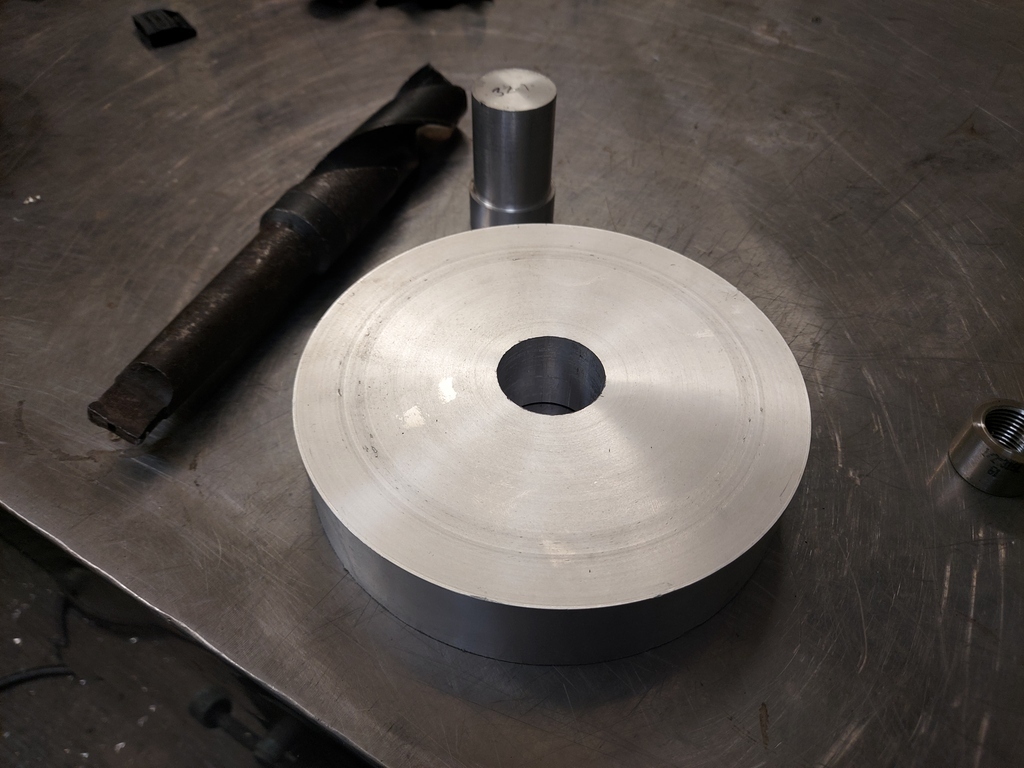 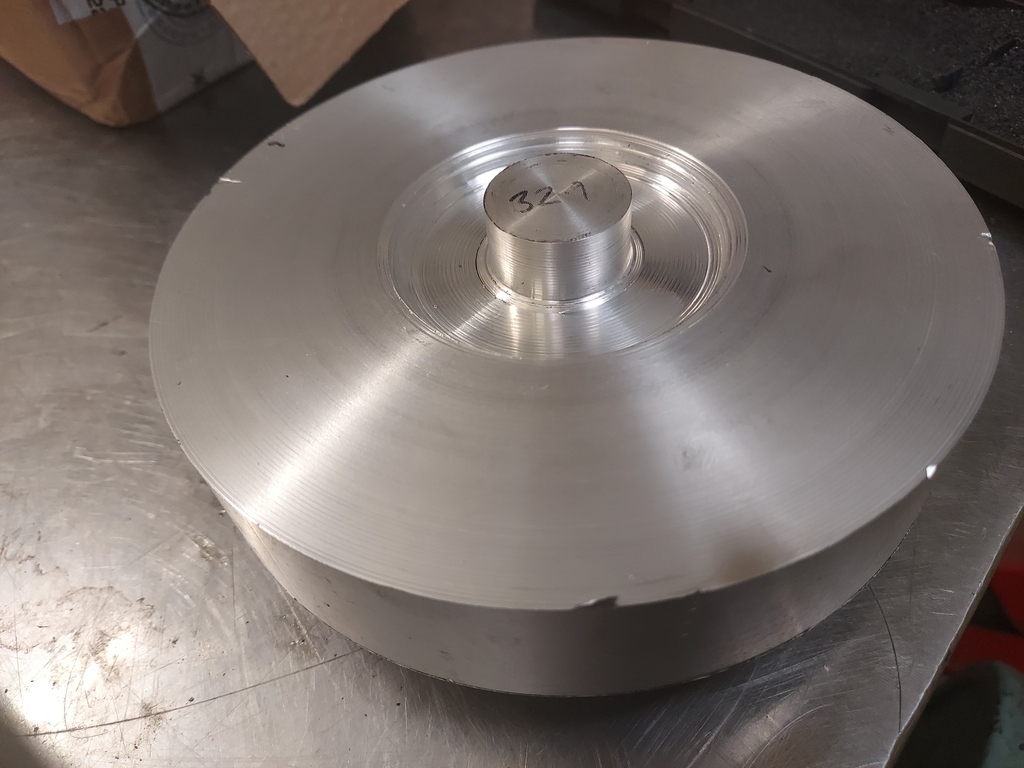 Holes in the bellhousing were repurposed to attach the slave cylinder adaptor. I countersunk them so that the fasteners fit flush. I then drilled and tapped the front of the adaptor so that the cylinder bolts to the adaptor with the pipe union pointing to 12 o'clock. This cyliner doesn't have a bleed nipple so will be fun to bleed I'm sure. I think this feature, and the oil seal arrangement, means I probably would have gone for a different cylinder in hindsight, but we're here now so I just need to make it work. 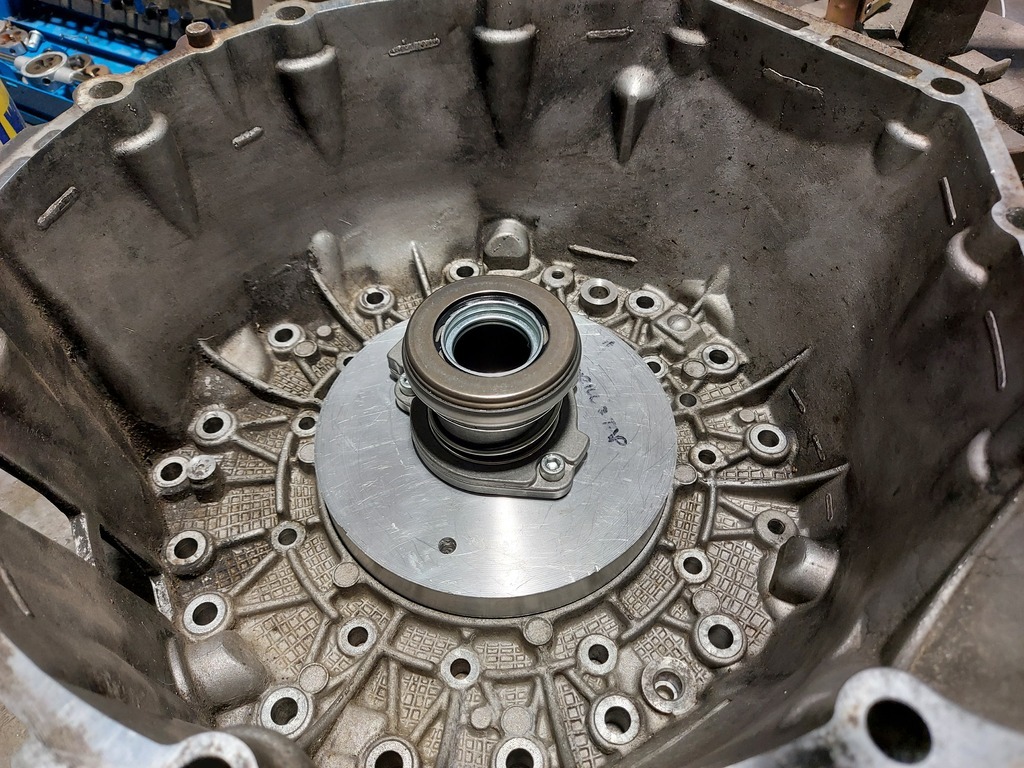 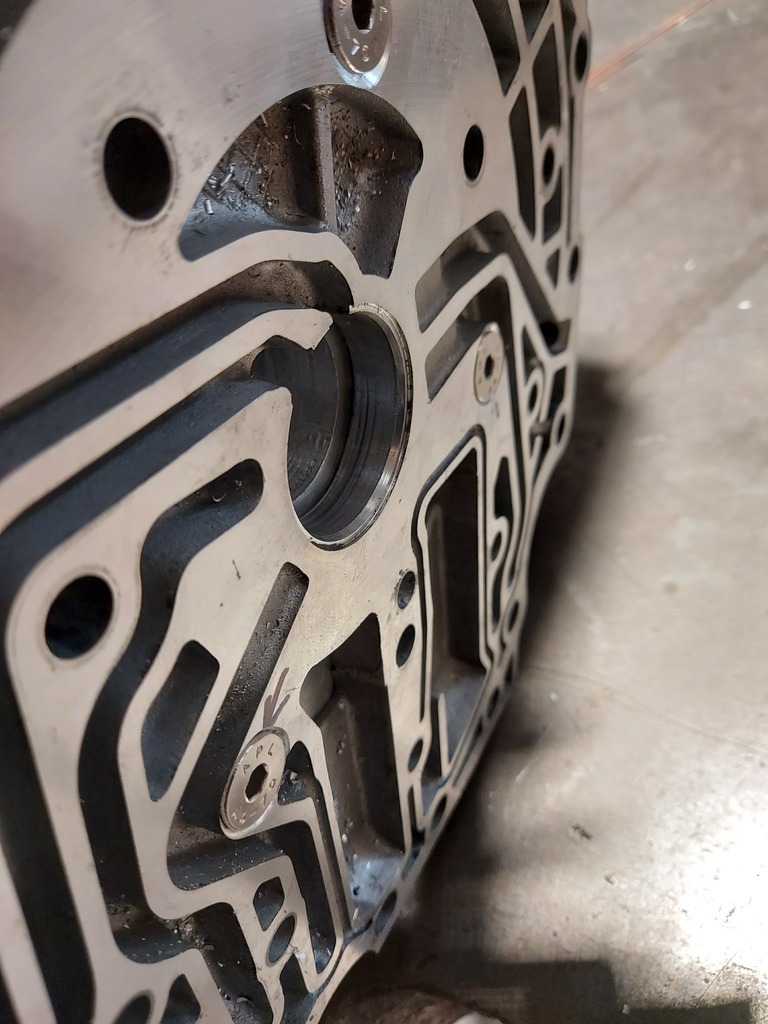 I then made up a short pipe from the cylinder to outide the bellhousing. I used a convenient blank in the casting to put a male fitting ready to take a flexi to the master cylinder when the gearbox is back in. The black pipe is a rubber sleeve I slid over the pipe to stop it chafing on the bellhousing. 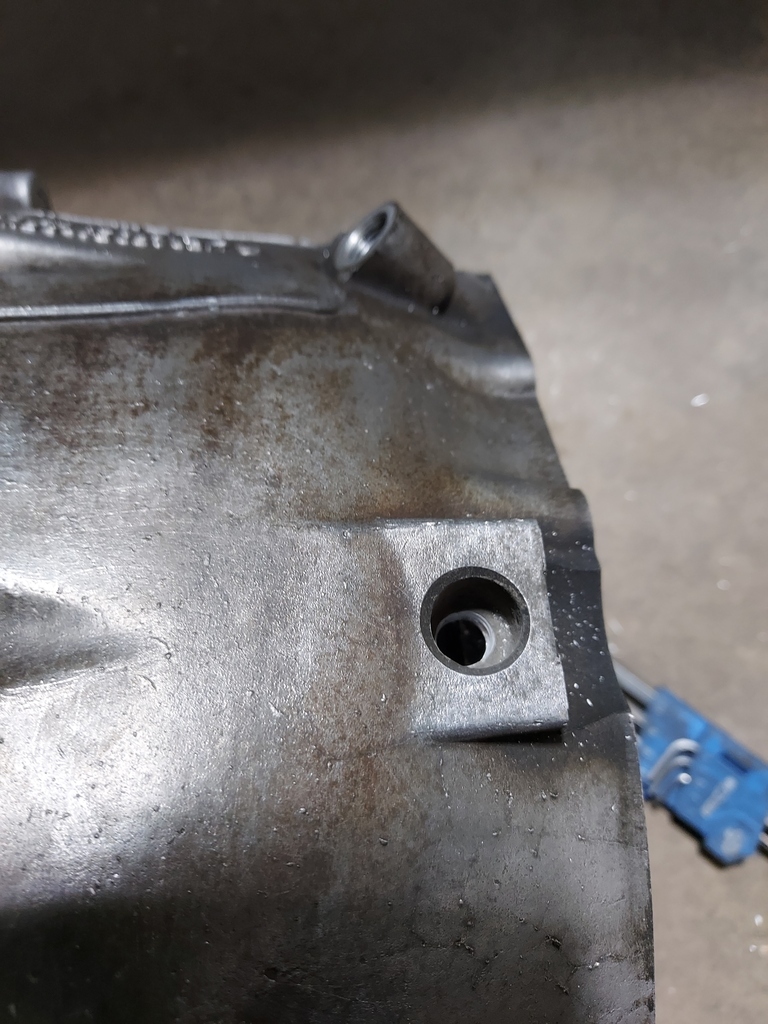 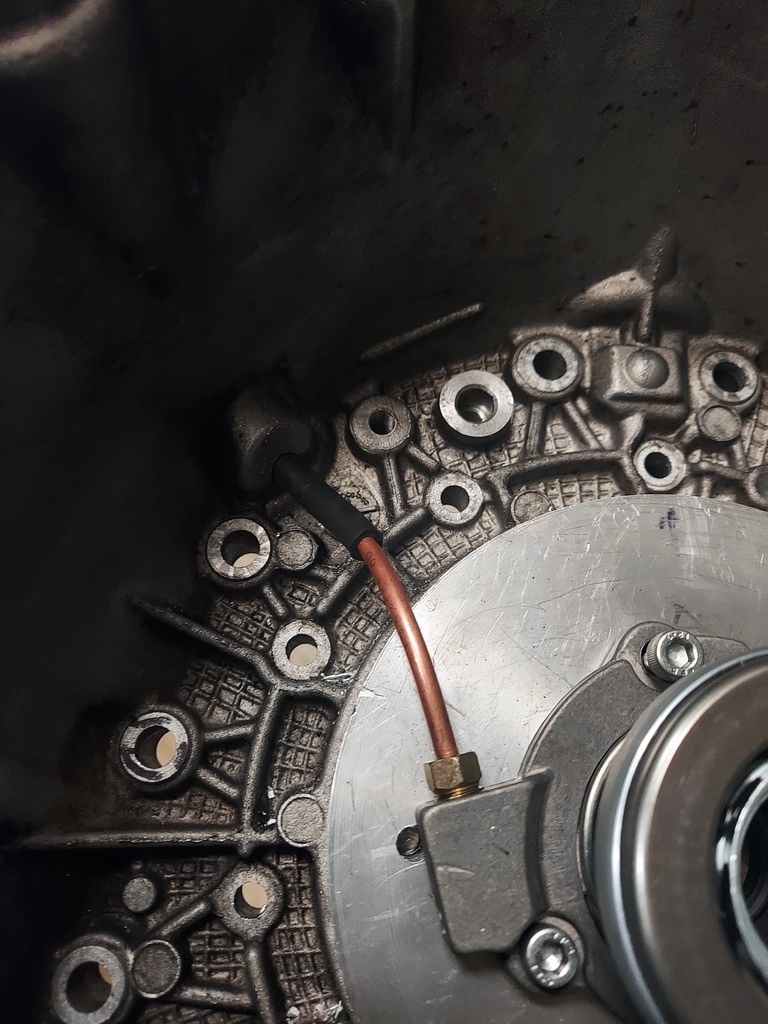 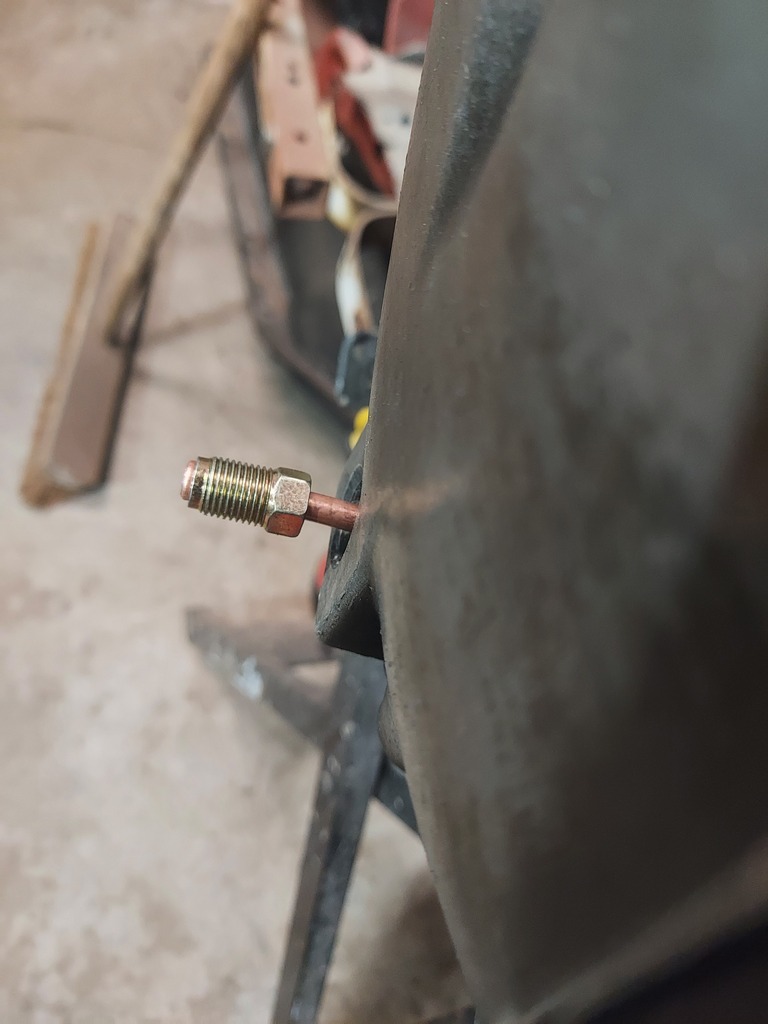 So that's the clutch arrangement hopefully sorted. I'll only know for sure when it's all bolted together though! Another machining job I needed to tackle was the spigot bearing. I'd got the engine and transmission at a distance which meant I had good spline engagement with the clutch, but this meant that the end of the input shaft sat rather far inside the flywheel (in fact, through the other end!). This meant that if I put the spigot bearing centrally in the flywheel there was a risk that a step in the input shaft would hit the bearing, and stop the gearbox and engine surfaces mating. Or at the very least It could put pressure on the input shaft and break something. I measured and measured again... it was close, it may or may not be an issue depending on how accurate my measurements were (hey, I'm no engineer!). I decided it wasn't worth the risk, and seeing as I needed to make an adaptor to fit the Nissan spigot bearing anyway, I might aswell design it so that it sits further towards the engine and avoids any issues with the input shaft step-up. 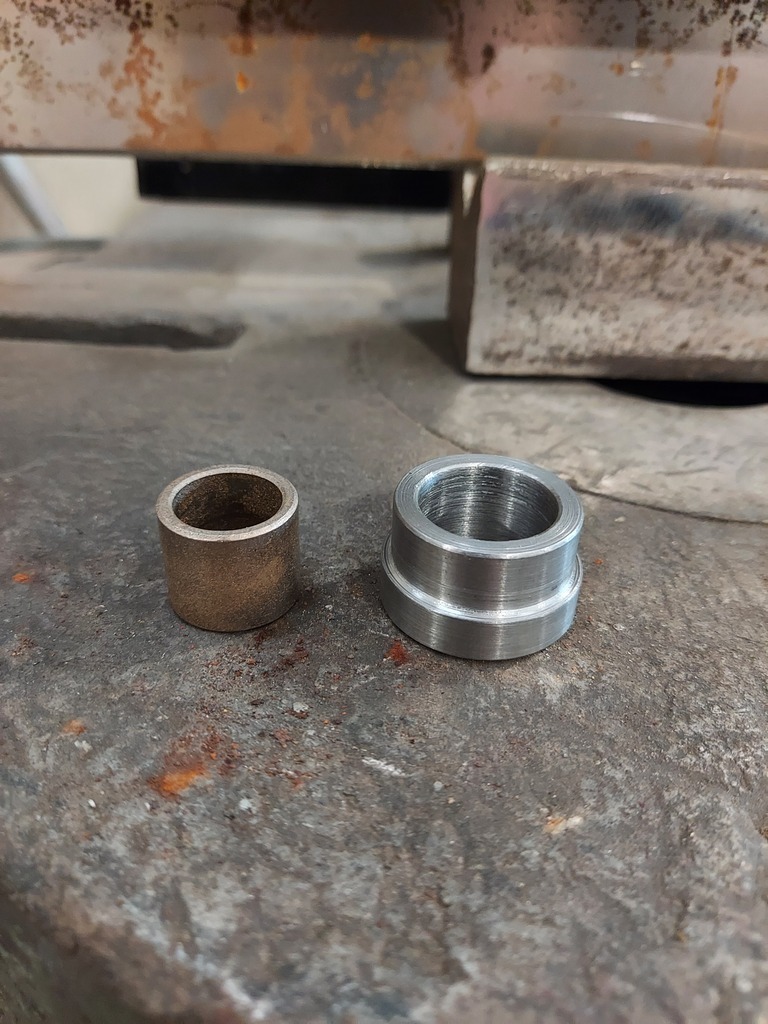 Here we have the adaptor, with the Nissan L28 spigot bearing. I designed it to be a press fit into the flywheel, and the bearing is a press fit into the steel adaptor. Full disclosure: I actually got a mate to make this piece after I gave him the dimensions. I just didn't have the time, and it needed to be super precise and I didn't want to mess it up. 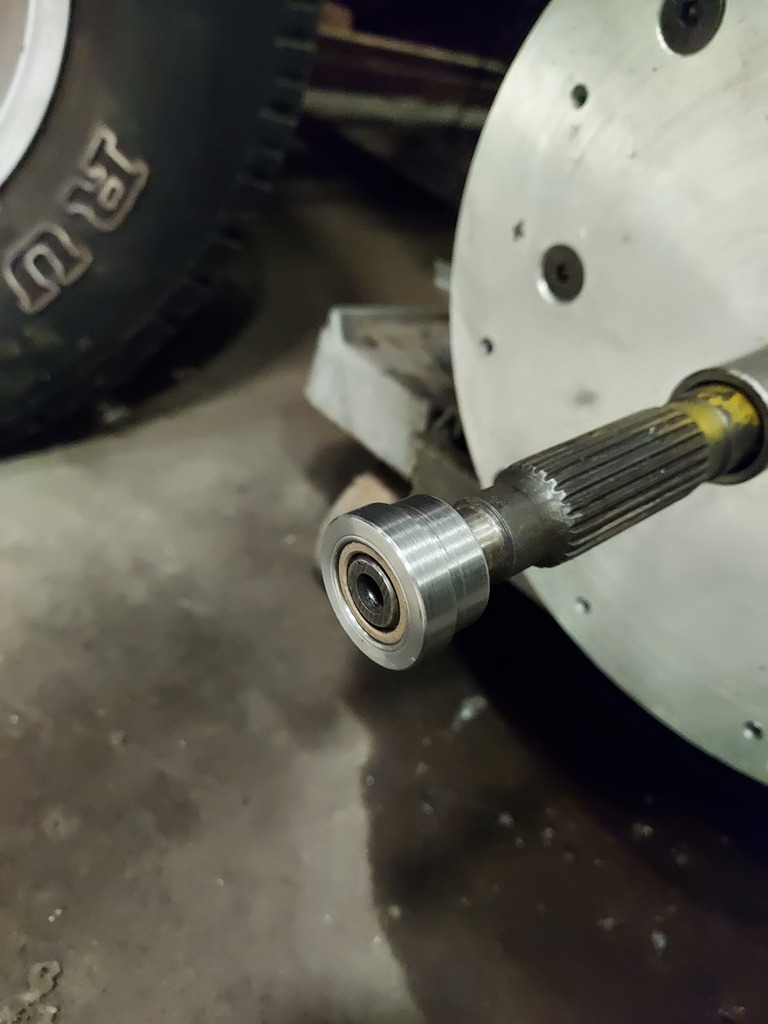 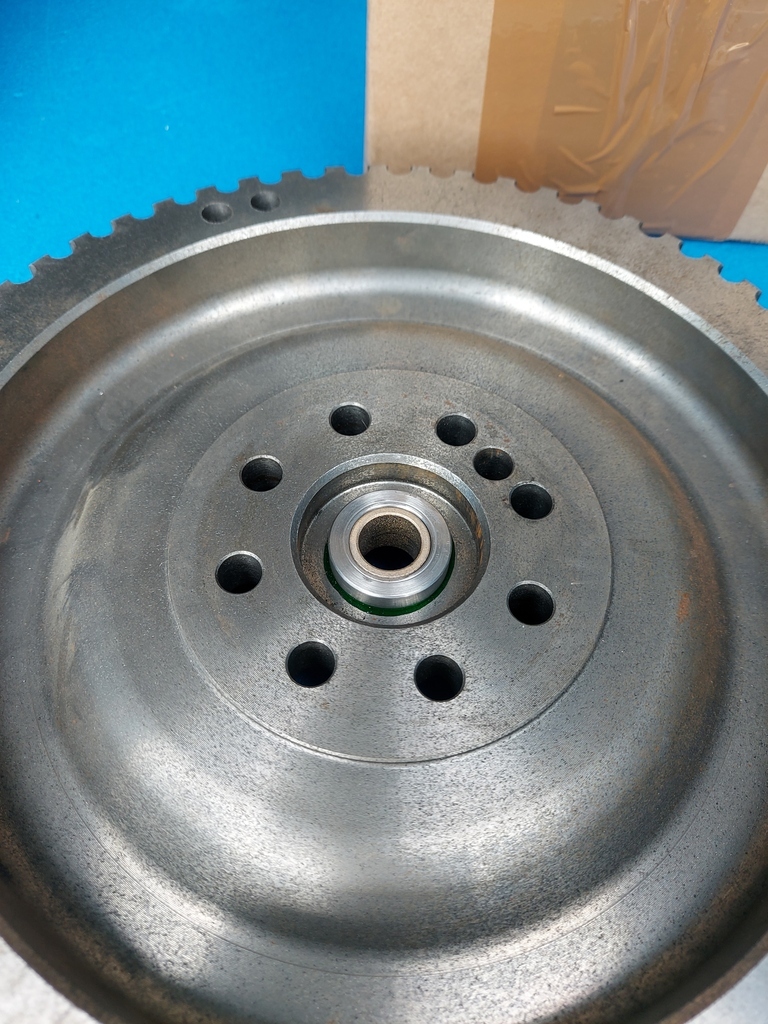 I test fitted it on the input shaft after I pressed the bearing in just to make sure it hadn't distorted, then pressed it into the back of the flywheel. You can see the step in the input shaft in the photo. 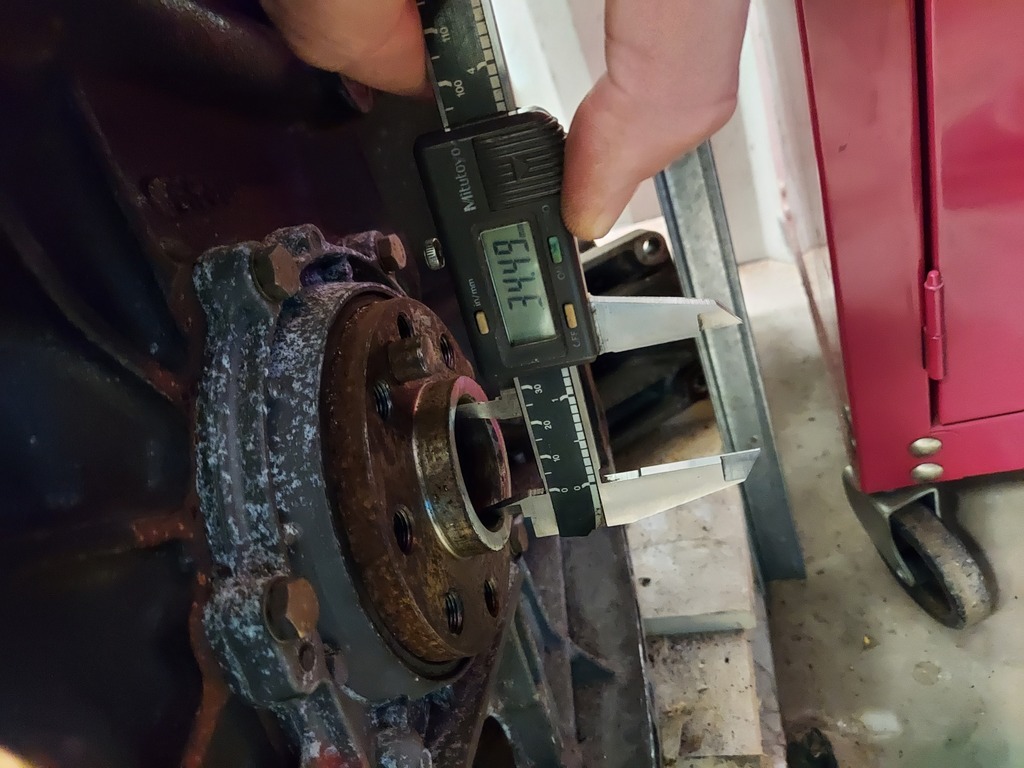 The flywheel bolts flush with the crankshaft flange, howerver there is a centre bore running quite deep into the crank flange, and my adapter is a few mm smaller in diameter. This positions the spigot bearing to run on the end of the input shaft. So that's all the engine and gearbox adaptors made! My next step is to test it all by joining the engine and gearbox and crossing fingers and toes that all this theory actually works... You'll have to look out for a future update to see whether it's worked or not (Oh god I hope it works!!) Other jobs I've done on the Patrol is undersealing the area above the fuel tank. It wasn't particularly bad, but I wanted to throw something on there while I had the opportunity. It was a messy old job but worth doing to keep any rust at bay. 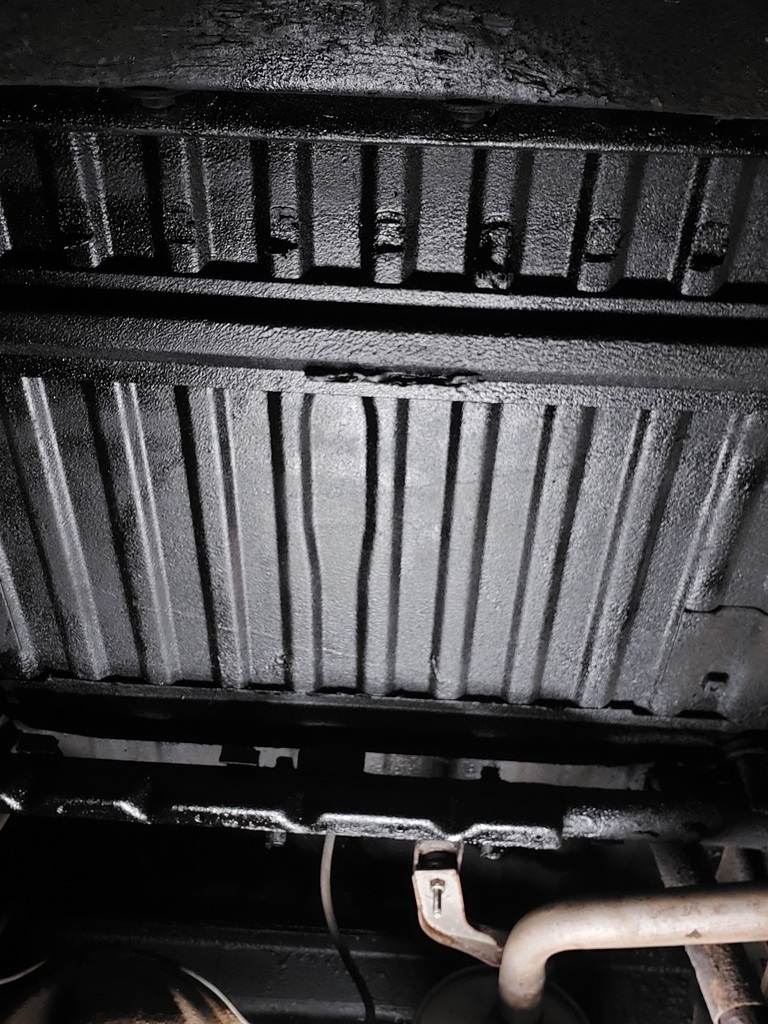 I also removed all of the old fuel lines and the fuel pump. The lines were in terrible condition and I think one more year of use would have given me multiple fuel leaks. This was a pretty horrendous job! Lots of rusted fasteners, upside-down angle grinding, grit and rust in the eyes... you know how it is. Had to be done though! Braided fuel lines will be going in before the gearbox gets bolted in. 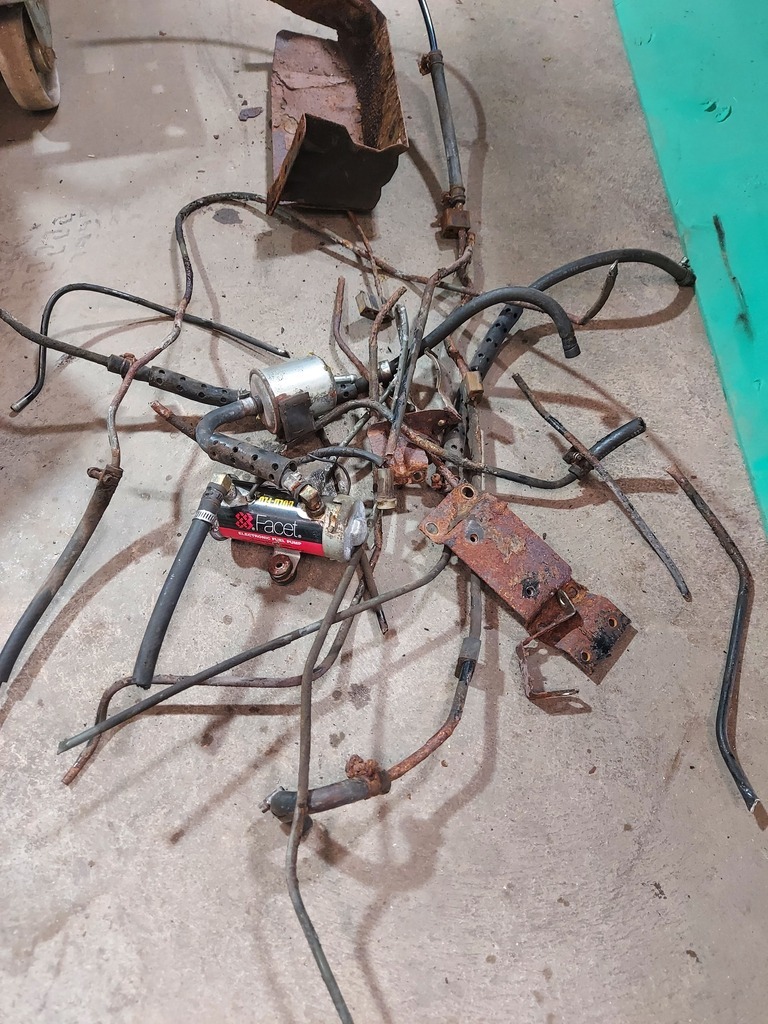 So that's us pretty much up to date. I've gone into quite a lot of detail with all the adaptors and machining, I hope it's not too dry to read through! I figured it might help someone else who is contemplating doing a conversion where no adaptors exist. This project is a bit of a slow burner, I only get a few hours to work on it each week so progress is slow and steady! Retro Rides Gathering gave me a boost of inspiration though, I really REALLY want to finish it in time for RRG22... not that I want the pressure of a deadline... |
| |
Last Edit: Sept 5, 2021 16:17:42 GMT by BenzBoy
|
|
|
|
|
|
|
|
Absolutely brilliant show, well done and thank you to the RRG team and all the Shelsley staff. It felt really good to be back after 2 years!
|
| |
Last Edit: Aug 23, 2021 9:26:26 GMT by BenzBoy
|
|
|
|
Entry queues?BenzBoy
@benzboy
Club Retro Rides Member 7
|
|
|
|
I'm not sure if it's logistically possible but perhaps having two gates open - one each for traffic coming from either direction - might help alleviate the queues a little, as the bottleneck seemed to be the single gate and having to control traffic coming in from both directions. Although you'd obviously need more people on the gate checking tickets and there would at some point be a convergence of the traffic inside the showfield.
I've queued at loads of car shows, it's just an inevitability of having a large number of visitors converging on a single location. I'm not sure what other events are like at Shelsley and whether they have the same abount of traffic.
|
| |
|
|
|
|


 and an apparent failure to disengage..... Guess how I know this

