funkyhunk
Part of things
 Old Ford's R Us
Posts: 265
|
|
|
|
Time for an update again. Things have gone forwards somewhat. The left door finally got painted, with an okay result. 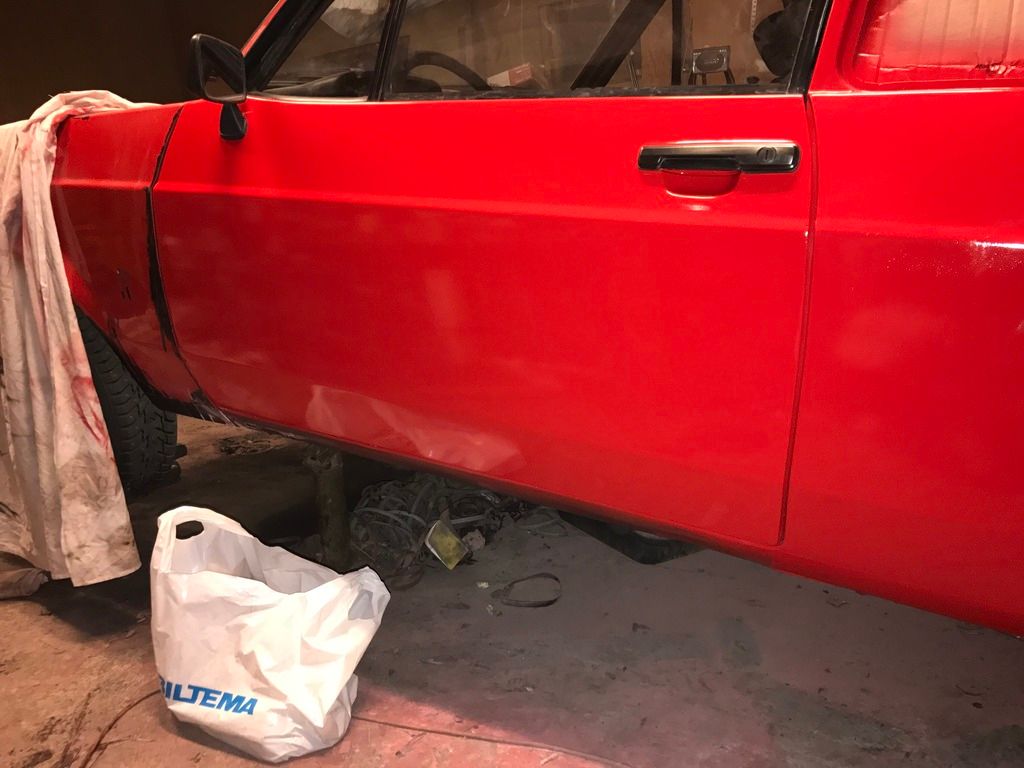 I had the 90amp alternator out to remove a screw that broke off when I wanted to change the voltage regulator. I also took down the oilpan to fix a dent that was made when the jack slipped and hit the pan, making the engine seize up on one of the conrods. It was actually smart to take it out, as there was a 5mm layer of sludge on the bottom. I also replaced both engine mounts, as they were old and starting to crack. 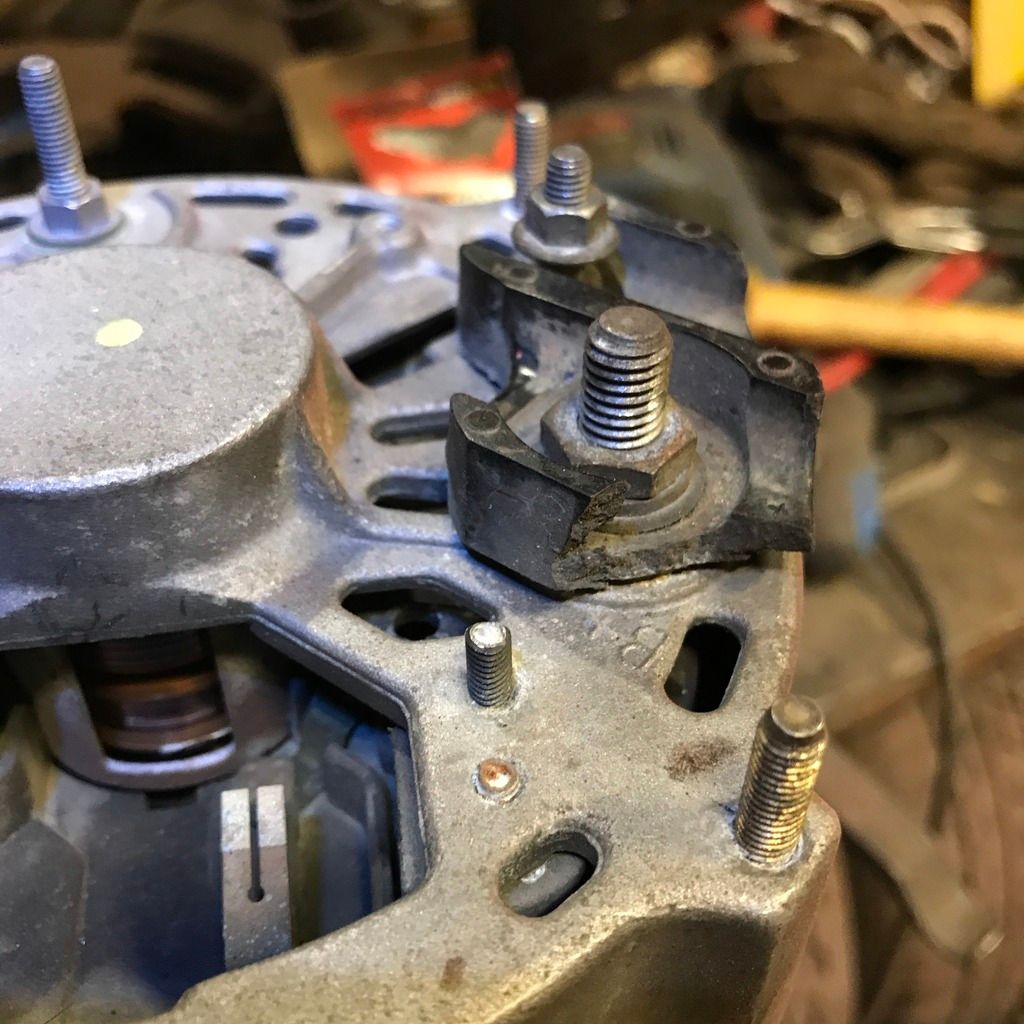  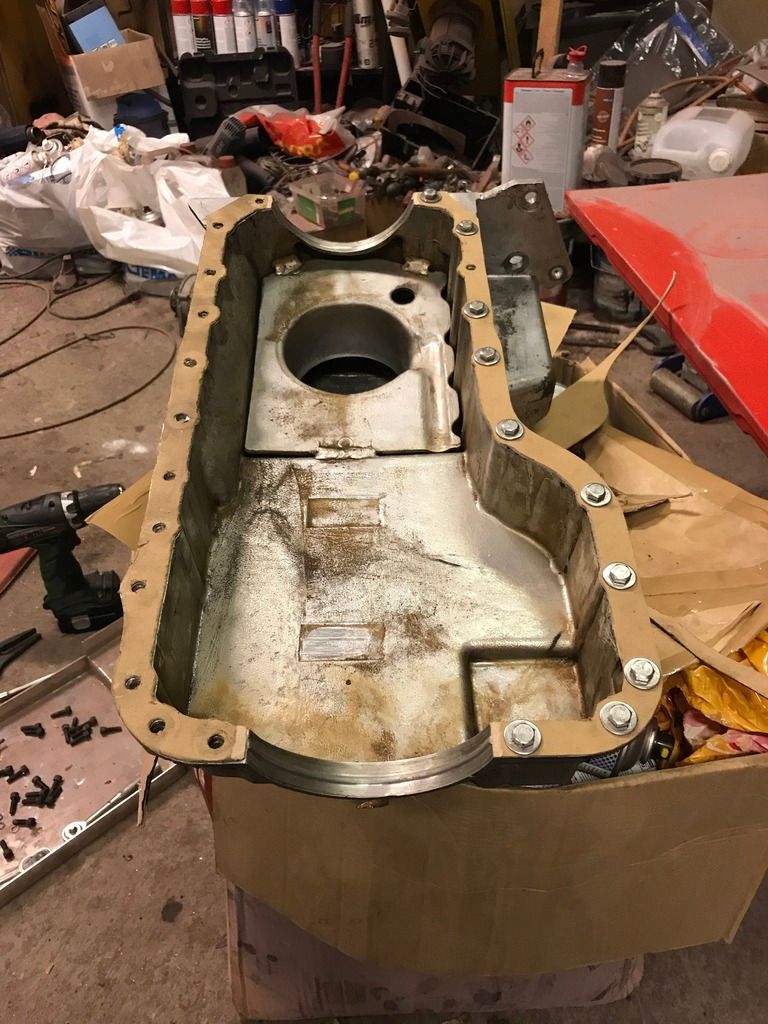 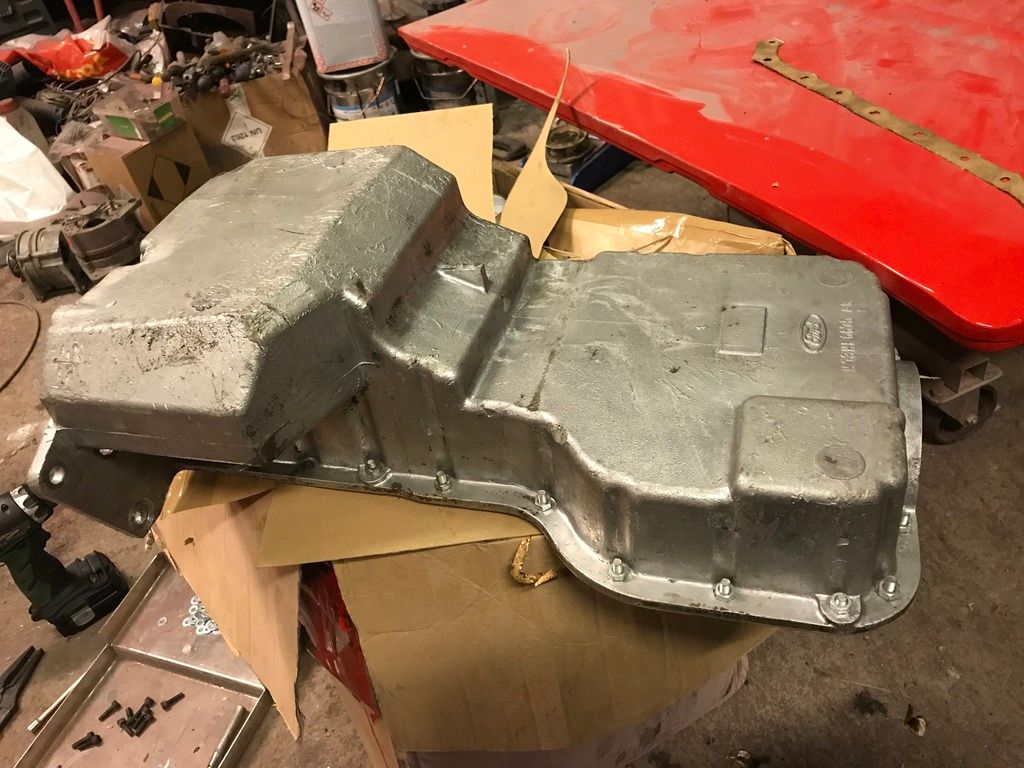 Next was to adjust the valve clearance as they were very noisy. All four inlet rockerarms were very worn, so I had to replace those as well. 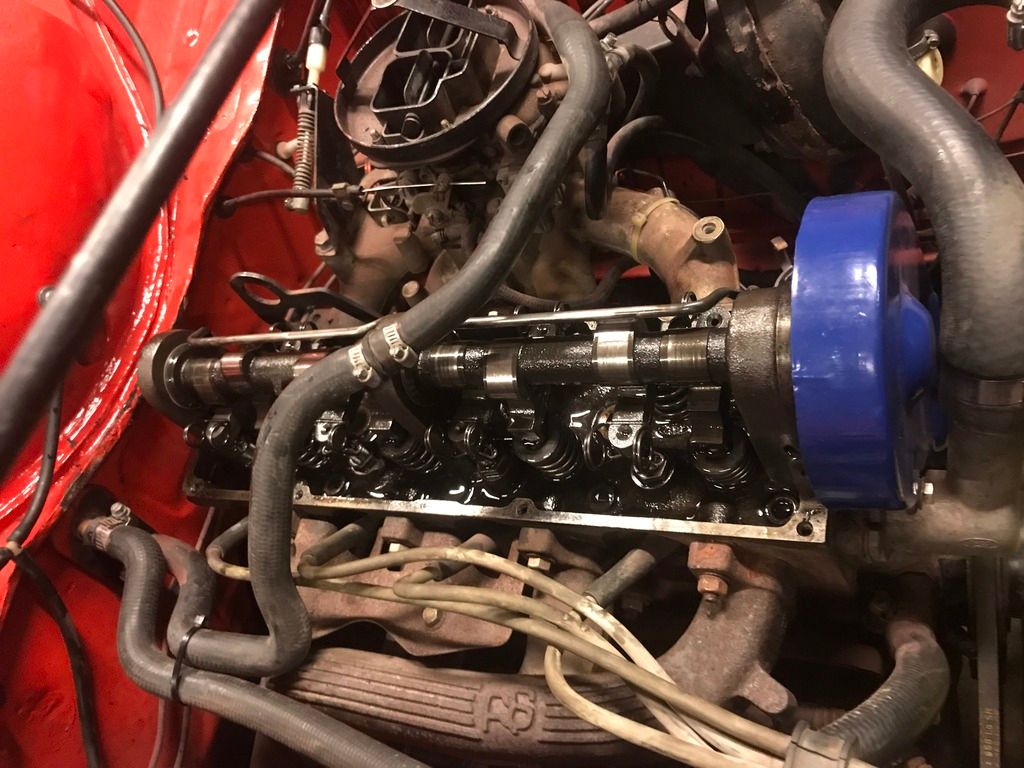 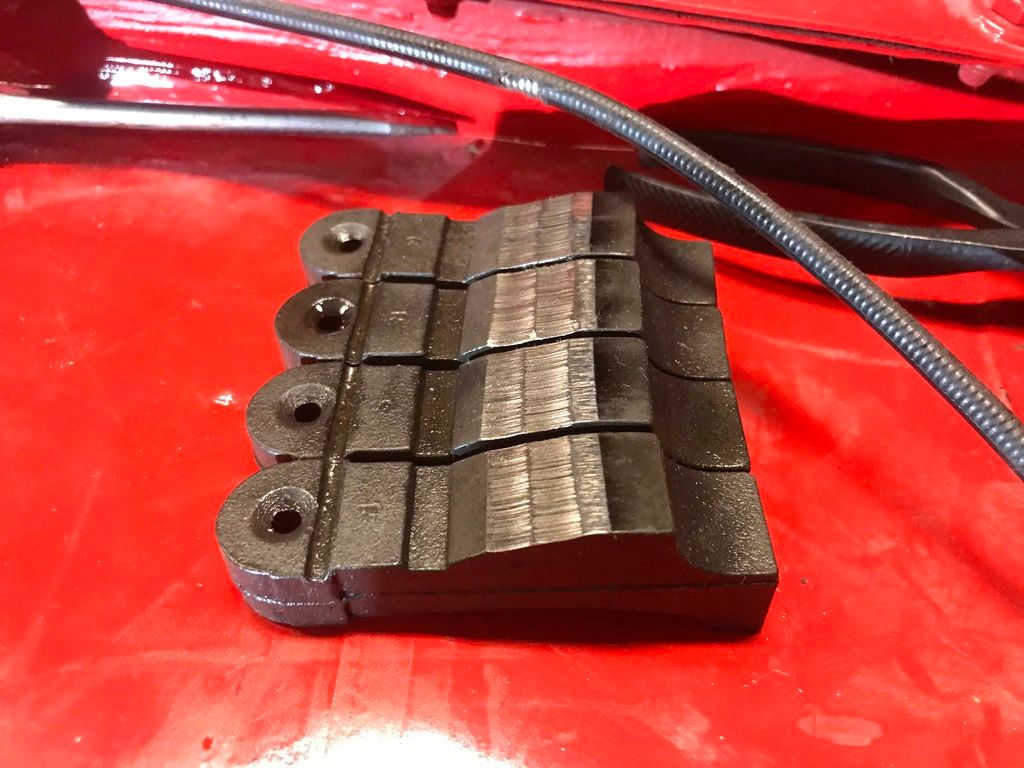 I also had to repaint the valve cover while it was out. 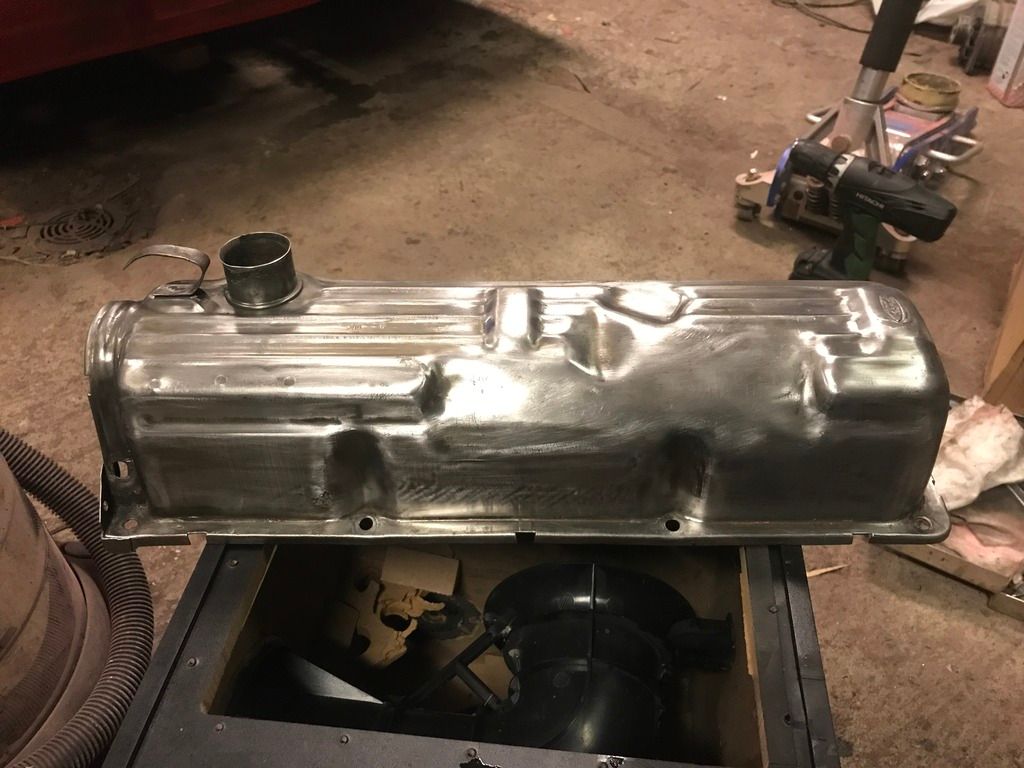 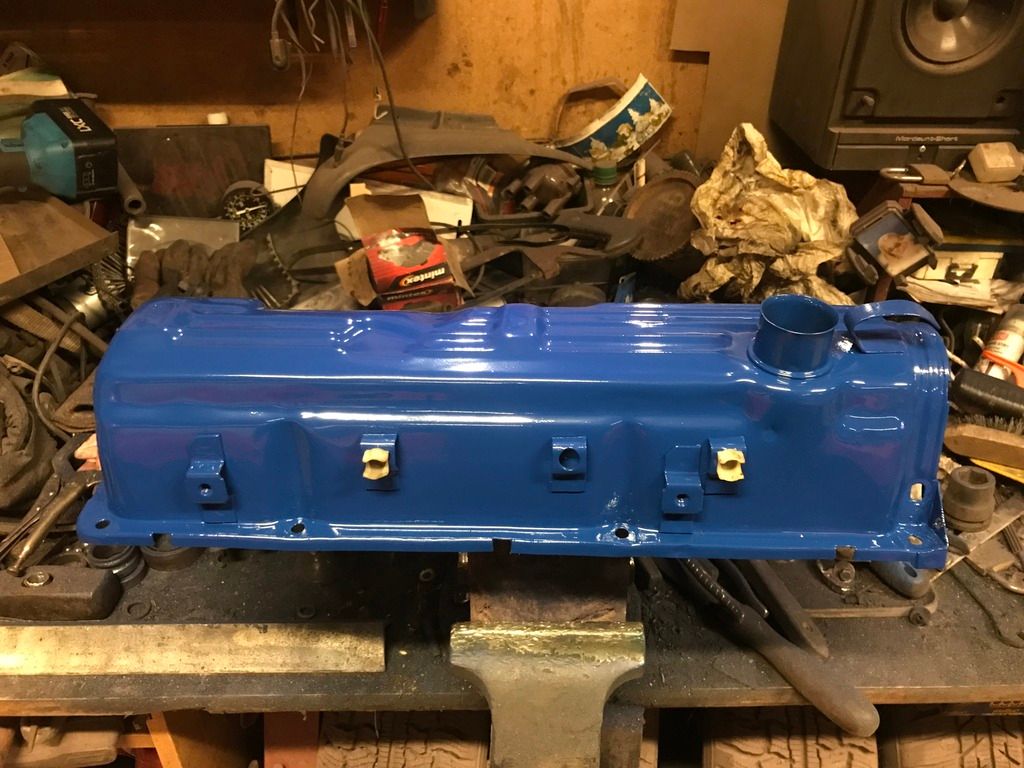 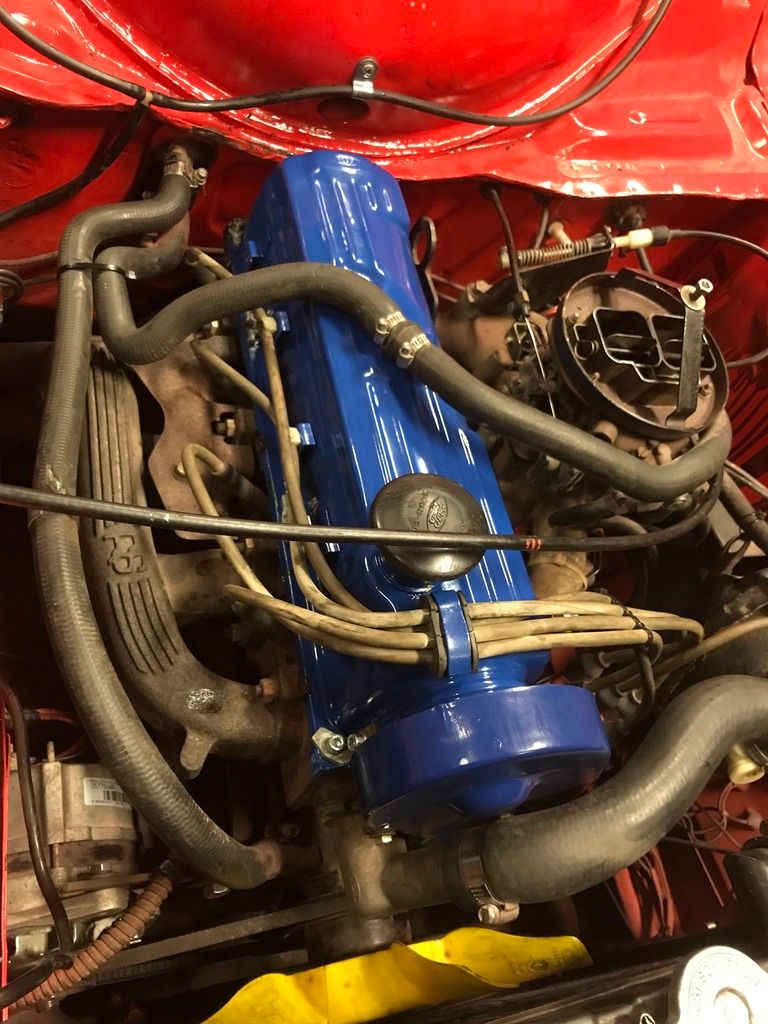 Next up was the left front fender. Not much bondo needed, but lots of wetsanding gave acceptable results: 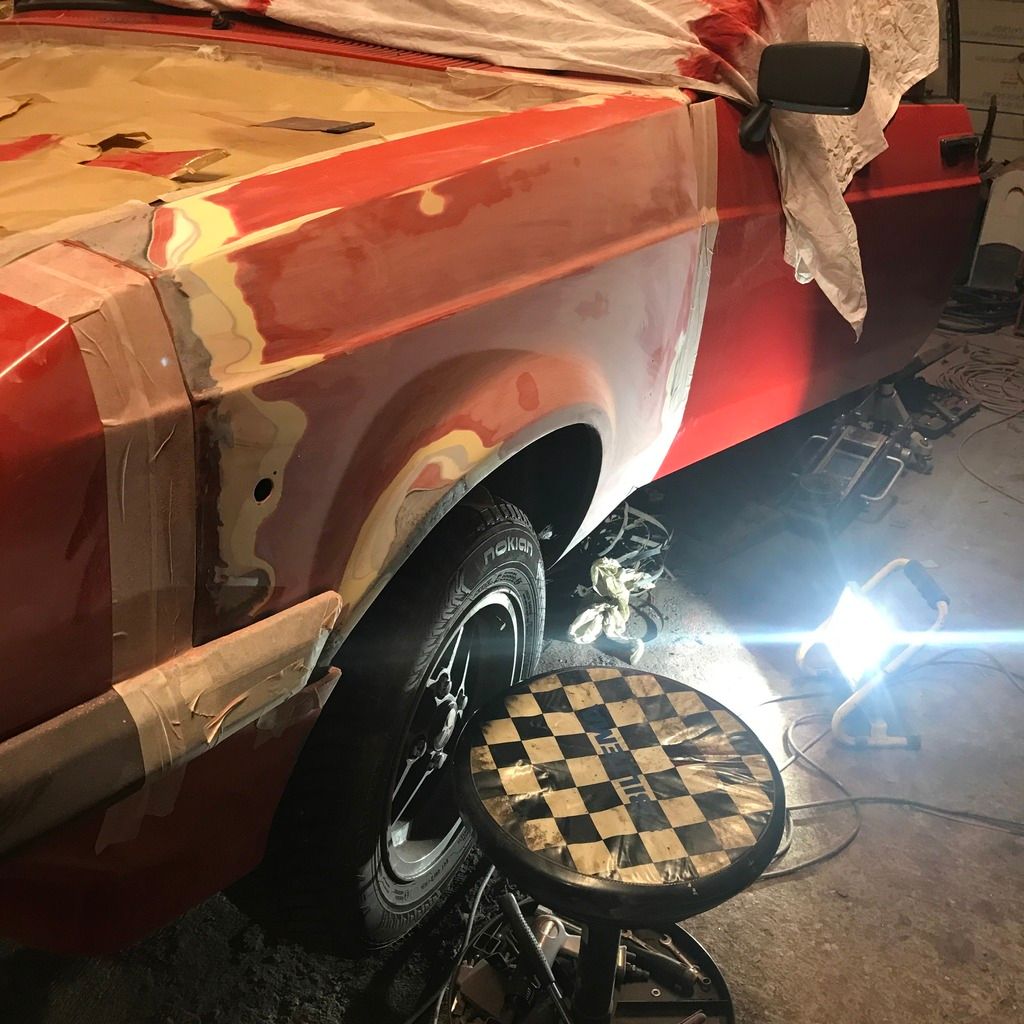 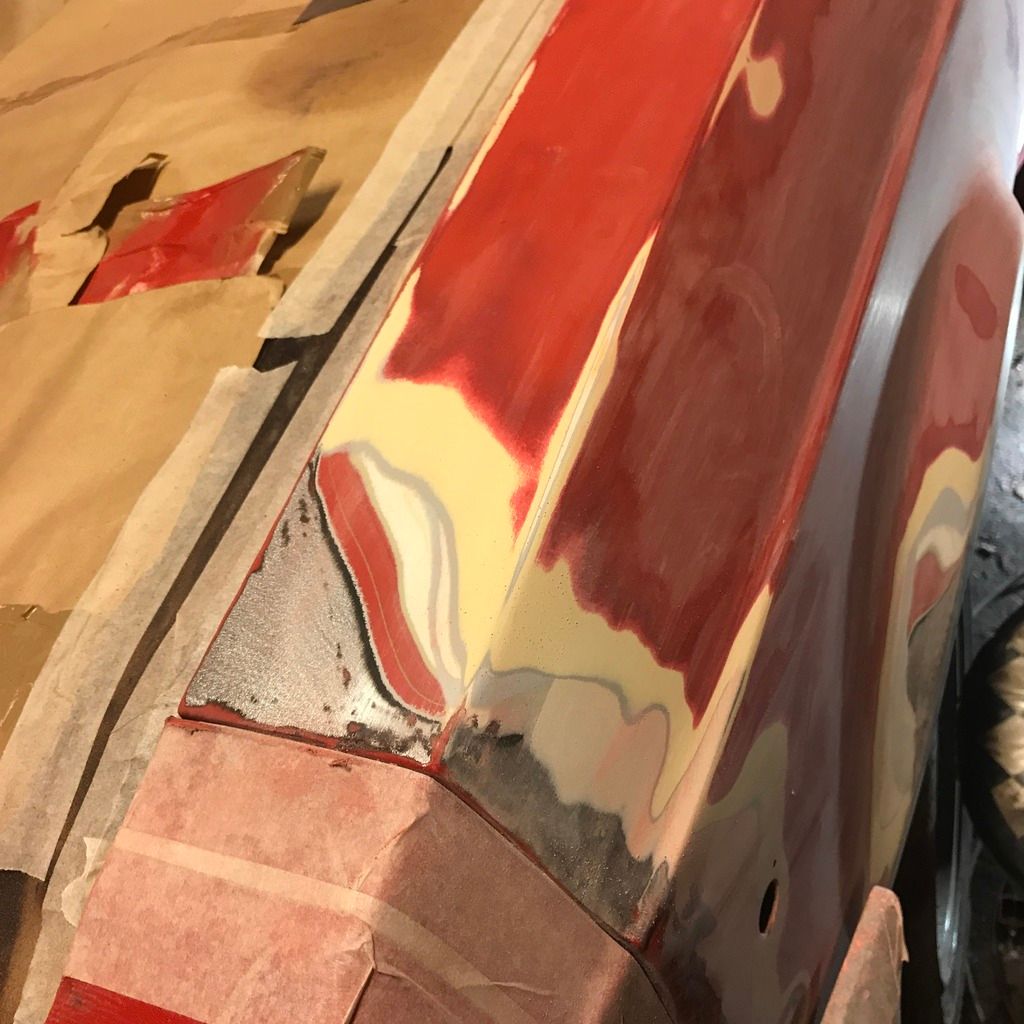 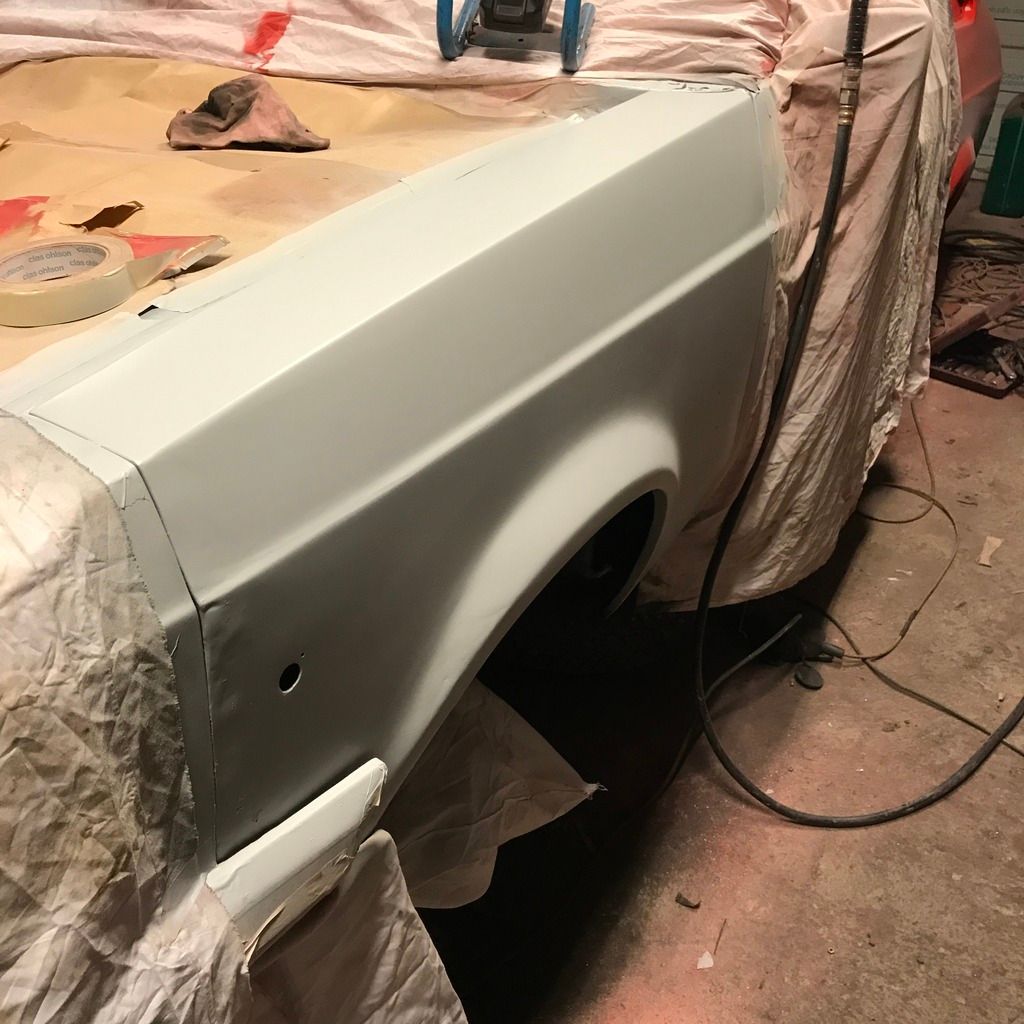 One coat of paint: 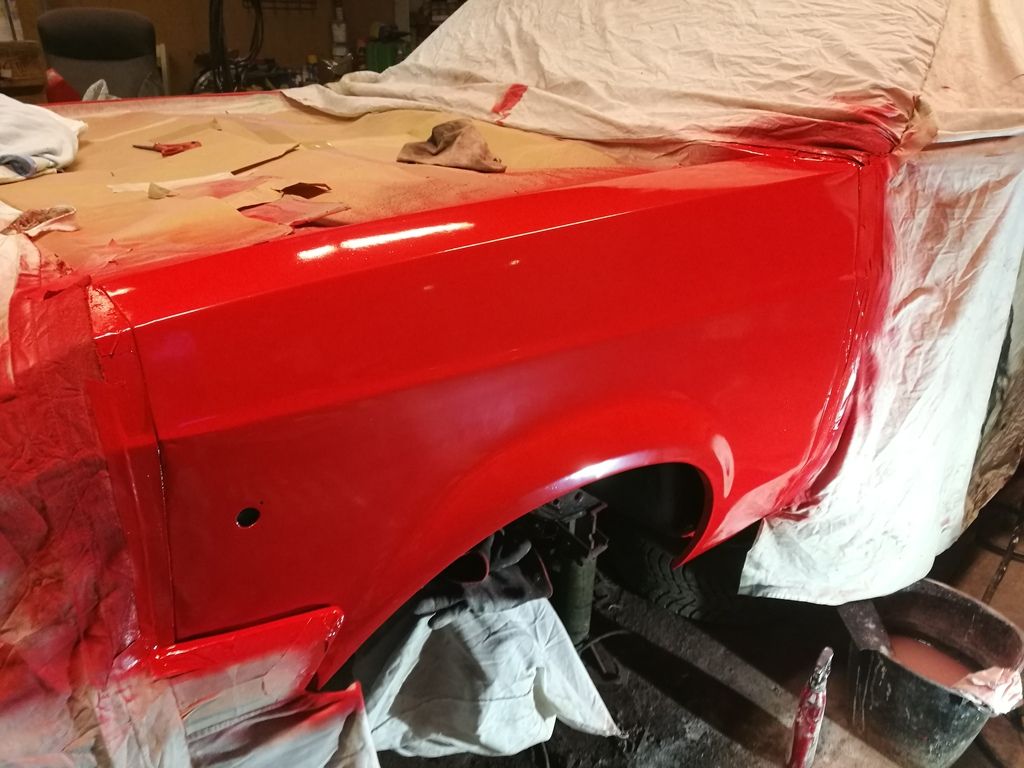 Two coats of paint, and three coats of clearcoat later: 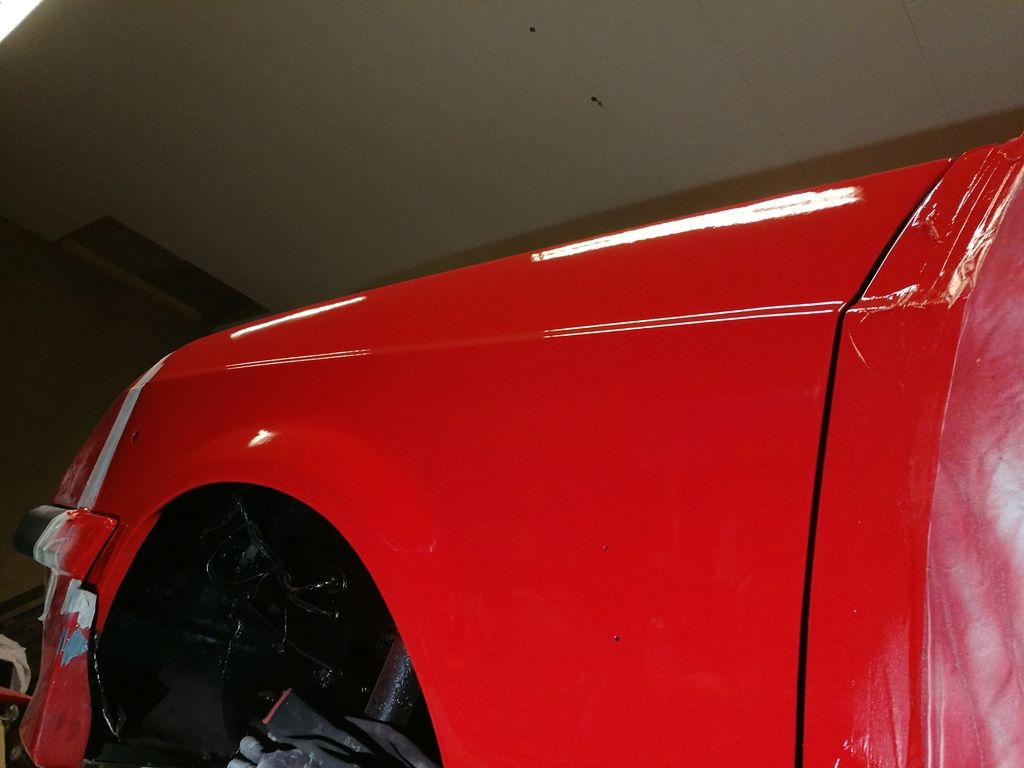 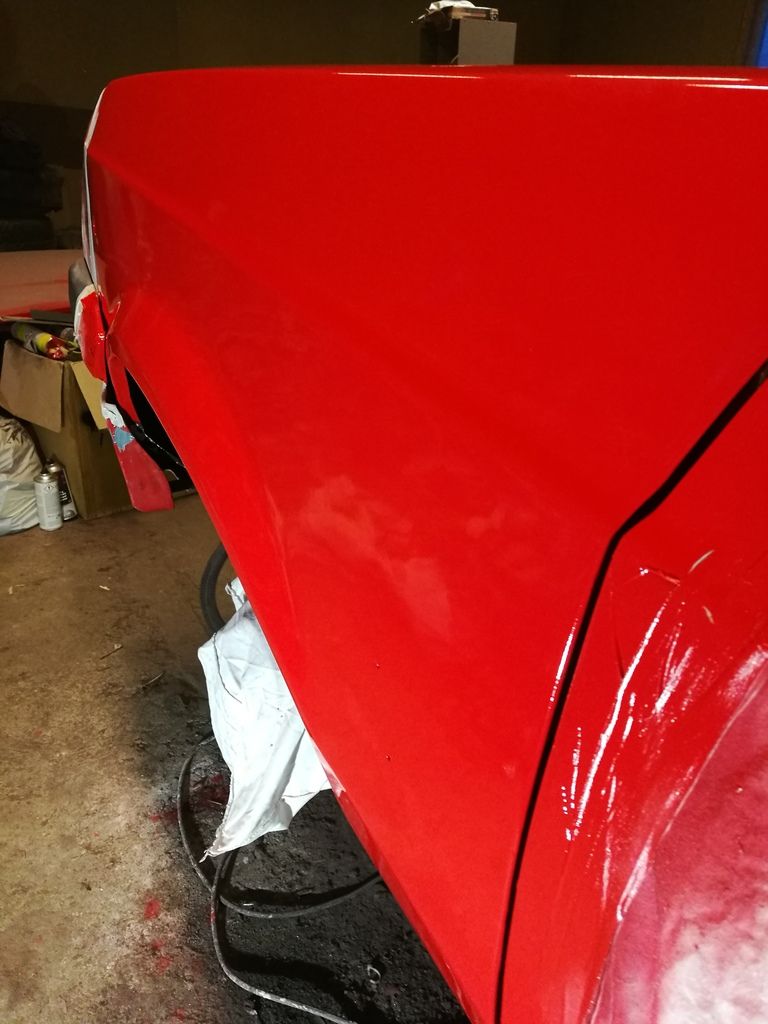 It came out satisfactorily I guess. Next up was the right front fender. Some bondo needed at the bottom where I replaced most of it. 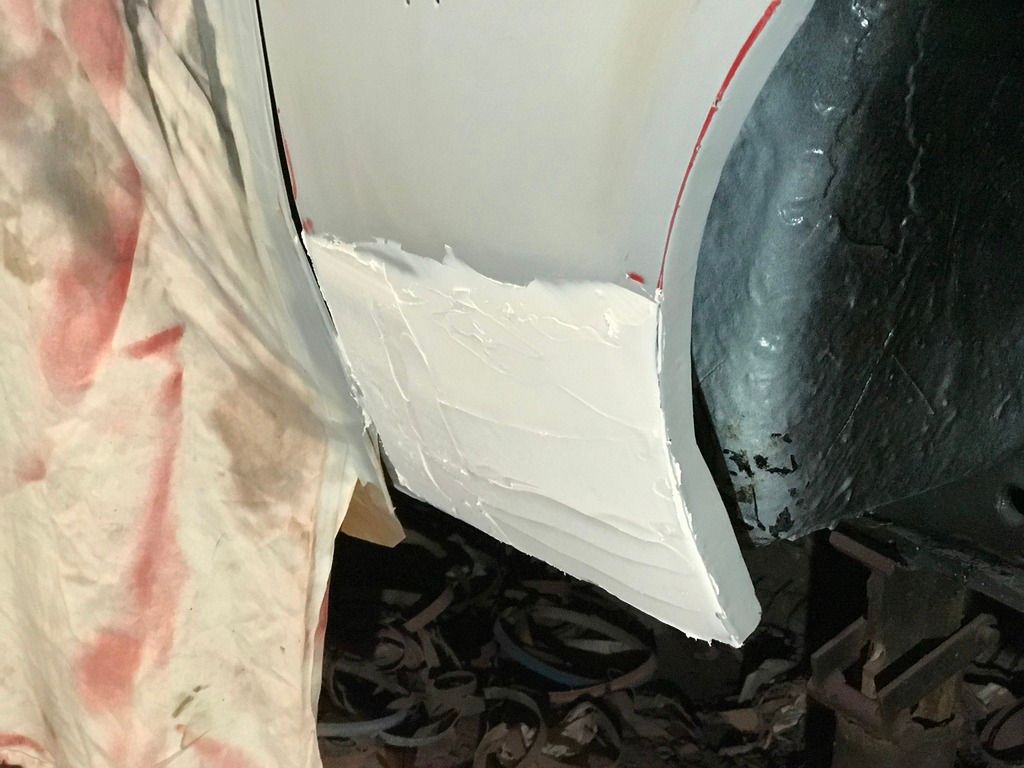 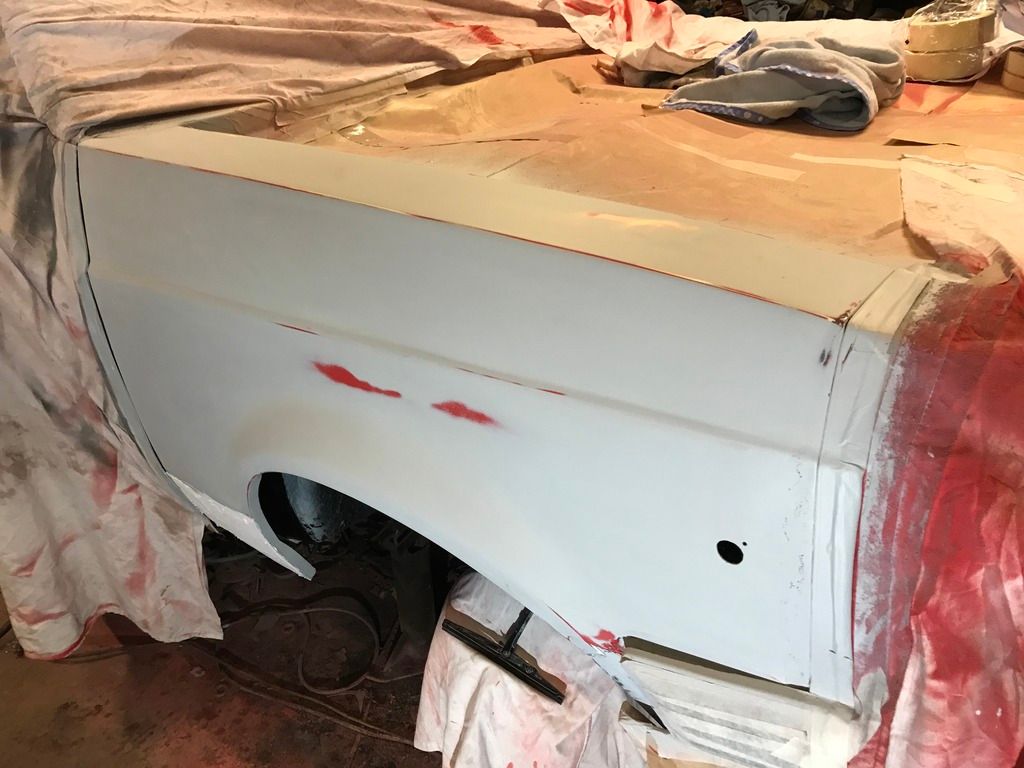 Some wetsanding, two coats of red, and three coats of clear later it also passed quality control:  Next in line was the bootlid. That one was a mess of surface rust and flaking paint all over. The grinder with wire brush took care of that, and it got a coat of rust converter. 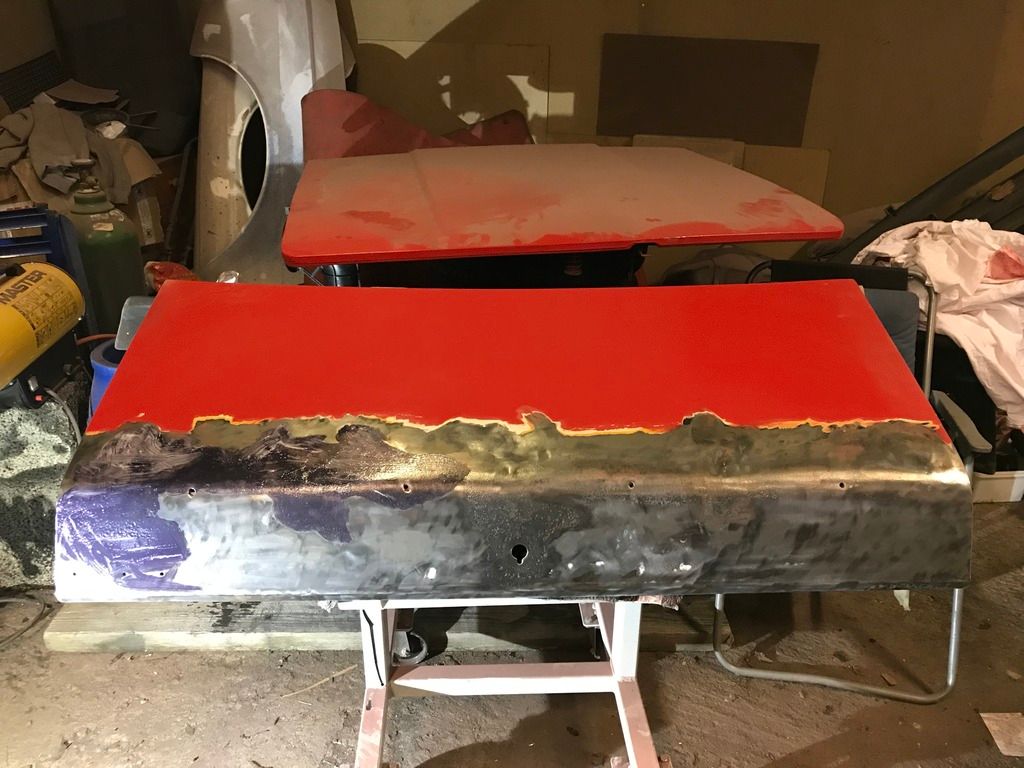 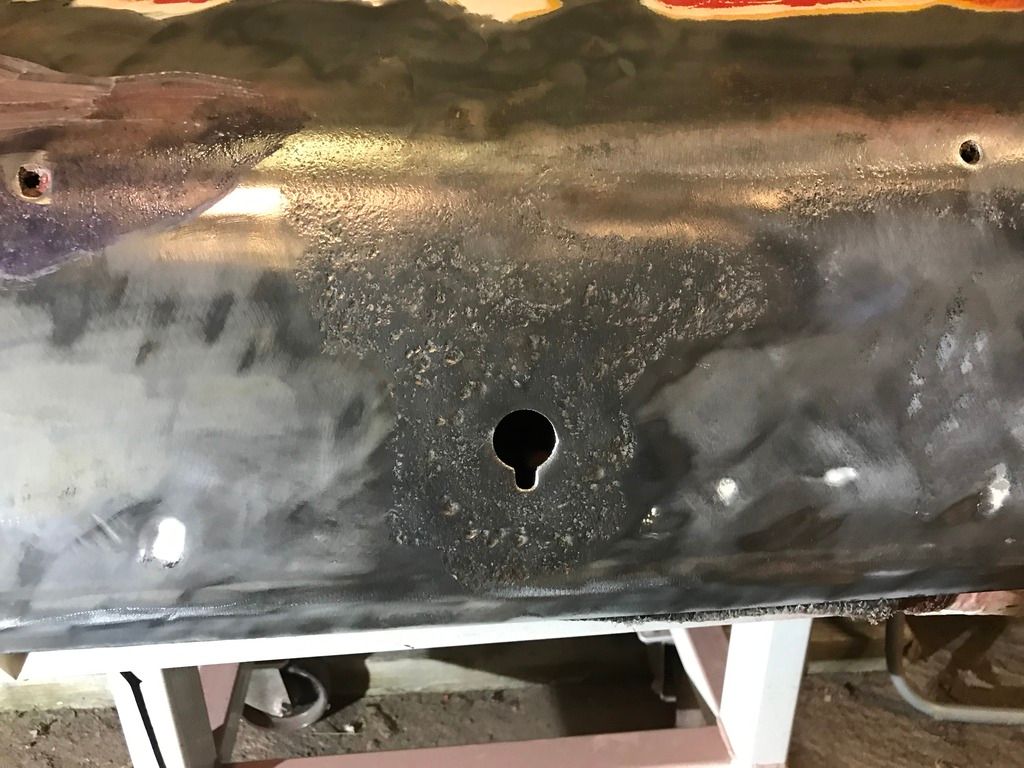 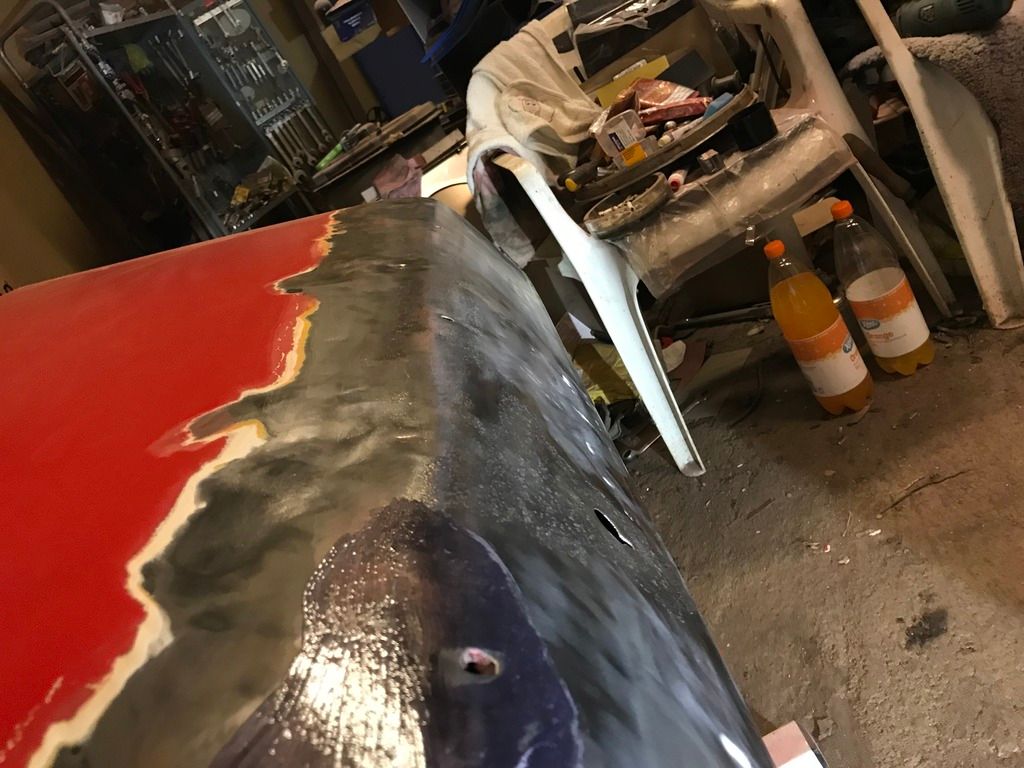 This was then sanded down and bondo'd a few times. It was dented and deformed all over the surface. I also filled isotrol in all the panel-flanges. 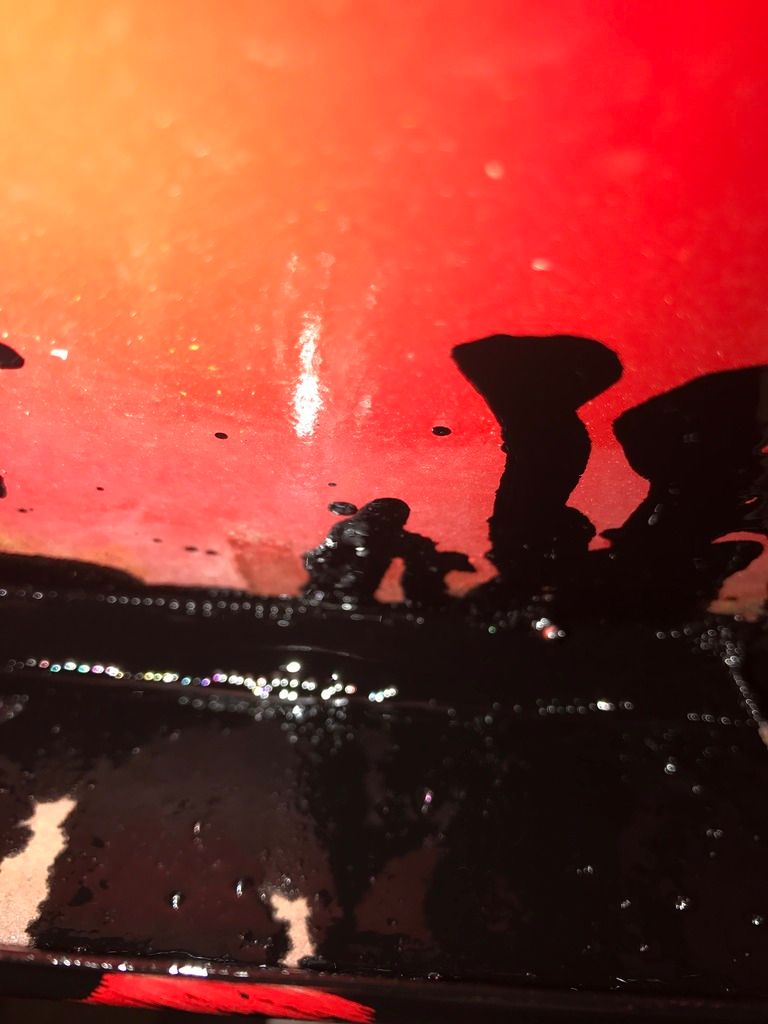 So after alot of sanding and a coat of fillprimer it looked like this: 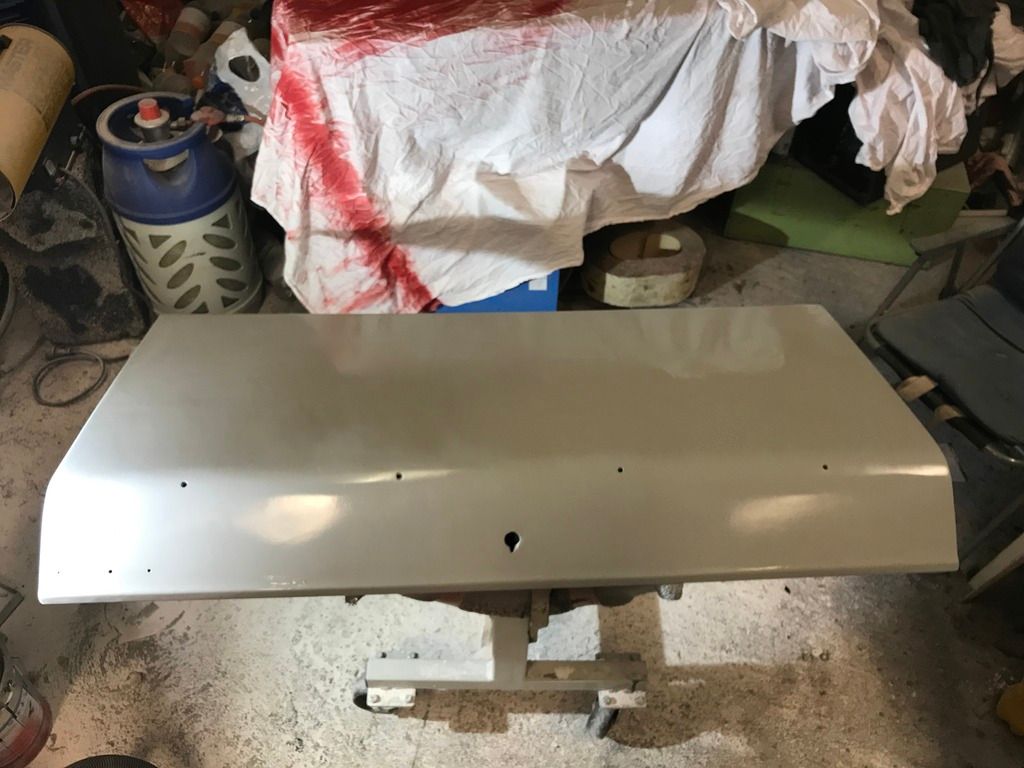 Wetsanding with 800 grit gave this finish, ready for paint: 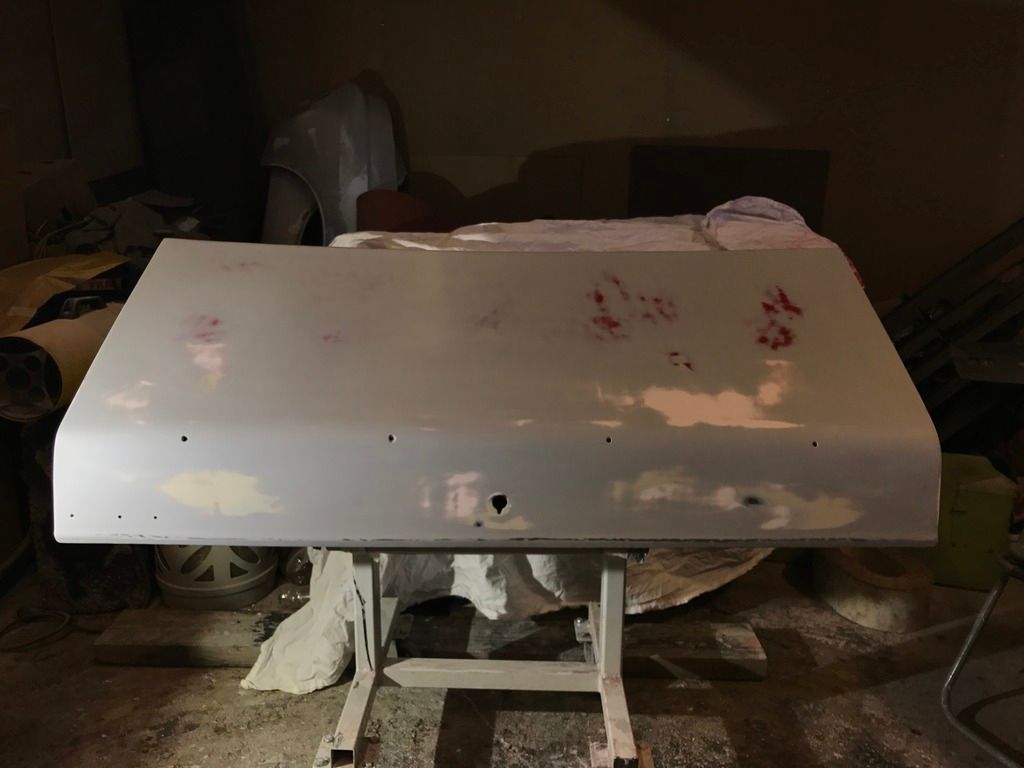 Two coats of red: 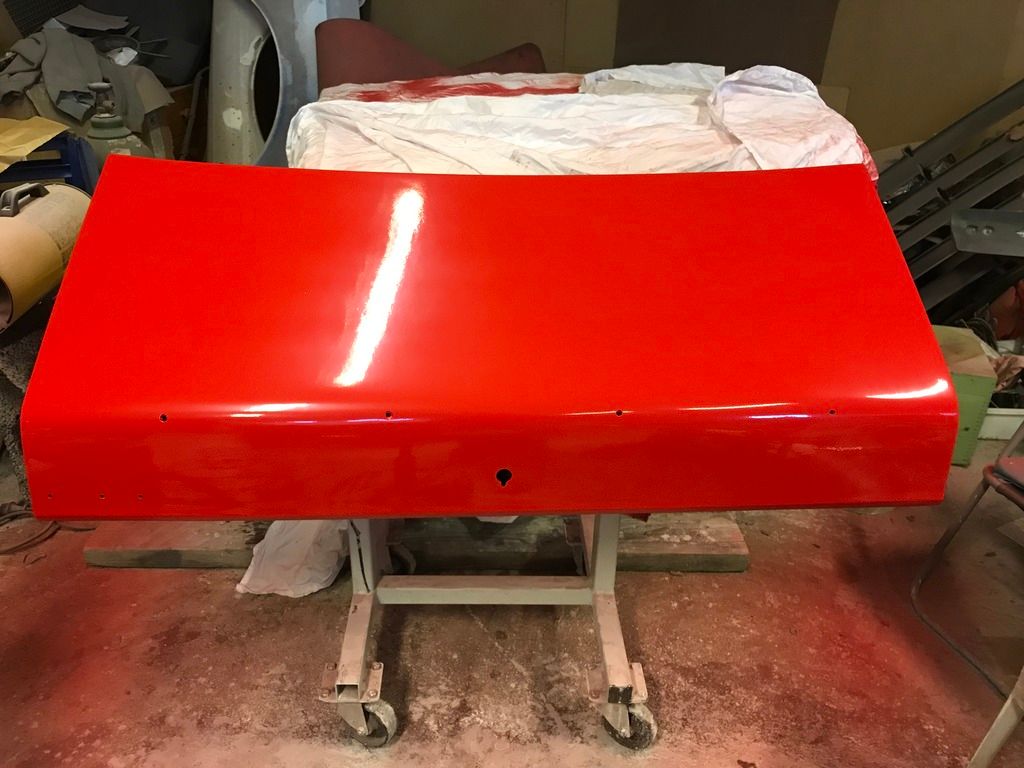 Three coats of clear. Then I wanted to test how the finish would be if I wetsanded it with 1200 grit paper, and doing a three stage polish. All sanded: 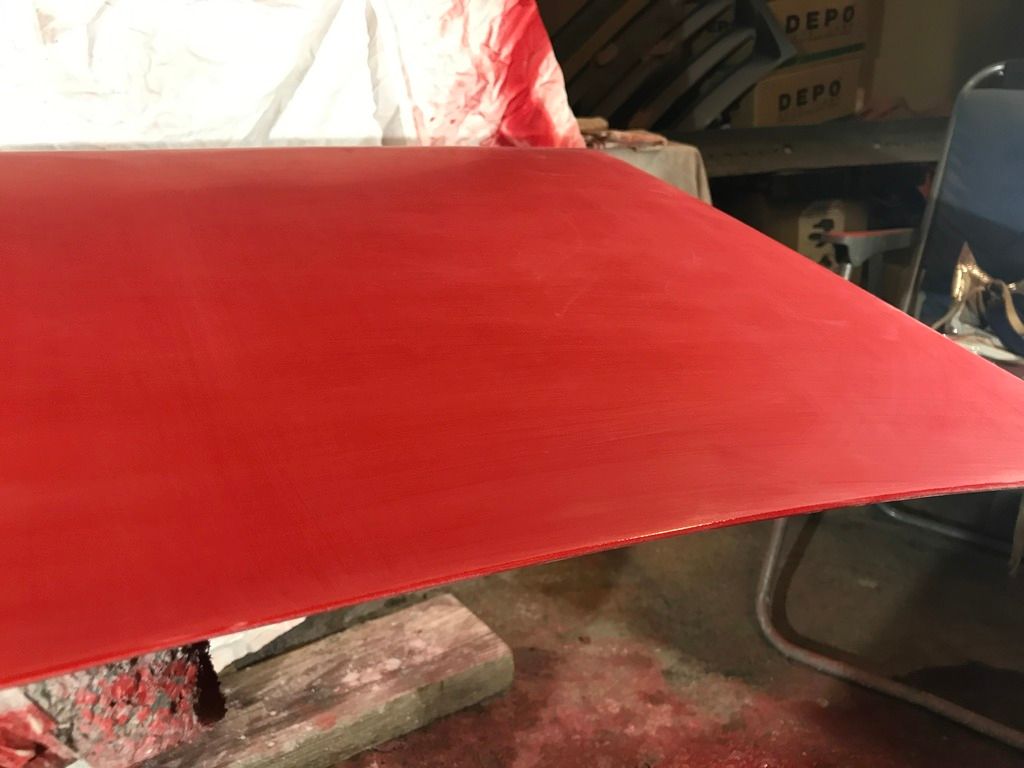 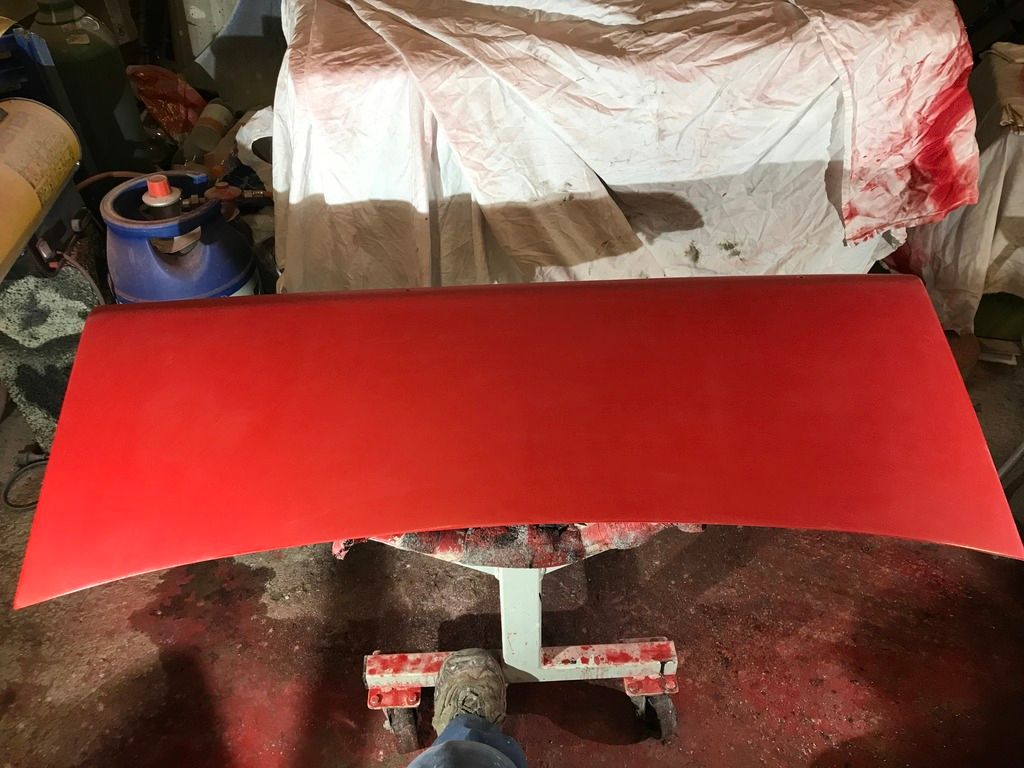 Three steps of polishing later gave astonishing results: 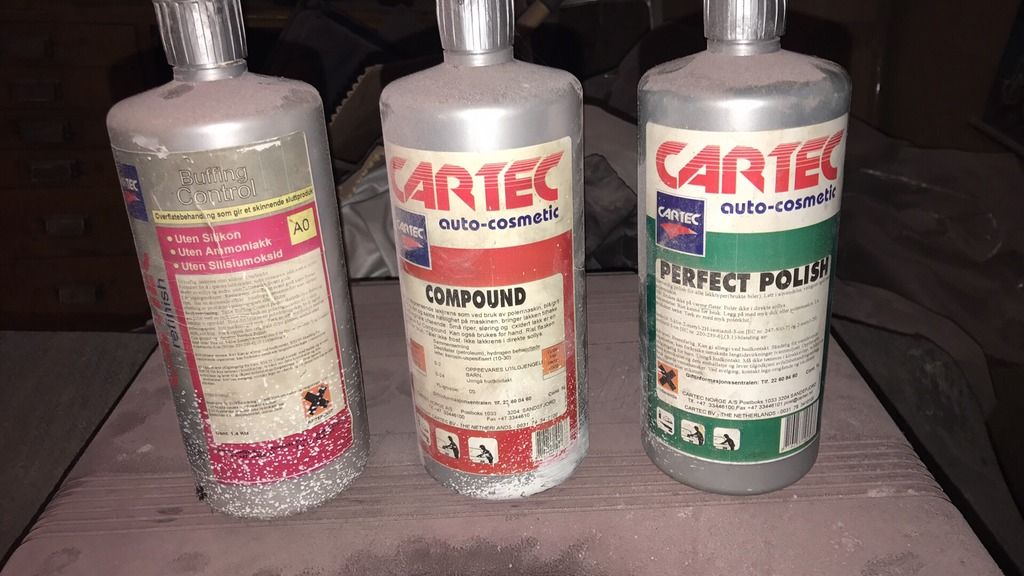  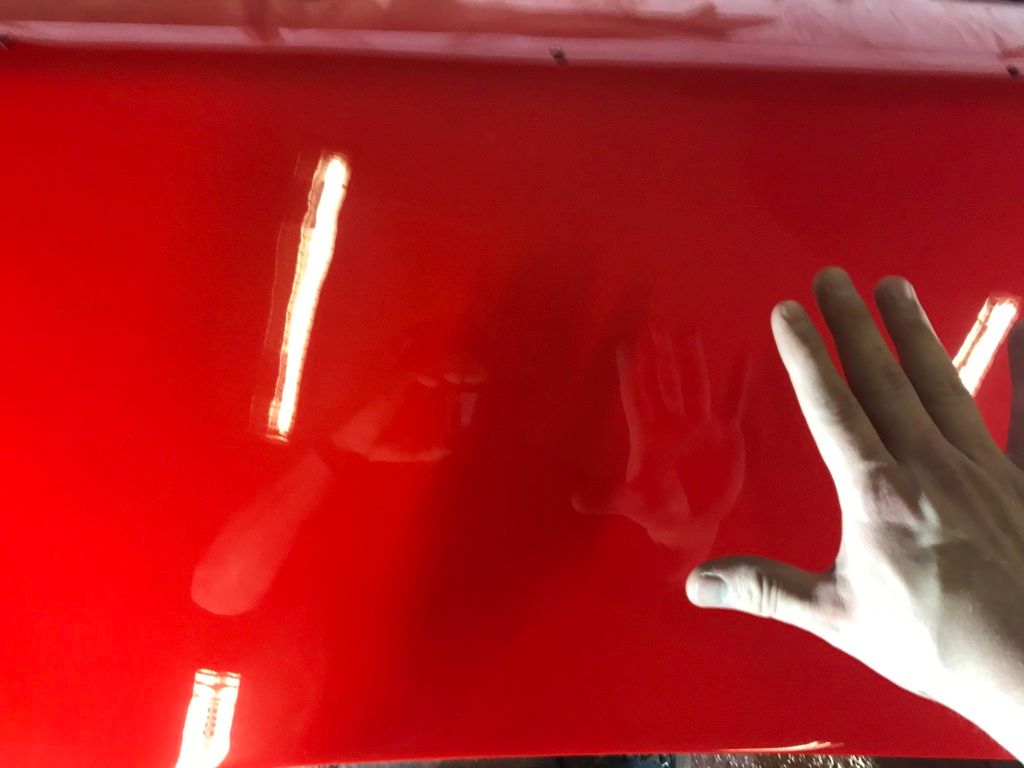 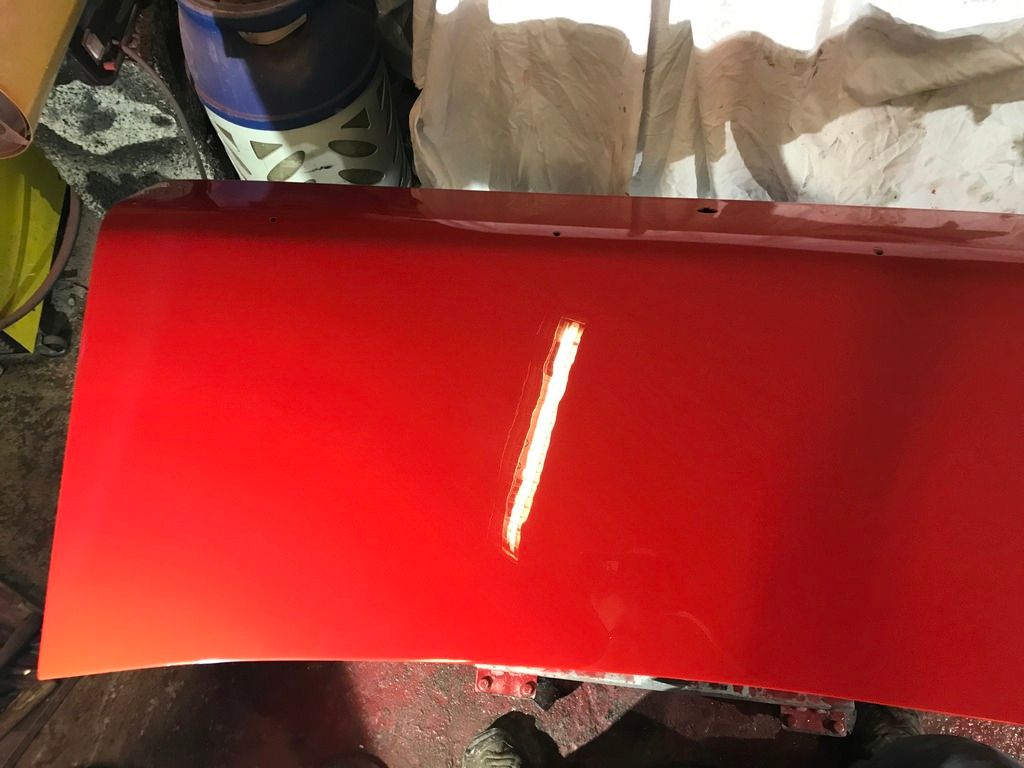 Also had to test on the front left fender:  It gave amazing results, shiny as F!! Nobody is going to guess I painted the entire car with rattle cans. Now I can't wait until I'm done with all the painting so I can wetsand and polish the entire car  Thanks for reading! |
| |
|
|
|
|
funkyhunk
Part of things
Old Ford's R Us
Posts: 265
|
|
|
|
Time for a new update! Some time have passed since last time, and some work as been done to the old shed. Easter is upon us, and a week off work has been most welcome, both spending time with my little family and some time in the garage. Last update I was doing a little work on the tramp bars on the rear axle. That required the tramp bars to be overhauled and painted. They look like stock ford units, but that have been modified to adjust the length. The rubbers were Ford anyways. 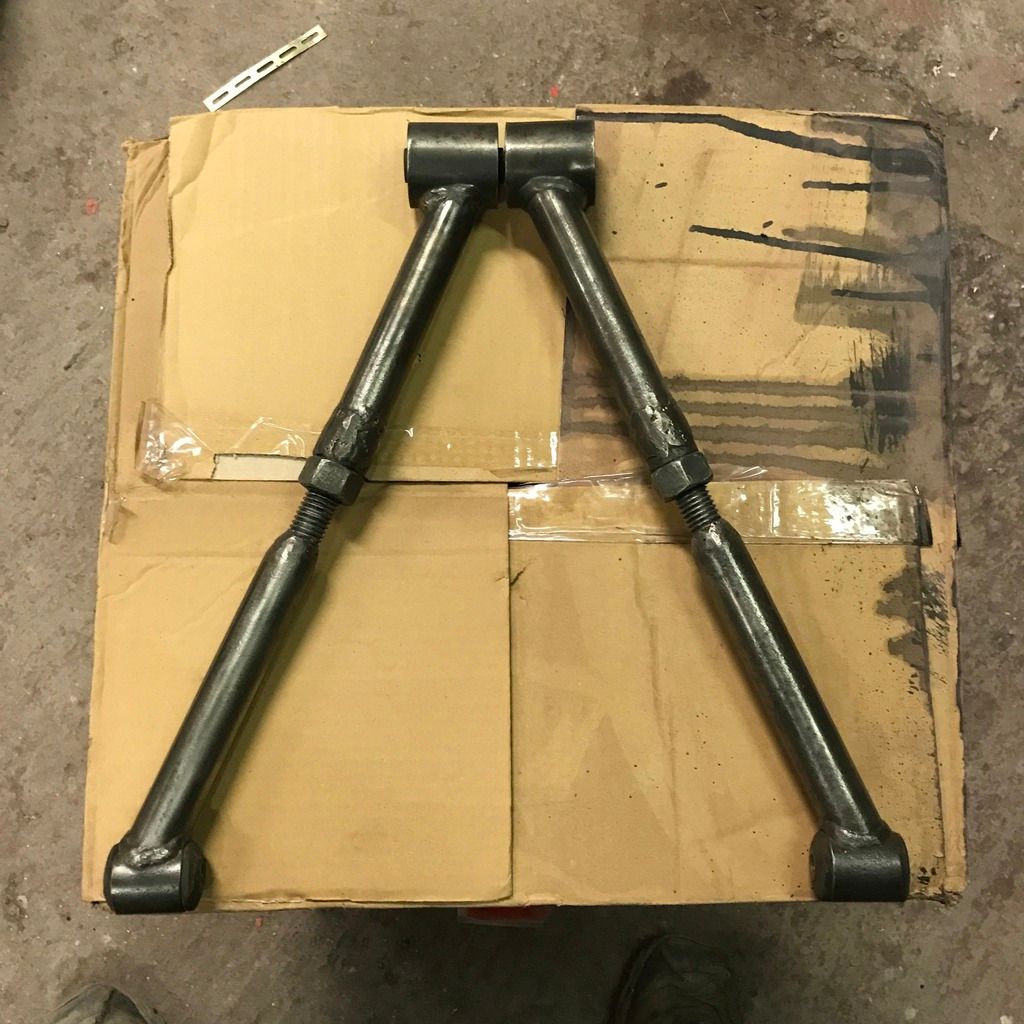 After three coats of paint: 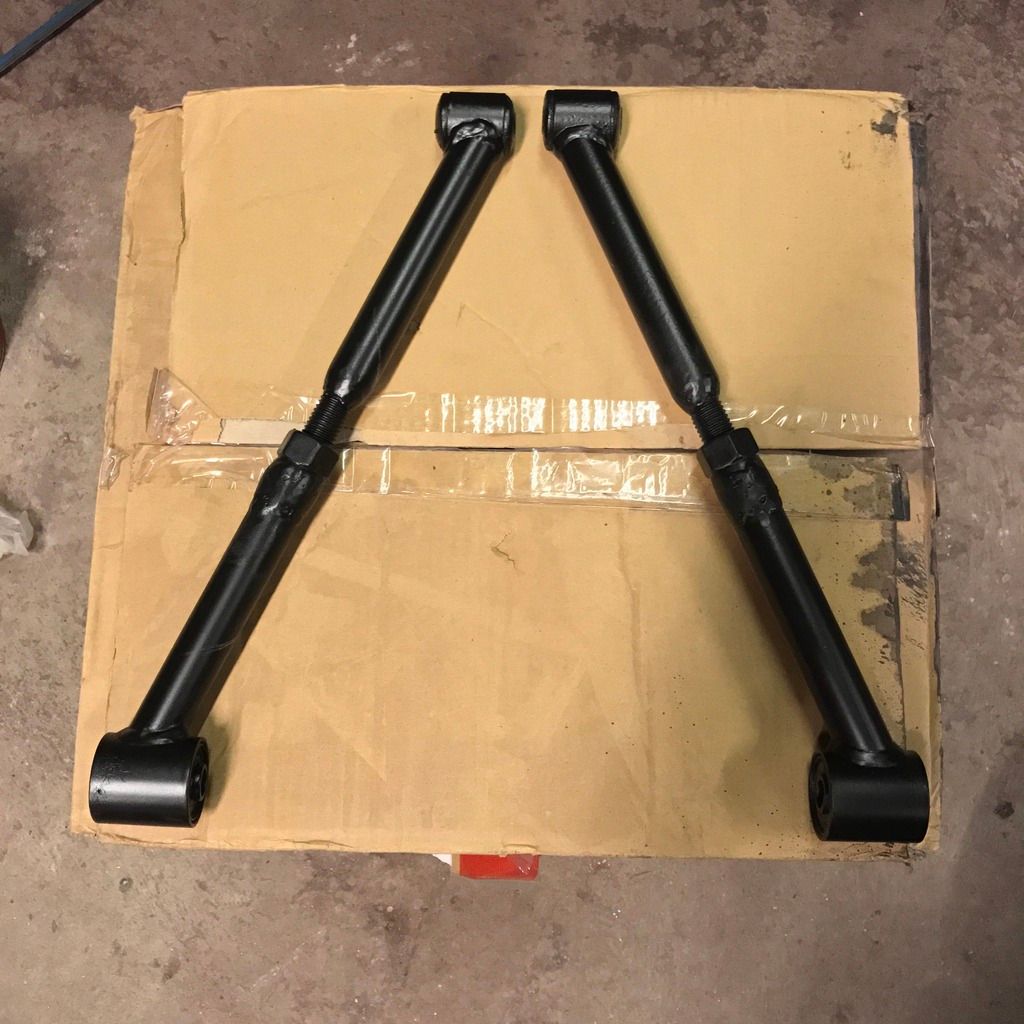 So, to get the brackets welded in place with the rear axle in situ, I had trouble getting under the car with my large welding helmet. Some masking tape, the glass from an old mask, and my protective glasses solved that conundrum. 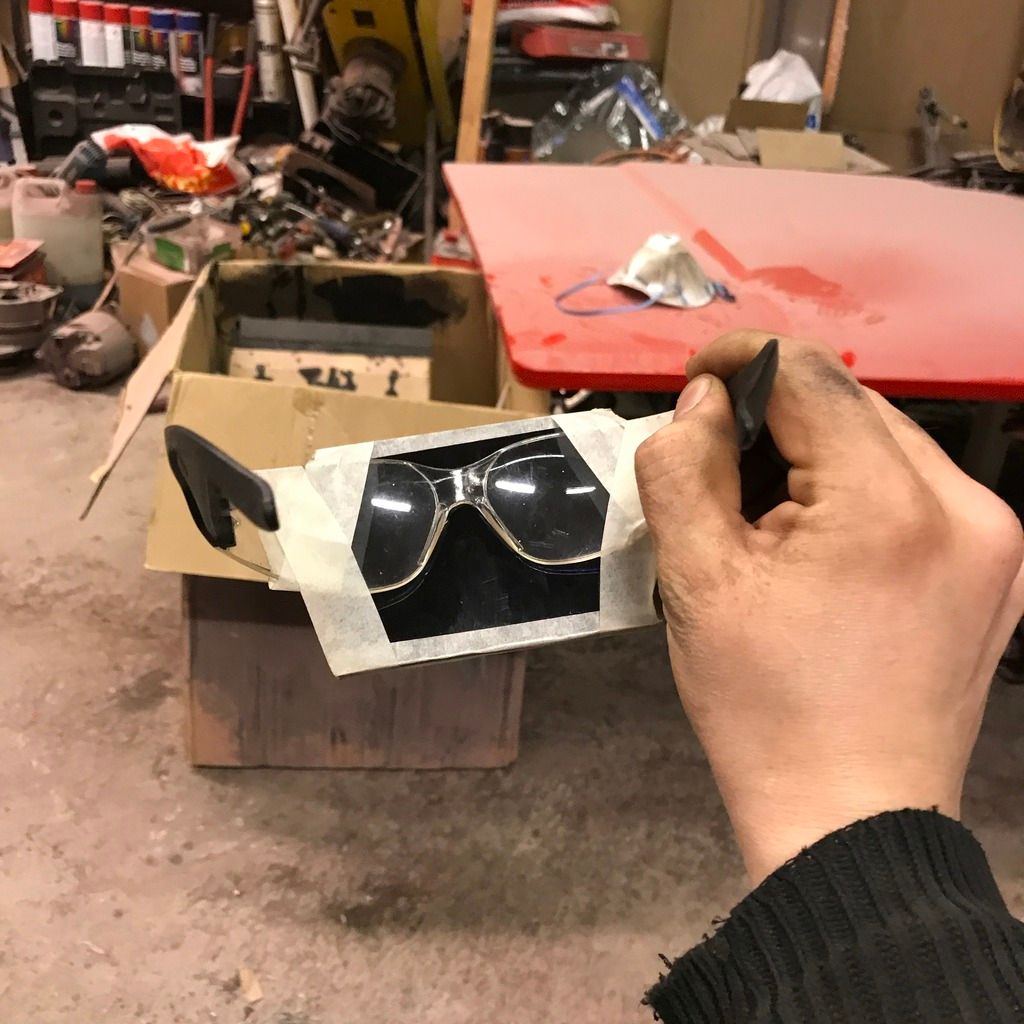 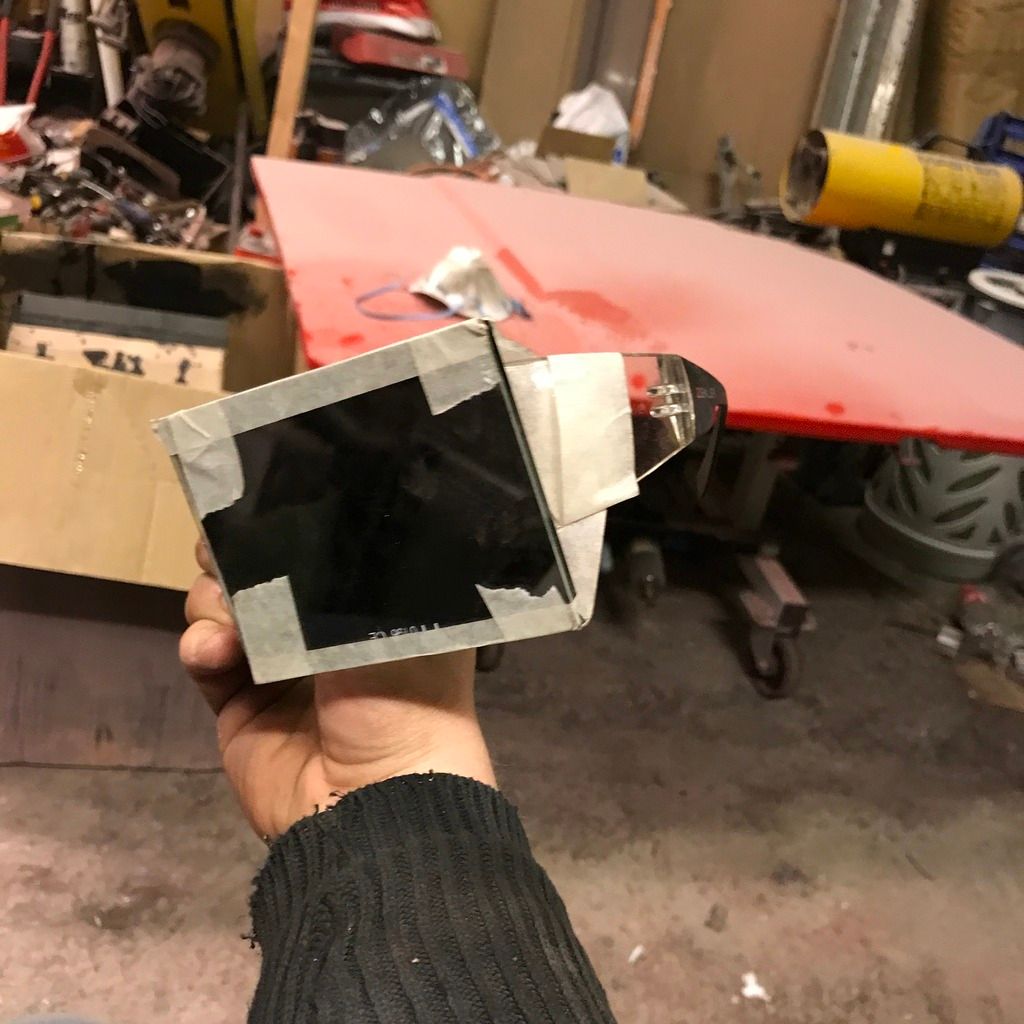 If it looks stupid, but works, it ain't stupid. Finally the brackets was welded properly on there, and the tramp bars mounted beautifully: 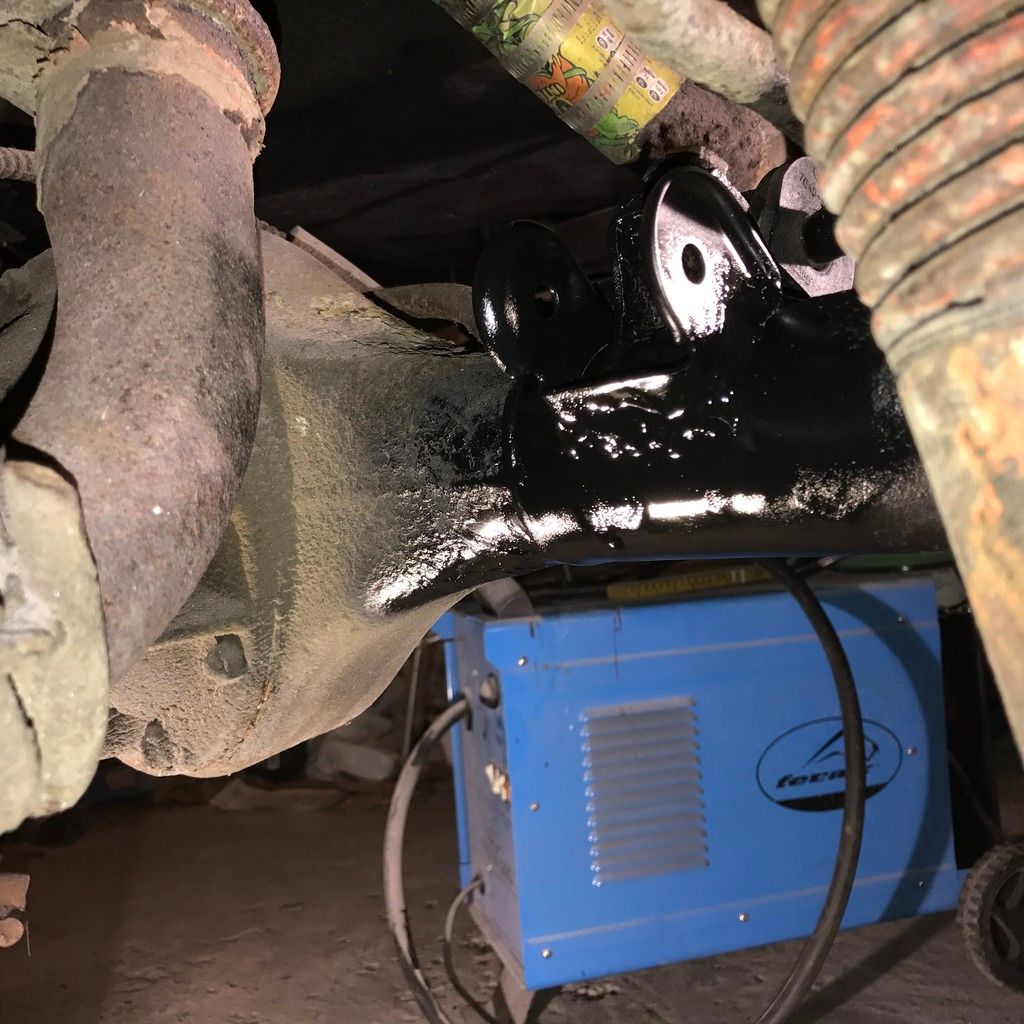 I also identified the rear shocks as adjustable Koni's. I have no clue as to what type is mounted in the front though. 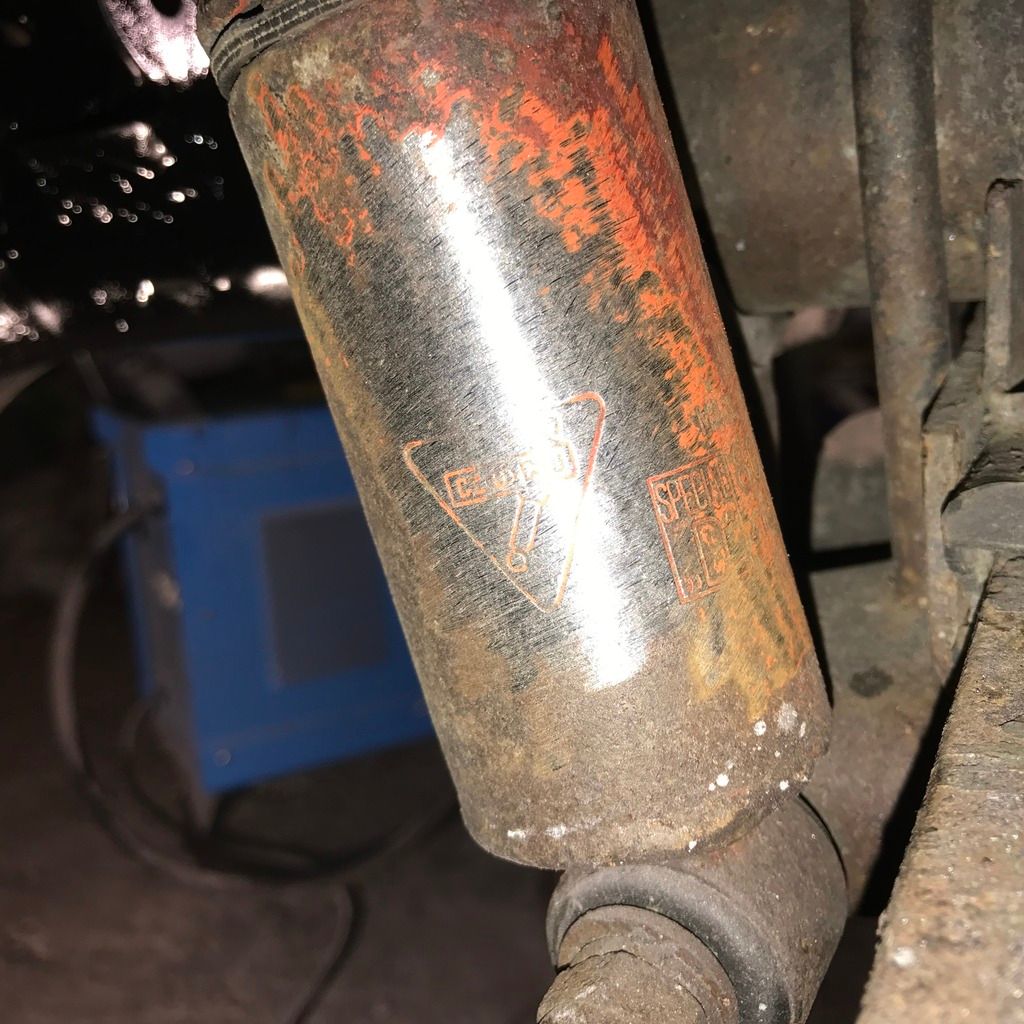 Next was the exhaust. The bend over the rear axle was in a decrepid state, so that had to be replaced. I ordered two 2" v-band joins from ebay for a tenner, and got cutting and welding: 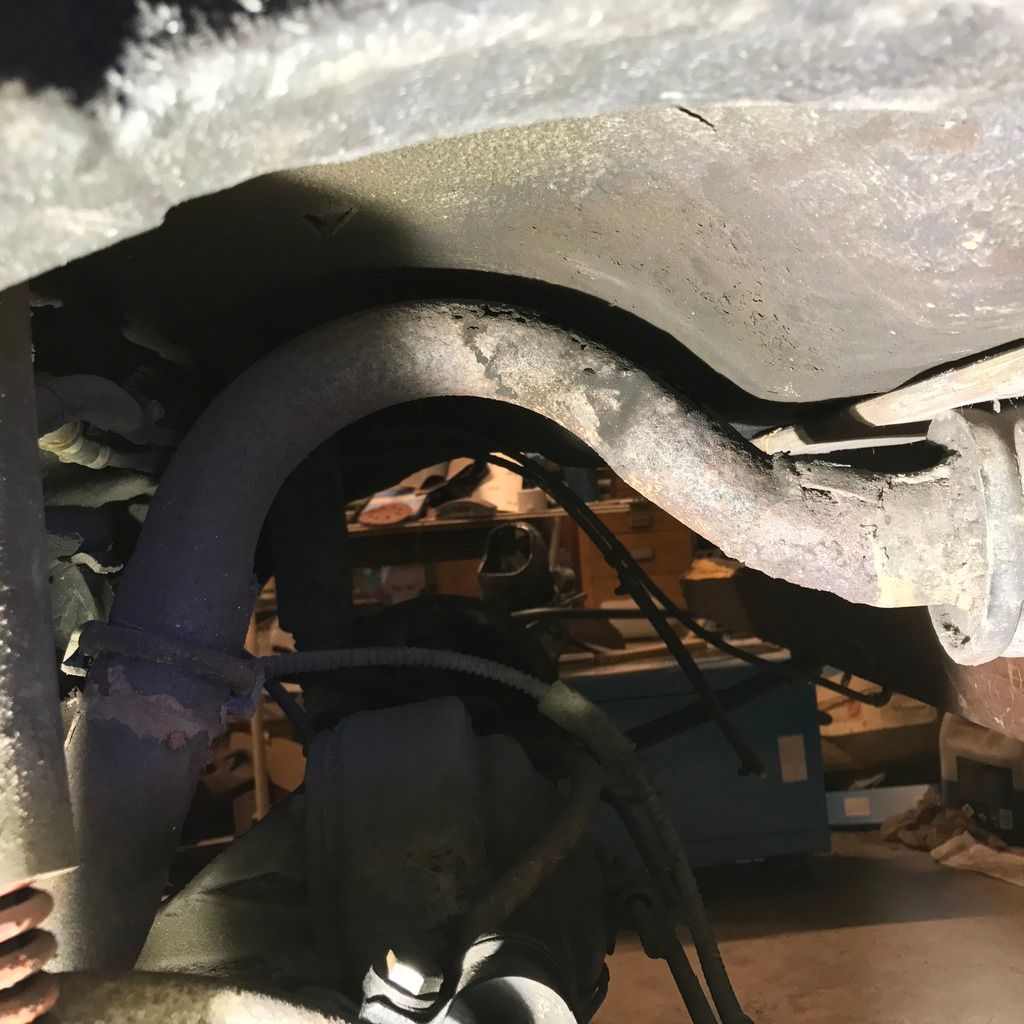 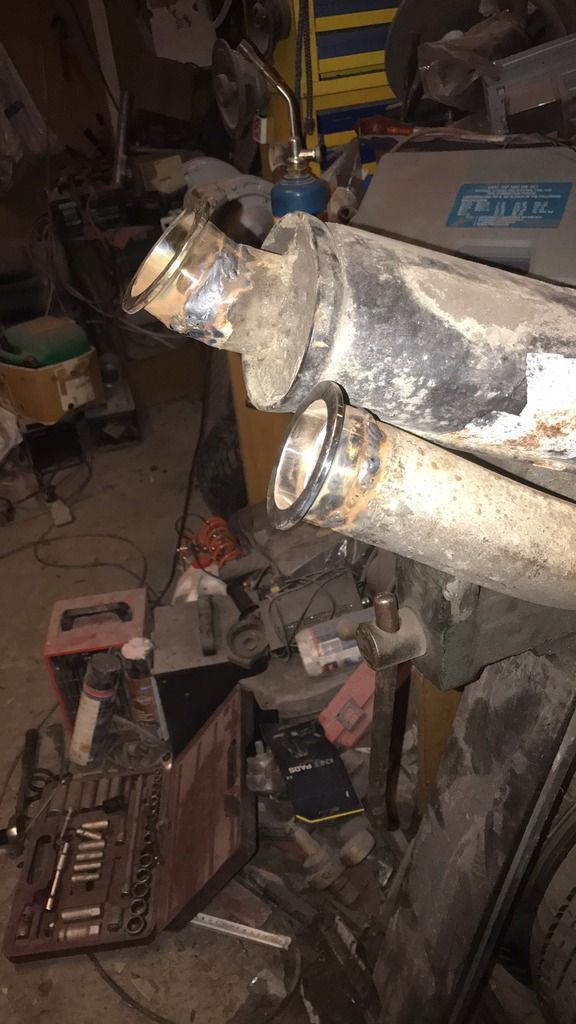 Since I am bordering obsessive compulsive, I had to paint the whole exhaust system I'm high-temp paint as well. Cue three hours of wirewheeling, finding a little hole in the first muffler and welding that, before painting it all. It was also evident that it was a 2" Simons-exhaust as well. Bonus  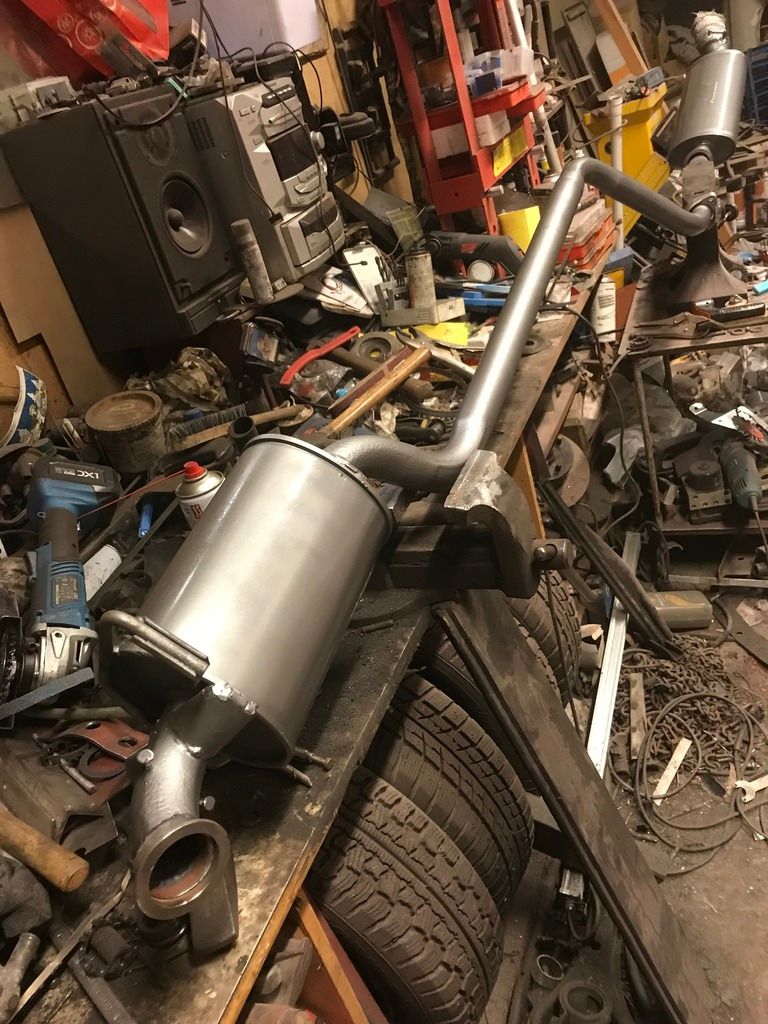 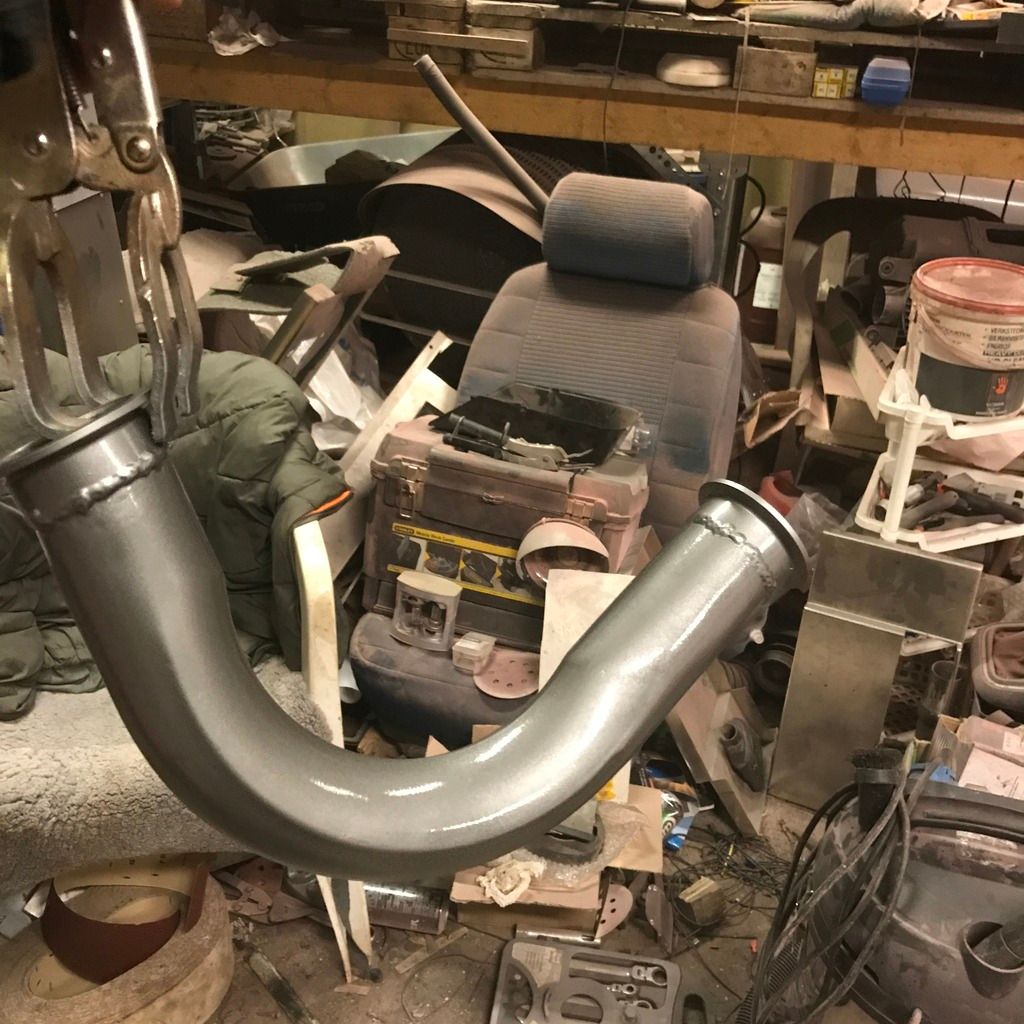 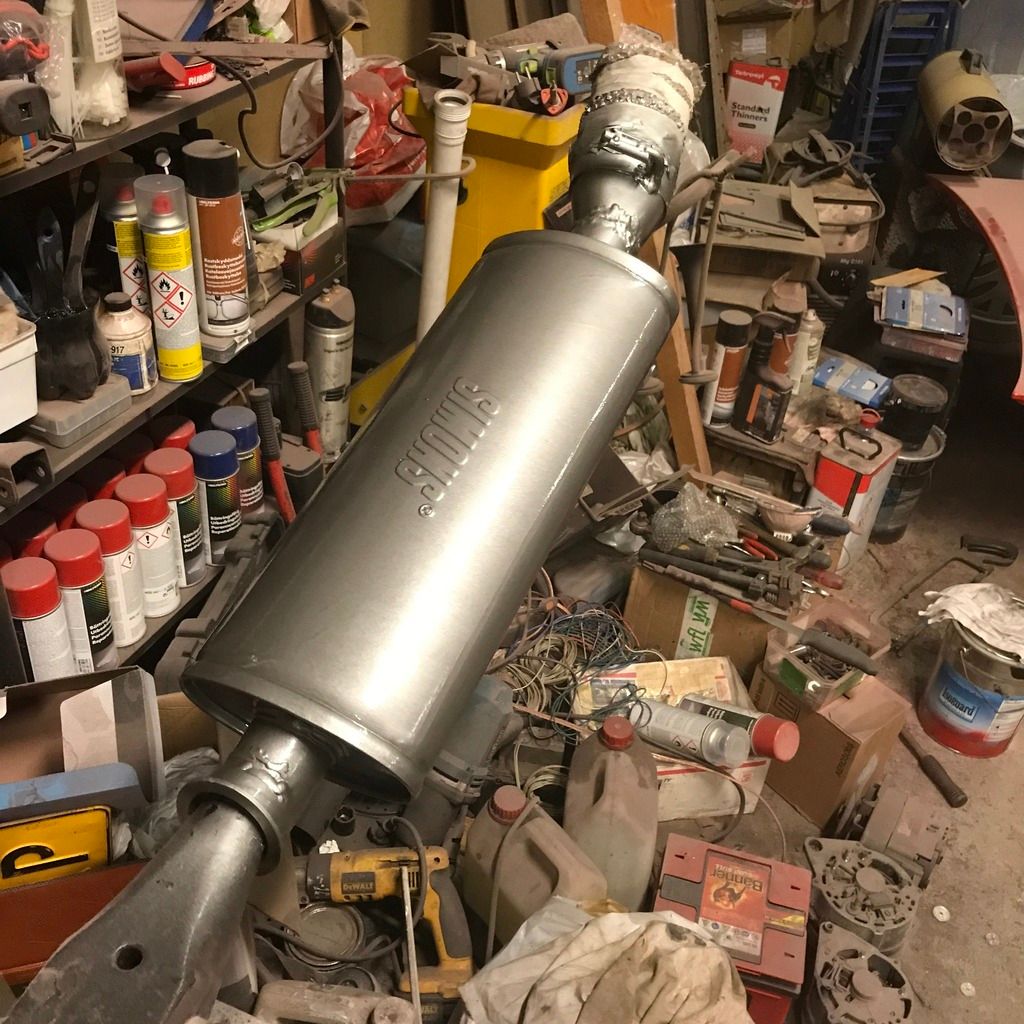 I'm abit dubious as to how well the paint will stick, but time will tell. Assembled: 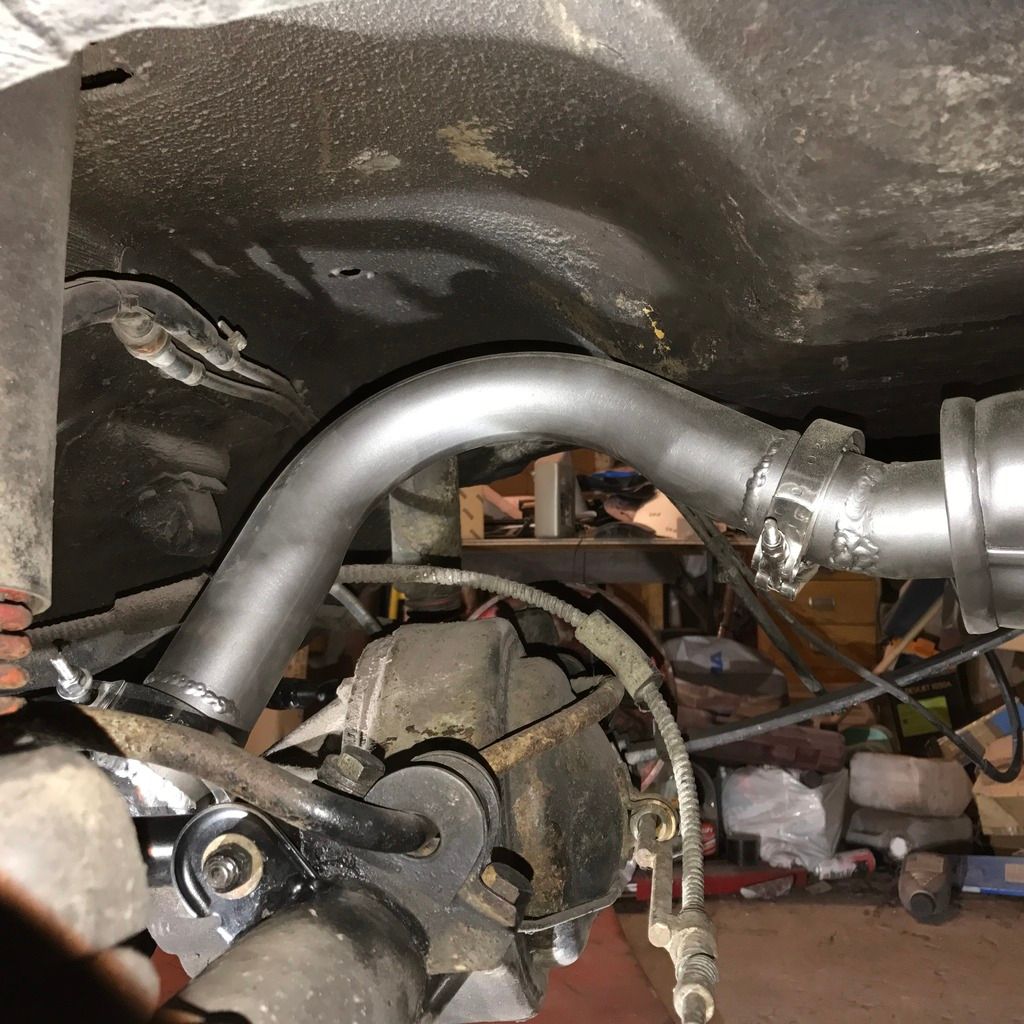 A few shots of the tramp bars, exhaust and the shocks all mounted and ready for the road. 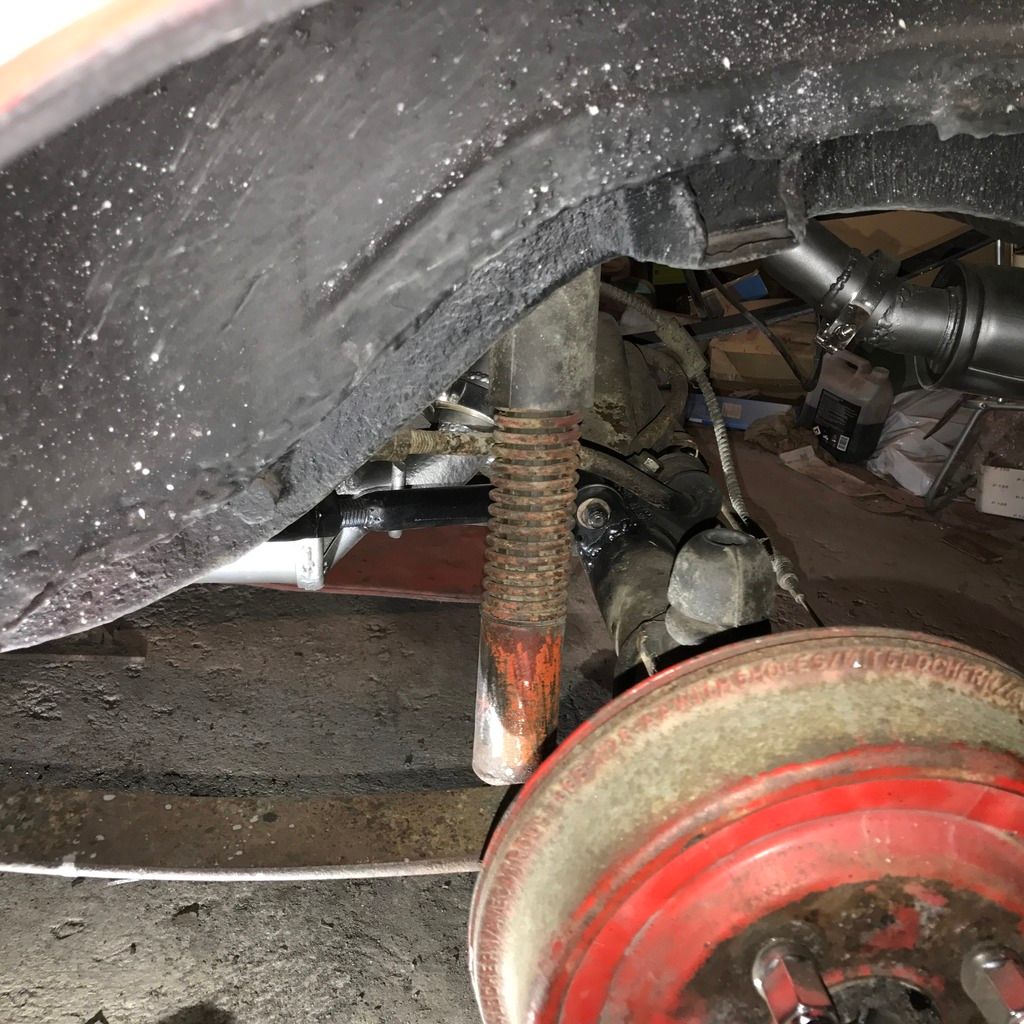 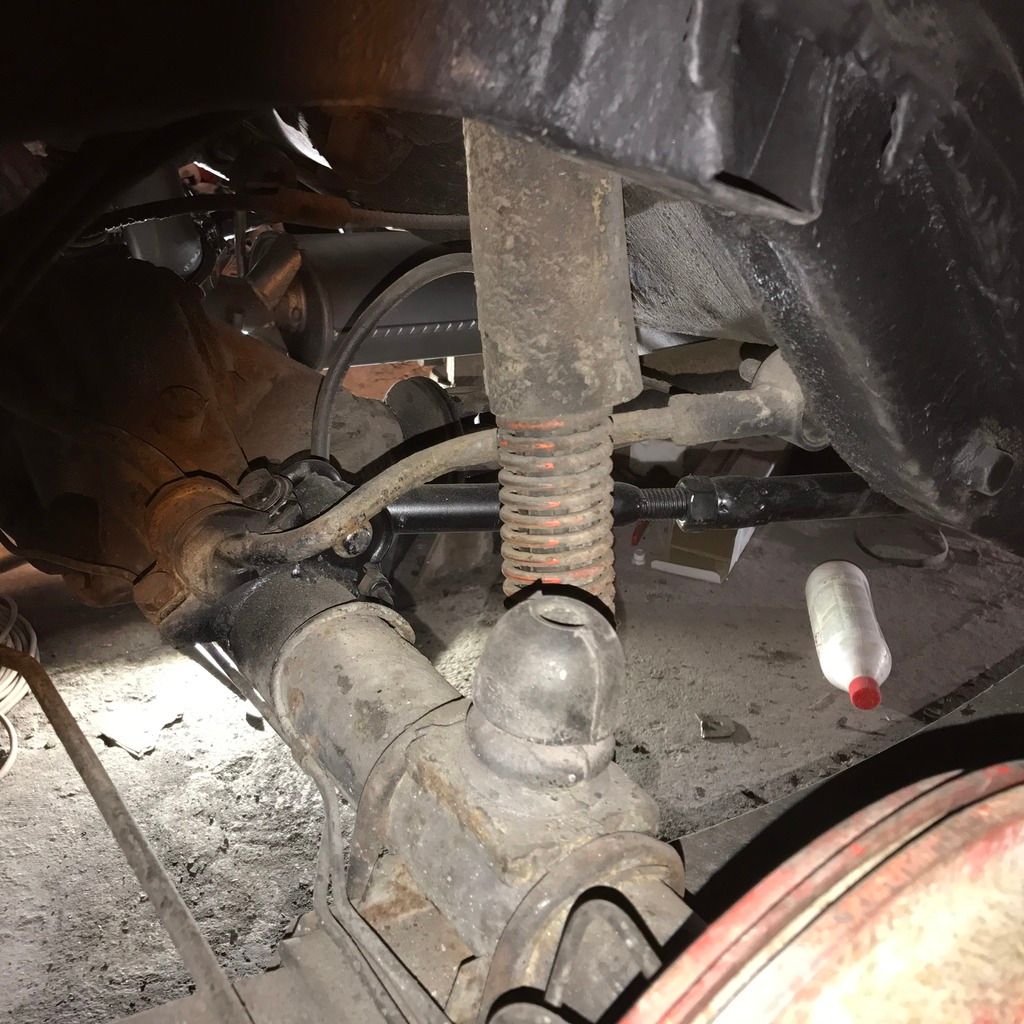 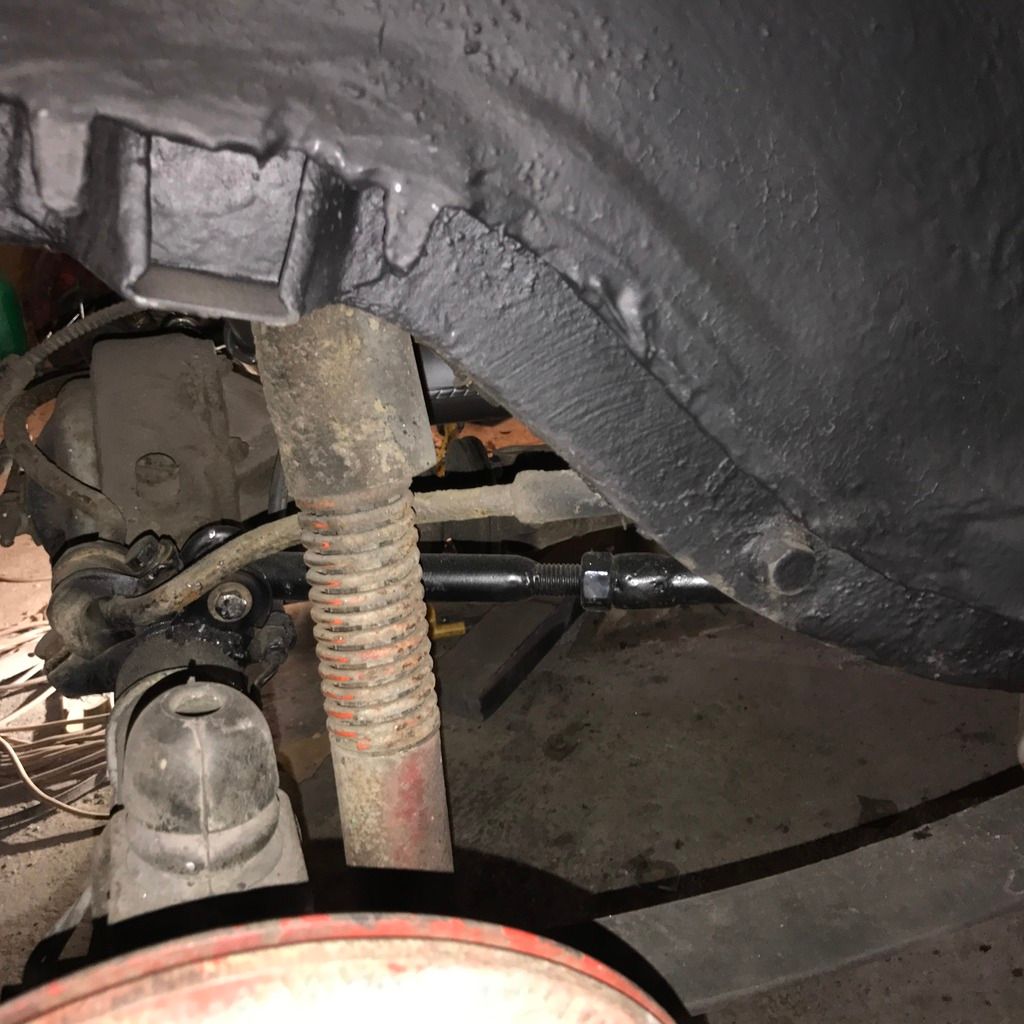 That concluded ALL the work under the car. Unless if I forgot something important. So, time for something completely different. Visual improvements! 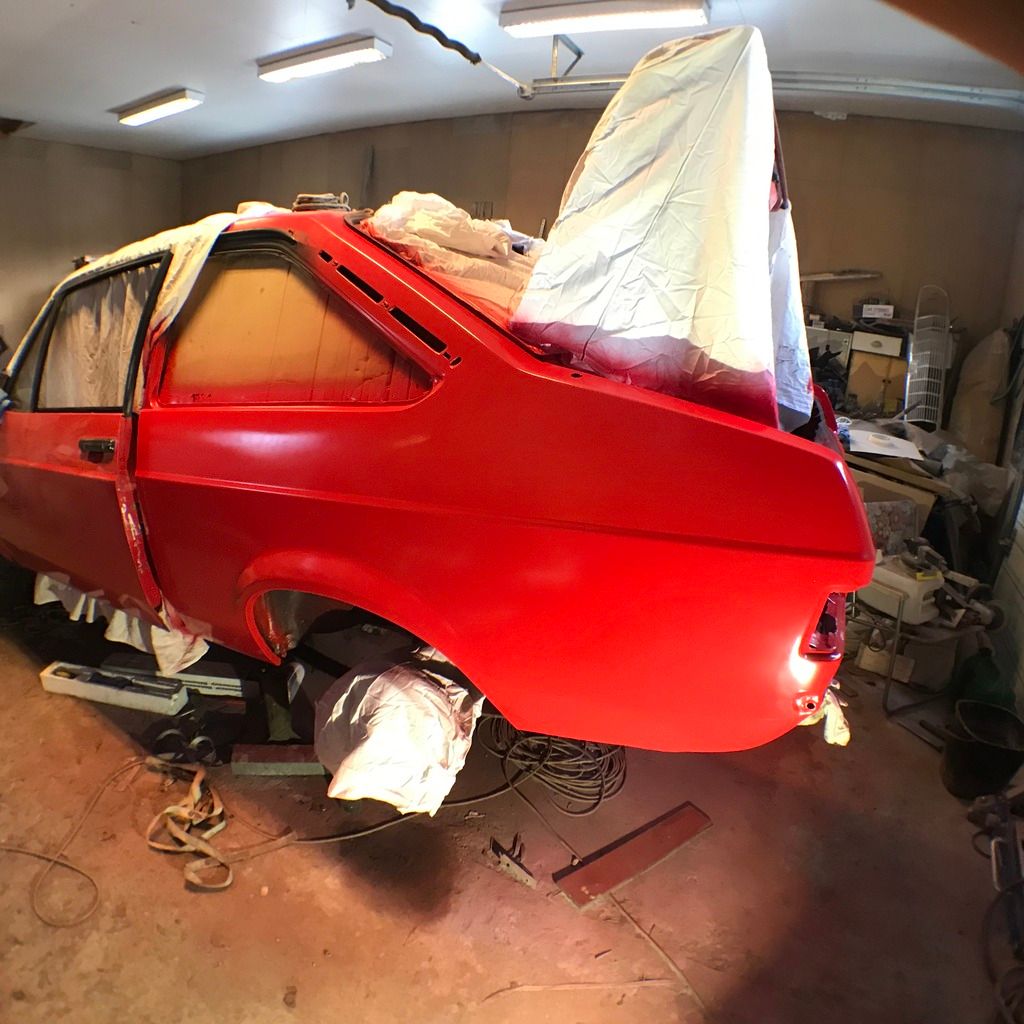 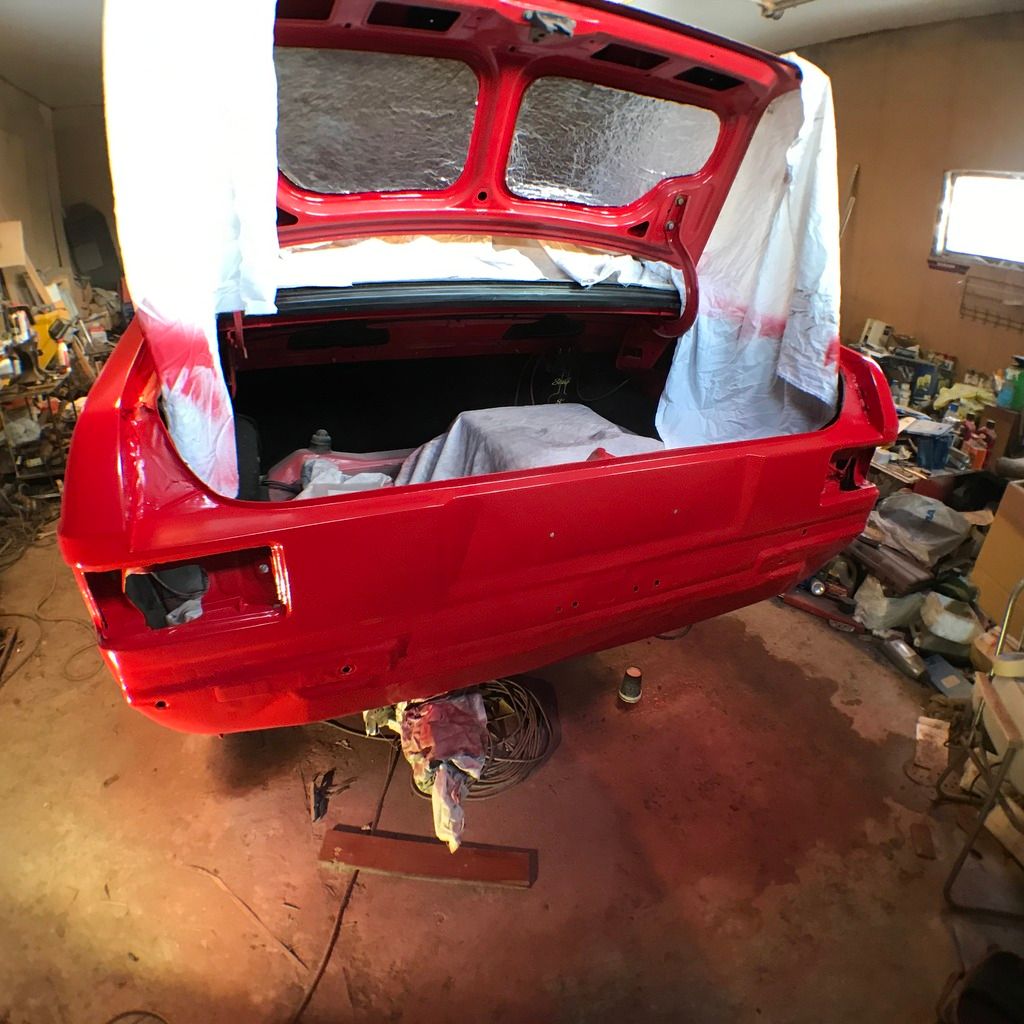 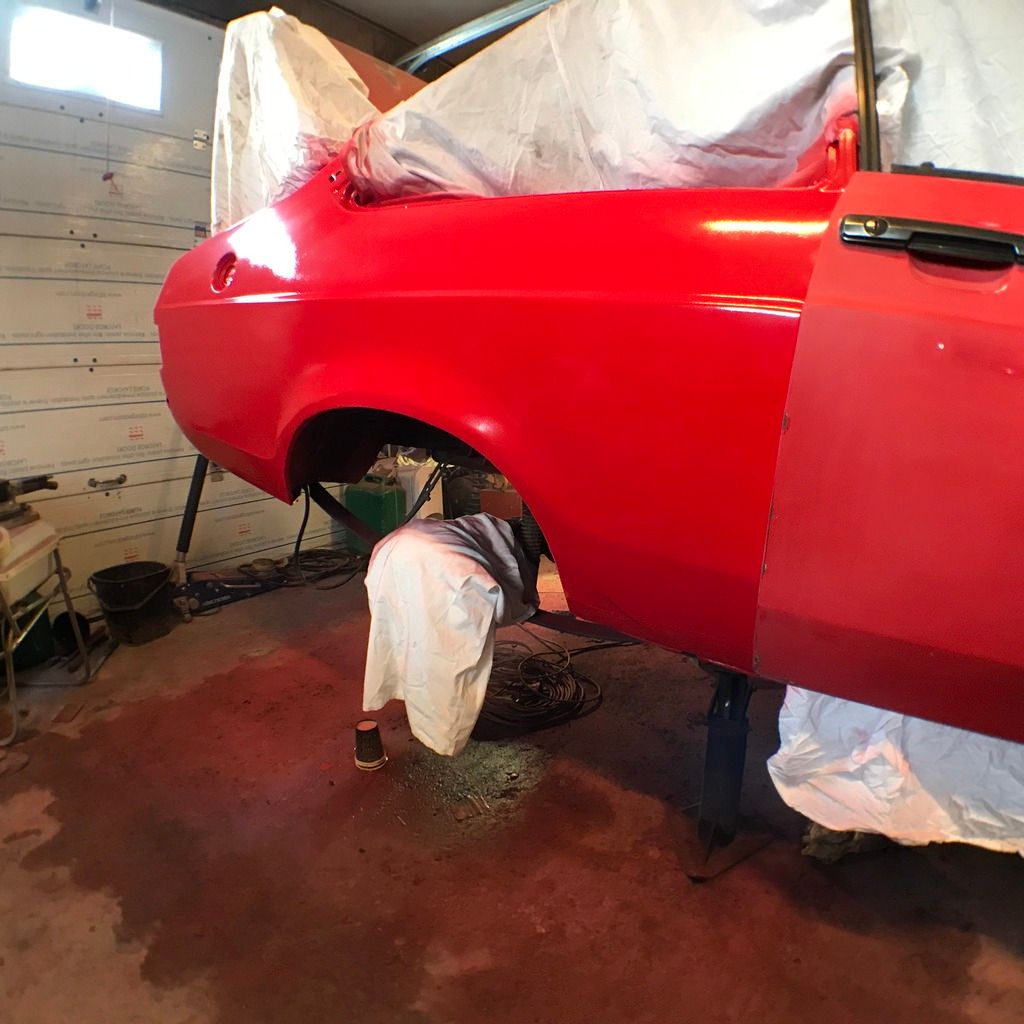 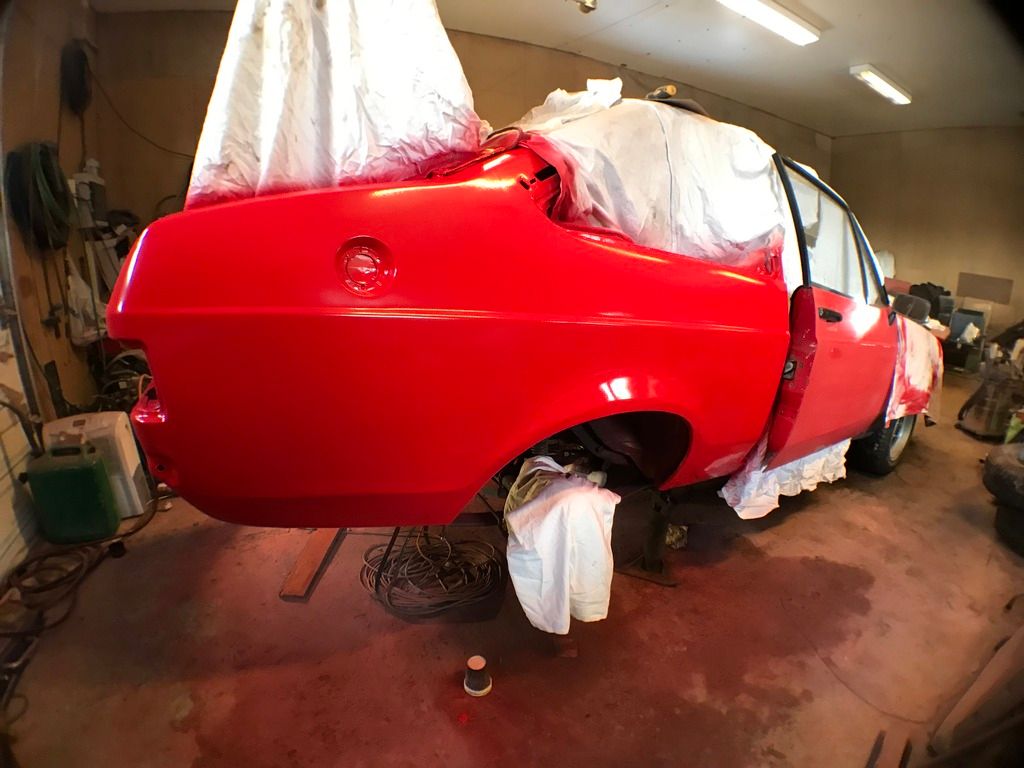 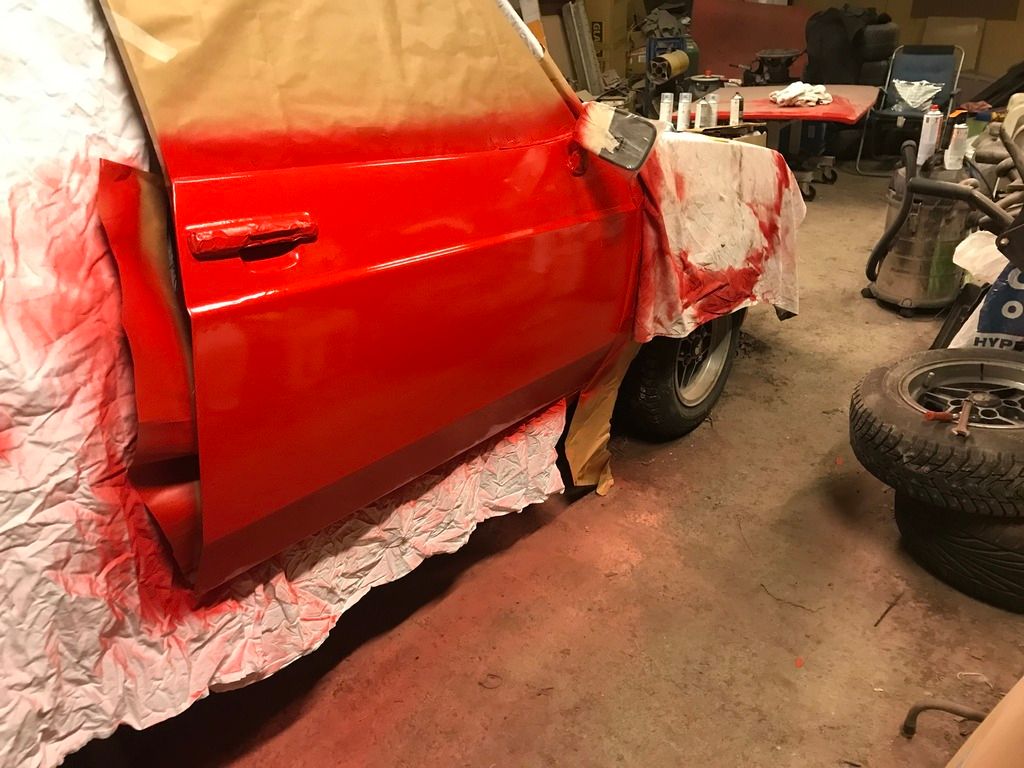 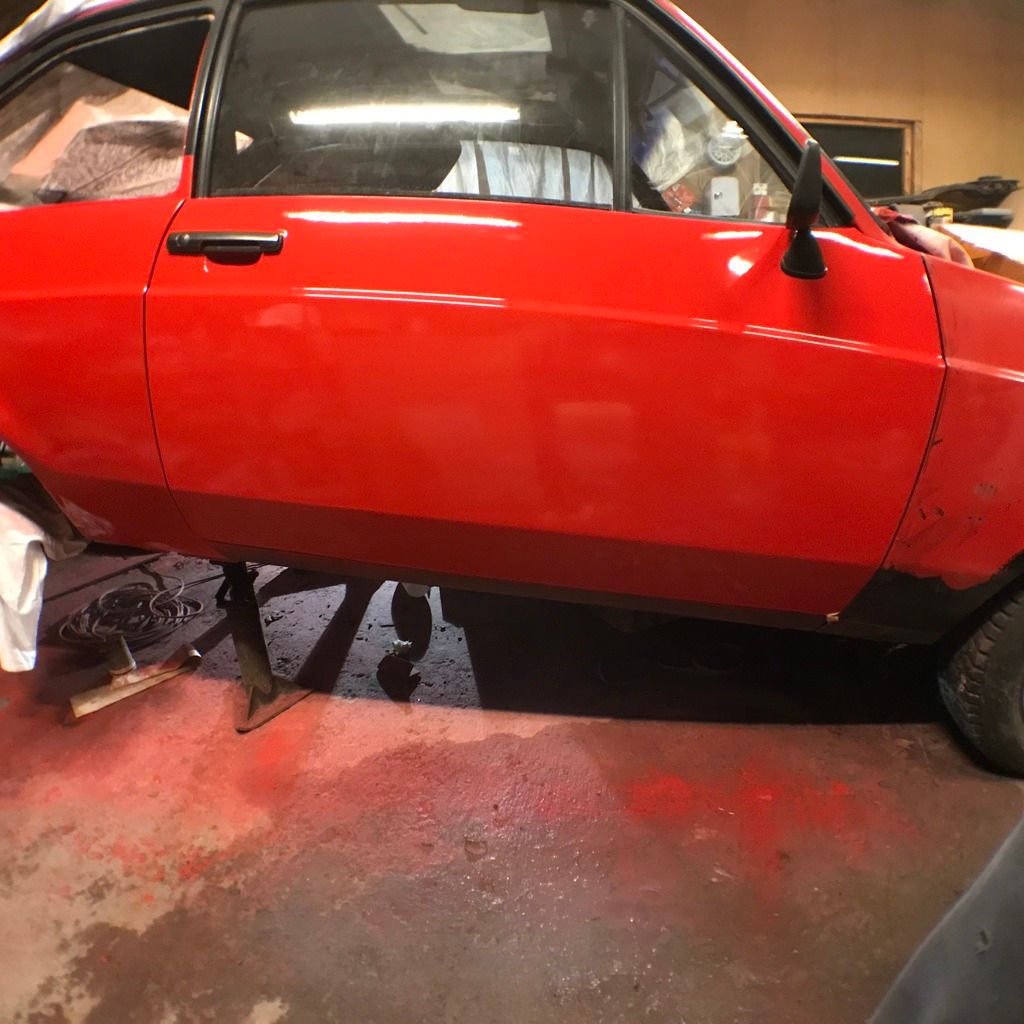 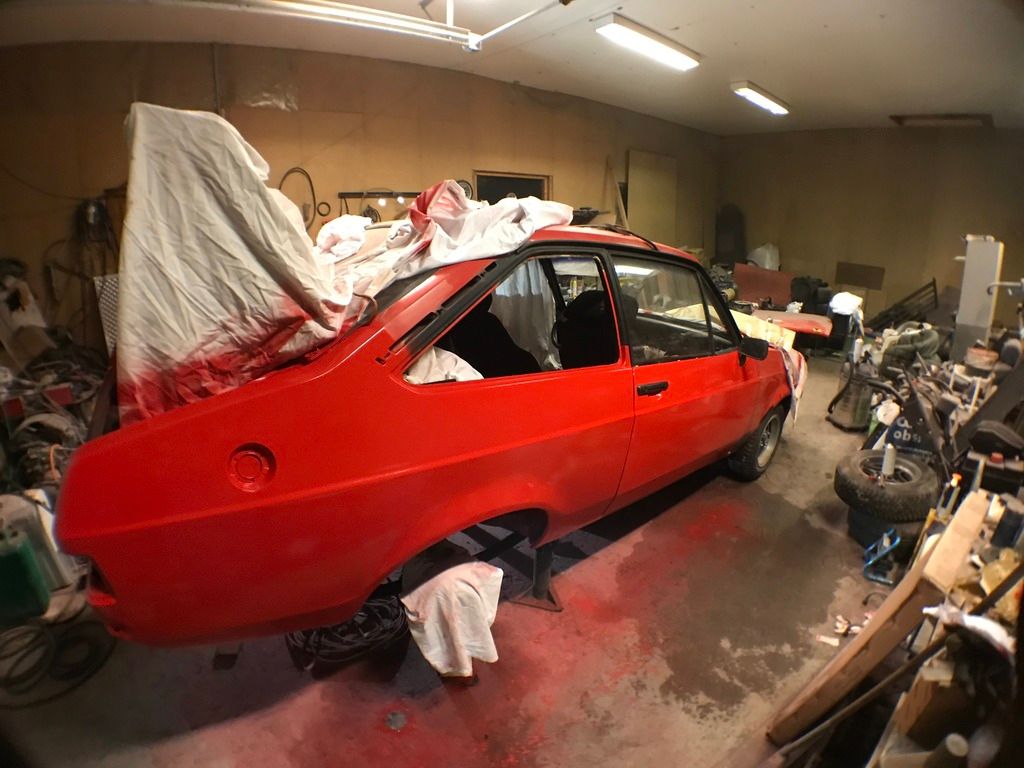 And today ended with the left door ready for paint, minus the masking for course. The doors needed little help, they were straight af with little to no blemishes, so everything was fixed with wetsanding. 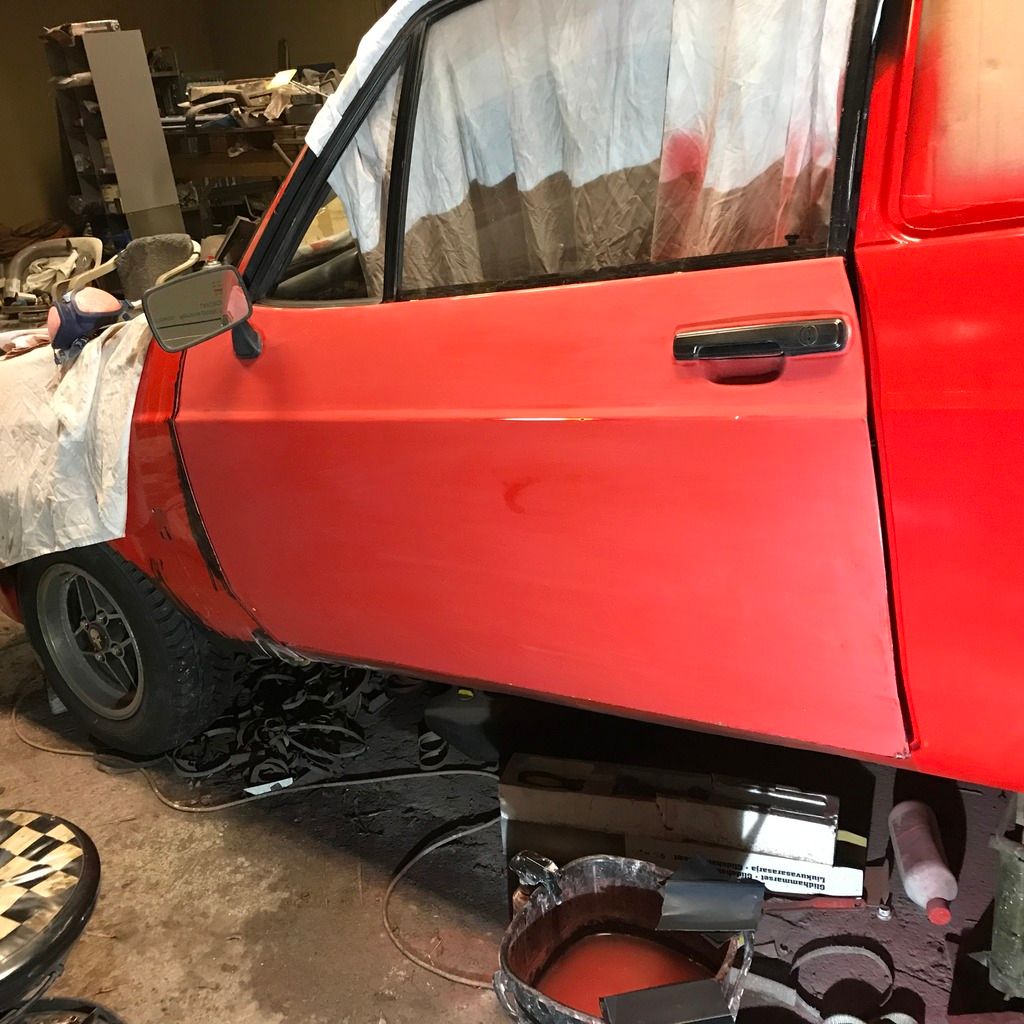 I weep a little when I try to count the hours spent on the car to come to this stage, but I hope it will be worth it in the end. The paint will not be perfect, but I wont be afraid to use the car anyways. Nice from a far, but far from nice  It will be drying for at least a week after I'm finished with the paint before I take it out of the garage for it's MOT, hopefully it will be enough. 1k clearcoat is not known to be very durable, but I hope it will stand up to road salt and stuff like that. I will also sand down the clearcoat with 1500/2000 grit sandpaper and machine polish the paint when it has had time to settle. Thanks for reading! |
| |
|
|
funkyhunk
Part of things
Old Ford's R Us
Posts: 265
|
|
Mar 30, 2017 16:40:54 GMT
|
Too long since I last spotted your progress, & good to see the developments. The evidence of thick old filler in the rear sides is depressing, but it will be great just to have it safe & sound, usable & looking respectable to be enjoyed rather than sitting around deteriorating. Thanks Yeah, well the only really thick areas of filler I've found was the rear right quarter, and the area under the left rear window where welding has been done earlier in the cars life. The rest of the car has around 1mm layer of filler for some reason. Too much for my taste. But I managed to get rid of most of the filler on the RR quarter, with the thickest parts around 5mm. Nearly no filler anywhere else. Small update coming. I got this thing from my dad. It's supposed to mount under the car door, and light up when you open the door, to show the ford-logo on the ground. I will not use this on the mk2, but maybe on some of the other fords I have. 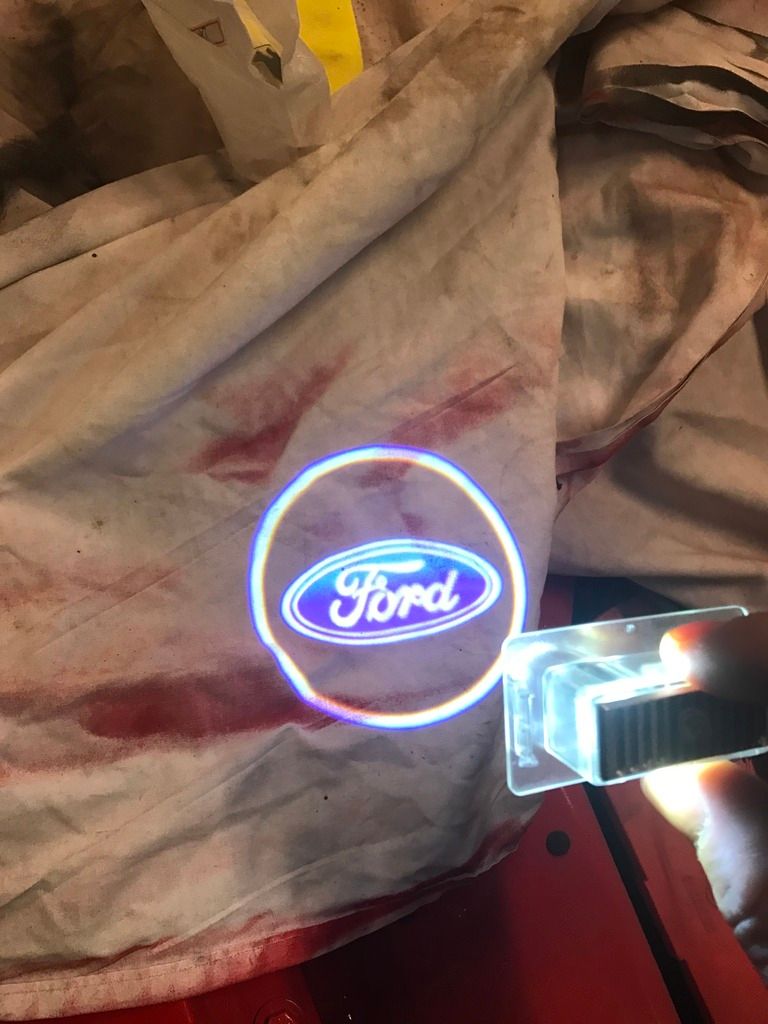 So, cleaning and checking the brakes next. Brake cylinders looked manky, but nothing a little elbow grease couldn't fix. 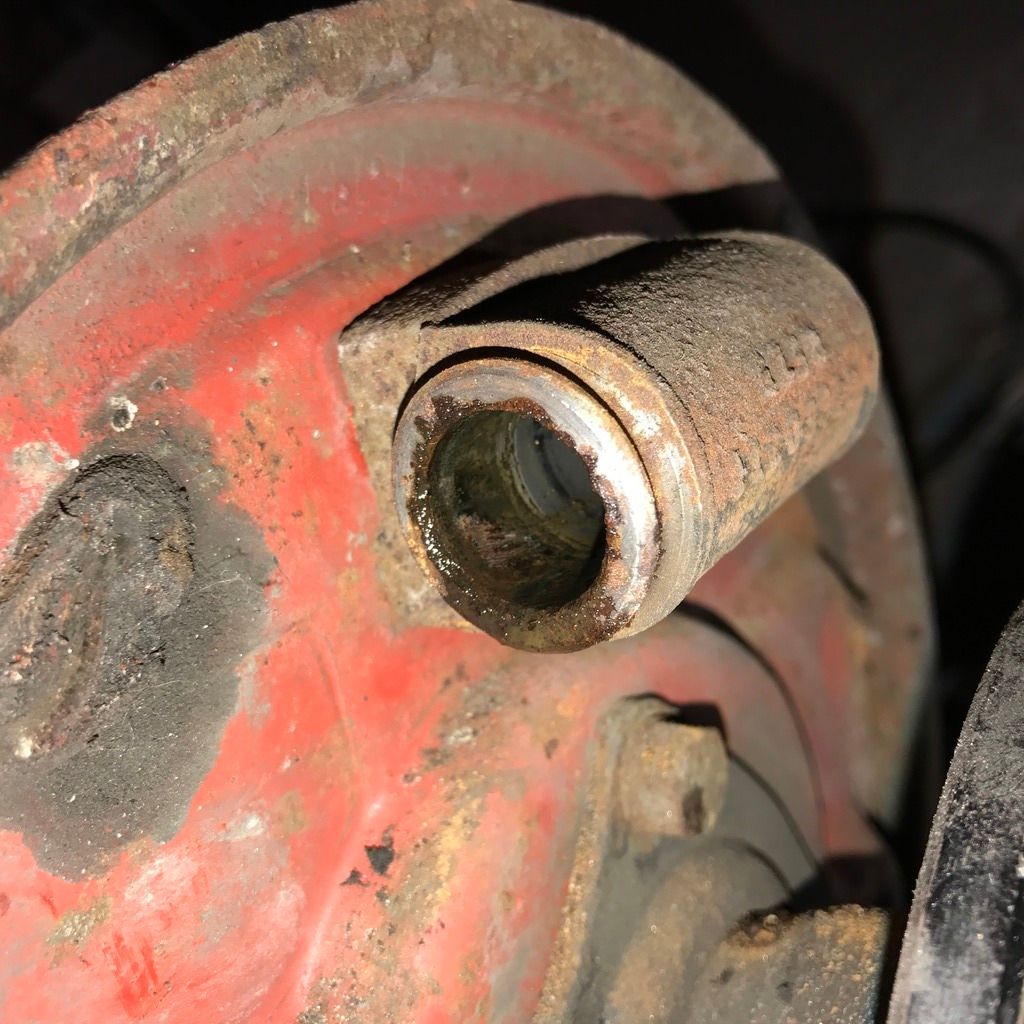 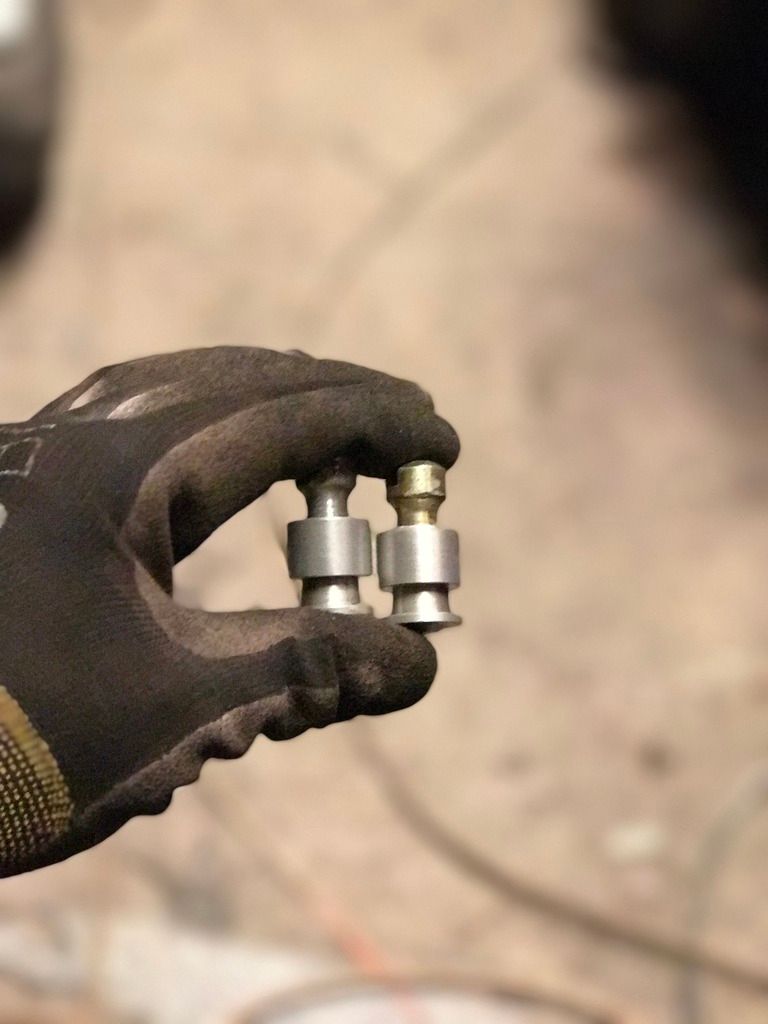 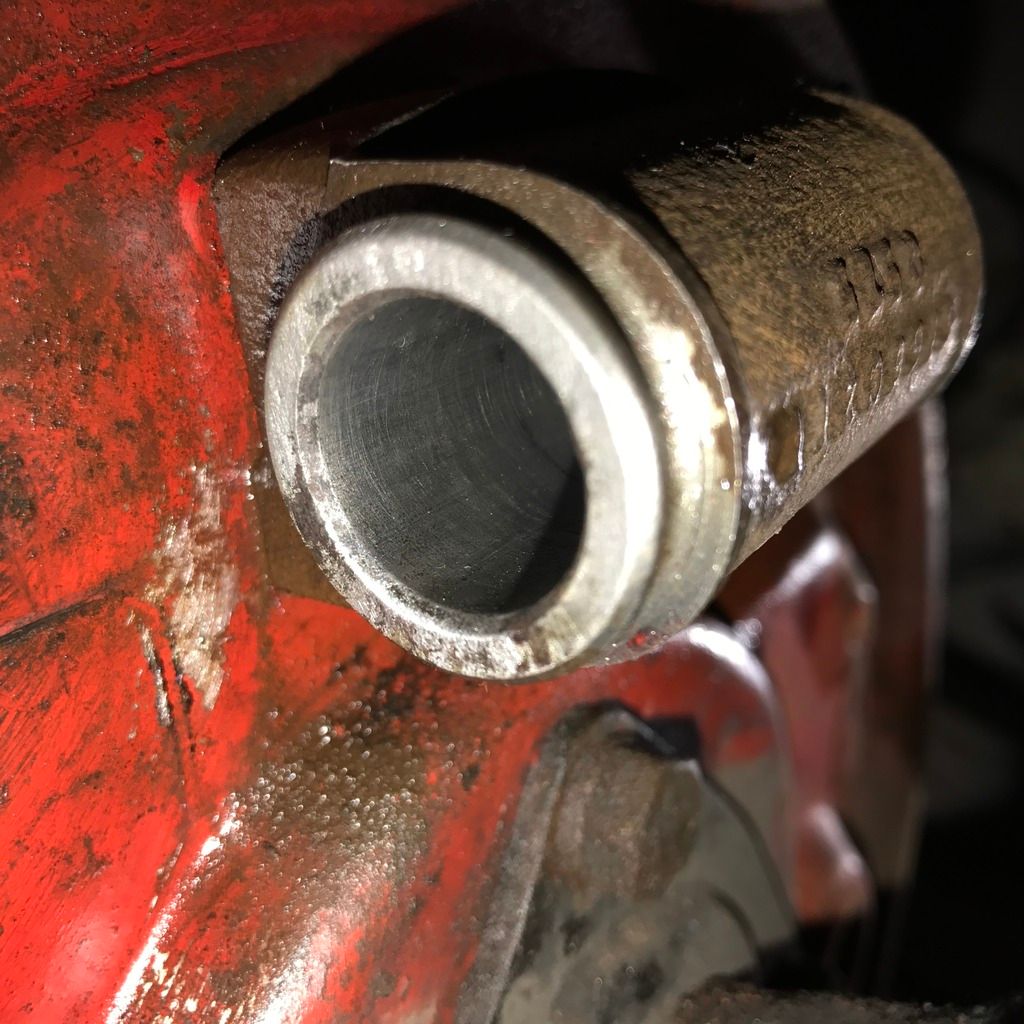 E-brake adjustment thingy: 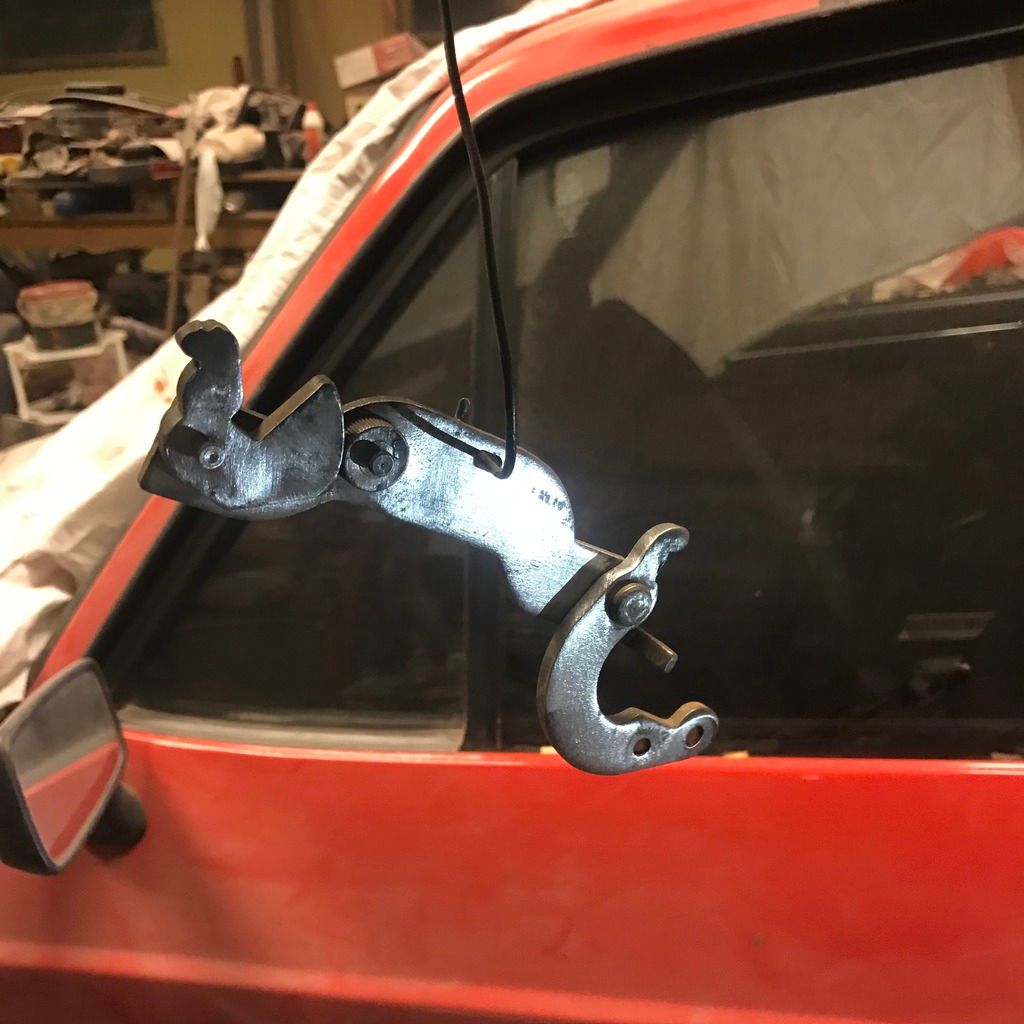 So while I was in the area i wanted to change both outer wheel bearings. When I bought the car I remembered a lot of rumbling from the rear axle, so I ordered a complete rear bearing and diff kit from bearingkits.co.uk for 50£. The slide hammer didn't at first work, as I mounted it through one of the holes in the flange. 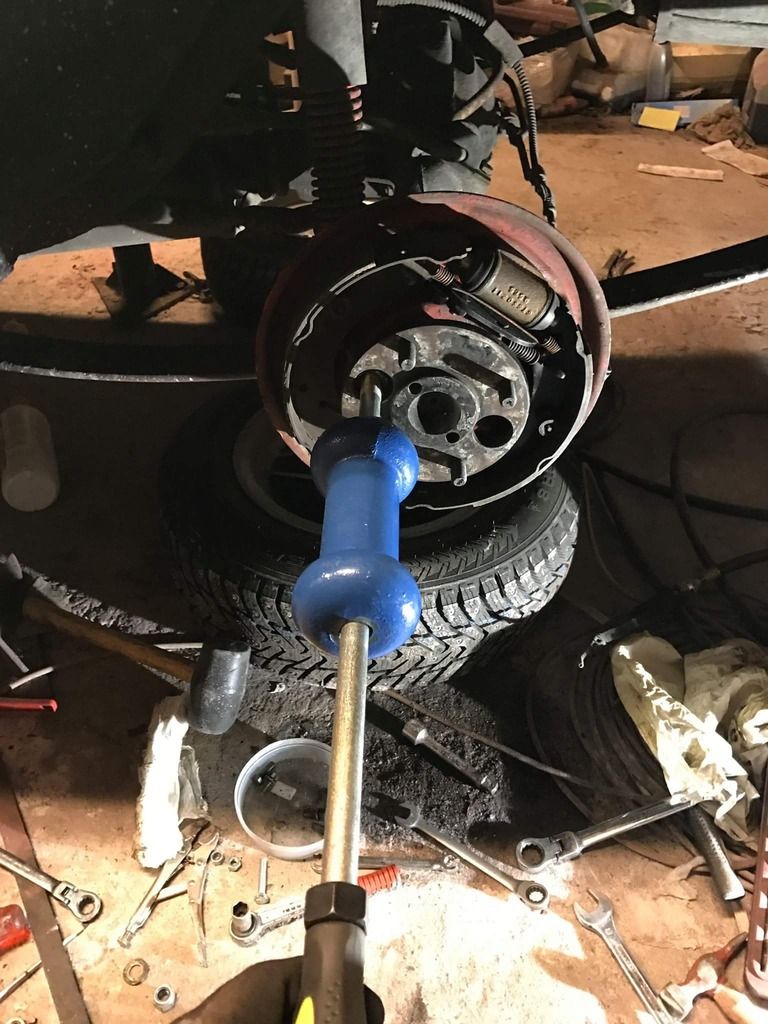 So then I made a bracket with three holes, and set the slidehammer through the centre hole. Worked like a charm, three pulls and it was out. 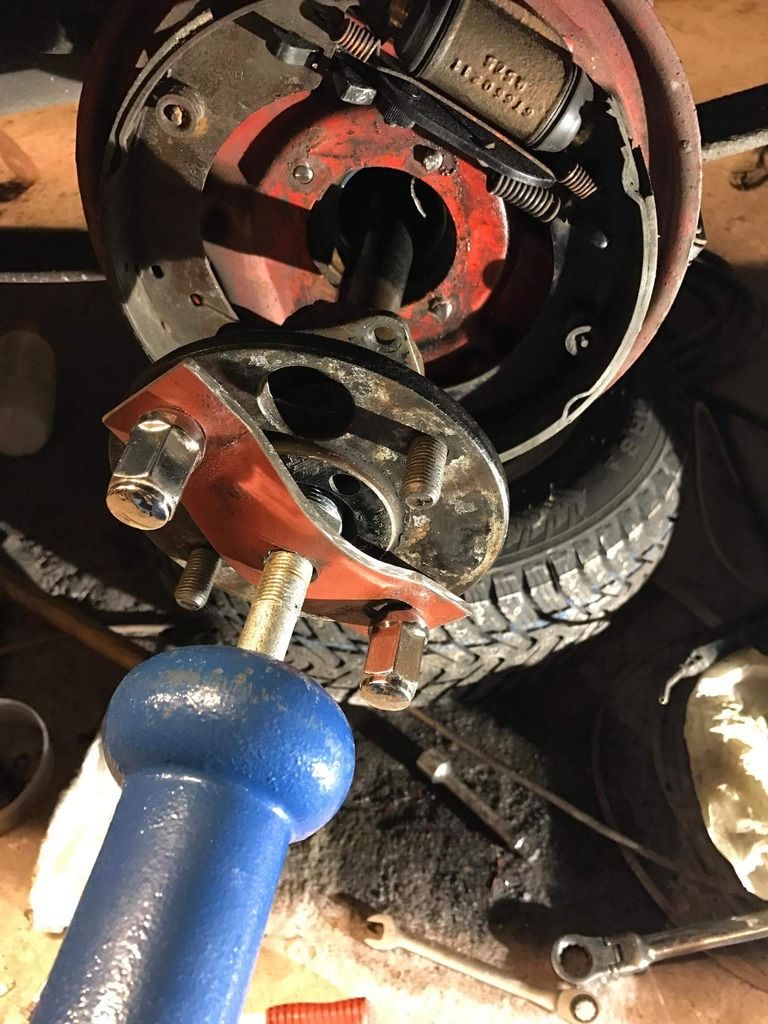 Good thing I ordered the bearings beforehand, the worst bearing looked like this:  Then i looked at the tramp bar placement. Tis rear axle had previously come from a 1600 sport, so it had the rear stabilizer bar, but no tramp bars. The Mk2 RS had rear tramp bars, but no stabilizer for no reason. But now my Escort will have both The previous "genious" owner had mounted the tramp brackets on the underside of the rear axle, effectively making them useless as evident in these photos:   The angle of the bars was now paralell to the leafs, and on the top of the axle. Rough placement, awaiting welding: 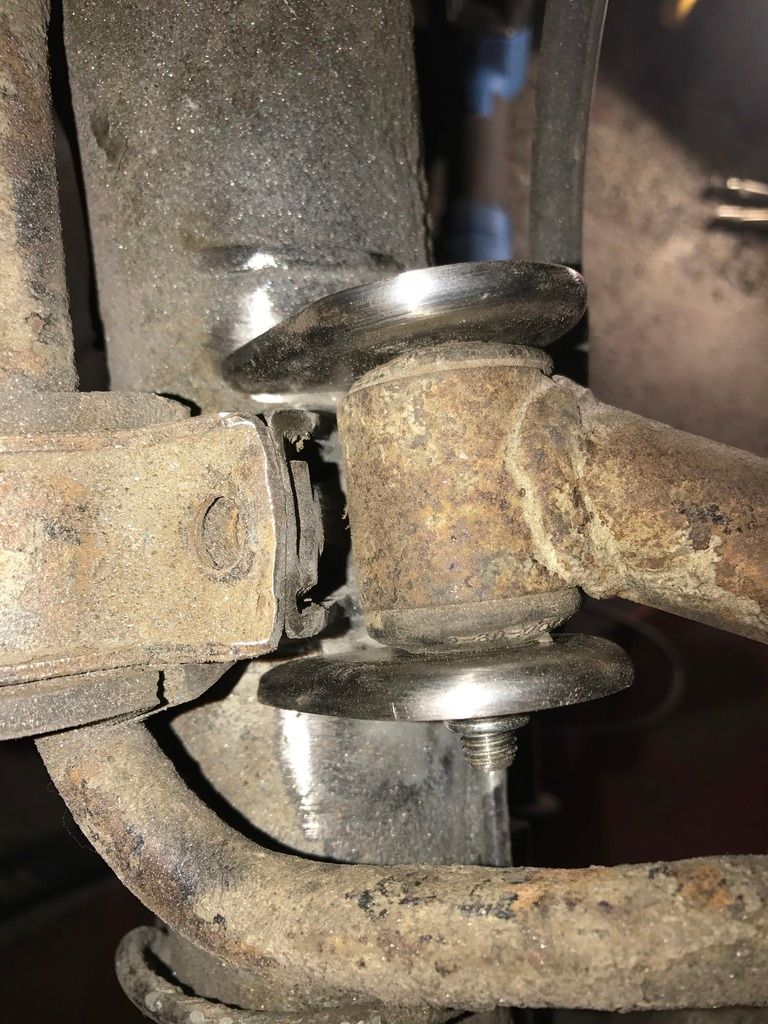 Measurements on both sides is being made to make sure they are in level in relation to each other. Pictures will follow next update. Thanks for reading. |
| |
|
|
funkyhunk
Part of things
Old Ford's R Us
Posts: 265
|
|
Mar 22, 2017 23:43:45 GMT
|
Good to see you moving on with the project Ståle  Thanks Richard. Progress is progress i guess, regardless of the glacial pace this project moves forward with Time for 'nother update again! A month since last time, but nevertheless I've made some progress. Progress moves forward at a glacial pace tho, bondo and paint takes an awful long time to do properly. Especially since I'm a n00b when it comes to paint, and have to fumble my way every step I take. Also, I'm in a full time job, have a swmbo, and a soon to be two year old girl at home that requires my attention as well. Sometimes I manage three maybe four nights a week, of maybe three four hours a piece. Regardless, some things have progressed: Both rear quarters have been filled/primered and wetsanded. Some pictures to follow. Rear left after first layer of bondo, with a coat of sprayable filler on top. It started to run abit since it was fairly cold in the garage, with -15c outside. 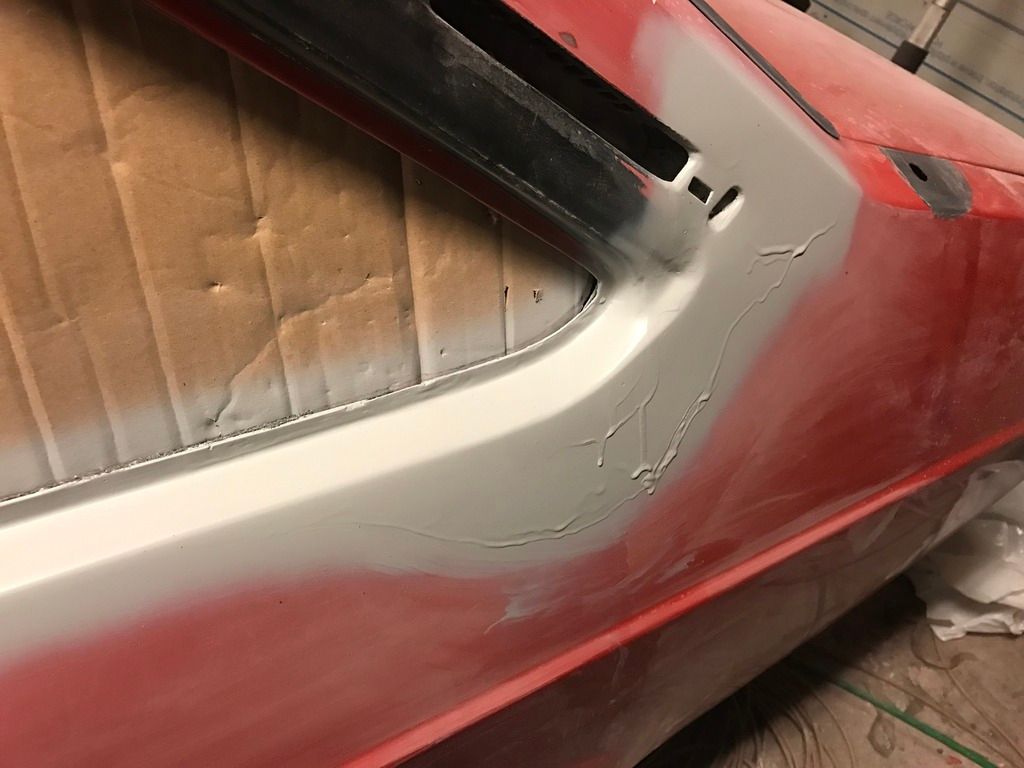 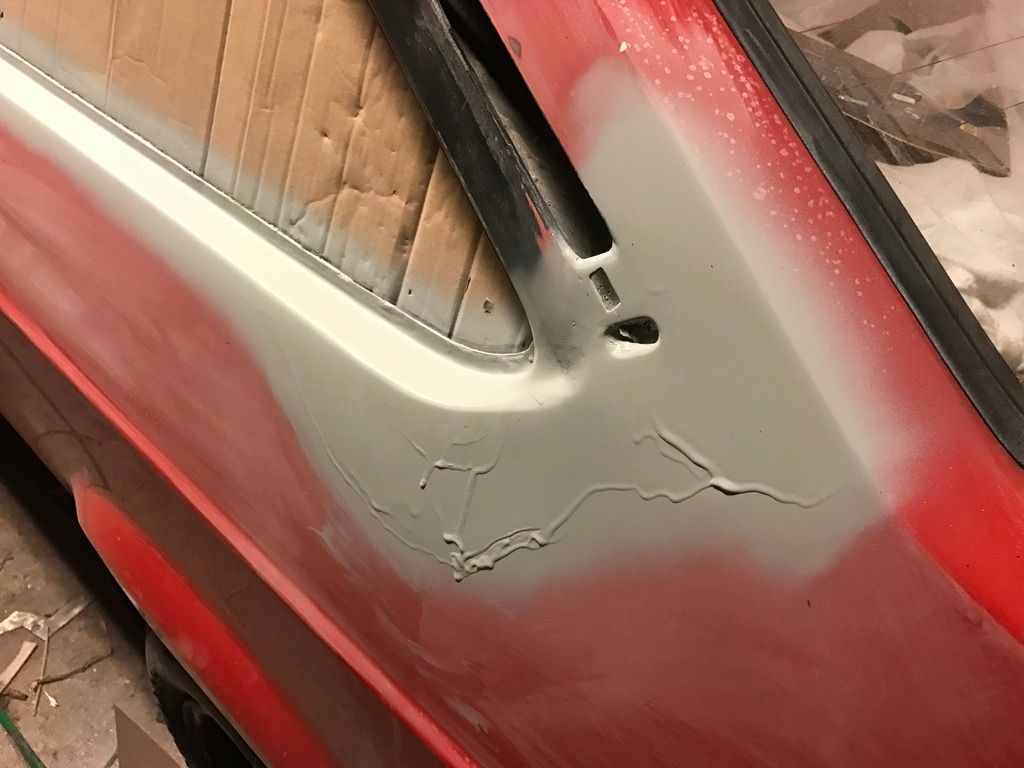 Wetsanded with 800grit paper: 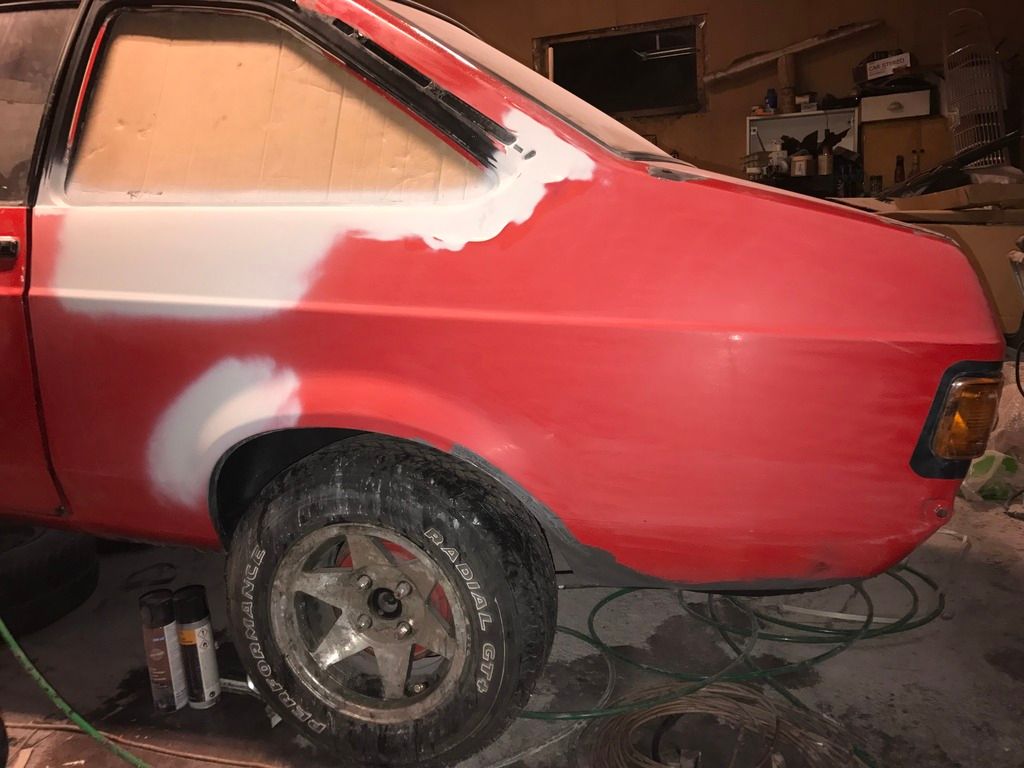 Then over to the right rear wheelarch. I found a deep crack in the filler (that covered up a previously not so nicely welded arch repair) running all the way to the steel beneath. Grind away the old filler, remove all surface rust, neutralize rust, prime, fill and sand sand sand. An okay result surfaced after a few hours though. Pictures are taken after the spray filler: 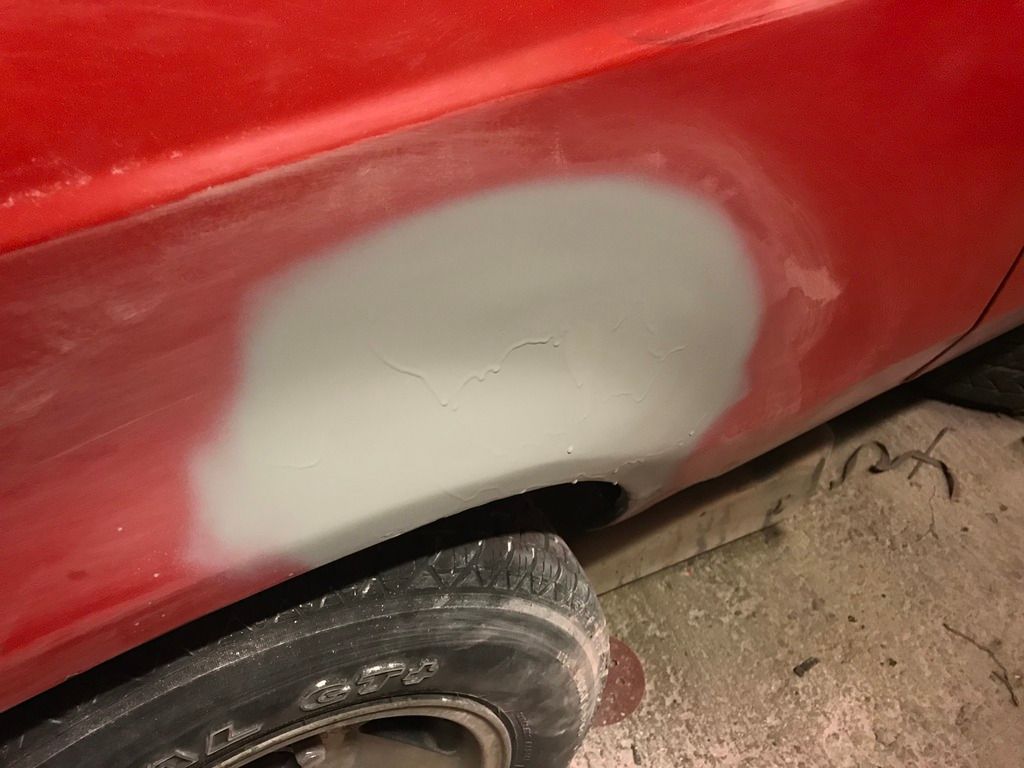 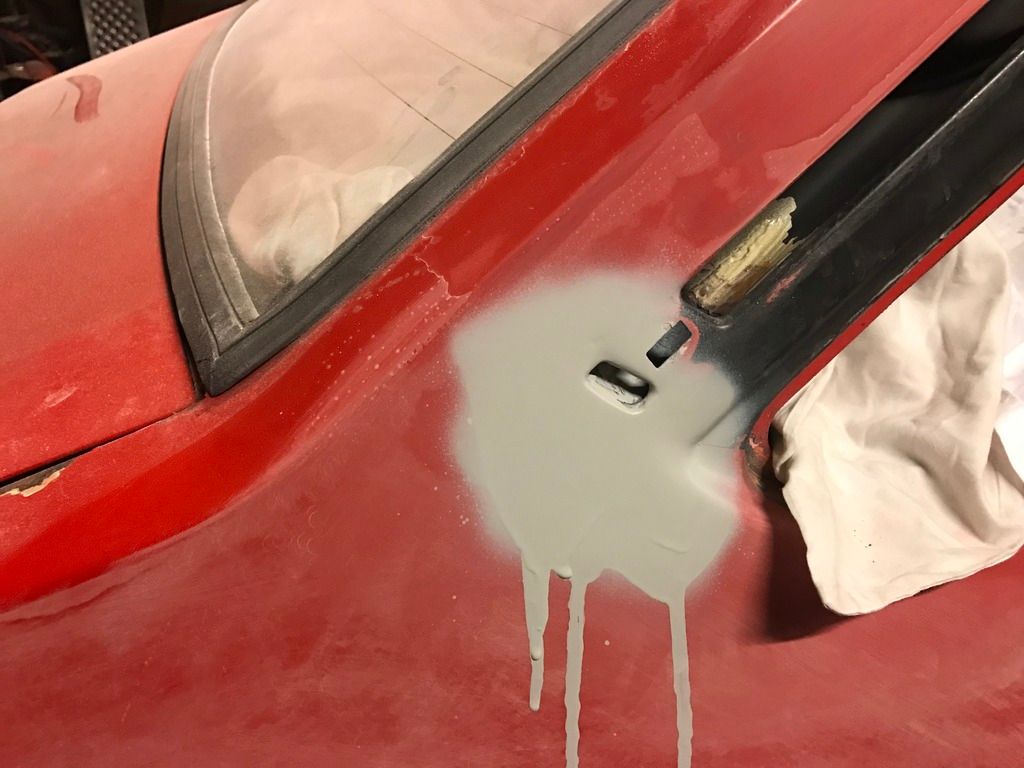 All done wetsanding around the wheelarch and the c-post. 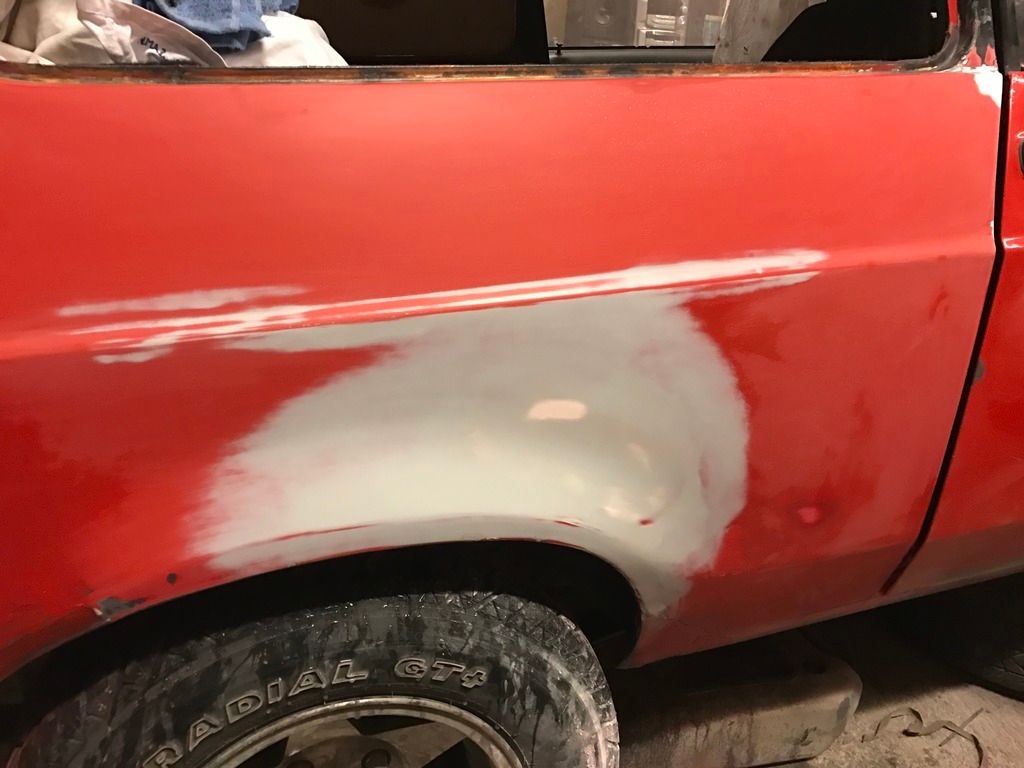 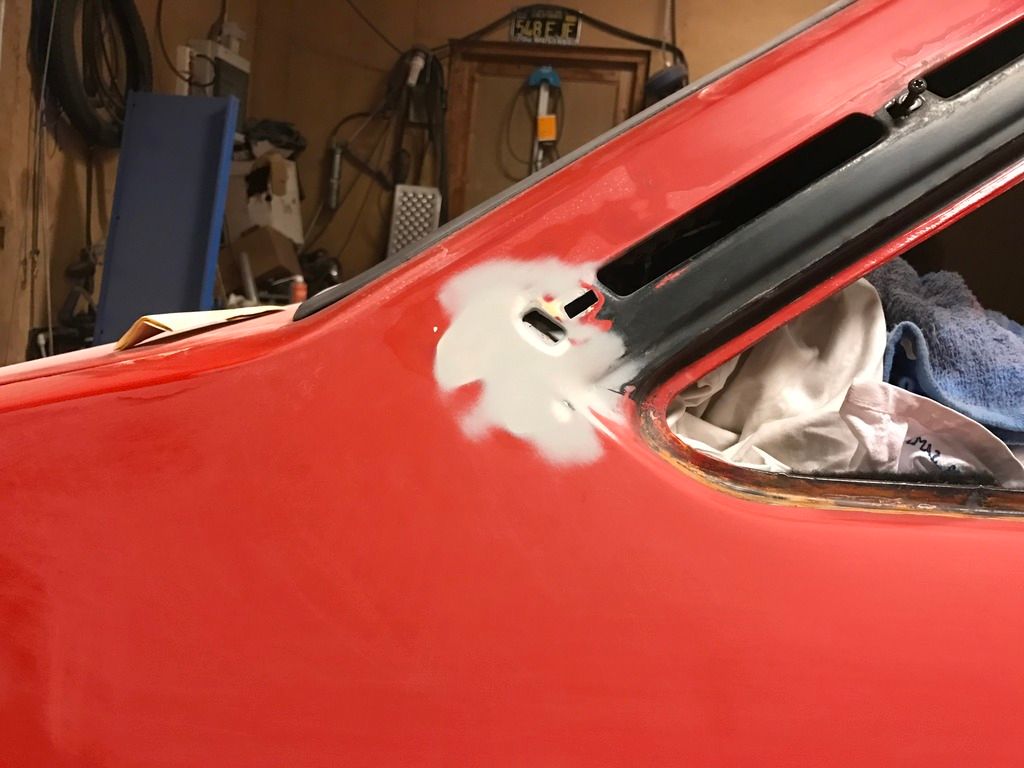 I had to take some measurements of the starmag wheels I'm going to use next summer:  A friend of mine bought a 3d-printer, and wanted to give printing some centre caps a try. He will print a rough draft first to check the dimensions and the fit, before printing the finished product. Rapid prototyping Next piece of work was rear right quarter. It had a dent there from when I bought the car in 2009. The thickest piece of filler on that quarter was 1.5cm!!! I spent nearly 12 hours sanding it with a machine and 40grit paper. Pic from 2009: 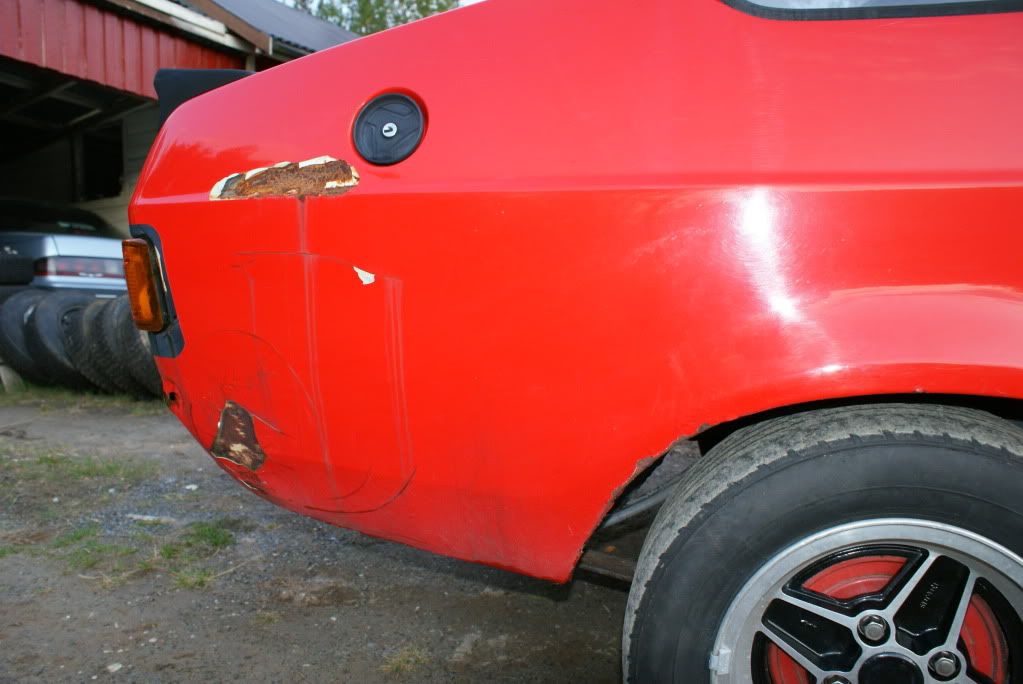 Previous attempts to beat the quarter was evident, making everything crooked and full of dents, high and low spots. Hammer and dolly was used to get the surface reasonably straight before I started to apply filler and sand it off again. The only straight piece on the quarter was the piece I replaced last year After fillerspray: 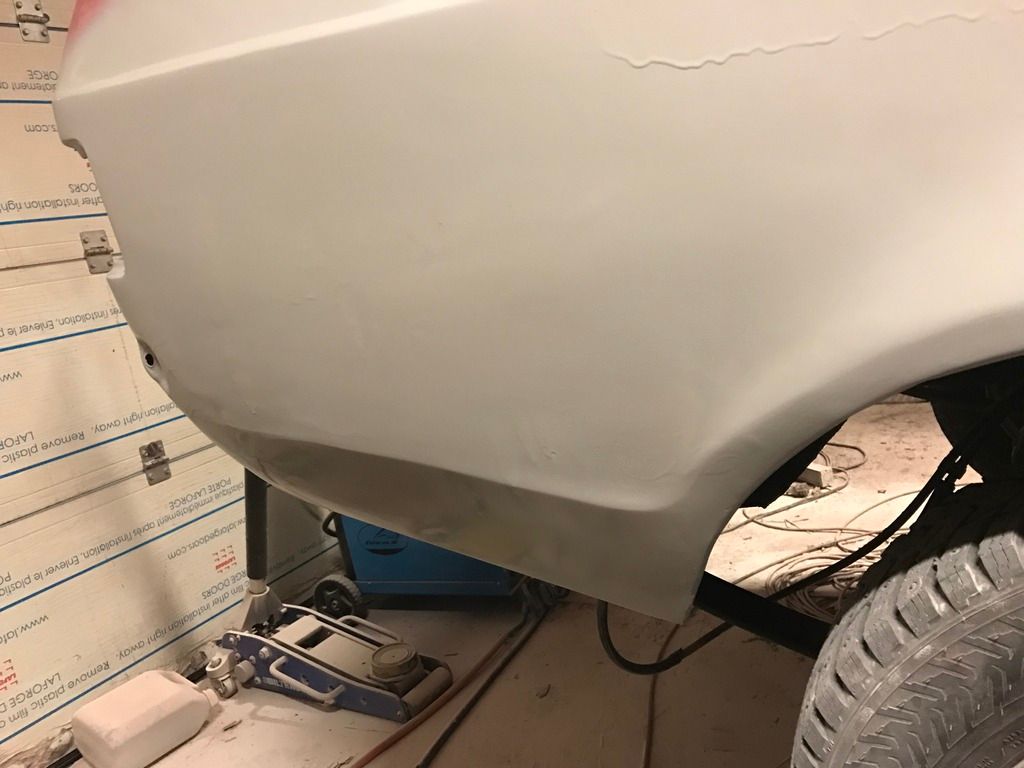 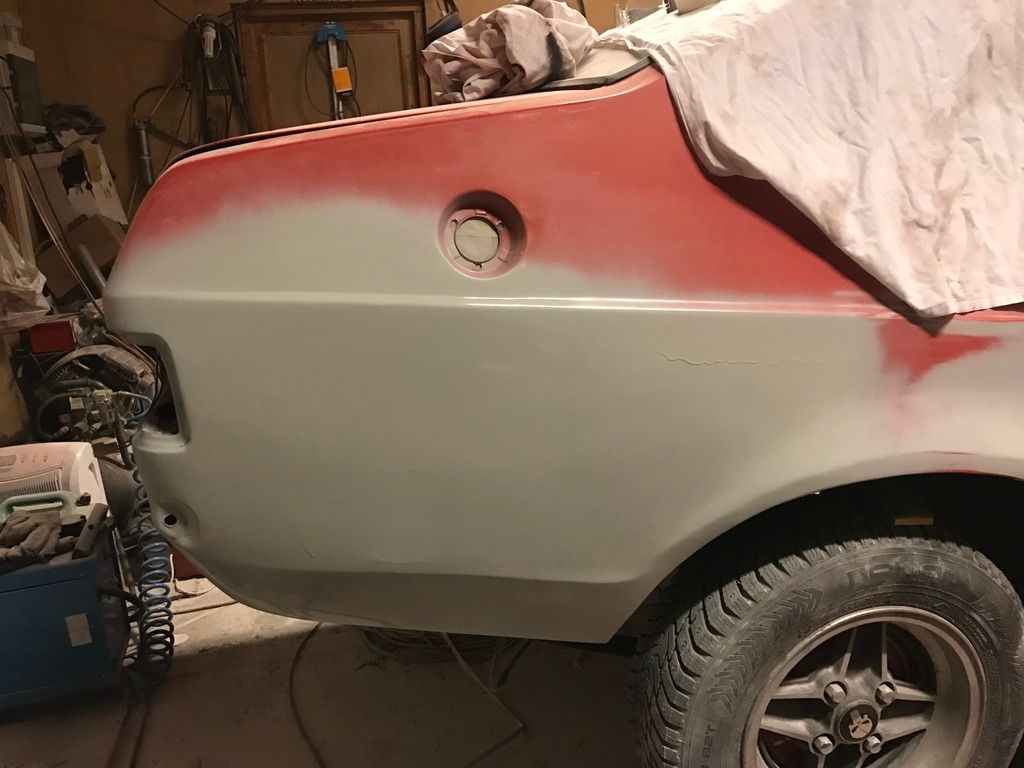 All done with wetsanding with 800 grit paper: 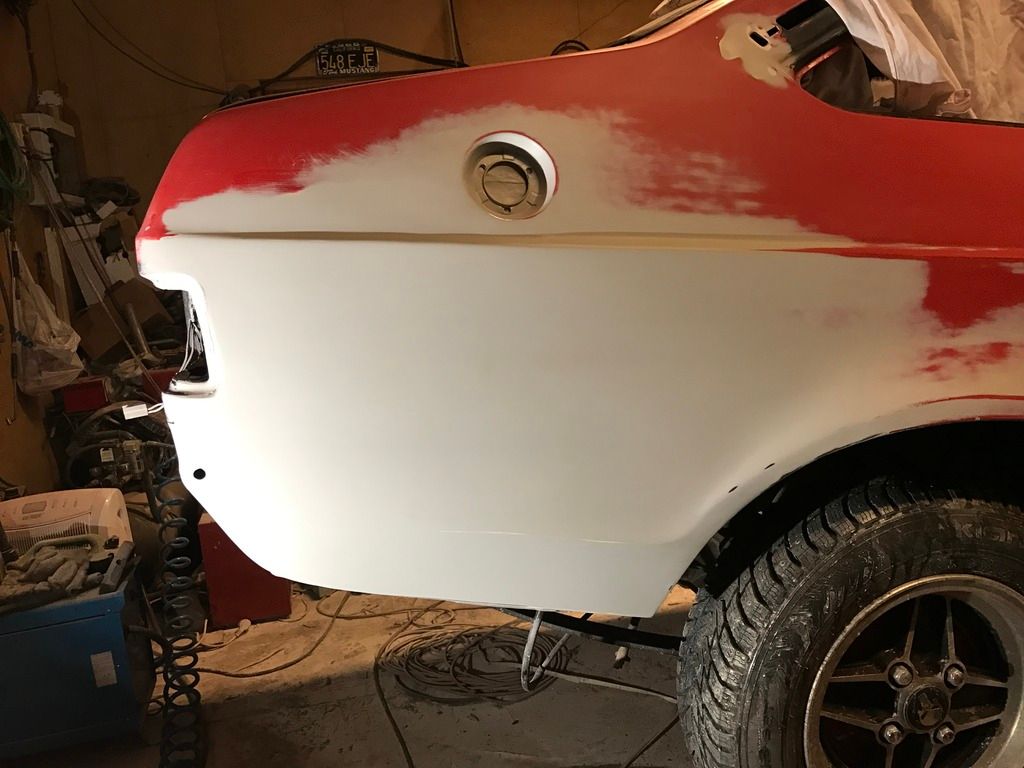 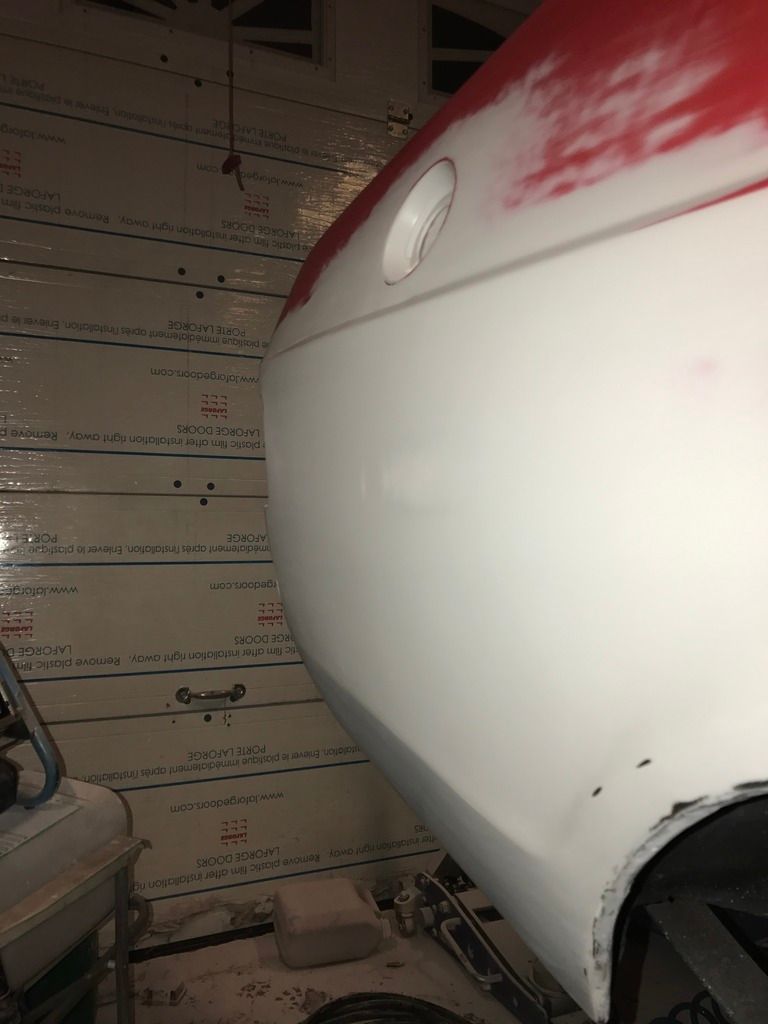 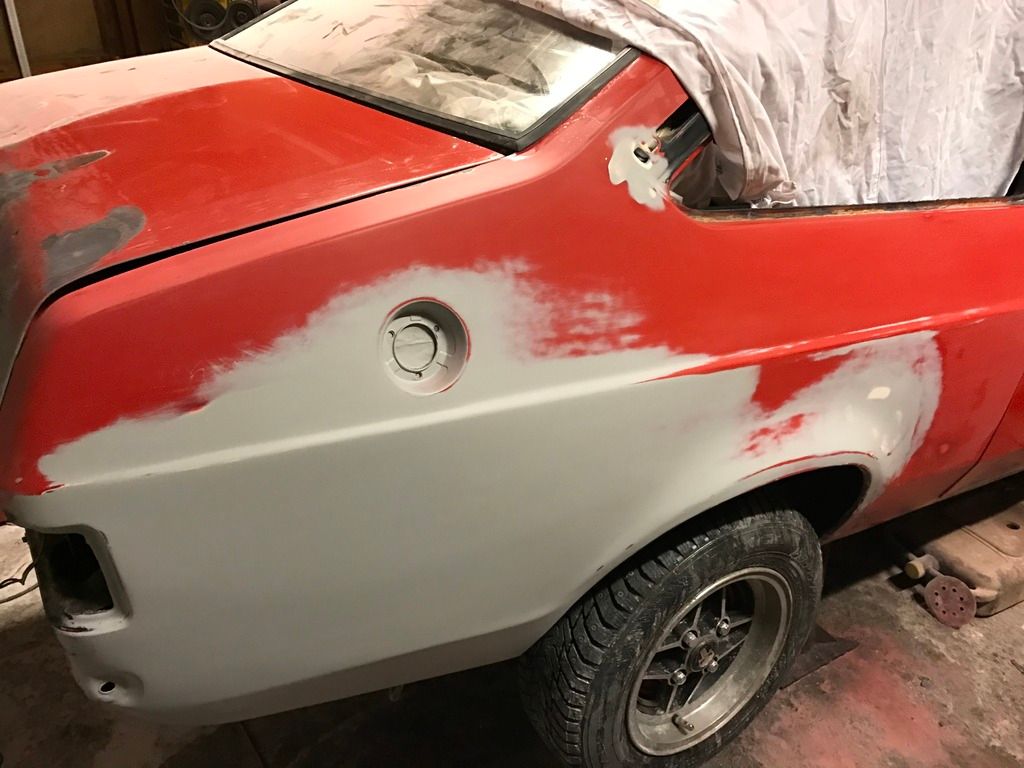 Then the drip rail around the trunk lid was next. Lots of flaking paint and a lot of surface rust. Luckily nothing was rusted through, and no welding was needed I attacked it with a rotating steel brush, coarse sanding paper and my trusty powerfile/belt sander. 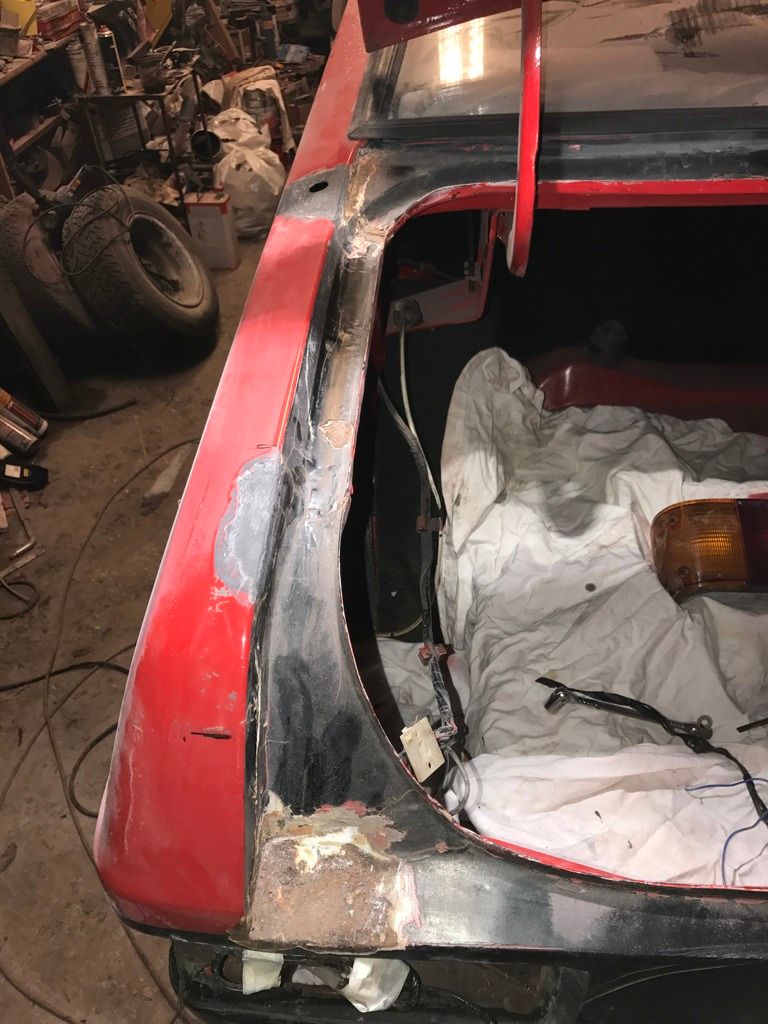 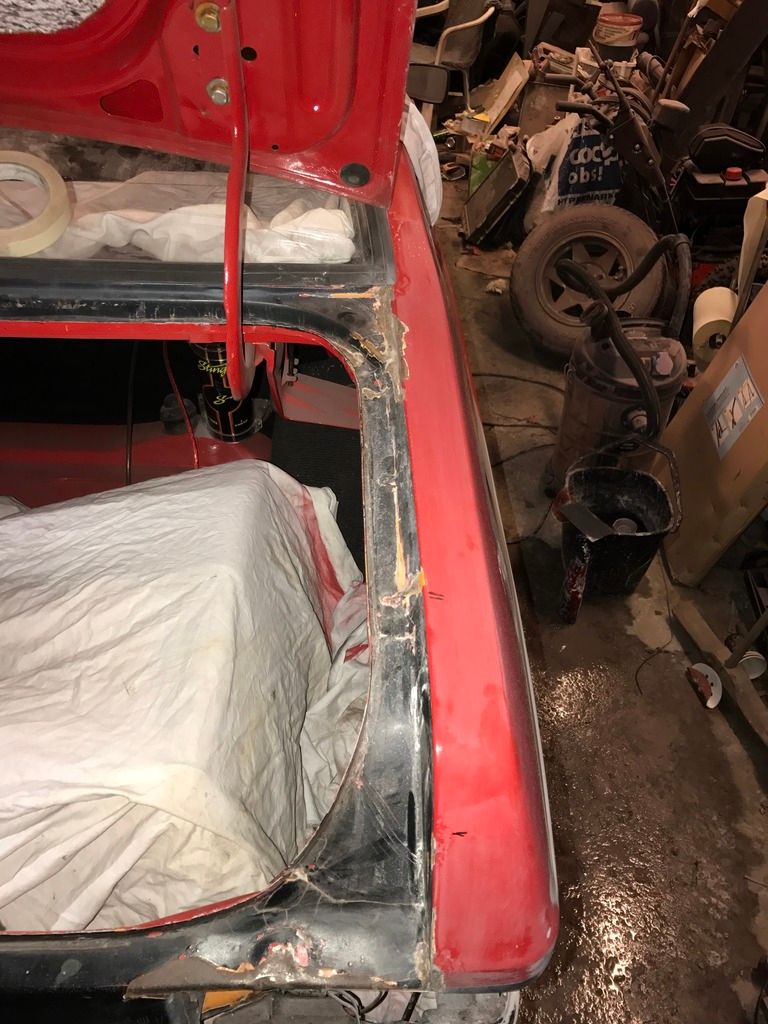 All of the drip rail and surrounding areas got a coat of Isotrol primer after paint and rust removal. 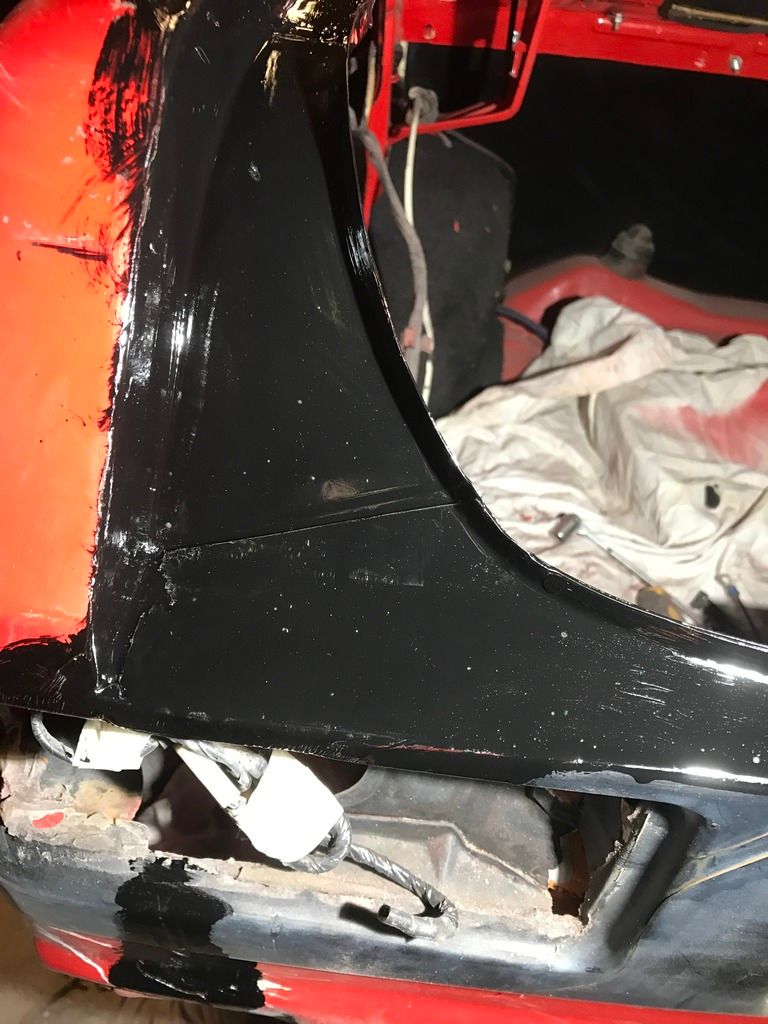 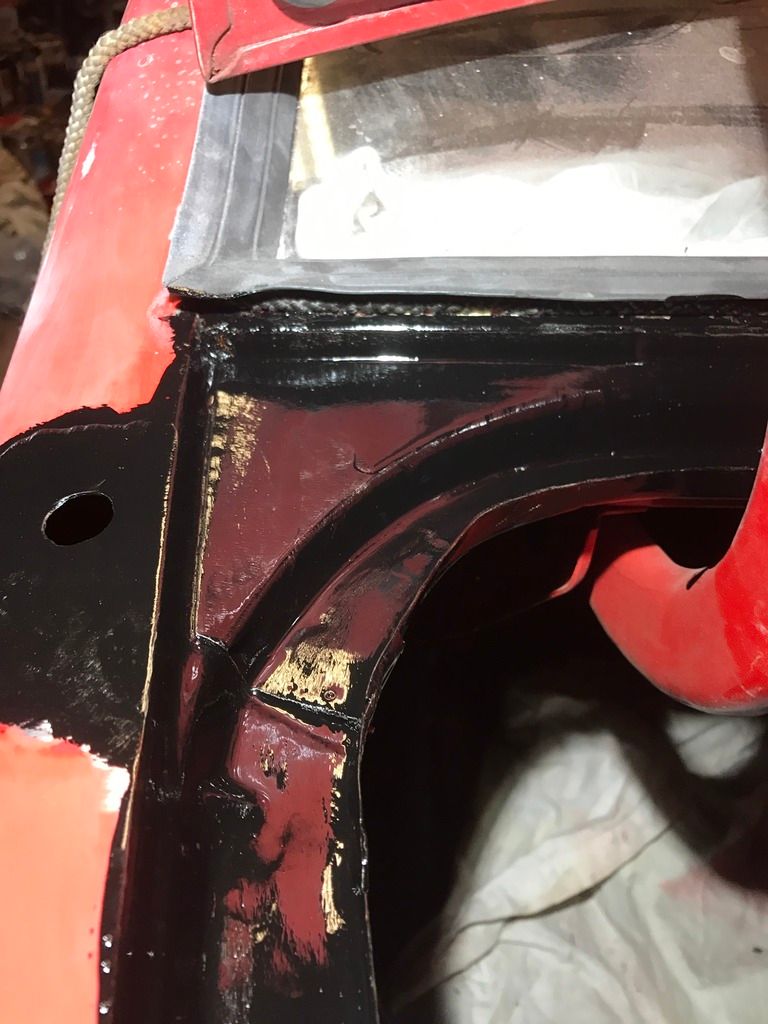 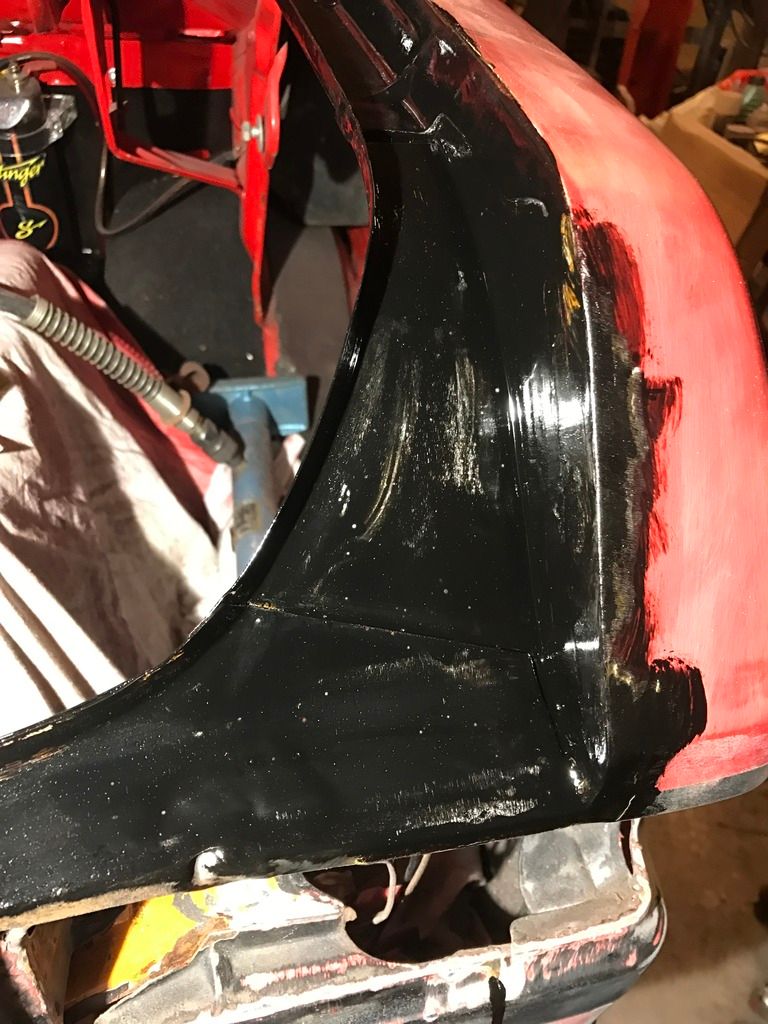 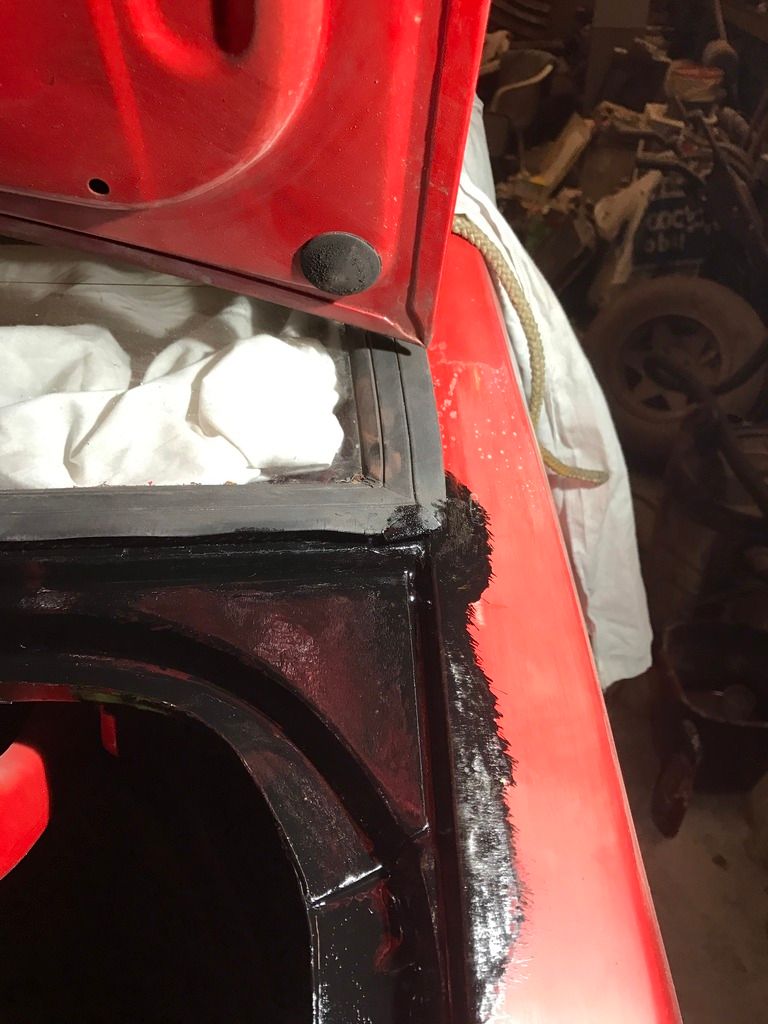 I also removed the old tint from 1989 on the windows in the front. There was no tint left, only a transparent layer of crinkling film that did nothing else but impair the visibility. I used a glass scrape with razor blades. Really effective, and it left very little glue residue. Great results when I was finished, but I forgot to take a picture of it.  So came the time to remove flaking paint and surface rust from the rear end. I was sanding and filling everything above the bumper.   After a coat of spray filler:  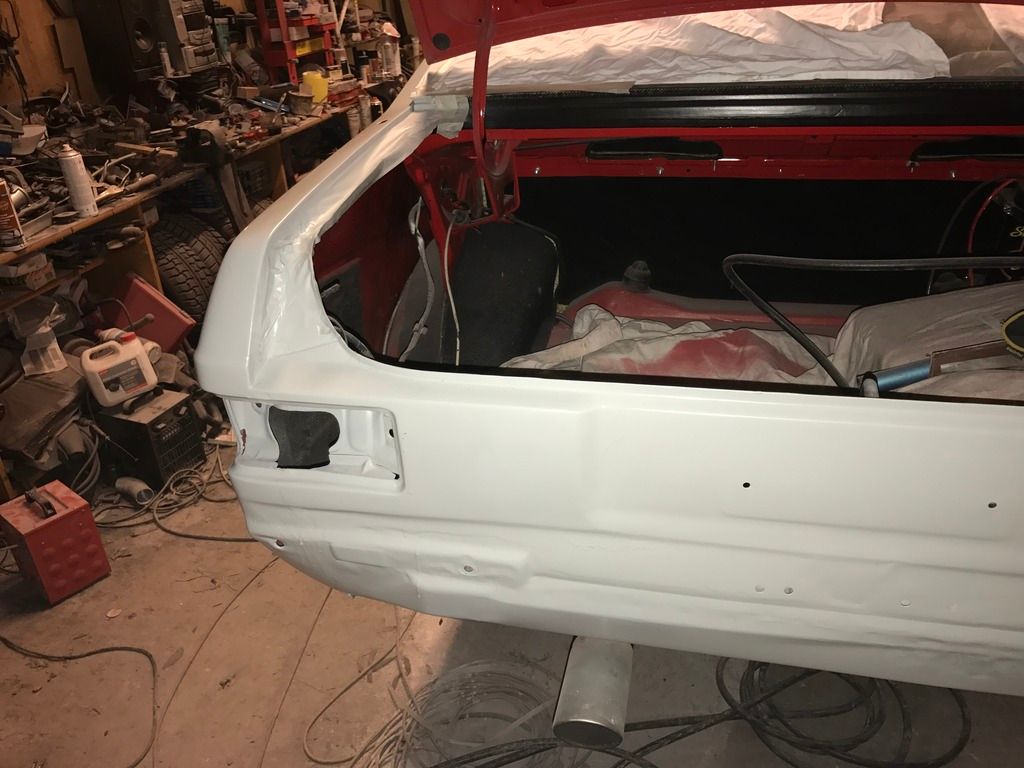 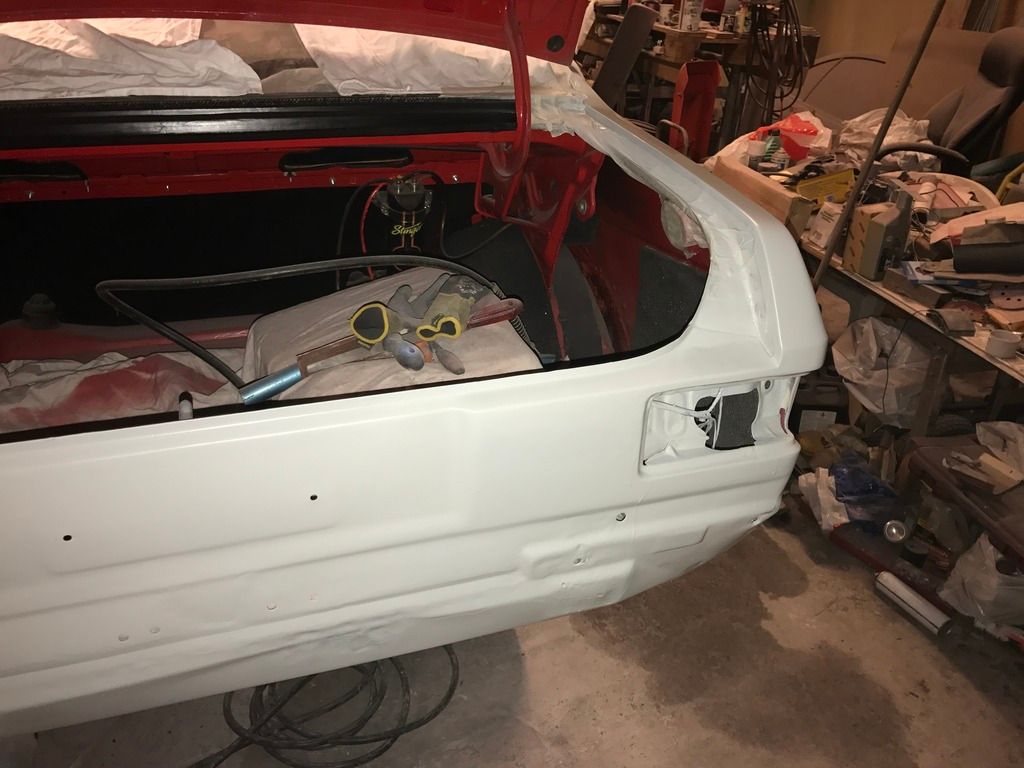 A friend of mine, called Christoffer came by, and wetsanded the right door. AWESOME! 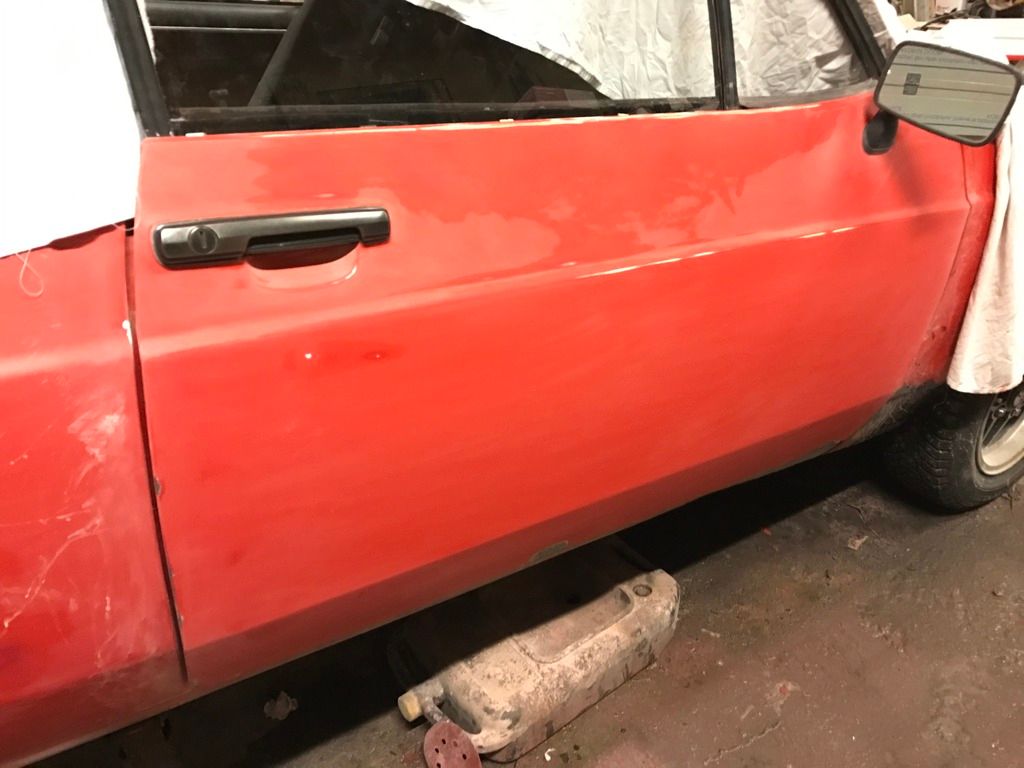 All done with the wetsanding, I masked it up and laid down a few coats of stonechip: (still wet when the pic was taken) 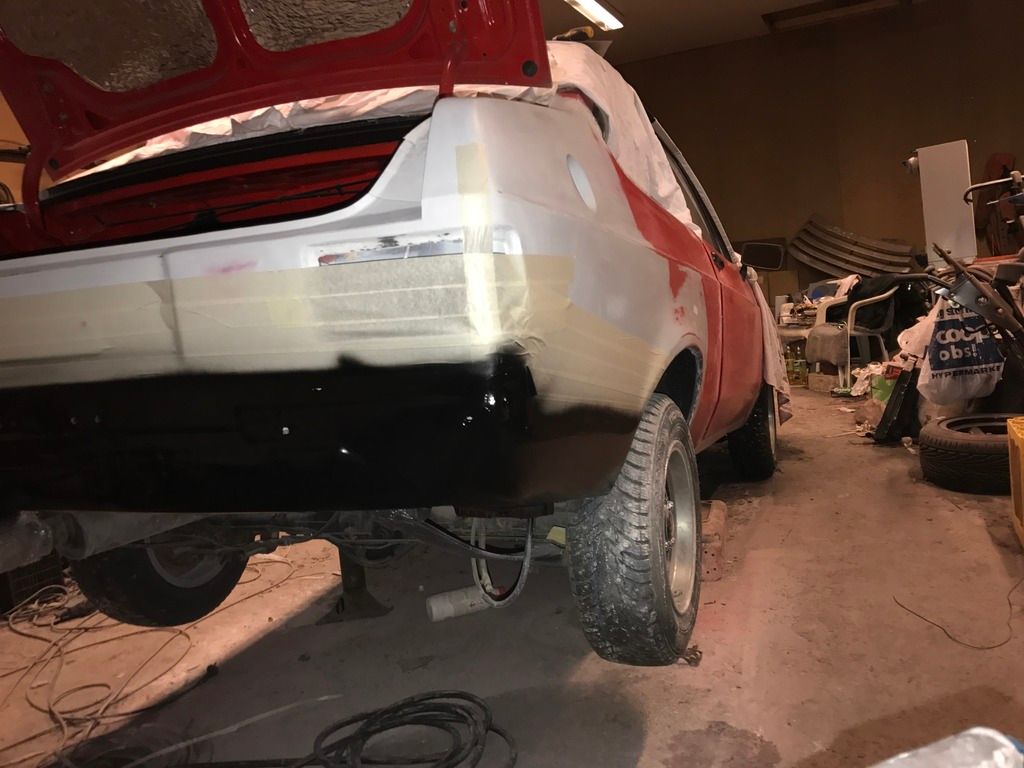 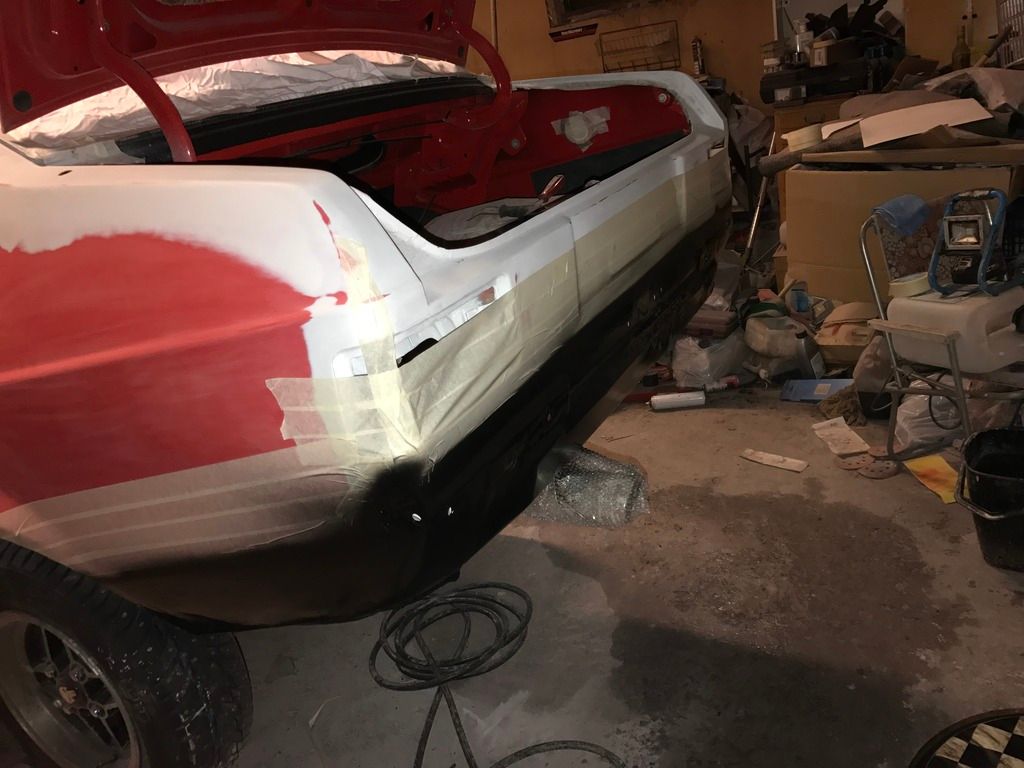 While waiting for some of the skin on my fingers to grow back after all that wetsanding, I decided to look at the rear drumbrakes. I unstuck the brake cylinder, and honed the bore, while lubing the handbrake mechanism and checking everything else. 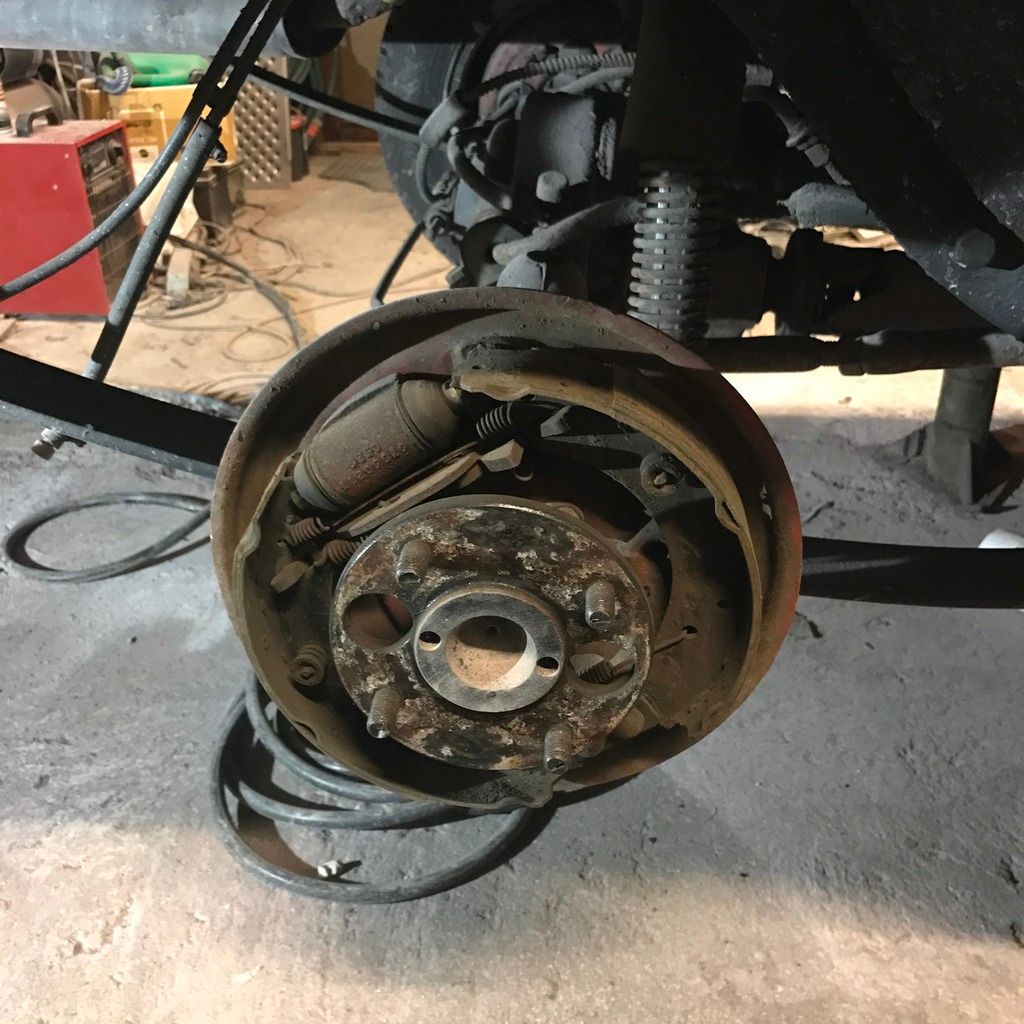 Any comments, constructive criticism? Let me know! Thanks for reading! |
| |
|
|
funkyhunk
Part of things
Old Ford's R Us
Posts: 265
|
|
Feb 13, 2017 18:44:45 GMT
|
Time for a new update! The dreary/slowest part of my build is coming I think. I hate paint and stuff like that, I'm no good at it. I thought I should start small, with the bonnet. The biggest bodypanel on the car. (makes sense, aye? ) It had flaking clearcoat all over including a few rustspots where rust had started under the paint. That was attacked with the grinder, and hit with rustconverter before bondo, sprayfiller and sanding. Lots of sanding with the orbital sander, removing all the clearcoat. 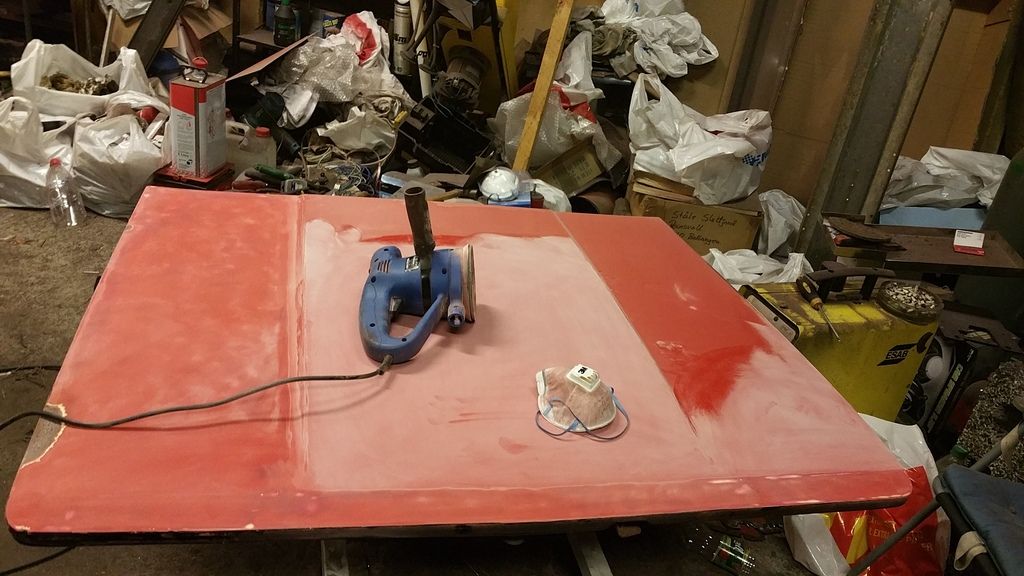 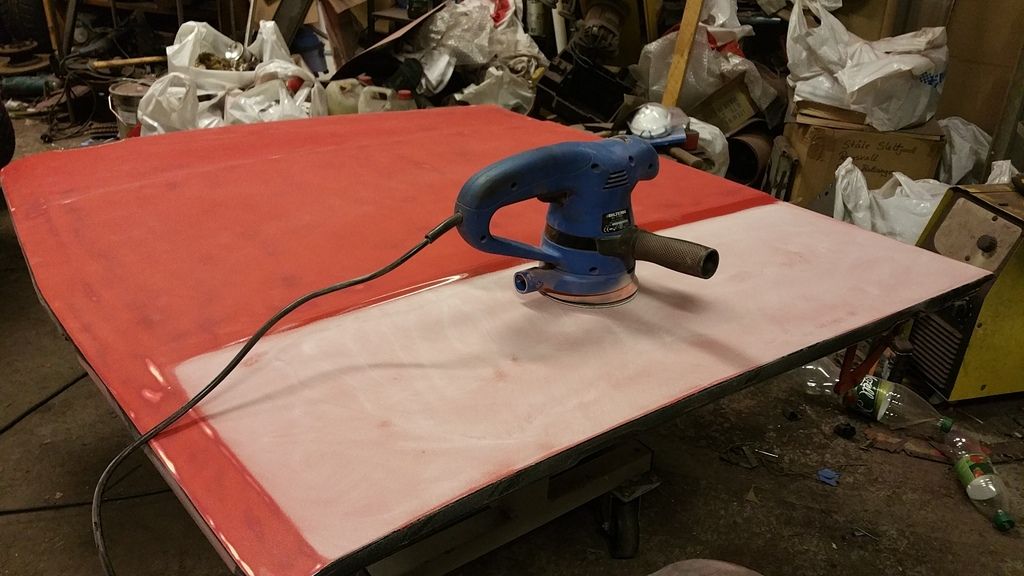 Fillerwork: 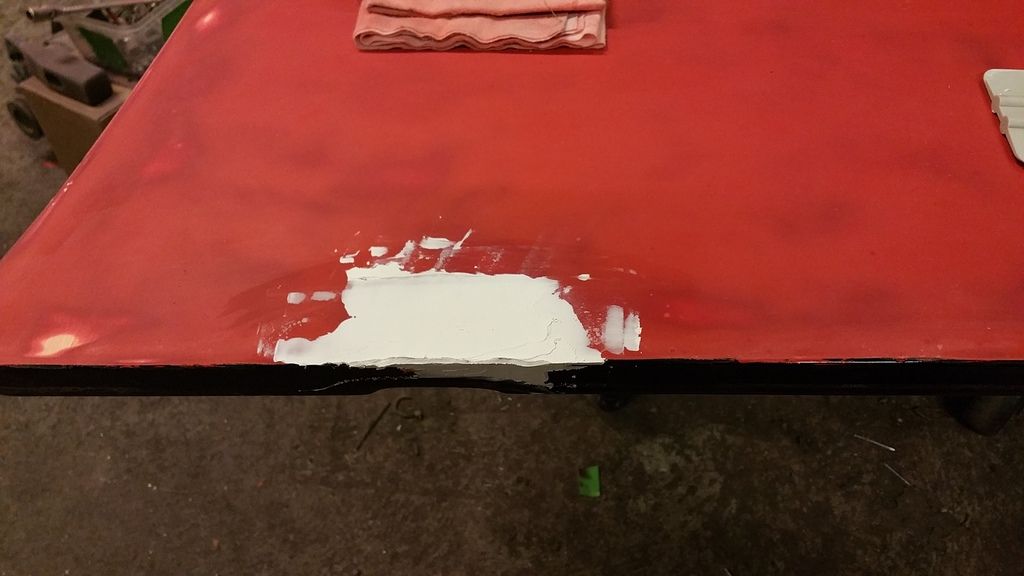 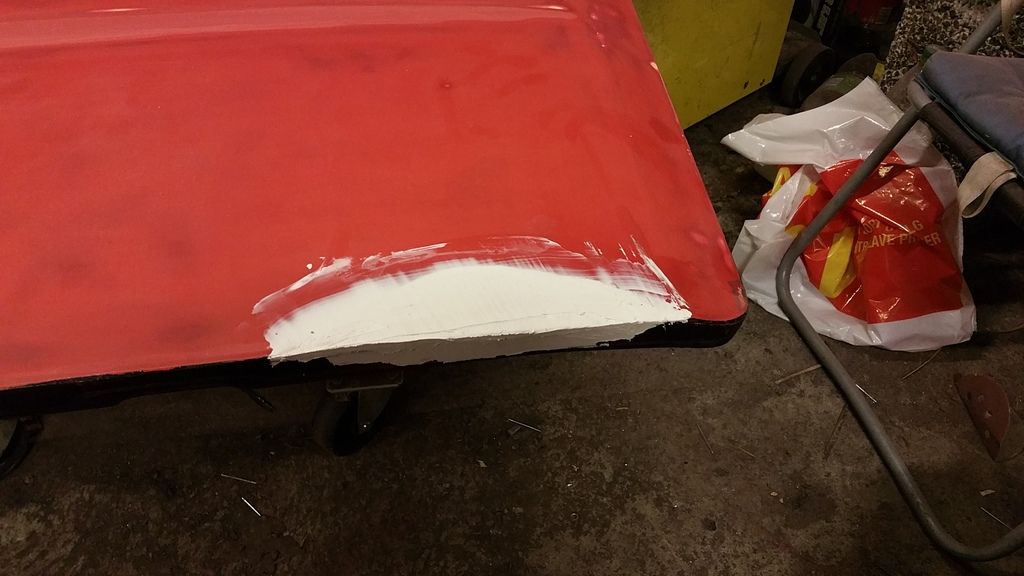 Also gave some bondo to a few small nicks on the right rear fender: 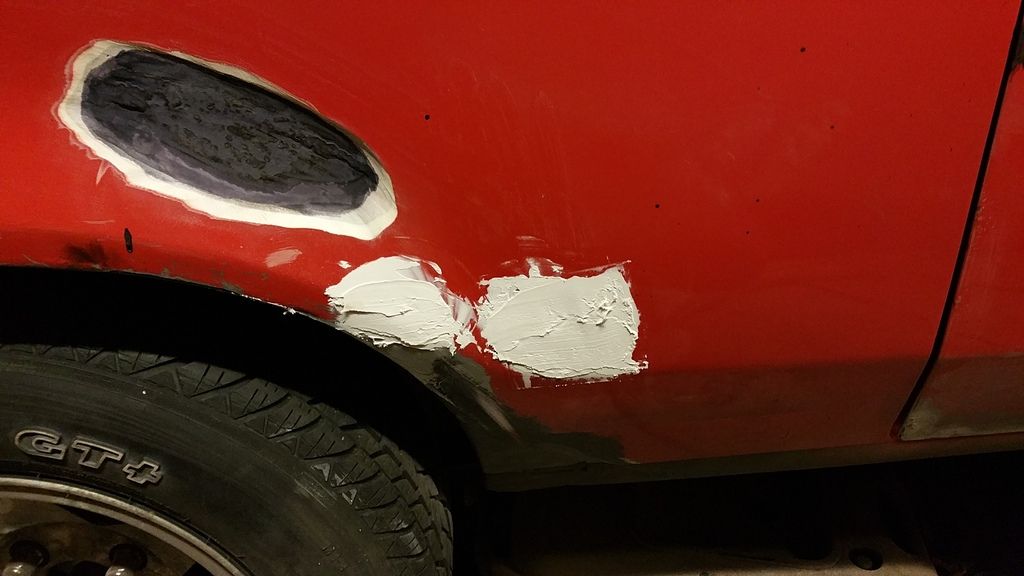 Some sanding later: 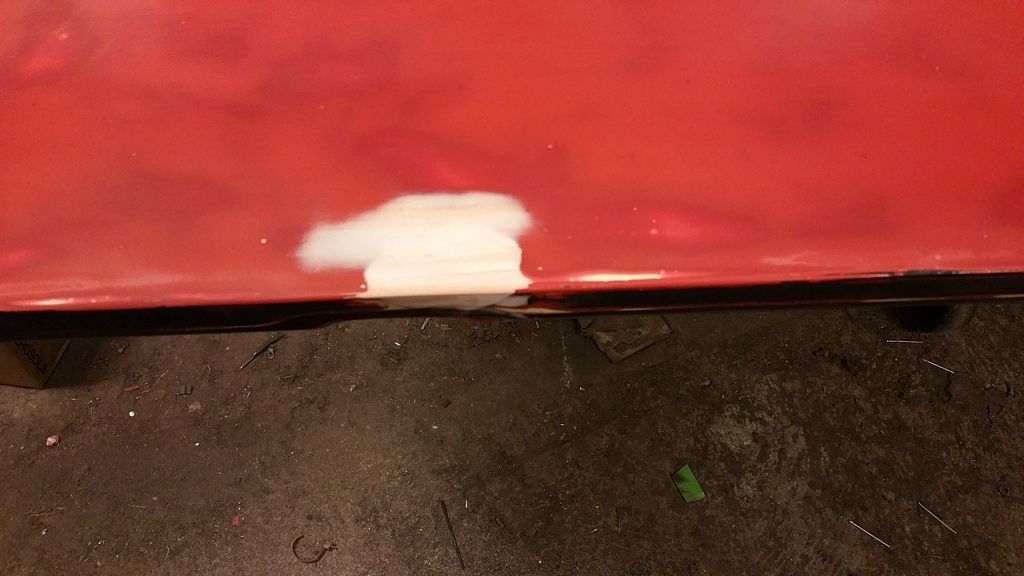 Spray filler: 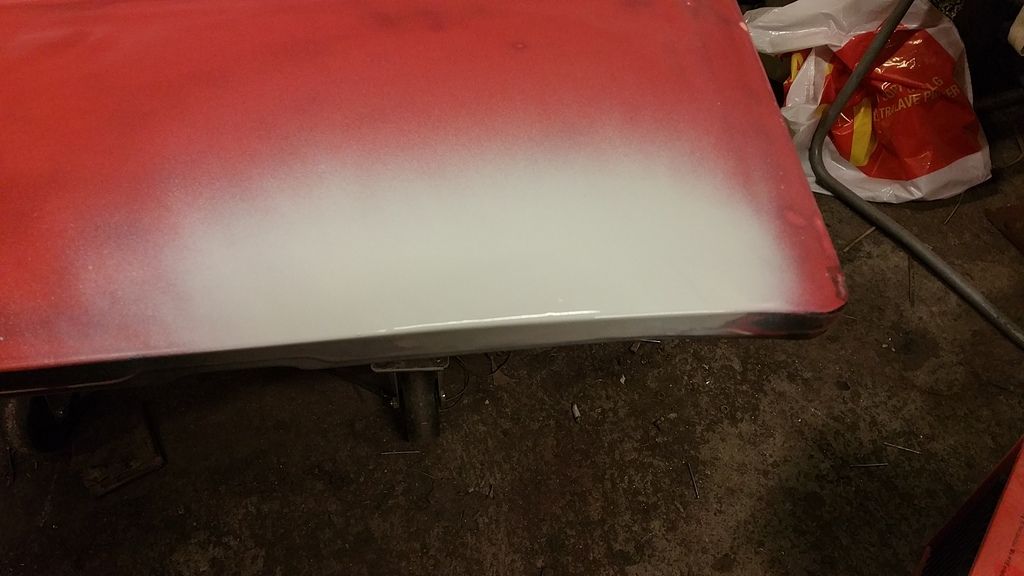 Some more sanding: 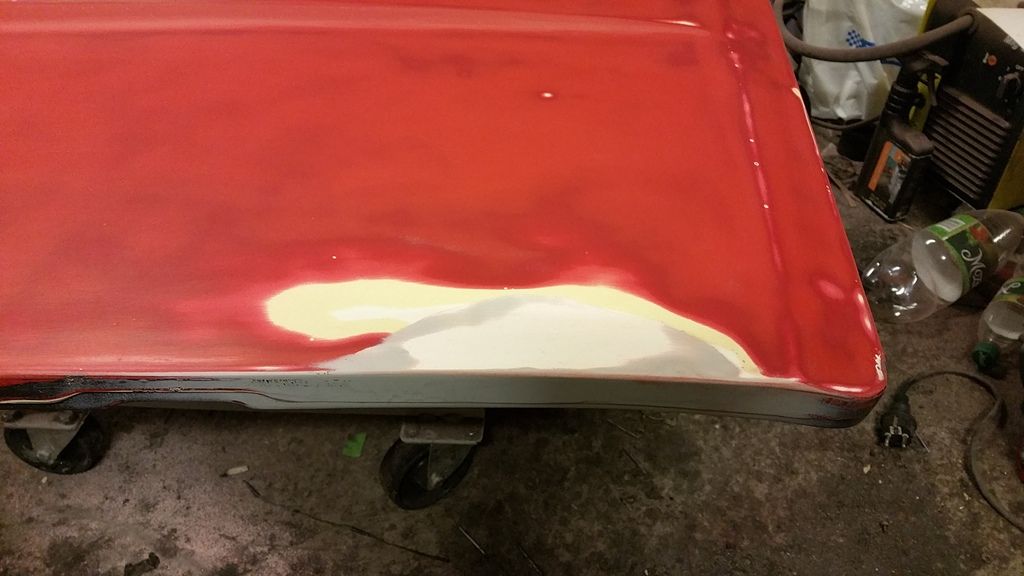 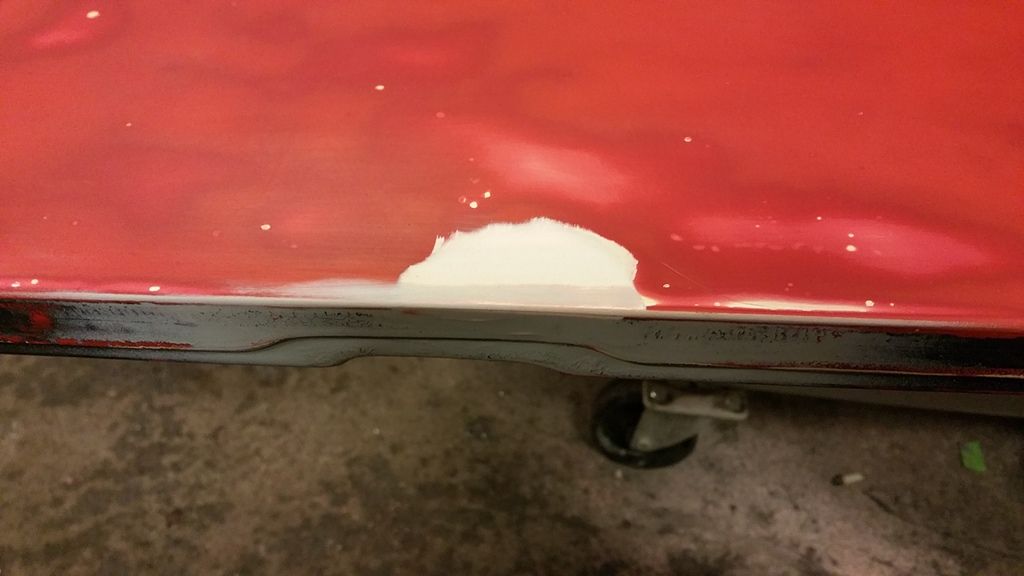 Bonnet sanded with 240/400 grit, then wet sanded with 800grit ready for red paint: 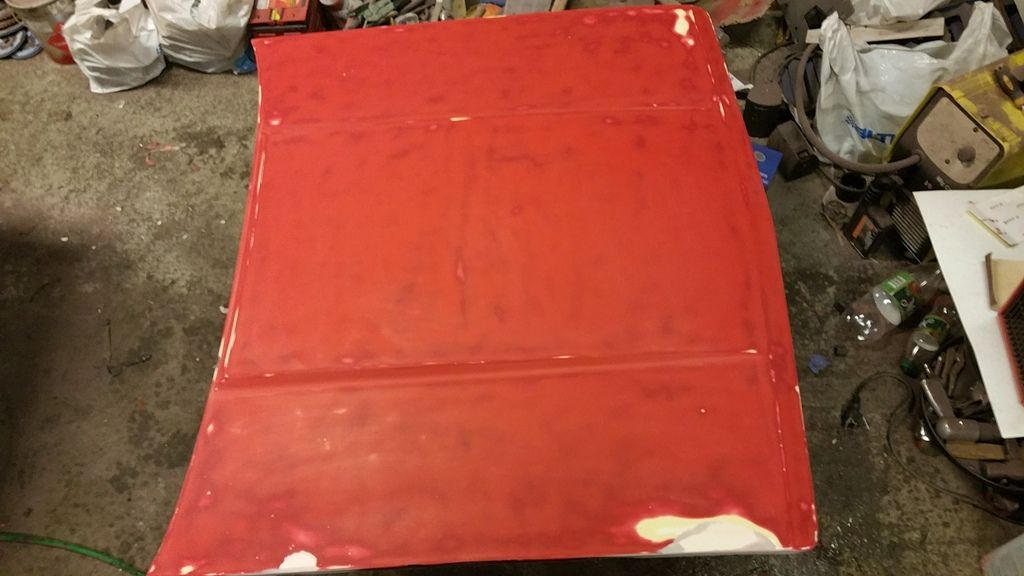 Four thick coats later, with lots of dust on the surface: 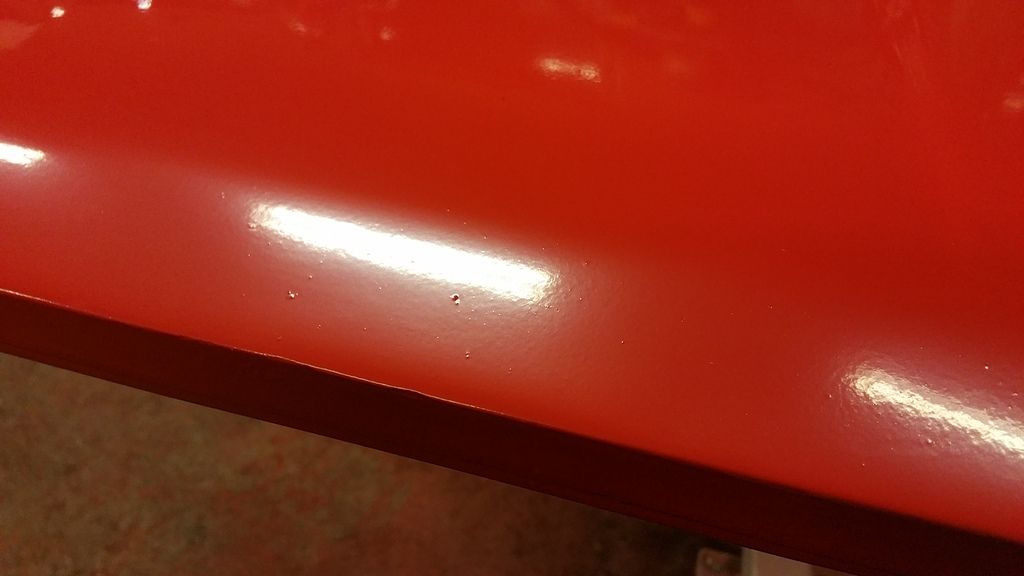 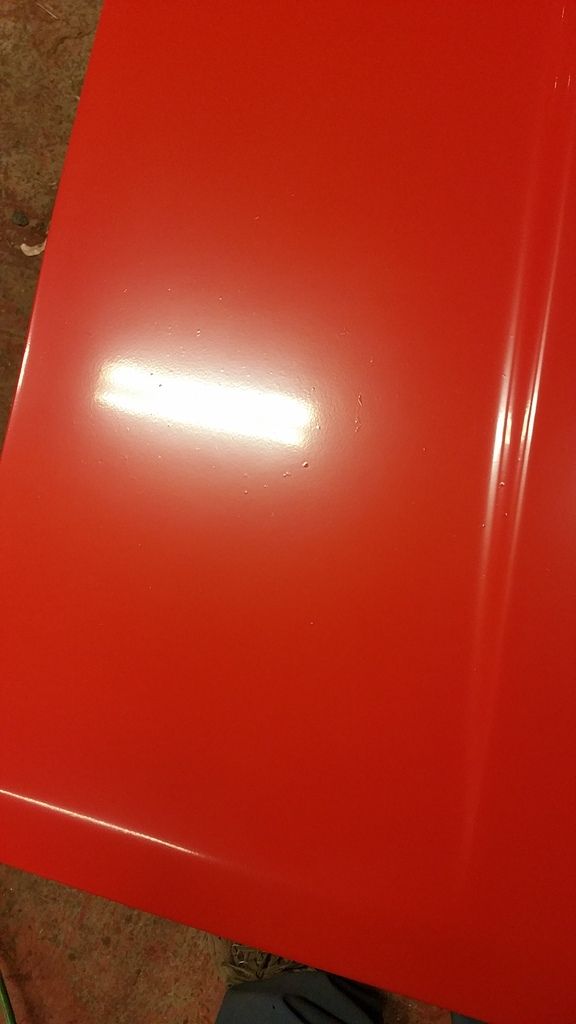 After the paint had a few days to dry, I wetsanded all the highspots, matting down the paint for clearcoat. I shot three thick coats of clearcoat, and i got orange peel over the whole bonnet. This will be rectified later with a good wetsand and a polish. Next on the agenda was the rear left window. Bubblin paint around the rubber seal made me want to inspect further. I found lots of surface rust under the window seal when I got the window out, so happy I did that. Rotating steel brush and some rust converter later it looked much better. Lots of pockmarks after the rust, but it's all neutralized now. 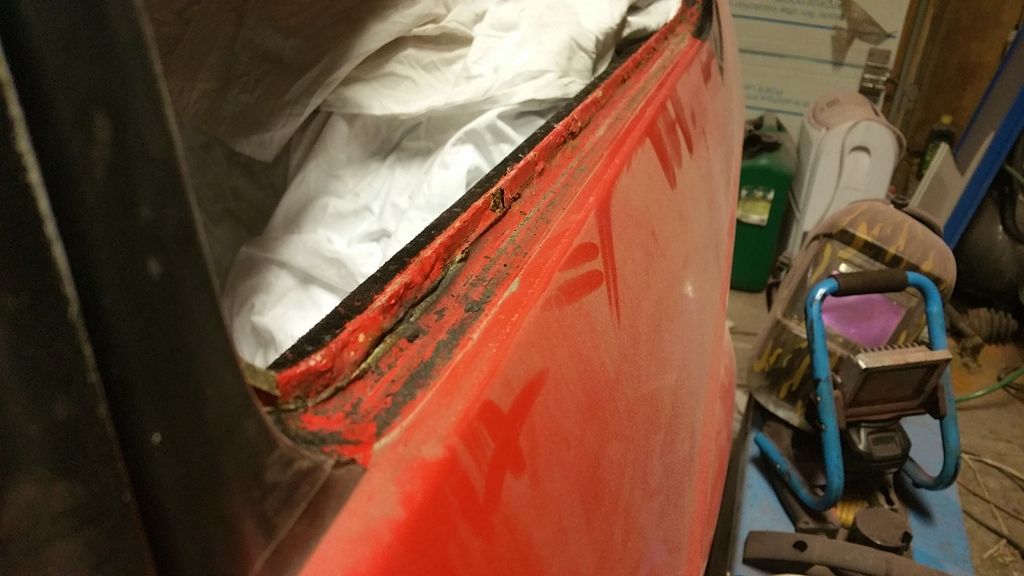 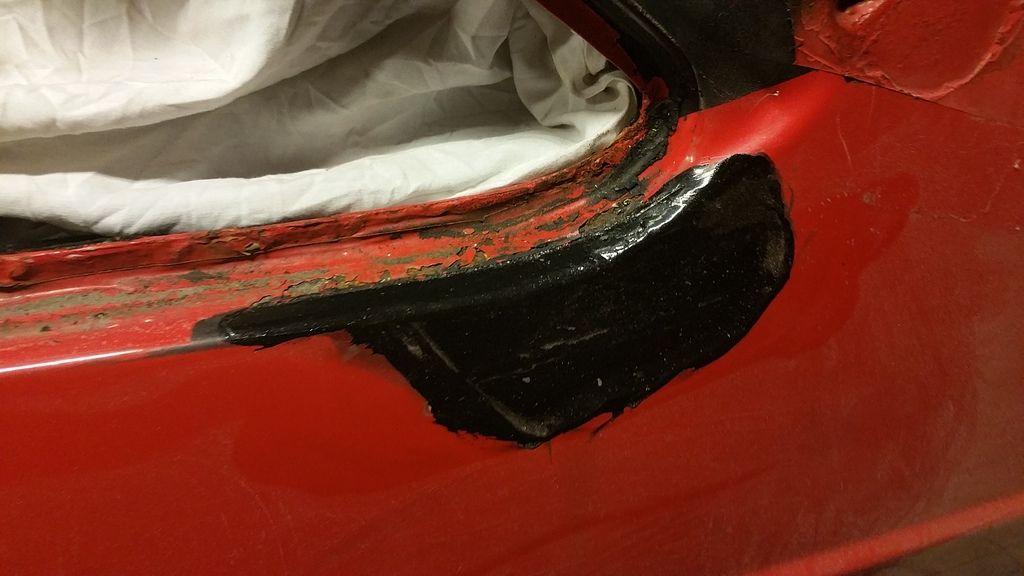 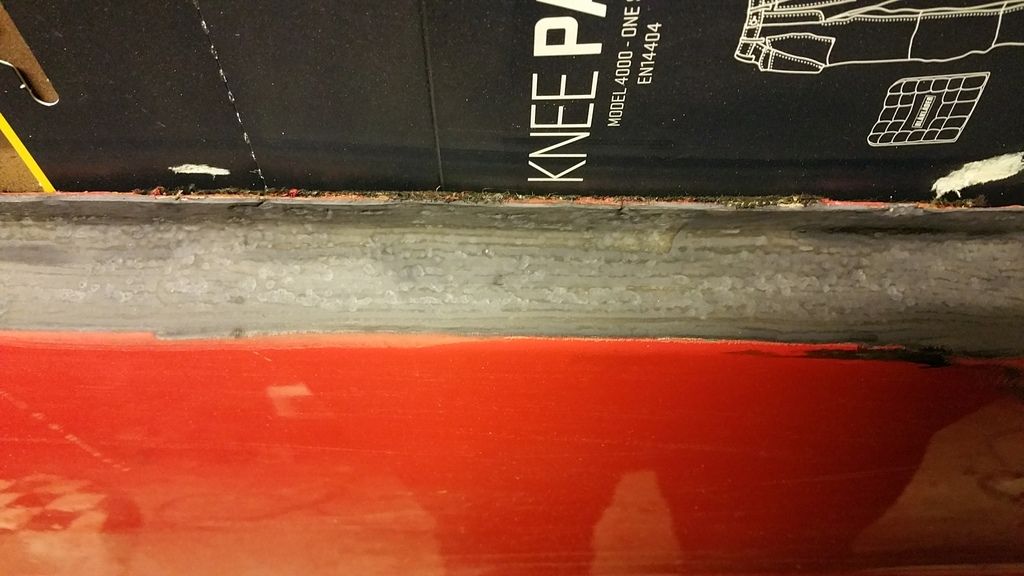 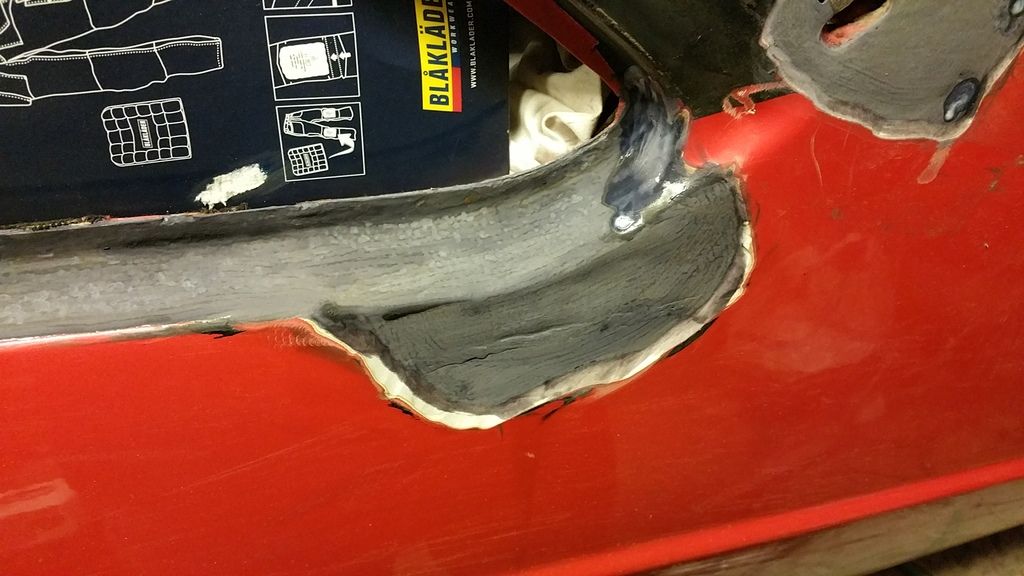 Around the antenna: 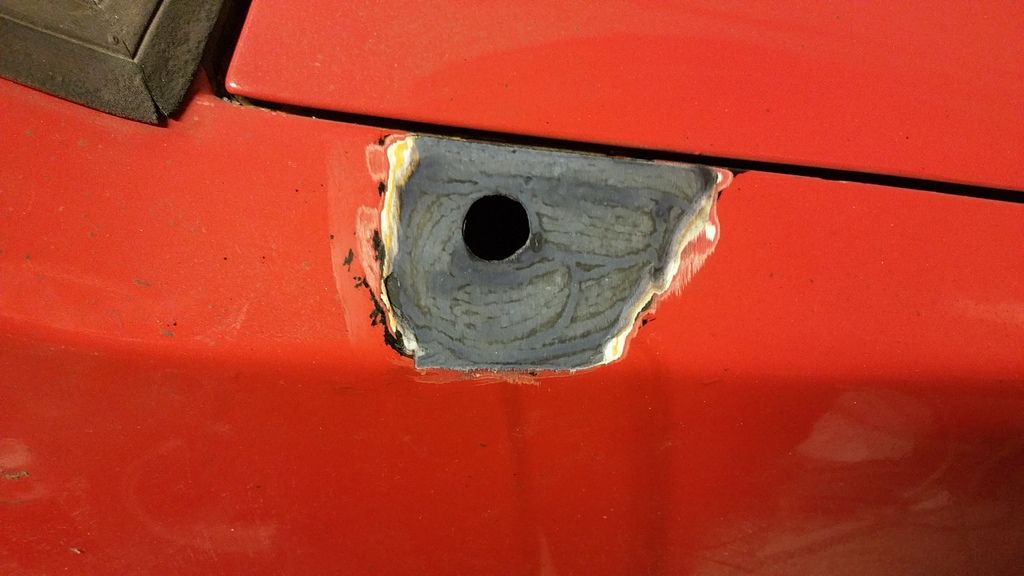 Thanks for reading |
| |
Last Edit: Feb 13, 2017 18:45:22 GMT by funkyhunk
|
|
funkyhunk
Part of things
Old Ford's R Us
Posts: 265
|
|
|
|
|
|
| |
|
|
funkyhunk
Part of things
Old Ford's R Us
Posts: 265
|
|
Jan 20, 2017 18:01:53 GMT
|
Time for another update. The last leg of the restoration has begun. Therefore the progress has slowed down, the last 10% of work take up 80% of the time as you all surely know I got some new tramp bar brackets from the UK yesterday for the rear axle. The old ones are mounted wrong, and badly. 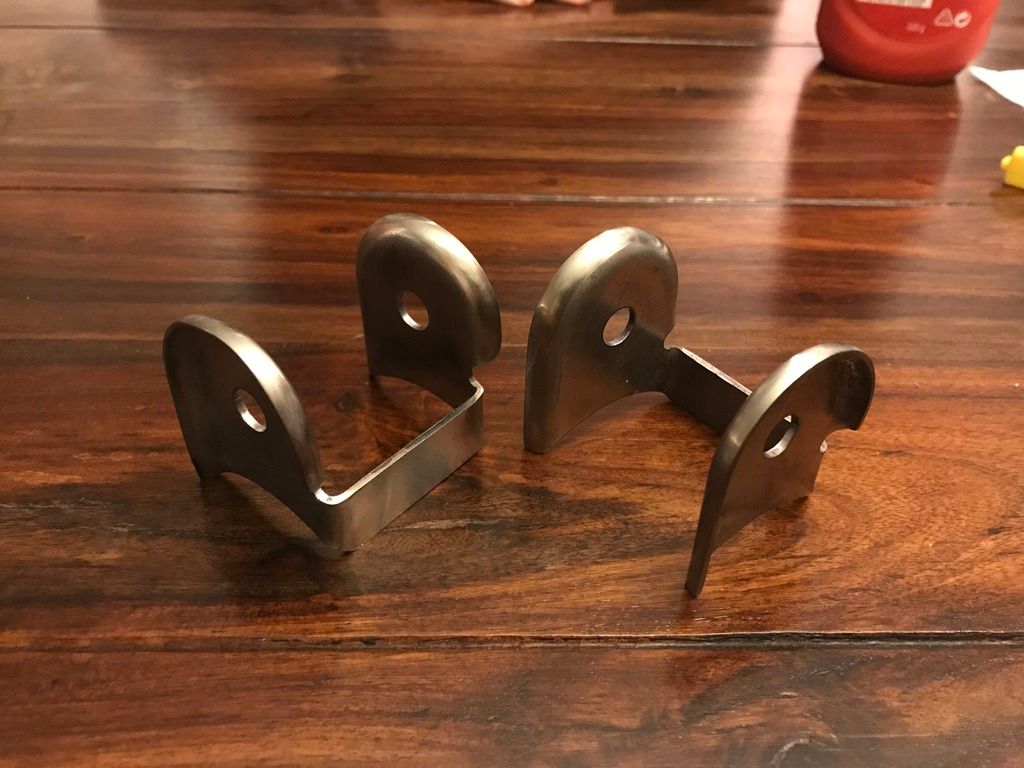 And then the first steps on the way to a proper outside paintjob starts on the inside. Both sills and the bottom of both doors were in Isotrol primer only, and needed to get some body colour. I first painted the sills with stonechip, and then three coats of body colour: 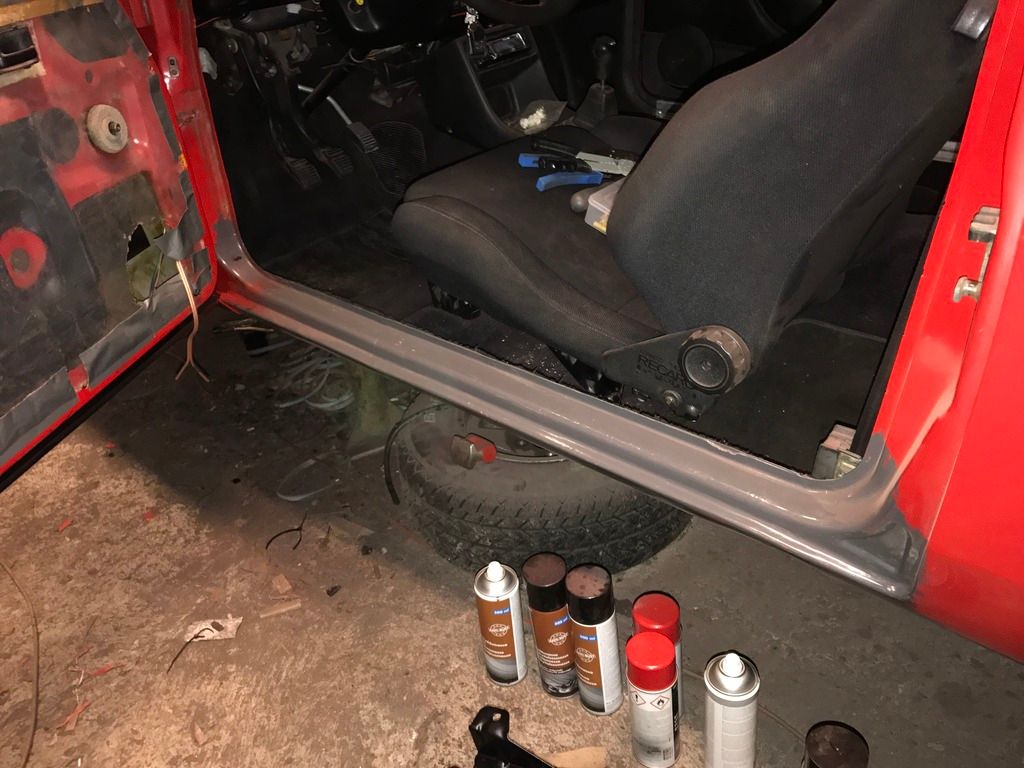 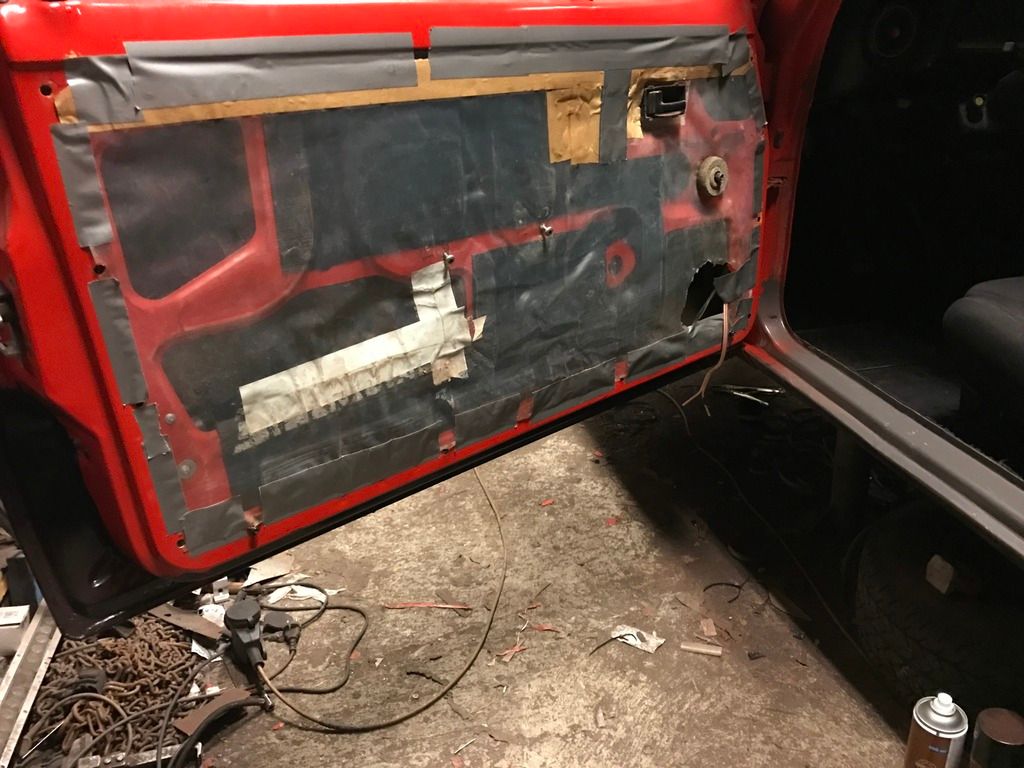 I was quite happy with the colour match, I couldn't find the exact place the old paint started and the new paintjob ended. Chuffed with that actually. Sorry about the picture quality, I was testing my old Galaxy Note Edge.   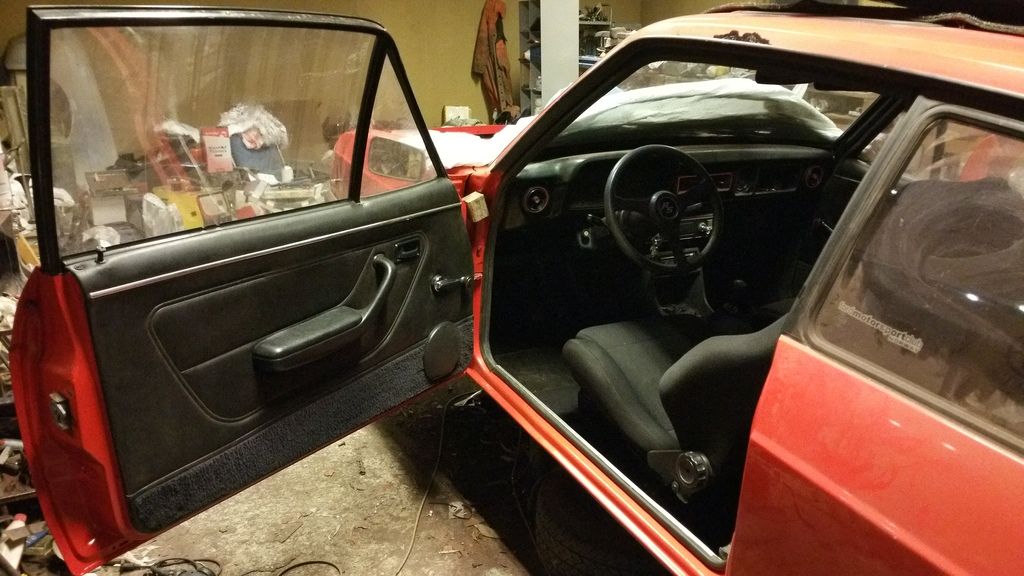 B-pillar:  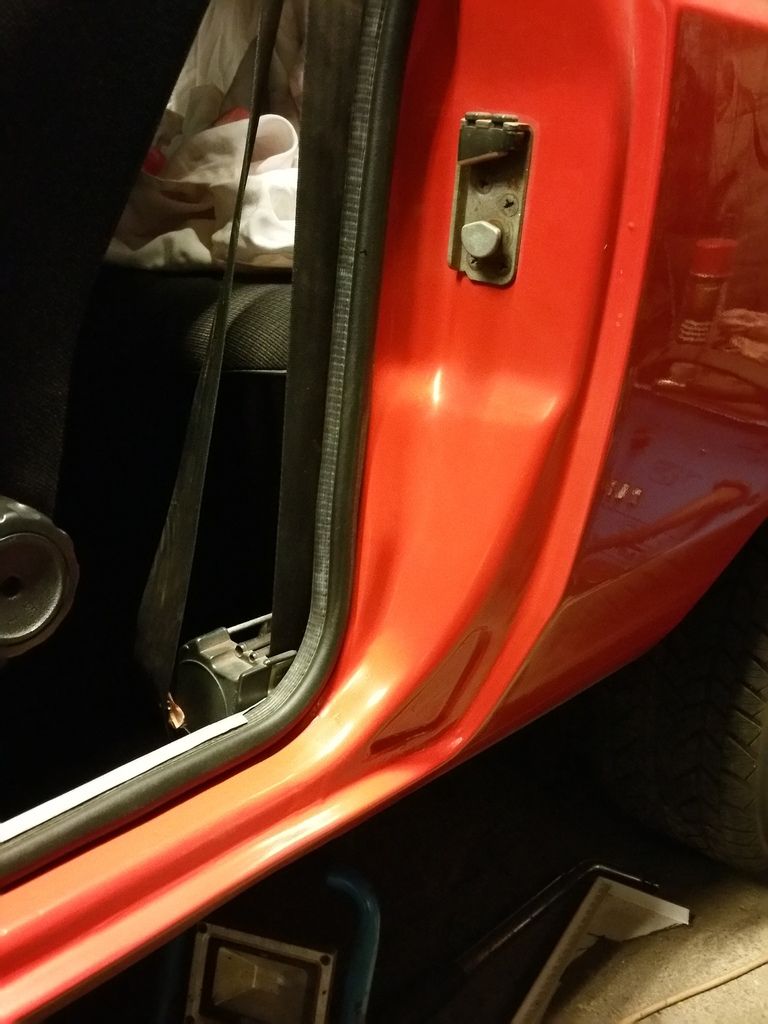 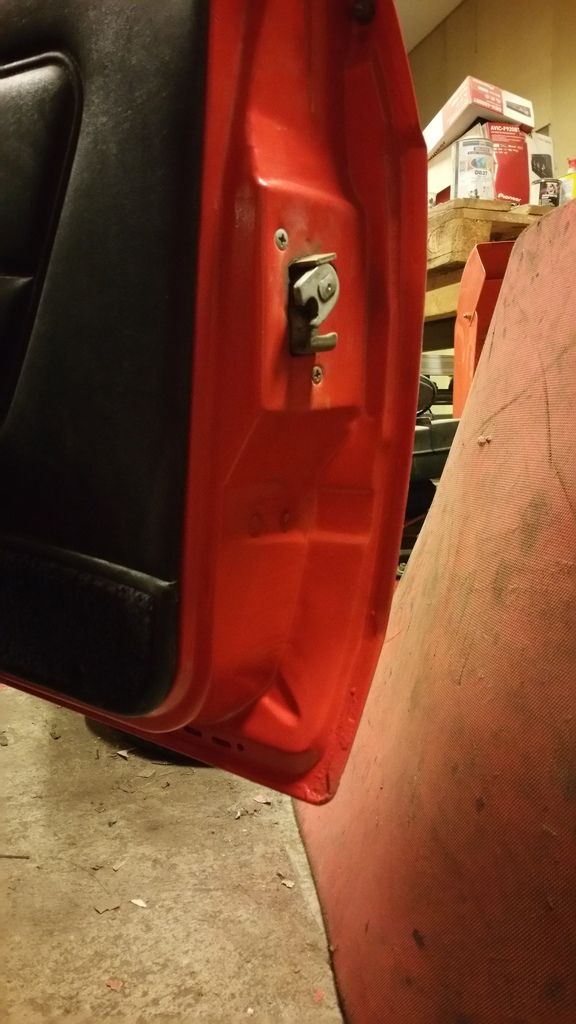 teH interior was cleaned, vacuumed and assembled for the last time afterwards. The right seat had a fur of steel shavings, dust and other grime after been standing in the garage during all this time. 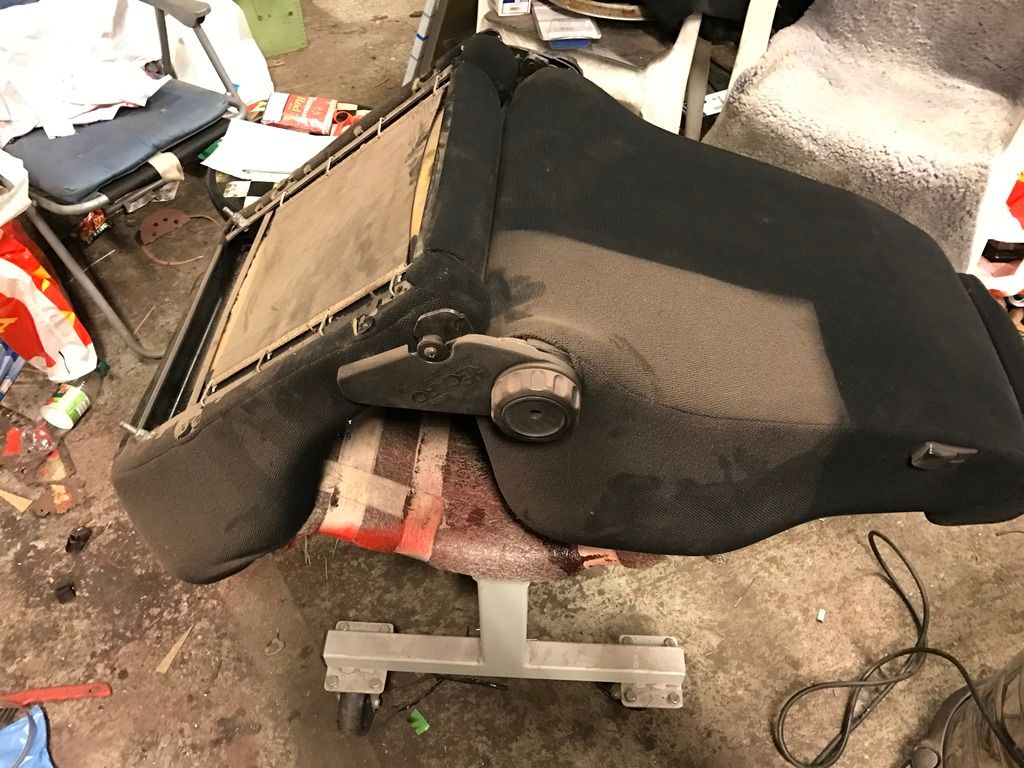 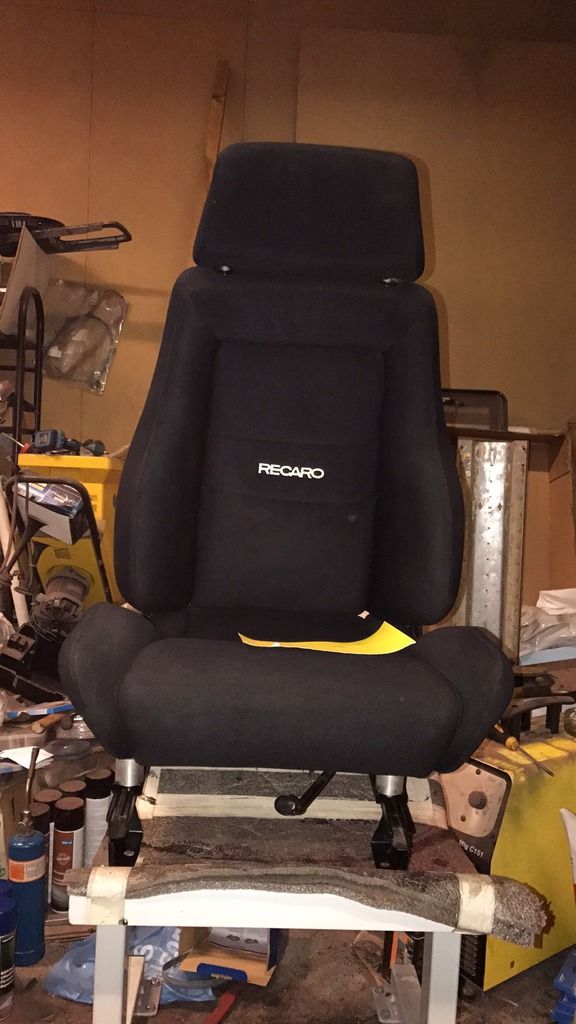 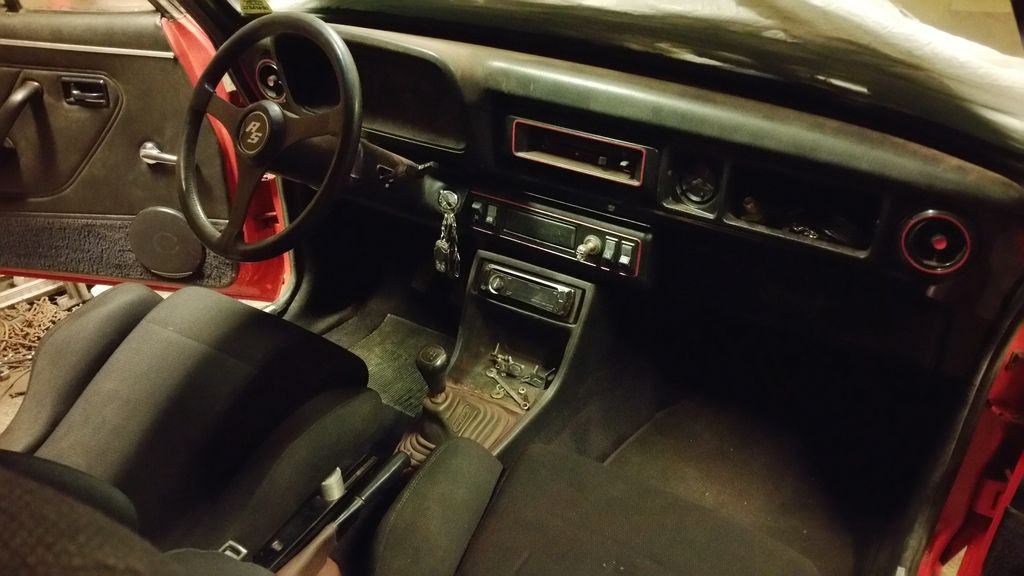 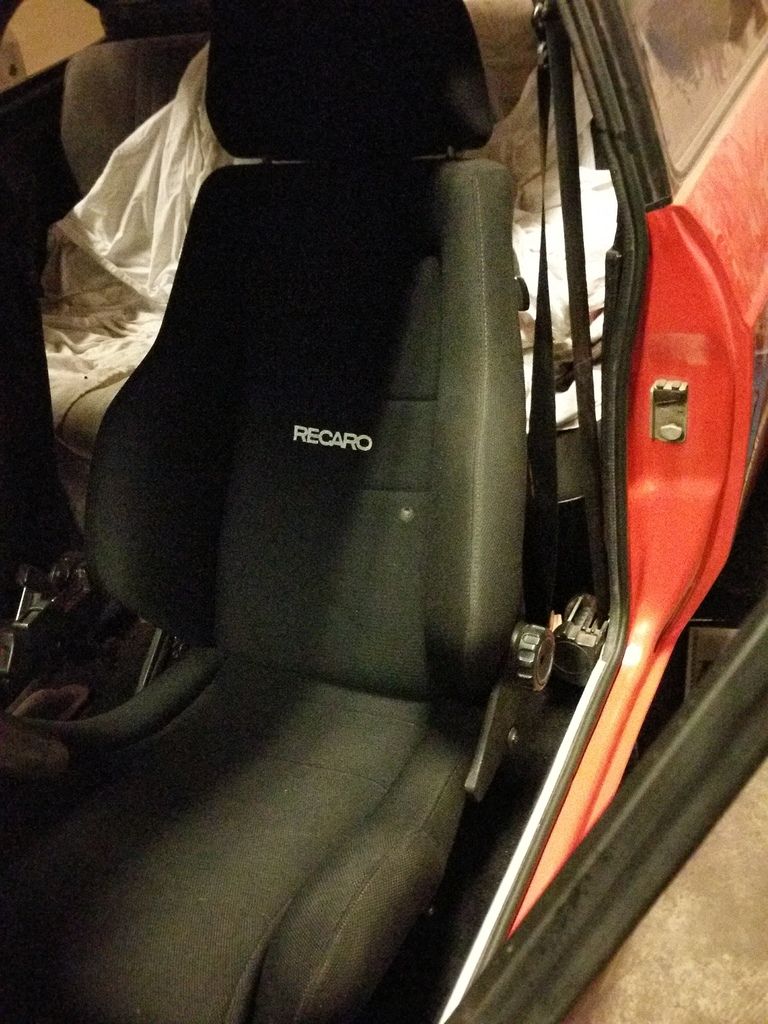 Then I wanted to paint the timing cover. It was full of flaky paint and surface rust, so It got the standard treatment with the rotating steelbrush, primer and topcoat: 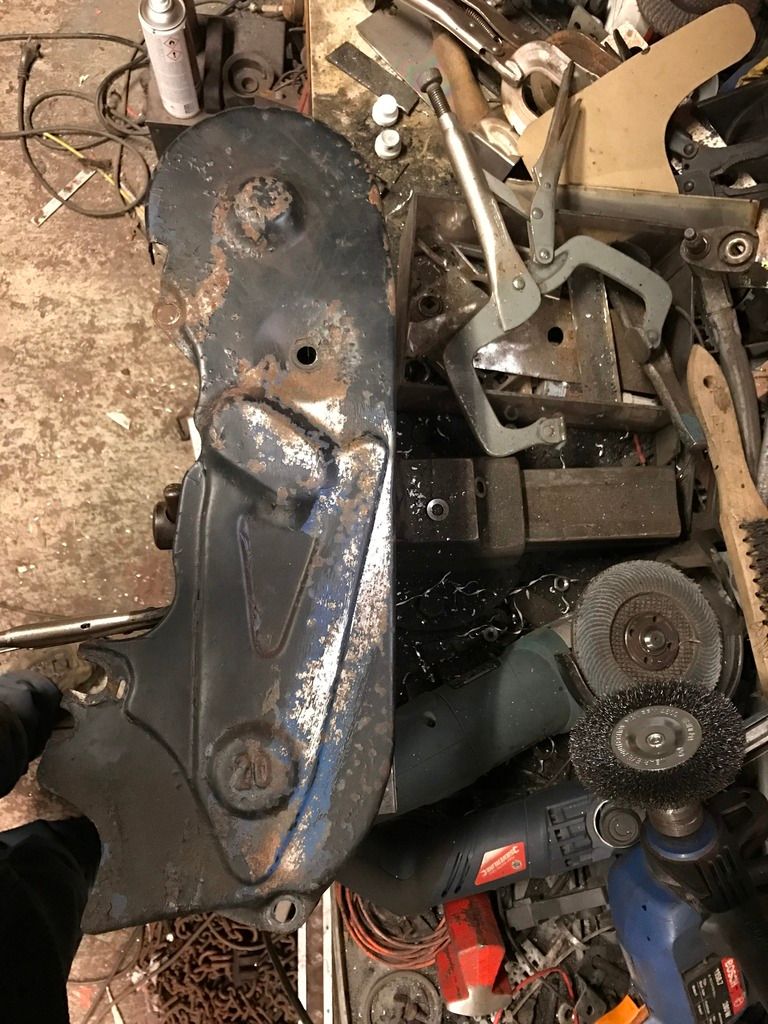 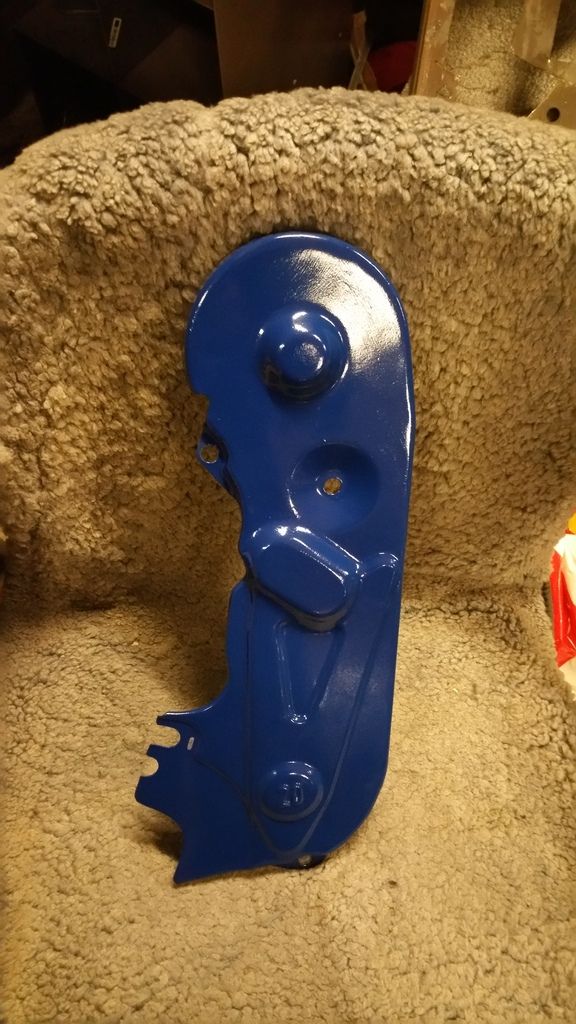 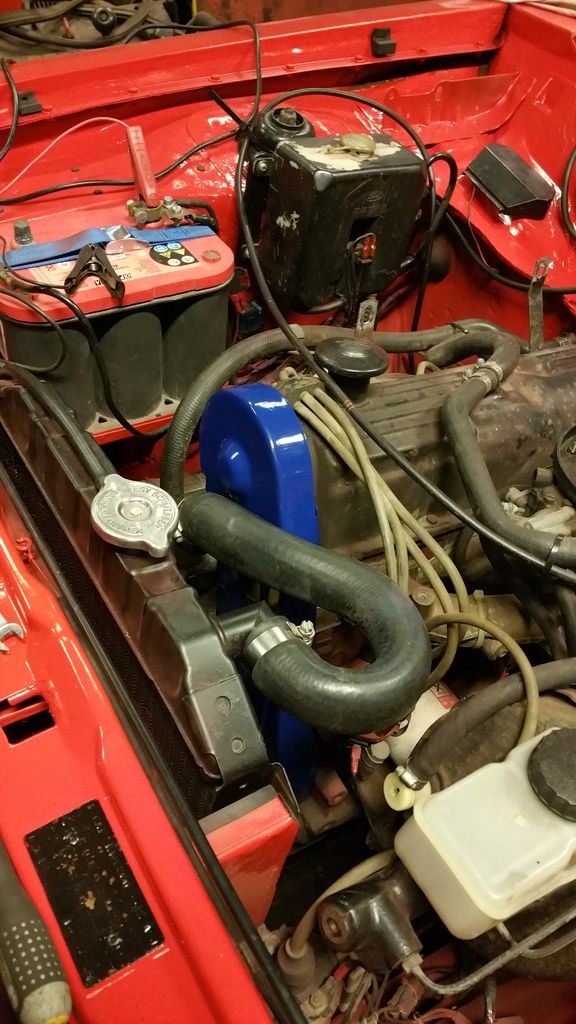 The Rocker Cover is also getting this treatment when I'm adjusting the valve clearance. It too has flaking paint and a few rust spots. The valves badly need clearance adjustment. Next project on the way to a painted car is the bonnet. Nearly the entire outside is covered in flaking and bubbling clearcoat with a few spots of rust as well. I gave it a coat of Isotrol primer in all the flanges before laying it down to inspect the horror. I just hope I can achieve some resemblance of a paint finish on this after I'm done. 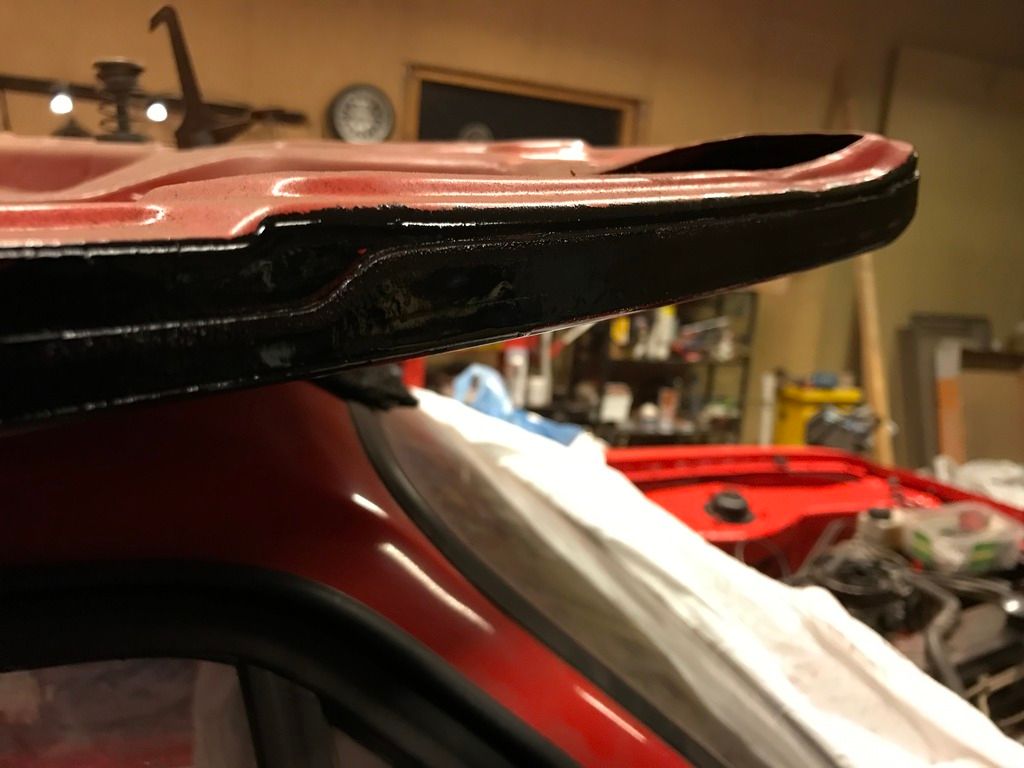 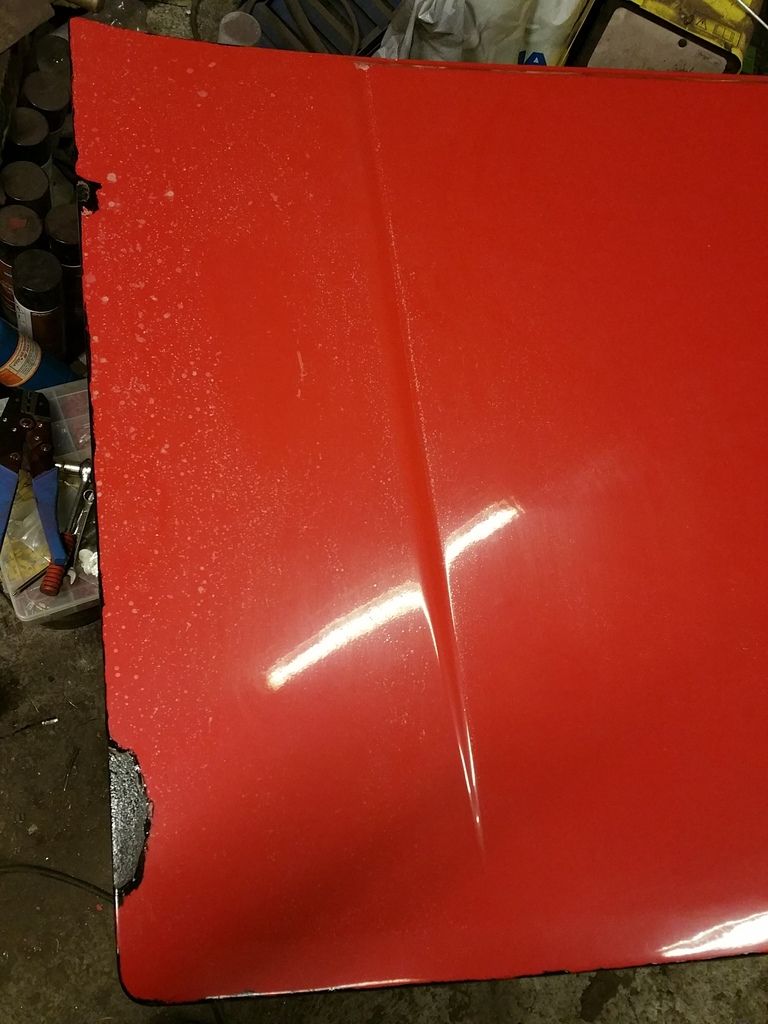 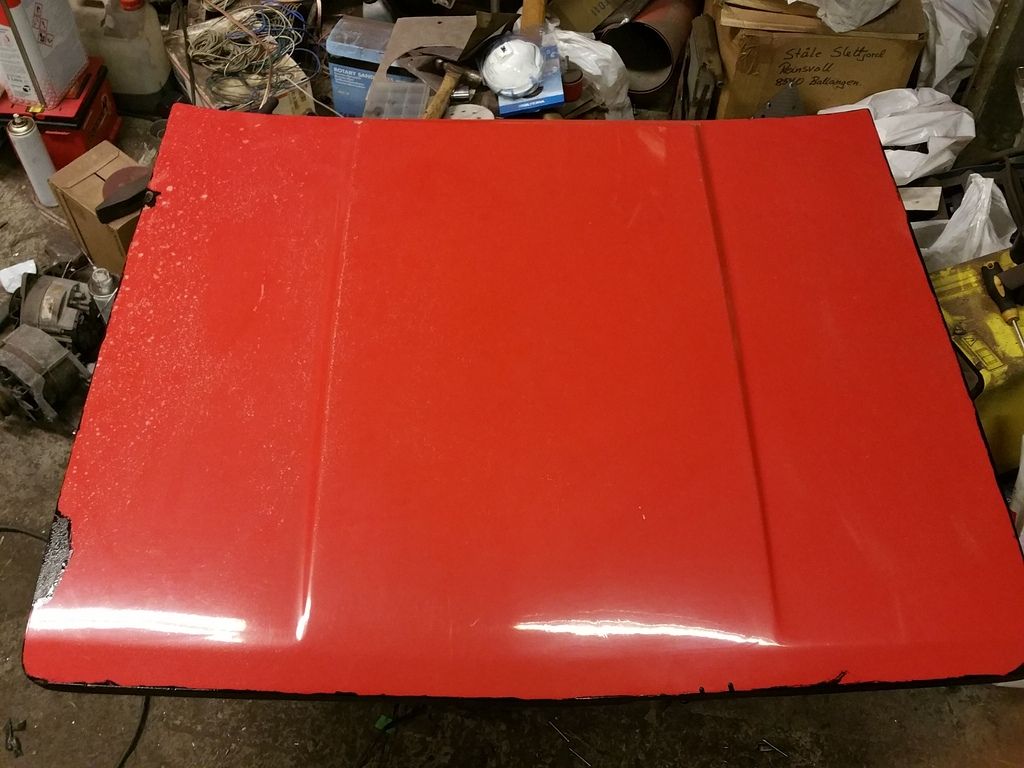 That's it for an update this time. My new studded 175/70/13 winter tyres have arrived today as well so I have to get those ready for when I'm releasing this animal into the wild. I've also ordered the original RS-decal pack for the side/boot/front pieces. Thanks for reading! Stay tuned, great things are afoot! |
| |
|
|
funkyhunk
Part of things
Old Ford's R Us
Posts: 265
|
|
|
|
Small update coming. Not much visible progress has been made, but some have been done regardless. I have tidied up the wiring under the bonnet to a large degree, found lots of wires that did absolutely nothing, and simplified alot of the other stuff. I also cleaned the inside some, painted the sills and rockers with stonechip. And lots of niggly annoying little bitty timeconsuming stuff. And waxoyling ALL the surfaces that's not going to be painted. But, the nose-cone was assembled/mounted for the (hopefully) last time: 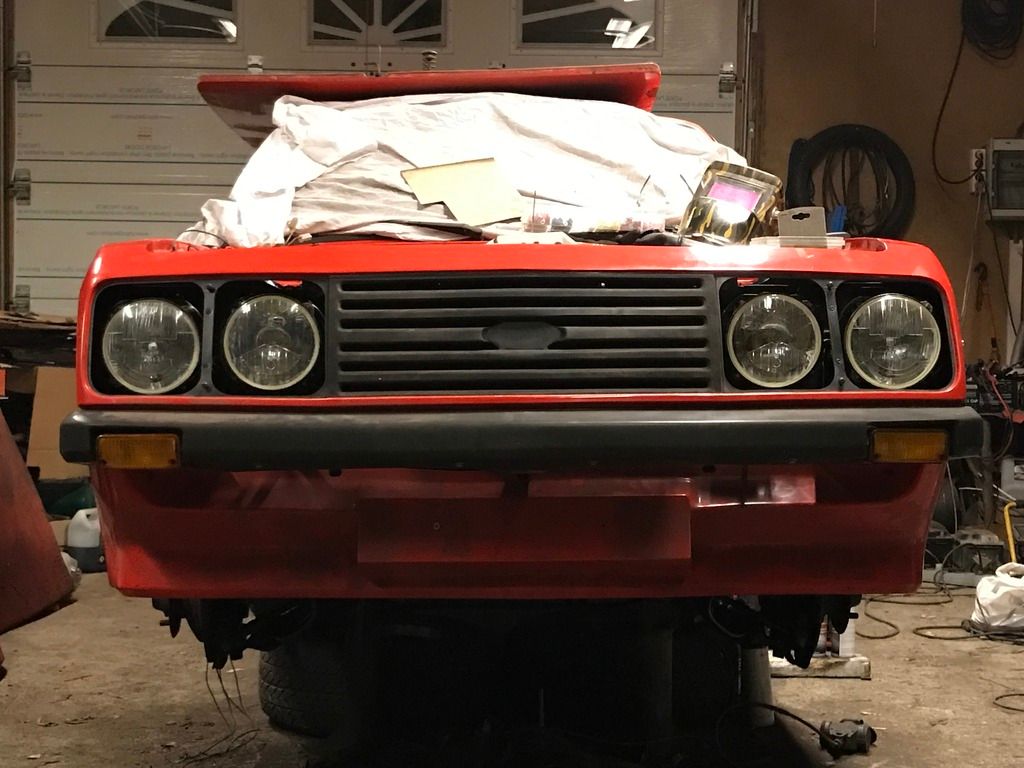 With a modified red Ford badge in the grill 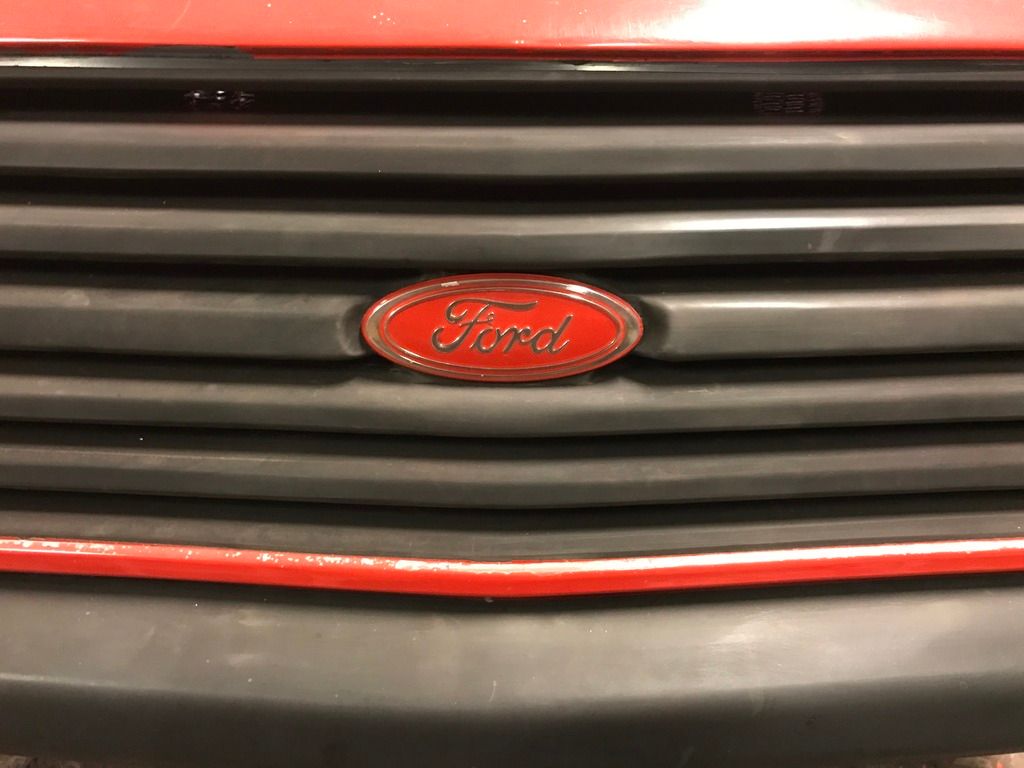 Testing the high beams: 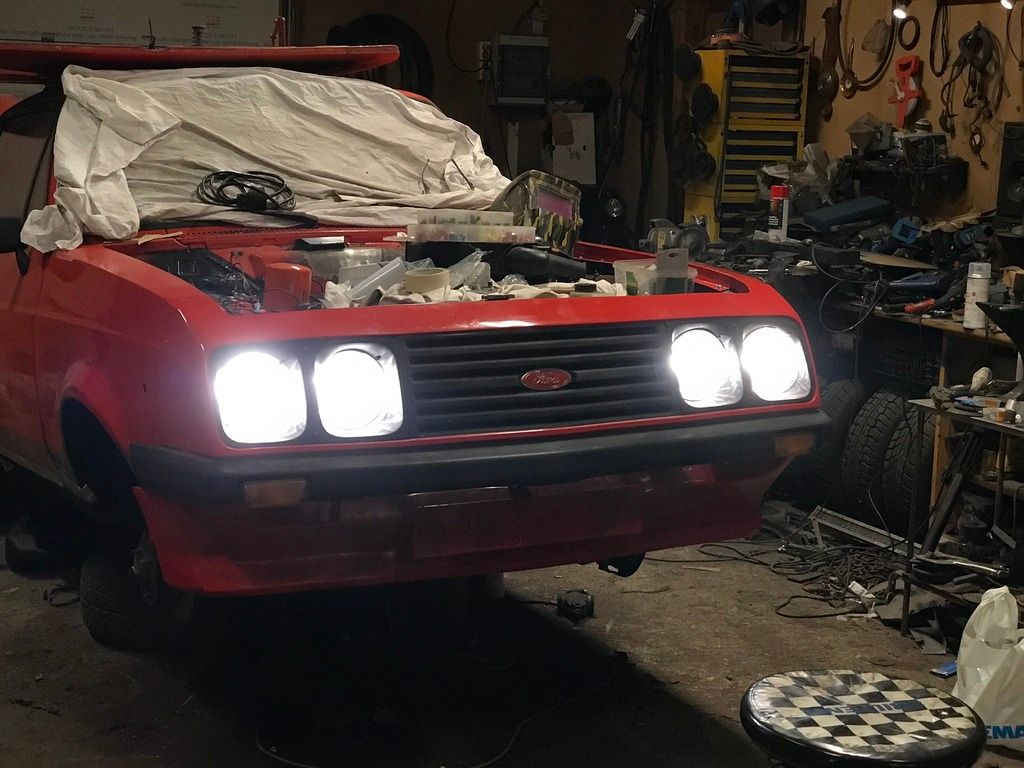 So, time to do something about the under bonnet-area. I debated to do something with this area since it won't be seen when the hood is closed, and I'm the only person I know of that is going to open it. But in the end I jumped head first into it. First sanding a few hours, then wiping it down with thinners, and then painting with rattle cans. Before the work, looking kinda horrible: 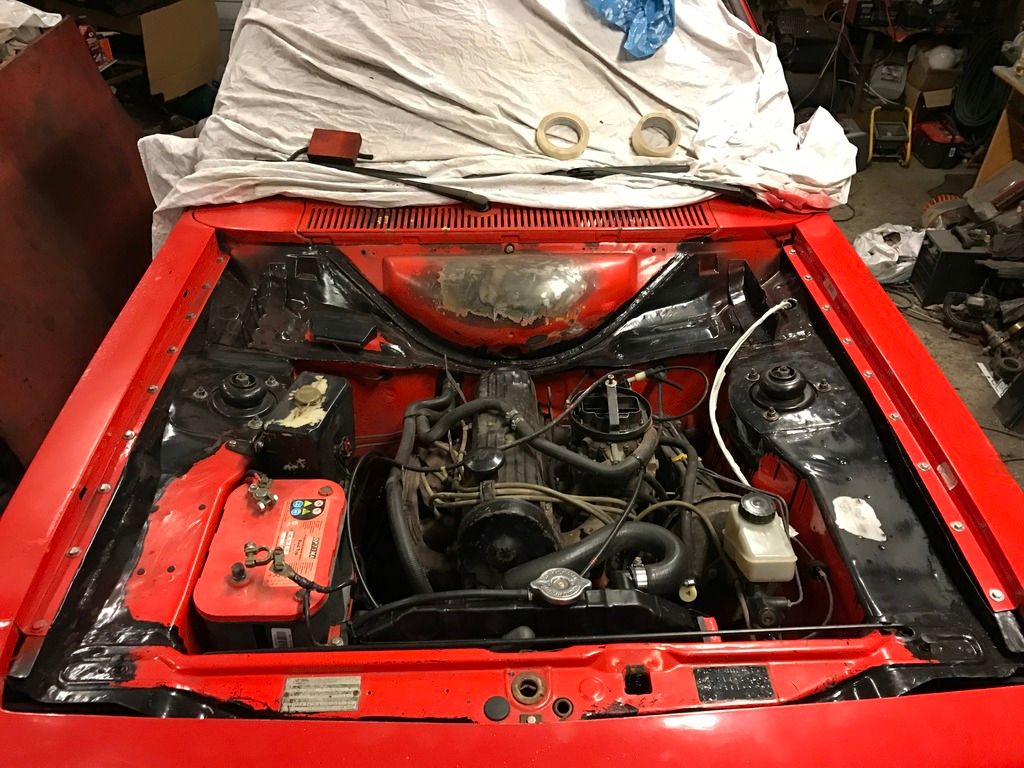 After the first coat of paint: 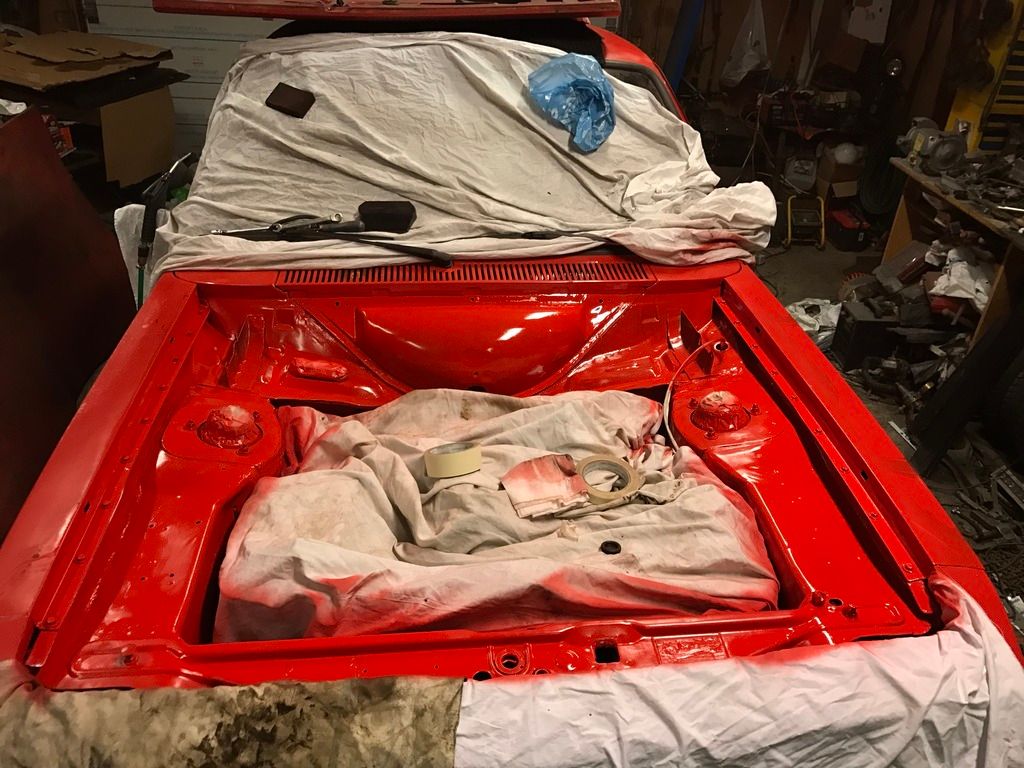 This is after three coats of paint, and two of clearcoat. I haven't removed all of the masking tape either: 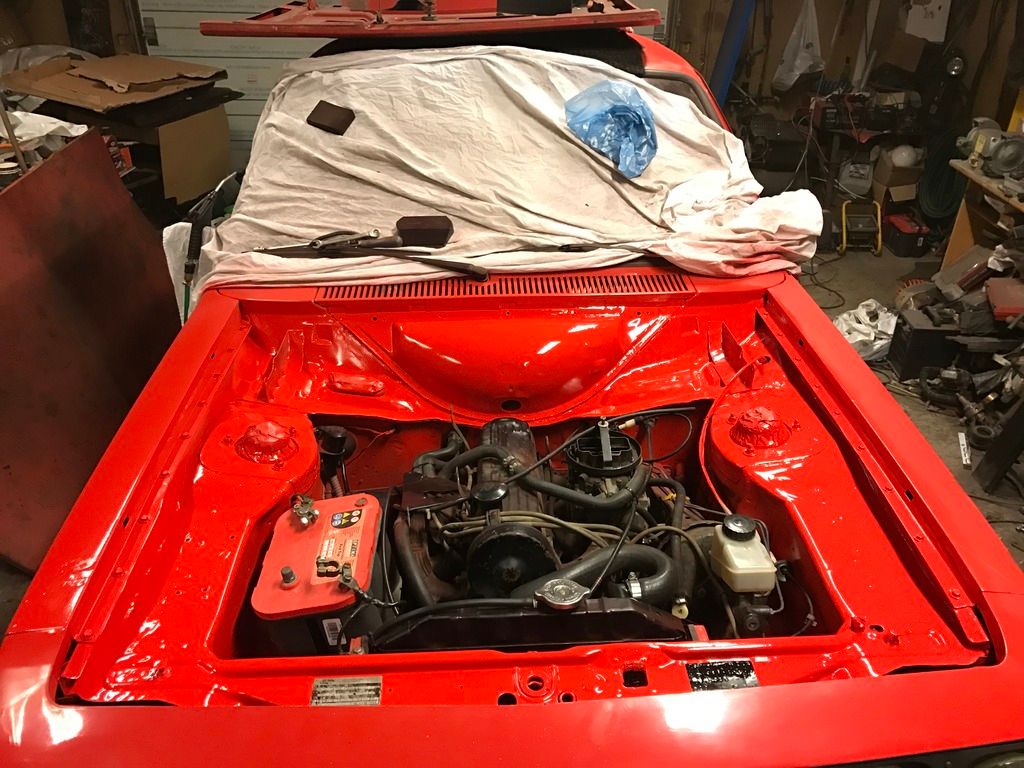 An enormous lift of the looks in the engine compartment. Pretty chuffed with that Thanks for your interest |
| |
|
|
funkyhunk
Part of things
Old Ford's R Us
Posts: 265
|
|
|
|
Very thorough work, that should last for a few more years now Coming from you that's a great compliment. You are the reason I dared to take the plunge into "making panels" and fixing rust. I used the making panels thread as a guidebook for my first babysteps into the world of rust repairs. If it hadn't been for that thread and your thorough documentation and how to, hints, tips and tricks I would have fumbled alot more than I really have. And for that I thank you sir If you are ever around my neck of the woods in Northern Norway, gimme a shout, I'll buy you a pint, or a dozen! Spectacular craftmanship ! I'm in awe. Please continue 😬 Thank you very much, I appreciate it plenty This years last update is afoot! A little peek at the butchering I did to the battery tray support to have room to fit the 90 amp dynamo: 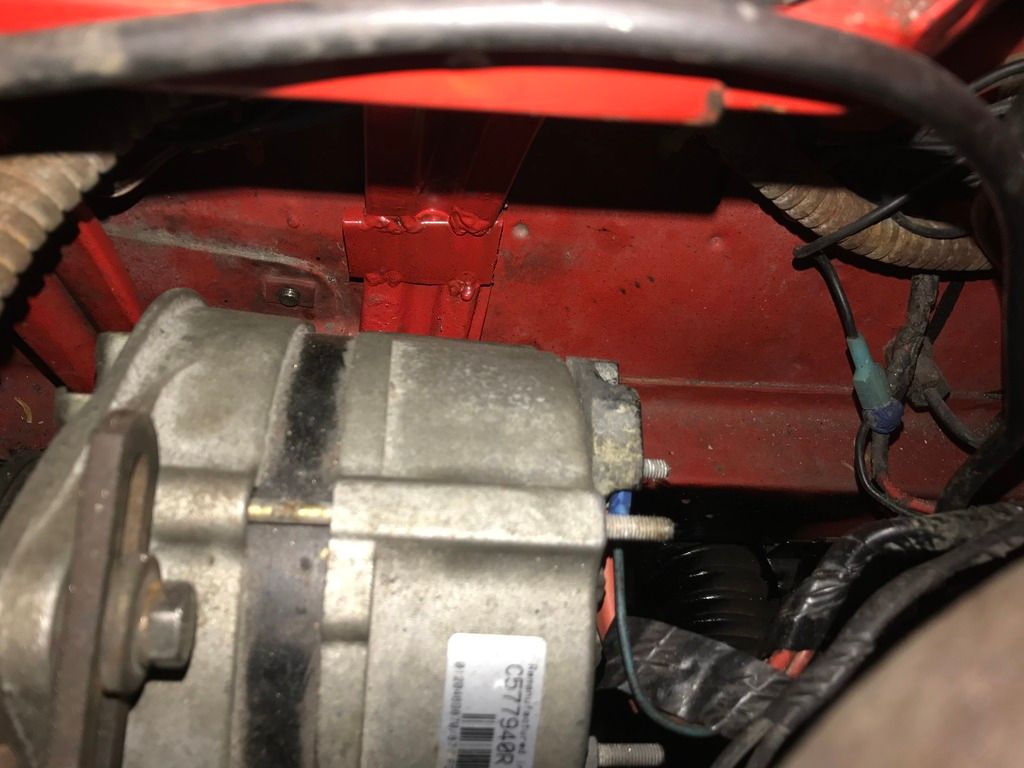 Then I sanded off old black paint (!!!) from the front indicators, one down, one to go:  Additionally I cleaned up some of the wiring in the right side of the engine bay. Specifically this area: (picture from 2009 when i just bought it) 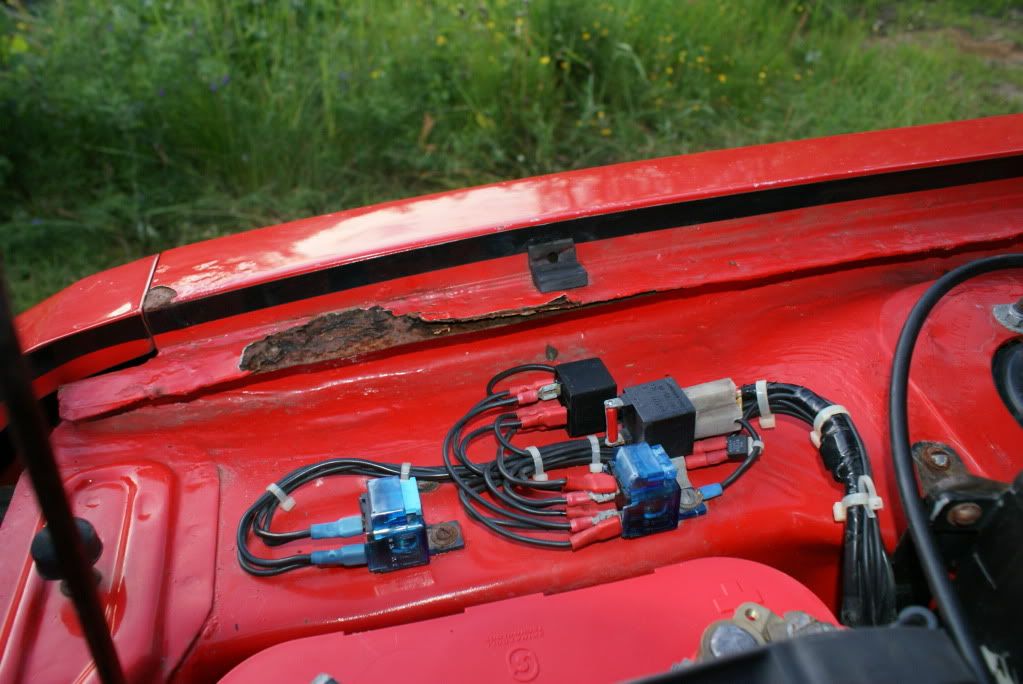 I had no plans of driving with any extra high beams, foglights or anything as I had removed the old foglights that were on the front. So i tried to find out what relay did what. well, as it turned out only one of those relays had any function, that was to the inner high beams of the standard headlights. The three other relays had something to do with the foglights, but for the life of me I couldnt find out what. It certainly didn't help that all wires to and from were black either. So, I just removed them, and a BUNCH of wires, tidying up massively in the engine bay. Result!! Here is everything complete in the front, ready for the dropsnoot, with new horns, bulbs, lamps, and so on. 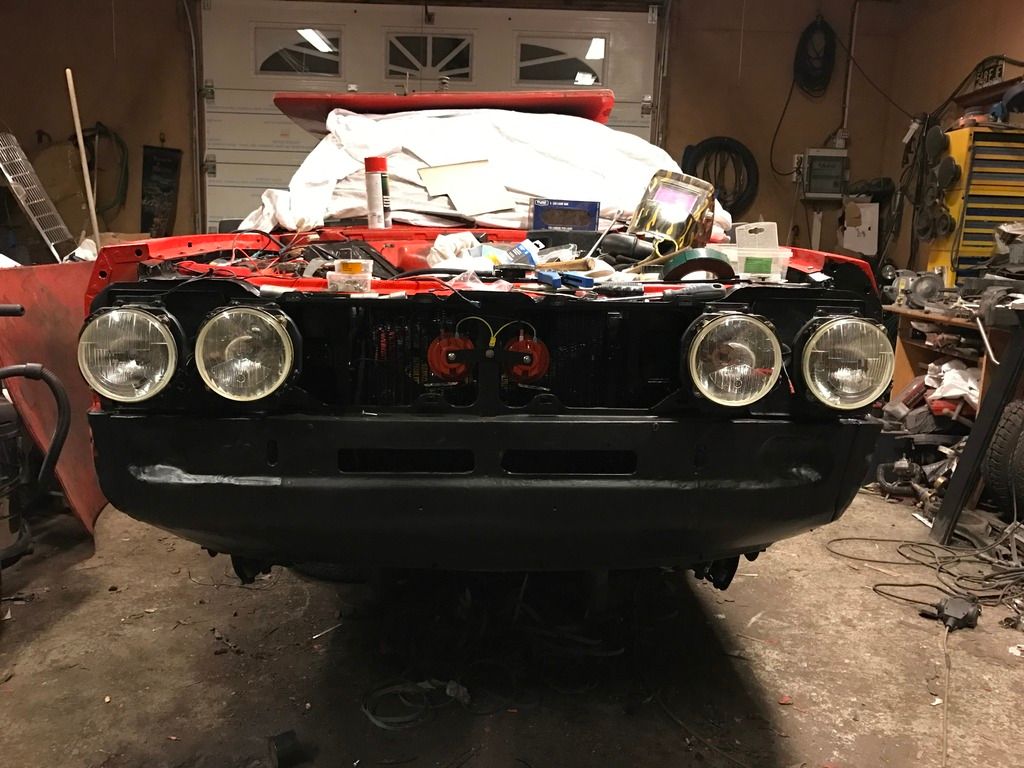 What is next is to assemble the dropsnoot, align all the gaps to the bonnet and fender and so on. After that it's over to paint. And how to proceed with that debacle. Tomorrow I'm going to enjoy the last day of this horrible year 2016, eat myself stupid on a huge bird, and drink copious amounts of alcohol. It surely is needed sometimes. Happy new year guys and gals! |
| |
|
|
funkyhunk
Part of things
Old Ford's R Us
Posts: 265
|
|
Dec 28, 2016 15:28:51 GMT
|
Time for an update again. Some small tasks have been completed, in spite of celebrating christmas and stuff like that. Fender has been primered, and given two coats of topcoat with Isotrol Pansar:  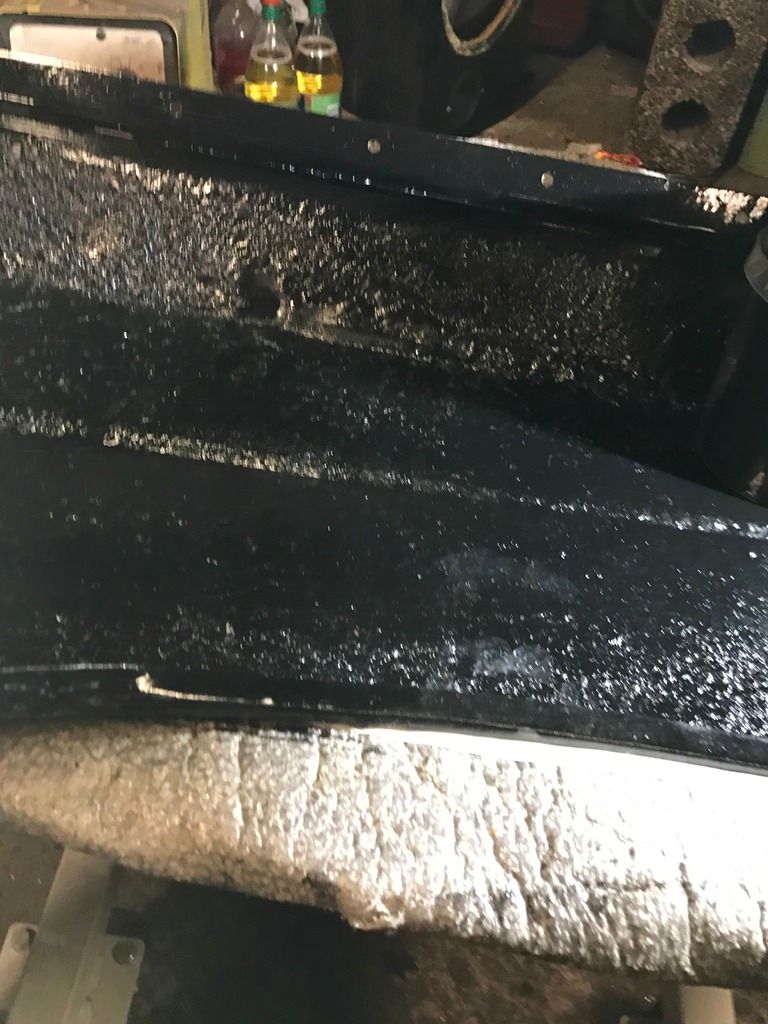 I also painted the A-pillar prior to mounting the fender. 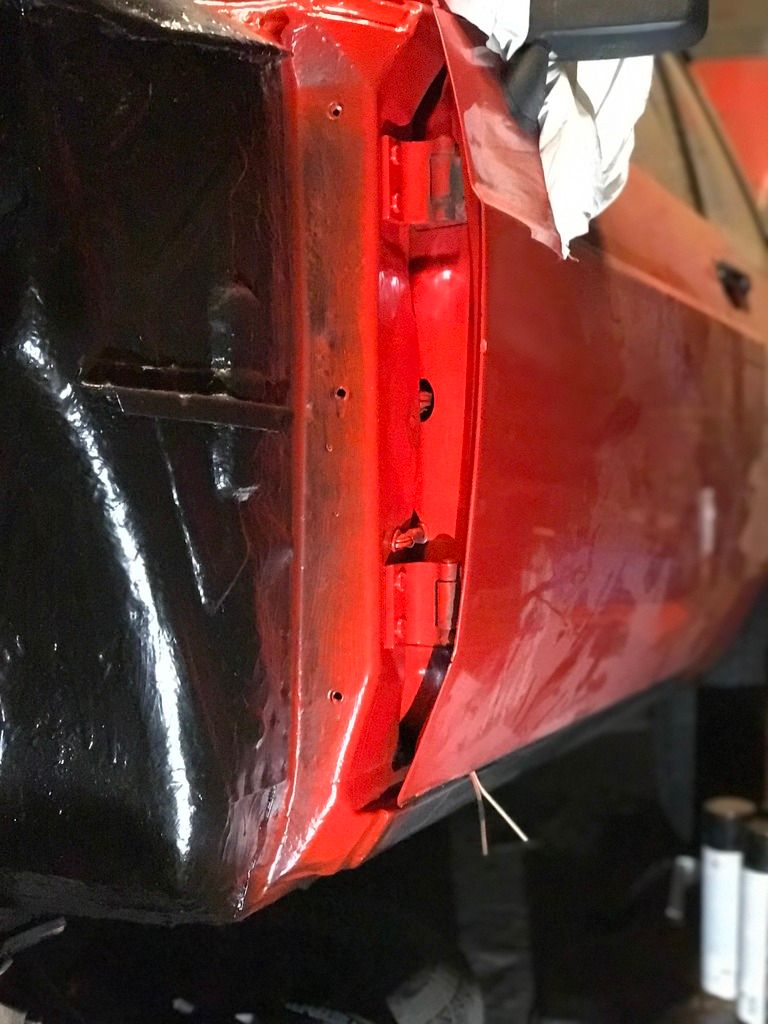 Inner fender with a coat of tectyl/waxoyl: 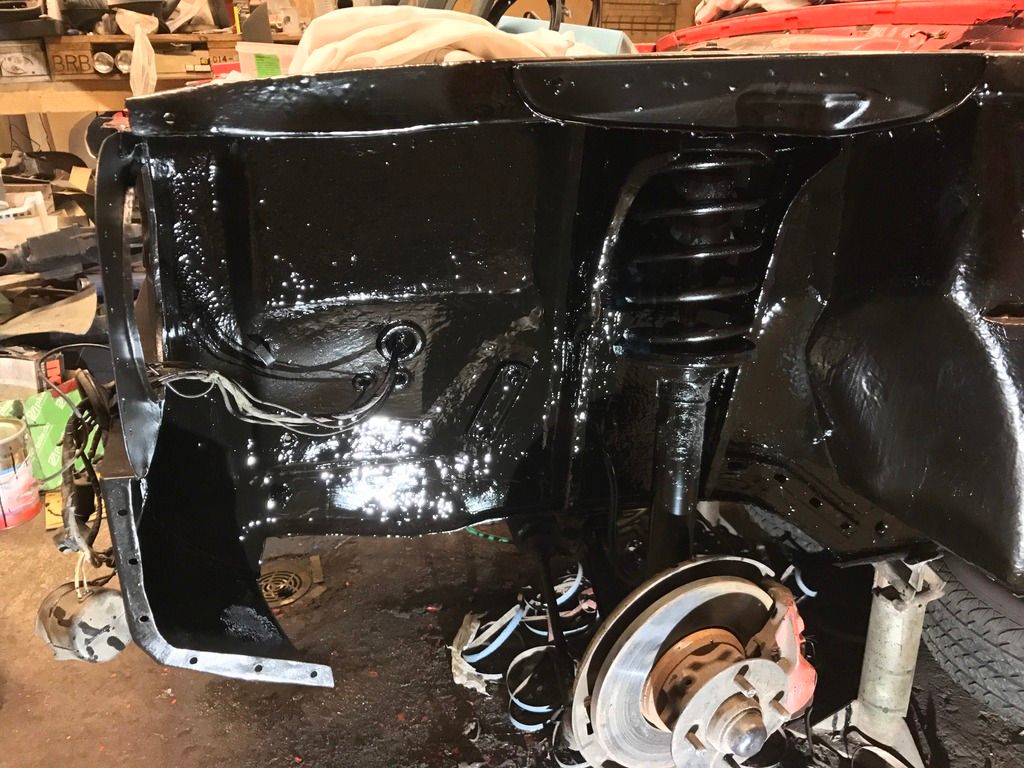 Here I have mounted the headlight brackets, given a last coat of Pansar in the fender flange, and mounted the fender for the last time. 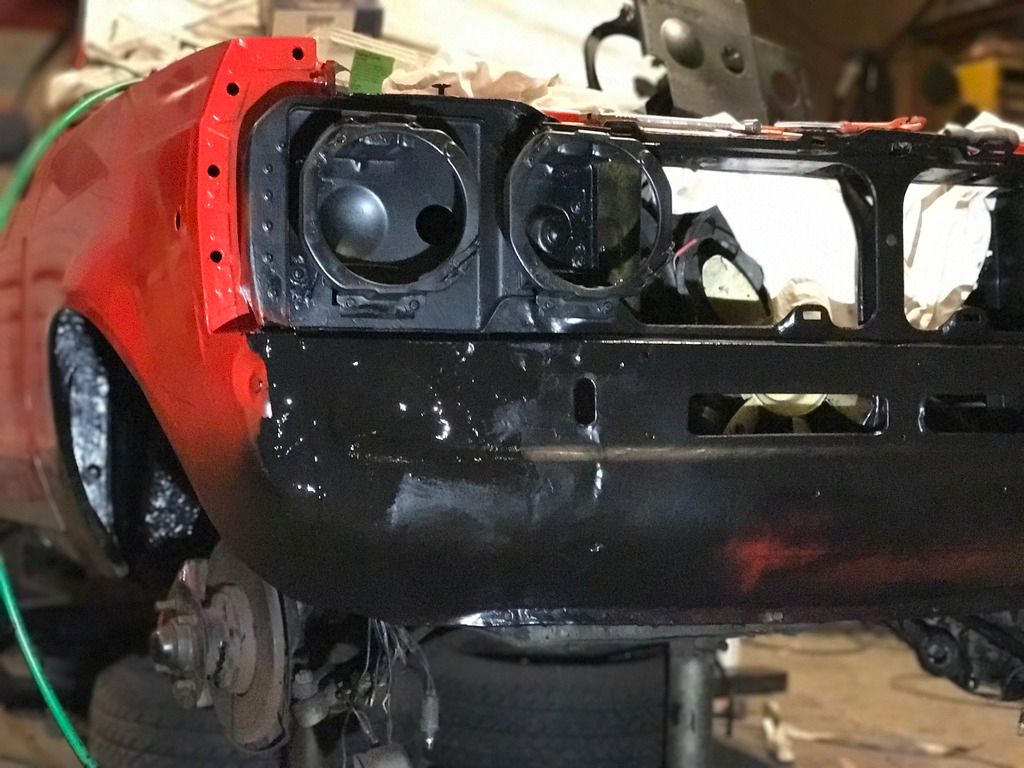 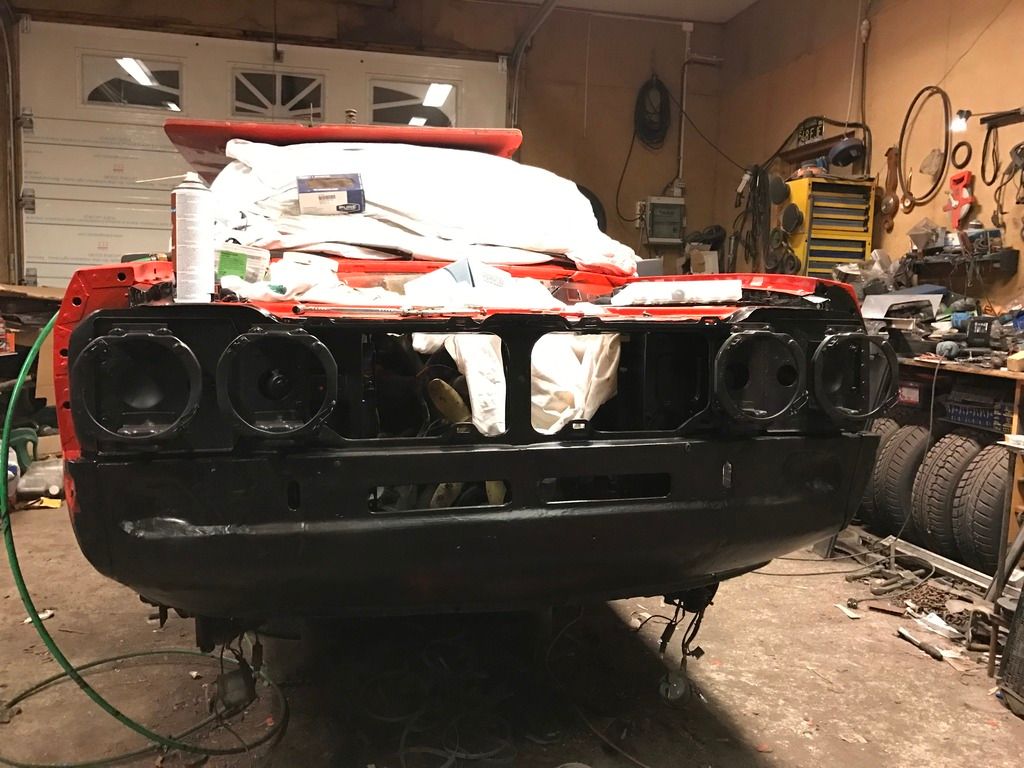 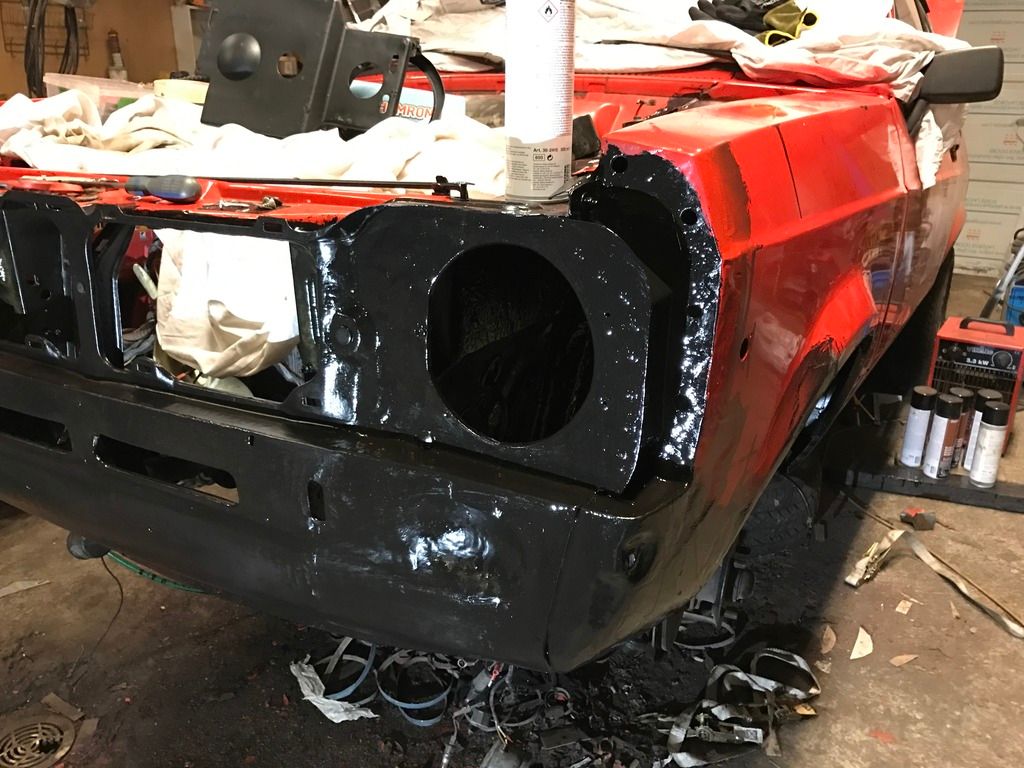 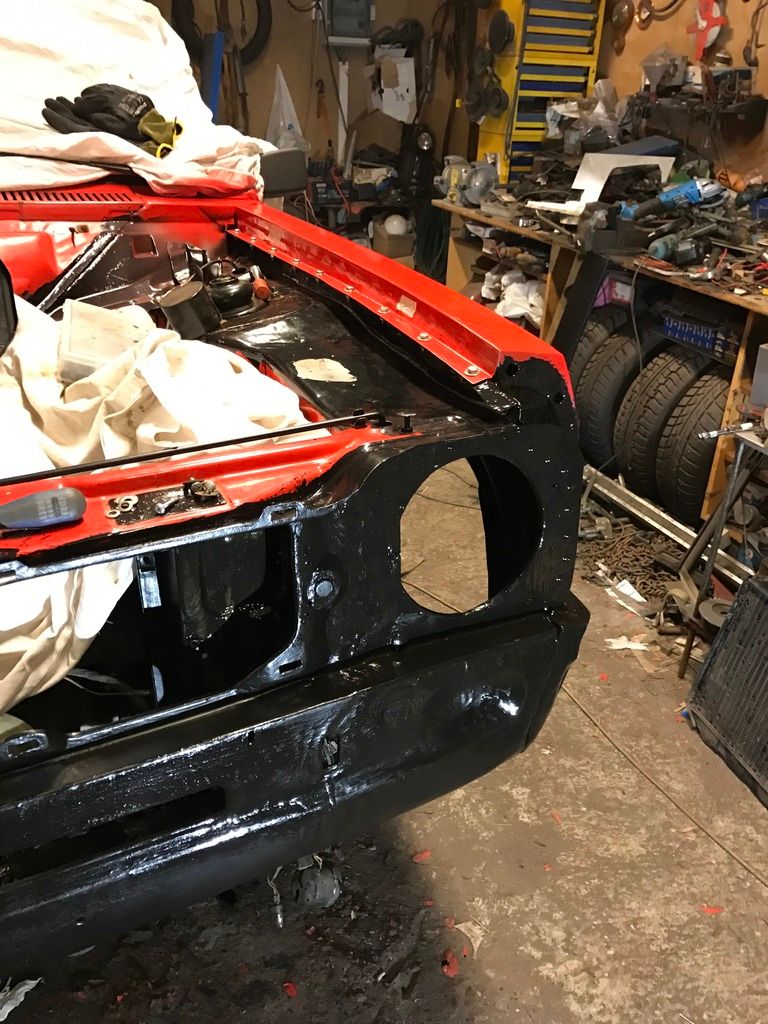 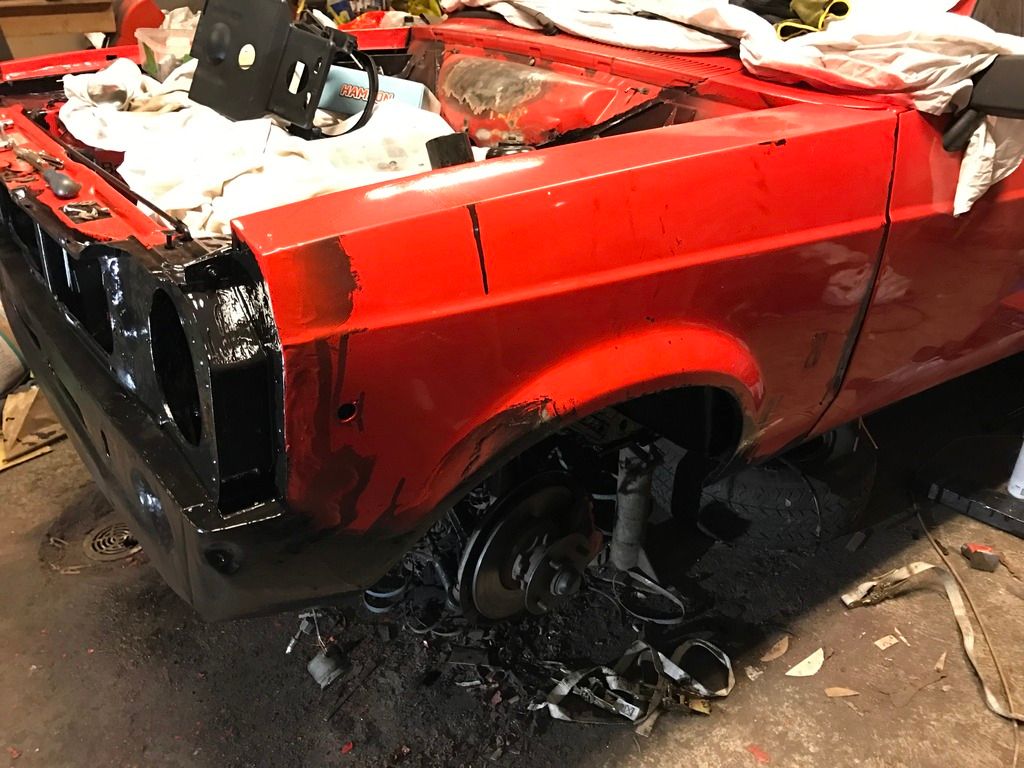 Now time to look at the dropsnoot. I found a crack at the lower right corner, and fixed it.  At the same time I took out the mounting brackets, removed old paint and surface rust, exchanged the bolts for stainless ones, and painted them:  All the hardware in the dropsnoot is now stainless  And a small modification to the ford badge, so it'll match the colour of the car  Next up was the radiator. The old one was in a rather sorry state, it had been patched a few times, and the bottom fitting/flange had previously been cut down to around a 15mm long flange, so I found two old Taunus/Cortina Rads I had lying around. The bottom fitting was angled so I had to use a Taunus bottom hose as well. I also had to make new mounts since the mounting holes was in a different and lower position on the escort rad. The lineup, leftmost is original Escort rad, tired Taunus rad in the middle, and ready to mount modified Taunus rad to the right. 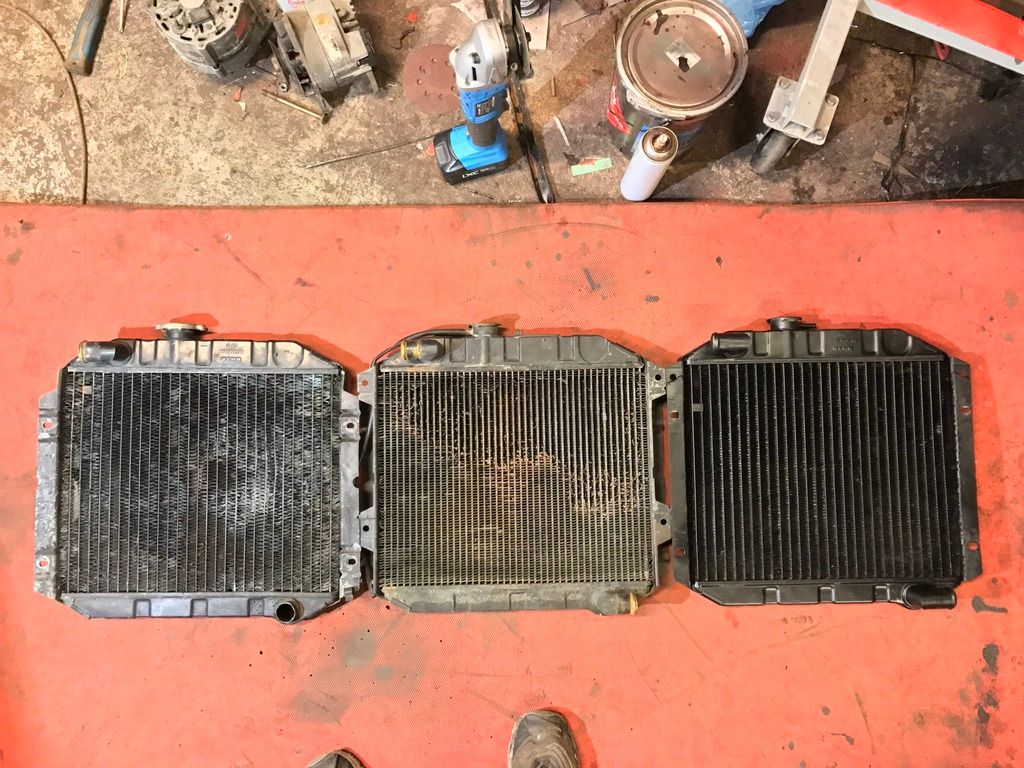 The most annoying fault with the rad, the side bracket had broke off the bottom tank, and also the hose flange had been cut down by some genious. 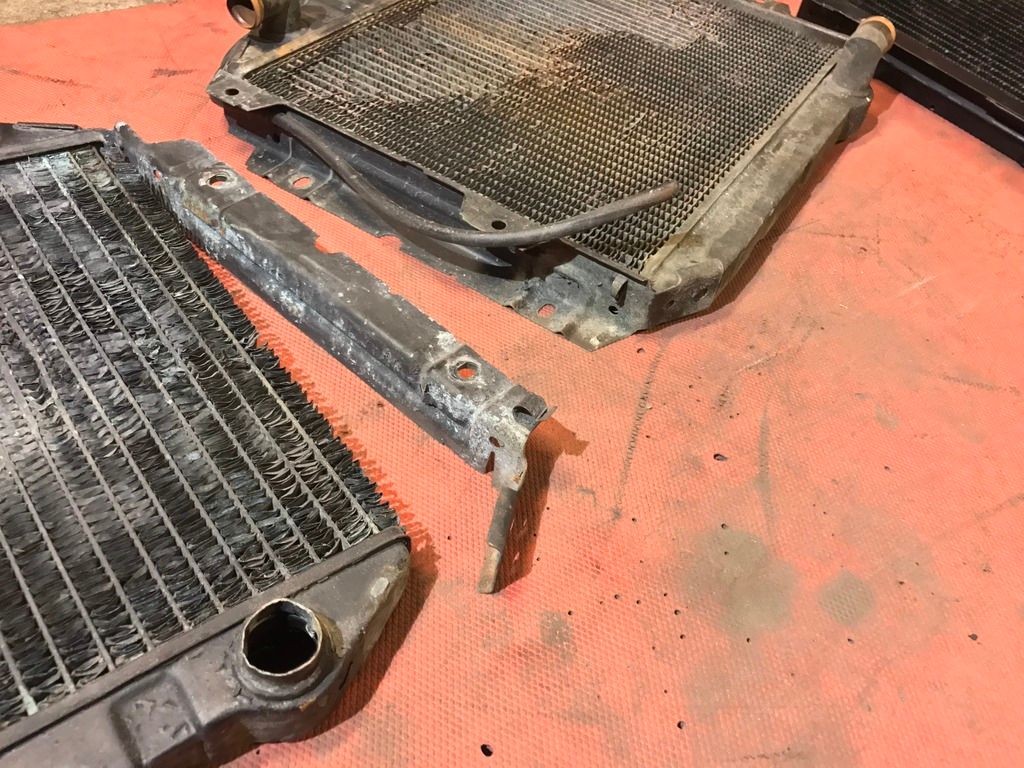 Mounts came out like this, fit like a glove. Rad also painted matte black. 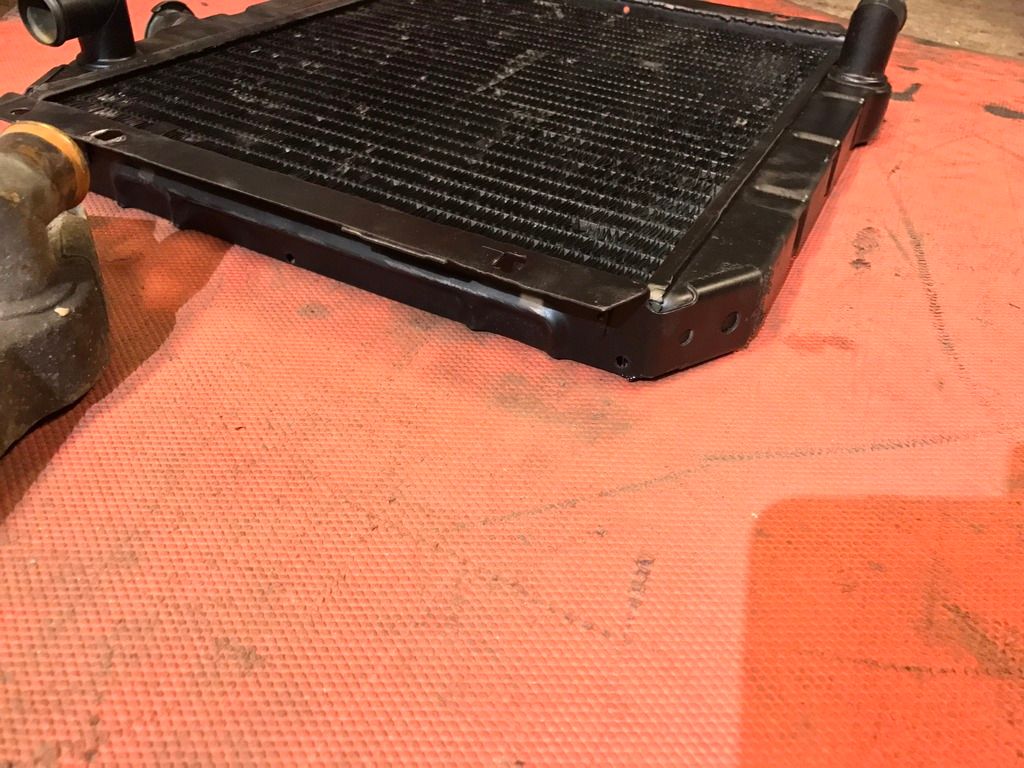 Time to upgrade the charging system abit. The old "Prince of Darkness" Lucas alternator only trickled charge into the battery, and the headlights flickered when idling. A newly serviced 92 Sierra DOHC 90amp alternator would be a definite upgrade. Luckily I had 2 I had to change the pulley from a ribbed to a small wedge-type wheel. Luckily I had that one also lying around. A bit of a size difference: 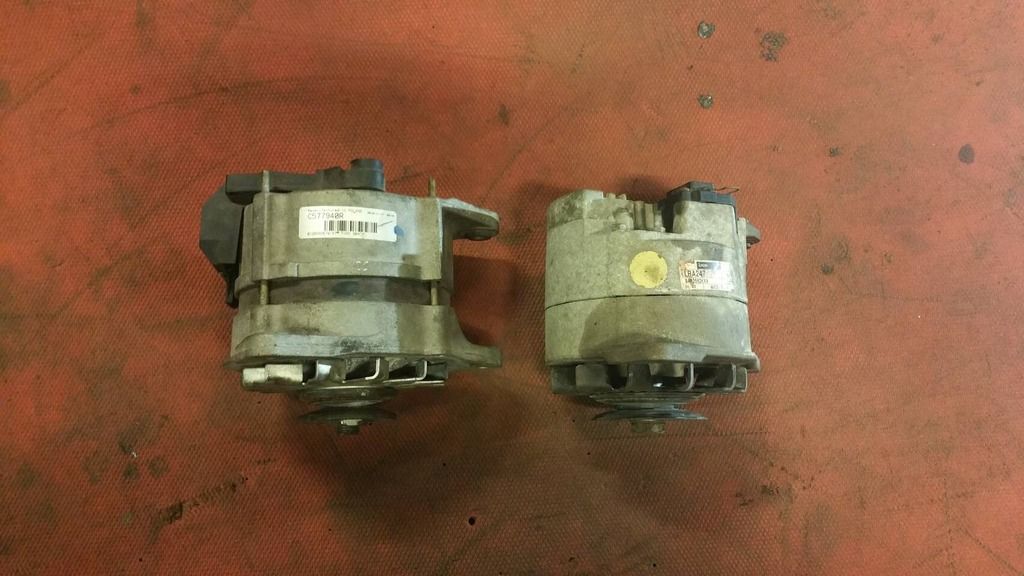 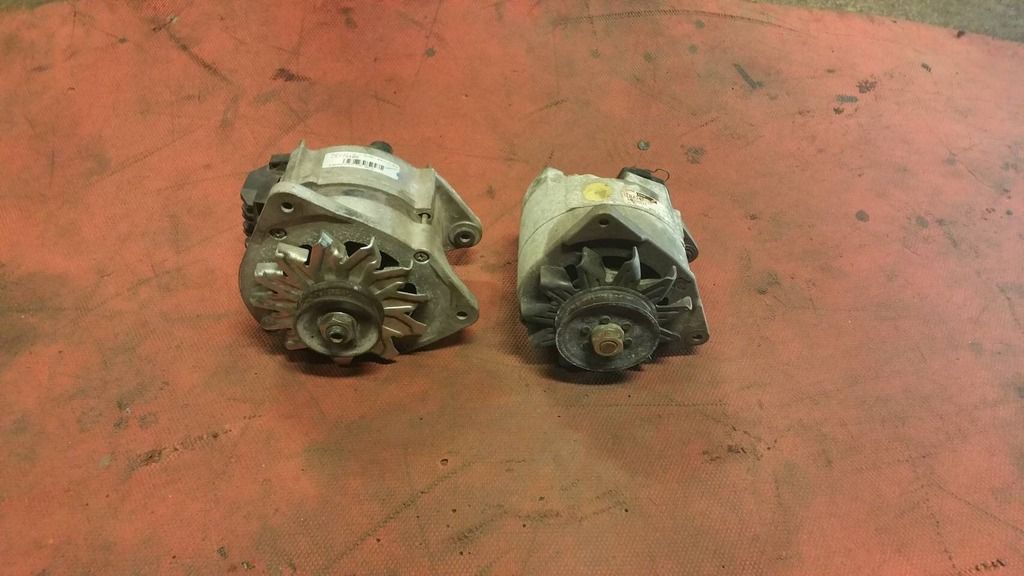 I had to take the anglegrinder to one of the supports for the the battery tray to have room to adjust it properly. I welded a piece between the cut supports, so the rigidity was maintained. Trial assemblage: 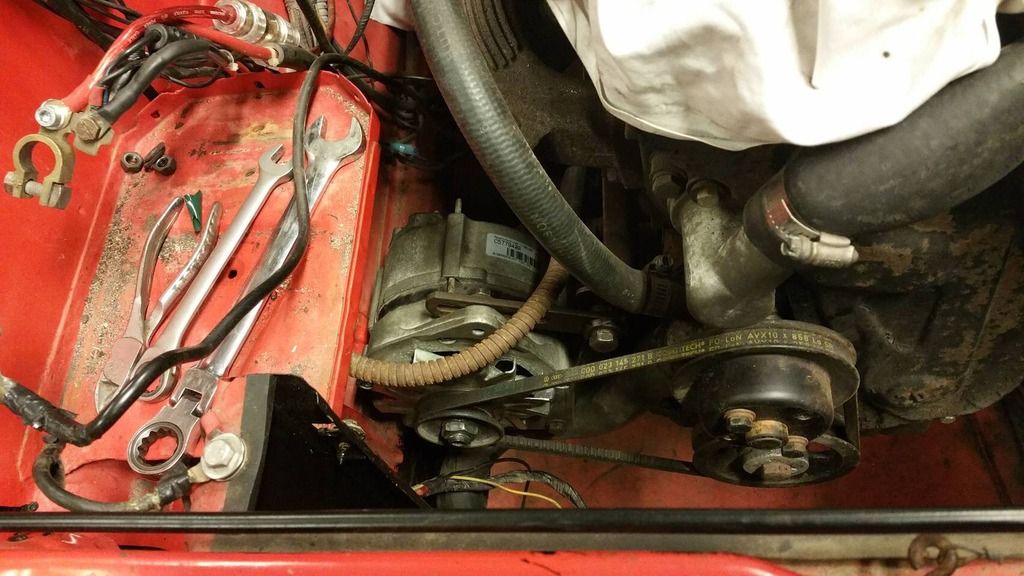 That's all I have documented for now. Have a nice new years everybody! |
| |
|
|
|
|
funkyhunk
Part of things
Old Ford's R Us
Posts: 265
|
|
|
|
|
So, what ever became of this old barge?
|
| |
|
|
funkyhunk
Part of things
Old Ford's R Us
Posts: 265
|
|
|
|
Just caught up on this. Spectacular work on the Escort. The panels and welds are things of rare beauty! Well thank you sir for your kindly words. I am humbled and inspired by your praise Time for a new update. Firstly the light brackets/mounts got a overhaul, here is one side done, one side not yet done. Both are done now tho. 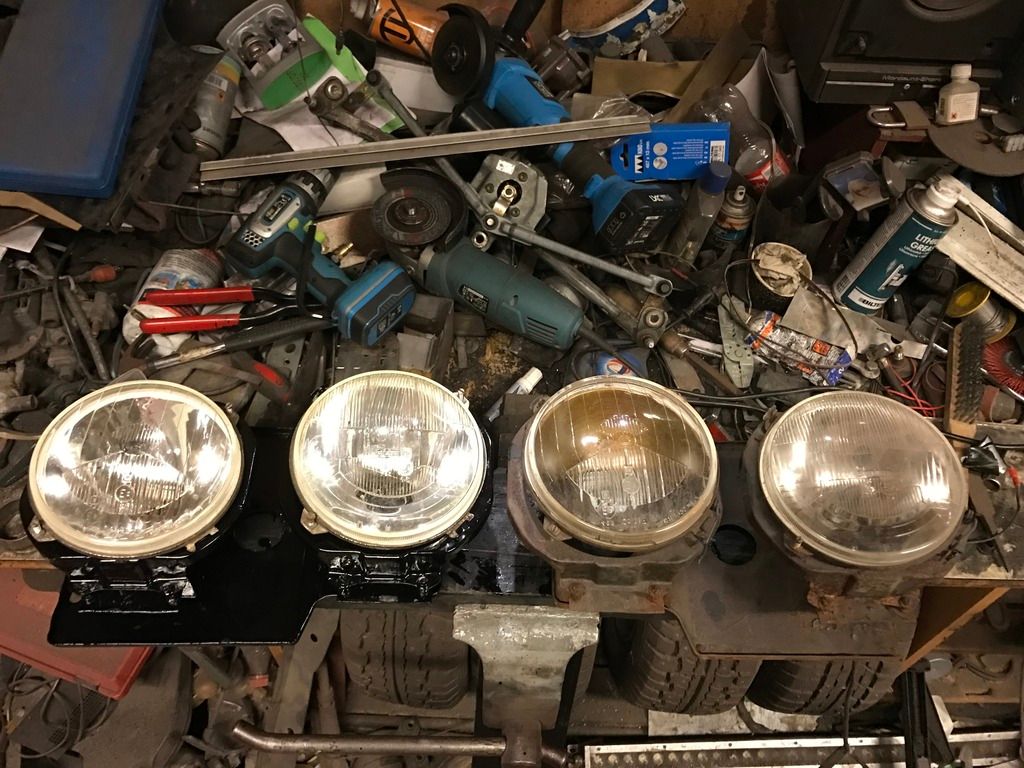 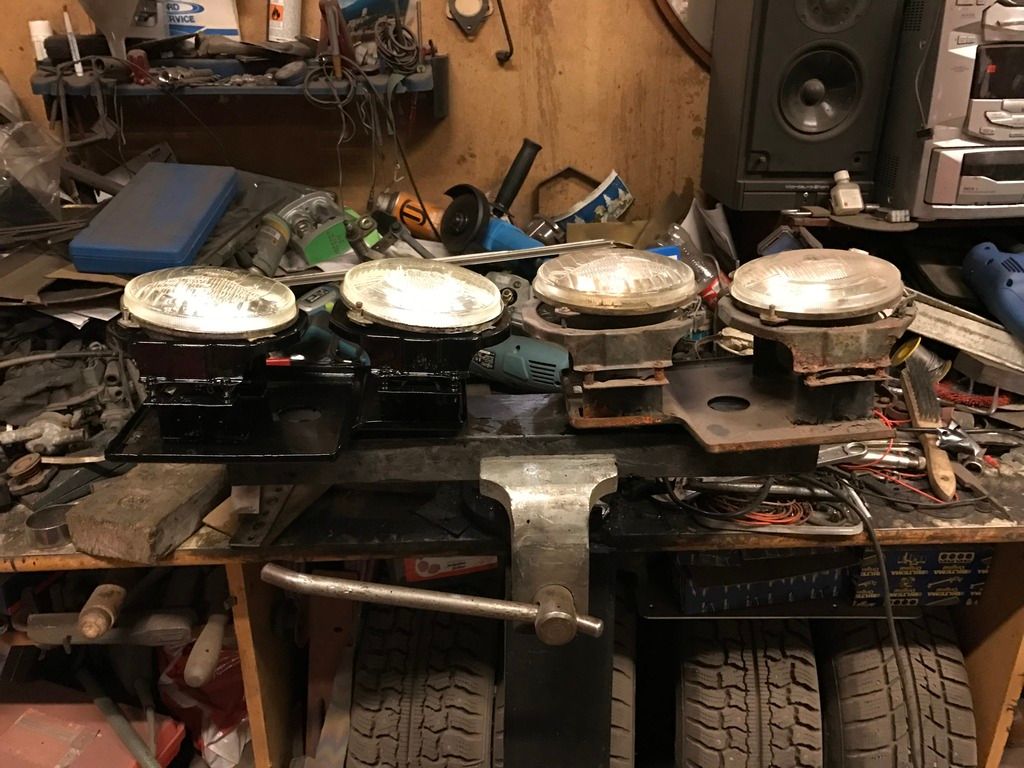 So to the last bit of the welding on this car, if my calculations are correct. (apart from the exhaust, but that doesn't count) The a-post mounting flange area was in a decrepid state: 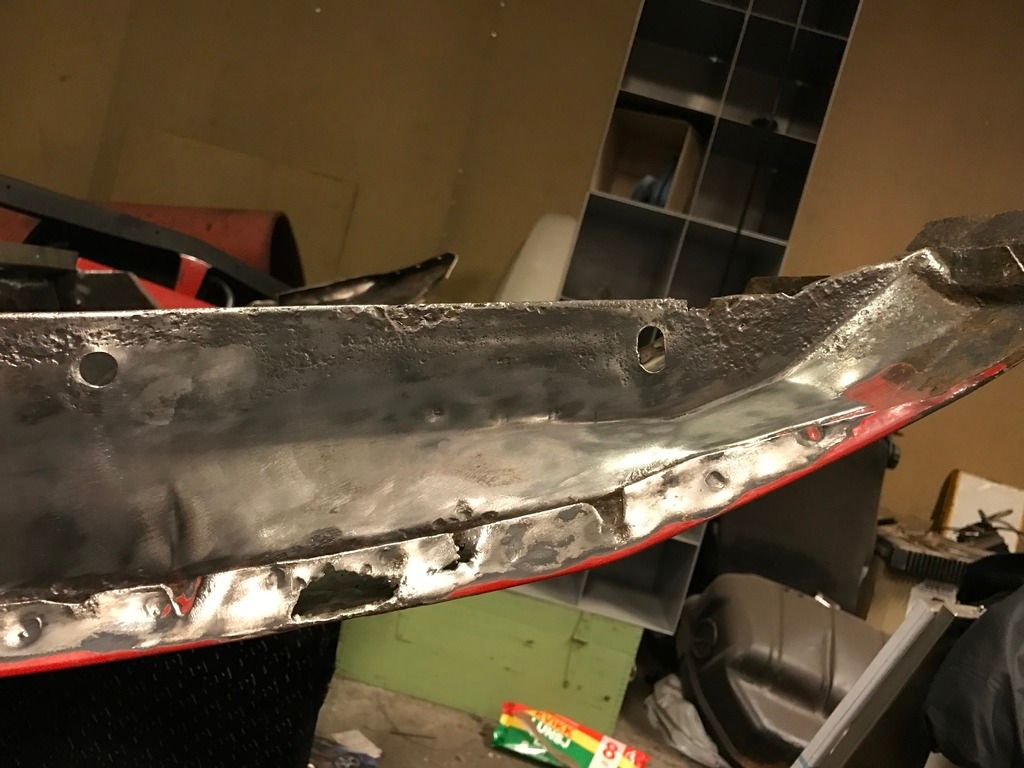 One little hole patched: 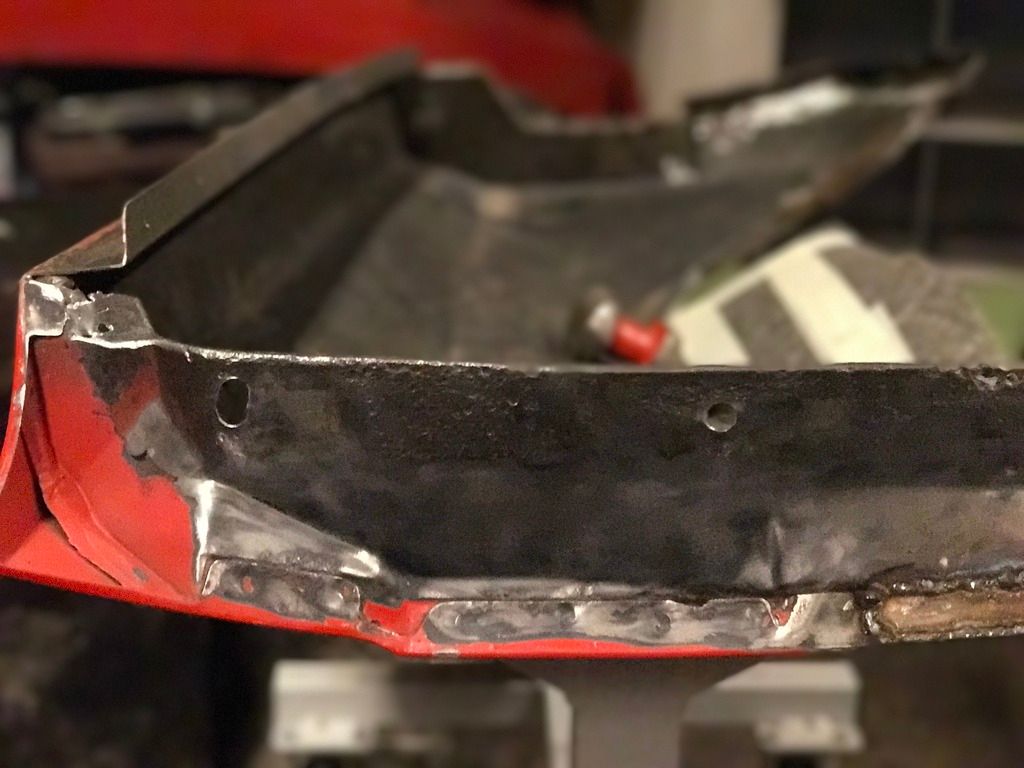 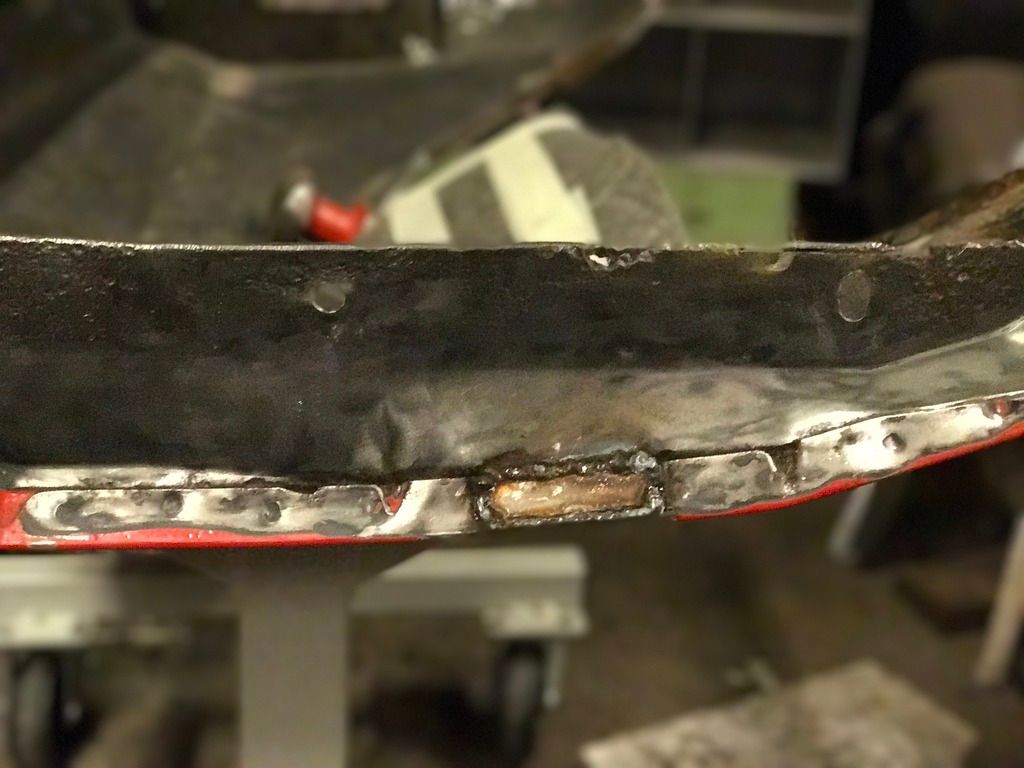 Out with the old, in with the new: 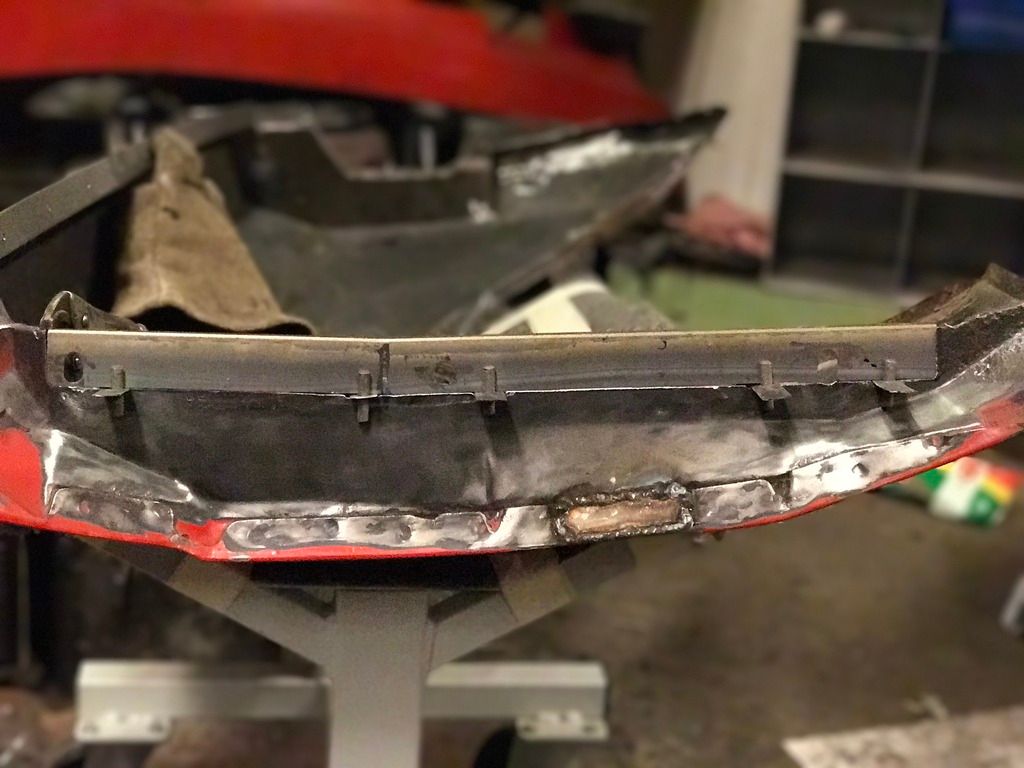 Burning it in place: 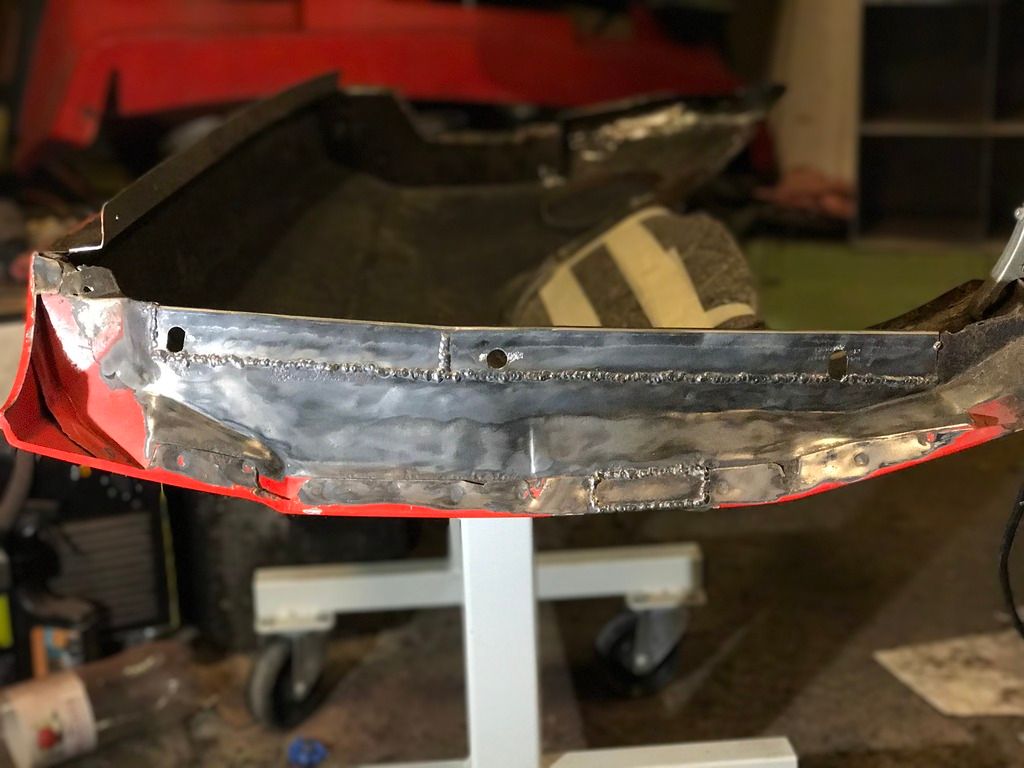 Ground down: 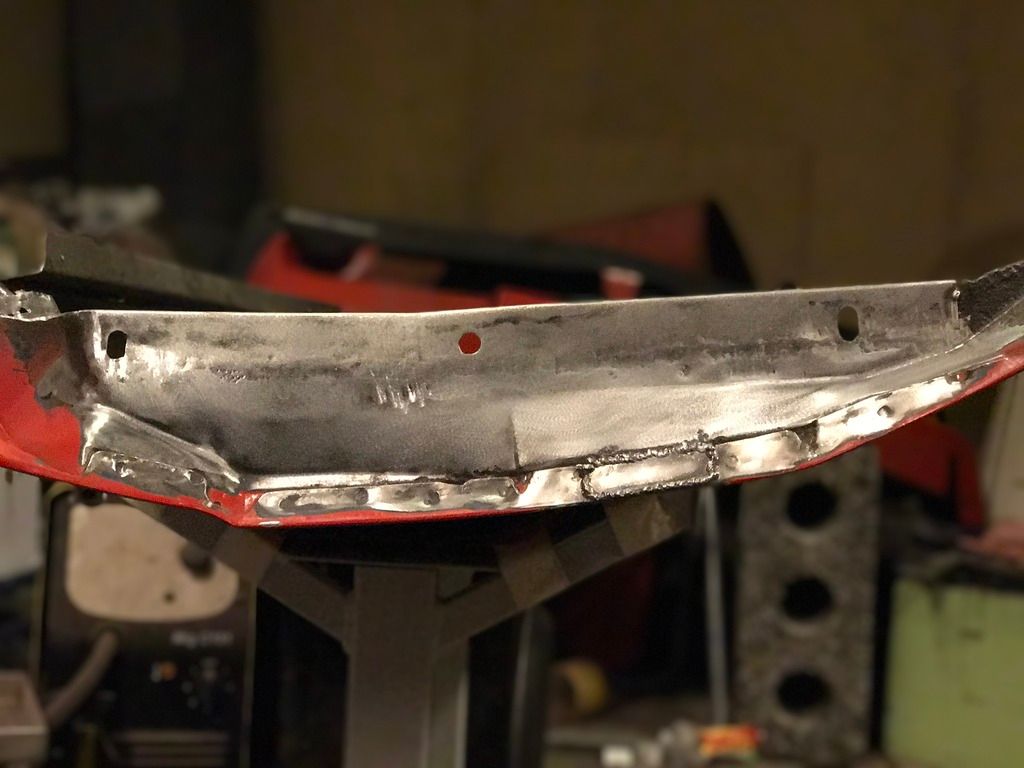 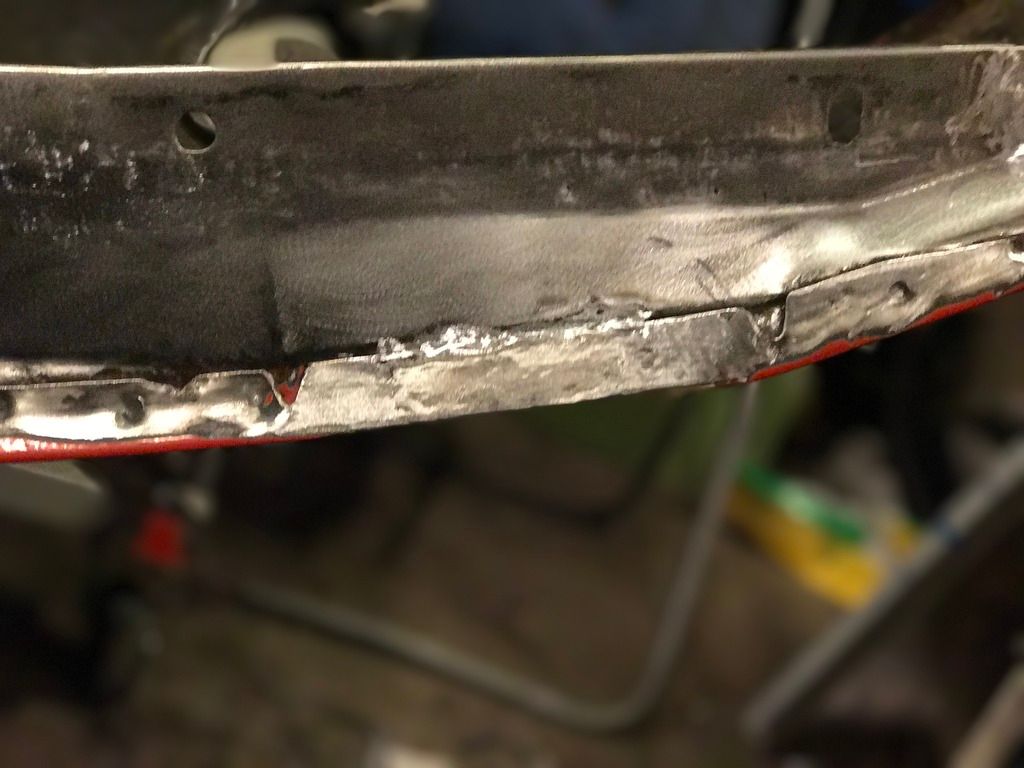 Bottom part of the fender needed a new piece also: 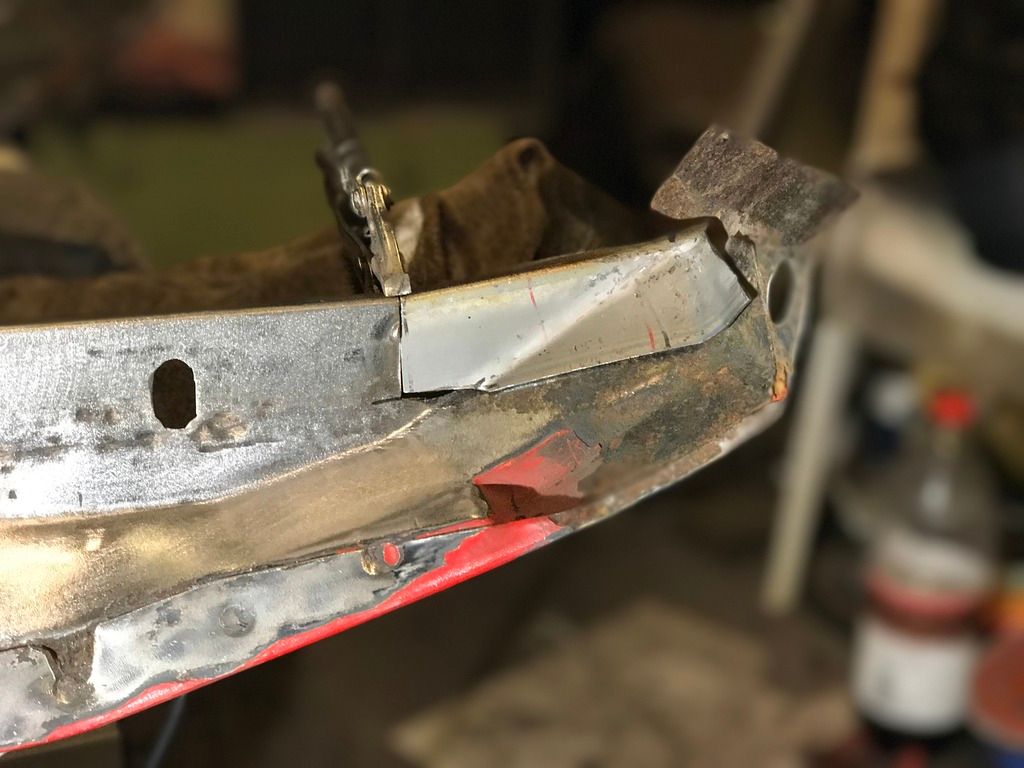 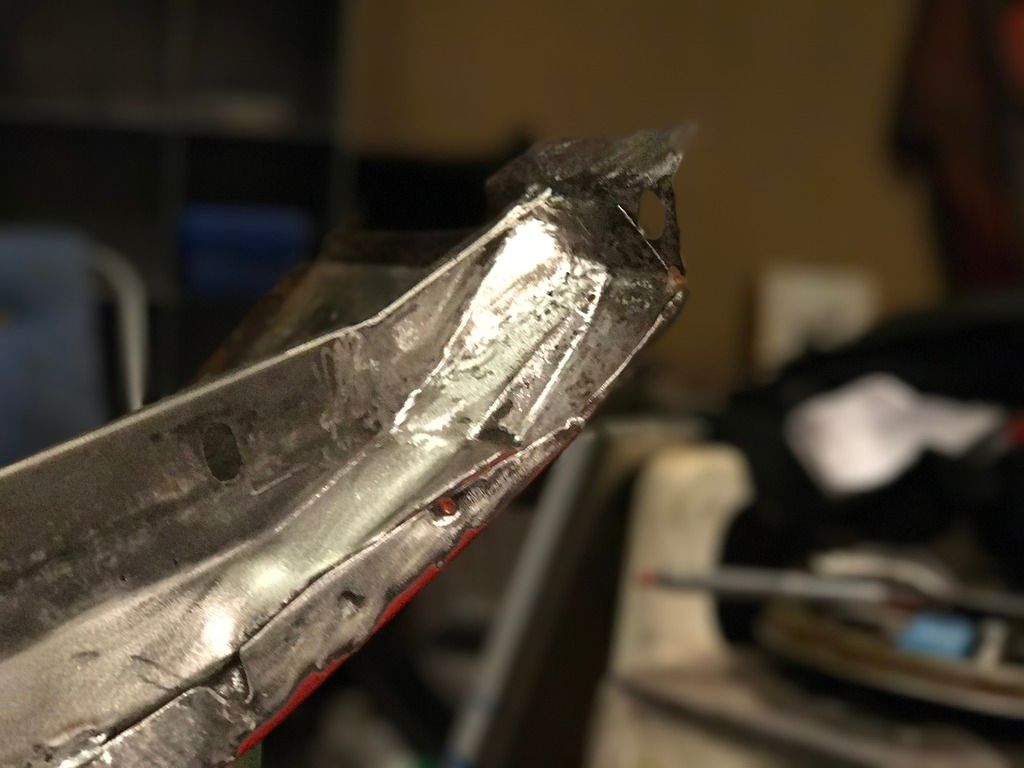 And on the top: 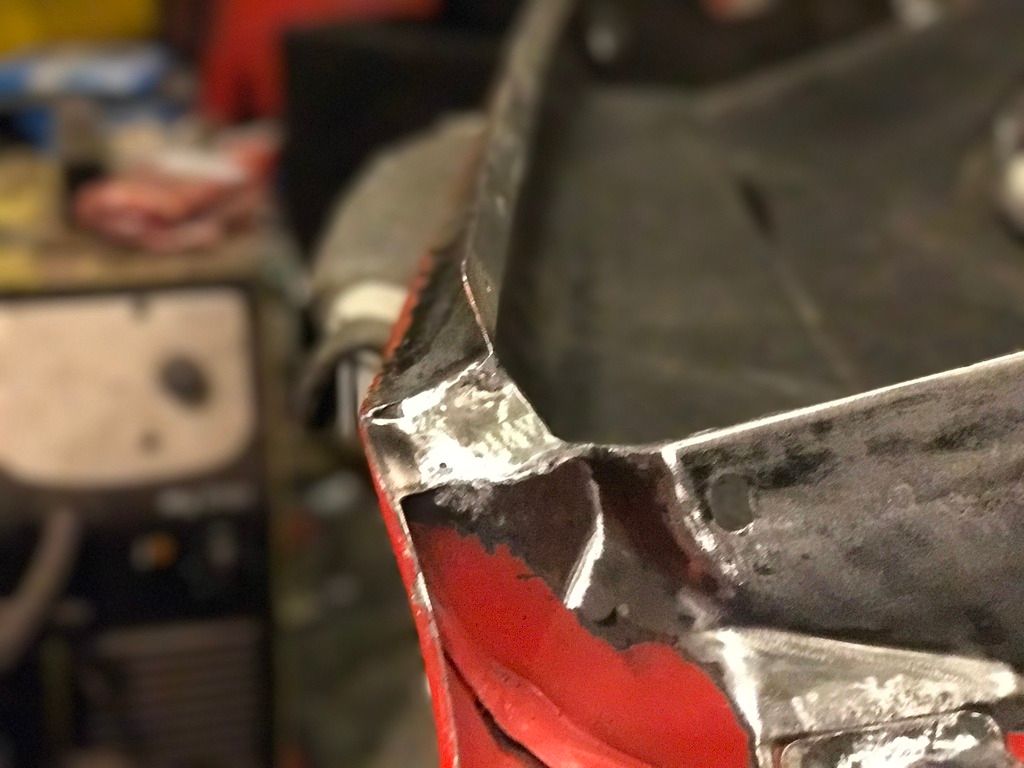 Lastly a small piece of the wheelarch: 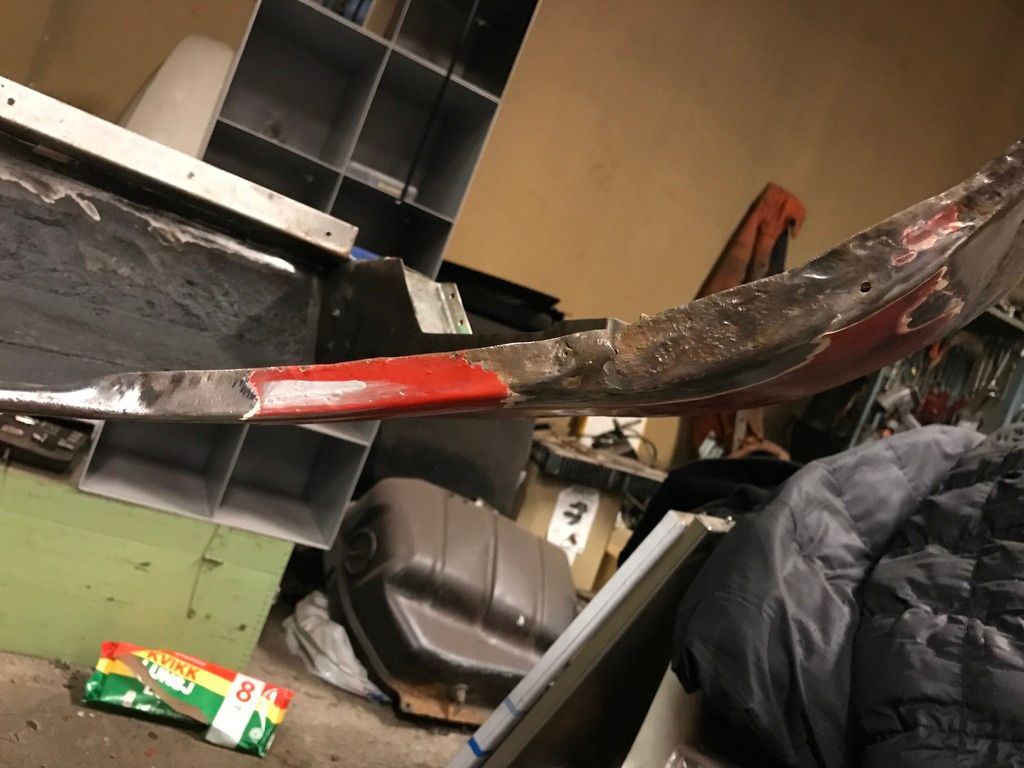 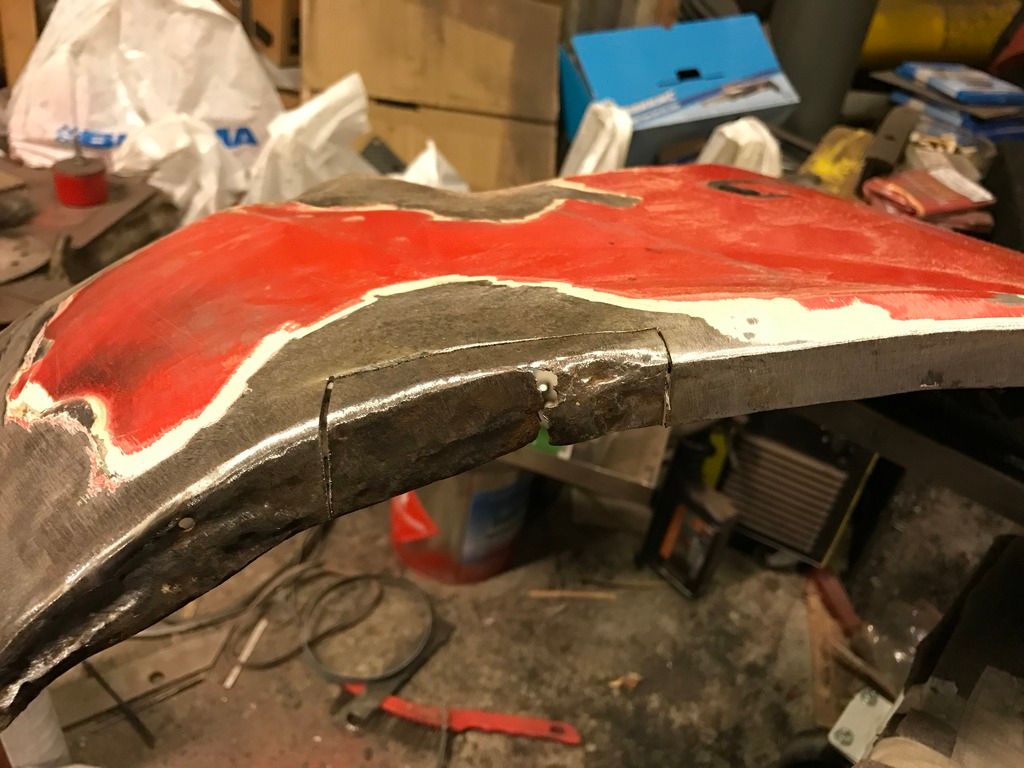 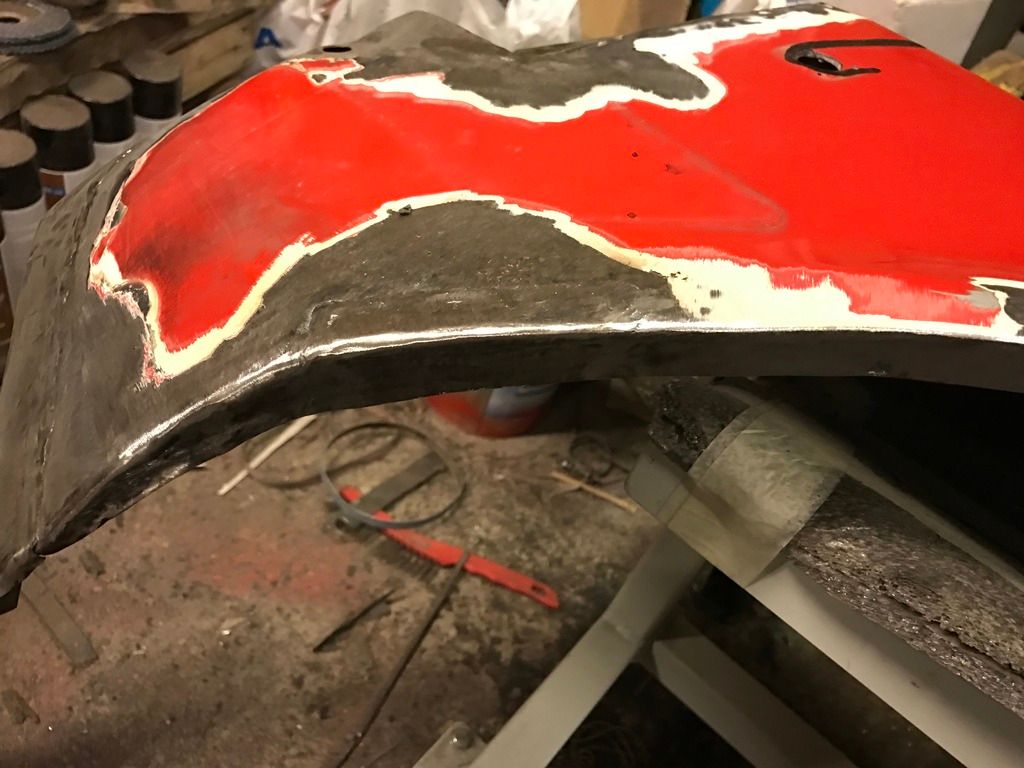 Primer time: 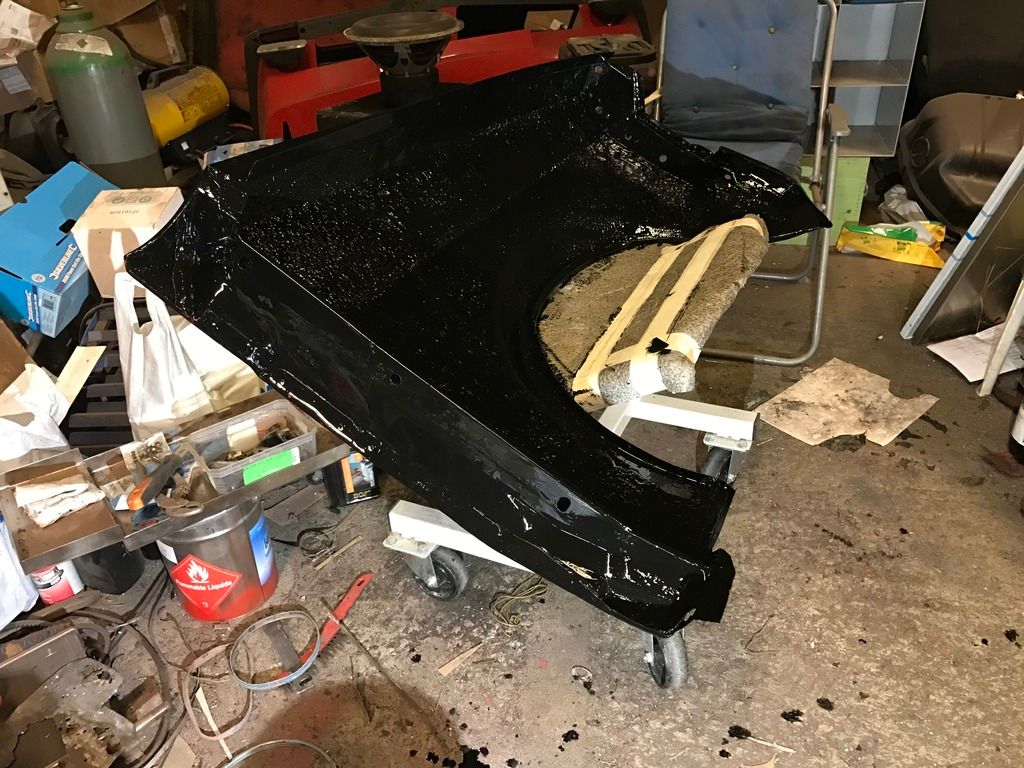 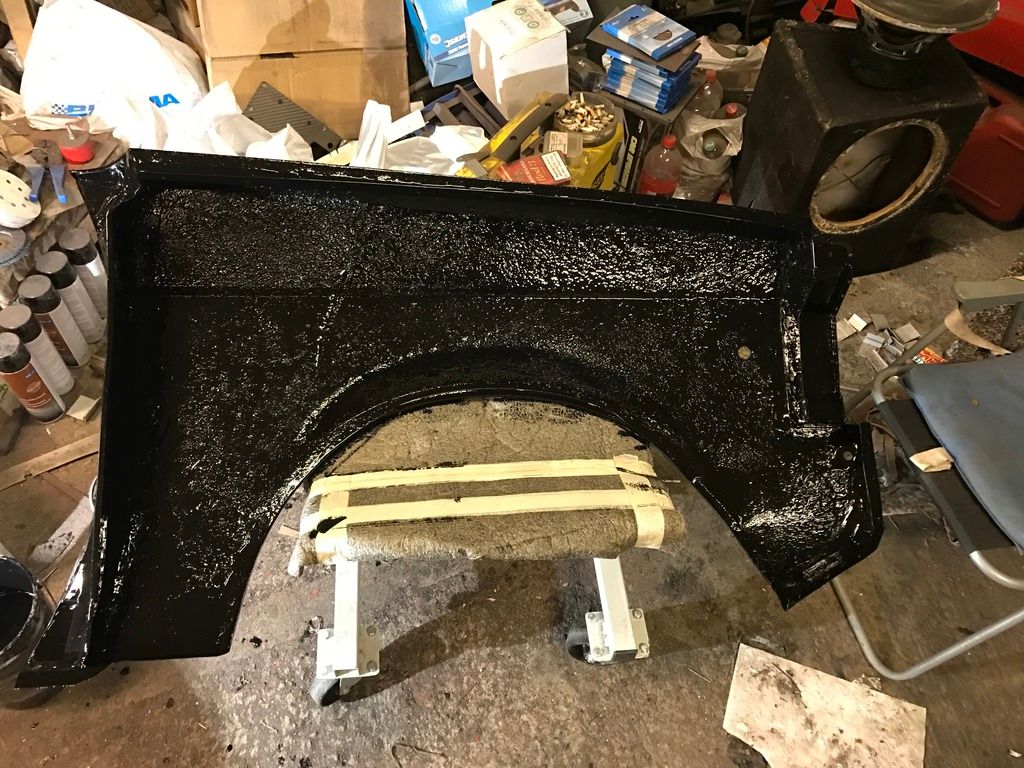 I'm sorry about the mess, I thrive in chaos Thanks for reading! |
| |
Last Edit: Dec 12, 2016 0:48:32 GMT by funkyhunk
|
|
funkyhunk
Part of things
Old Ford's R Us
Posts: 265
|
|
Nov 28, 2016 23:37:14 GMT
|
Time for a small update I guess. Not much has been done since last time, as I've had long days at work, a sinus infection, and I also had to replace the enginge in the daily, as the old one threw a rod bearing and deeply hurt the crank. That stuff took all last weekend. All this at the same time as balancing a 180hours a month job, a wife, and a daughter of 1.5 years. I'll be glad when I'm done with the car and I can start using and enjoying it properly, doing skids in the snow, not jacked up in the garage welding rust. Anyways next on the agenda was to cover all the bare metal with Isotrol Primer before it started flash rusting. Ready for primer: 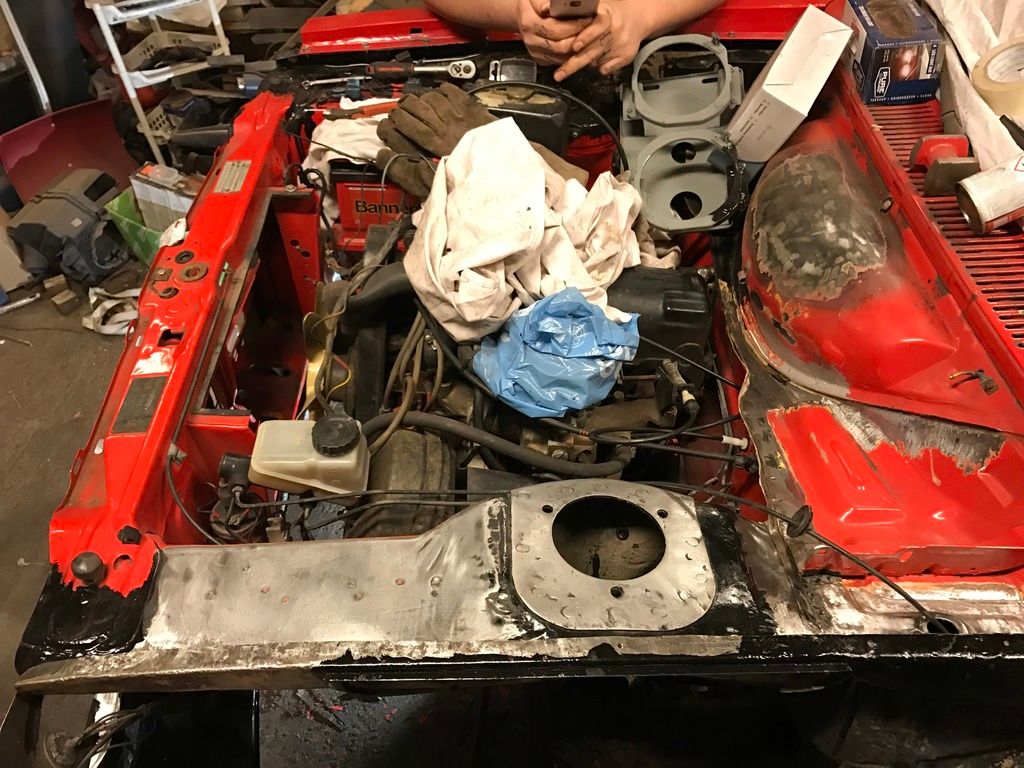 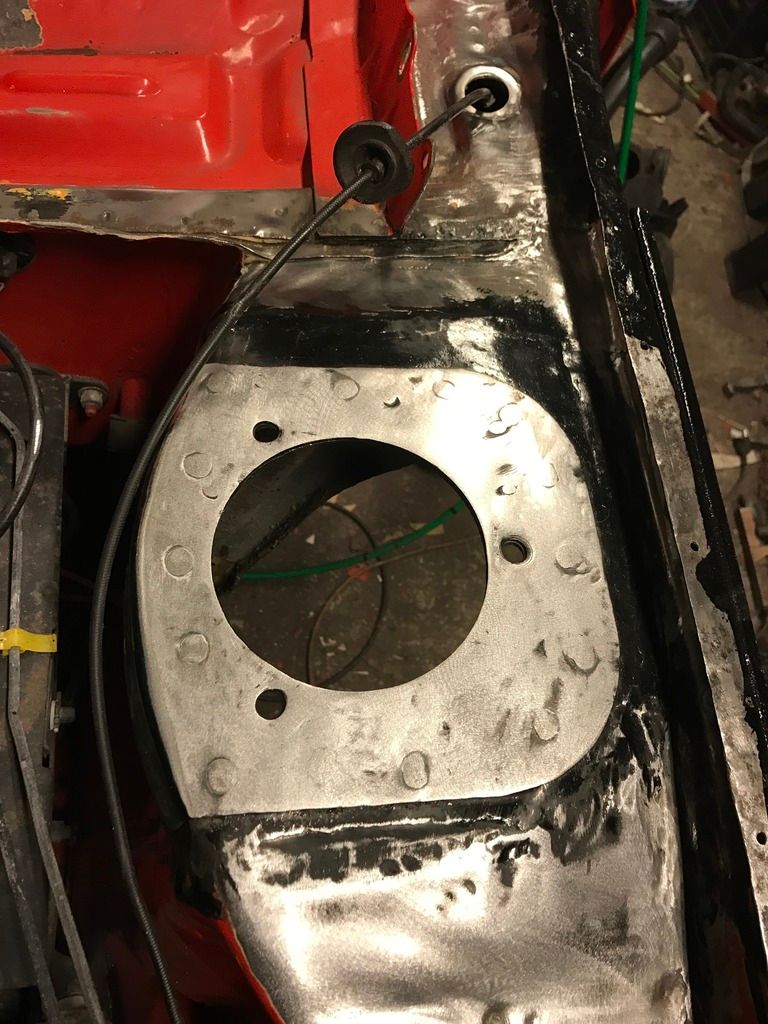 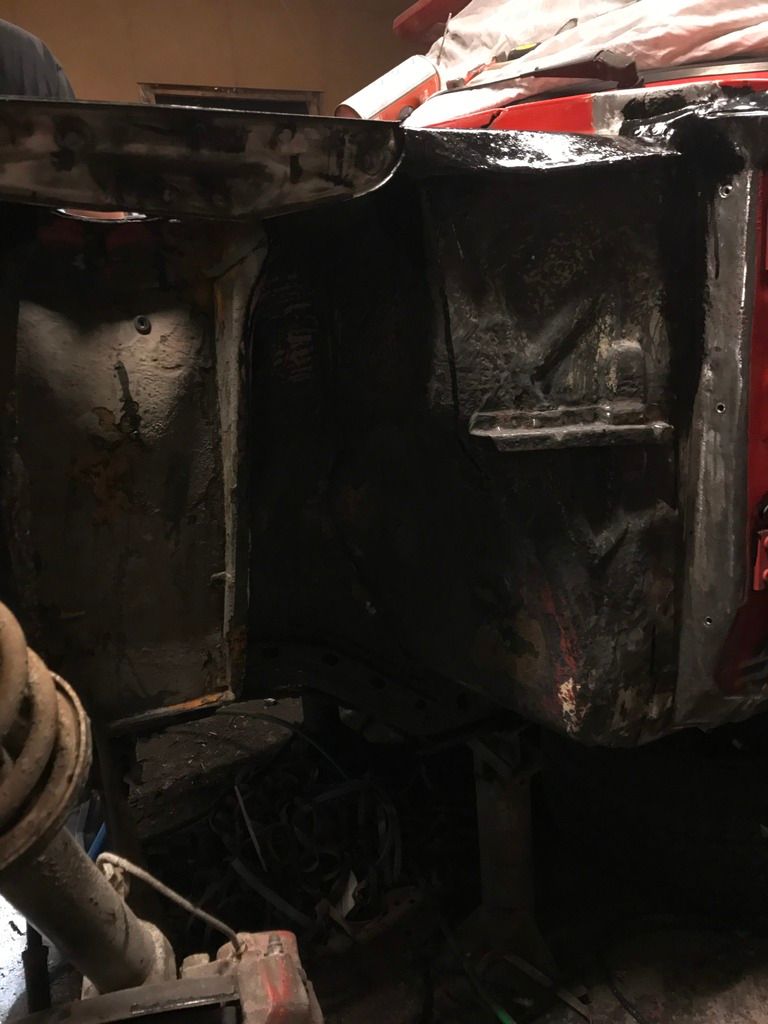 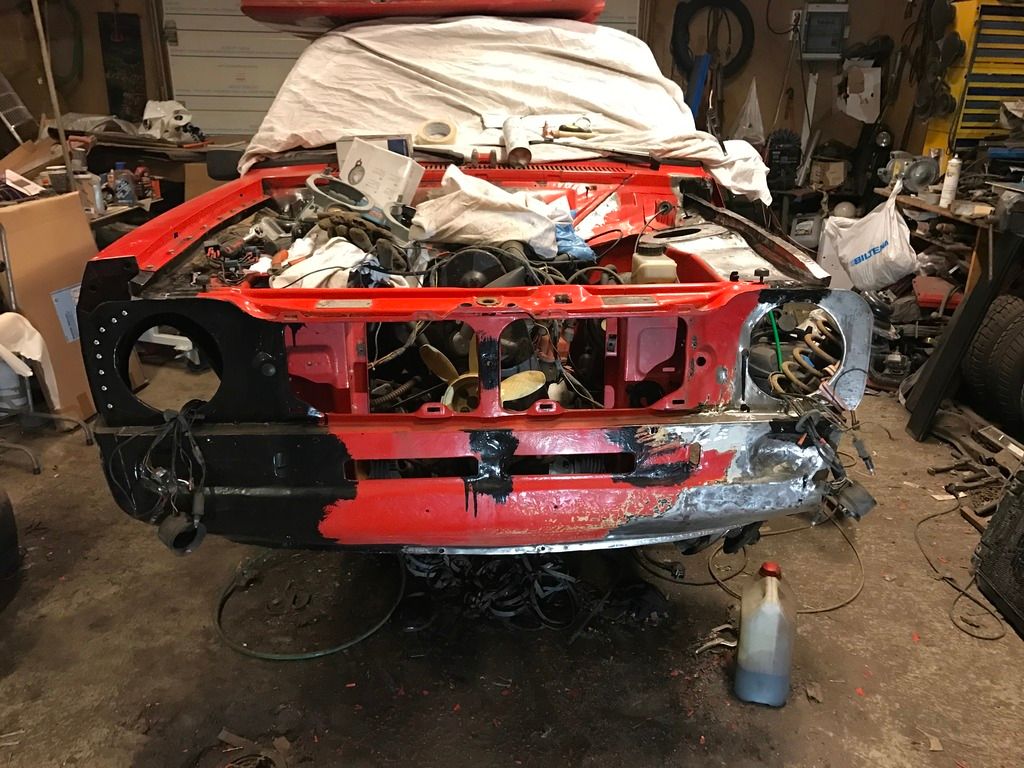 All of the front has gotten a liberal coat of Primer, inside, outside, all flanges and joins, everything really. 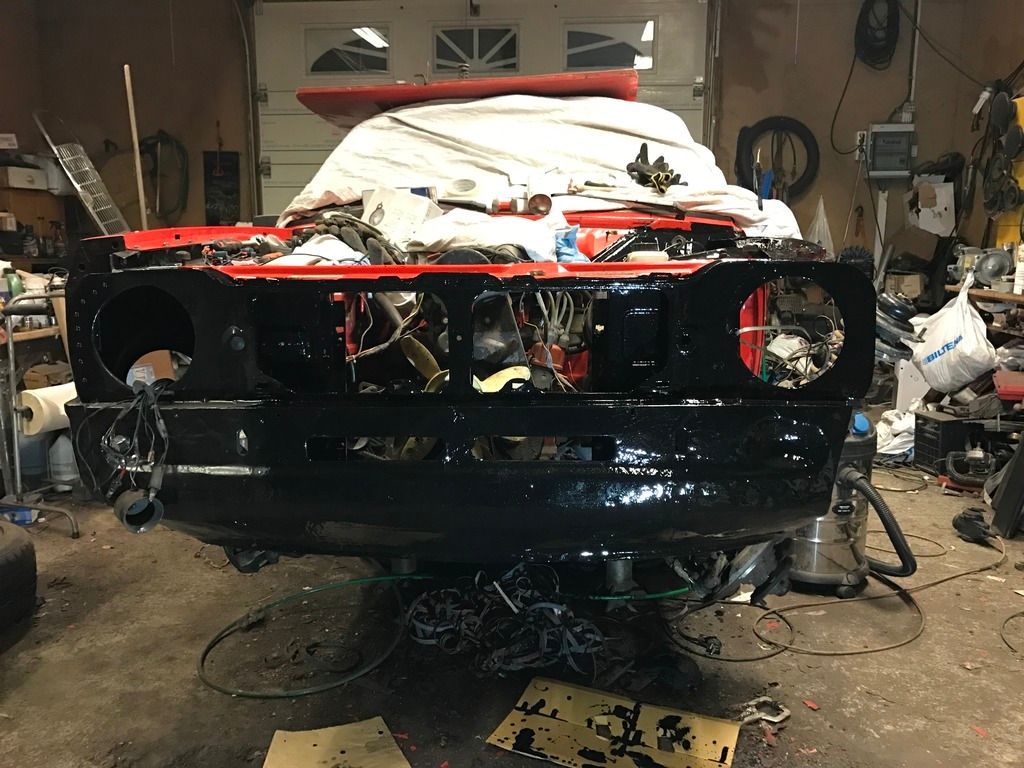    And this last photo just show how deeply penetrating the Isotrol Primer really is. It even surprised me, and I've been using this stuff for some years now. Here is one of the id-tags on the the front slam panel:  If you look closely you can see that the primer has penetrated and circled the pop-rivets, and the base of the plate. And that is from my painting the UNDERSIDE of the slam panel. Totally unbelievable. Too bad I have to do alot of horse trading with the factory in Sweden to get this stuff over to my place in Norway. I actually have to import it myself. Anyways there may be another update this weekend, as I've asked the wife to let me go to the garage thur/fri/sat/sunday for once Not much feedback on my posts here? I guess the like button has taken over for much of the comments people used to get on their project threads. Thanks for reading regardless |
| |
|
|
funkyhunk
Part of things
Old Ford's R Us
Posts: 265
|
|
Nov 13, 2016 22:49:53 GMT
|
This update will ber a short one. Not much has been done, but some progress has been made. Firstly I started to remove flaking and loose paint, and fount poprivets around the shocktower plate.  It appeared to be welded on, but I found 7 rivets on the underside. Fuggin p|key bodgers! Well I started to remove surface rust on both planes, drilled holes for plug welding, and painted it before plugwelding it back. 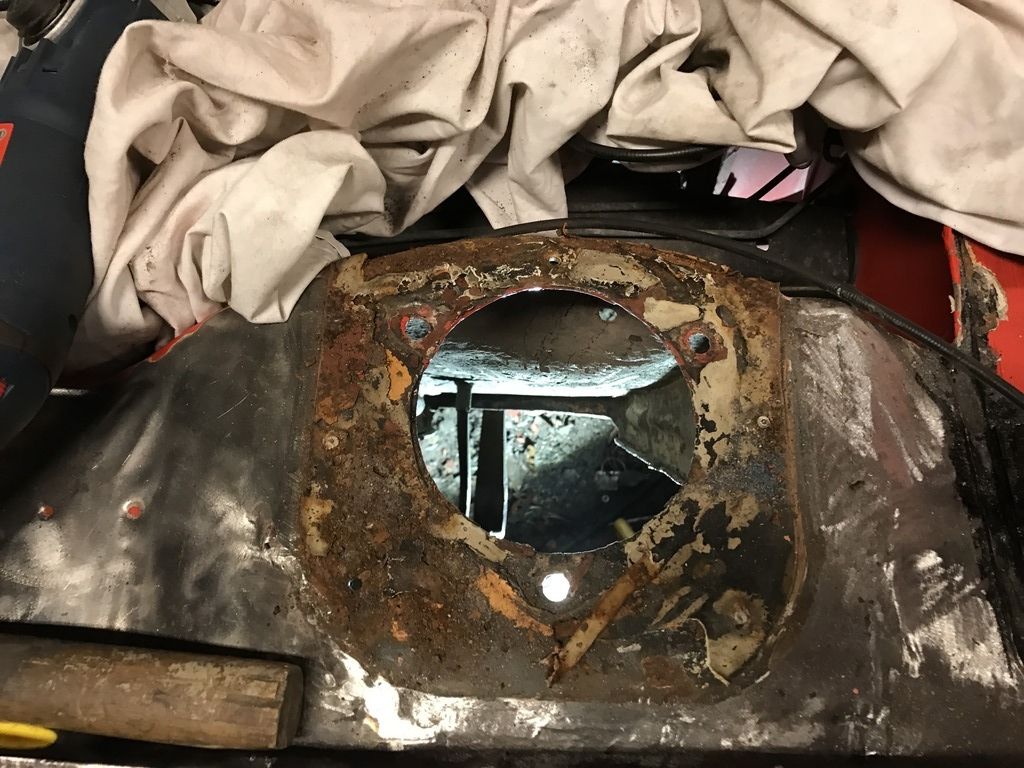 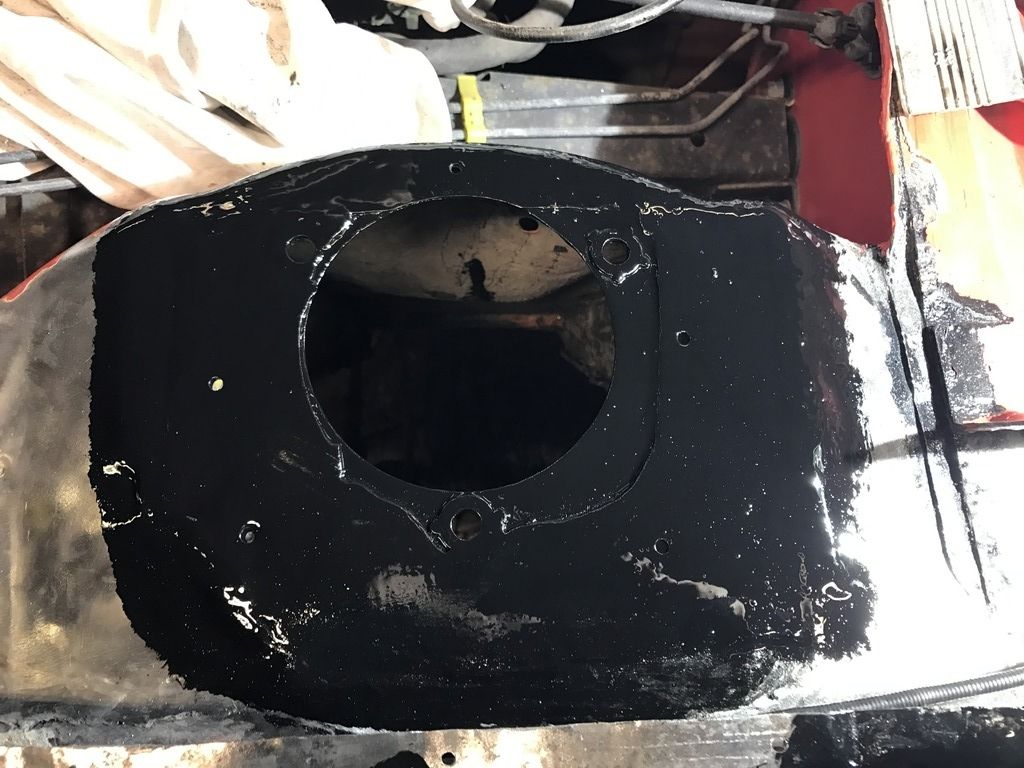 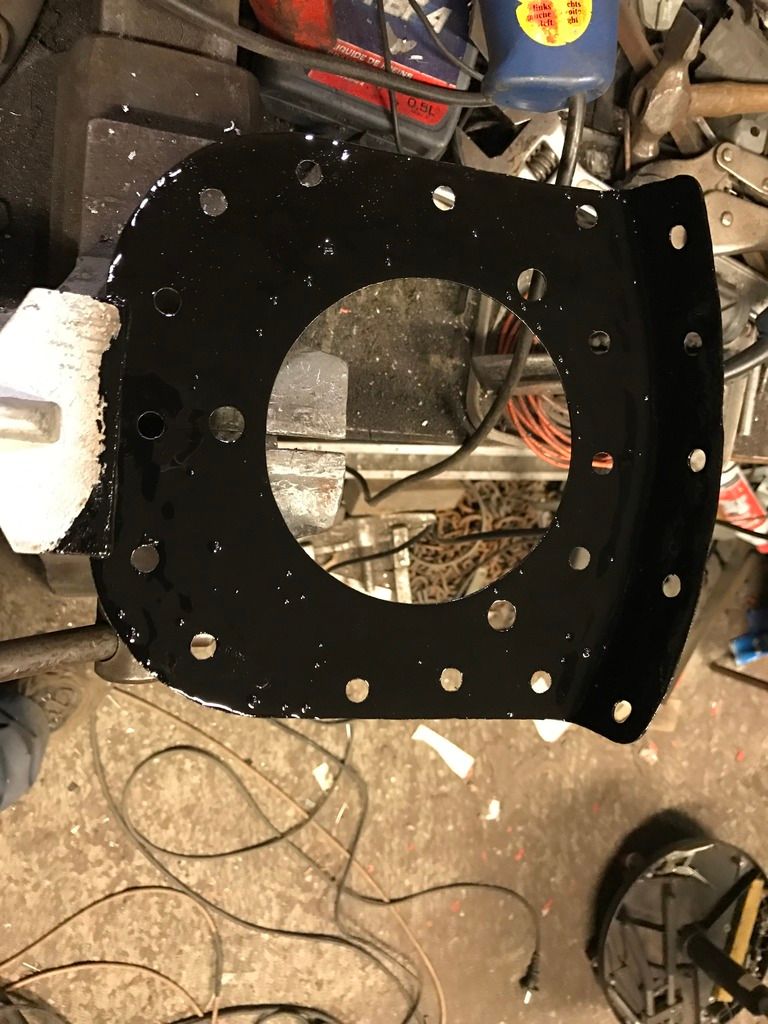 All done, 19 plugwelds done: 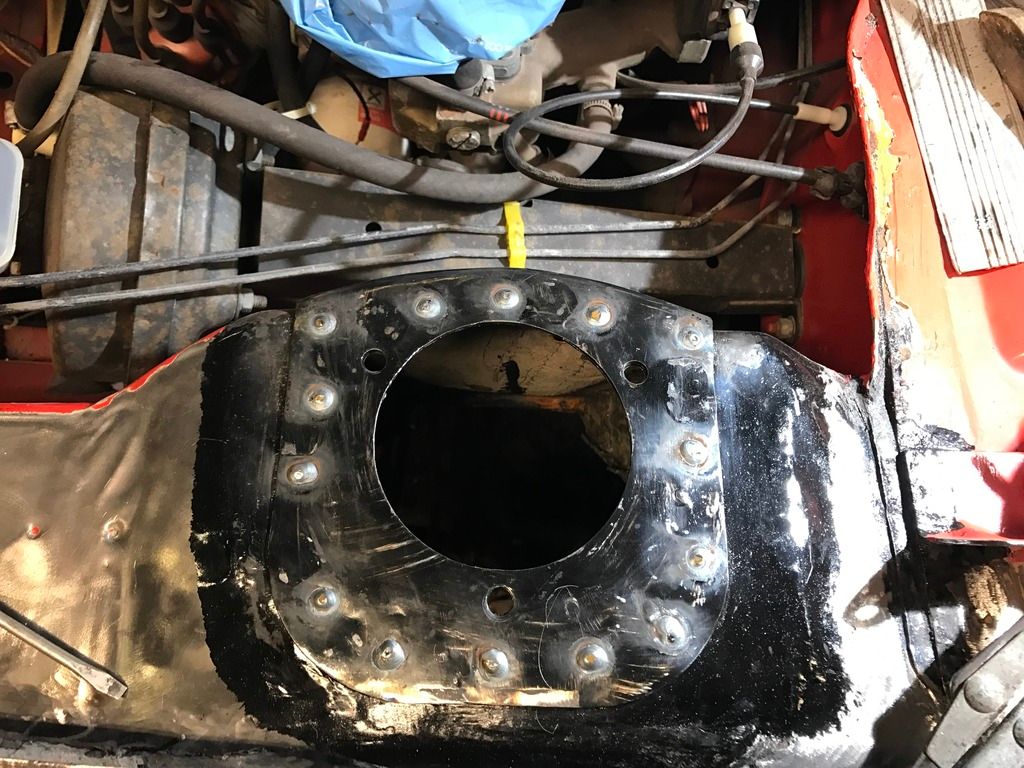 So came the time to finish up the front piece of the car. First I had to take out the front ARB, to get access to the front cavities, and next came out the radiator. 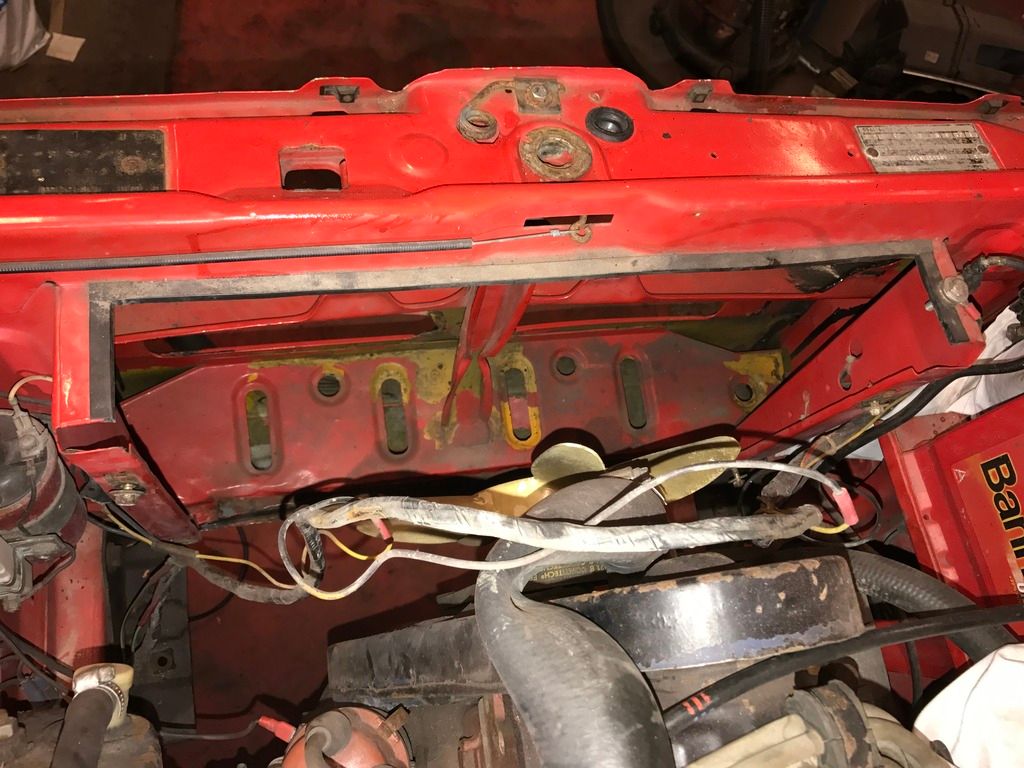 The bottom cavity looked like this though, lots of surface rust. 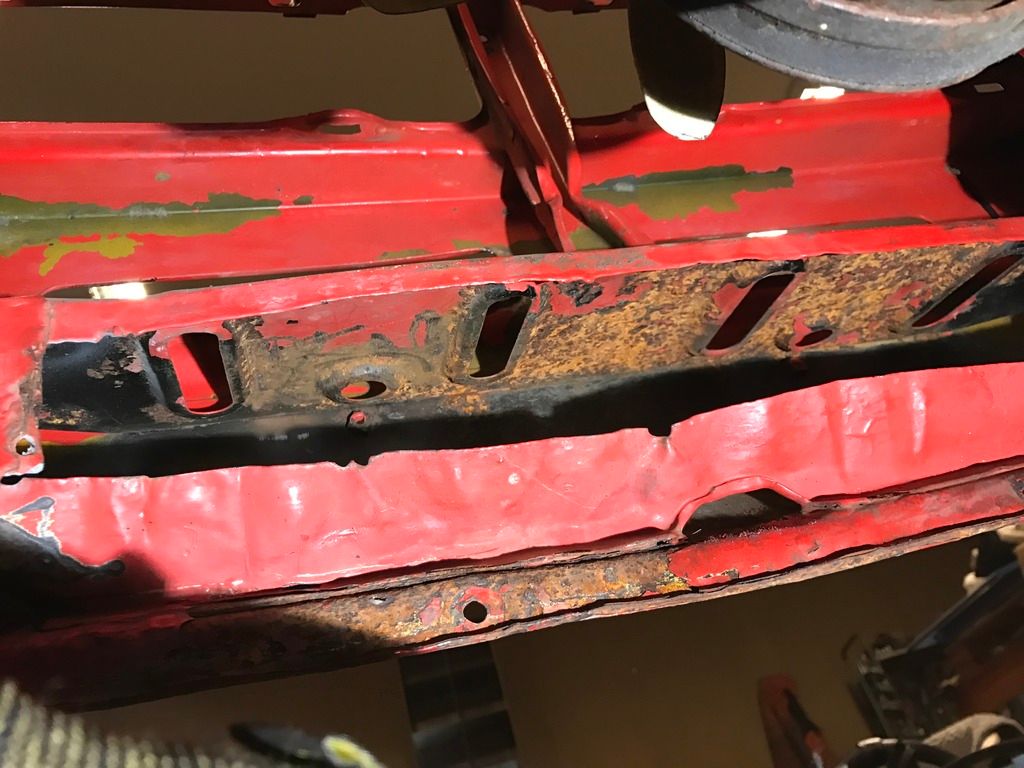 After a victory lap with the belt sander it looked heaps better. Except for my face, I was covered in rust 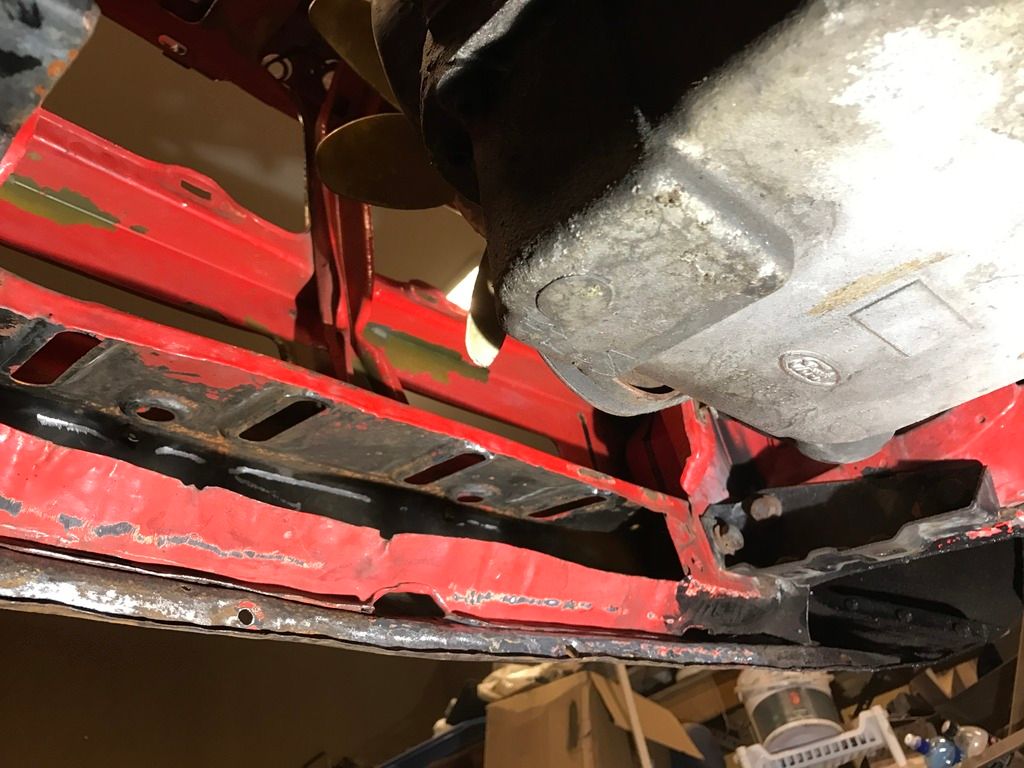 Stay tuned for the next update folks |
| |
|
|
funkyhunk
Part of things
Old Ford's R Us
Posts: 265
|
|
|
|
|
It seems that nightmaresracing has left the forum sadly.
|
| |
|
|
funkyhunk
Part of things
Old Ford's R Us
Posts: 265
|
|
|
|
Going great from my chair at the computer! Fab work looks great, and it looks like you need to do a lot of it  Must get one of those power files, they look very handy. Keep up the great work Thanks mate Your MK2 is coming along as well I noticed. Race you to the finish? Those power files are one of the most usefull tools I have, I use it even more than the anglegrinder. Its an invaluable bit of tool for precisely grinding welds. Love your fab work,whats make of mig and wire thickness? Thanks mate, the welder I use is some cheap noname nondescript welder that my dad picked up cheap. I use 0.6mm welding wire, since it doesn't generate as much heat, and is easier to weld thin gague metal without distortion. 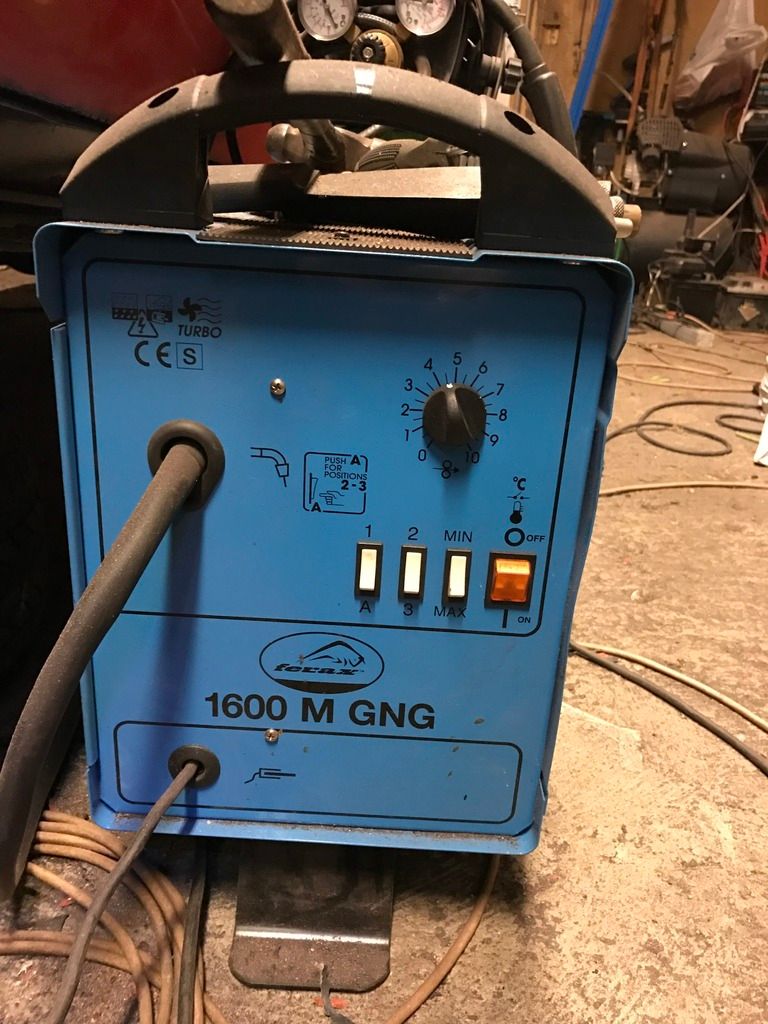 Time for a new update! some things have been done since last time, Just doing the last of the body welding in the left front inner fender. When this is done I can finally begin to rustproof and assemble the car Here I replaced a piece under the slam panel. Often rusted on mk2's after what I've seen in various build threads. 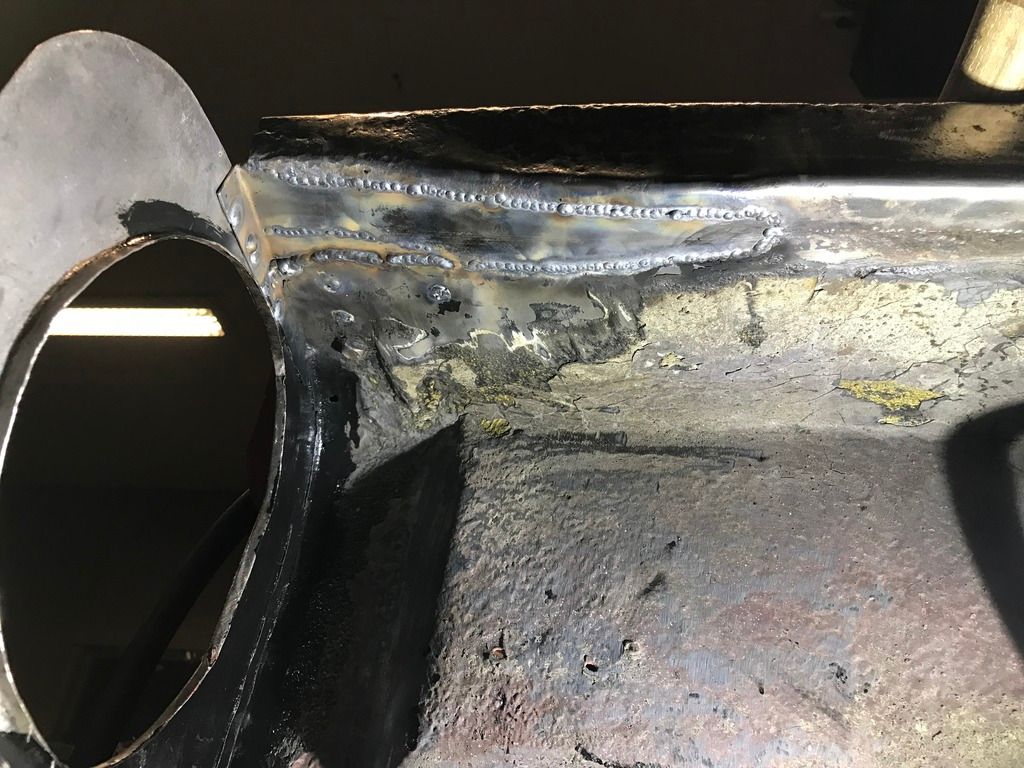  Ground down:  And I replaced all the mounting screws in the dropsnoot with 6mm stainless bolts. Maybe It'll disassemble easier next time? 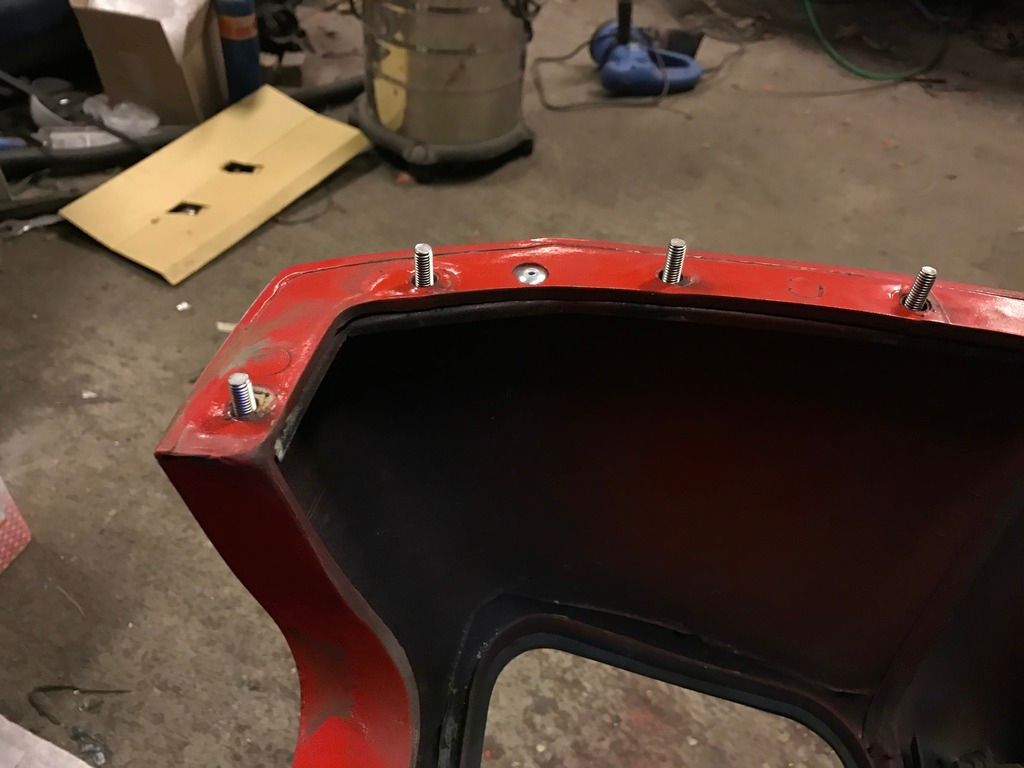 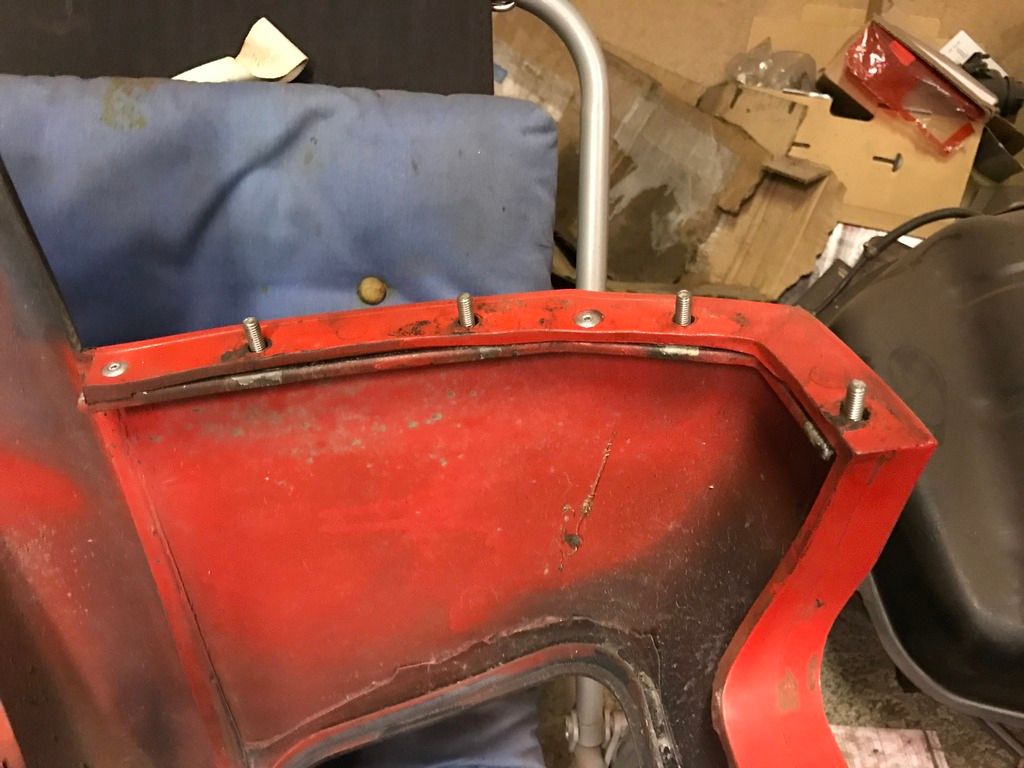 Then there was the next hole next to the bonnet hinge. I forgot to take a picture of this area finished, but it came out allright 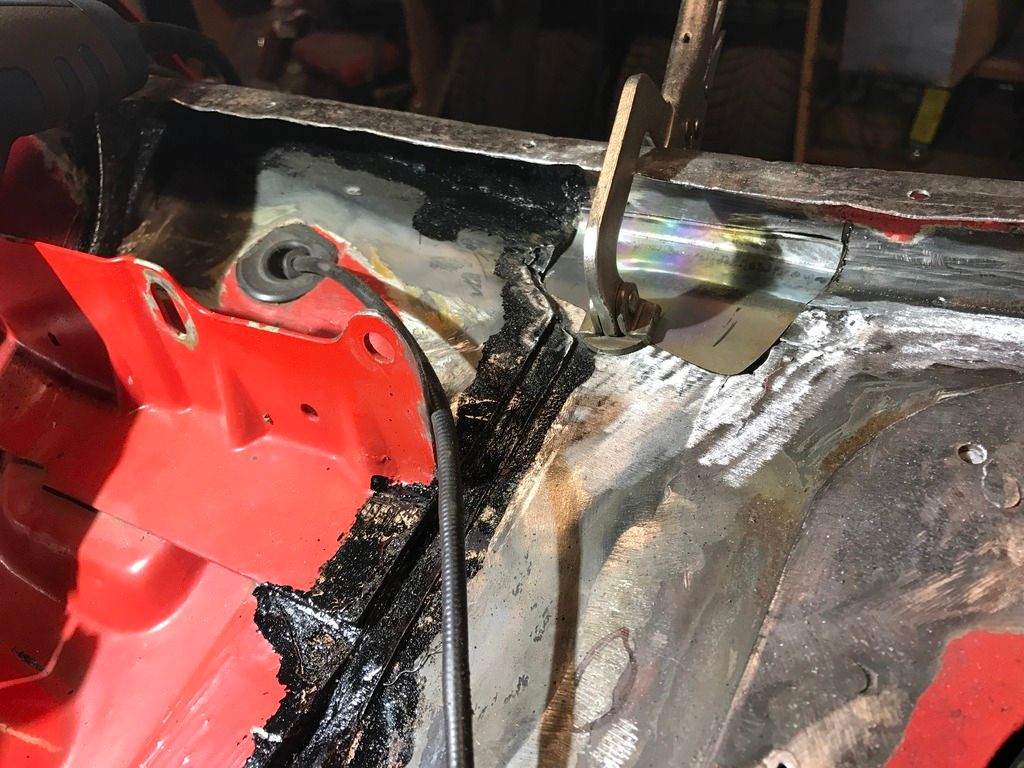 Then there was time for the last hole in the body! Stupid place for it though, really thin metal, I think 0.7mm or something like it, and awkwardly placed. The repair panel had compound curves every way. But I made it somewhat. Here is some of the process:  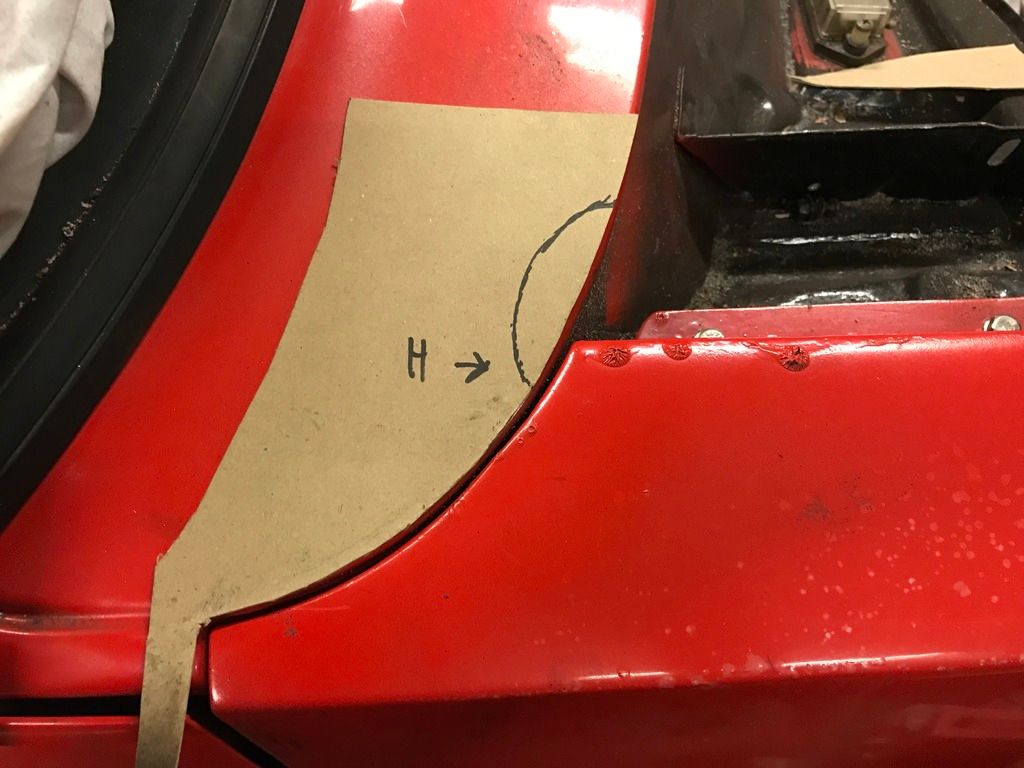 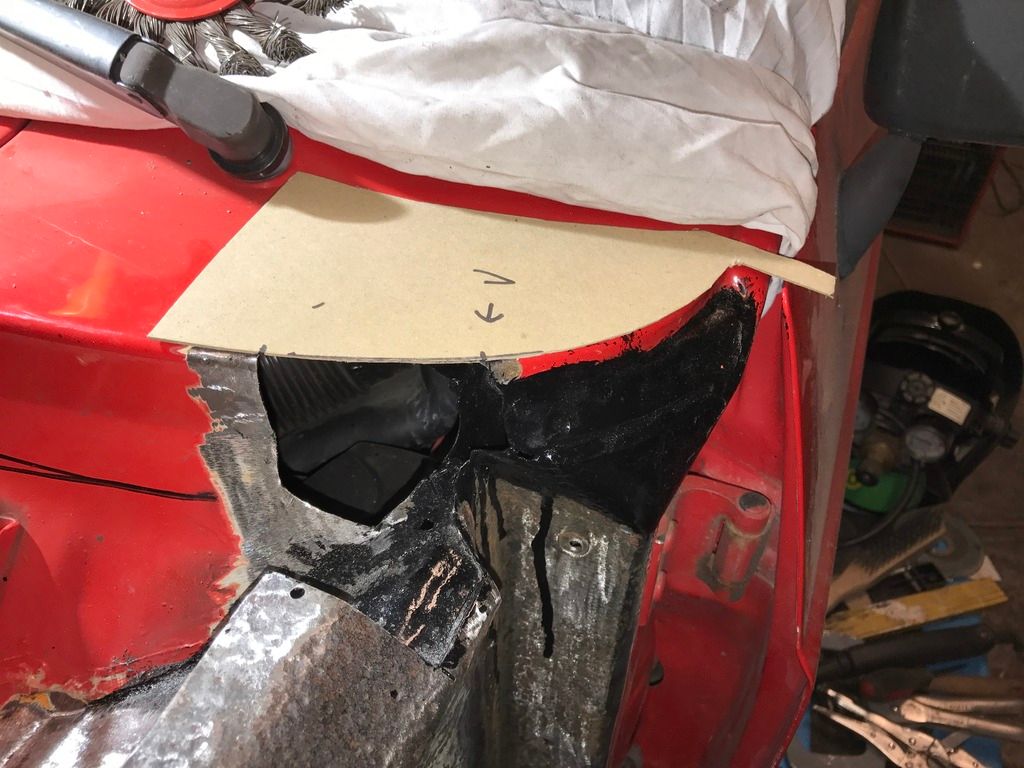 Roughly sketched on cardboard: 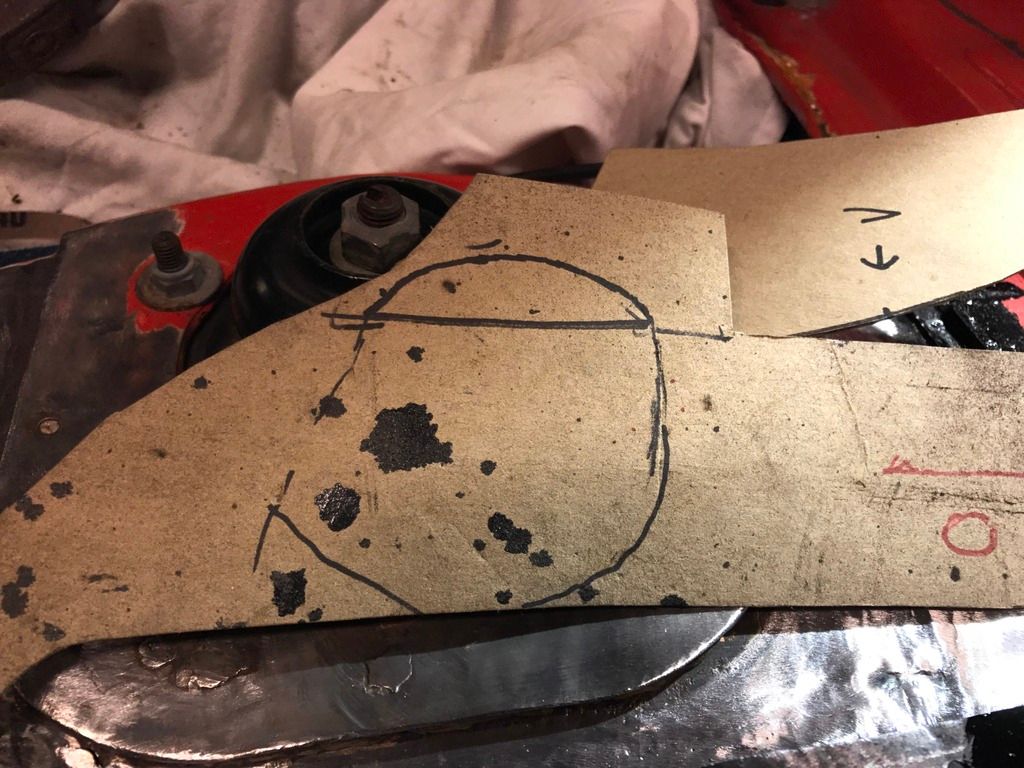 And after cutting, hammering, spannering, and swearing this was the almost finished result: 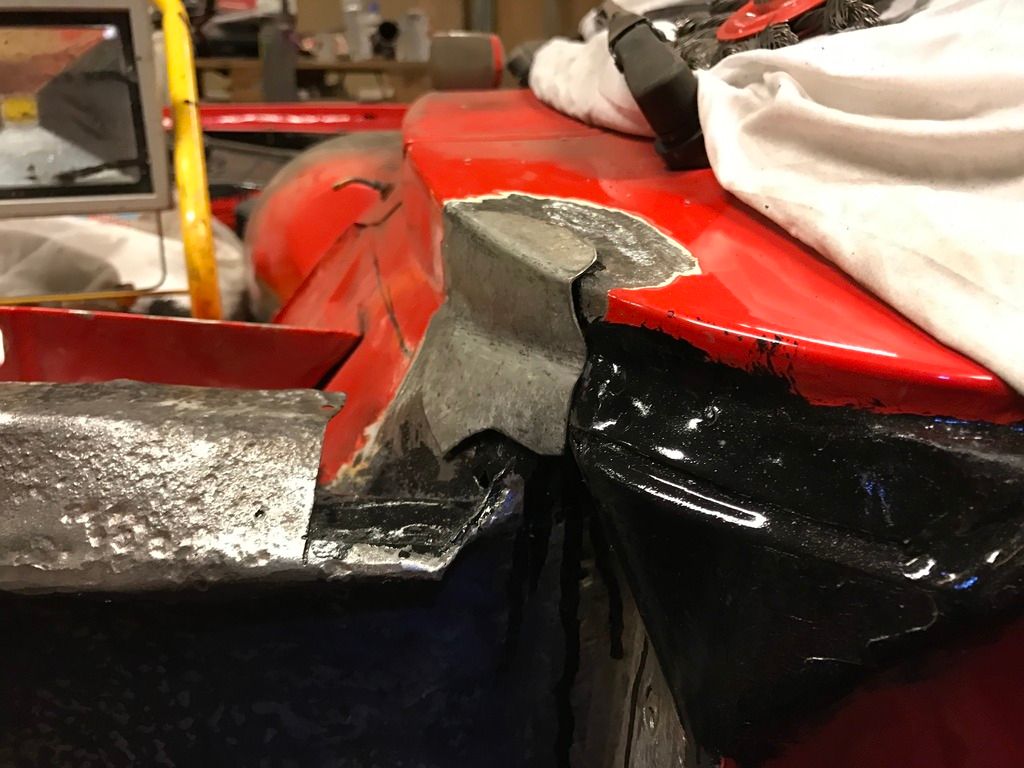 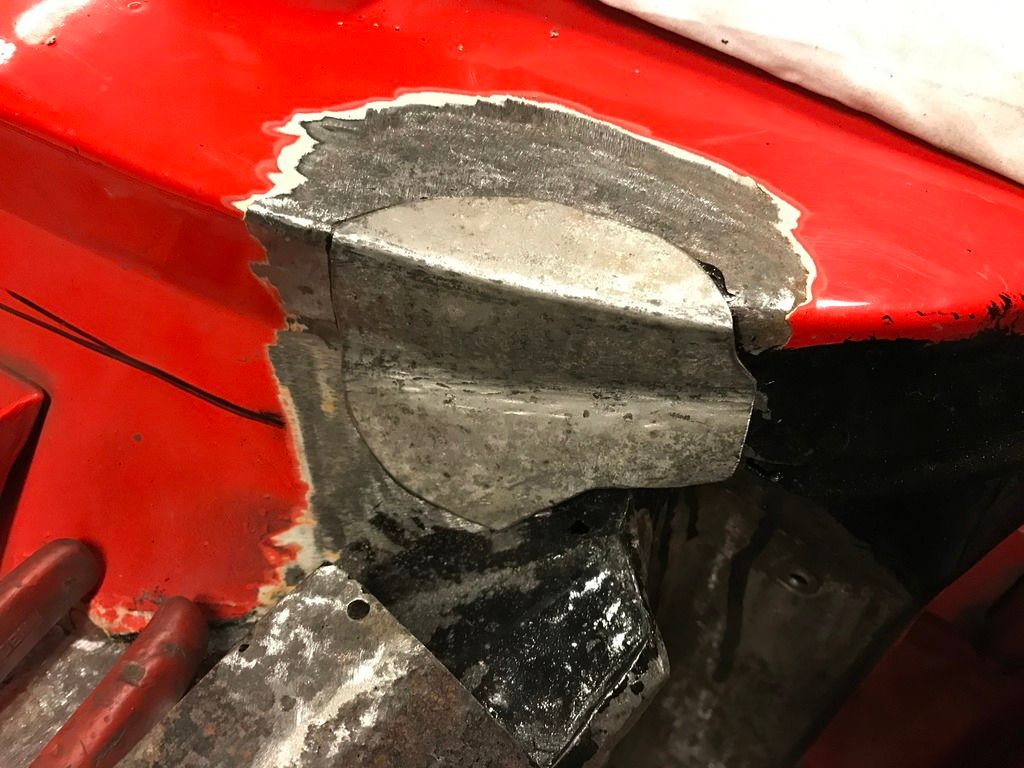 After much grinding and adapting it fit the hole satisfactorily. 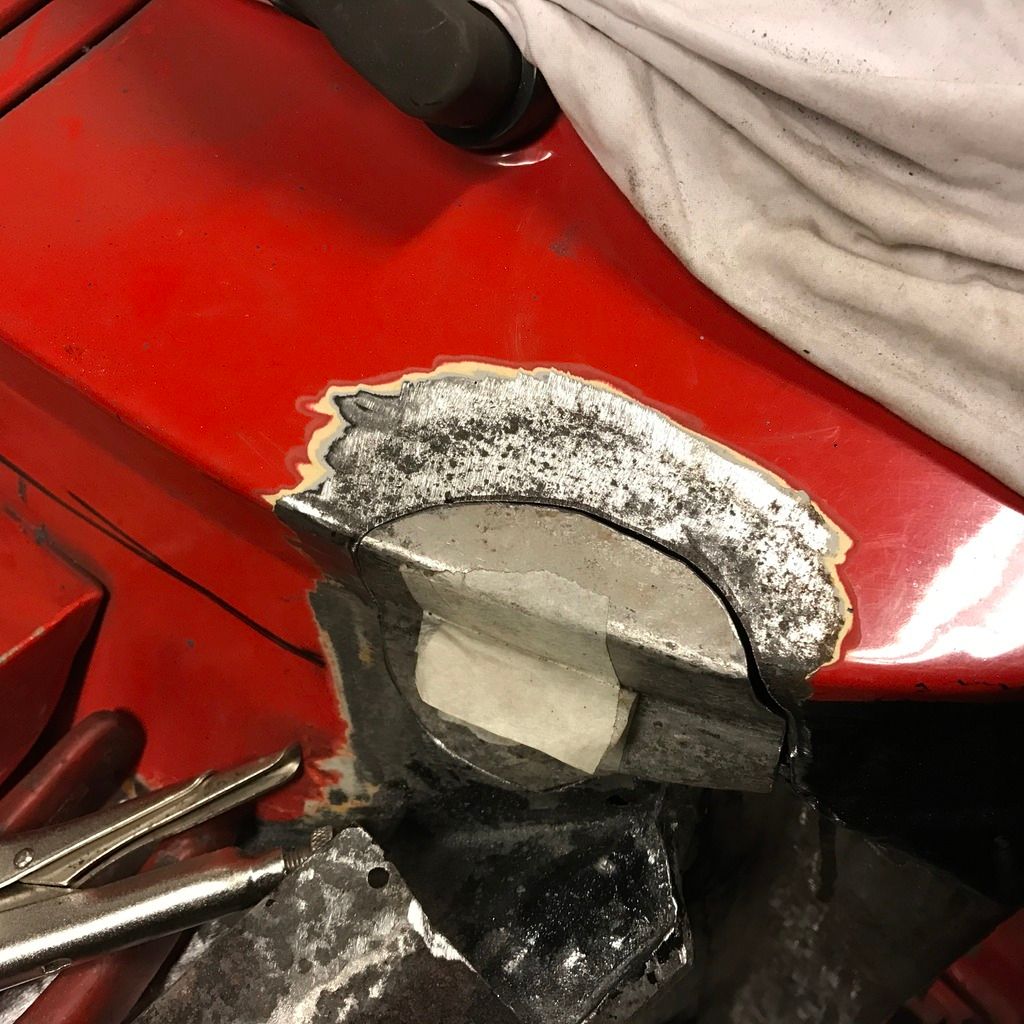 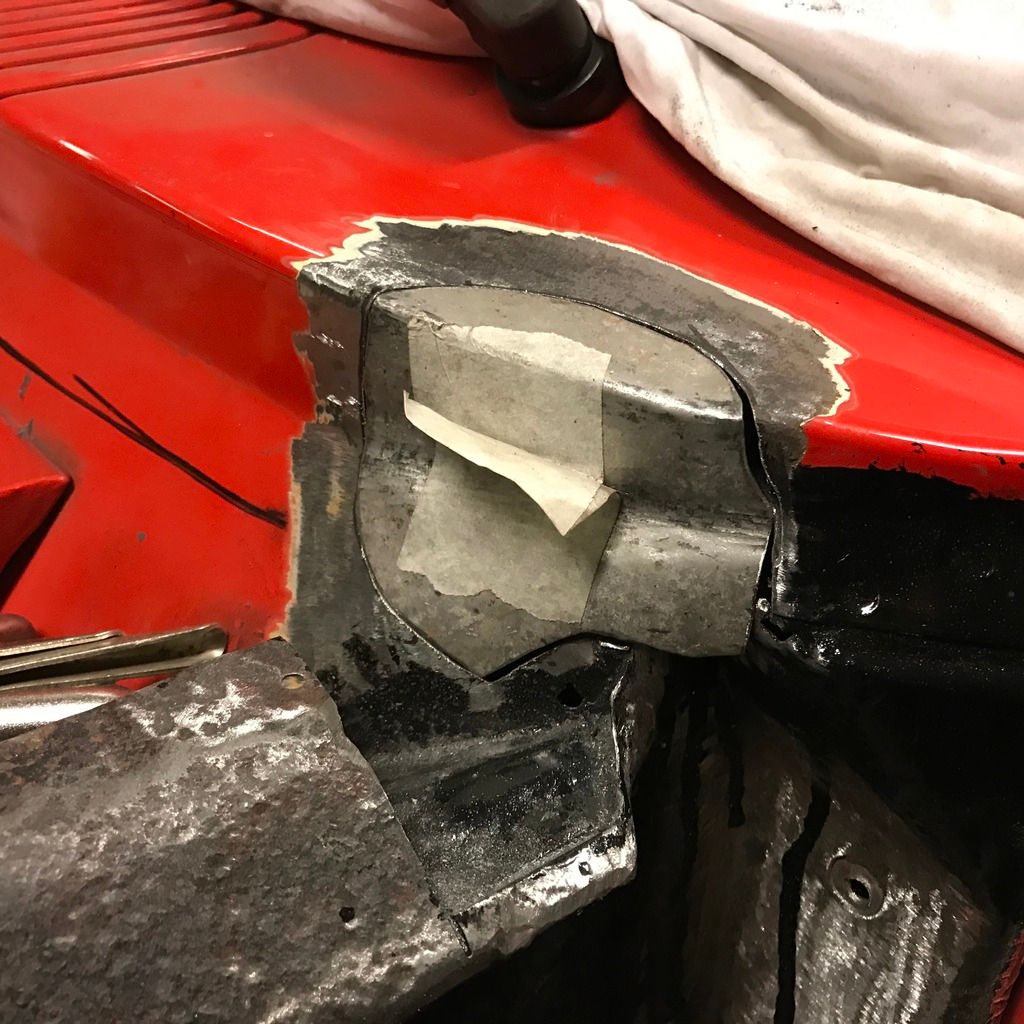 Lots of curves to account for here, hit it with a hammer one place, it goes out of shape another place. 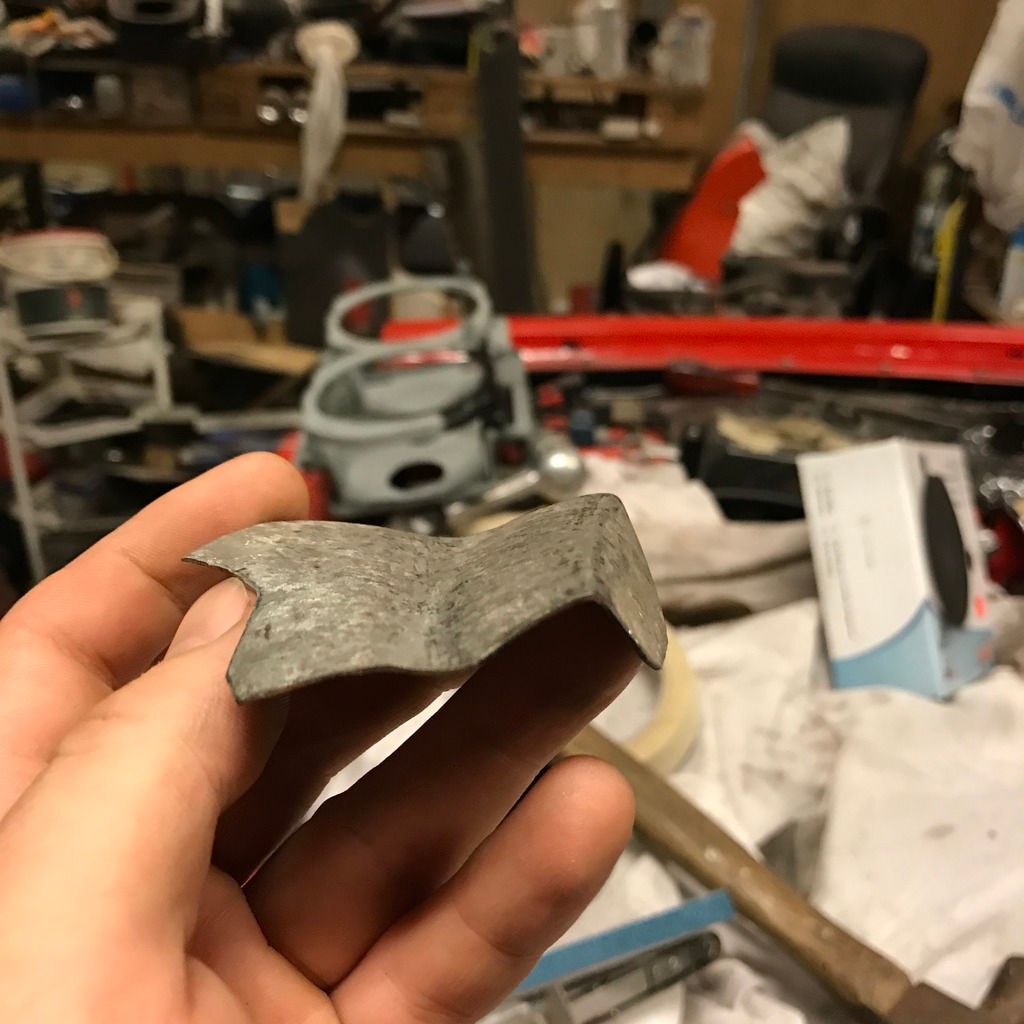 Piece welded, starting to grind the welds: 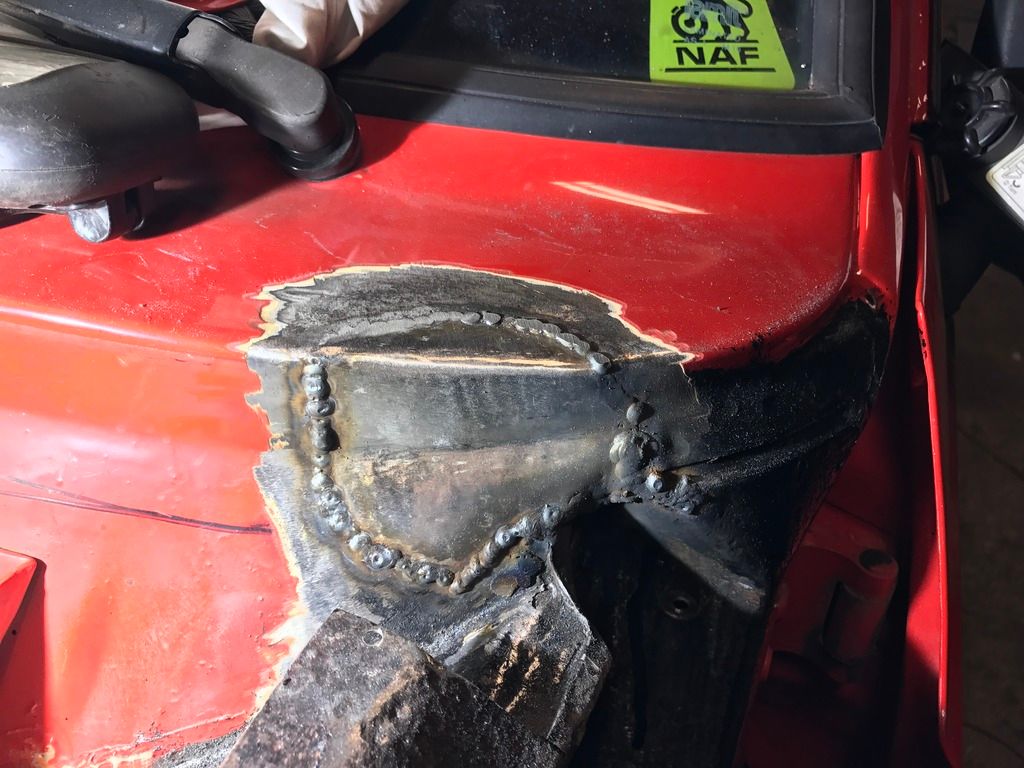 Ground back: 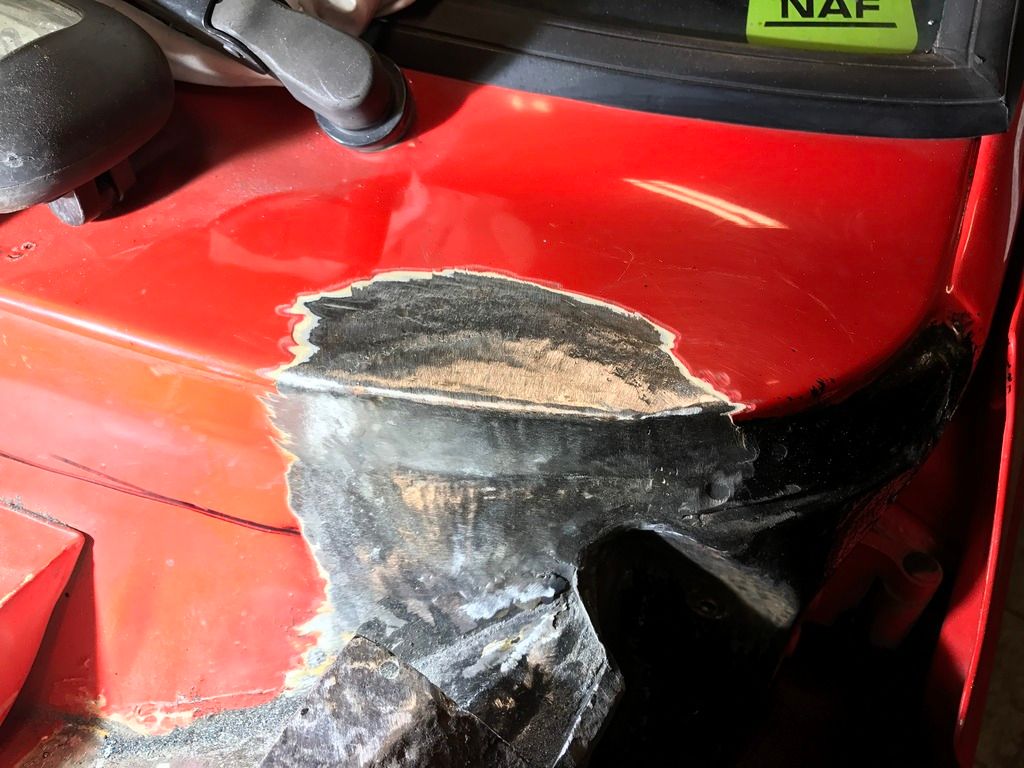 I also welded the shock tower stiffener back on after coating everything behind it in Isotrol primer: 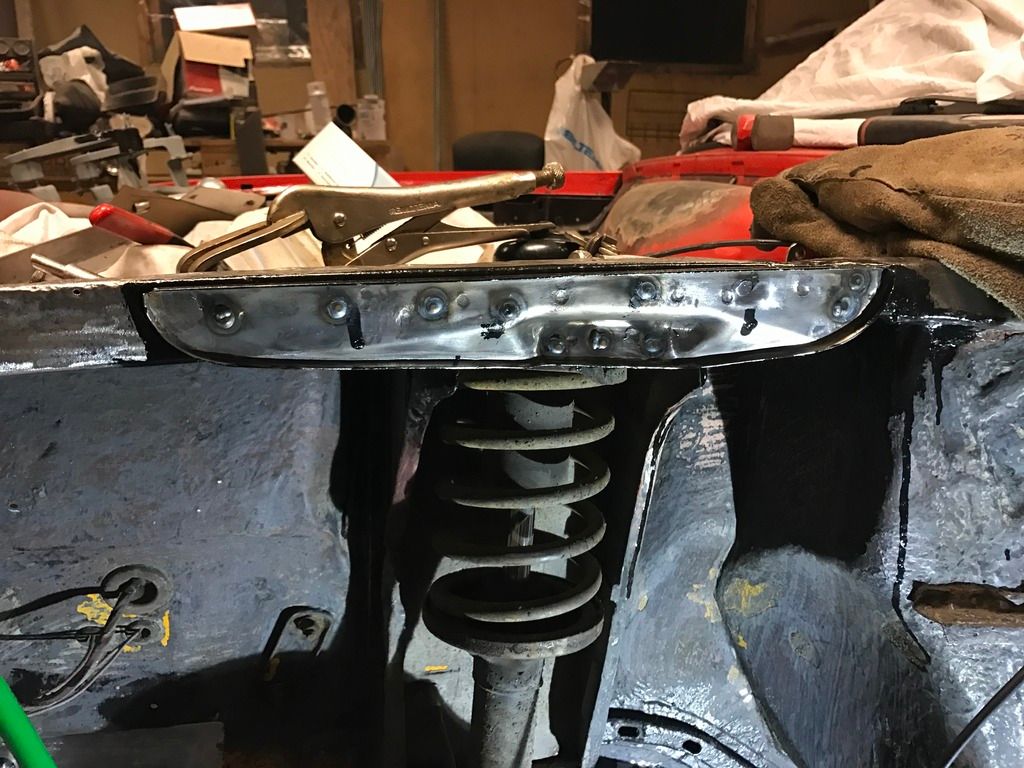 Last of the fender mount welded back on: 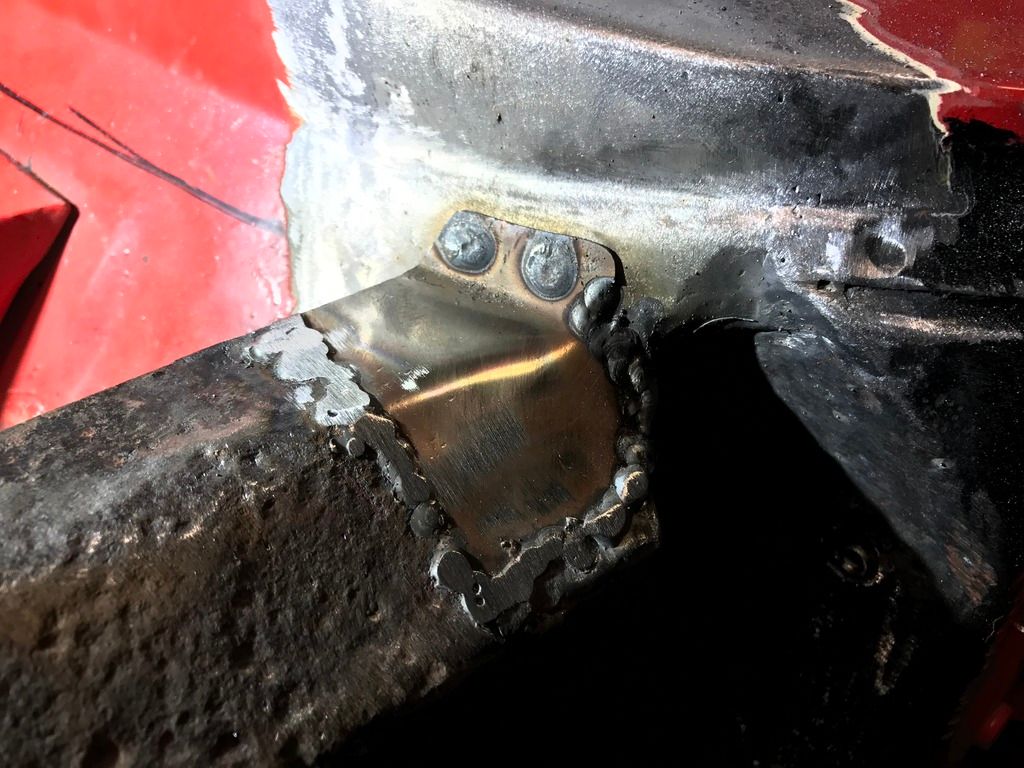 And the entire piece ground back: 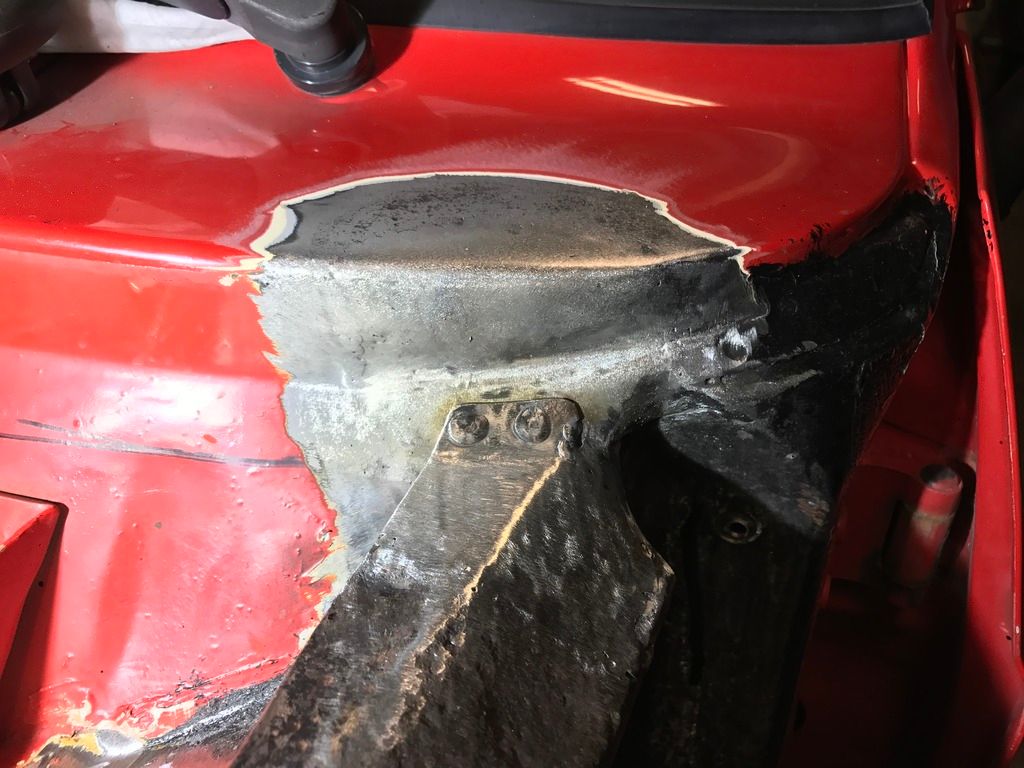 Thanks for reading! |
| |
|
|
funkyhunk
Part of things
Old Ford's R Us
Posts: 265
|
|
|
|
Looking good, I'd love to hear the sound of those carbs |
| |
Last Edit: Nov 2, 2016 19:02:54 GMT by funkyhunk
|
|
funkyhunk
Part of things
Old Ford's R Us
Posts: 265
|
|
|
|
|
Why not butt weld instead of making an overlapping flange and spotwelding?
It's just another place for moisture to accumulate.
Even though you use seam sealer and such, it WILL accumulate moisture and start to rust sometime later, especially in damp areas like the boot, and undercarriage.
I always buttweld, and never make flanges/overlap and spotweld unless it was there originally when the car was built.
|
| |
Last Edit: Nov 2, 2016 18:19:01 GMT by funkyhunk
|
|
funkyhunk
Part of things
Old Ford's R Us
Posts: 265
|
|
Oct 25, 2016 17:19:39 GMT
|
Update time again! The right inner fender got a few new coats of undercoat: 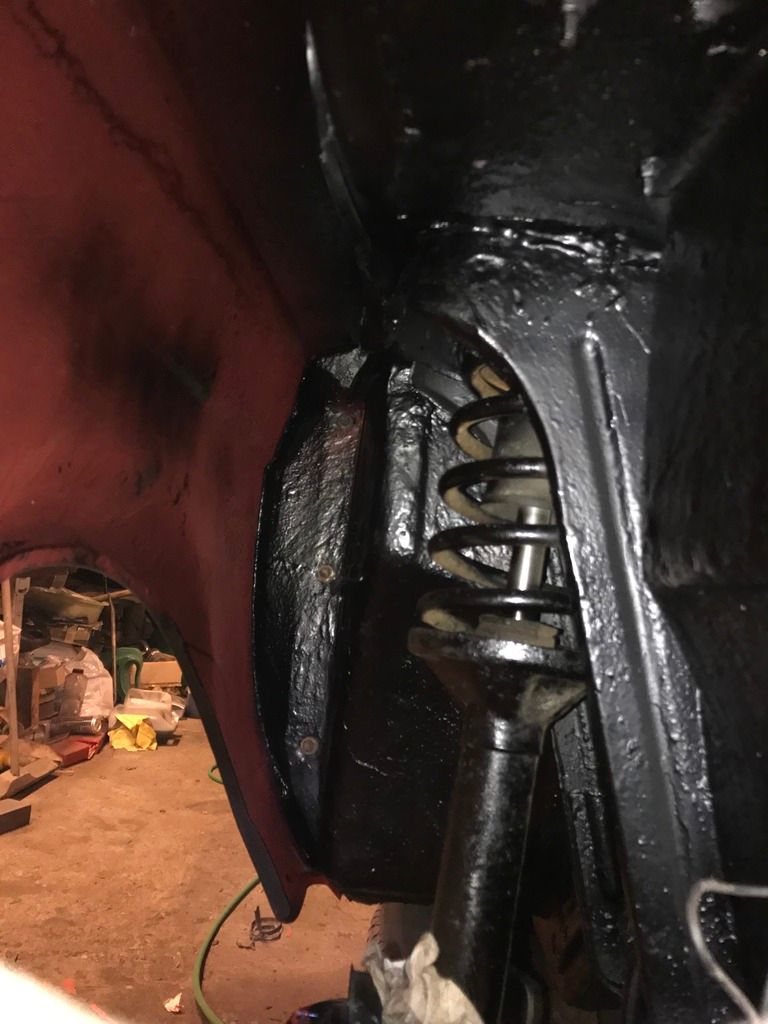 The lights and bracket for the right side got ground down and zink-coated. Those had seen better days: 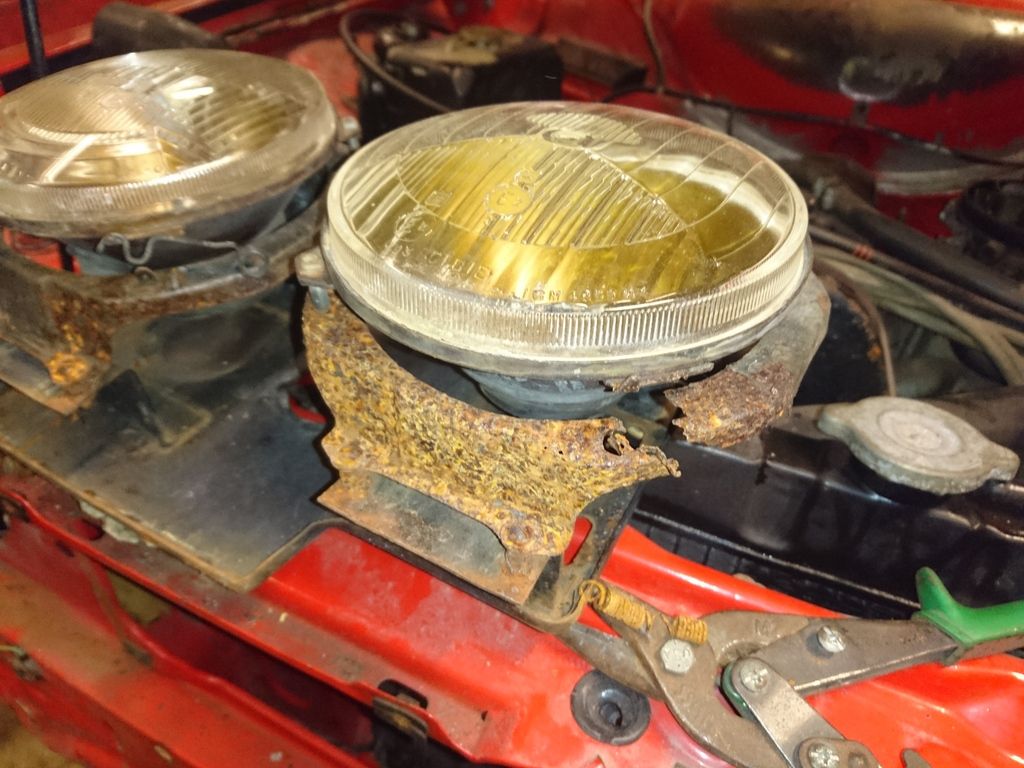 I had good used lights and brackets in laying around, and got to assembling them: 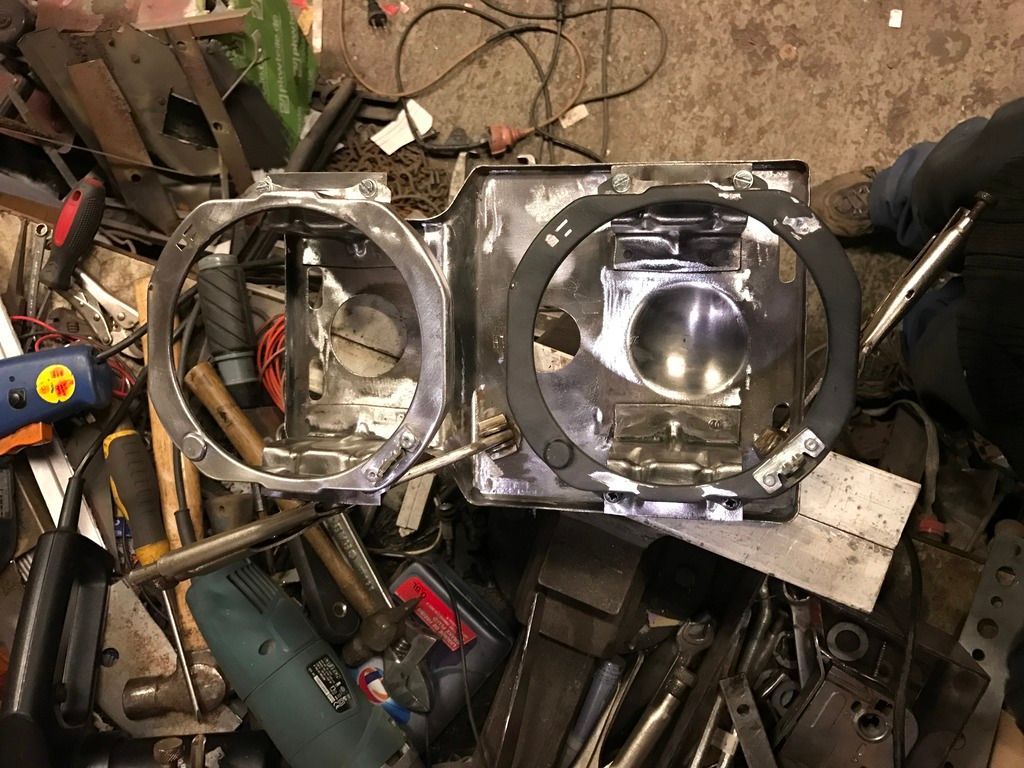  Continuing on the left side fender. Welded on a piece: 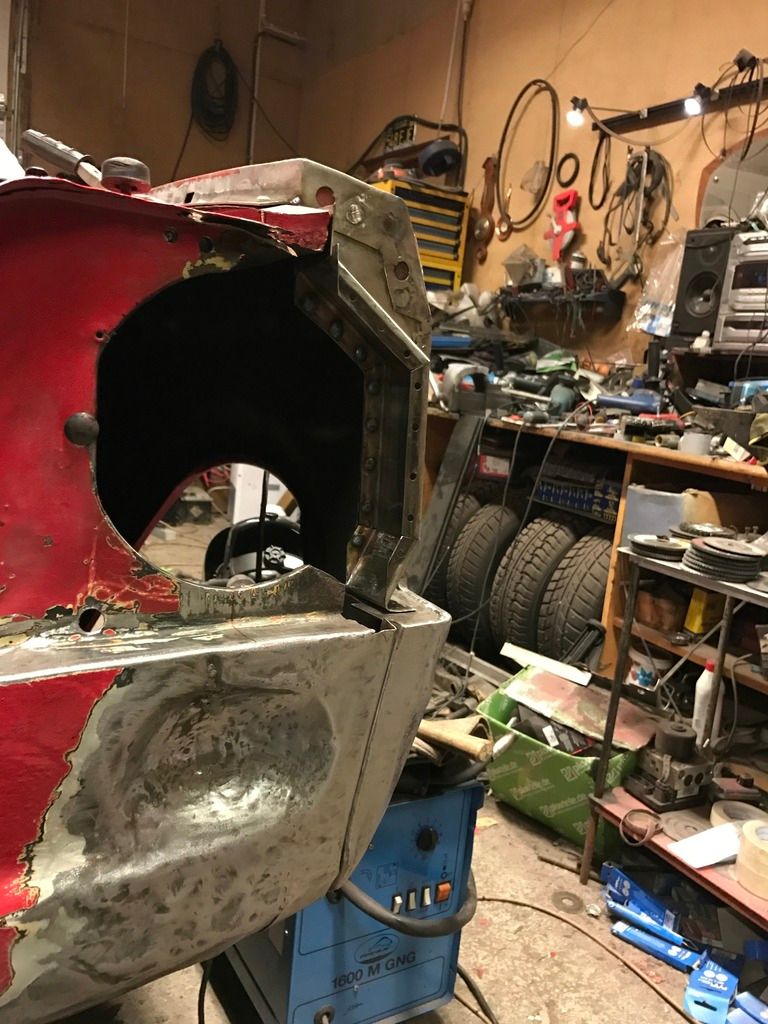 Starting to adapt the light surround: 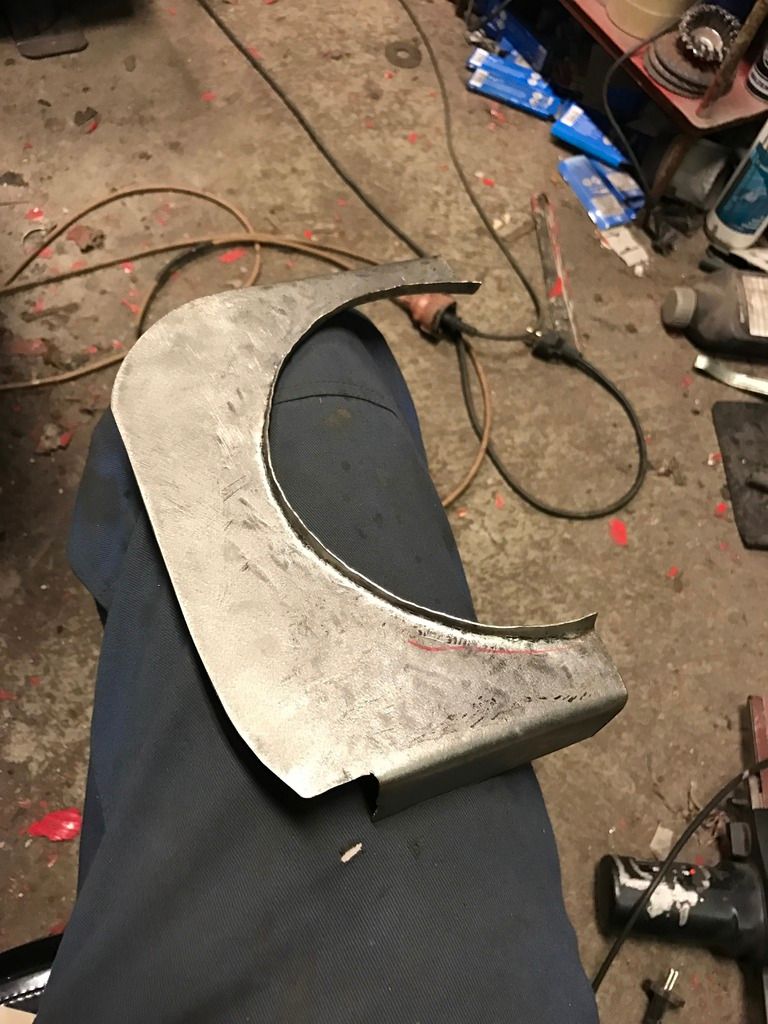 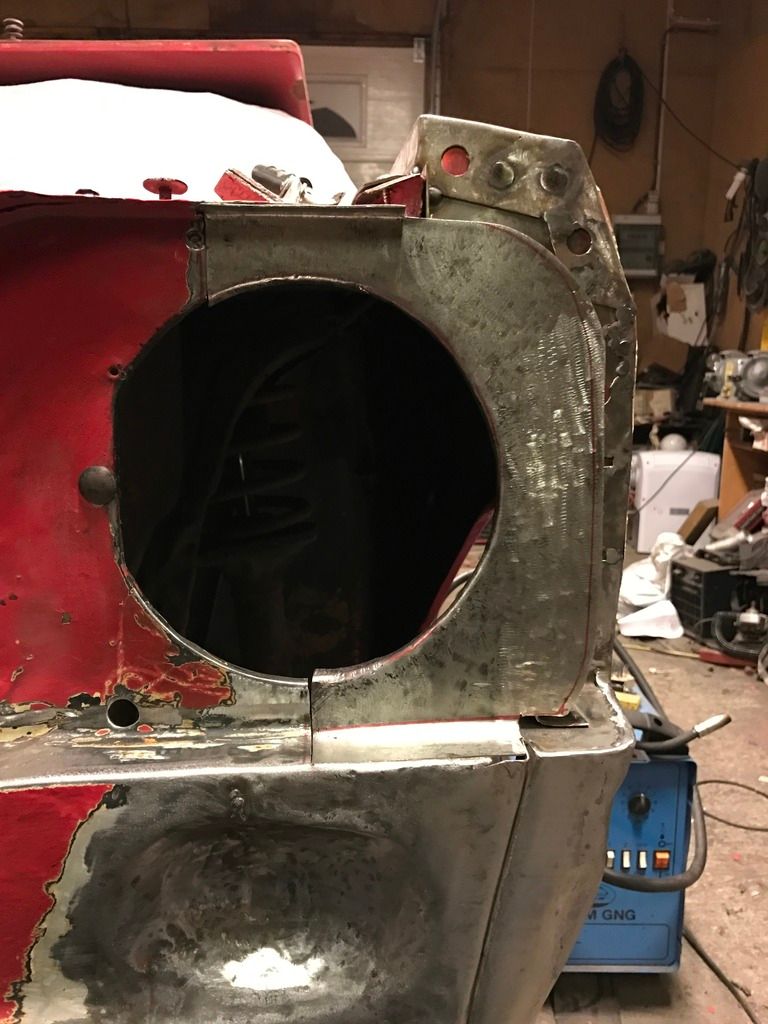 Welded: 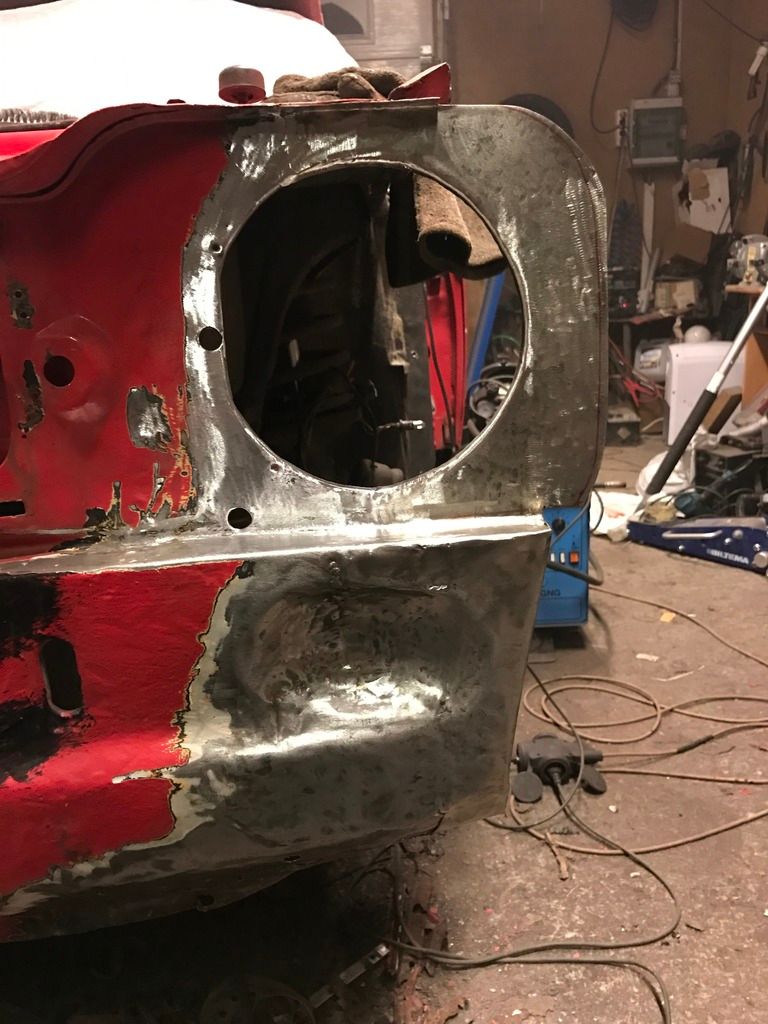 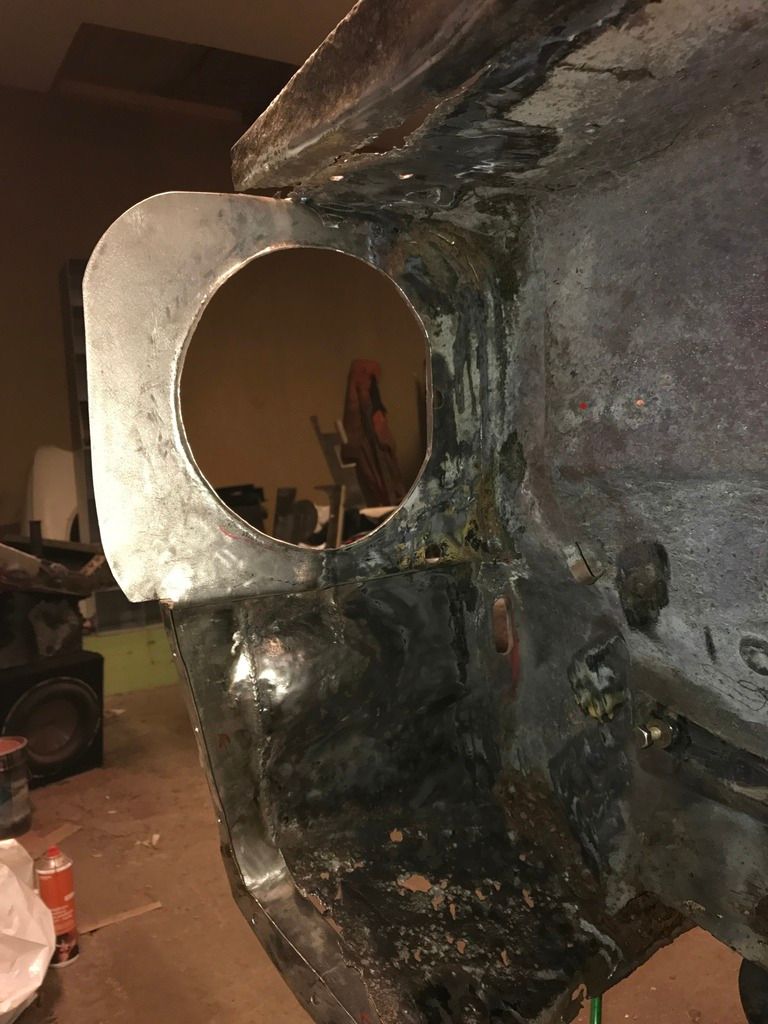 And I got a new supply of sanding belts for my 13mm belt sander/powerfile from ebay. I go through these like they were going out of style: 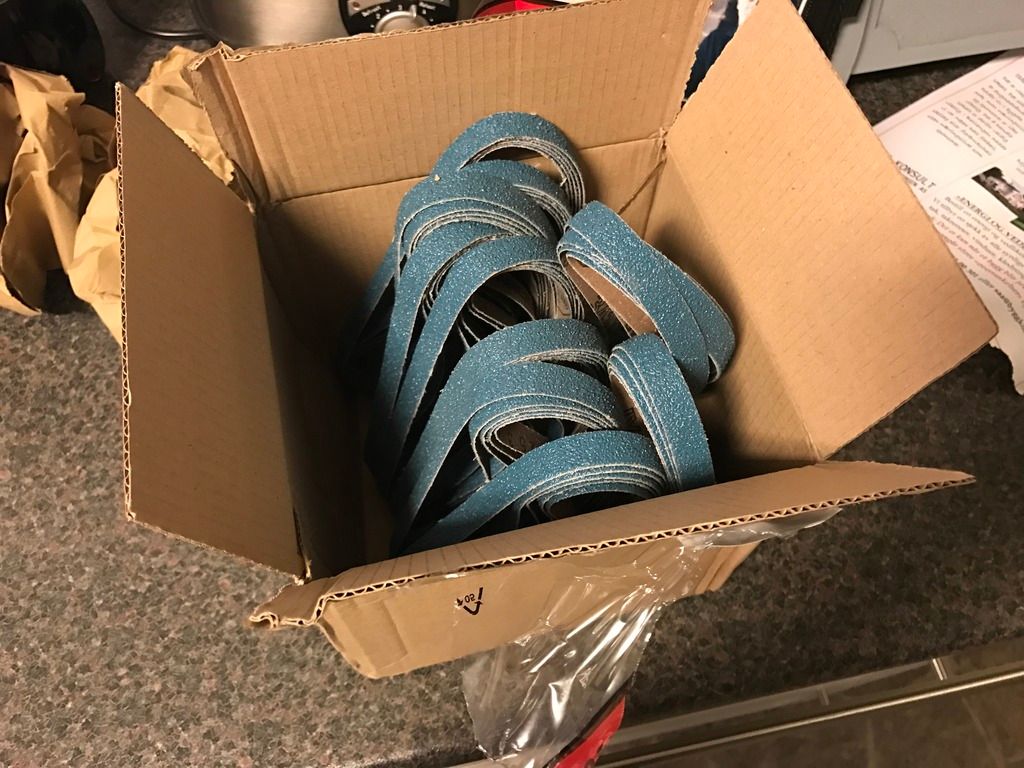 Finally I had taken of the fender and took off the shock tower strenghtener to check the underside. It was fastened with a few shoddy spot welds, i could almost tear it off with my bare hands. Luckily no grot found on the inside: 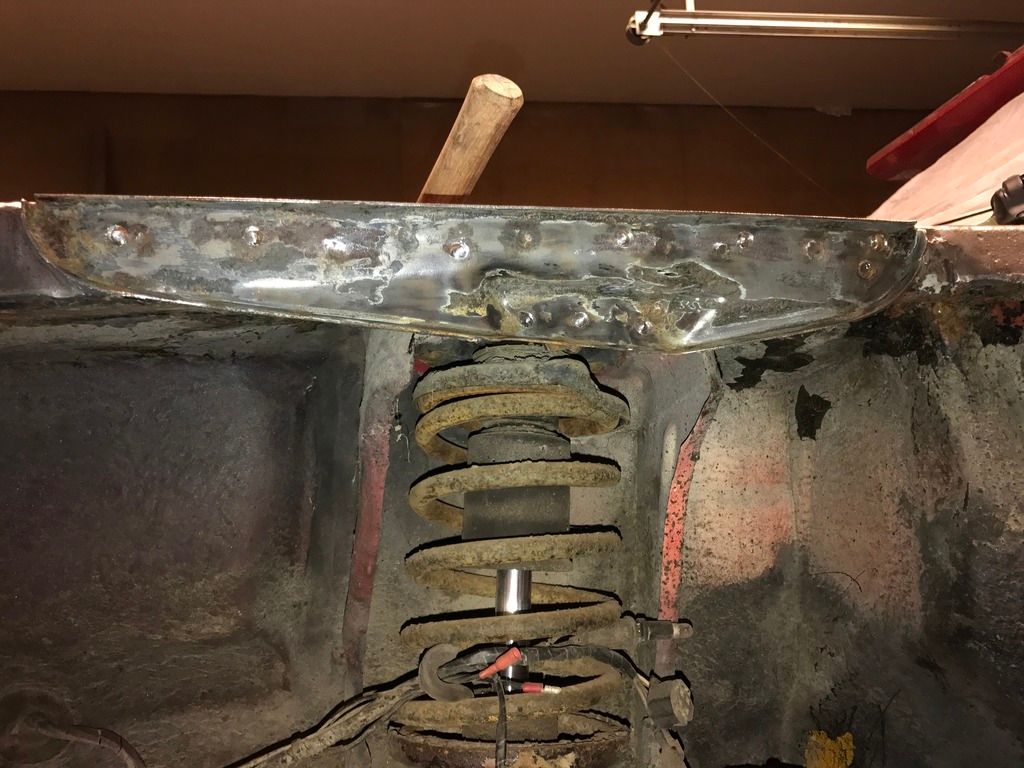 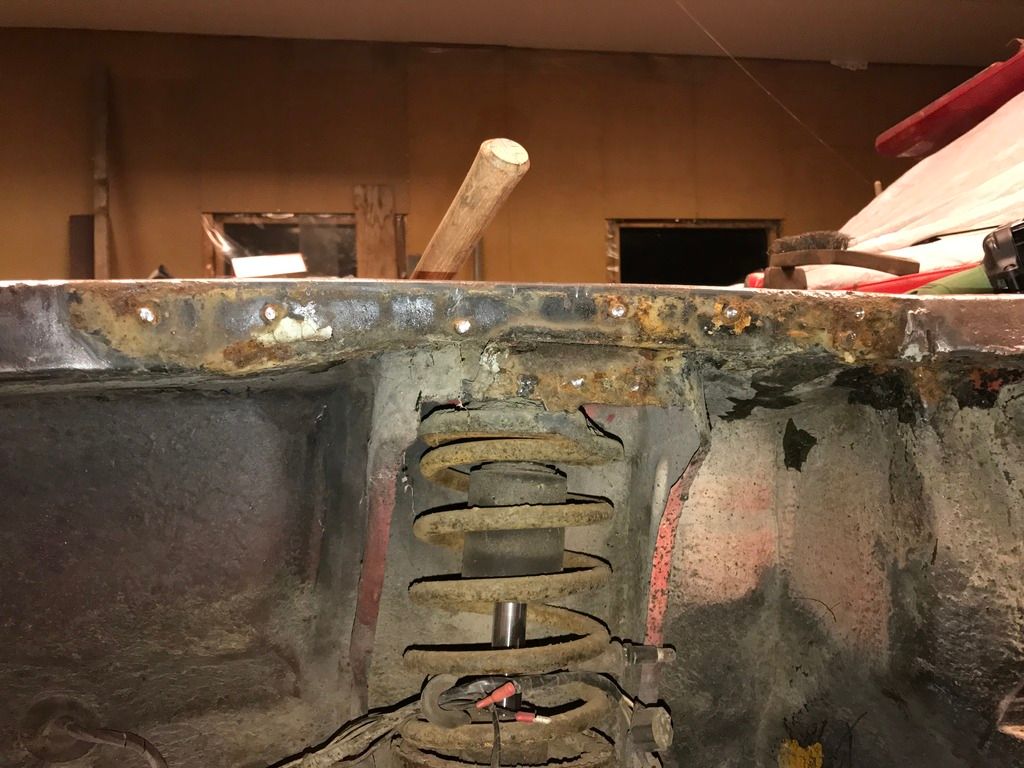 Then this piece was next: 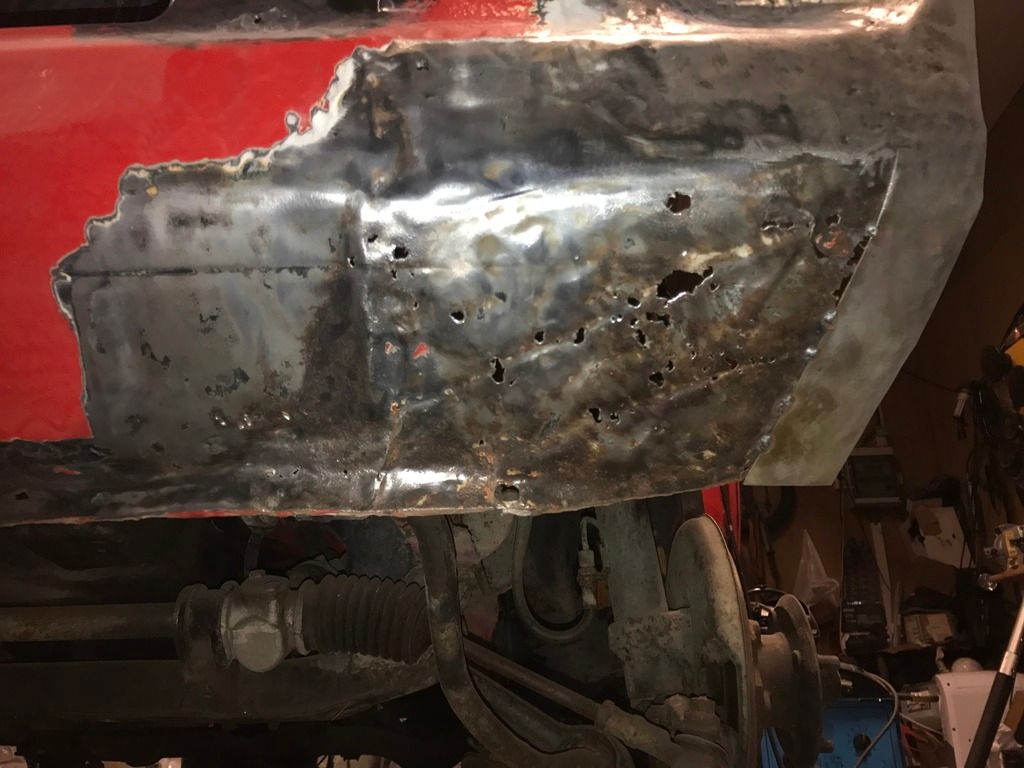 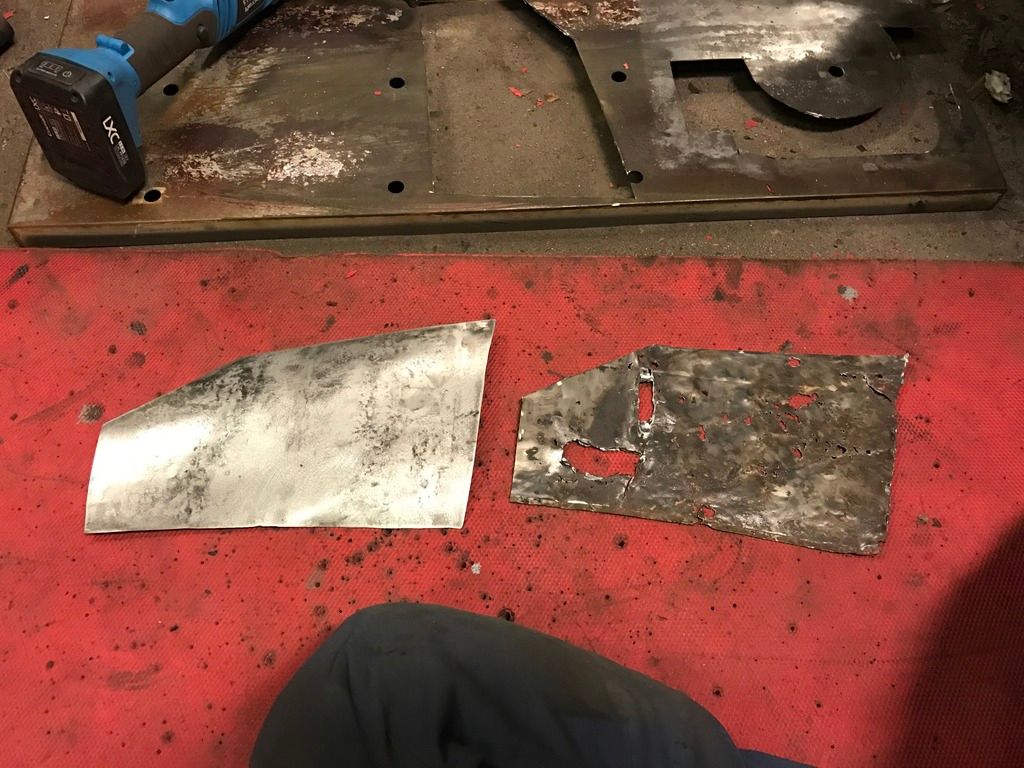 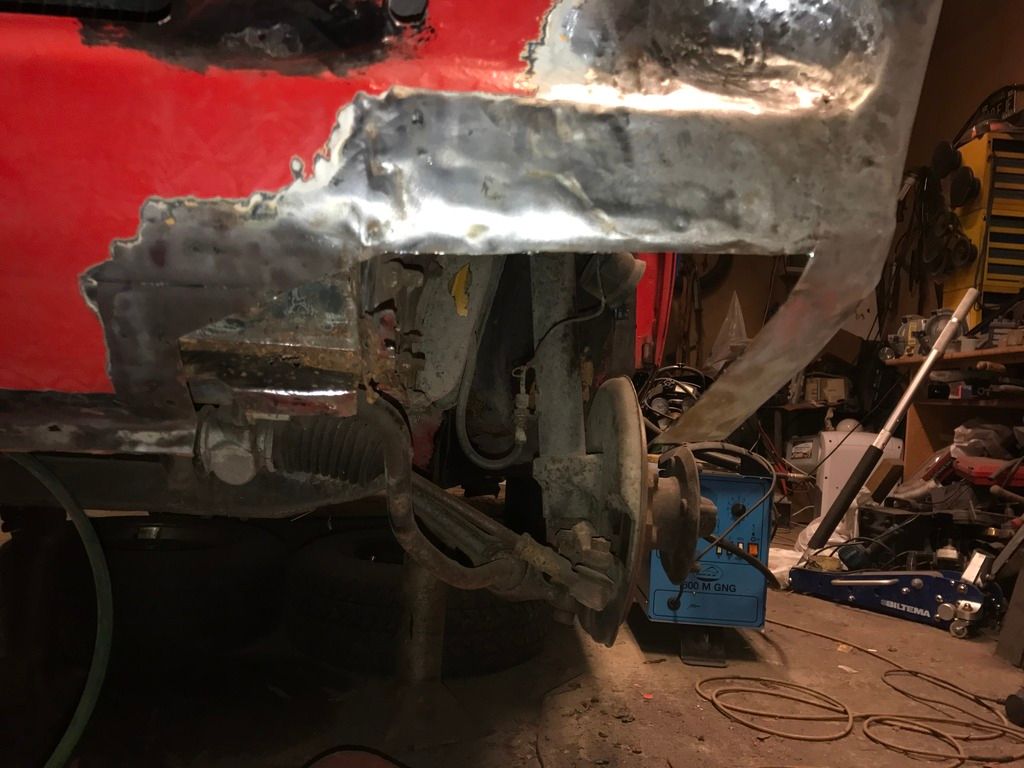 Fettling: 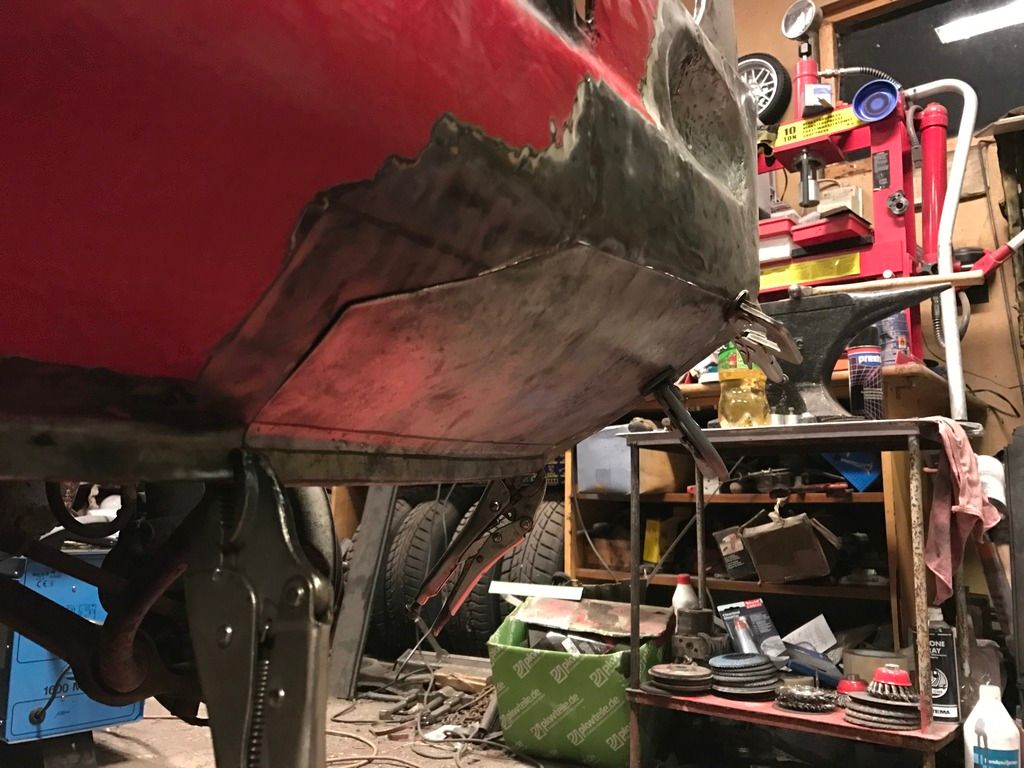 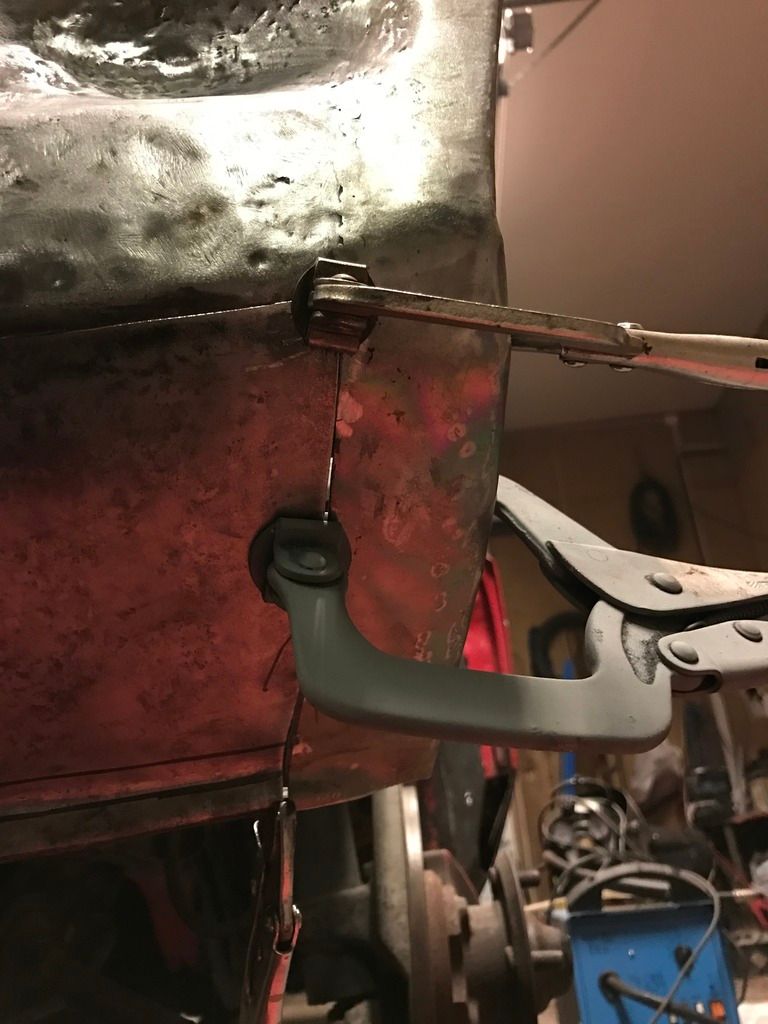 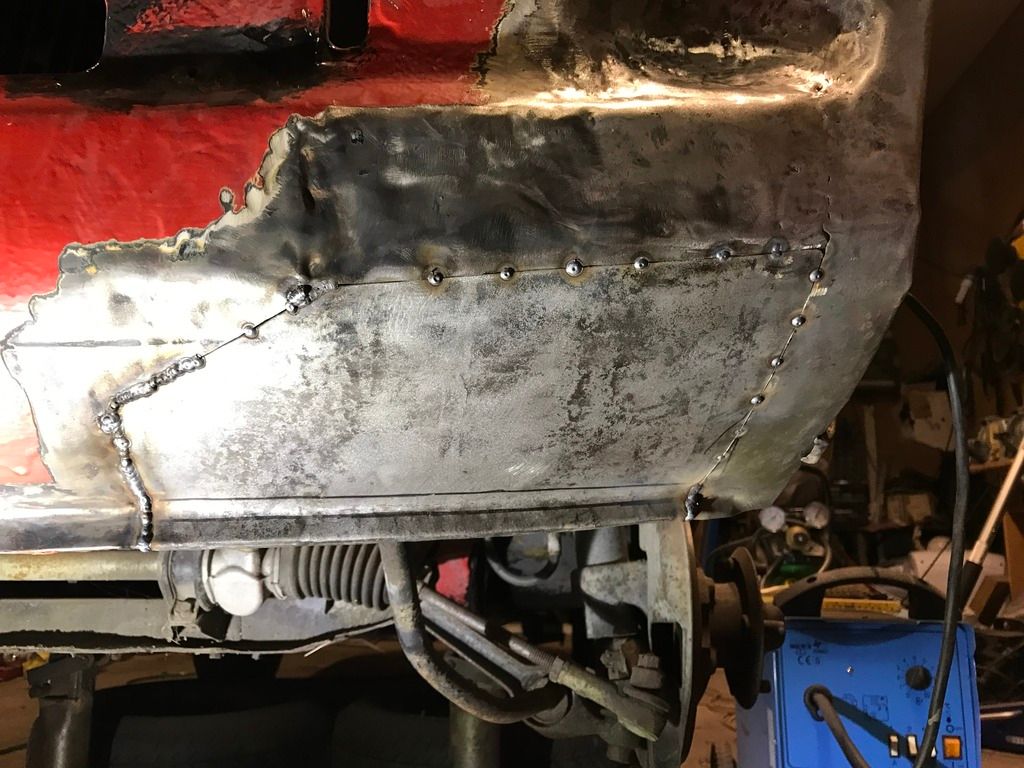 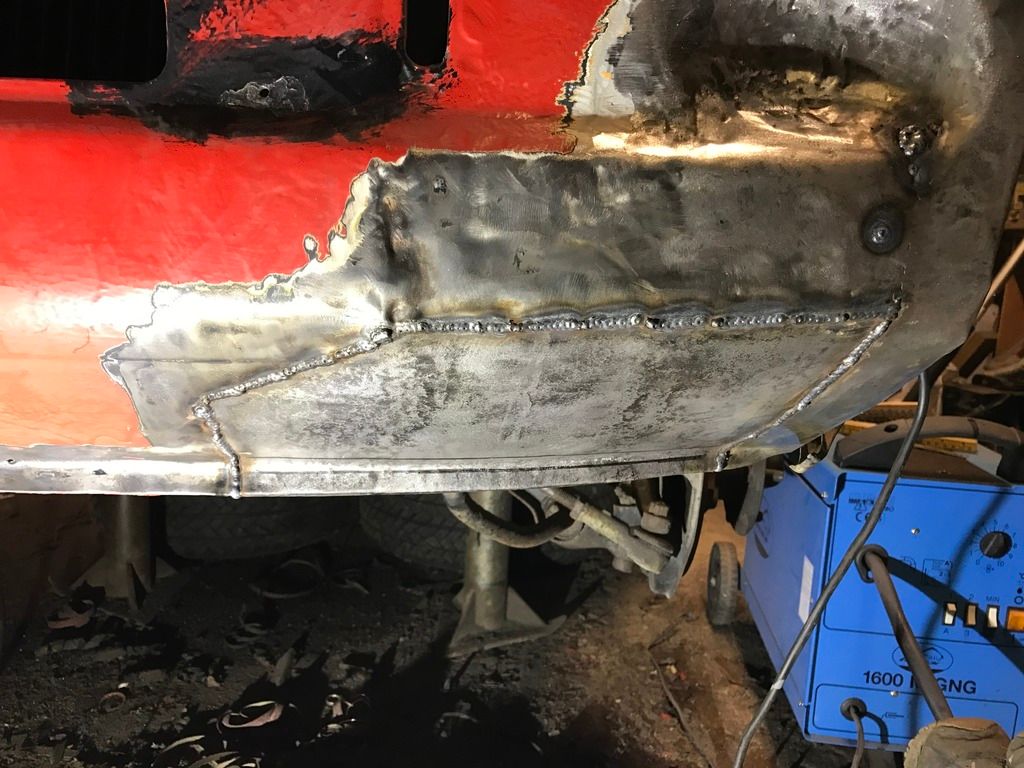 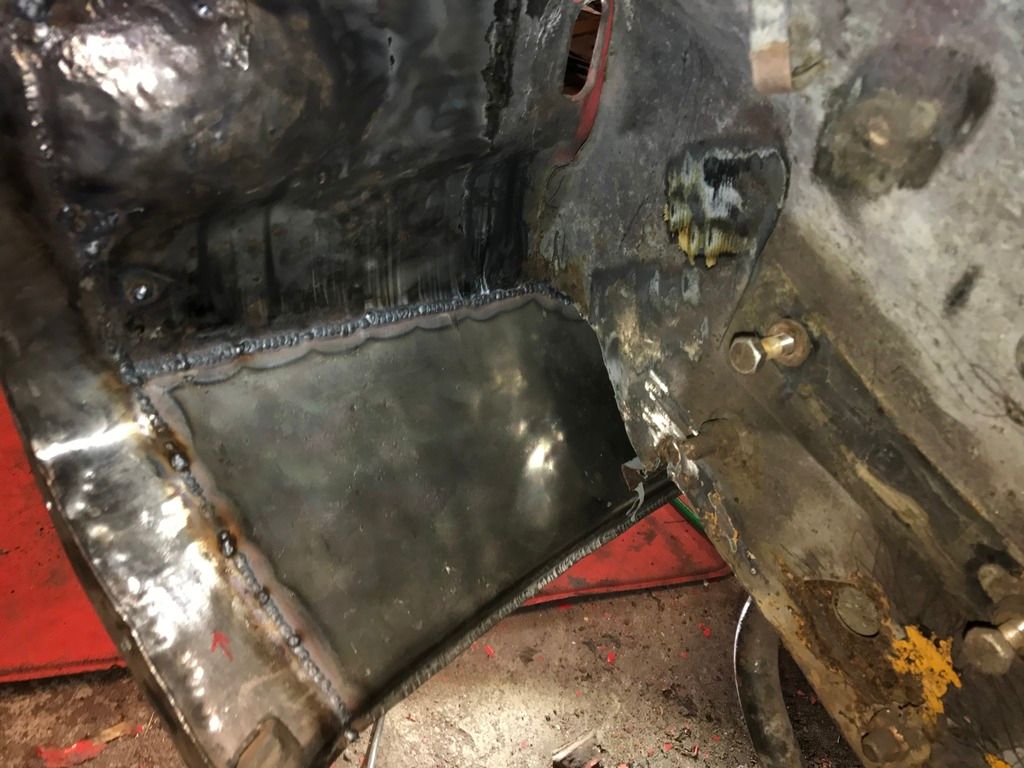 And finally ground down all the welds. This piece was came out quite good If I have to say so myself 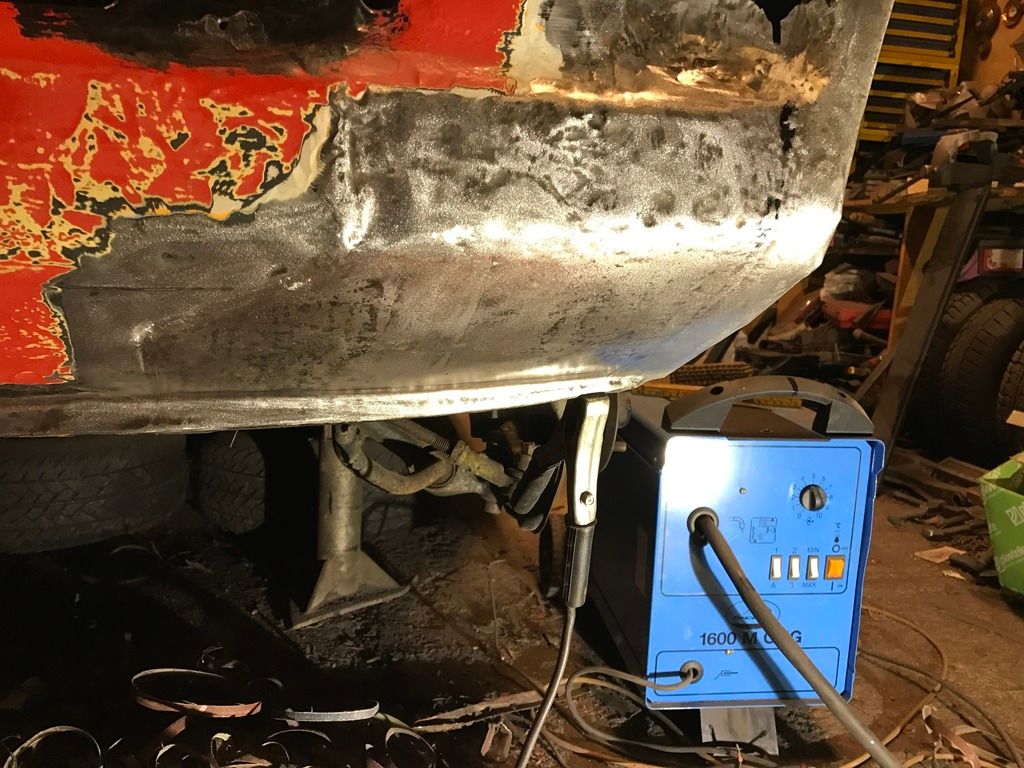 And finally got my new powerfile from ebay for 30£, bargain! The old black and decker I had used previously started making funny noises after been worn out through many restorations. 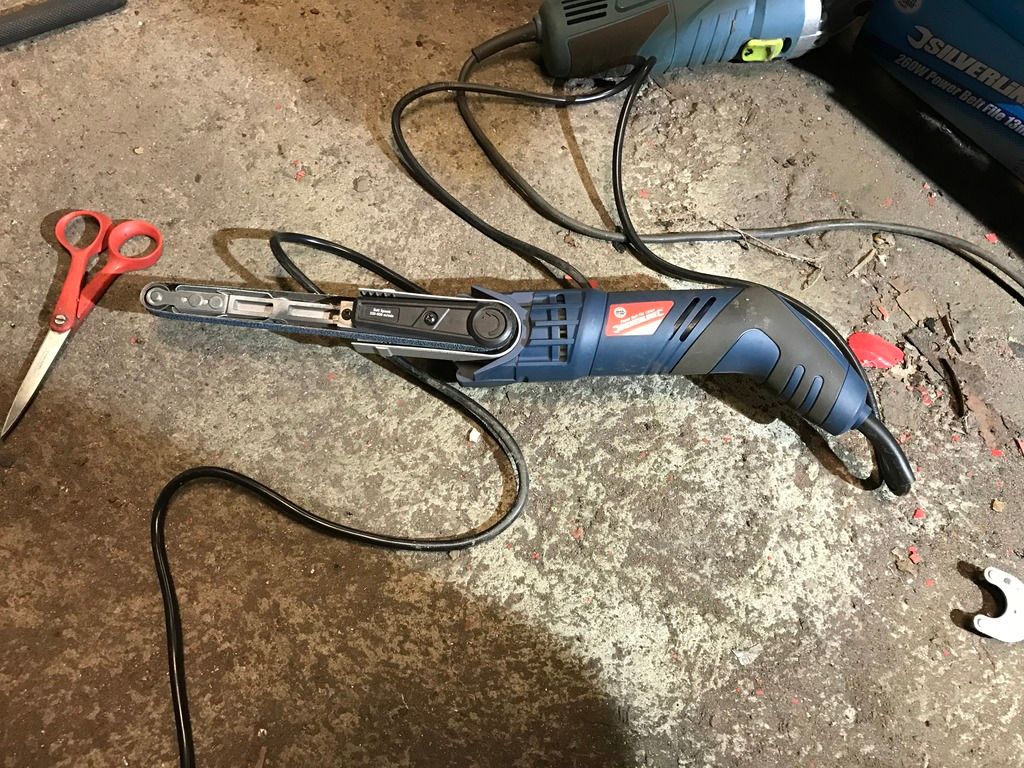 Then it was time to finish the lower piece of the inner fender. I removed the grot, and coated it with primer before I welded on the new piece: 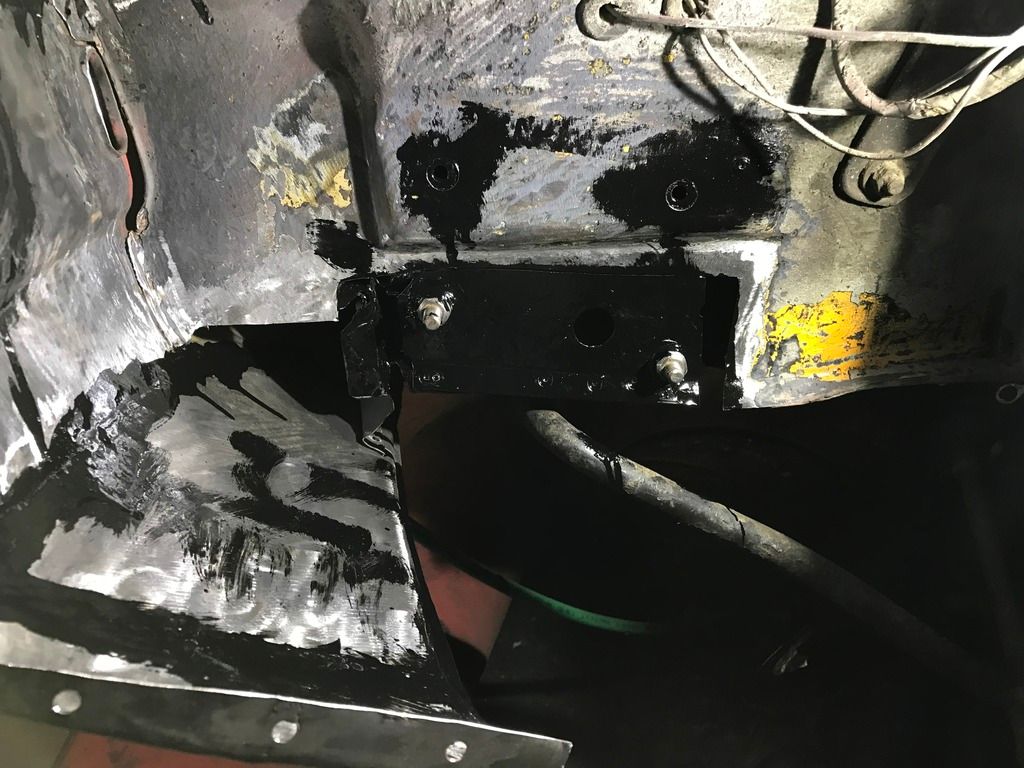 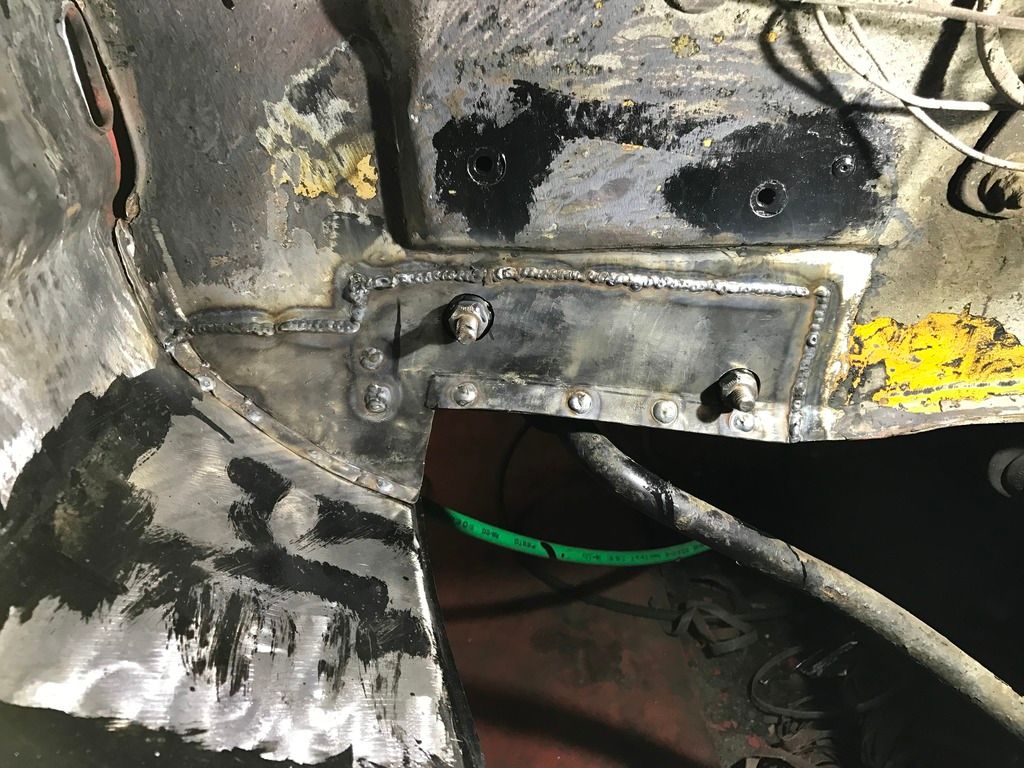 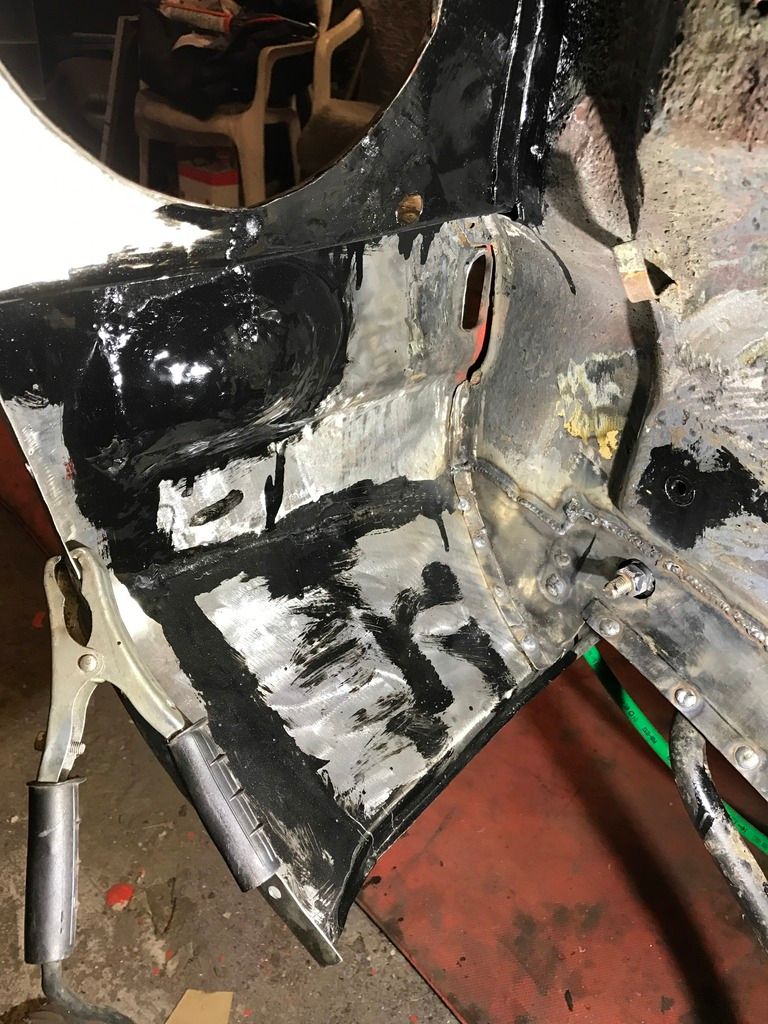 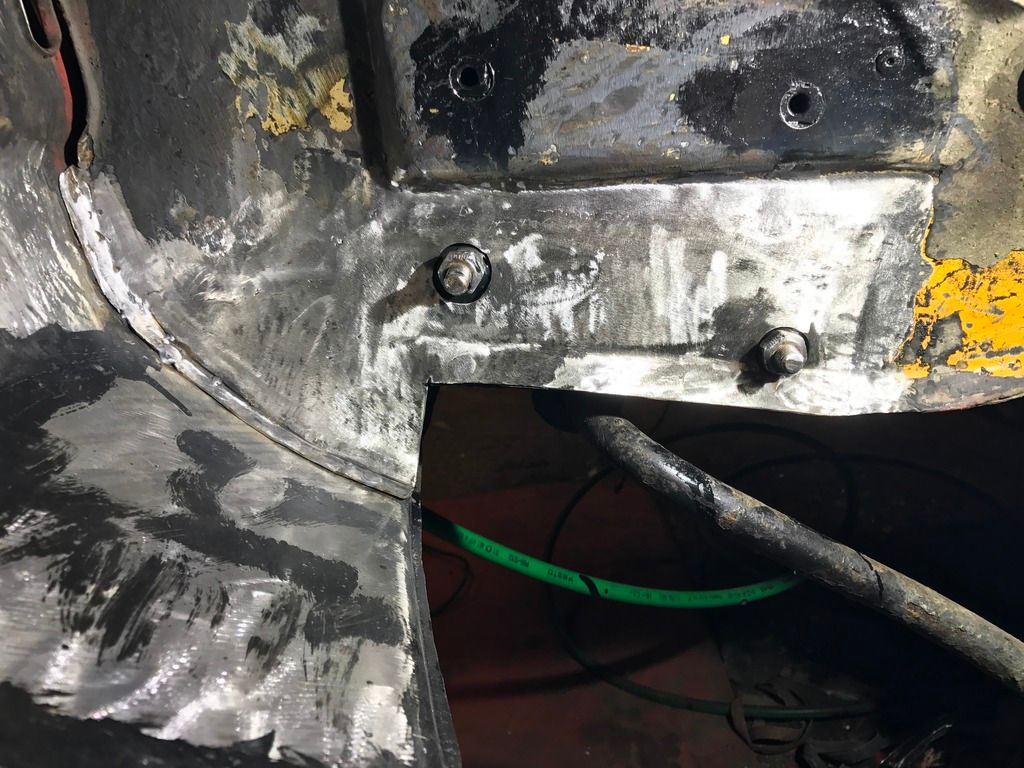 The new beltsander worked flawlessly, and it was much easier to handle due to it being smaller, and had a bendable belt. If you have any suggestions, please let me know If I'm doing something wrong. Thanks for your interest. |
| |
|
|
funkyhunk
Part of things
Old Ford's R Us
Posts: 265
|
|
|
|
Lots of progress to be proud of! Thanks m8, such progress, but not much Not as much as I would like, but progress is progress regardless Time for 'nother update! This week I had tuesday and friday off, so I finally got two sorely needed days off work to spend time with the kid and swmbo I even got some fettling done in the garage. I started with completing the work on the right fender, mounting it for the last time. I made a decision to screw the fender to the chassis, to make future disassembly less laborious if I felt so inclined. All the places where the fender would be welded normally got a nice dollop of TEC7 glue, and then was fastened with 6mm stainless bolts, nuts and washers. It should be as strong, if not stronger than it's welded counterpart I think. Oh, and all the mounting hardware I used in mounting the fender is stainless. 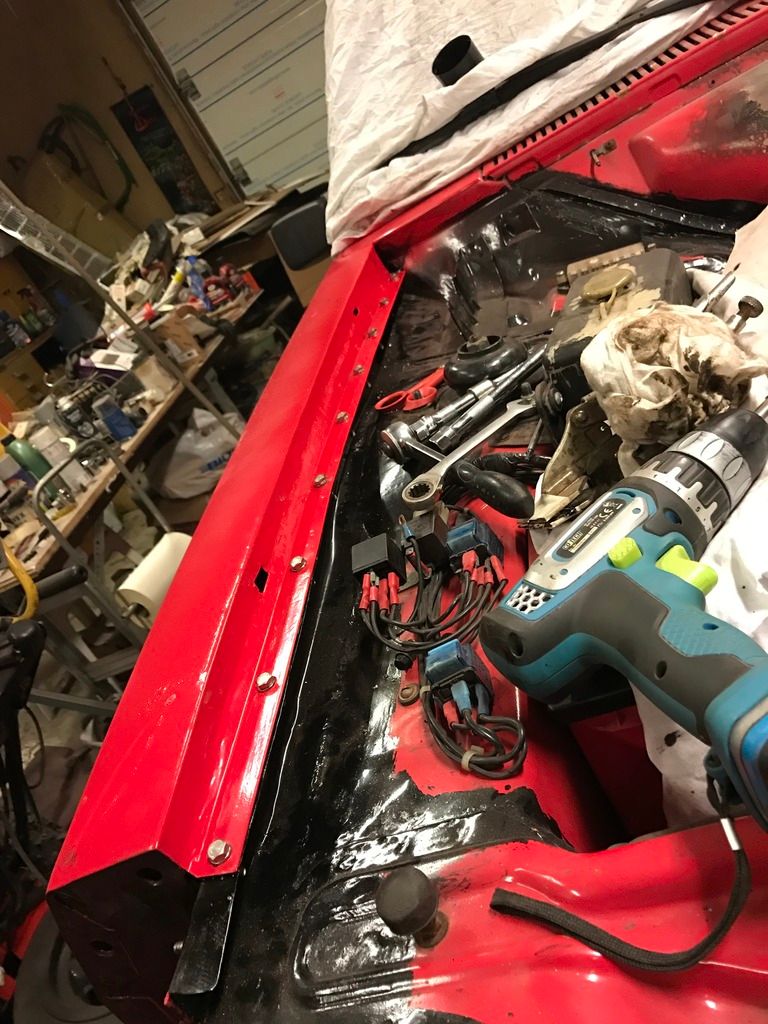 Here I used stainless poprivets. I thought about using "nutserts" but I had'nt any lying around in stainless, so poprivets it is. At least they wont oxydize 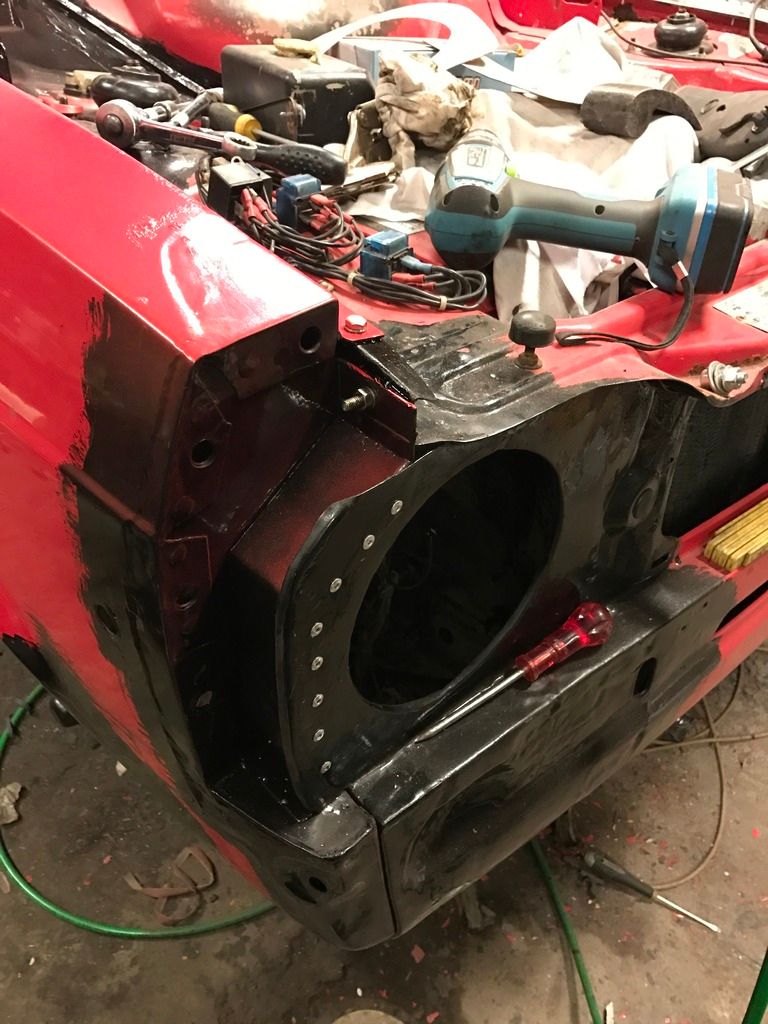 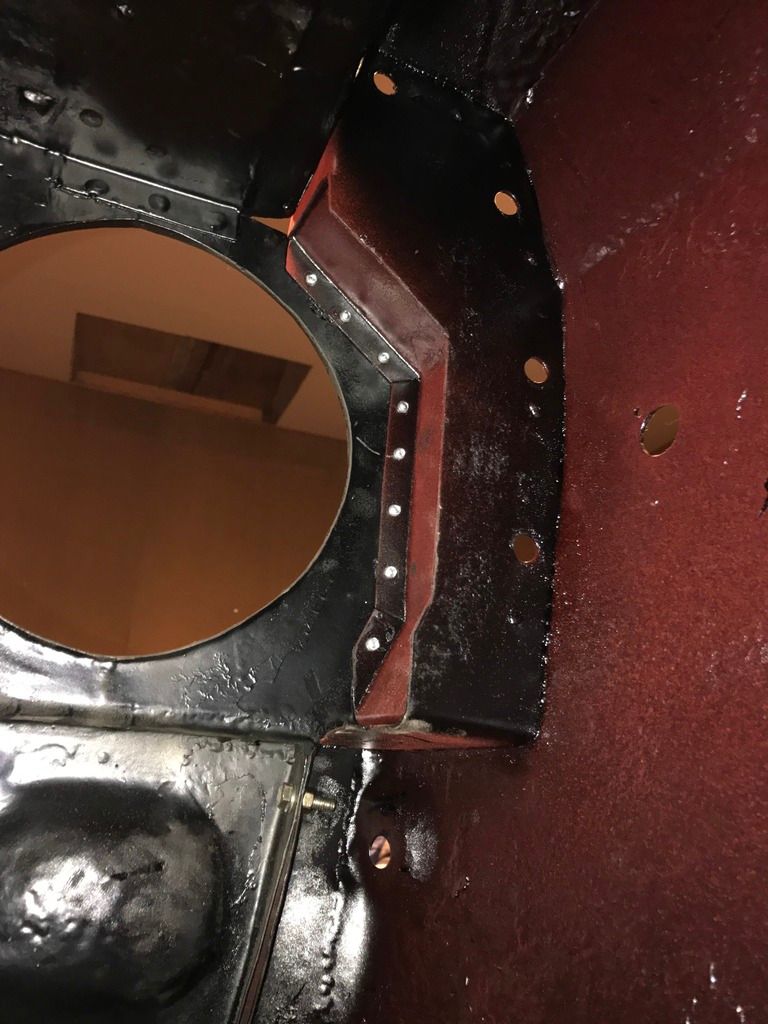 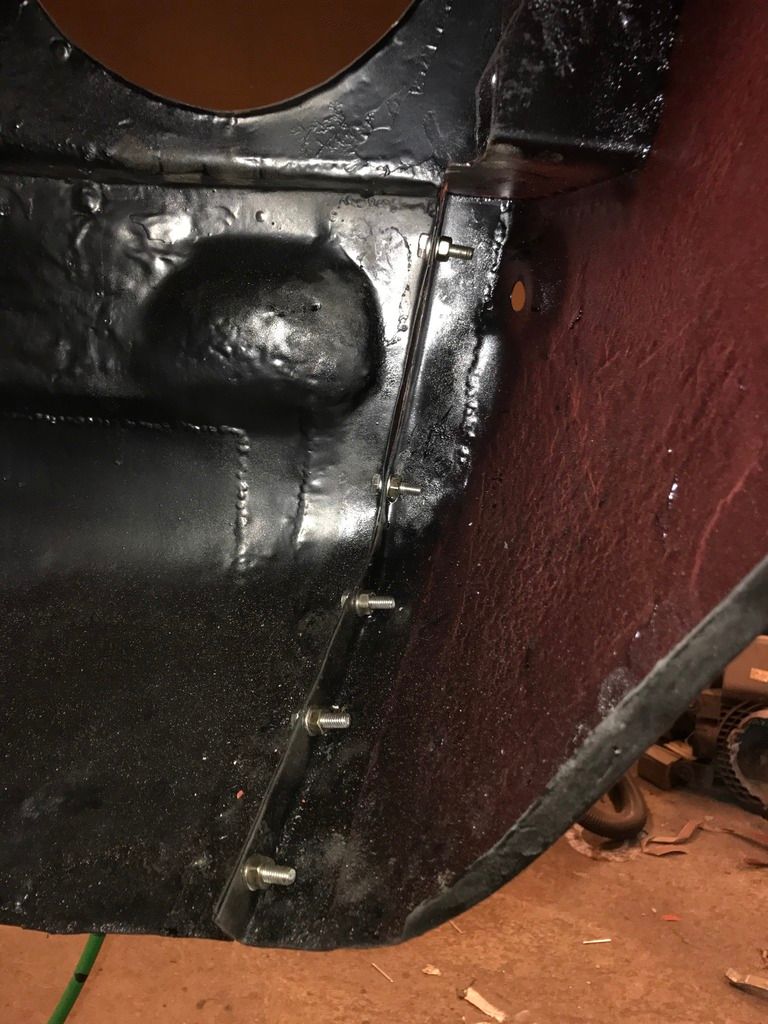 It felt amazing to actually be able to mount something for the last time! it's a sure motivator for what's to be tackled next! The Left side then. Fabricated and welded new fendermount: 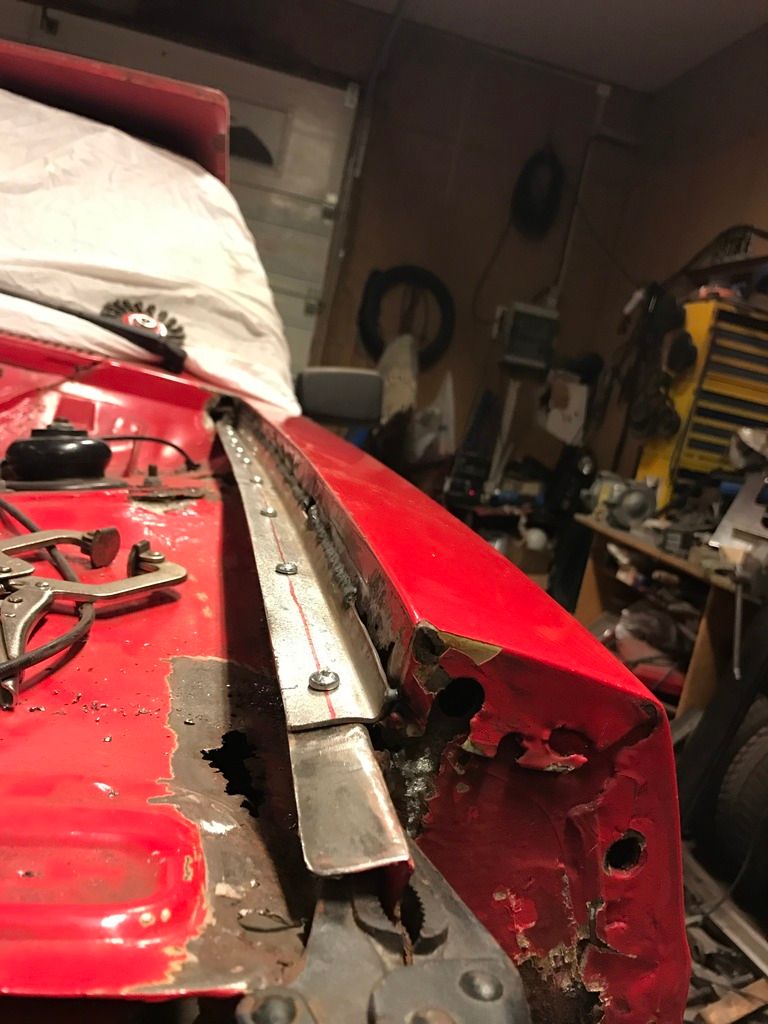 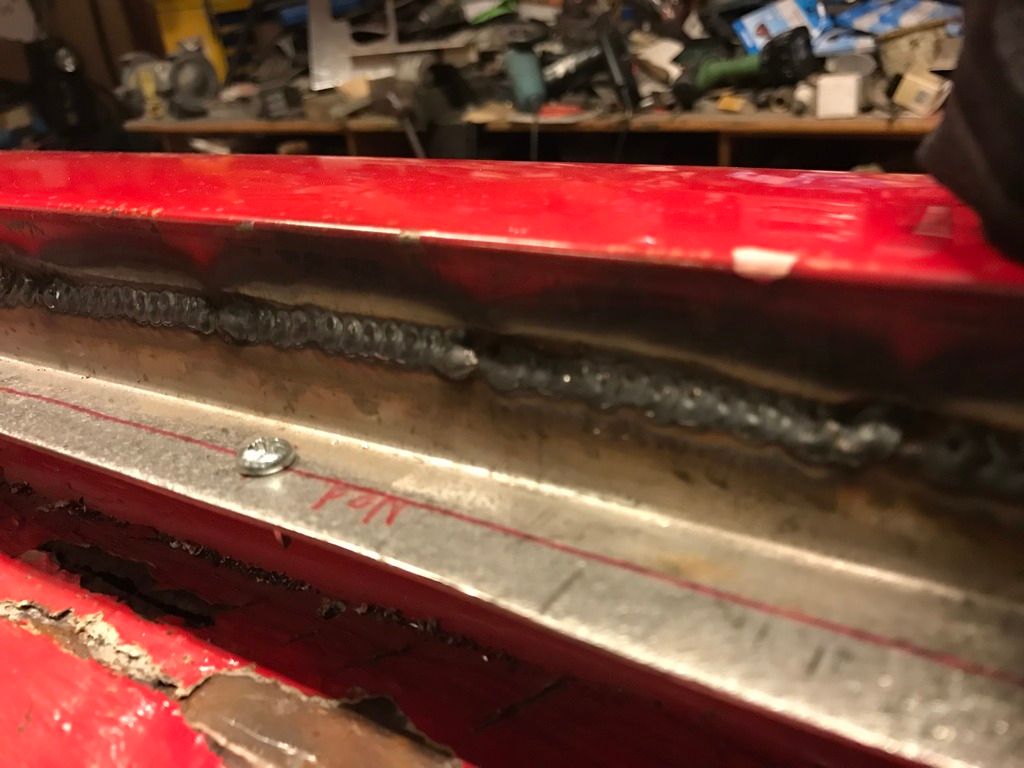 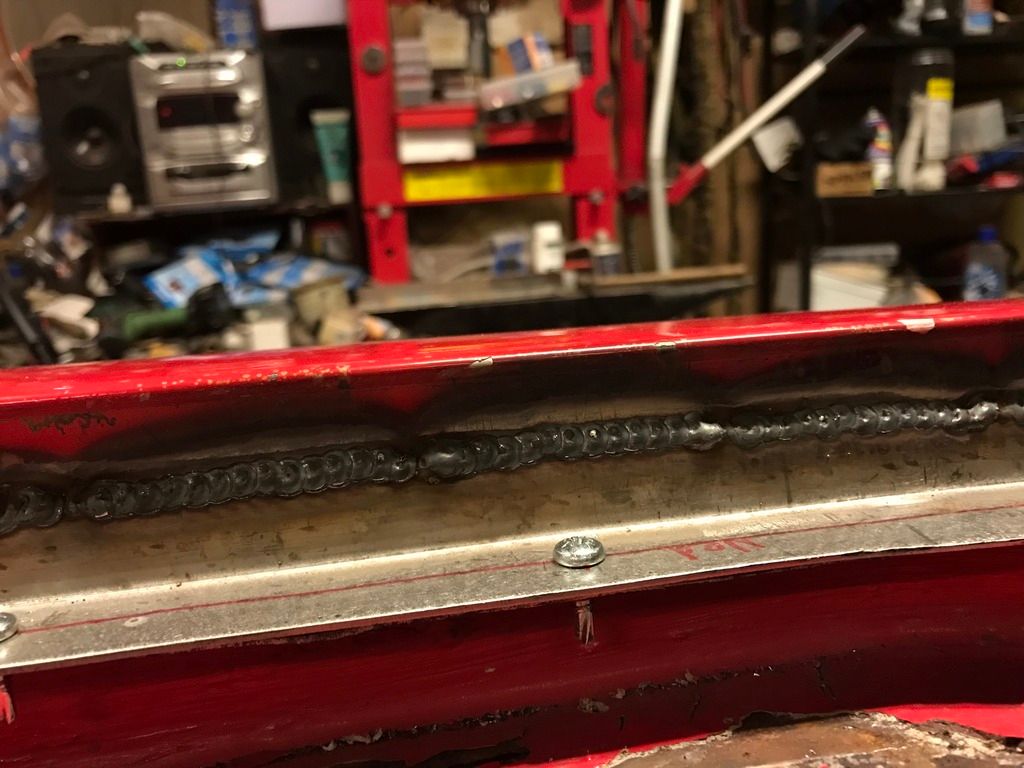 The corner had seen better days, but I only needed to replace the sides, as the top was fine. That was a bonus, since I wouldnt have to care so much about the profile of the original piece: 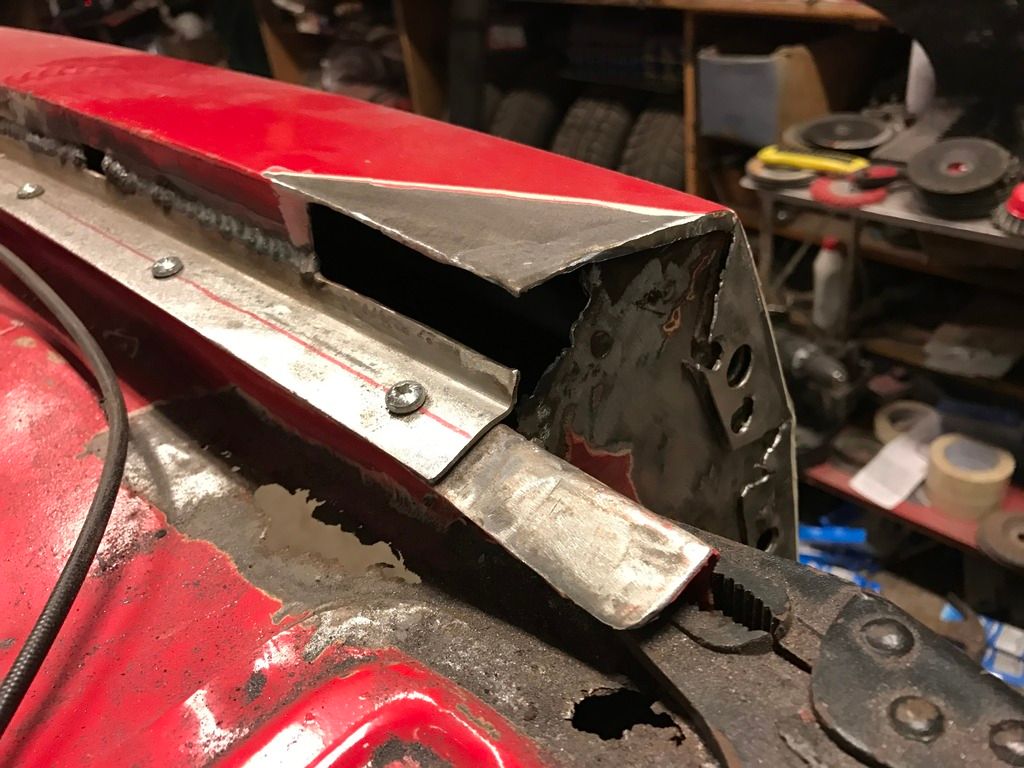  Welded, than ground down: 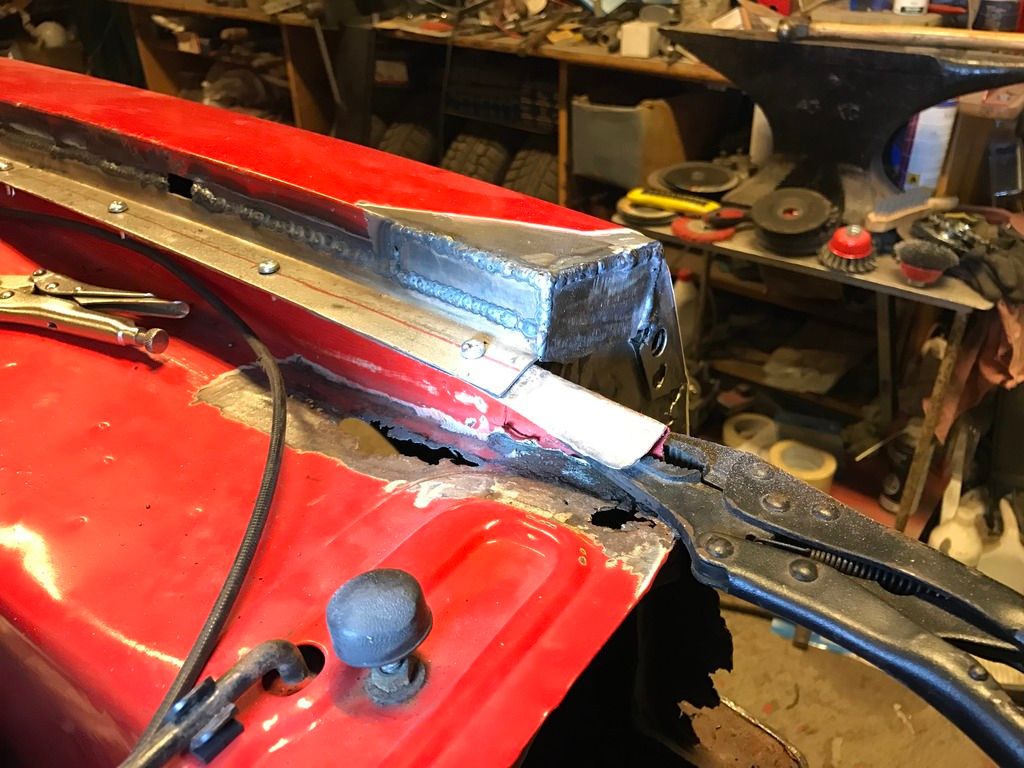 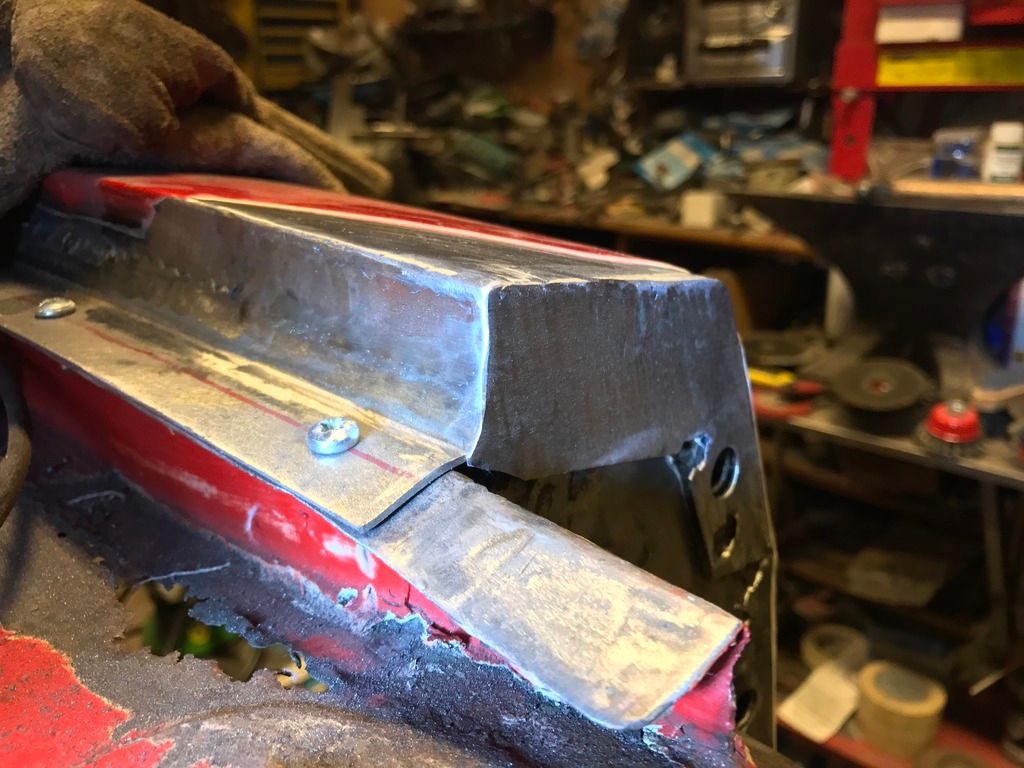 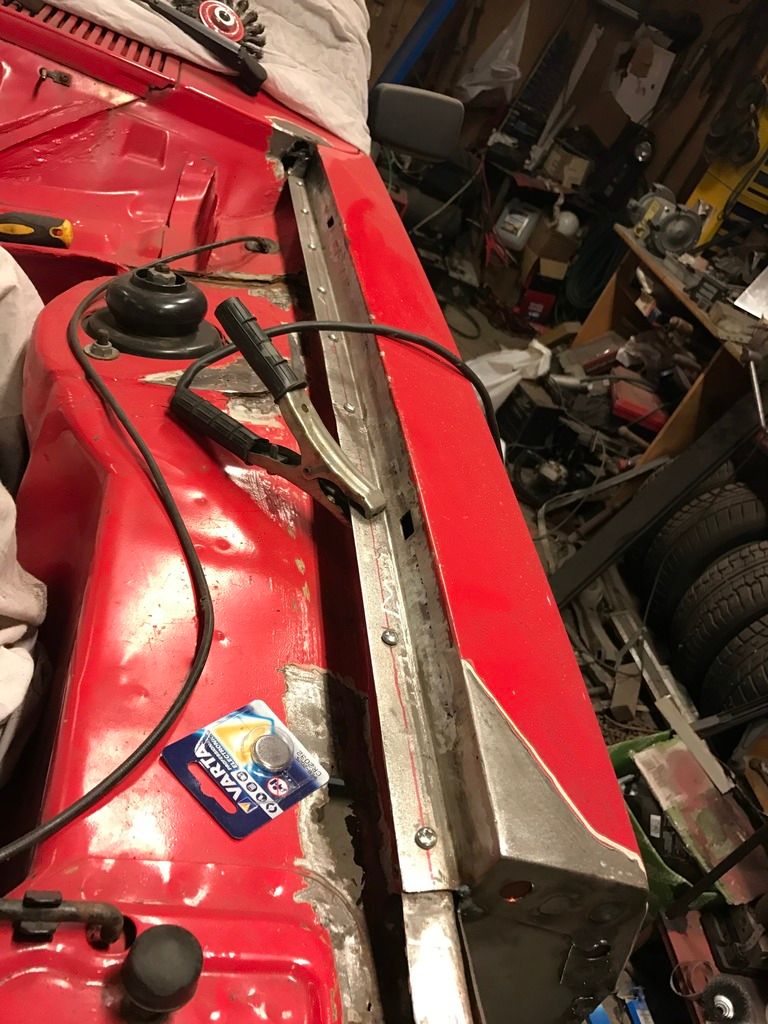 Next was the flange between the front piece and the fender. Quite a lot missing once I removed the rust:  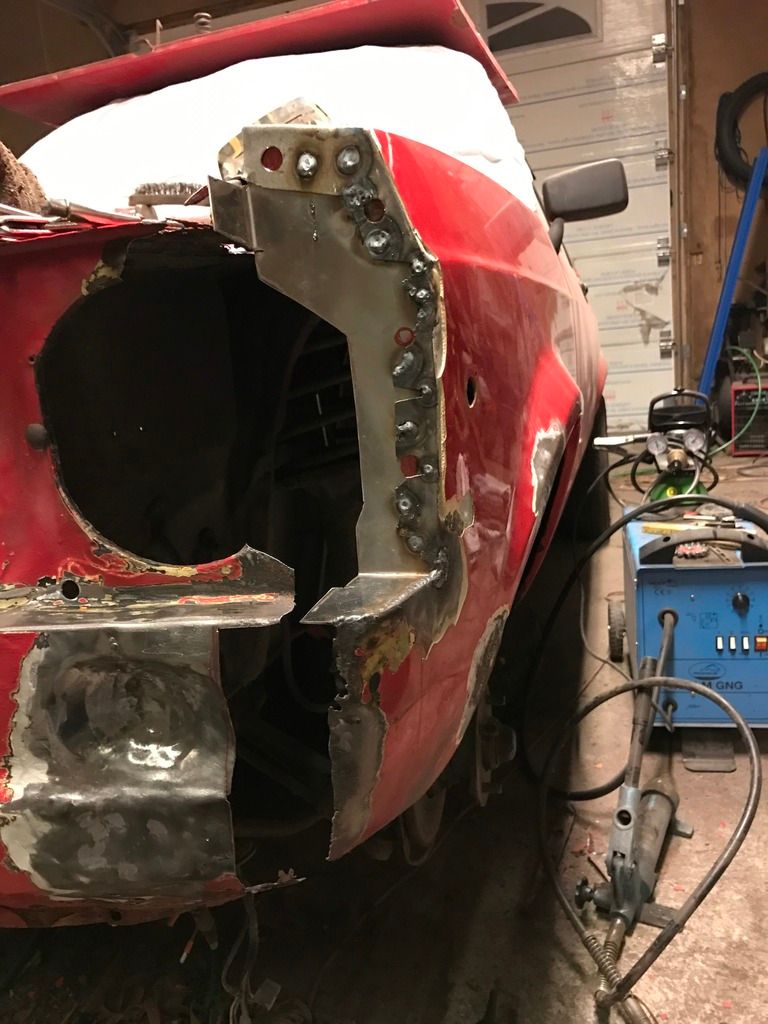 A bit more work for later: 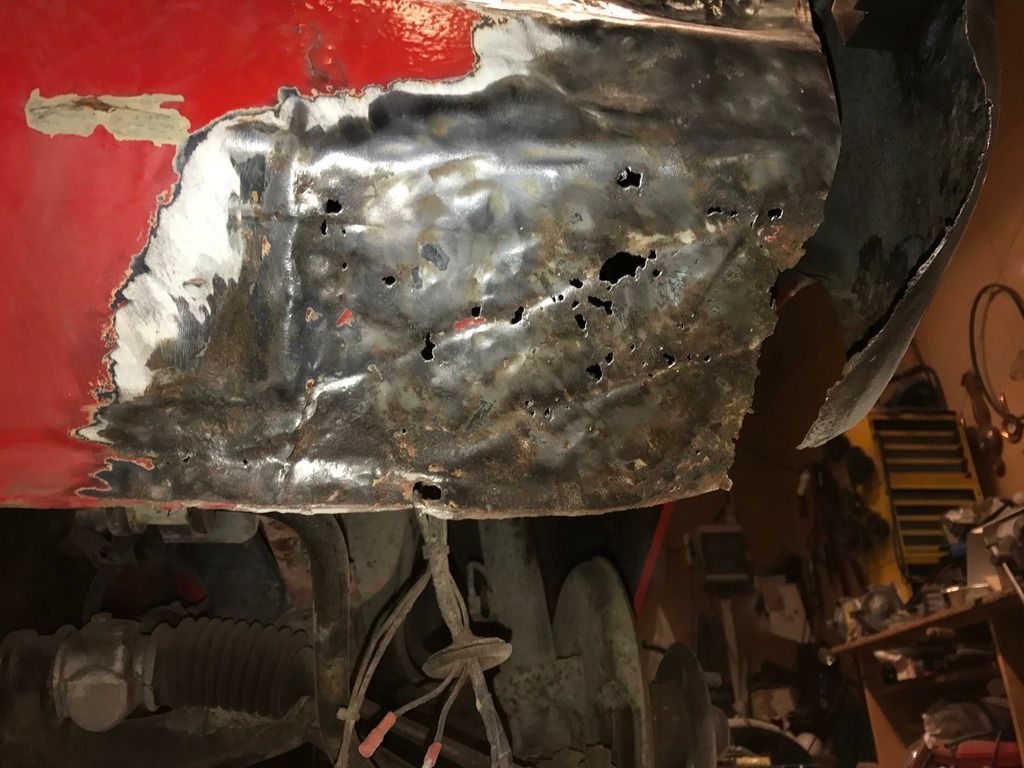 Flange going in:   Both flanges welded:   Most of the piece ground down, ready for the next step in the masterplan: 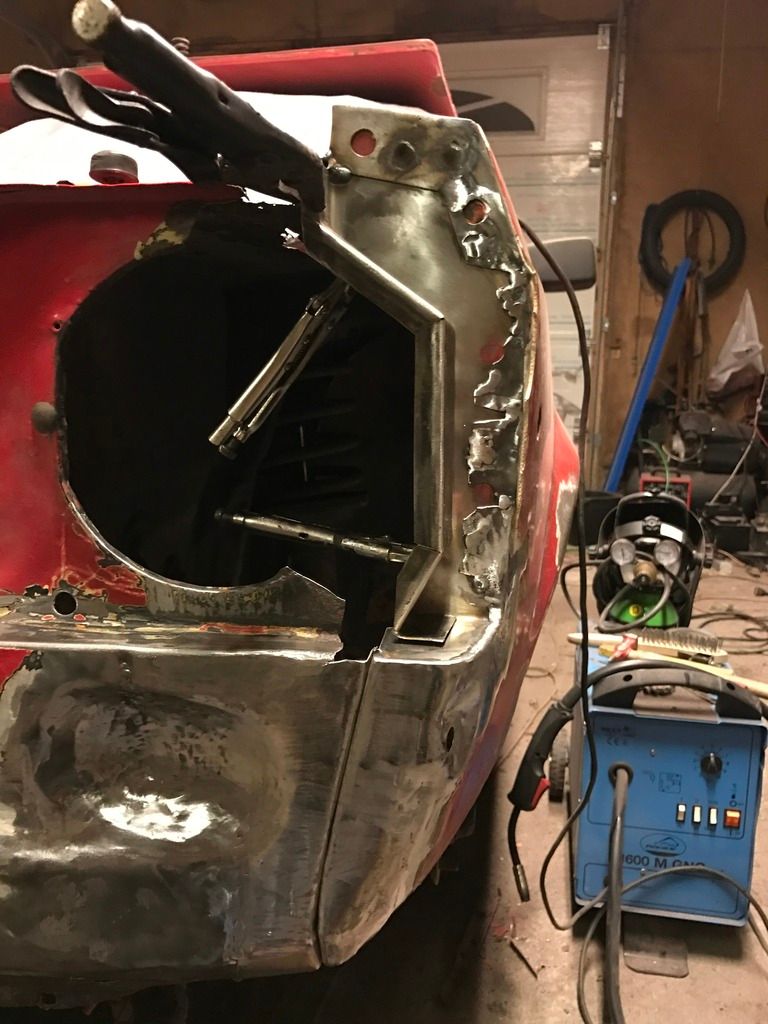 I actually feel the work drawing to a close, I can see the light in the proverbial tunnel as it were. I can't wait to thrash this shed around a few corners when I'm done |
| |
|
|
|
|


 Must get one of those power files, they look very handy. Keep up the great work