|
|
|
|
|
|
Hey, I totaly forgot to awnser your message... Modified cars are a bit critical. Basically you need a certificate for everything except shock absorbers. Any altered component on the car, be it brakes, suspension, wheels, tyres, exhaust, bodykits, brakes, lights etc. needs a certificate. With this certificate Mr. TÜV can then approve altered parts and register them into the car's paperwork. There's the possibility of having alterations approve individually - but this can get expensive and there's no guarantee stuff will get approved. And then you'd probably still need to provide a lot of paperwork stating various things. Flammabillity of GRP body kits p.e. Getting wheels approved without a sheet stating weight carrying capacity is very hard these days. Even changing tyre size needs approval by TÜV...
I however don't know what rules apply should a vehicle be brought over and maintain it's registration from the counry of origin. I guess trouble with police would be plenty.
I've a feeling that wildly modified cars are getting rarer and rarer in Joymoney. Difficult to awnser this question. And many times it just depends on how ignorant or willing an engineer is to get approval. For my engine conversion I had some preliminary talks with the engineer from TÜV. I had a huge pile of all sorts of paper work. And it was nothing far from stock, I basically just tranfered a stock engine into a shell of the same model car,just with two doors less.
Bolting a turbo or super charger to an engine - you'd have to pay a couple of thousand euros for an emissions certificate (no guarantee for a pass, you need to pay for the certificate either way). and so on and on.
It's difficult.
|
| |
|
|
|
|
|
|
|
|
|
Well hello! My next appointment with Monsieur TÜV is due. Well actually it's past due... And there's stuff to fix. Shortly after the last TÜV, one of the gaiters on the rear drive shafts split. I didn't care, until now. It's a fail, so I might as well fix it before failing the test. To get them in & out, I actually had to unbolt the differential. Tolerances can be very tight. 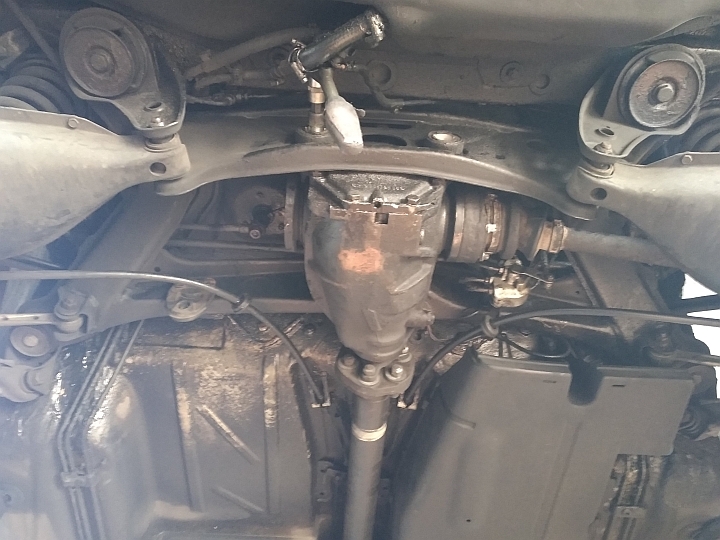 Only one bolt rounded off, no big deal. Cut off, remove shaft, weld on nut, rattle gun. 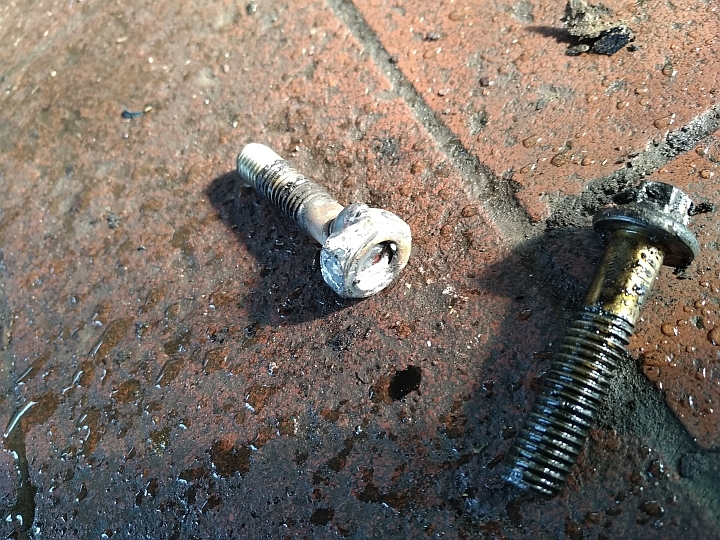 I was not able to source the correct drive shafts, but no big issue. Manual cars have thicker drive shafts, to reduce twist in the drive train. There are so many variants of drive shafts, it's beayond stupid. 3 flange sizes and 3 different lenghts. In two diameters. 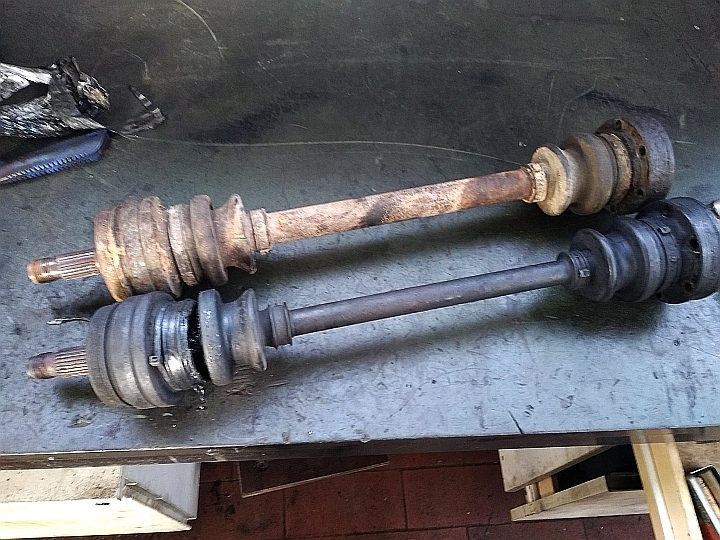 New on top, old on bottom. To my surprise, the gaiter still had planty of oil & grease inside, it was far from dry. I could have possibly replaced the gaiter, but those old drive shafts are ridiciously worn out, you can twist them about 10-15°, that's how much play is in the joints  And the thicker shafts have an actual advantage; they need more time to rust through. Yes, right. Grease/oil never makes it to the inner end of the gaiter. But over time water may leak past the rubber. Result: 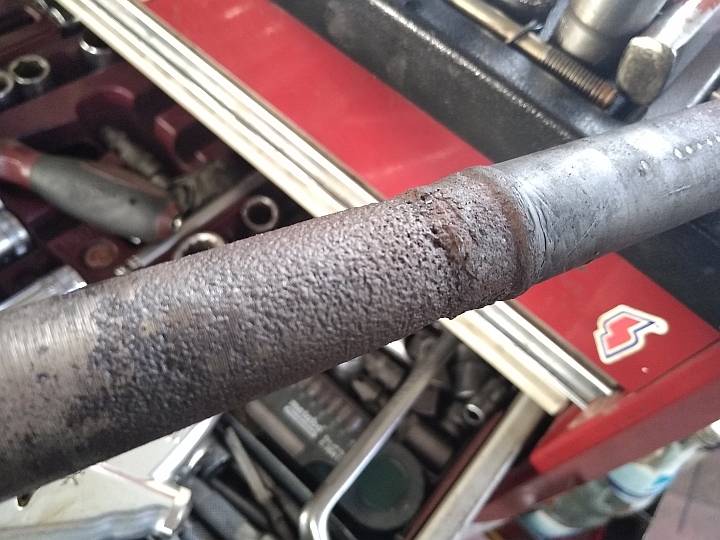 They get seriously weakend and eventually snap. Not uncommon. That's all for now... Cheers, Jan Oh wait... There's more. I had to weld another hole in the exhaust  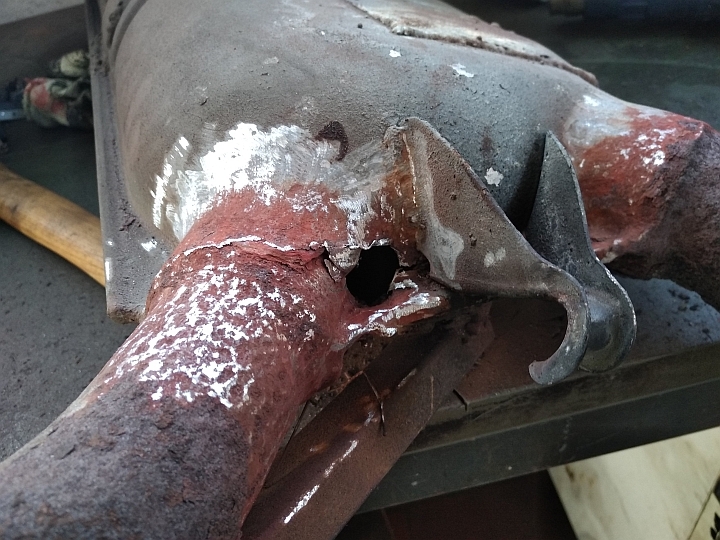 1.062.000km |
| |
|
|
|
|
|
Oct 13, 2018 17:57:39 GMT
|
No... Not even easy to make legal... Anyway... Started with this little fella today. It needed it's exhaust fastened properly. Like - better than chicken wire. 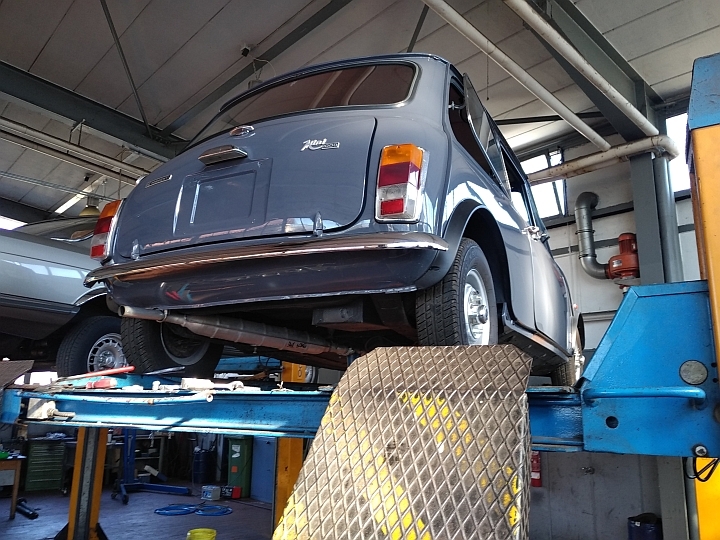 Then it was time for the Clubman to be put on the lift. First time actually. Floor repair looks nicely done, they even put back the useless tabs and all the little strips that hold the fuel & brake line  Looks really professional. But back to the buiseness end - the Magnaflow malarkey. 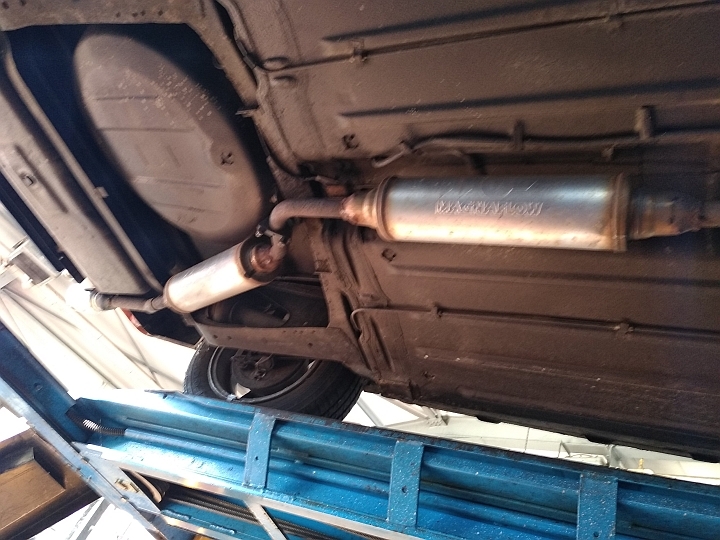 Not so professional. So out with the cutting disc. 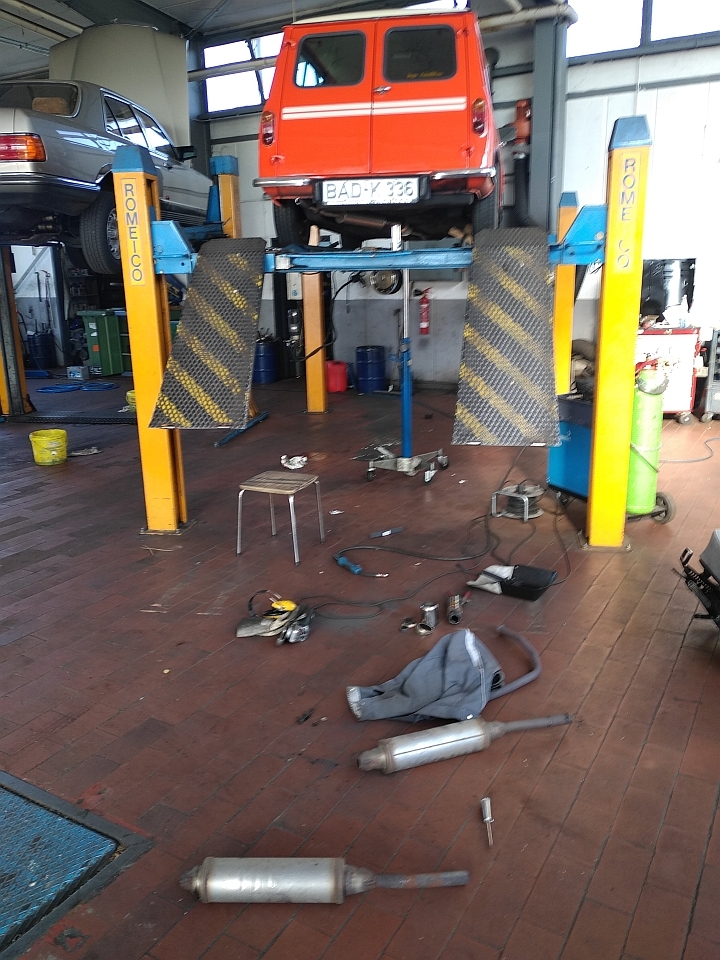 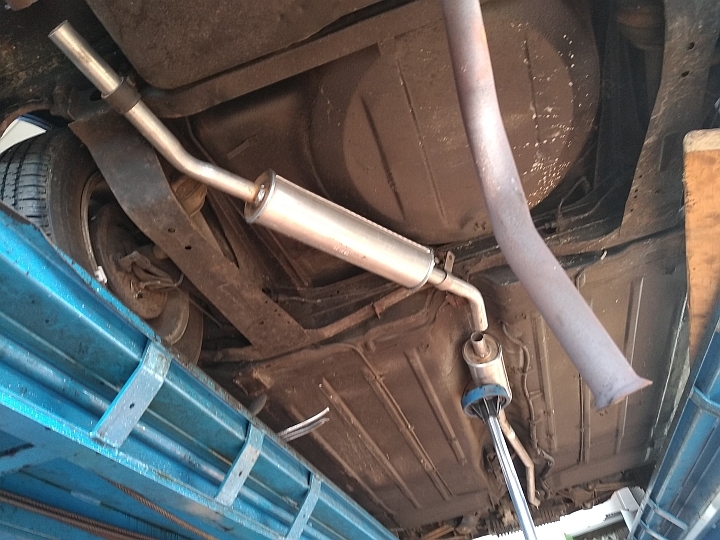 I didn't use the curved pipe that sways around the spare wheel well, but instead went with just an extension. It's a Saloon exhaust, not a Traveller exhaust. Hence it was a LOT cheaper. And works just as well, there's no way it will rattle against the sapre wheel well. 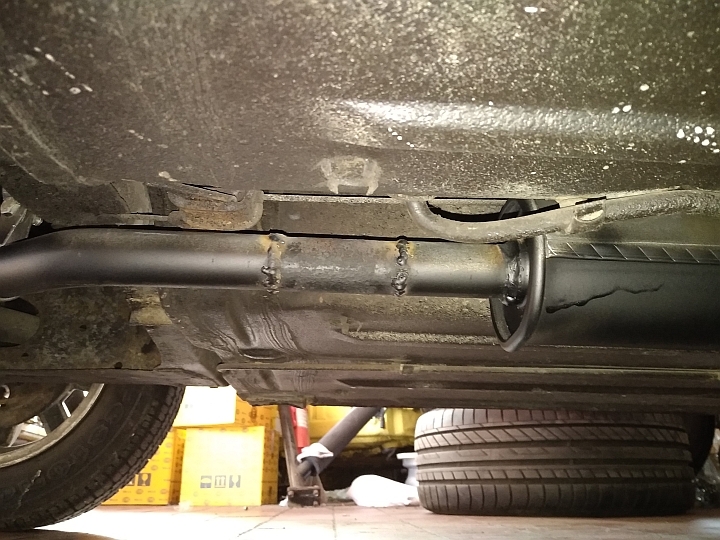 And I could not resist welding on a big tipp...  Made from the butchered Magnaflow tail piece and some random italian tail piece that came with a car from Italy, many years ago... I made a fun of it and put it on any new car that came to out workshop. Now it's welded to the Clubman and found it's final place... 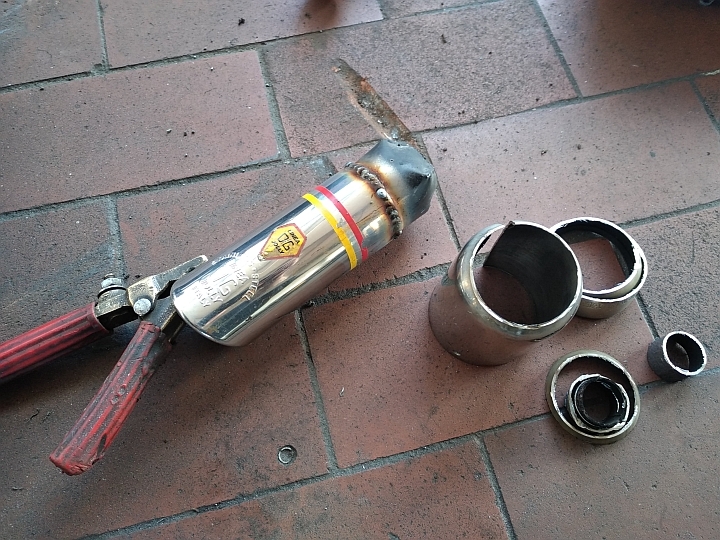 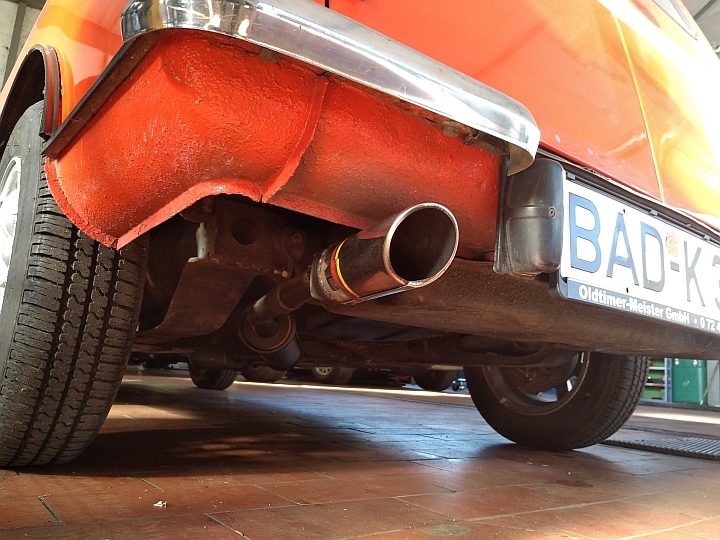 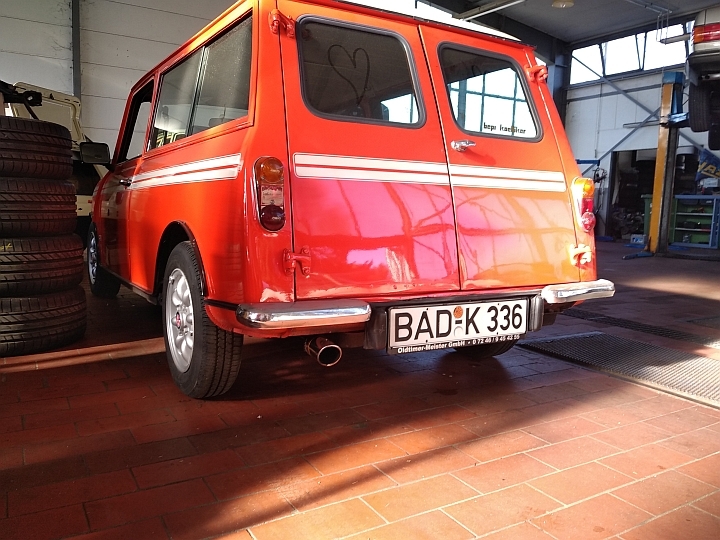 Could always cut it off and weld on a smaler one. But for now... It'll do. Better then a rusty straw  And that's it for now I'm afraid. Cheers, Jan |
| |
|
|
|
|
|
|
|
No... I would have replaced it anyway sooner or later. It's too "boy racer" for my taste. |
| |
|
|
|
|
|
|
|
Hey! Thought I'd stop by and say a little "hello". Early this year, the Clubman went for a TÜV test - and failed on a couple of small and big things. Mainly some neatly hidden holes in the floor. 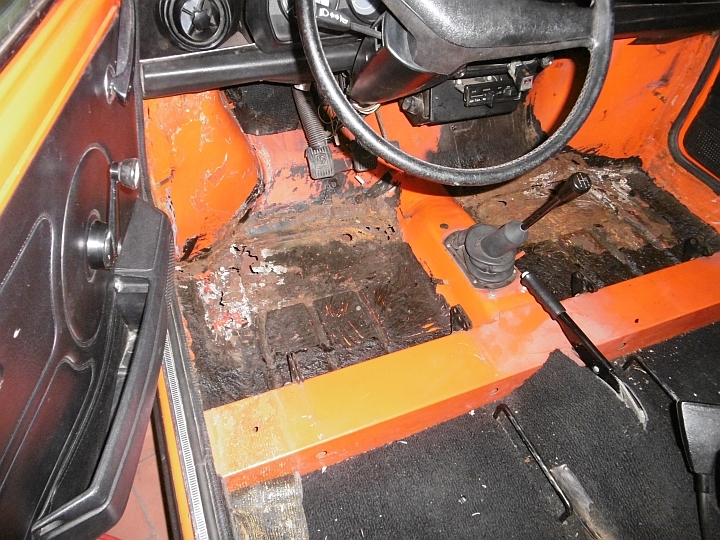 Seeing that my time these days is limited, I actually gave this away. Second time ever I did this. I took a long time, but still quicker than if I had done it myself. And from what I can tell they didn't do a worse job than I would have done (in a hurry). Not brilliant, but it'll do just fine. 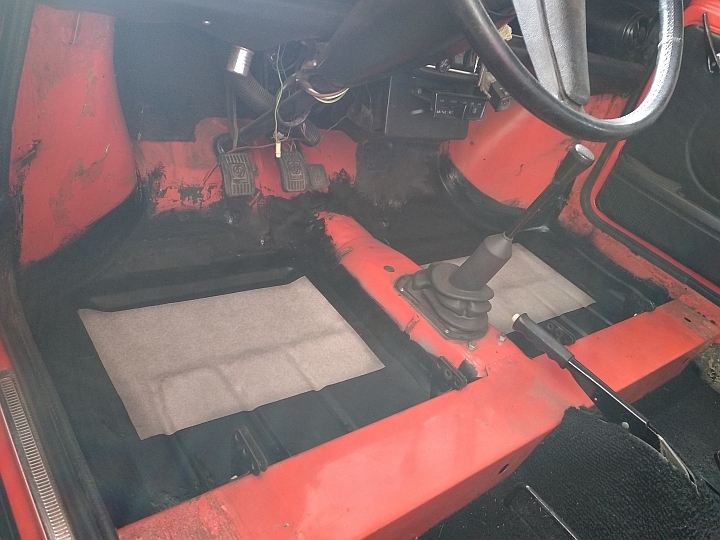 Next up is me replacing the steering rack & ball joints. Steering rack has a worn inner joint & torn gaiter. Looking at tge price for new racks - why bother with the old one... And last but not least, Mr. TÜV was not keen on the Magnaflow exhaust. Ordered a stock exhaust, cheap as chips, much to my surprise. 65€ delivered. Sooo... I still own this, it's still not on the road - but step by step I'm getting there. It's been almost a year already, as I have just realised. 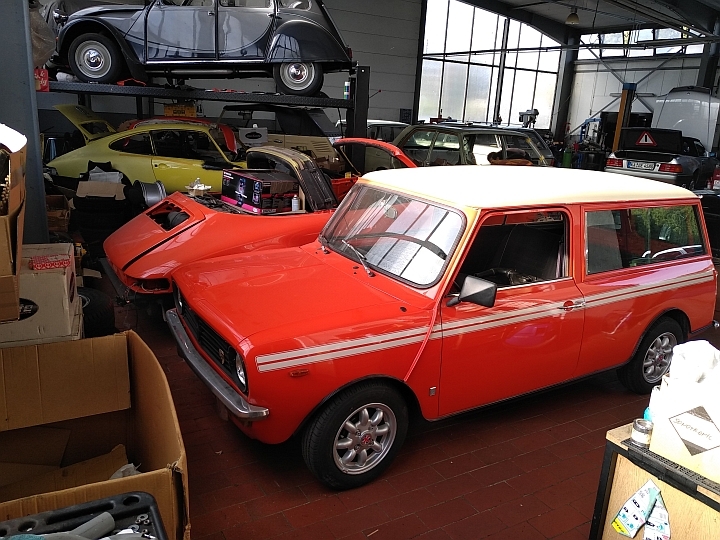 Maybe next year... Maybe this year - who knows... Just to let you know there's still stuff hapening at TDW Works. Even though I've taken on another time & money intensive hobby and "car" is getting more of a 2nd or 3rd degree hobby... Cheers, Jan |
| |
|
|
|
|
|
Jul 30, 2018 19:33:11 GMT
|
It's actually a mixture of propane and iso-butane. |
| |
|
|
|
|
|
|
|
Hi! Time for a little experiment... R134a refrigerant ist getting ridiculously expensive now. So - why not use what's used in common household refrigerators? Cheap, environmentally friendly and readily available. So I bought the cheapest propane burner I could find. Attached it to the cheapest r134a filling hose I could find. With a couple of random fitting I found in the workshop. 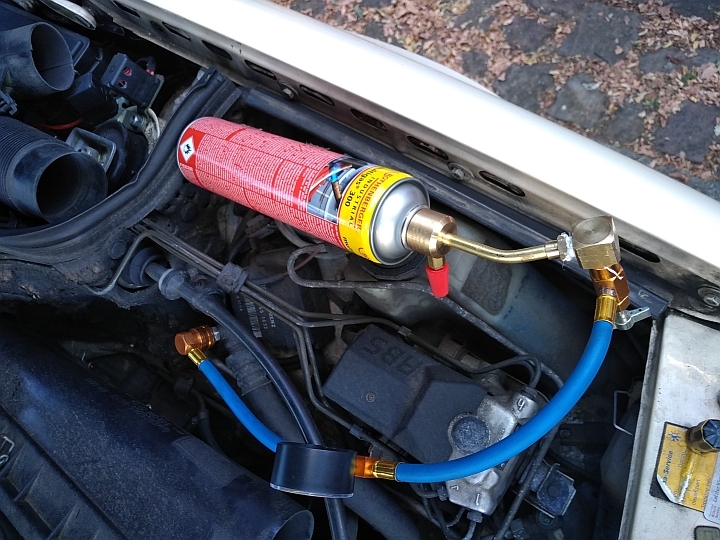 I used a scale to weigh the gas bottle. It's about 290g propane/butane mix to replace 1000g r134. And after a while, the compressor engaged and refrigerant started to flow... 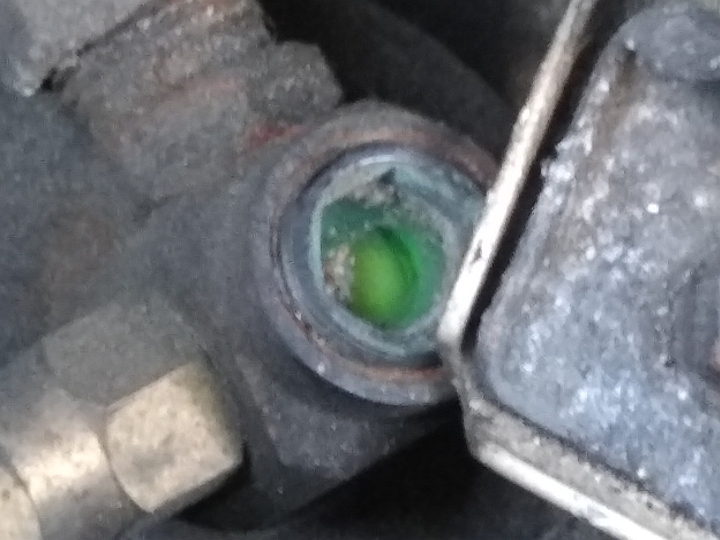 ...and a cool breeze started to come out the dashboard vents. Aaaaaaaaahhhh. Nice! Only one slight problem; the evaporator has finally given up the ghost. So it strated to smell of gas real bad. I had to evacuate it - so I'm still sweating. However - it works. And it does so rather well! And it's 5€ for a fill. Not sure if I continue with this, but it was a nice little experiment with a surprisingly well outcome. It has some disadvantages though, hence the following: Disclaimer: do not try this! It's a not an approved refrigerant, it burns and may explode. And it may harm your health and make you dizzy. You may loose insurance cover in case of an accident. Always use the approved refrigerant for your vehicle. That's all... 1.047.000km. Cheers, Jan |
| |
|
|
|
|
|
Jun 21, 2018 17:38:24 GMT
|
I'm quite glad about it myself |
| |
|
|
|
|
|
Jun 18, 2018 20:34:01 GMT
|
Hey, not dead - just seriously busy, my weekly mileage increased to well over 1100km. All is well, new rear calipers & pads and recently 4 brand spanking new tyres got installed. Car's got a wheel alignment today as well, as it never behaved as nice as it should. And the inside of the tyres was wearing excessively. Should be sorted now. Oil chnage is past due, maybe during the week. Current mileage: beyond 1.040.000. And a couple of weeks back, I even gave it a hand-wash. 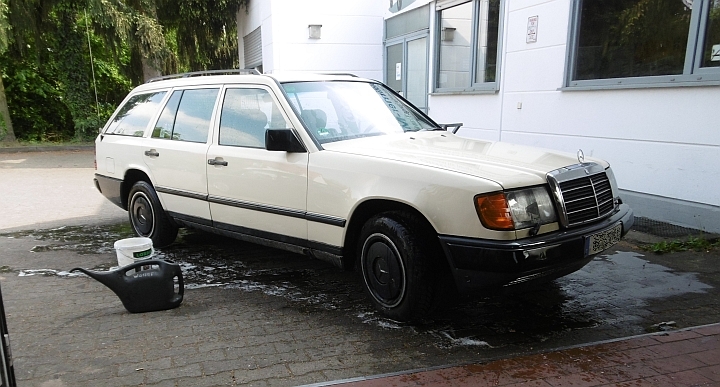 That's all...  Cheers, Jan |
| |
|
|
|
|
|
|
|
I gave the door another good polish, it's starting to get there...  I fitted the pin stripe now, because I hope with polishing over it may start to look a bit more like the old ones. Next I drained the fuel tank. Because... Well, see for yourselfes:  That's no good. Doesn't even burn well... I hate gasoline. Old diesel fuel is far less problematic. Next I removed the fuel tank. And found the reason why it always smelled of petrol inside. That'll explain it well:  Then I went to install the rear shocks and camber/toe adjusters. I feared I would have to remove the brke lines in order to loosen the inner nuts for the radius arms. Turns out, Mercedes invented just the right tool for the job:  Perfect! That's a wrench that came in the on-board tool kit of 2-valve 4-cylinder W201s and W124s. It's meant for the belt tensioner. Anyway, shocks & adjusters fitted, no big dramas or snapped bolts.  Bar one. Same guy who did the messy flares was also tasked with replacing the radius arms. Oh well.  I was able to repair the thread, all good. Pushed the car out and had a look. Erm well, it will need quite a bit of adjusting  The very first thing I did in the morning though was to install another core plug. In the evening I filled topped the engine up with coolant, so far it seems like there are no new leaks. This time I used a glue-type sealant that's meant for permanently installed parts.  That's all for now. I also wanted to finally bleed the brakes - it was then that I realised I still had not ordered new copper washers for the brake hoses. Hnnrgh. Cheers, Jan |
| |
|
|
|
|
|
|
|
|
|
Oh... From the title I thought they plan something like a Daytona beach race. They'r not. Not interested. 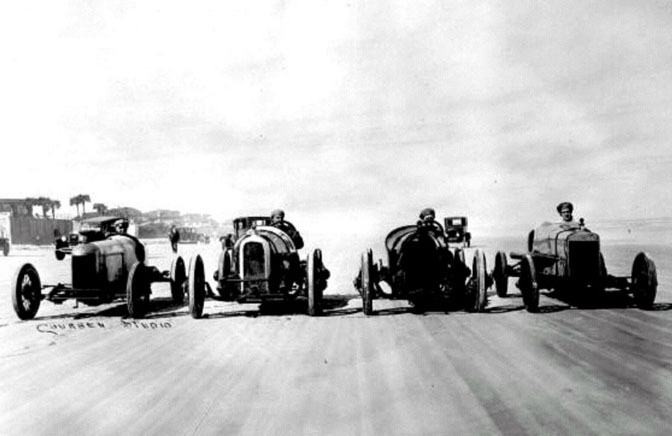 |
| |
|
|
|
|
|
|
|
Also...  |
| |
|
|
|
|
|
|
|
|
Wouldn't it be cheaper & easier to have that welded from a couple of pipes? Or is it like - super-nuclear single-piece no-weld-joints spec? Anyway, fascinating stuff. Don't want to know how much this costs, sitting a couple of days on the machine...
|
| |
|
|
|
|
|
|
|
Installed the negative camber lower arms today, with new bushes + poly-bushes on the front of the tie bars (better braking stability). All went well, bar one shock absorber, the bush was a bit stuck on the shaft. But no huge issue... 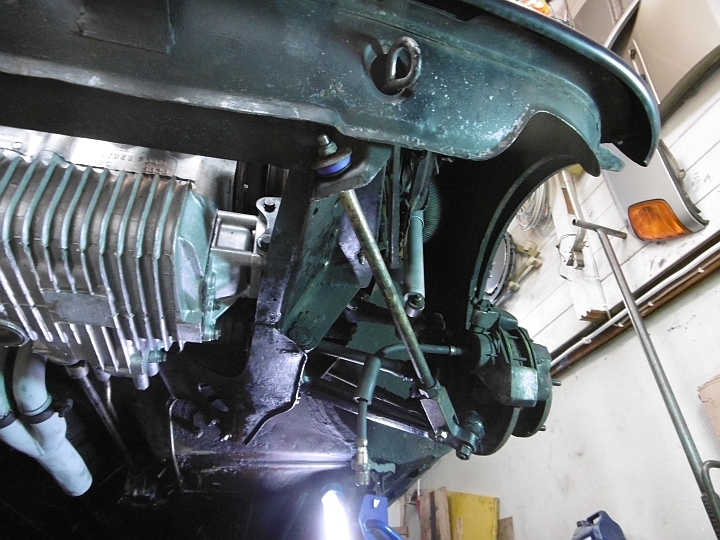 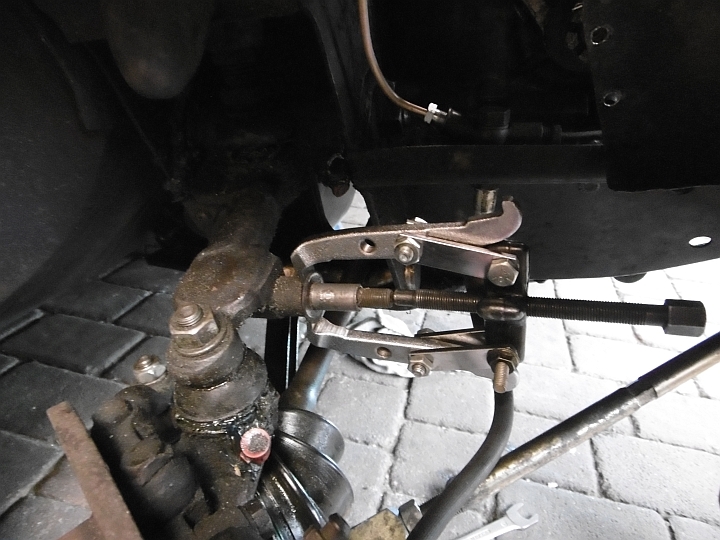 Also wanted to replace the brake hoses - but I had totally forgotten that a Mini has copper rings... Didn't order those of course. Bah. So lowered it back on it's wheels - and that's finally the grown up stance I always wanted on this car. Positive camber looks ridiculous... Still have to install the rear adjusters, but that's for another day. I fear a lot of broken bolts, since I never touched the rear suspension...  And with the tyres pointing inwards instead of outwards, I don't think the 6" Remotec will be an issue. TÜV might be one, though... Cheers, Jan |
| |
|
|
|
|
|
|
|
Installed the door today, no dramas. 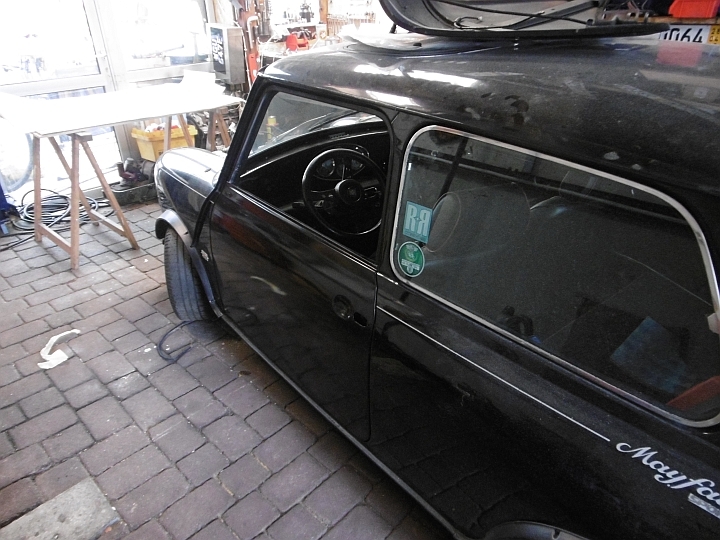 My initial plan was to make an adapter plate to mount the mirror, but - I changed my mind and drilled new holes. Riv nut in, all good. 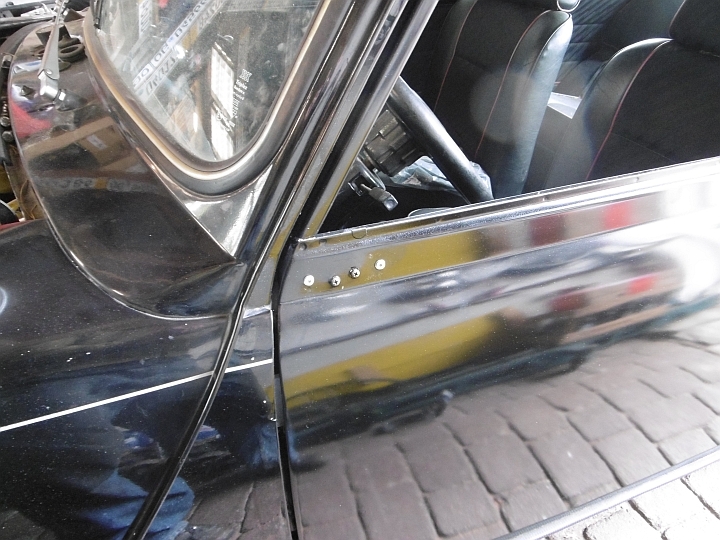 And then I could not resist to give it a quick polish. I didn't go into full-attack mode, just a slight, quick skim with the electrical hand-numbing-machine. 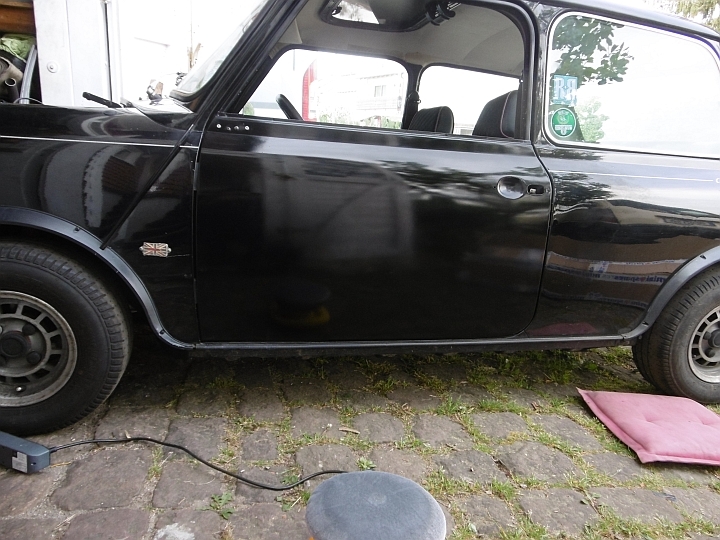 I think this is going to be fine. Monday evening it looked terrible, almost the same reaction in the paint again. But - as of today, it's almost invisible, almost disappeared again. Paint is weird stuff... I think the problem was the epoxy filler I used to fill some dents. 'Cause it only reacted in the areas where I used it, everything else is fine. And as said - it has disappeared almost completely. Something learned. I have used the exact same filler many times before, but with rattle cans. Never had an issue. Anyway, door's on. I let the paint harden for a couple of weeks and then attack it withsome cuting compound to make it shine. And I got some suspension bits from Minispares... 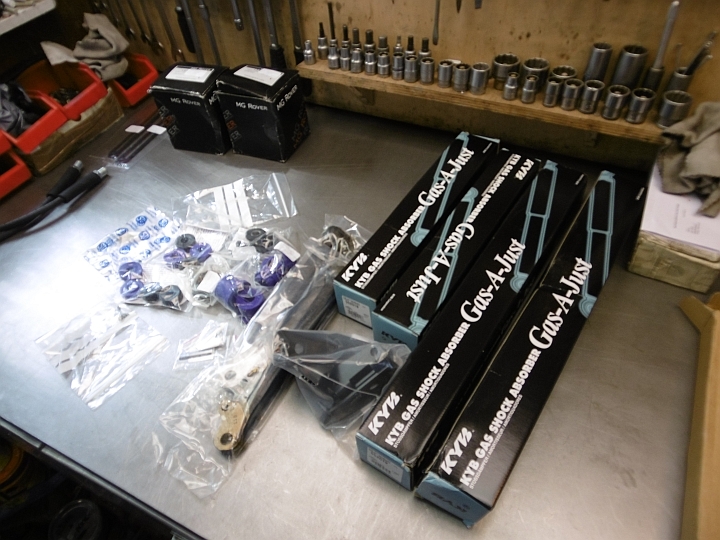 And that is all for now. Cheers, Jan |
| |
|
|
|
|
|
Apr 30, 2018 10:40:30 GMT
|
Thank you guys! So today I wet sanded the spray filler down until it looked & felt very smooth. And then... Let's try it once more. 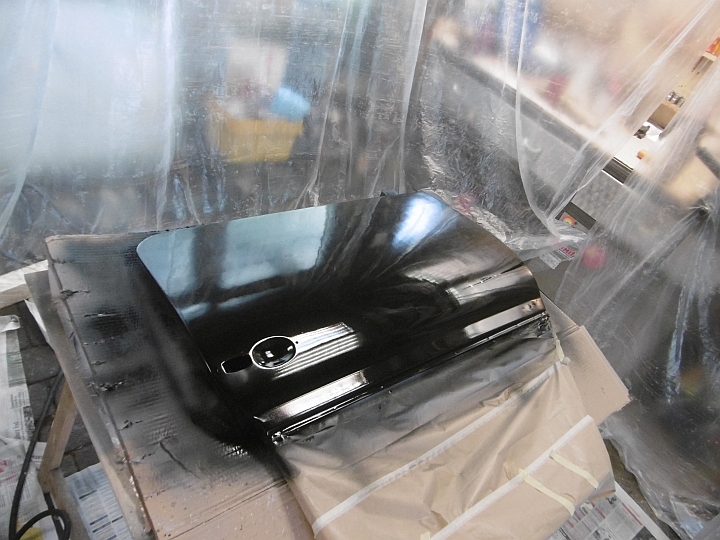 I didn't re-paint the frame, it's good enough. Now that the paint has settled a bit, I can still see some minor scratches - but you know what? I don't care. I'll wet sand them with 3000 and 5000 grit paper, polish and that's it. There's also a lot of dirt in the paint, it was no good idea to paint on a very windy day. Albeit I had all doors closed, layed out the floor with wet news paper and closed my "spray booth". Last time I had only very few dirt particles in the paint - this was on a very calm day under same conditions. Just tells you how much cr@p flies through the air... Maybe not the best time in the year for painting. Lot's of pollen & strong wind. Well... The biggest part of "paint" is "pain"... Btw; see how "milky" the plastic foil is? That's all dust just from spraying! Cheers, Jan |
| |
|
|
|
|
|
Apr 28, 2018 15:40:59 GMT
|
So, that's about the same spot as highlighted before: I think this might work out better...  |
| |
|
|
|
|
|
Apr 28, 2018 12:54:47 GMT
|
So, I tried to sand it back with 1200, 2000, 3000 and 5000 grit wet paper, then a metric ton of cutting compound with the electric polishing machine - no luck. In some spots I went through the paint and many scratches still visible. So back to 1200 grit...  ...erect another spray booth and blast it with spray filler.  No survivors! Poor little bug...  I let it settle until monday - then sand back to smooth and try to paint it again. We'll see... Cheers, Jan |
| |
|
|
|
|
|
Apr 26, 2018 13:16:14 GMT
|
He's left the building, not enough appreciation was given to him... |
| |
|
|
|
|
|
Apr 24, 2018 17:29:39 GMT
|
I do the "reverse masking" thing... You basically stick the masking paper on over the area you want to spray, fold it over with a gentle wave and tape it. This gives a soft overspray area that's fairly easy to polish out. Worst case use 3000 grit wet paper to flatten down & polish.     I you chose to go this way, practice it first. Too tight a radius on the masking paper may leave a harsh line, too wide and you end up with a lot of overspray = more work. And give it a week to fully cure before you attempt to polish. But depending on where you have to paint, it can be tough to mask this way, so it's not always the best option for a spot repair! |
| |
|
|


 Looks really professional.
  Made from the butchered Magnaflow tail piece and some random italian tail piece that came with a car from Italy, many years ago... I made a fun of it and put it on any new car that came to out workshop.
