jonomisfit
Club Retro Rides Member
Posts: 1,746
Club RR Member Number: 49
|
|
Apr 21, 2024 19:37:13 GMT
|
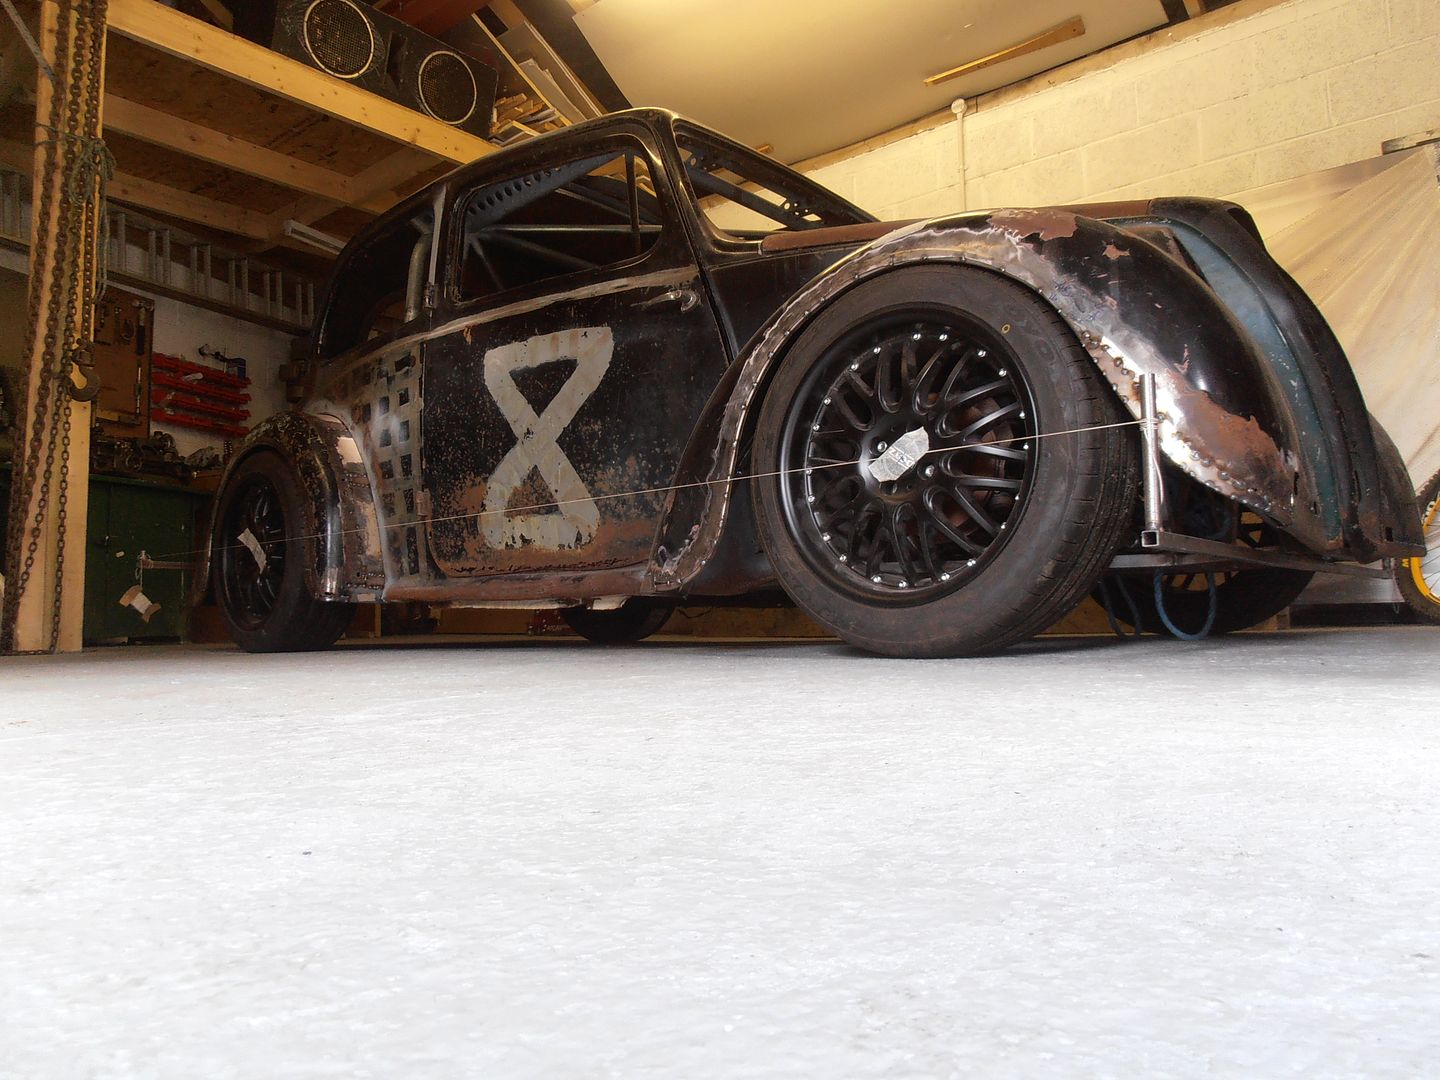
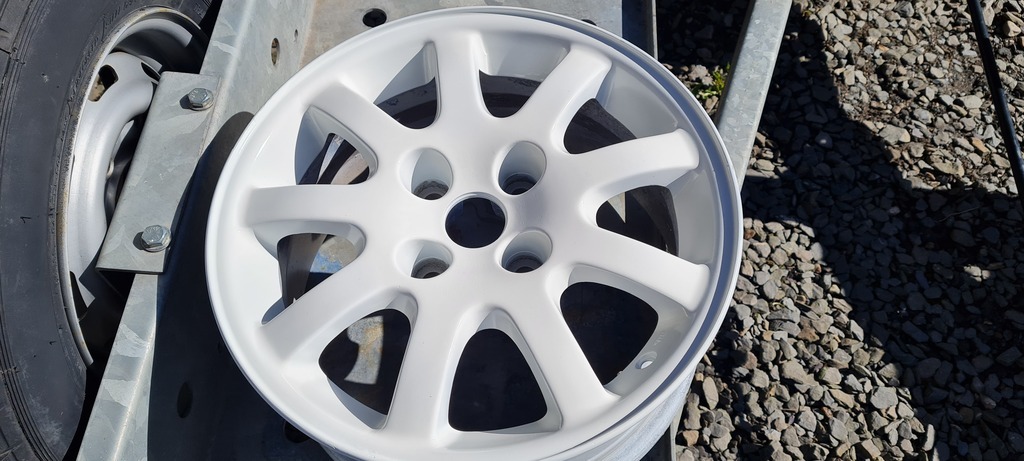
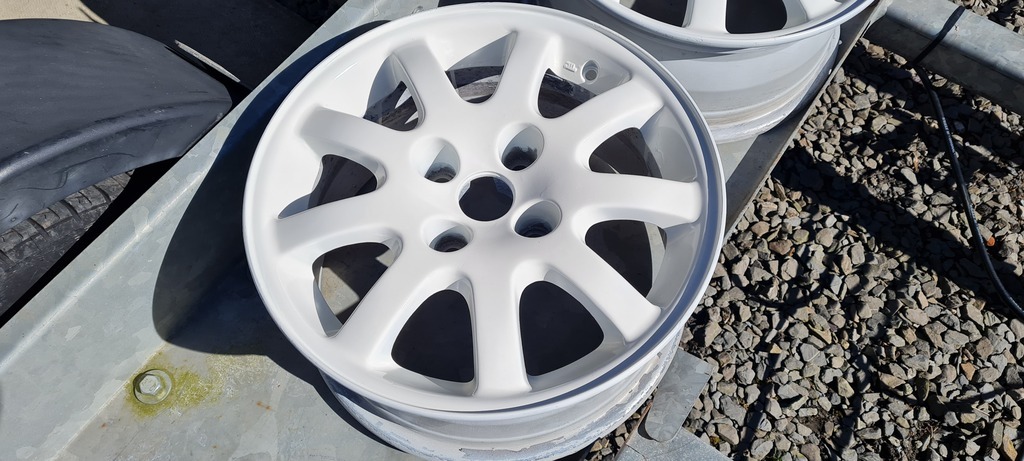
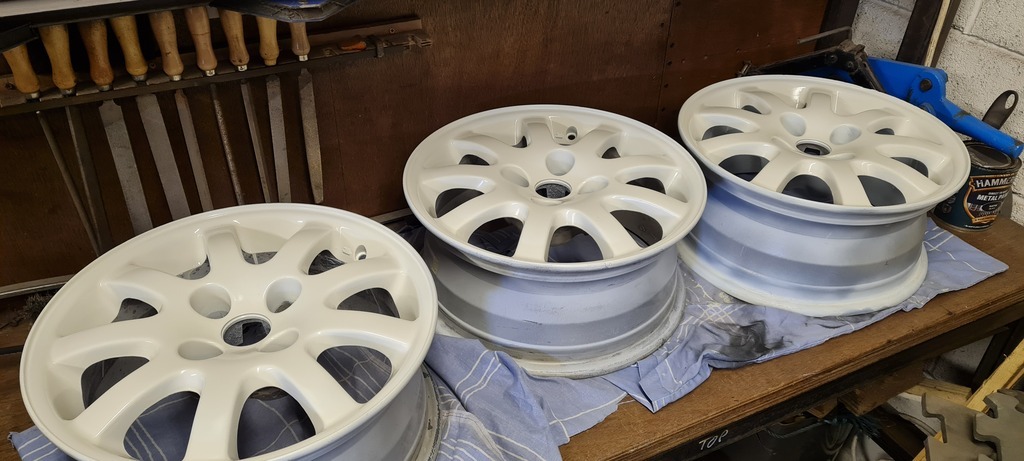
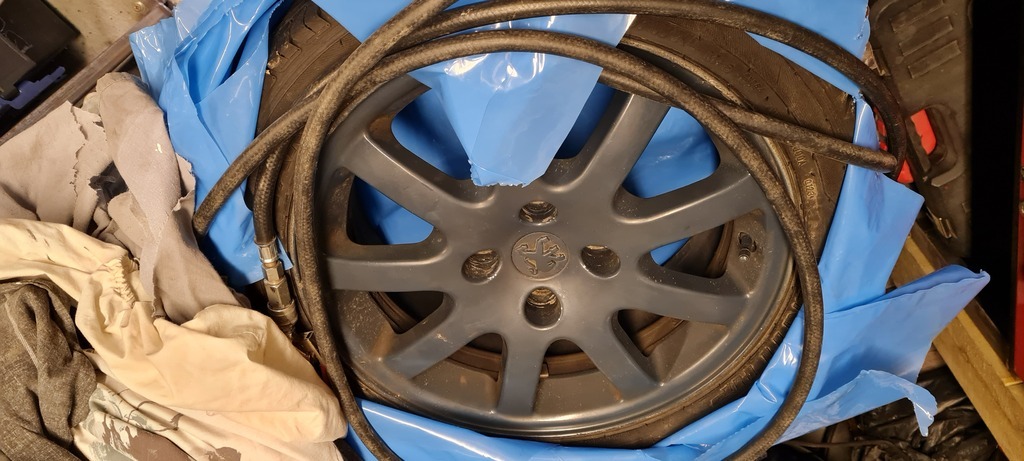
I was busy doign other things this weekend so not much rally car (fixing the daily, and writting a new song for my band) I need to take the front struts out so I can change the bearings in the top mount, however I've struggled to get the hub nut undone. They are done up "rather" tight. My 600NM impact gun cant shift them and neither will my normal breaker bars. I bought a slightly larger one...  P1080636 P1080636 by jono_misfit, on Flickr Which is 3/4 drive 1000mm long. I already have a 1/2 drive 35mm socket, so bought an adaptor. After a bit of yanking the drivers side nut undid happily. which was nice. Then swapped over to the passenger side..... and predictably I sheared the adaptor... I now have a 3/4 drive 35mm socket on its way.... and a new adaptor. I finished the stickering on the passenger side, and as it wasnt raining i pushed it outside.  P1080637 P1080637 by jono_misfit, on Flickr 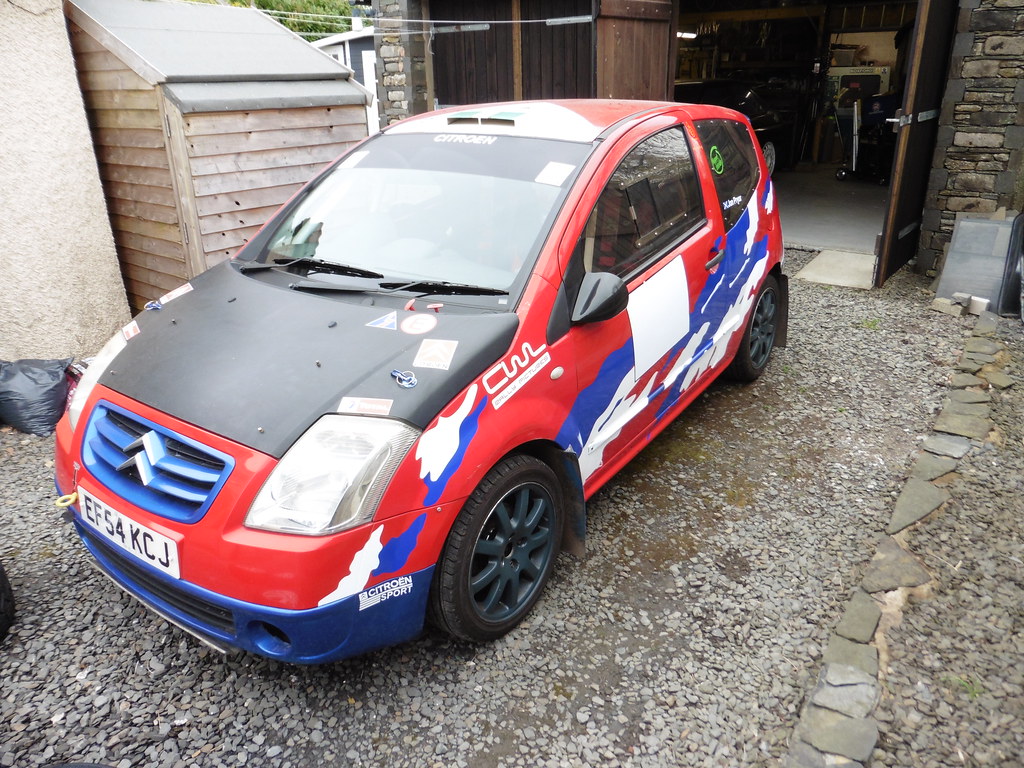 P1080638 P1080638 by jono_misfit, on Flickr  P1080639 P1080639 by jono_misfit, on Flickr  P1080640 P1080640 by jono_misfit, on Flickr My new tyres turned up, so took them to the garage this week to get fitted.... one issue..... it turns out the spare set of wheels 1is 15" diameter... not 16" ... I hadnt bothered checking, and had assumed spare wheel = same size. I took the oringal wheels down and got the tyres fitted to them. But they are in a poor state. Most of them are 50p shaped, although the garage did manage to get them ballanced. The paint is also in poor state. Looks like i've got a fun couple of hours of flatting them down then...  P1080641 P1080641 by jono_misfit, on Flickr  P1080642 P1080642 by jono_misfit, on Flickr The last set I bought "alloy wheel paint" which was OK, but the biggest limit with them was the cans don't put down a good coverage. I bought a can of enamel gloss white from the local farm stores (intended for tractors etc.) and figured i'd give this a go. I suspect it wont last well, but the wheels need replaced so they'll do for now. I used the spot repair gun and with a very small amount of thinners to loose the paint up gave then a go. Then put them into the sun to dry for a bit  P1080643 P1080643 by jono_misfit, on Flickr  P1080644 P1080644 by jono_misfit, on Flickr gave them half an hour in the sun, then put on a second coat  P1080645 P1080645 by jono_misfit, on Flickr  P1080646 P1080646 by jono_misfit, on Flickr  P1080647 P1080647 by jono_misfit, on Flickr  P1080648 P1080648 by jono_misfit, on Flickr well..... they came out a lot better than I was expecting... A lot better..... I left them to dry for a bit, then took the tape off  P1080649 P1080649 by jono_misfit, on Flickr  P1080650 P1080650 by jono_misfit, on Flickr I'll leave them to cure for the week, then fit them next weekend. |
| |
Last Edit: Apr 21, 2024 19:39:03 GMT by jonomisfit
|
|
|
|
jonomisfit
Club Retro Rides Member
Posts: 1,746
Club RR Member Number: 49
|
|
|
|
 Absolutely, performance unleashed.
|
| |
|
|
jonomisfit
Club Retro Rides Member
Posts: 1,746
Club RR Member Number: 49
|
|
Apr 14, 2024 19:39:31 GMT
|
Not much done this weekend as had some other things on, inlcuding a top mount and engine mount change on the the daily C2, plus sorting an exhaust blow. The weather was reasonable today, so got the rally car out, cleaned it down and removed all the old sticker residue. Today was start fitting the graphics. I spent a lot of time getting the main graphics lined up both sides then peeled the backing film and started fitting them.  P1080624 P1080624 by jono_misfit, on Flickr and the front piece  P1080625 P1080625 by jono_misfit, on Flickr I did both sides of the main blue piece then started lining up the first white piece  P1080626 P1080626 by jono_misfit, on Flickr I very much regret my choice of graphics.... this is a pain to fit... More white bits  P1080627 P1080627 by jono_misfit, on Flickr  P1080628 P1080628 by jono_misfit, on Flickr and back end done  P1080629 P1080629 by jono_misfit, on Flickr  P1080630 P1080630 by jono_misfit, on Flickr door square fitted  P1080632 P1080632 by jono_misfit, on Flickr  P1080633 P1080633 by jono_misfit, on Flickr  P1080634 P1080634 by jono_misfit, on Flickr  P1080635 P1080635 by jono_misfit, on Flickr What a pain in the backside. It far from a great job. It would have been a lot easier if it didnt have the lower door body trim. I did think about removing it, fitting the sticker, then replacing it. But i think it'd look a bit strange. Anyway.... only another side to do. Cry. |
| |
|
|
jonomisfit
Club Retro Rides Member
Posts: 1,746
Club RR Member Number: 49
|
|
|
|
I decided the bolts will rust if left to their own devices, so gave a trip through the cleaning and blackening solutions, then a coat of matt clear coat. 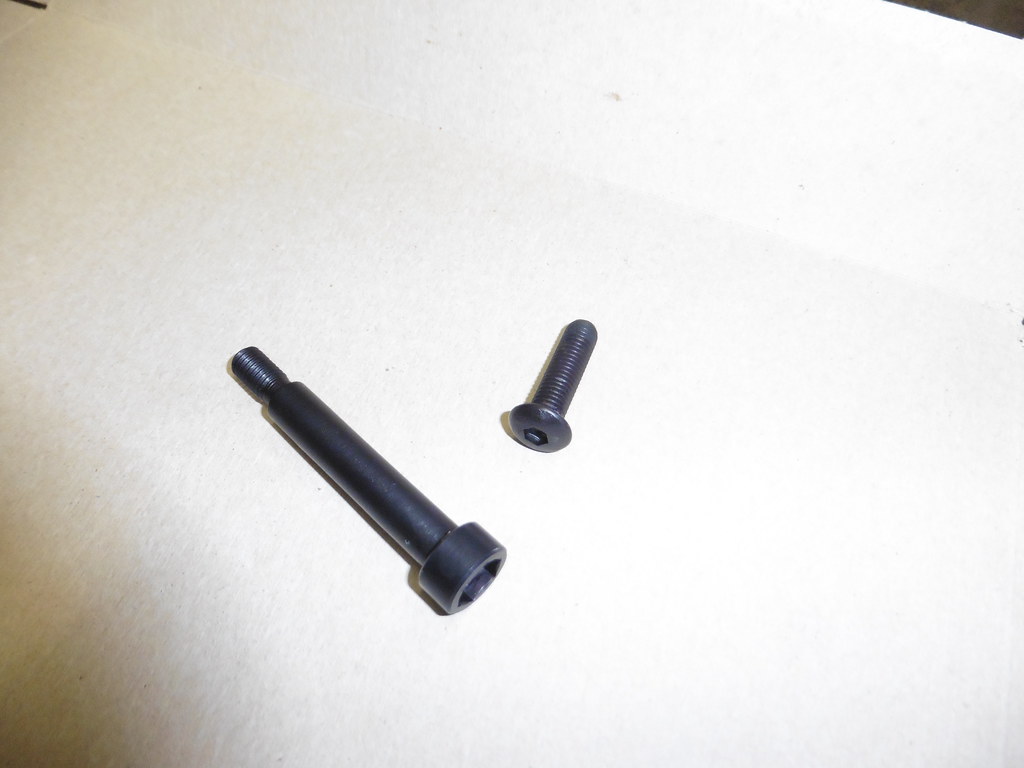 P1080602 P1080602 by jono_misfit, on Flickr bracket and handbrake given a coat of black  P1080603 P1080603 by jono_misfit, on Flickr  P1080604 P1080604 by jono_misfit, on Flickr then made an end bung (marks are from a partial trial fit to make sure it was the right level of inteference fit.  P1080605 P1080605 by jono_misfit, on Flickr after turning and smoothing the plastic has turned a dull white colour  P1080606 P1080606 by jono_misfit, on Flickr go gave it a go with the heat gun which blackened it a lot more.  P1080607 P1080607 by jono_misfit, on Flickr refitted the handbrake  P1080617 P1080617 by jono_misfit, on Flickr  P1080616 P1080616 by jono_misfit, on Flickr definitely feels much better position for me. then on to sorting one of the annoying rattles, the unsecured fuel filter.  P1080608 P1080608 by jono_misfit, on Flickr I'd tried cable tying it onto things but it didnt work. Needs a bracket. this will do  P1080609 P1080609 by jono_misfit, on Flickr and this  P1080610 P1080610 by jono_misfit, on Flickr welded on some captive nuts to the bottom plate, then set up for welding the ring and plate together.  P1080611 P1080611 by jono_misfit, on Flickr like so  P1080612 P1080612 by jono_misfit, on Flickr hmm.... too heavy.... needs.... lightening  P1080613 P1080613 by jono_misfit, on Flickr welded on some clamp tabs  P1080614 P1080614 by jono_misfit, on Flickr  P1080615 P1080615 by jono_misfit, on Flickr etch primed, dried, then painted black  P1080618 P1080618 by jono_misfit, on Flickr needs some squishyness  P1080619 P1080619 by jono_misfit, on Flickr rubber held in with tessa tape  P1080620 P1080620 by jono_misfit, on Flickr and fitted. As it was so close to the tank and fuel pipes I put in a temporary piece of 3mm steel to make sure no accidental slips saw me puncture the tank! It all went in fine. I may drop it back out and trim the bolts a bit.  P1080621 P1080621 by jono_misfit, on Flickr  P1080622 P1080622 by jono_misfit, on Flickr and fastenings in the car  P1080623 P1080623 by jono_misfit, on Flickr It was a bit of a pain to get them aligned and tightened up, but I got there. Back to work tomorrow, so progress will drop off again. |
| |
|
|
jonomisfit
Club Retro Rides Member
Posts: 1,746
Club RR Member Number: 49
|
|
|
|
The cheek, but also fairly accurate.... I ordered up some tyres this week as the ones on it look very old, and are ready for the bin. Once they are arrived and I get them fitted.... and its a dry day.... I may take the car for a reasonable length of run. Anyway... back to my overly complex handbrake. I cut a piece of steel, drilled and tapped it for a bolt, then welded it on as the angle set / stop... Then remembered my camera.  P1080575 P1080575 by jono_misfit, on Flickr  P1080576 P1080576 by jono_misfit, on Flickr Unfortunately, despite me cleaning it out, there was some moly based lubricant hiding on the threads still which ran down and contaminated the welds a bit. Which was annoying. the stop works like so  P1080577 P1080577 by jono_misfit, on Flickr then I cut some tube  P1080578 P1080578 by jono_misfit, on Flickr and set up the offset  P1080579 P1080579 by jono_misfit, on Flickr tacked  P1080580 P1080580 by jono_misfit, on Flickr setting up to weld onthe bottom section 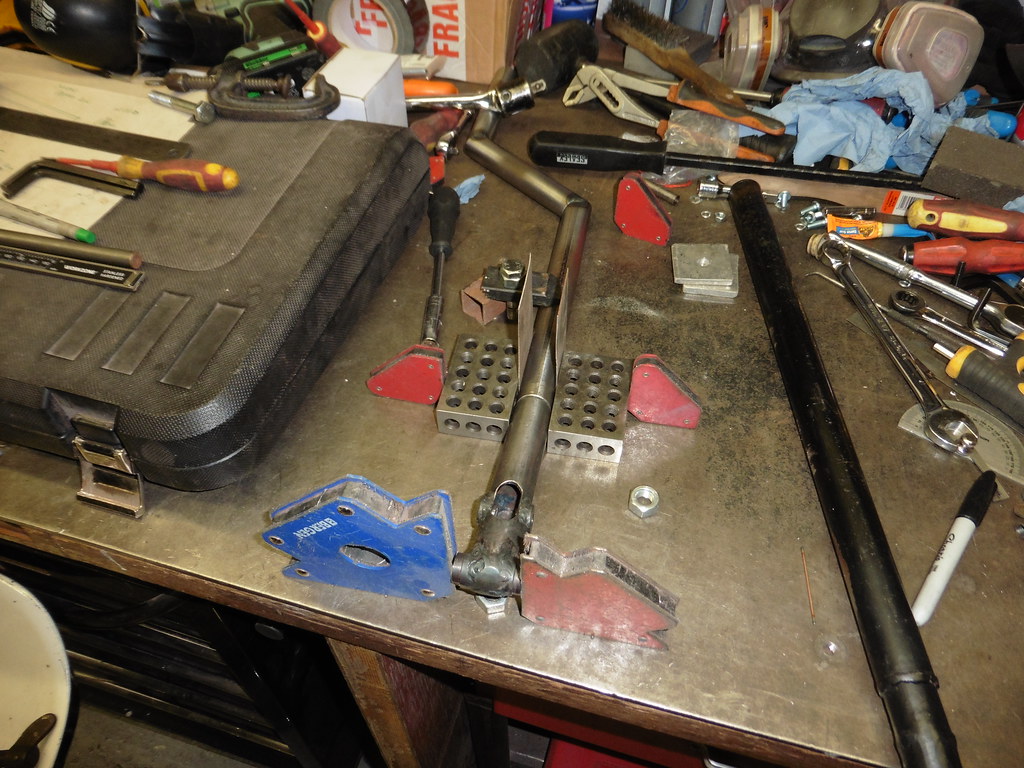 P1080581 P1080581 by jono_misfit, on Flickr I test fitted it all in the car, decided the offset was too much, so reduced it a bit, then welded it all up.  P1080582 P1080582 by jono_misfit, on Flickr need to strengthen some of the welds a bit, so cut some load spreading plates  P1080583 P1080583 by jono_misfit, on Flickr go here  P1080584 P1080584 by jono_misfit, on Flickr welded on  P1080585 P1080585 by jono_misfit, on Flickr  P1080586 P1080586 by jono_misfit, on Flickr I really like welding steel with the tig. I find welding ali often a frustrating process, but steel is just behaves each time. Its great. then on to gussetting the other joints  P1080587 P1080587 by jono_misfit, on Flickr go here  P1080588 P1080588 by jono_misfit, on Flickr welded on  P1080589 P1080589 by jono_misfit, on Flickr  P1080590 P1080590 by jono_misfit, on Flickr and in the car  P1080591 P1080591 by jono_misfit, on Flickr sits nicely between the gear stick and the steering wheel  P1080592 P1080592 by jono_misfit, on Flickr clears my leg  P1080593 P1080593 by jono_misfit, on Flickr hand on wheel  P1080594 P1080594 by jono_misfit, on Flickr hand on gear stick  P1080595 P1080595 by jono_misfit, on Flickr plenty of clearance in 5th  P1080596 P1080596 by jono_misfit, on Flickr relative position whilst in first  P1080597 P1080597 by jono_misfit, on Flickr in first and onto handbrake 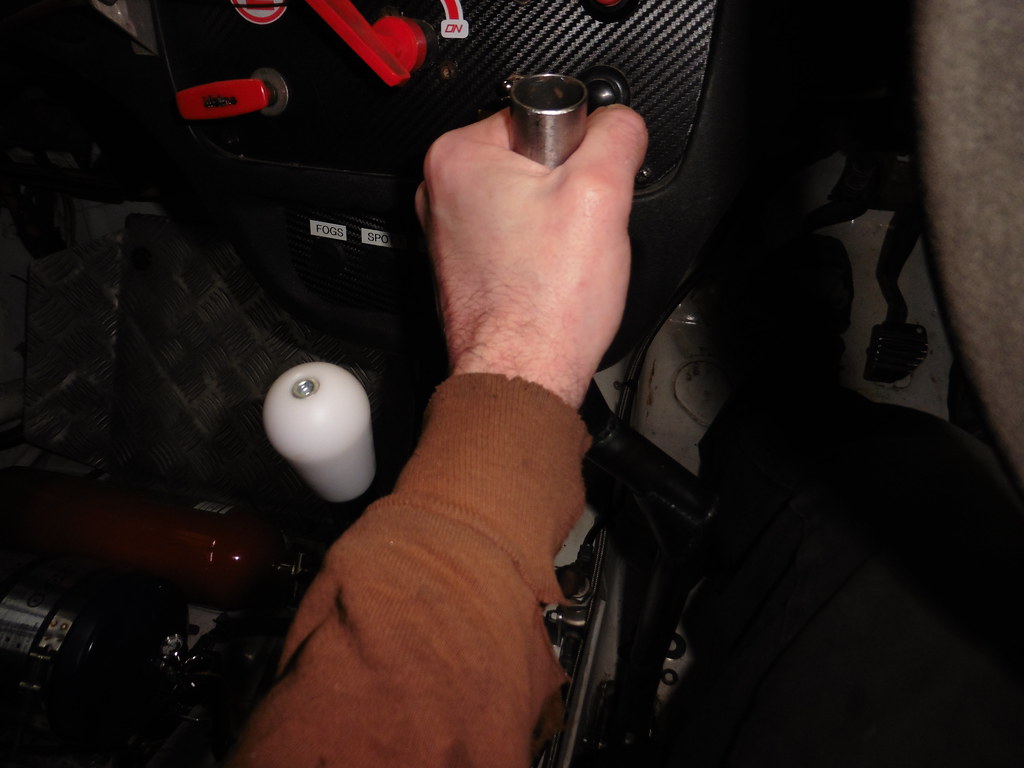 P1080598 P1080598 by jono_misfit, on Flickr and the gusset is low enought nto to trouble my hand. Also, my finger showing the result of an excess of hammer and dearth of accuracy a couple of months ago. 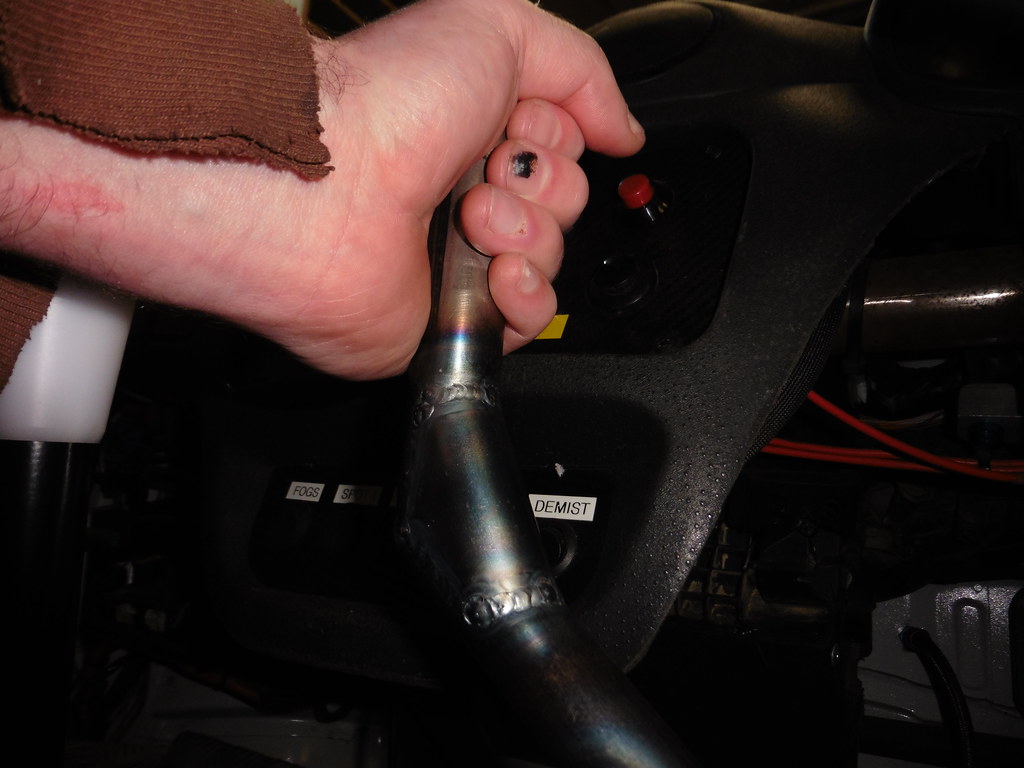 P1080599 P1080599 by jono_misfit, on Flickr For me it feels much better, and more natural position wise. The old position felt practically under the steering wheel and I found it clumsy to use. Will see how it works in practice. It also has no play in any direction which was the other reason for the rebuild. primed and left to dry  P1080600 P1080600 by jono_misfit, on Flickr  P1080601 P1080601 by jono_misfit, on Flickr Next jobs are paint in satin black, make a cap for the top, then re-assmble into the car. |
| |
|
|
jonomisfit
Club Retro Rides Member
Posts: 1,746
Club RR Member Number: 49
|
|
|
|
I had a think about my solution and decided I could do better. This will help, an M12 x 65mm bolt. Now, i know that the holes are 8mm or 10mm... but bear with me  P1080553 P1080553 by jono_misfit, on Flickr an application of lathe resulted in this. A shoulder bolt, 10mm shank the right length, onto 8mm threaded (in concept, threads not yet cut)  P1080554 P1080554 by jono_misfit, on Flickr and then another minor lathe trip  P1080556 P1080556 by jono_misfit, on Flickr I drilled out the bracket to 10mm on one side and tried the shoulder bolt  P1080557 P1080557 by jono_misfit, on Flickr a very minor correction in shoulder length took place, then test fitted the bottom shaft  P1080558 P1080558 by jono_misfit, on Flickr then set it back up for single point threading  P1080559 P1080559 by jono_misfit, on Flickr and threaded  P1080560 P1080560 by jono_misfit, on Flickr goes like so  P1080561 P1080561 by jono_misfit, on Flickr setting up for welding 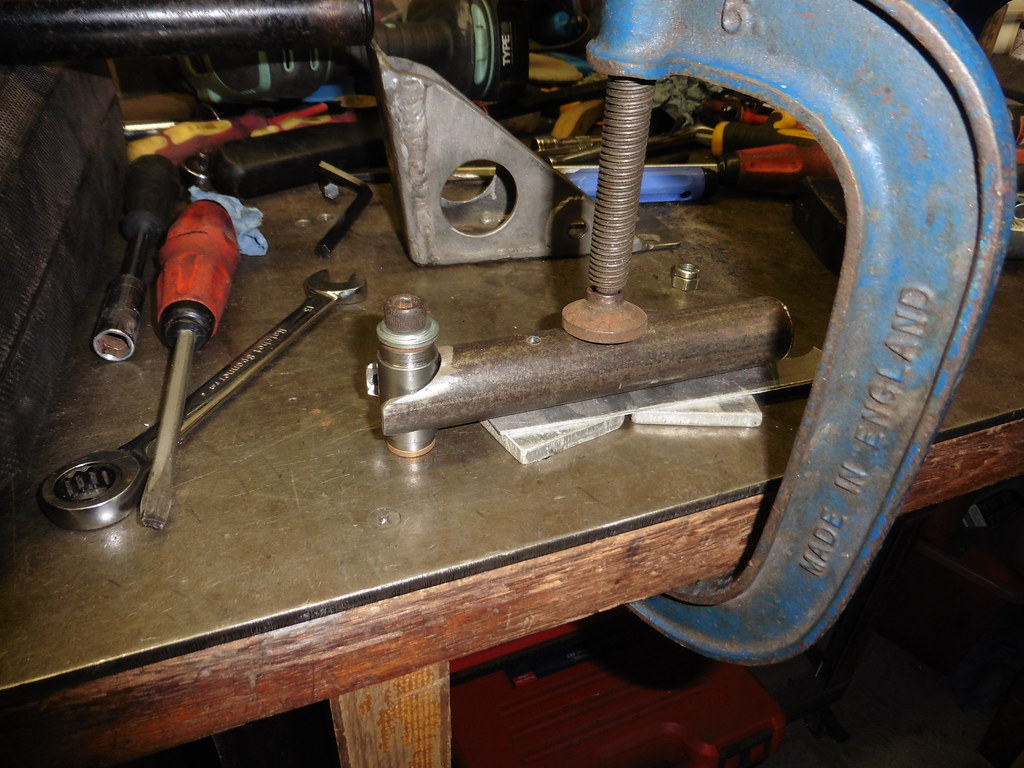 P1080562 P1080562 by jono_misfit, on Flickr tigged on 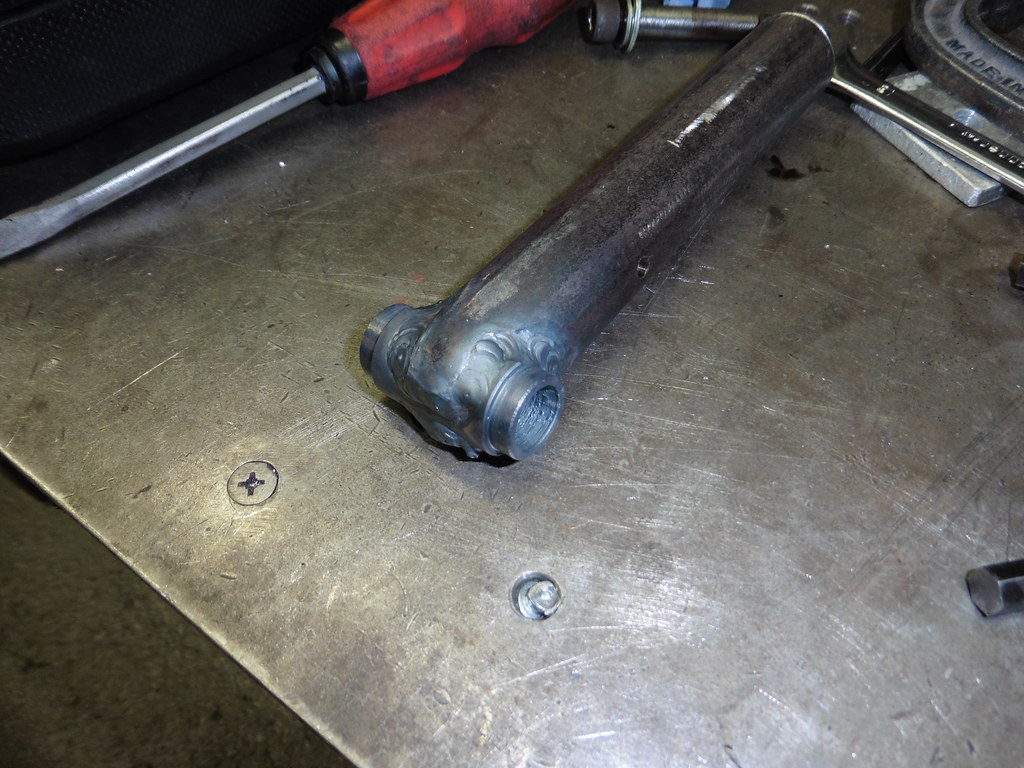 P1080563 P1080563 by jono_misfit, on Flickr setting up centre for the master cylinder rod end  P1080564 P1080564 by jono_misfit, on Flickr quick sketch of what I want to do  P1080565 P1080565 by jono_misfit, on Flickr converted to steel  P1080566 P1080566 by jono_misfit, on Flickr then set up the bar in the mill and cut some slots  P1080567 P1080567 by jono_misfit, on Flickr welded in the rod end mounts  P1080568 P1080568 by jono_misfit, on Flickr made the strengthening plate  P1080569 P1080569 by jono_misfit, on Flickr welded on  P1080570 P1080570 by jono_misfit, on Flickr  P1080571 P1080571 by jono_misfit, on Flickr fits like so  P1080572 P1080572 by jono_misfit, on Flickr  P1080573 P1080573 by jono_misfit, on Flickr  P1080574 P1080574 by jono_misfit, on Flickr this is feeling somewhat excessive.... But also feels smooth as |
| |
|
|
jonomisfit
Club Retro Rides Member
Posts: 1,746
Club RR Member Number: 49
|
|
|
|
I couldnt help myself... I sat in the drivers seat and the wobble onthe handbrake annoyed me. I took it all out, including the bracket.  P1080538 P1080538 by jono_misfit, on Flickr The bracket is a bit shonkilly made and weights a lot  P1080539 P1080539 by jono_misfit, on Flickr I gave it a trip through the blast cabinet. 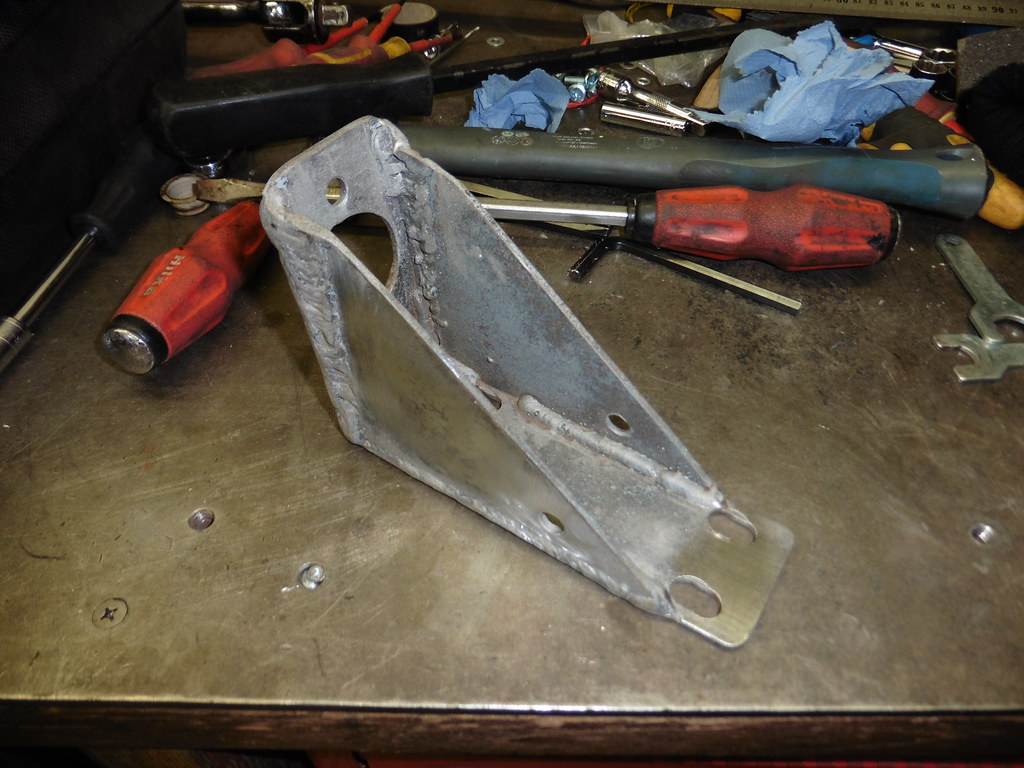 P1080540 P1080540 by jono_misfit, on Flickr  P1080541 P1080541 by jono_misfit, on Flickr Its made from 3mm steel, although not sure what type. I think it might actually be low grade stainless. Maybe. If i were to remake the handbrake the lower pivot would go in like so  P1080542 P1080542 by jono_misfit, on Flickr The pivot holes were oversized, elongated, and out ocf alignment, so i welded on some washers and redrilled the hole.  P1080543 P1080543 by jono_misfit, on Flickr I also decided it needed a diet  P1080544 P1080544 by jono_misfit, on Flickr  P1080545 P1080545 by jono_misfit, on Flickr some weight taken out  P1080546 P1080546 by jono_misfit, on Flickr  P1080547 P1080547 by jono_misfit, on Flickr Pivot goes in like so  P1080548 P1080548 by jono_misfit, on Flickr not so clear to see, but I turned up a sleeve for inbetween the bush and the bolt  P1080549 P1080549 by jono_misfit, on Flickr which is about 0.5mm longer than the bushed in the tube, so when bolted up tight its this thats clamped, not the bushes, so they can rotate freely still 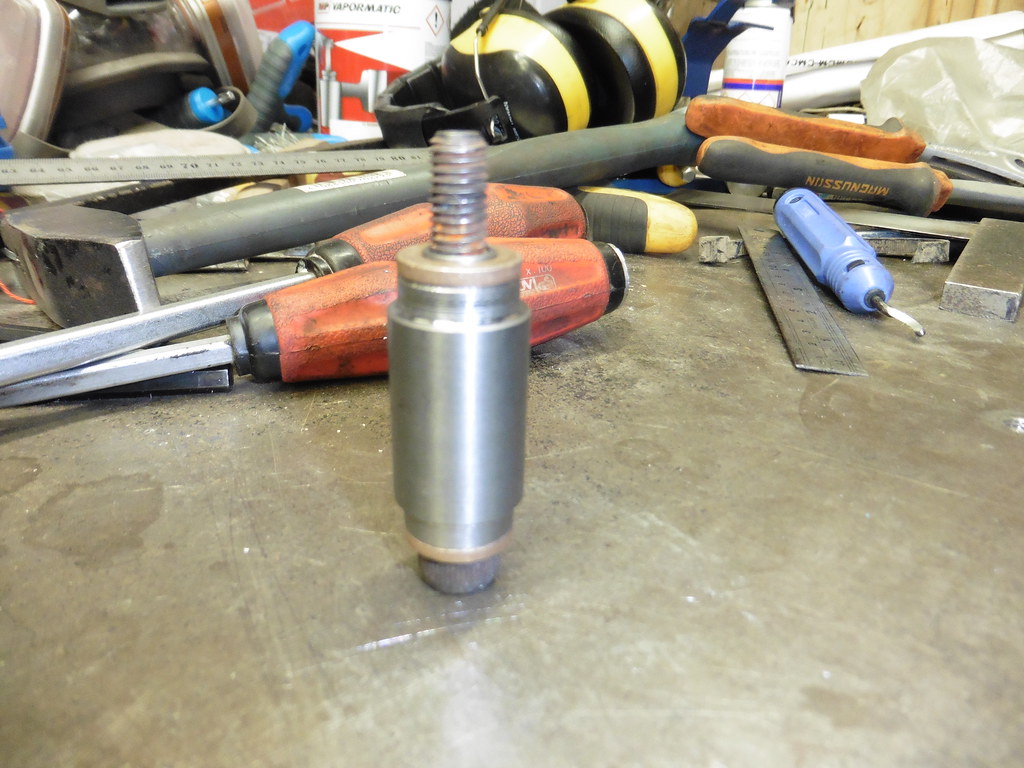 P1080551 P1080551 by jono_misfit, on Flickr constituent parts  P1080552 P1080552 by jono_misfit, on Flickr Groove on the tube is what as known as a mistake.... where i for some reason operated the cross slide handle rather than the carriage.... but as this was the second one I made (first was 0.5mm too short....) its staying... |
| |
|
|
jonomisfit
Club Retro Rides Member
Posts: 1,746
Club RR Member Number: 49
|
|
|
|
I took the handbrake out so I could measure some bits on it  P1080532 P1080532 by jono_misfit, on Flickr Having looked at it, its not the greatest work of engineering and has a fair bit of play in it. Still work ok. I don't like the open end to the tube so started turning up a bung  P1080533 P1080533 by jono_misfit, on Flickr turn the top  P1080534 P1080534 by jono_misfit, on Flickr and fitted  P1080535 P1080535 by jono_misfit, on Flickr I then re-fitted into the car. .... for no particular good reason i took some measurements, and looked in my box of bits.  P1080536 P1080536 by jono_misfit, on Flickr and decided to work out if the handbrake could be made to work with some oilite bearings. So turned up a trial piece.  P1080537 P1080537 by jono_misfit, on Flickr If i am going to re-do it i'd prefer to use roller or ball bearings, but they wouldnt fit in the space... I am not going to make a new over the top handbrake... i'm not... |
| |
|
|
jonomisfit
Club Retro Rides Member
Posts: 1,746
Club RR Member Number: 49
|
|
|
|
|
|
| |
|
|
jonomisfit
Club Retro Rides Member
Posts: 1,746
Club RR Member Number: 49
|
|
Mar 30, 2024 14:17:32 GMT
|
|
|
| |
Last Edit: Mar 30, 2024 18:11:09 GMT by jonomisfit
|
|
|
|
jonomisfit
Club Retro Rides Member
Posts: 1,746
Club RR Member Number: 49
|
|
Mar 24, 2024 20:36:35 GMT
|
My spending spree contintues. I've ordered a race suit, helmet, Head restrain, etc. which should be here in a few days. Still working my way through a few odds and sods on the car though. Thge wing mirror has been knocked off at some point and the stubs that the screws go into are all snapped off the mounting panel.  P1080502 P1080502 by jono_misfit, on Flickr I turned up a nylon stub  P1080503 P1080503 by jono_misfit, on Flickr I was going to glue it on, but figure it'll just snap at the join line, especially with the existing damage to the mounting plate. So i've drilled it from the back 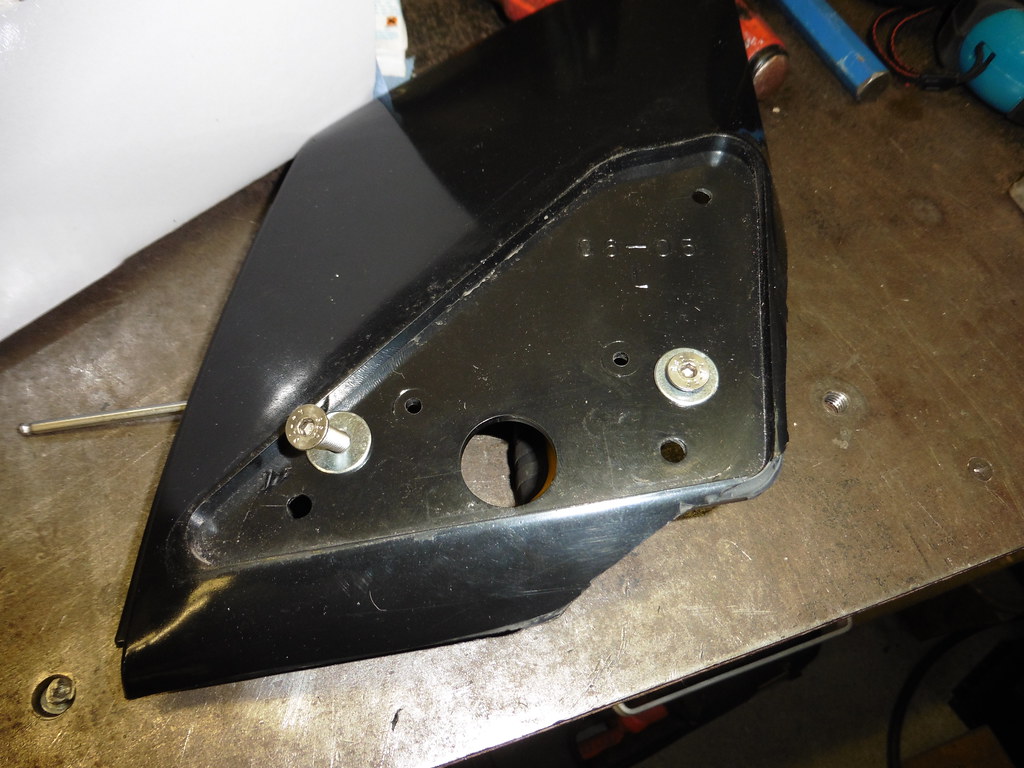 P1080504 P1080504 by jono_misfit, on Flickr the counter bored the mirror to clear the bolt / washers 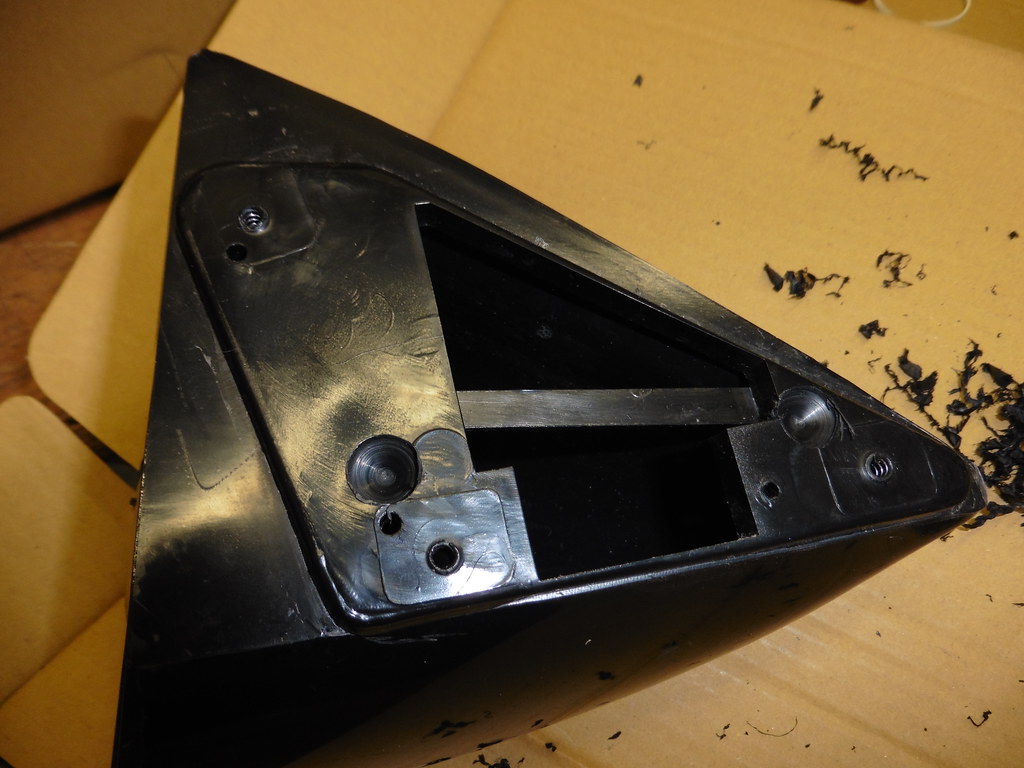 P1080505 P1080505 by jono_misfit, on Flickr goes on like so  P1080506 P1080506 by jono_misfit, on Flickr a test fit shows it works ok. So back to the lathe to make another one  P1080507 P1080507 by jono_misfit, on Flickr due to the damage under it I made the stub have a wider base so it spreads the load  P1080508 P1080508 by jono_misfit, on Flickr  P1080509 P1080509 by jono_misfit, on Flickr  P1080510 P1080510 by jono_misfit, on Flickr The top one is very thin material so I don't think does a lot for holding it all on, so i've left it out for now. on the car  P1080511 P1080511 by jono_misfit, on Flickr worked well, but another hit on it will likely break the mirror beyond repair. Fitted the harnesses and as it was a a nice day I took the car out for a shakedown drive. It went quite nicely and there a definitely less clonks than before, but still a couple more to sort. The new gear shift is epic. Nice and short, really positive feel, and really precise.  P1080515 P1080515 by jono_misfit, on Flickr  P1080516 P1080516 by jono_misfit, on Flickr I didnt do that many handbrake turns in the laybys.... In between other things I gave the spare set of alloys a quick run through the blast cabinet, then a sand down ready for a coat of paint to tidy them up a bit. The need full refurbs, but will do for now. coat 1  P1080513 P1080513 by jono_misfit, on Flickr coat 2  P1080517 P1080517 by jono_misfit, on Flickr coat 3  P1080518 P1080518 by jono_misfit, on Flickr leaving to the side for a week to cure before I give them a laquer  P1080519 P1080519 by jono_misfit, on Flickr I spoke to a local scrutineer tonight. Really nice guy. I'm going to take my car round in a couple of weeks for him to look it over and advise if there is anything else I need to do before it can be used. I might also get the car onto a new passport at the same time and save any faffing next year. |
| |
|
|
jonomisfit
Club Retro Rides Member
Posts: 1,746
Club RR Member Number: 49
|
|
Mar 17, 2024 22:06:23 GMT
|
I've been playing about in the livery editor in EA WRC game to try out that may be close to what I go for. Its based on the colour scheme the car is already in, and sort of based on some graphics I found on I can get from Ebay. I used the C2 S1600.  Thoughts? |
| |
|
|
jonomisfit
Club Retro Rides Member
Posts: 1,746
Club RR Member Number: 49
|
|
Mar 17, 2024 20:44:23 GMT
|
I need to mount the brake bias adjuster. It used to be attached to the gear shift housing.. which is no longer there  P1080483 P1080483 by jono_misfit, on Flickr handy stud  P1080484 P1080484 by jono_misfit, on Flickr cut a piece of 3mm aluminium angle  P1080485 P1080485 by jono_misfit, on Flickr couple of holes and cut down  P1080486 P1080486 by jono_misfit, on Flickr a bit of cutting and drilling later  P1080487 P1080487 by jono_misfit, on Flickr fitted  P1080488 P1080488 by jono_misfit, on Flickr  P1080489 P1080489 by jono_misfit, on Flickr Then onto the rear beam. I watched a youtube video that showed the best approach on these was leave the full suspension assembled, then unbolt the beam bracket. SO all suspension back on again....  P1080490 P1080490 by jono_misfit, on Flickr Then undid the 3 beam beam mounts each side, which was very easy. E type toque bolts, but worryingly 2 on the driver side and 1 on the passenger side were fairly slack. SO have evidently loosened with time and rallyling... Getting this out was a mare, and took over an hour on its own  P1080491 P1080491 by jono_misfit, on Flickr I was trying to press it out with by bearing press kit (bolt through centre etc.) but snapped a piece of 12mm stud as it wouldnt move. Eventually hammered a big screwdriver up the side of the bush, turned it cracking the plastic housin, then did that repeatedly round the edge. Eventually it then pressed out. Cleaned up the beam bush housing casting  P1080492 P1080492 by jono_misfit, on Flickr then for the beam bush  P1080493 P1080493 by jono_misfit, on Flickr in  P1080495 P1080495 by jono_misfit, on Flickr then did the other side  P1080494 P1080494 by jono_misfit, on Flickr I've gone for "fast road" spec bushes, but if they move too much I may go for the harder compound ones. I didnt have enought time left after the beam, so sorted rollcage padding  P1080497 P1080497 by jono_misfit, on Flickr  P1080498 P1080498 by jono_misfit, on Flickr then continued on with removing stickers  P1080499 P1080499 by jono_misfit, on Flickr and cleaned up residue with tar and glue remover  P1080500 P1080500 by jono_misfit, on Flickr  P1080501 P1080501 by jono_misfit, on Flickr All ready for whatevewr graphics I decide to go for. |
| |
Last Edit: Mar 17, 2024 20:45:06 GMT by jonomisfit
|
|
jonomisfit
Club Retro Rides Member
Posts: 1,746
Club RR Member Number: 49
|
|
Mar 15, 2024 19:38:14 GMT
|
After much swearing I got the roll pin in. I ended up taking the arm off again, getting the pin partly in, re-fitting it, then drivign it in the rest of the way with the air hammer set on low impact. A right pain for access to it.  P1080471 P1080471 by jono_misfit, on Flickr difficult to see, but i also got the second roll pin i, this time using a welding clamp. Taking care to anti align it to the first roll pin.  P1080472 P1080472 by jono_misfit, on Flickr connected the linkages and started greasing it up, but decided I didnt like the angle on the cross gate ball joints, so flipped the upper middle one after this pic. Put it at a much better angle and nothing fouls on it.  P1080473 P1080473 by jono_misfit, on Flickr set the gearshift up. What a difference. very positive engagement feels great!  P1080474 P1080474 by jono_misfit, on Flickr Sorted all the things I'd moved / disconnected  P1080482 P1080482 by jono_misfit, on Flickr extinguishers came back from service so fitted them  P1080475 P1080475 by jono_misfit, on Flickr  P1080477 P1080477 by jono_misfit, on Flickr  P1080479 P1080479 by jono_misfit, on Flickr  P1080480 P1080480 by jono_misfit, on Flickr I need to sort a bracket for the bias adjuster, plus I don't like the handbrake position so may well re-make the handle on it  P1080481 P1080481 by jono_misfit, on Flickr |
| |
|
|
jonomisfit
Club Retro Rides Member
Posts: 1,746
Club RR Member Number: 49
|
Satin blackjonomisfit
@jonomisfit
Club Retro Rides Member 49
|
Mar 14, 2024 20:27:11 GMT
|
I tend to use U-Pol power cans for satin black. I find if you do thin coats to build it up, at the right temperature you get a good proper satin finish and no real patches. My experience is when I rush it, and its cold during spraying and curing it goes patchy. If you're having issues with the paint. Can you vinyl wrap it in satin black? ebay vinyl black wrap |
| |
|
|
jonomisfit
Club Retro Rides Member
Posts: 1,746
Club RR Member Number: 49
|
|
Mar 14, 2024 18:47:40 GMT
|
|
Thanks. I'll keep that in mind when I refit them.
|
| |
|
|
jonomisfit
Club Retro Rides Member
Posts: 1,746
Club RR Member Number: 49
|
|
Mar 10, 2024 20:51:34 GMT
|
I got the old bolt out. A couple fo blobs of mig on the top, then welded on a nut and it came straight out.  P1080441 P1080441 by jono_misfit, on Flickr I machined up a standard bolt to match the length and tip shape of broken one, then refitted  P1080442 P1080442 by jono_misfit, on Flickr then on to start fitting this. 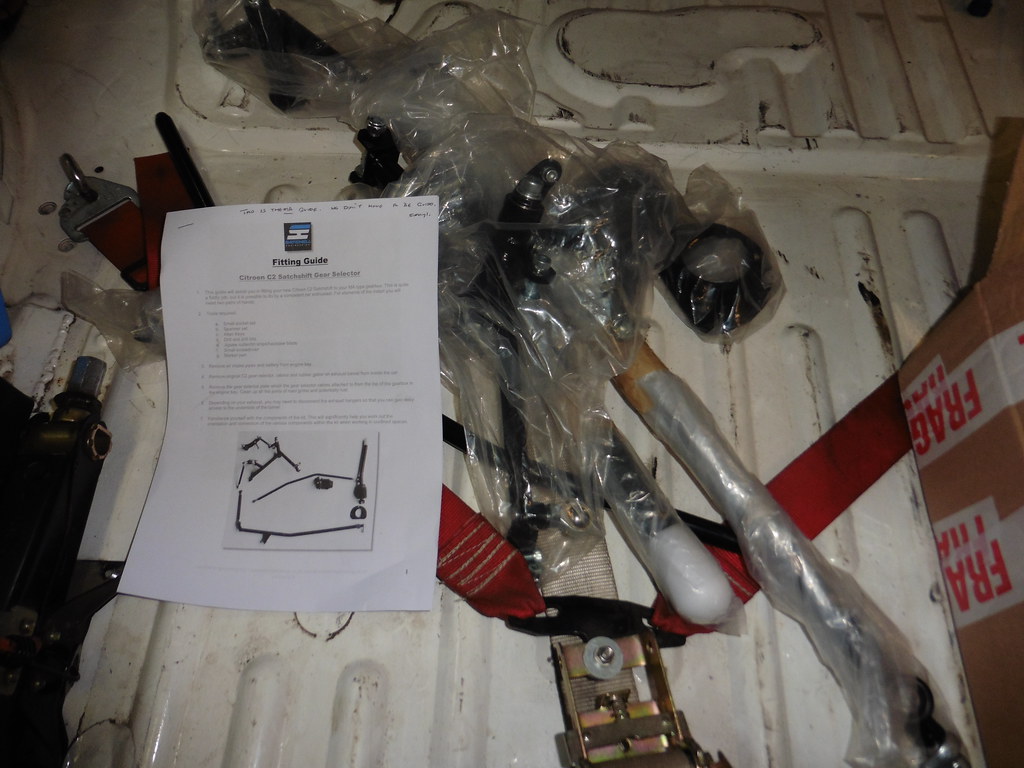 P1080443 P1080443 by jono_misfit, on Flickr Satchell Engineering "Satchshift" replacement for this  P1080444 P1080444 by jono_misfit, on Flickr which is frankly abysmal... Maybe when all the bushes are new it works well, but mine is worn and so vague it almost unuseable. I'm surprised it hasnt led to a load of missed shifts. The satch shifts arent cheap (~£360) but they are very good, and the quality of kit seems very high. This ammused me.  P1080448 P1080448 by jono_misfit, on Flickr They arent a million miles different so should be fairly straight forward. popped the cables off  P1080445 P1080445 by jono_misfit, on Flickr then took out the gear shift  P1080446 P1080446 by jono_misfit, on Flickr and cleaned it up  P1080447 P1080447 by jono_misfit, on Flickr this bit goes in first, on the rear most original shifter mount  P1080449 P1080449 by jono_misfit, on Flickr draw round for a hole to drill  P1080450 P1080450 by jono_misfit, on Flickr  P1080451 P1080451 by jono_misfit, on Flickr marked up the centre  P1080452 P1080452 by jono_misfit, on Flickr X marks the spot 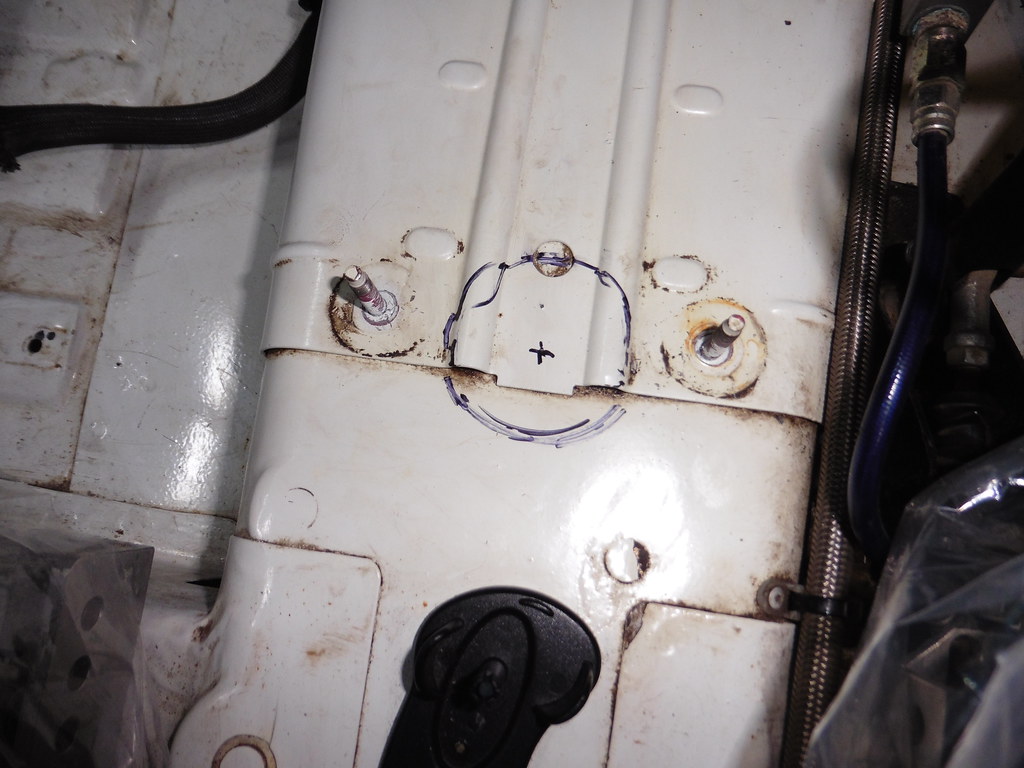 P1080453 P1080453 by jono_misfit, on Flickr drilled the floor, and also the heat shield  P1080454 P1080454 by jono_misfit, on Flickr Then cleaned up and painted the edges. I put1 some strips of foam rubber on the lip that presses on the hole and bolted it down  P1080455 P1080455 by jono_misfit, on Flickr start stripping these bits out  P1080456 P1080456 by jono_misfit, on Flickr then a roll pin to knock out of the fwd/aft shift  P1080457 P1080457 by jono_misfit, on Flickr removed  P1080458 P1080458 by jono_misfit, on Flickr not sure if this is a standard thing or not, but there was a roll pin inside the roll pin, i'm assuming to make it less likely to come out 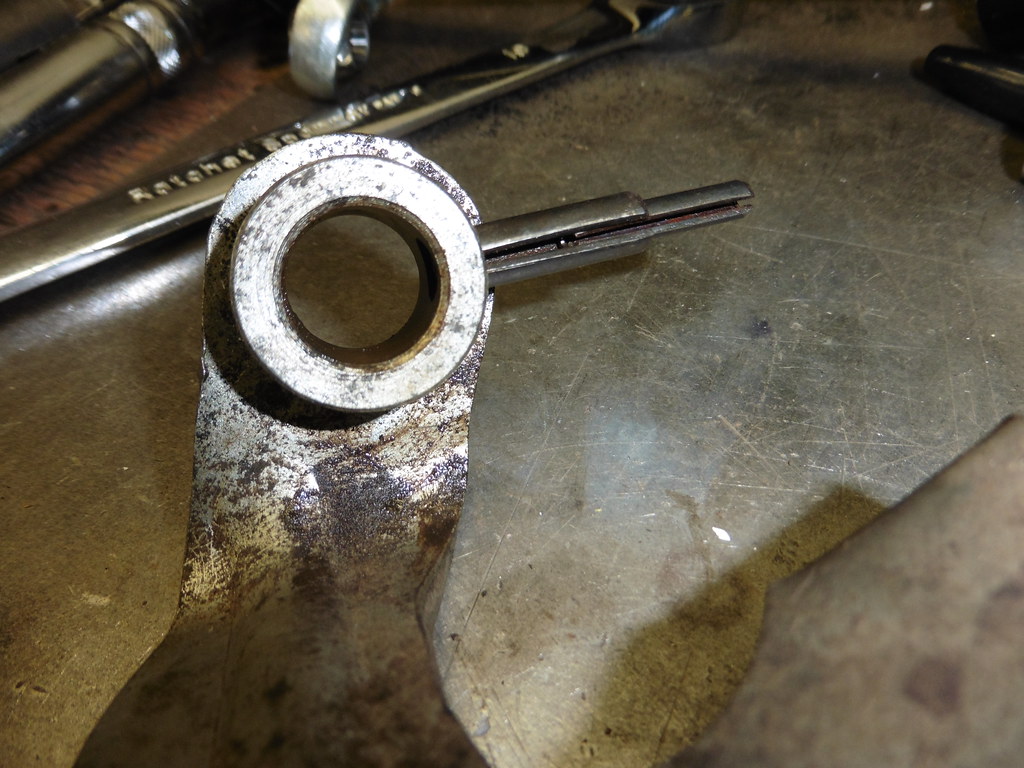 P1080459 P1080459 by jono_misfit, on Flickr start fitting the first piece of the shift, goes onto the ARB mount and a spare bolt hole at the back of the subframe  P1080460 P1080460 by jono_misfit, on Flickr also has a little bracket to bolt to the bulkhead 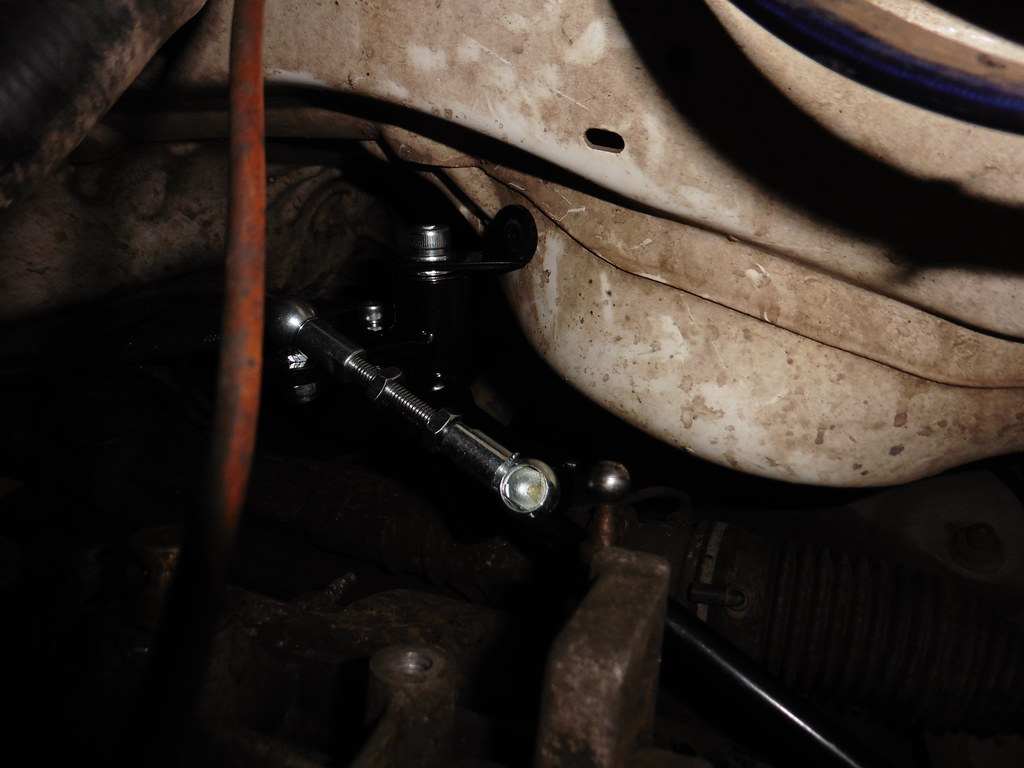 P1080461 P1080461 by jono_misfit, on Flickr  P1080462 P1080462 by jono_misfit, on Flickr fitted the first shaft  P1080463 P1080463 by jono_misfit, on Flickr  P1080464 P1080464 by jono_misfit, on Flickr I had to shim it with a few washers to get it set correctly fitted the shifter  P1080465 P1080465 by jono_misfit, on Flickr it was at this point this went wrong.... The what felt like a secure pin, that I assumed was held in place inside the gearbox suddenly dropped into the gearbox. Ahhhhh. I think it was just stiction from the o-ring seal that had been holding it in place.  P1080467 P1080467 by jono_misfit, on Flickr I managed to fish it back out but it didnt feel right. After much moving it round and moving the cross gate I managed to get it back working so that turning it moved the cross gate back and forward. I had to go by feel and it was awkward to get in there. It also would just drop straight back down again if not supported.  P1080466 P1080466 by jono_misfit, on Flickr I spent a hour watching BE gearbox rebuild videos and it looks like what holds the shaft in place is the shift arm outside the gearbox and the little spring that sits under it. How to get the new arm on without stripping the gearbox? eventually I settled on drilling the centre (although this isnt the center as I couldnt get he drill in properly) and tapping it for a bolt  P1080468 P1080468 by jono_misfit, on Flickr I could then put the shift arm loosley in place, and use a nut and washers to pull it down, whilst pulling up on the bolt to stop it dropping out of position  P1080469 P1080469 by jono_misfit, on Flickr  P1080470 P1080470 by jono_misfit, on Flickr What a pain in the backside, but got there eventually. As it took so long to do I ran out of time. Will pick it back up next weekend. So much for a quick job... |
| |
|
|
jonomisfit
Club Retro Rides Member
Posts: 1,746
Club RR Member Number: 49
|
|
|
|
|
|
| |
|
|
jonomisfit
Club Retro Rides Member
Posts: 1,746
Club RR Member Number: 49
|
|
|
|
The car runs on all standard bushing as far as I can tell, and much of it isnt in good condition. I was going to drop the wishbones and swap the bushes out on them, however this is a french car..... it has got what I consider to be.... unusual bolt / nut sizes throughout and it turns out I don't have all the tools to remove. I.e the ARB drop links are 17mm, the damper pinch bolt on the upright is 16mm, the bottom ball joint are 17mm, the pinch bolt for the bottom ball join I think are 15mm, the hub nut is 35mm. I have some buying to do. The front ARB bolt was 19mm.. .which seems utter overkill for the loads in it, state of the bushes  P1080421 P1080421 by jono_misfit, on Flickr Blasted and ready for rust killer 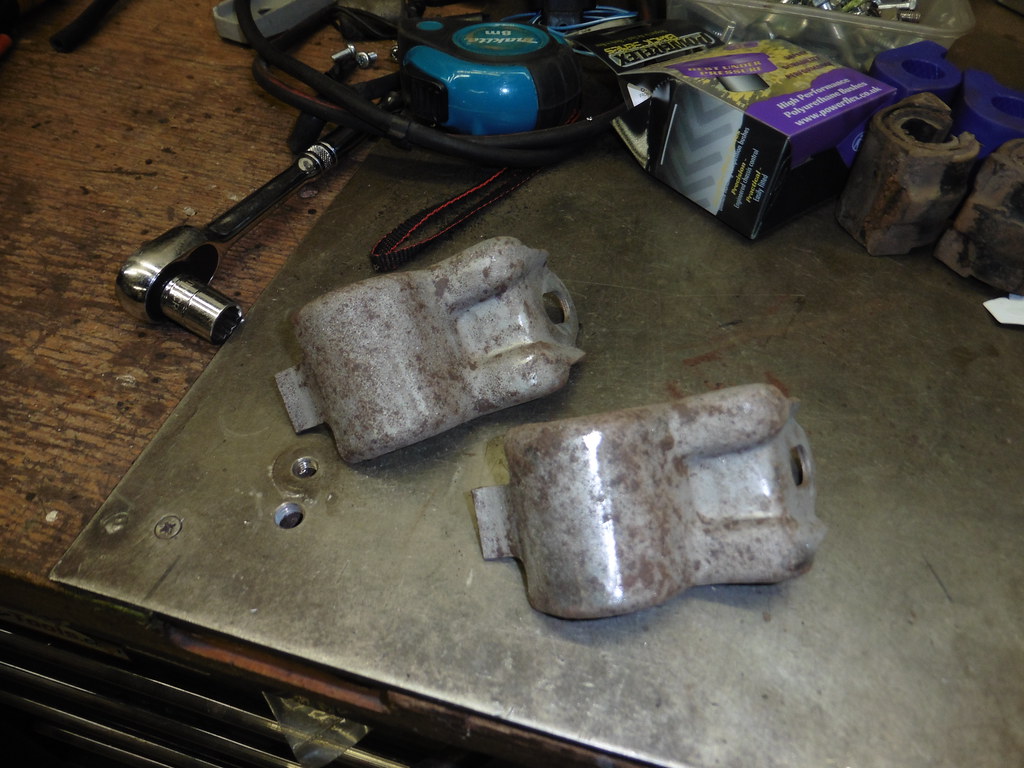 P1080424 P1080424 by jono_misfit, on Flickr treated and primed with etch primer  P1080425 P1080425 by jono_misfit, on Flickr baked, painted black, baked again  P1080433 P1080433 by jono_misfit, on Flickr new bushes  P1080422 P1080422 by jono_misfit, on Flickr Fitted  P1080434 P1080434 by jono_misfit, on Flickr I was going to replace the bushes in the rear beam as they are equally toasted. dropped the rear dampers out, which are in good condition (top bolt 16mm in double shear, bottom bolt 22mm in single shear)  P1080426 P1080426 by jono_misfit, on Flickr then onto the rear beam  P1080427 P1080427 by jono_misfit, on Flickr except this needs a deep 18mm socket on to get off, which i don't have  P1080428 P1080428 by jono_misfit, on Flickr so that scuppered that job impact marks on the exhaust  P1080429 P1080429 by jono_misfit, on Flickr free floating fuel filter, which I managed to re-secure to a bracket above it  P1080430 P1080430 by jono_misfit, on Flickr so onto another job. The front cam cover gasket is leaking so need to replace it. Which was fine until.... one re-fitting one of the bolts went slack suddenly, and on trying to wind it back out again.  P1080435 P1080435 by jono_misfit, on Flickr Joys. So next time I need to take it back out and extract the broken bolt. I went in at this point. |
| |
|
|
jonomisfit
Club Retro Rides Member
Posts: 1,746
Club RR Member Number: 49
|
|
|
|
I upgraded the blast cabinet. Additional LED lights to make it a bit brighter, changed the protection film, and fitted a pedal operated bottom fed blast gun. 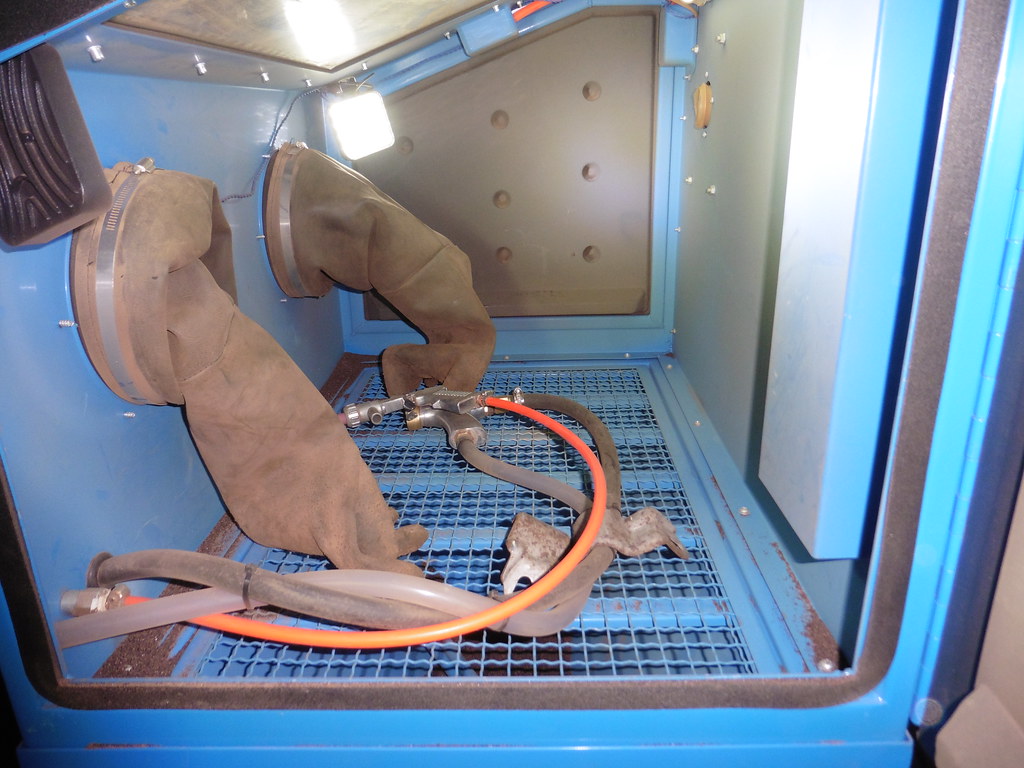 P1080423 P1080423 by jono_misfit, on Flickr  P1080431 P1080431 by jono_misfit, on Flickr  P1080432 P1080432 by jono_misfit, on Flickr works a lot better than the old gun which has now been re-purposed for blow down duties. Foot pedal has an annoying guard on it that my boot doesnt fit in, so will need to modify it a bit |
| |
|
|
|
|