pmc
Part of things

Posts: 23
|
|
Feb 18, 2023 21:33:09 GMT
|
New rear numberplate lights have been fitted as they were missing. They were direct replacements from a TVR supplier but the new ones had a little locating sort of pin that the originals can't of had, just had to file a little slot to fit them.  2023-02-09 16.18.13 2023-02-09 16.18.13 by Pete Clayton, on Flickr  2023-02-09 16.39.12 2023-02-09 16.39.12 by Pete Clayton, on Flickr One of the things that I think is pretty cool on the early Chimaera's is the back lit translucent rear numberplate. I need to get a new plate as it's not in great condition but you get the idea.  2023-02-09 16.40.31 2023-02-09 16.40.31 by Pete Clayton, on Flickr Next was a new gas strut for the boot as the one that came with the car was weak when I fitted it and would barely hold the boot open. When looking in to it I found from a Pistonheads thread that SGS sell a longer one that allows the boot to open further. That has got to make it easier to put the roof panel in there and filling it with fuel. I think SGS worked with someone who had fitted LPG to spec it as they needed more space for the LPG filler nozzle. Before  2023-02-11 16.51.54 2023-02-11 16.51.54 by Pete Clayton, on Flickr After  2023-02-11 17.02.45 2023-02-11 17.02.45 by Pete Clayton, on Flickr I won a pair of Corrado mirrors on ebay for £60 as the original items are hard to get hold of and fragile. There is a company who make some adapters to fit them without modification so I ordered some of those as well, more expensive than the mirrors were but I liked the idea of a bolt on solution.  2023-02-12 14.17.56 2023-02-12 14.17.56 by Pete Clayton, on Flickr  2023-02-12 14.18.43 2023-02-12 14.18.43 by Pete Clayton, on Flickr  2023-02-12 14.18.52 2023-02-12 14.18.52 by Pete Clayton, on Flickr I bought a service kit for the car from one of the TVR specialists along with the lambda extension cable which I was missing, the price of the cable made me wince but I couldn't find one anywhere else. I fitted the lambda cable and tried running it with the sensors plugged in. I think one of the sensors is faulty as it was popping and banging with them connected and the readings for the two on the ECU mate were showing differently when revved. I changed the oil today, the plugs and air filter haven't been done yet, I thought I'd wait until it was a bit closer to being on the road to fitting them. There is a lot of debates about the best oil, some people saying 0w/40 fully synthetic, others saying 20w/50 as it's an old engine. I went for some Mobil 1 Super 2000 Semi Synthetic in 10w/40 grade. The important bit is the zinc content due to issues with cam wear on the Rover V8 and this oil has it in the formula. The oil filter on the car is a bit of a pain to get at. It's easiest to get at from underneath, just tricky refitting with it prefilled with oil.  2023-02-18 14.59.39 2023-02-18 14.59.39 by Pete Clayton, on Flickr Whilst I had the car jacked up I had a better look at the outriggers. This is the worst bit I can see, it's just behind the passenger side front wheel.  2023-02-18 15.06.13 2023-02-18 15.06.13 by Pete Clayton, on Flickr Oh, and I can't remember if I mentioned but the engine tapping has stopped, I think it was just a sticky lifter as while it was running and up to temperature the other week it just suddenly stopped. It sounds pretty sweet now which is a result. |
| |
Last Edit: Feb 19, 2023 9:05:09 GMT by pmc
|
|
|
|
|
|
|
Feb 18, 2023 22:28:19 GMT
|
|
Nice work. I've always fancied a TVR...
|
| |
|
|
pmc
Part of things
Posts: 23
|
|
Apr 20, 2023 21:45:07 GMT
|
I've got a few little jobs done since the last update. The oil pressure sender adapter turned in to a bit of a game to source. I had one sent with the service kit I bought but the threads weren't correct so I returned it. Another TVR specialist has them listed but it was £19.50 + vat and then £8 for delivery! I didn't fancy paying that, I was pretty sure the sender thread was 1/8 NPT so I took a punt on an adapter from Demon Tweeks on ebay for £14.50 delivered.  2023-03-04 15.40.18 2023-03-04 15.40.18 by Pete Clayton, on Flickr I was worried it might be a bit long, but it fitted a treat.  2023-03-05 16.22.23 2023-03-05 16.22.23 by Pete Clayton, on Flickr When I first started the car I thought the gauge might be over reading and maybe I had the wrong sender but once the car was up to temperature it had dropped down to between 25-30psi. I also managed to get the car to idle when warm and was able to check if the fans kicked in which they did. I got some new LED bulbs the for the number plate lights so decided I could fit the rear plate. I managed to salvage the original one by soaking all of the sticky strips off the back. I've drilled and screwed it on as when I tested it the original sticky strips were blocking some of the backlighting. It's starting to look like a car from the rear now! Unfortunately I missed out on a good condition rear badge I was bidding on otherwise that would have been the rear exterior sorted.  2023-04-09 10.52.24 2023-04-09 10.52.24 by Pete Clayton, on Flickr I did however spot a good condition front badge on Facebook marketplace which I bought and have fitted. The original one could be repainted but this was cheap enough it wouldn't be worth the effort of sorting the original.  2023-04-08 14.01.21 2023-04-08 14.01.21 by Pete Clayton, on Flickr  2023-04-09 21.18.35 2023-04-09 21.18.35 by Pete Clayton, on Flickr I've cleaned up the door locks (I'd mostly done one in the photo and just started the other) and refitted them to the body as it makes it easier to deactivate the alarm, I just need some seals now which are hard to come by. The aluminium housings were quite corroded but cleaned up fairly well. I need to fit the latches and central locking solenoids too but I want to repaint the mounting bracket first. I did connect up the central locking solenoids and tested them with the locks and they operated as they should.  2023-04-17 19.44.11 2023-04-17 19.44.11 by Pete Clayton, on Flickr  2023-04-17 21.02.56 2023-04-17 21.02.56 by Pete Clayton, on Flickr The little cap that holds the plunger for the low brake fluid light on the reservoir cap was missing when I got the car, someone on facebook kindly sent me one. Another little job ticked off.  2023-04-06 20.38.51 2023-04-06 20.38.51 by Pete Clayton, on Flickr  2023-04-06 20.40.02 2023-04-06 20.40.02 by Pete Clayton, on Flickr The past couple of evenings I've had a go at seeing if the roof is salvageable. It hadn't been folded down very carefully when it was removed and there were some big creases, a little split and it was very hard. I bolted the folding supports in place and then heated the rear screen with a heat gun on low to try and soften it a bit. I tried to open it out. It was tight but I managed it, although it pulled up a bit from the rear where I hadn't put the nuts on yet. I left it over night and this evening I've added the 3 nuts in the boot above the fuel tank, it now seems to fold a little easier as well. I tried putting it up with the hard solid section, it was really tight but I managed to get it in and I've left it on to see if it relaxes a little if it's left up for a bit.  2023-04-20 21.02.51 2023-04-20 21.02.51 by Pete Clayton, on Flickr  2023-04-20 21.13.15 2023-04-20 21.13.15 by Pete Clayton, on Flickr I'm not sure if this little split can be repaired? it's where the screen was folded to almost a point. It would be a shame to have to put a new window in for just this.  2023-04-20 21.05.59 2023-04-20 21.05.59 by Pete Clayton, on Flickr  2023-04-20 21.05.23 2023-04-20 21.05.23 by Pete Clayton, on Flickr I also got an ebay bargain, not necessarily something I need but I have a saved search for Chimaera bits and it popped up and I think it was incorrectly priced. A brand new starter motor with a label from one of the TVR specialists for £12 delivered. I was expecting the transaction to be cancelled but it turned up the following day! I've found a TVR specialist in Downham Market which is just under 40 miles from me. I'm going to have a chat with them about doing the chassis repairs as I'd like to get that done fairly soon. |
| |
Last Edit: Apr 21, 2023 20:08:39 GMT by pmc
|
|
pmc
Part of things
Posts: 23
|
|
|
|
I've continued to clean up some bits and get them refitted. The plates the door latches bolt to were a bit manky. They won't be seen but I wanted to get rid of the surface rust and tidy them up a bit before refitting.  2023-04-29 11.30.47 2023-04-29 11.30.47 by Pete Clayton, on Flickr I gave them a bit of the flap disk and wire wheel treatment along with the dash switch/light mounting panels.  2023-04-29 15.05.03 2023-04-29 15.05.03 by Pete Clayton, on Flickr A couple of quick coats of some Nitromorse silver paint and they look much better  2023-05-01 19.33.49 2023-05-01 19.33.49 by Pete Clayton, on Flickr I figured out how it all went together and refitted the door latches with the solenoids and release cables both sides.  2023-05-04 21.23.32 2023-05-04 21.23.32 by Pete Clayton, on Flickr The warning lights and switches back in to the mounting plates (second attempt after putting them through the wrong side on the bigger plate!)  2023-05-06 22.03.00 2023-05-06 22.03.00 by Pete Clayton, on Flickr Boot latch, solenoid mounting plate and solenoid all refitted and working  2023-05-06 19.43.16 2023-05-06 19.43.16 by Pete Clayton, on Flickr I've also got the bonnet latch refitted.  2023-05-06 21.57.29 2023-05-06 21.57.29 by Pete Clayton, on Flickr Next up will be swapping one of the lambda sensors and doing a couple of fibreglass repairs, one to the battery box and one to reattach a snapped piece on the shelf behind the seats that the door release cable routes through. I've spoken to Matt Smith Sports Cars and the car is booked in for the outriggers to be replaced at the end of June, that will be a big step forward once completed. |
| |
Last Edit: May 8, 2023 21:29:36 GMT by pmc
|
|
pmc
Part of things
Posts: 23
|
|
Jul 10, 2023 21:57:29 GMT
|
Some good progress on the car since the last update. One of the things that didn't work was the horn. I couldn't hear the relay clicking when pushing the horn button. After a bit of research I thought it was probably the slip ring on the back of the boss, I found if I held the button and turned the wheel the horn would work at certain points. The boss didn't want to come off without a fight and in the end I had to use a 3 legged puller. When I finally got it off the slip ring looked pristine so I discounted that. I found if I earthed the wire from the boss to a different point on the car the horn worked so the issue was to do with the column earthing. In the end it turned out just to be the bolts on the column weren't fully tight and the horn was working when you turned the wheel because it was putting load on the column and making a contact. The horns both worked but were a bit grotty so I gave them and the brackets a bit of wire brush treatment and quick paint before fitting them back to the car.  2023-05-27 13.55.01 2023-05-27 13.55.01 by Pete Clayton, on Flickr  2023-05-27 18.09.20 2023-05-27 18.09.20 by Pete Clayton, on Flickr I fitted a new lambda sensor to replace the one that was missing the plug. A socket had to be adapted to remove it as they are smaller than most at 17mm and there isn't enough room to get a ring spanner in.  2023-06-09 20.59.21 2023-06-09 20.59.21 by Pete Clayton, on Flickr The car was still running rich when I ran it afterwards and wouldn't idle when hot. Rovergauge showed on the long term lambda readings -100% on the odd bank and it threw and error code for 'Injector bank even'. I tested the injector circuits for continuity and I checked they were pulsing as they should with noid lights. I came to the conclusion it was probably a leaky injector. The car has just come back from a trip to Mat Smith Sports cars.  2023-06-30 11.18.13 2023-06-30 11.18.13 by Pete Clayton, on Flickr It went in to have the outriggers replaced as I knew there was a hole in the n/s one. This is what was visible from underneath when I'd looked 2023-02-18 15.06.13 by Pete Clayton, on Flickr This is what the top side looked like when it had been removed  2023-07-01 17.38.40 2023-07-01 17.38.40 by Pete Clayton, on Flickr Mat found the other side had been repaired previously with a sleeve but there was only a little welding at the bottom of the join!  2023-07-01 17.38.13 2023-07-01 17.38.13 by Pete Clayton, on Flickr New ones in place  2023-07-01 17.39.48 2023-07-01 17.39.48 by Pete Clayton, on Flickr  2023-07-01 17.41.03 2023-07-01 17.41.03 by Pete Clayton, on Flickr He found another hole on one of the top tubes below the o/s exhaust manifold so that was repaired at the same time. The fuel hoses were replaced and a new fuel filter I supplied fitted. I had Mat test and clean the injectors whilst the plenum was off. The injectors weren't too bad, the spray pattern wasn't great on a couple before cleaning but it's wasn't the cause of my over fueling issues. The work cost more than I paid for the car but it's money well spent, he's done a cracking job. The car is now solid and the money I've spent so far is still well below what I could pick up a ropey one for. On Saturday I decided to swap the lambda sensors over just to see if my fault moved to the other bank. The car immediately sounded better and would idle when hot, previously it would stall if revved when warm. After a while it did throw a couple of faults 'Lambda sensor odd' and 'Low fuel pressure'. So I'm pretty sure the cause of the running issues is that lambda and I've ordered another today. I've also been told the low fuel pressure fault can come up when the car is running lean so hopefully it will clear that one too. |
| |
Last Edit: Jul 10, 2023 22:04:18 GMT by pmc
|
|
pmc
Part of things
Posts: 23
|
|
Oct 13, 2023 20:06:30 GMT
|
The lambda sensor didn't cure the issue and the low fuel pressure fault, that was actually caused by a misfire from one of the plug leads not seating properly. and the idle issue was the base idle was set too low. I've put a new set of angled leads on it so I could ditch the plug extenders, a new dizzy cap and rotor arm. I was then back to the original fault. I decided to test the fuel pressure as I thought the regulator might not be working properly and giving too much fuel pressure at idle. With the vacuum disconnected  2023-09-23 10.38.00 2023-09-23 10.38.00 by Pete Clayton, on Flickr With the vacuum connected  2023-09-23 10.37.05 2023-09-23 10.37.05 by Pete Clayton, on Flickr Those figures seemed about right from what I'd read so I could rule that out. I bought a used genuine MAF sensor that I was told was good, I thought for £25 it would be worth having a spare. I tried plugging that in out of interest just to see if it made any difference (I had no reason to doubt the original one it wasn't throwing error codes and the voltages all seemed fine in the Rovergauge logs) and to my surprise the lambdas both started switching and the fueling seemed better. Swapping back to the original both lambdas went to -100% straight away and would only move slightly if revved. I've put the one I bought back on at the moment. I'm not going to get too involved in doing any more until I can actually do a road test on it and see how it drives. The blower fan for the heaters was one thing that didn't work when I tested it. You could hear a click and it blew the fuse when turned to speed 3 so I figured it was seized. I thought whilst the interior is out it would be a good time to sort. TVR I'm guessing in an aid to save space put it behind a panel on the left hand side of the passenger foot well. The panel is screwed and siliconed in place and was a pain to get free, the battery and fuse box had to be removed to be able to get it out.  2023-10-07 15.17.45 2023-10-07 15.17.45 by Pete Clayton, on Flickr  2023-10-09 21.36.38 2023-10-09 21.36.38 by Pete Clayton, on Flickr  2023-10-09 21.36.26 2023-10-09 21.36.26 by Pete Clayton, on Flickr A bit of a spray with some WD40 on the bearings and I was able to free it off, I've sprayed them with some bearing lube and it seems to be all good now. I'm going to clean up and paint the heater pipes above it and replace the jubilee clips. I've got new discs and pads ready to fit for the rear and braided hoses and a silicone coolant hose set have been ordered. I just need to decide what I'm doing with the front brakes and get a new fan belt and then once all fitted that should be most of the mechanical side of things sorted. |
| |
Last Edit: Oct 13, 2023 20:48:46 GMT by pmc
|
|
|
|
|
Oct 24, 2023 11:53:14 GMT
|
|
squints, is that a vauxhall nova heater blower ?
i recognise the horns, they look like hi/lo tone klaxon units used on range rover.
|
| |
|
|
pmc
Part of things
Posts: 23
|
|
Oct 31, 2023 16:51:04 GMT
|
squints, is that a vauxhall nova heater blower ? i recognise the horns, they look like hi/lo tone klaxon units used on range rover. It wouldn't surprise me, there are a few Vauxhall parts on it. The fan speed switch, the steering column and the door locks are apparently Calibra/Tigra boot locks. |
| |
Last Edit: Oct 31, 2023 16:51:24 GMT by pmc
|
|
pmc
Part of things
Posts: 23
|
|
Jan 17, 2024 21:51:01 GMT
|
Managed to get a bit of time on the car this week, so I tackled the front brakes. The old discs were looking a bit crusty. At the moment it's more of a recommissioning job than a restoration so I just wire brushed any flakey bits, I'll come back to it in the future and paint wishbones etc.  2023-11-27 12.09.44 2023-11-27 12.09.44 by Pete Clayton, on Flickr Looking a bit better now  2024-01-15 10.33.05 2024-01-15 10.33.05 by Pete Clayton, on Flickr I still have the braided hoses to do. I've started looking at how the doors go back together and have figured out how the runners fit. I just want to get some new hinge bushes before they get refitted to the car. I drilled a hole through the mirror blocks to pass the wires through for the electrics and ground a little off the mounting lugs on the mirrors so they bolt up to the adapters. They still need a little tweaking but almost there.  2024-01-15 20.51.41 2024-01-15 20.51.41 by Pete Clayton, on Flickr 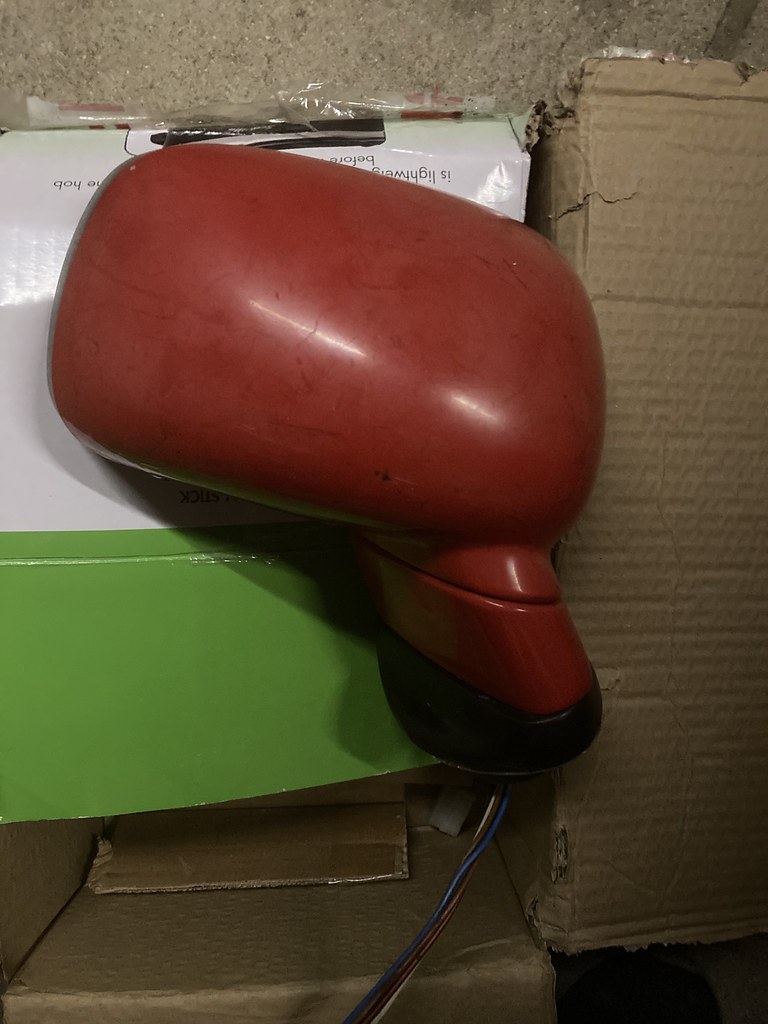 2024-01-15 20.51.33 2024-01-15 20.51.33 by Pete Clayton, on Flickr The wires for one of the interior light switches in the sill had been dropped inside the sill. There was no easy way to access them so on the advice of one of the TVR specialists I used a small hole cutter to put a hole on the inside so I could fish the wires out and get them back through. I've put a rubber blanking plug in the hole I made.  2023-11-27 20.33.46 2023-11-27 20.33.46 by Pete Clayton, on Flickr  2023-11-27 14.43.22 2023-11-27 14.43.22 by Pete Clayton, on Flickr I've managed to gather some more parts too. A lower dash in pretty good condition in the correct colour, although has a slightly annoying hole someone has drilled for an LED for an aftermarket alarm. A dash top in the correct colour which I got from a breakers and a TVR space saver spare wheel.  2024-01-15 15.57.41 2024-01-15 15.57.41 by Pete Clayton, on Flickr  2024-01-15 15.55.02 2024-01-15 15.55.02 by Pete Clayton, on Flickr The dash top isn't quite as good as I was told there are a couple of small areas of damage to the leather, I was offered to return for a refund but I just asked for some money back. I've bought some flexible leather filler as I plan to refurb the seats and I'll get some dye and hopefully it will tidy up ok.  Untitled Untitled by Pete Clayton, on Flickr  2024-01-15 15.55.48 2024-01-15 15.55.48 by Pete Clayton, on Flickr |
| |
Last Edit: Jan 17, 2024 21:57:28 GMT by pmc
|
|
pmc
Part of things
Posts: 23
|
|
Feb 26, 2024 11:07:42 GMT
|
I've had a go at sorting out the dash top. I bought some flexible leather filler from furniture clinic. First of all I rubbed down the areas that needed repair with some 1500 grit sand paper and then I cleaned the areas with some alcohol cleaner. The filler looked a bit like PVA glue and I applied it with a spatula once it was dried I rubbed it down to make it smooth. This is part way through  2024-01-23 11.46.19 2024-01-23 11.46.19 by Pete Clayton, on Flickr I needed to get some colourant to recolour the repaired areas but the colour match wasn't great between the dash top and the original trim.  2024-02-09 18.51.10 2024-02-09 18.51.10 by Pete Clayton, on Flickr I managed to find a piece about an inch square that I could cut off the bottom of the tunnel top trim and sent that to furniture clinic for colour matching. This weekend I had a go at recolouring the dash top.  2024-02-26 10.24.45 2024-02-26 10.24.45 by Pete Clayton, on Flickr  2024-02-26 10.24.54 2024-02-26 10.24.54 by Pete Clayton, on Flickr It looks almost black in the photos but it is blue. Here it is in the daylight with the tunnel top cover, it's not a perfect match but it's pretty close.  2024-02-25 12.23.51 2024-02-25 12.23.51 by Pete Clayton, on Flickr I applied the colourant with a sponge, they say to dab it on but it looked like it was putting loads of air bubbles in it so I tried small circles and when the first coat dried it was all patchy. It then did as the guidance said and dabbed it and when it dried all the air bubbled disappeared. I'm pretty happy with the result, definitely passable. There are still some pressure indents where it had been placed on top of something at the breakers but I'm hoping these will disappear over time. |
| |
Last Edit: Feb 26, 2024 11:10:12 GMT by pmc
|
|
|
|
|
|
|
Feb 27, 2024 18:51:37 GMT
|
|
That's coming together beautifully!
|
| |
|
|


