Tamber
Part of things
 Shattered. Held together by spite and tape.
Posts: 306
|
|
Apr 22, 2024 23:36:44 GMT
|
First off for this evening, let's start with that fixture plate. 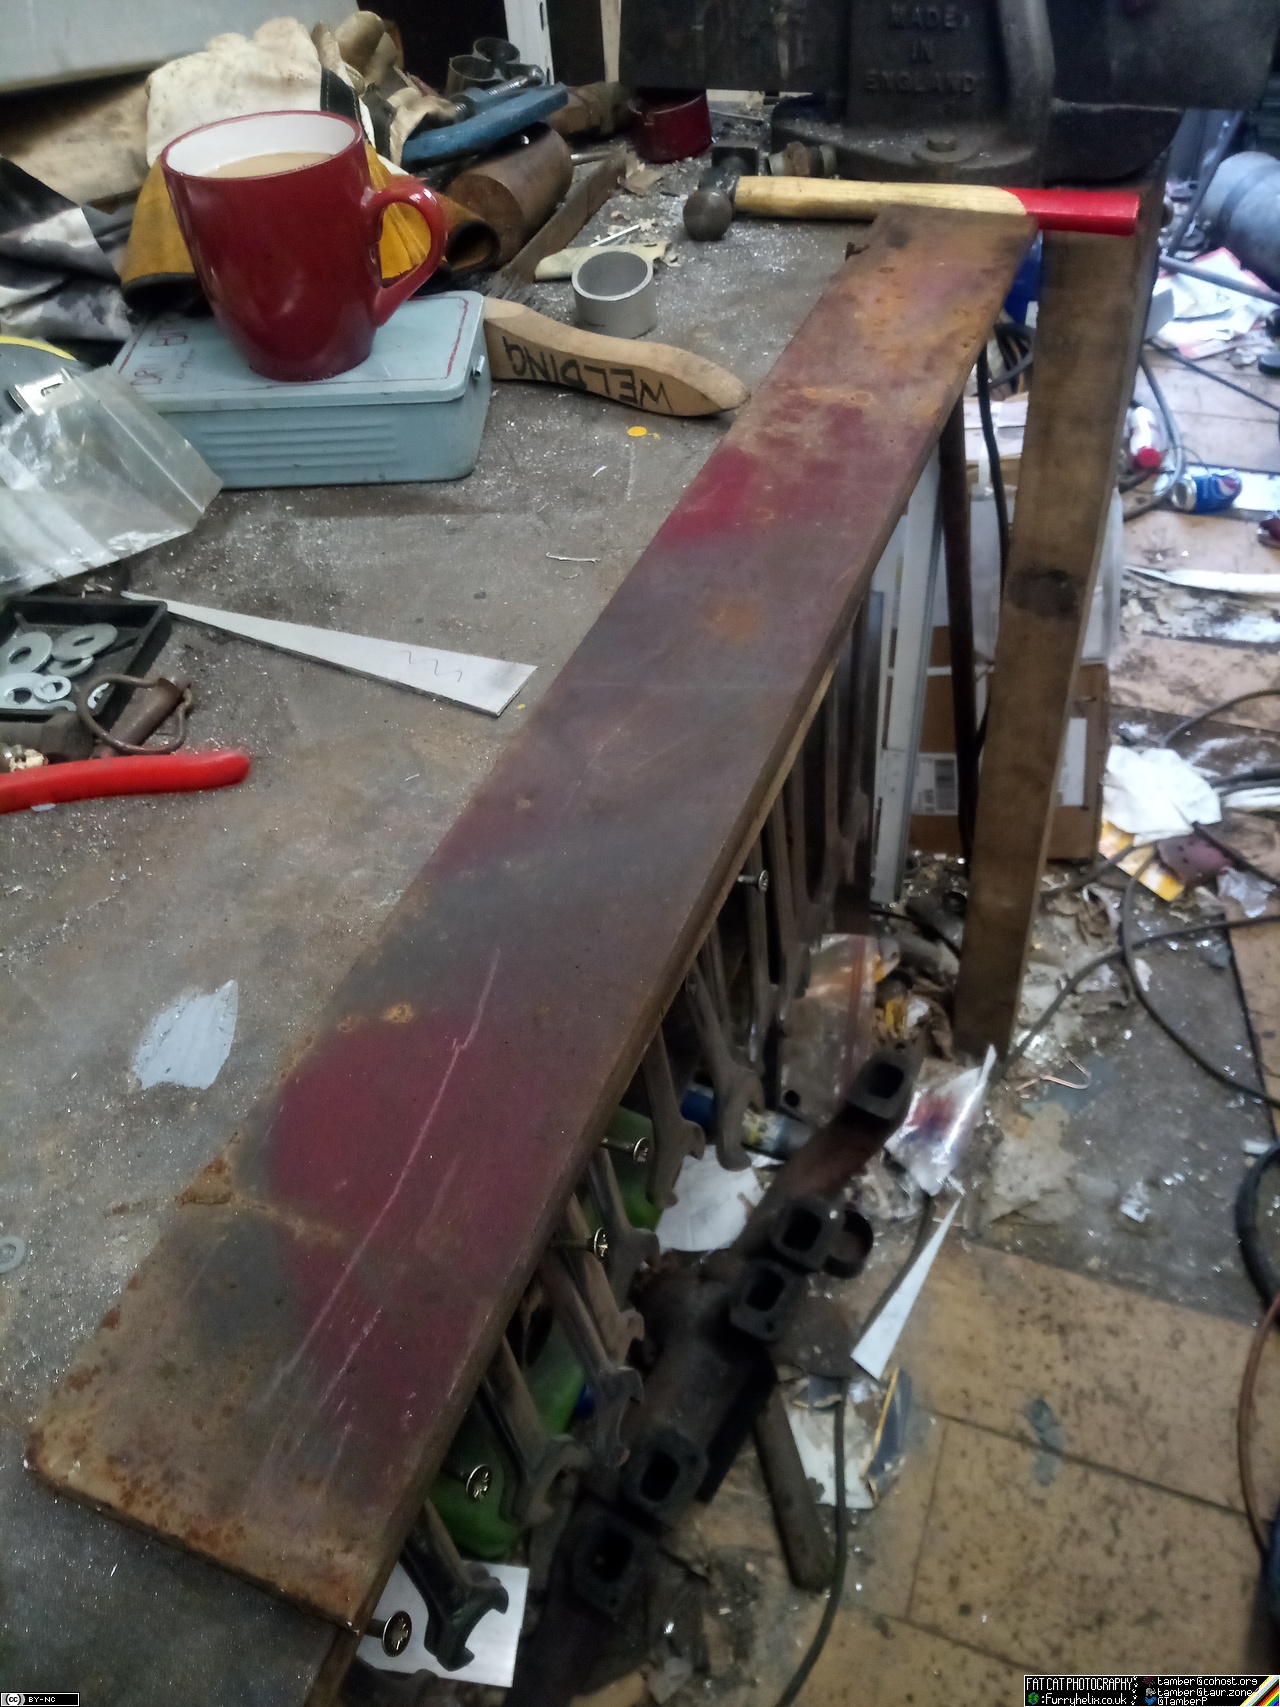 A 33" long piece of 100x16mm should do nicely.
Spend an hour and a half measuring, marking, re-measuring, re-marking, re-re-measuring, head-scratching, drinking coffee and thinking real hard, then measuring again just to make sure. It's recommended you do some swearing when you find out that the 3 pairs of studs that clamp down the inlet manifold all have different spacings. (There's about 3 to 4mm between the tightest to the widest.)
Thankfully, their exact spacing isn't critical, as long as they don't interfere with the flanges on the manifolds. But this does explain why I had a bigger gap than expected between two manifold flanges; I thought I'd just screwed something up with the welding somewhere, but the bolt-holes lined up! Then spend about half an hour drilling holes, and waiting for the drill to cool down. Optional step: Discover your 3/8NF tap has disappeared into the aether, and decide maybe that's enough on the fixture for one evening. I'm extremely not looking forward to drilling three 48mm holes through it. 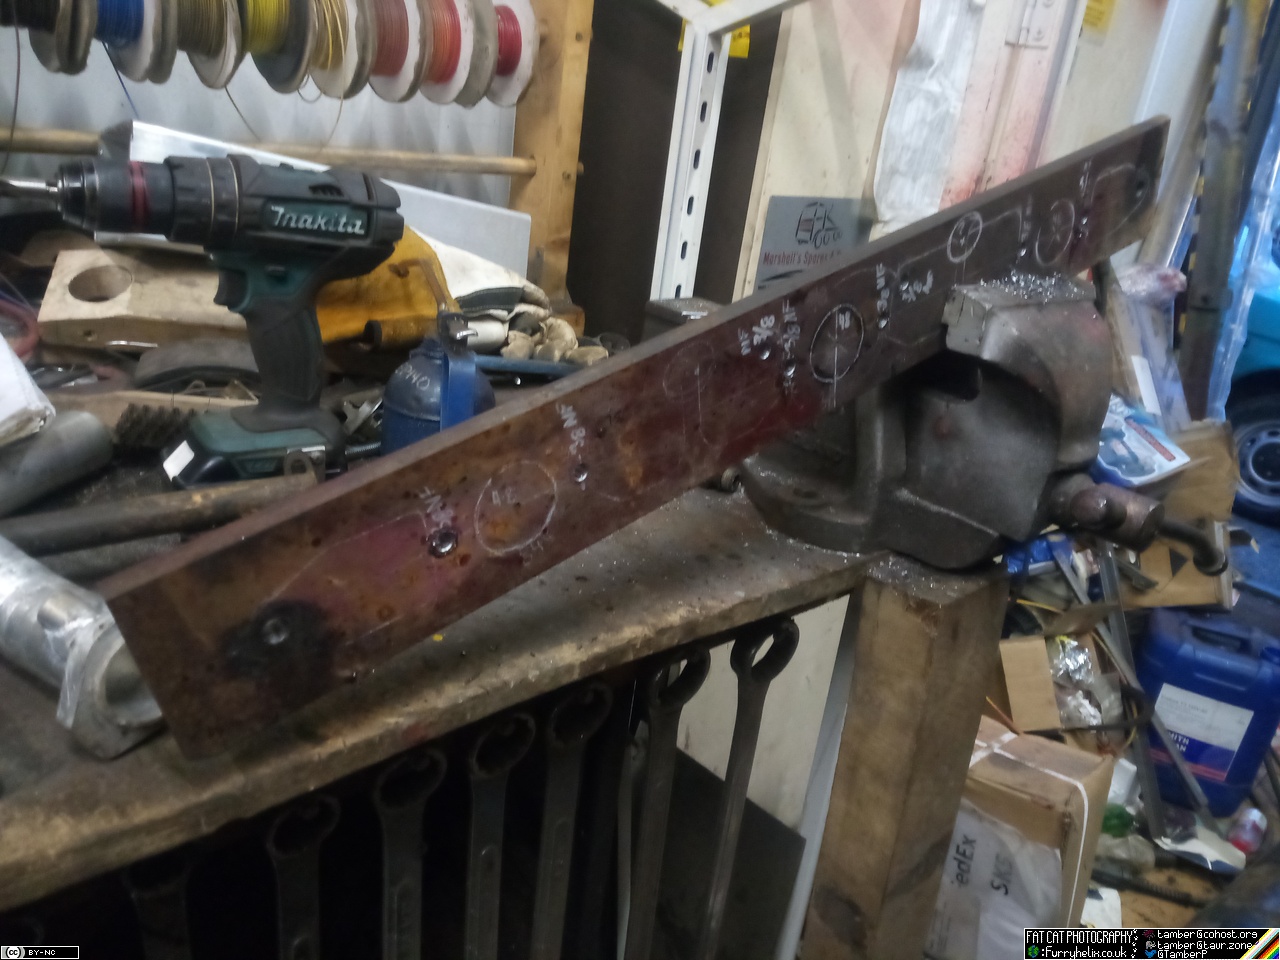 With that on hold, next I want to test-fit that intake runner I've been making, and see how much clearance I have to the engine cover. From measuring, I was pretty sure I'd have a little over 2 inches, but there's nothing quite like fitting it and measuring. 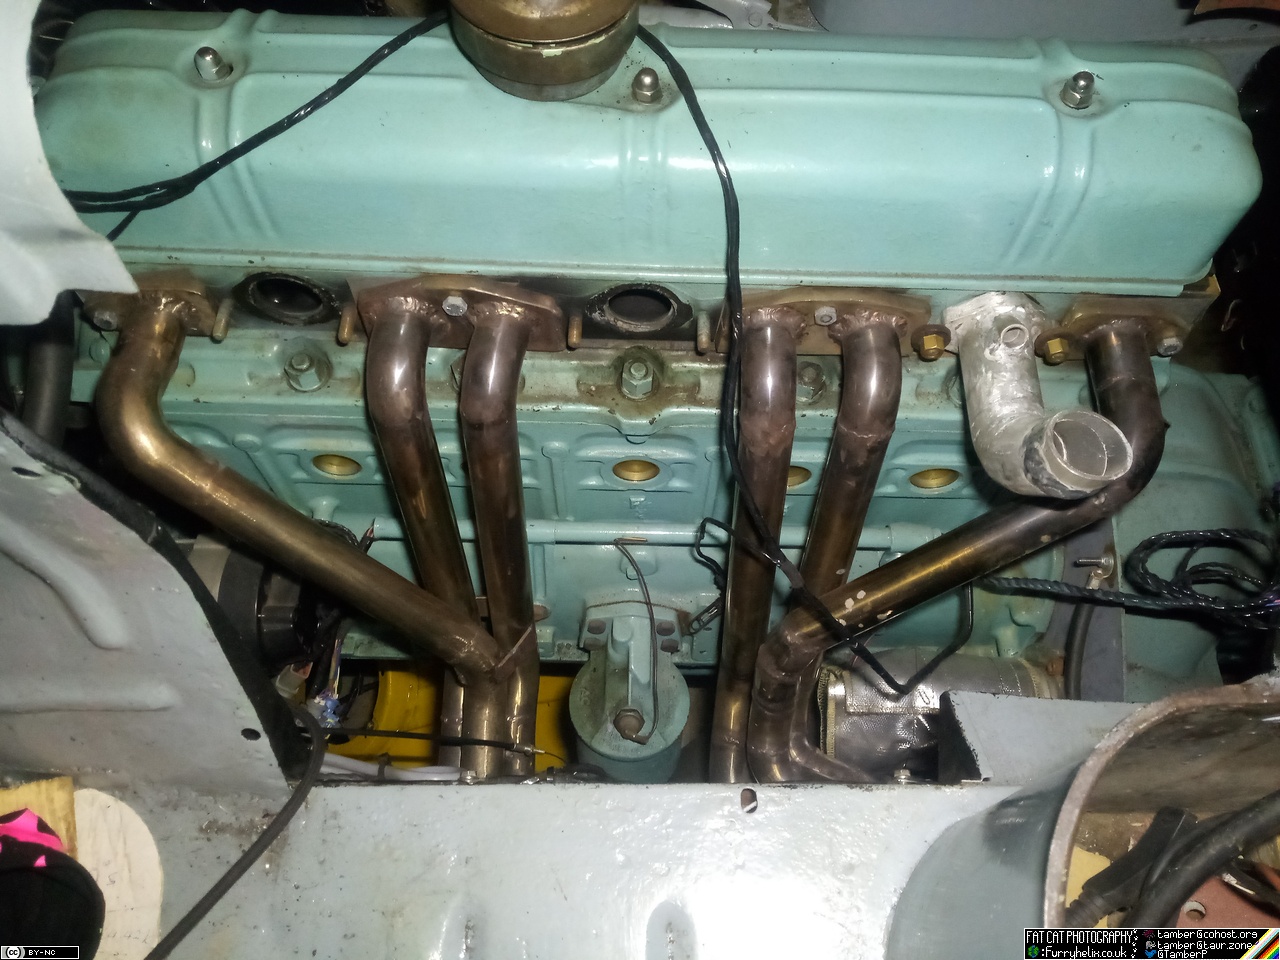 (This picture also shows that the engine is settling into its home quite nicely. Plenty of grot helping tone down that fresh paint. You can also see that the exhaust for #3 is blowing, and has destroyed its gasket; something warped during welding, and if I don't tighten them down in the correct sequence it won't seal. I'm hoping to fix that, hence why adding the exhaust mounting holes to the fixture  ) Next step is to close the engine cover, and hold up a calibrated stick behind the intake runner, to show how much clearance there is to the lid. 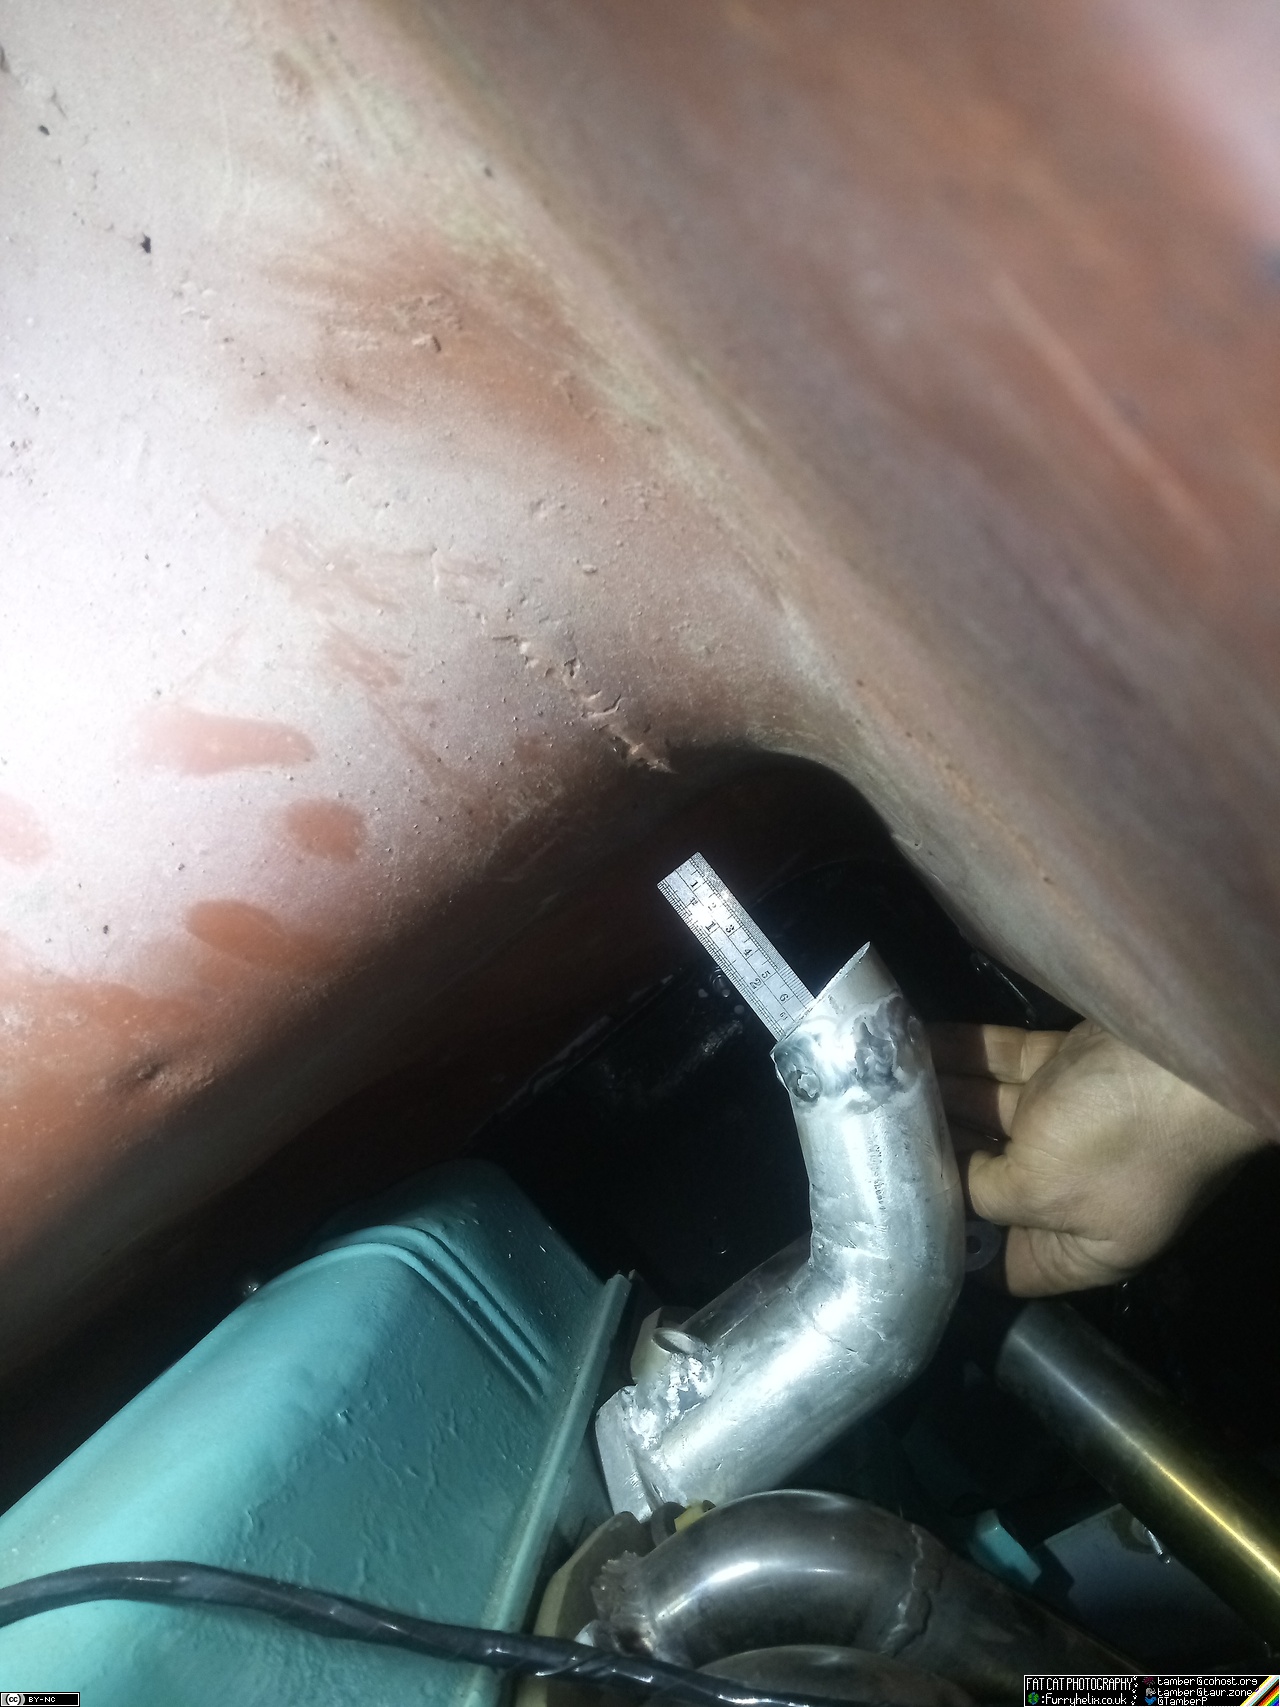 It's about 2-3/4" or so, at the tightest point. I want to leave at least 1/2" to the underside of the cover and any insulation I end up adding, so it is going to be tight regardless. Going to do some more pondering and doodling... (Do I make a wedge shaped plenum right on top of that vertical section of the runner? Do I roll the runner hard over another 90 degrees and build the plenum over the top of the injectors? I was pondering over intake trumpets, but I don't think there'd be enough room for that, and I don't think they'd add any real benefit anyway; so long as the transition is smooth... This sure is a neat corner I've painted myself into!) |
| |
-< Welder. Allegedly a mechanic. Bodger of Things >-
* 1958? Bedford RL - Progress: Glacial.
* 1994 Skoda Favorit - It's baaaaaaaack!
* 2018 Herald Classic - Off the road, indefinitely.
|
|
|
|
Tamber
Part of things
Shattered. Held together by spite and tape.
Posts: 306
|
|
Apr 25, 2024 23:06:09 GMT
|
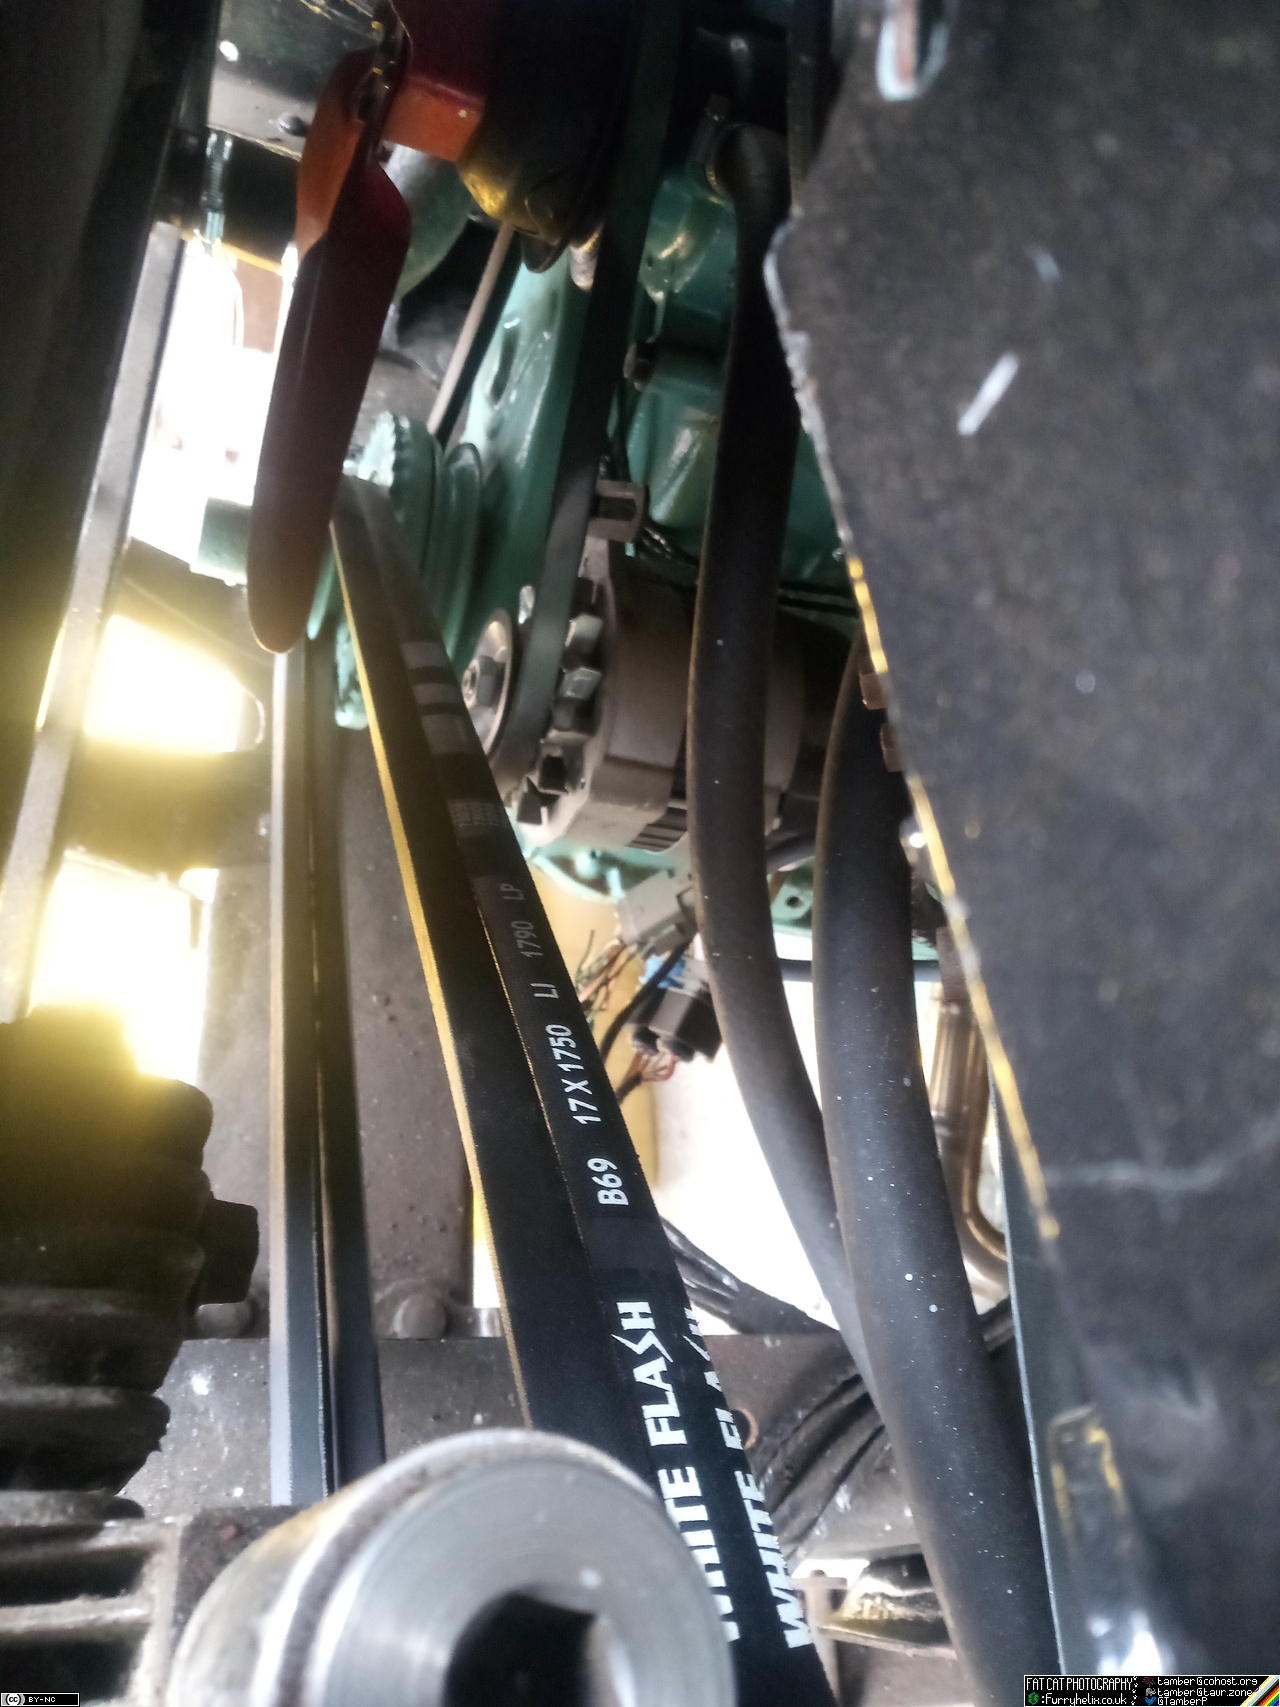
Man, I seem to have been crazy busy for having not gotten a lot done! The car forced my hand on the exhaust front, when I hit a speedbump at a funny angle dodging some clown who came to a complete stop on the far side of a blind bend on a B-road, and the exhaust just ... disintegrated. As amusing as it is for a small central-european economy car from the 90s to sound like it's just driven out of a tractor factory in Stalingrad and straight into action, the novelty wears off very quickly. So I spent five hours welding up just barely enough of an exhaust that I can use the car. It's basically just a 2" straight-pipe with a 45 degree turn-down pointing at the floor on the passenger side; but I sacrificed a complete roll of steel wool from my little selection bag and stuffed that into said turn-down, with a little piece of bar tacked across the end to hold it in place, and it's surprisingly civilised unless I really lean on the throttle. I managed to put a burn-mark on my tongue, because I was getting so sleep deprived that I went to hold the filler rod in my mouth while I adjusted the pipe in the vice... and bit down on the wrong end of said filler rod. I do not do well when I start running low on sleep.
On the truck front, I've ordered belts for the compressor (I hope it's the right size this time, I really do.), and new taps so I can finish that weld fixture! I've also fitted pipe to the extended fuel pump pickup thing. It's a slightly thinner wall, more flexible version of the nylon pipe I'm using for air on the truck; since I had the remains of a big roll of it from redoing the fuel lines on my car several years back. Need to put some little clamps on it, but I can't remember where I left them.  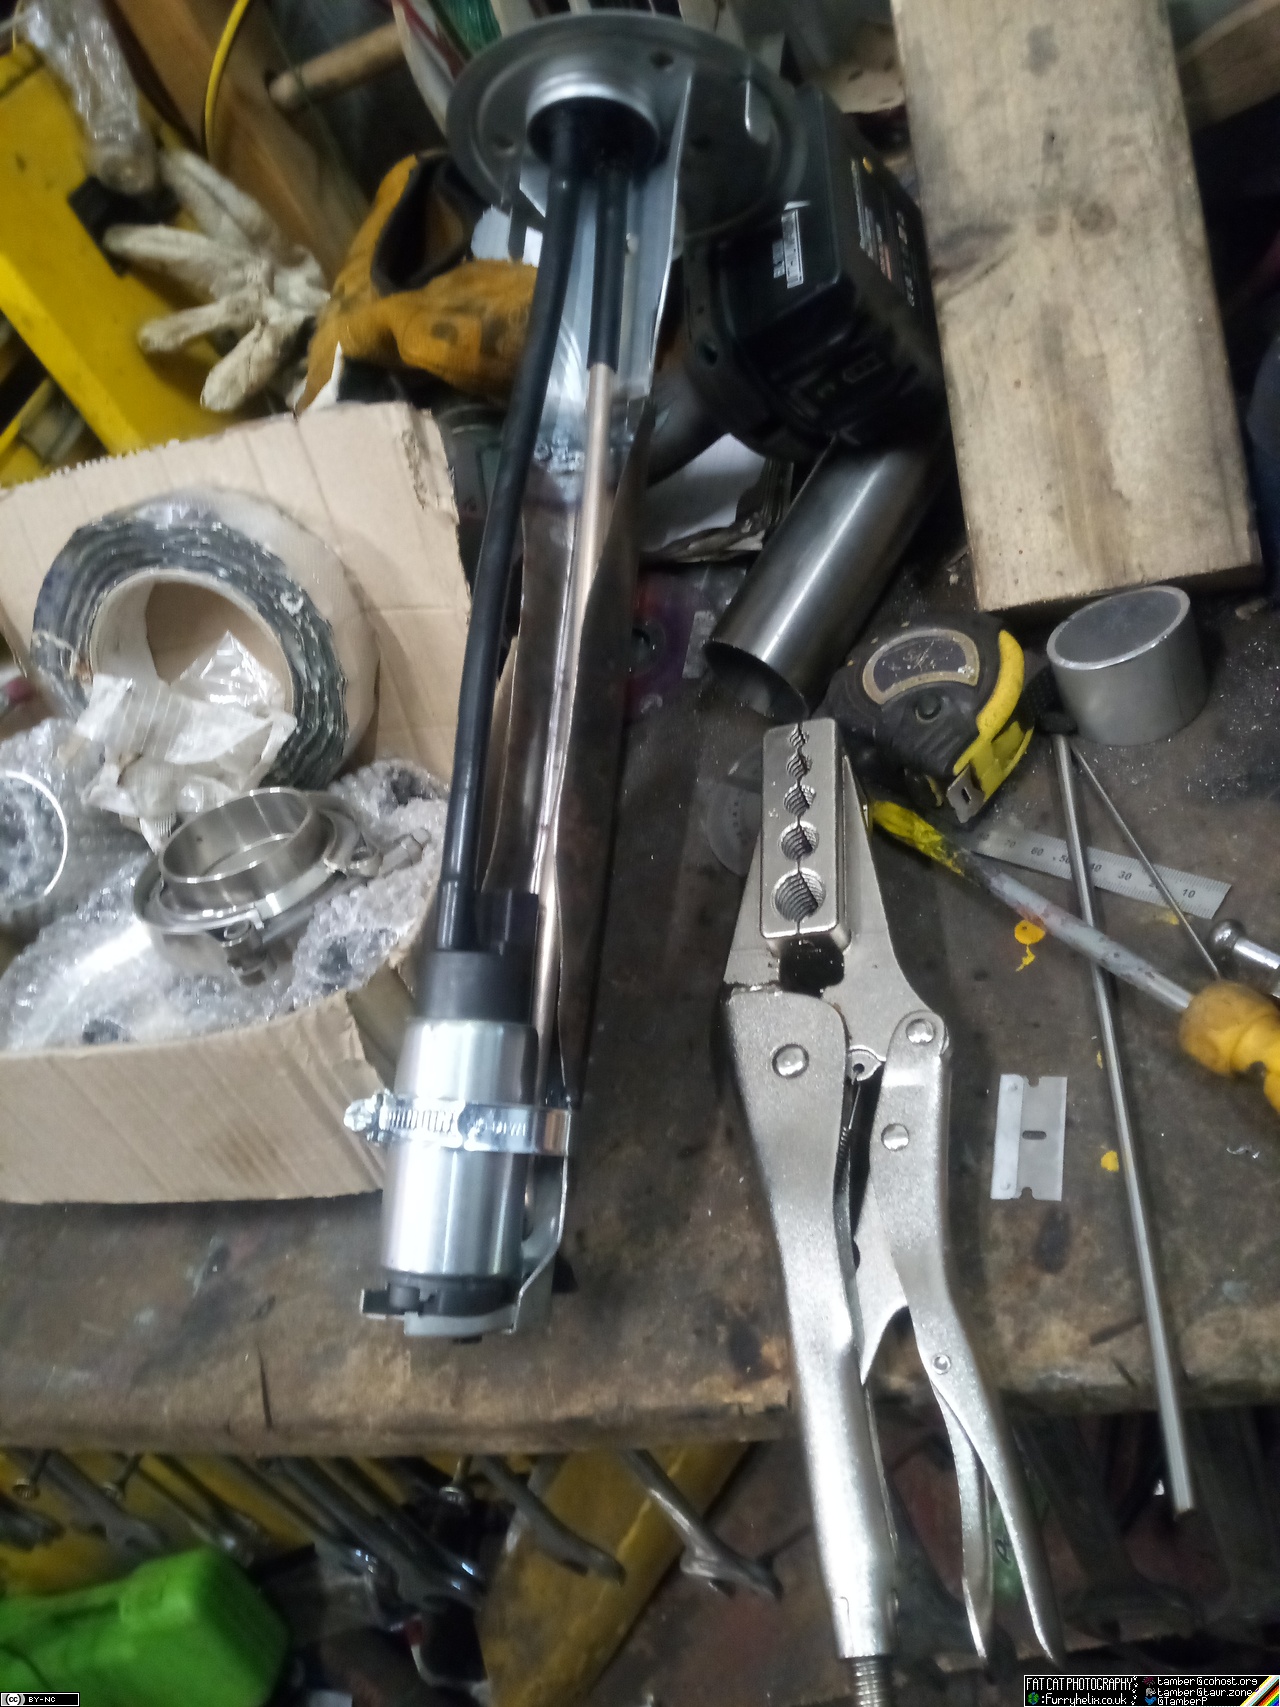 (Those air-pipe pliers are a godsend for pushing nylon tubing onto hose-barbs and the like, without kinking it!) Now I just need to come up with a mounting flange to stick it to the tank (and space it up a little bit, I think) and I'll be golden! Oh, and noodling over intake manifold design continues, too... |
| |
-< Welder. Allegedly a mechanic. Bodger of Things >-
* 1958? Bedford RL - Progress: Glacial.
* 1994 Skoda Favorit - It's baaaaaaaack!
* 2018 Herald Classic - Off the road, indefinitely.
|
|
glenanderson
Club Retro Rides Member
Posts: 4,107
Club RR Member Number: 64
|
|
|
|
|
Runs off to Google air pipe pliers…
…I’m not a tool addict, honestly. 🤣
|
| |
My worst worry about dying is my wife selling my stuff for what I told her it cost...
|
|
|
|
|
|
|
Runs off to Google air pipe pliers… …I’m not a tool addict, honestly. 🤣 Haha! I saw the photo and immediately thought "Oh do I need a pair of those!" Peas in a pod... |
| |
|
|
Tamber
Part of things
Shattered. Held together by spite and tape.
Posts: 306
|
|
Apr 27, 2024 21:03:06 GMT
|
Laser Tools 7030, if it helps. I do quite a bit of nylon air and fuel pipe in the day-job, so they're a real timesaver.
 Well, that's that sorted. Still need to get some longer bolts, as well as find (or re-make) the tensioner bolt thing. I'm also pretty sure I have the bolts for the compressor's intake manifold, so I should find those and actually fit that bit properly too. While I'm still noodling over how I want the manifold to lay out, I can still make up the other two runners to the same finishing point as the first. So, step one, cut some material in just the right way...  Enweldinate 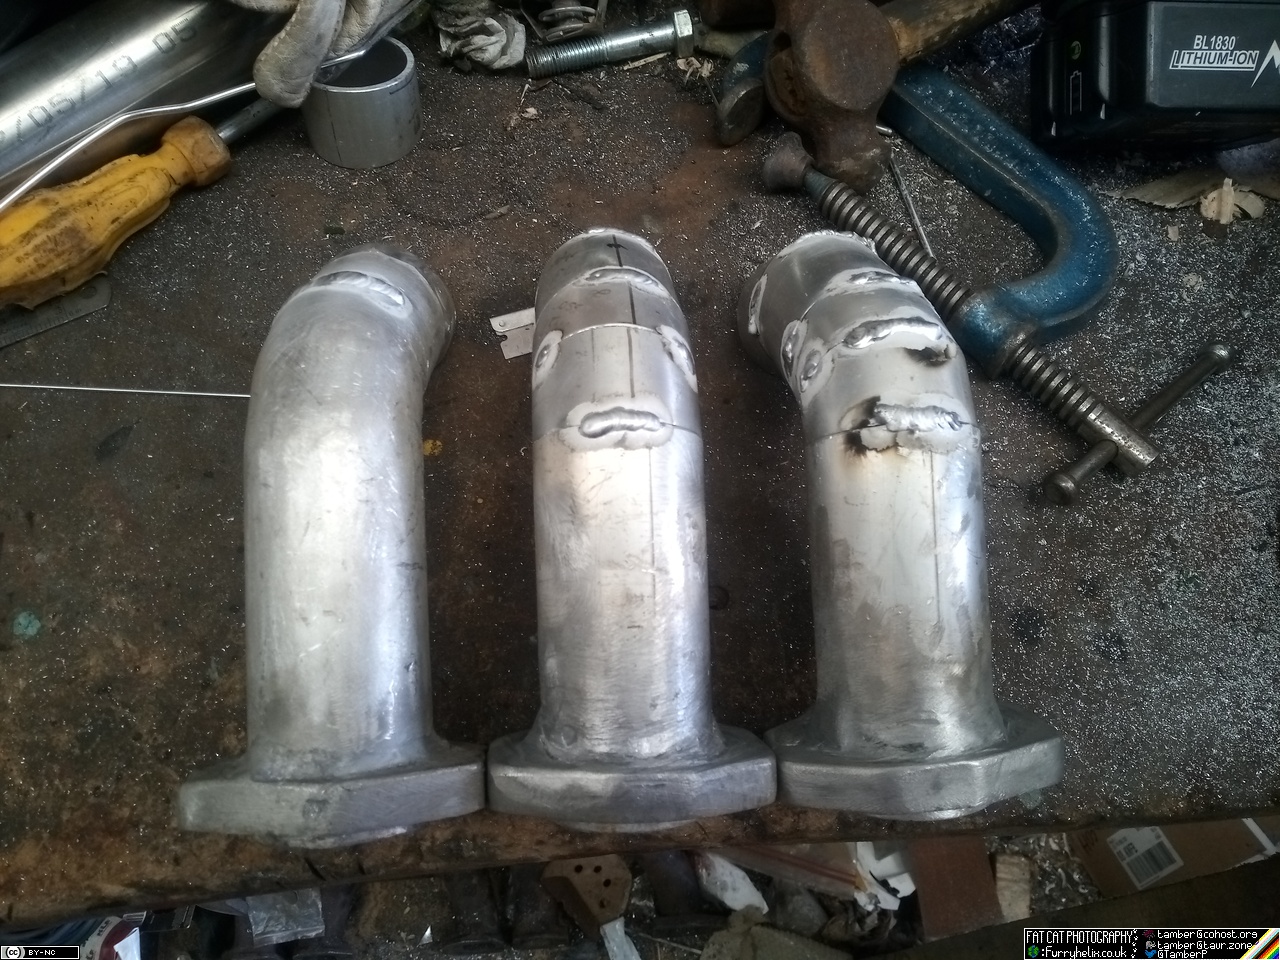 And admire  Optional step: Quietly wonder where the hell that missing manifold nut went, because it doesn't appear to have hit the floor. (Or if it has, it's zoomed off into oblivion.) I would like to also get the mountings for the injector hold-downs done, but I have managed to kill my drill (To be fair, it was already poorly, but now I've really finished it off. Smoke, flames, and flying chunks from the vents... It went out in spectacular fashion!) So those bits are a bit stuck until I can grab my other drill from work (and buy a new one at some point.) Also got started on the other mounting bracket for the back end of the main compressor feed pipe, but that needs a hole drilling in it, so that's on pause for now as well. Still plenty of other bits n pieces to fabricate, things to paint, etc. Frankly, the list seems neverending! |
| |
-< Welder. Allegedly a mechanic. Bodger of Things >-
* 1958? Bedford RL - Progress: Glacial.
* 1994 Skoda Favorit - It's baaaaaaaack!
* 2018 Herald Classic - Off the road, indefinitely.
|
|
Tamber
Part of things
Shattered. Held together by spite and tape.
Posts: 306
|
|
Apr 29, 2024 22:11:40 GMT
|
>brushie brushie brushie<  That's coming along quite nicely. I also gave the nearside front wing a cleaning and another coat, too, since I had the paint out. Really should finish repairing that cheek panel, so that I can refit this one, at some point. 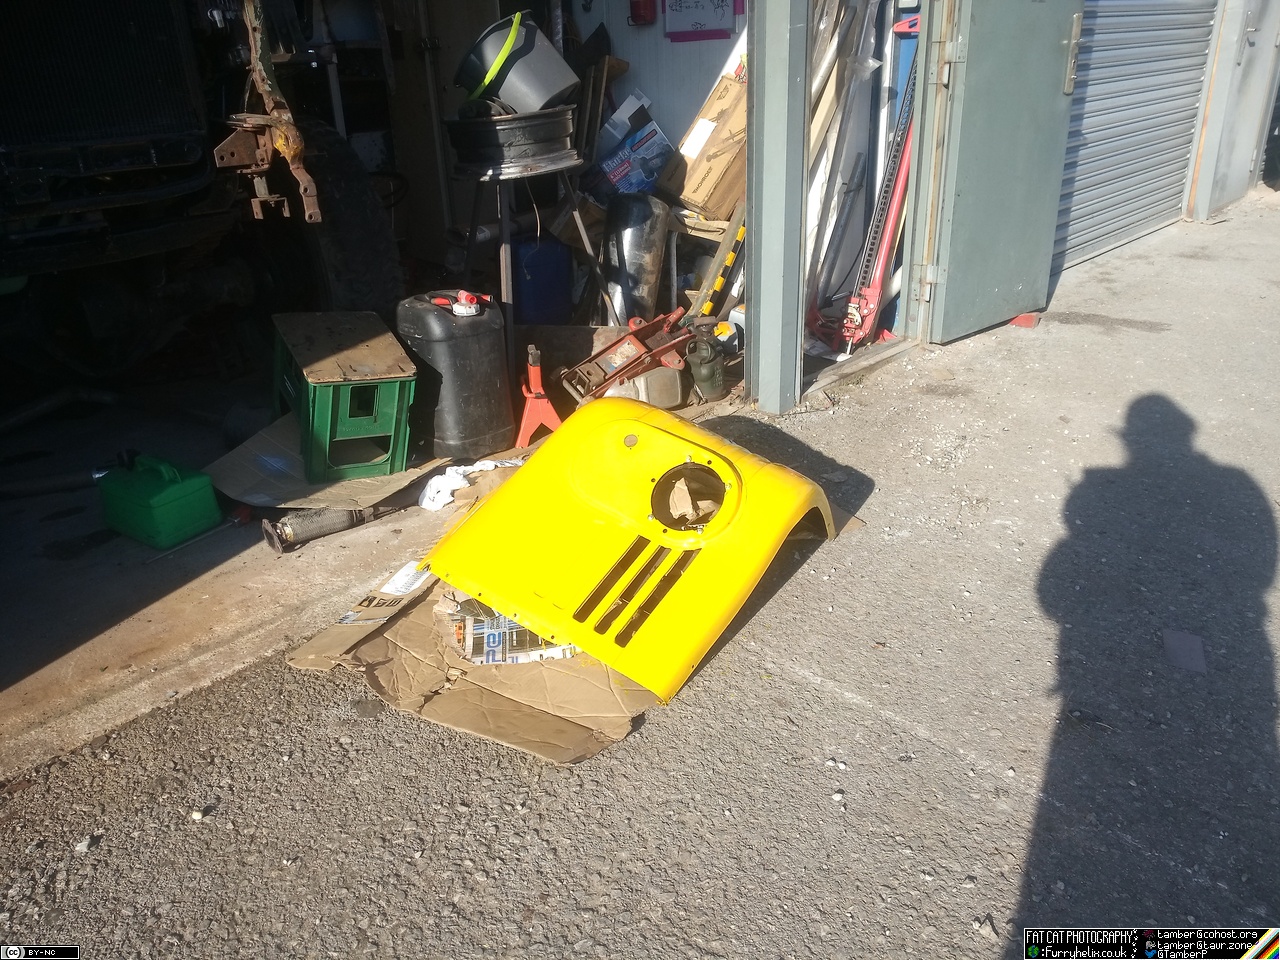 Next on the list, since I was stalled without a drill, was making a bracket to mount my air manifolds. Step one is finding a suitable location on the chassis to mount it; right here behind the brake booster, with these two convenient holes in the chassis, seems a fantastic place.  Forgot to get a picture of the bracket all welded up, so instead have a moment of me not thinking ahead far enough. I needed to hold both halves of this clevis in place while I welded it up, and they needed to be spaced a certain distance apart, so I wound a nut onto the bolt to act as a spacer. 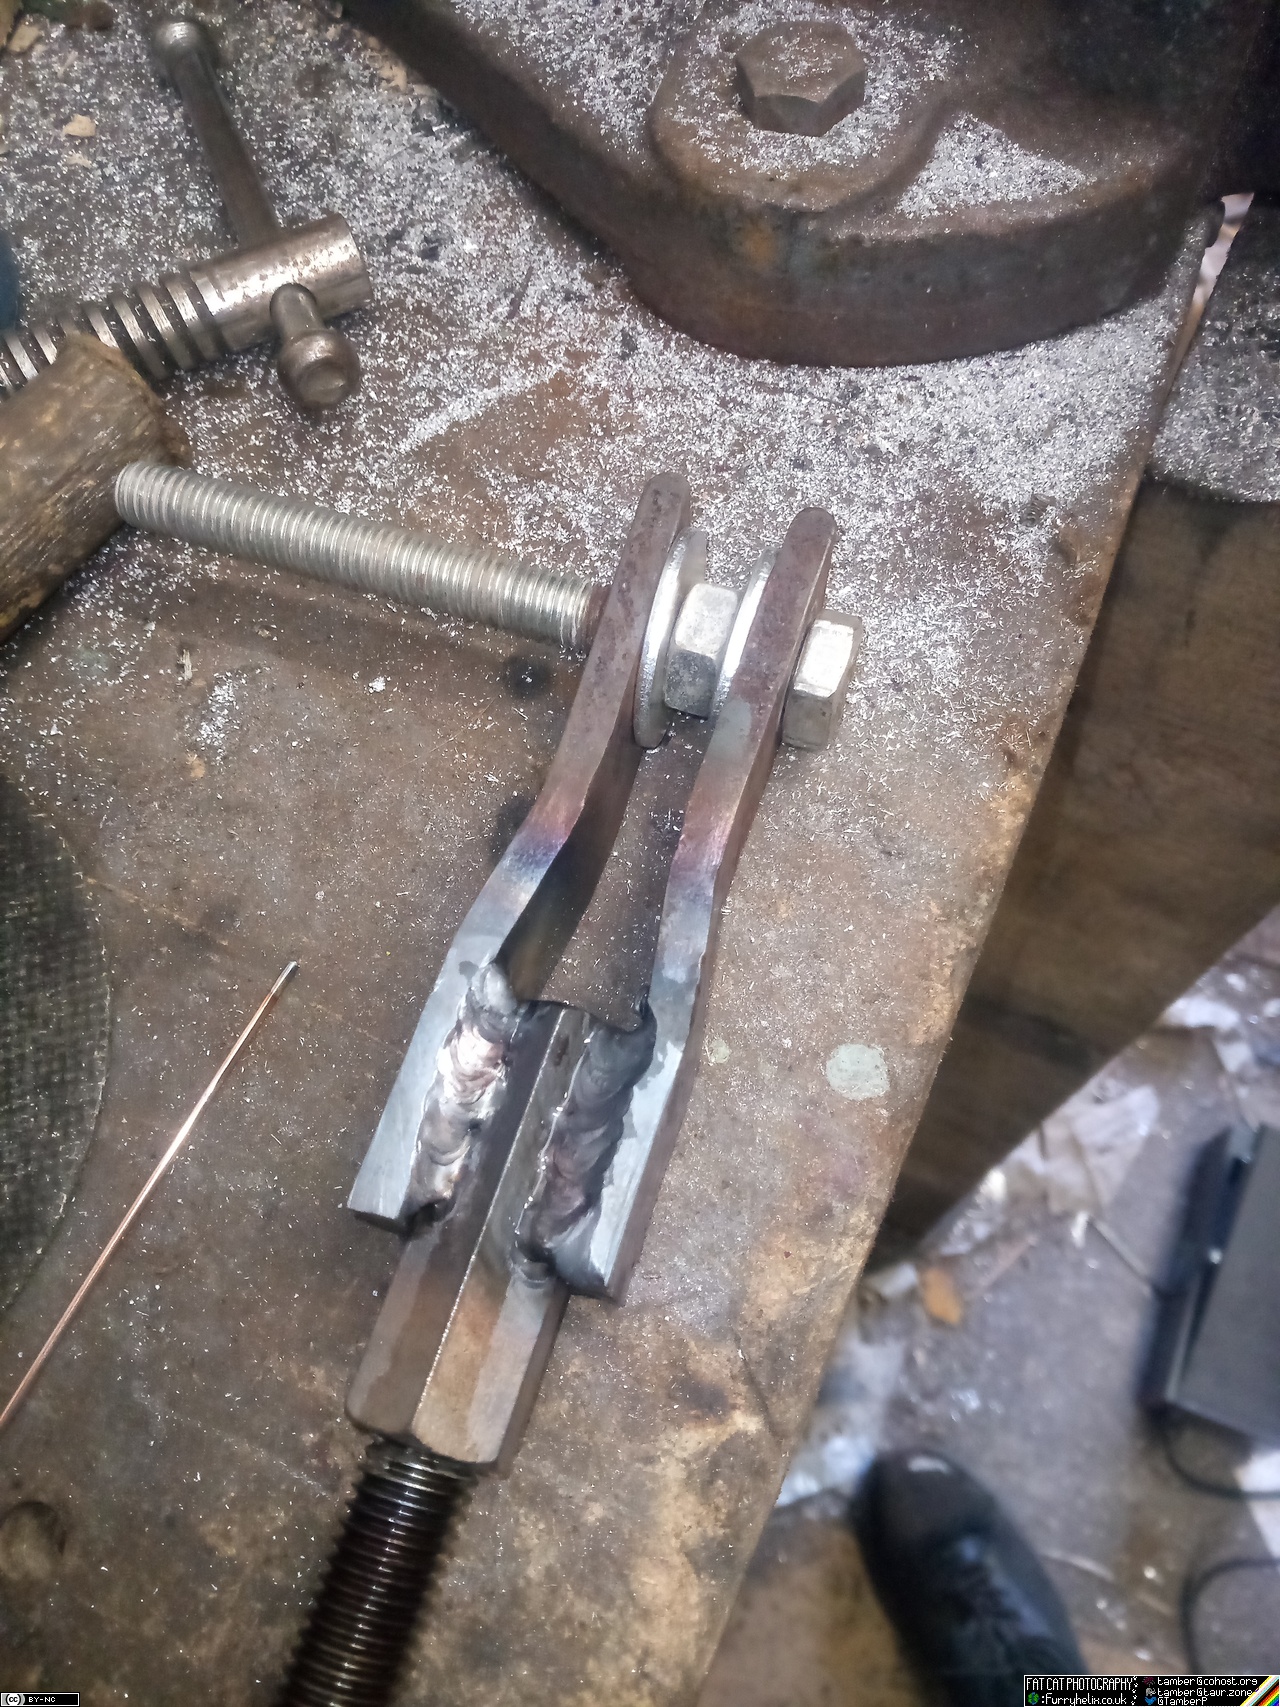 (Thankfully, it did come out easily enough, but there was a moment of intense concern when I realised what I'd done.) Rolling on forward to today, I brought my drill home from work, and put the two required holes in the air manifold bracket. At which point, I figured it'd be rude not to start connecting pipes. 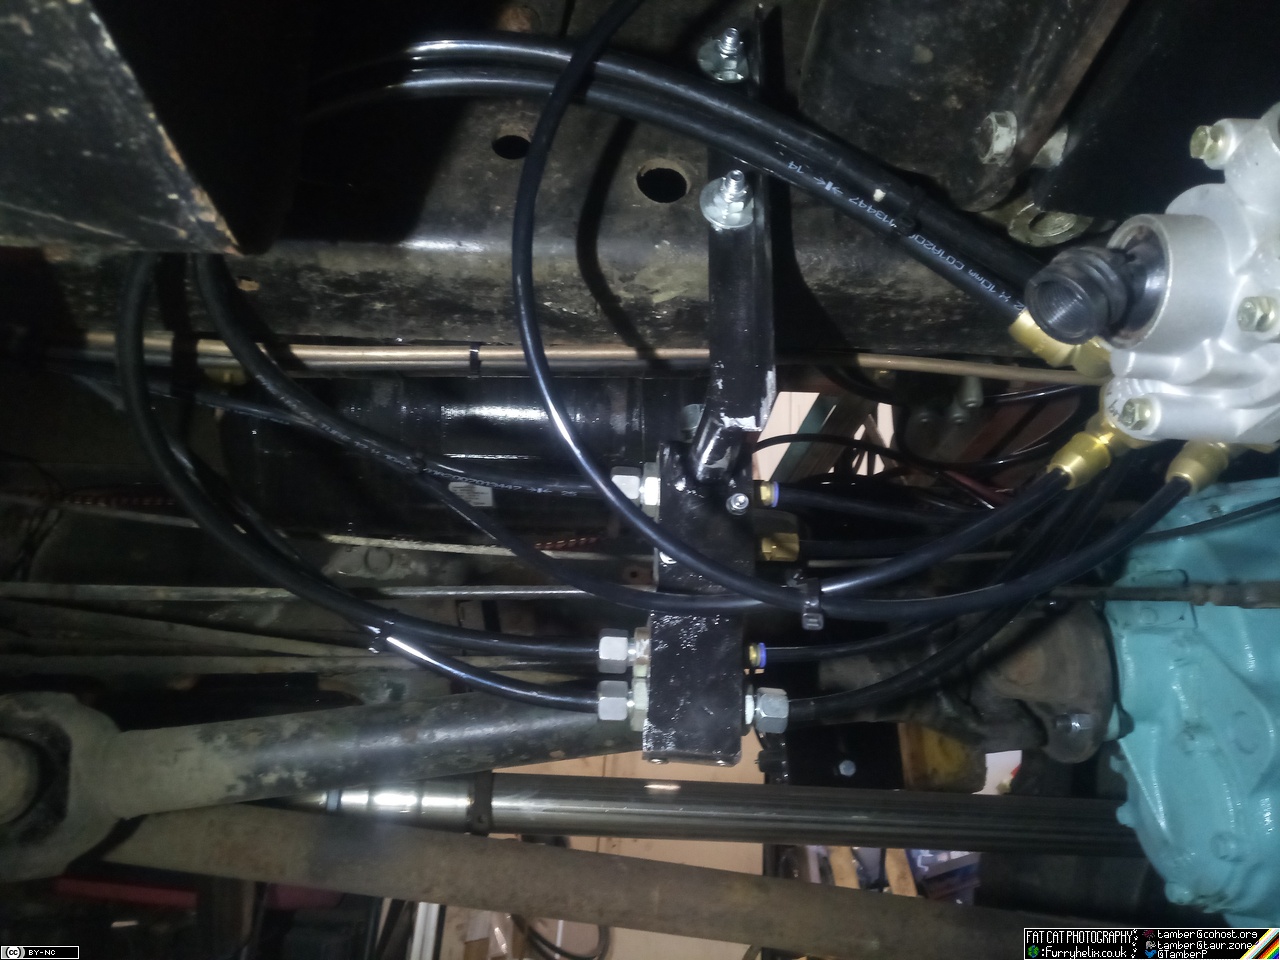  The open threaded hole in the upper block is an additional circuit 1 air port for auxiliary uses (like the winch drive clutch, and so forth), and whatnot. Being extremely pedantic about it, technically that's not optimal, because a leak would draw down the air pressure available for the brake servo; but that's no worse than how the truck was originally built, and I can always move it to circuit 3 at a later point if I decide it's worth worrying about. (Circuit 3 is currently earmarked for an air-tool/tyre-inflator supply.) Anywho, I also went and drilled one of the three big holes in the weld fixture, which took some time. It does also occur to me that I don't need those mounting holes to be UNF, and I don't have any free 3/8NF bolts anyway; so I could just tap them UNC and be done with it. I may need to move at least one of them over, though, depending on how the flange sits on the inlet manifold; but I'll have to drill the other two inlet holes first before I decide that. 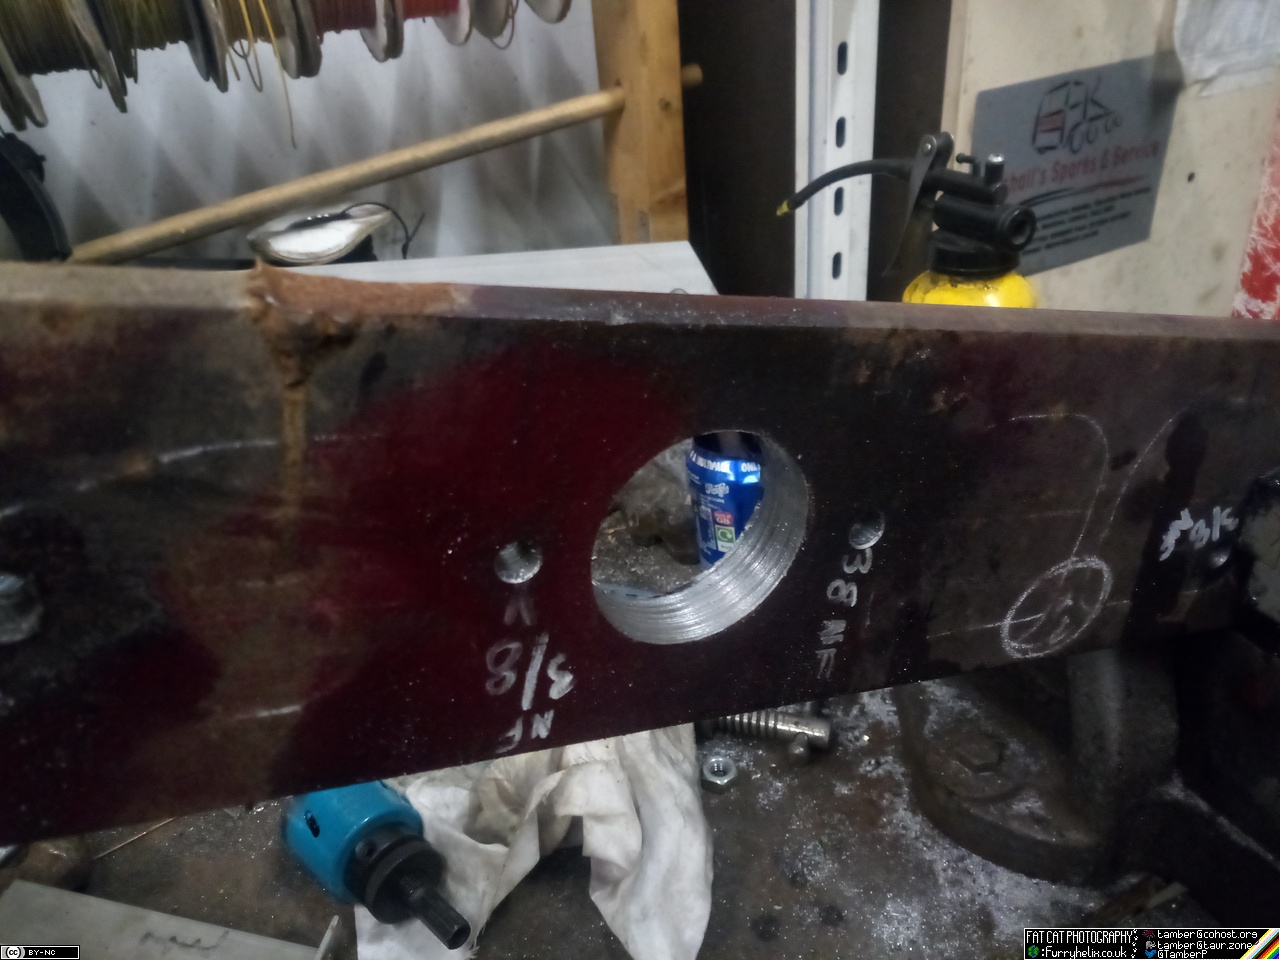 Oh, and I did find that missing manifold nut. It was hiding under the back of the offside front wheel. |
| |
-< Welder. Allegedly a mechanic. Bodger of Things >-
* 1958? Bedford RL - Progress: Glacial.
* 1994 Skoda Favorit - It's baaaaaaaack!
* 2018 Herald Classic - Off the road, indefinitely.
|
|


 )
)


