This thread has become a little quiet lately, and there were reasons. The basic reasons were as follows:
-Assumptions - Don't assume, and I generally don't.
-Parts roadblocks
-Mechanical setbacks
-Double checking things ; Sure, I'm not rebuilding a 2CV but it's had a few things done to the engine.
So, let's digress.
It's a bit of a miracle the old Gammatronix ignition system worked. Not only was the bare wire for earth pushed into the horn mounting, the powered wires were simply pushed onto the coil connections, with the factory connections for other wires holding it in place. It was a bit of a dog's breakfast. I myself thought dissasembly on the front end kept knocking out that earth wire, which took almost no force. After all, it was just pushed in. But with the 123 Ignition box in place, that would also be a distant memory .
.
I would also clean up the front of the engine bay. The crankcase was full of caked on oil and dirty oil in many places. Thankfully, it would become a thing of the past with some carb cleaner, in addition to me cleaning out the oil cooler. This was very grimy! But the carb cleaner and an airline cleaned this in no time.
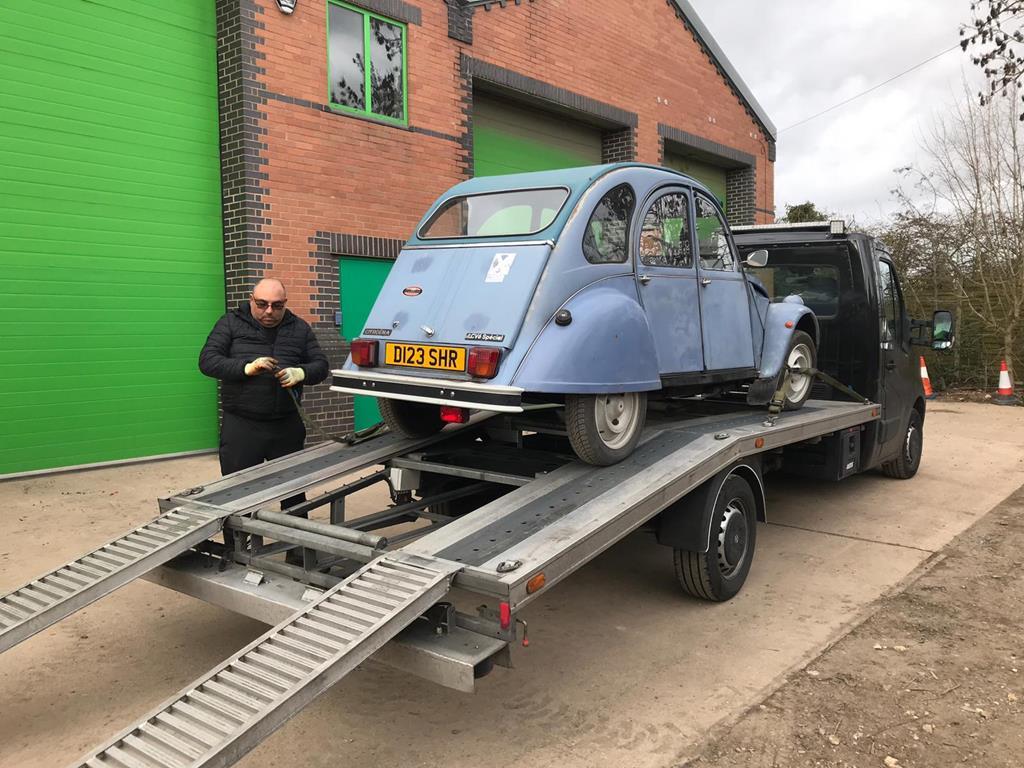
After asking around, Peter Sparrow came up trumps for having a Cupro-Nickel pipe. Talk about luck! With that in mind, I set off to Sunny Hereford yesterday in the trusty W124 to pick up the goods. For those who haven't met Pete, he is a real genuine bloke, who does know 2CVs inside out. I thought he was all how 2CVs should have BMW engines! I did not realise he also did 720cc conversions into 2CVs, and I got some feedback about the jetting for my 652cc barrel conversion, despite me having the Burton jets installed. It was all very great, and of course I got my pipes off him!
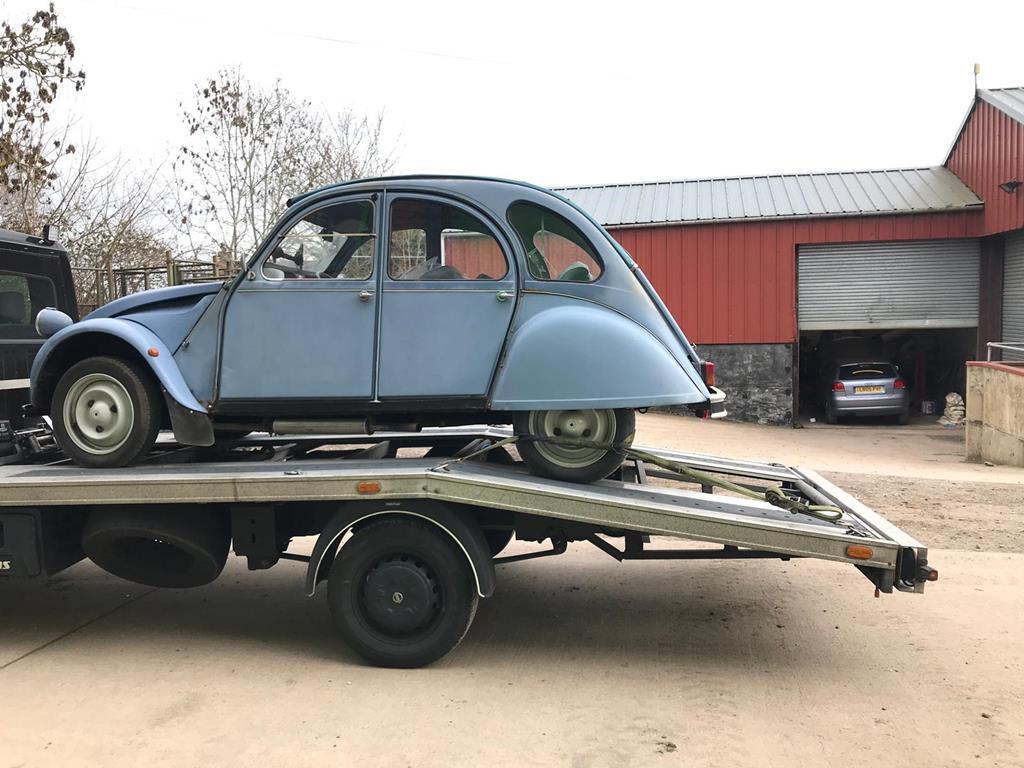
After all this, I had to get back to the unit. I couldn't wait to get back, now I had the new pipe! However, I struggled with getting a timing rod for my 2CV. I know you can use drill bits etc., but I am also aware that you can bend/damage the dipstick tube as well by trying to force it past it, in addition to also potentially getting the bit stuck in due to it being short. I did have timing marks tipped onto the engine, but was I right to trust them? I'd find out. So first of all, I bought a length of rod. Oi, hush it up in the back!
 2CV January Sagas by Charlieboy, on Flickr
Yup, it really is very long! However, I'd barely need 11cm's worth to get me what I needed. But first, I'd need a diagram, a pattern to work to.
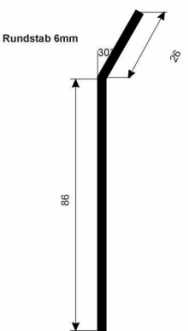
With my hot rolled 6mm rod, I put it into the vice to bend it into shape.
 2CV January Sagas by Charlieboy, on Flickr
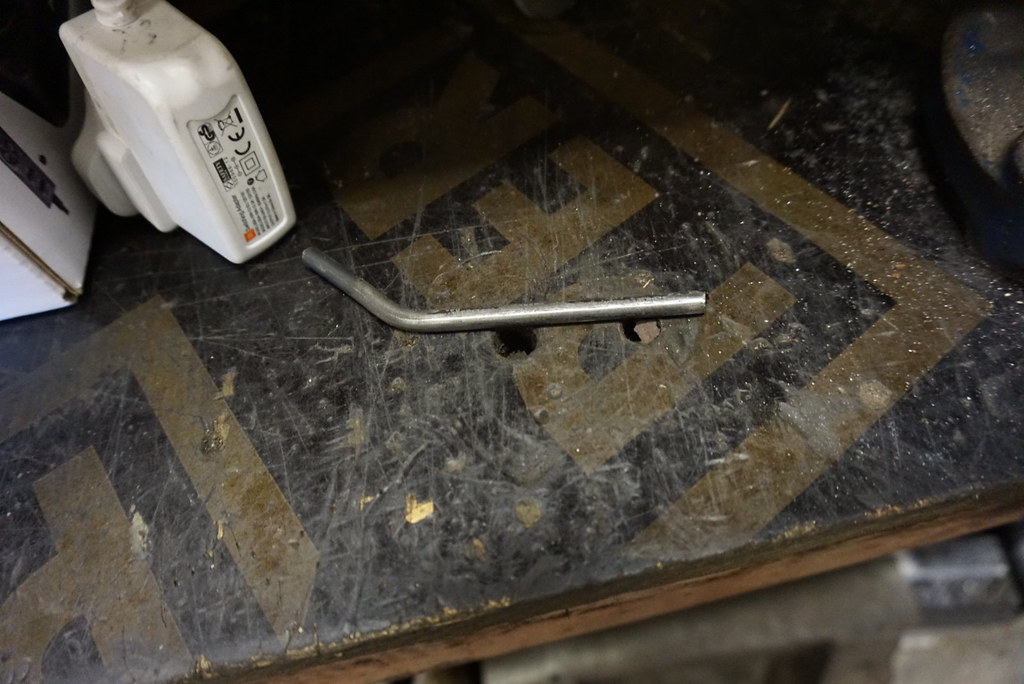
By the end of it, I ended up with this. I also sanded it down to make it look nicer but to also make it slightly easier to fit:
 2CV January Sagas by Charlieboy, on Flickr
With that done, I went to put into position. Despite being near as damnit, 6mm rod, it was tricky to fit! But it was exact and it fitted like a glove. I was also right not to trust the tippex mark. For some reason, the tippex mark aligned with a faint tippex mark on the engine casing, which you can barely see in the picture. Strange as it doesn't really line up as you can see, but the bolt hole for the starter motor lines up fine. With that in mind, I reset the 123 dizzy's ignition light. I didn't actually set it up miles off the mark, but it didn't hurt to get it spot on.
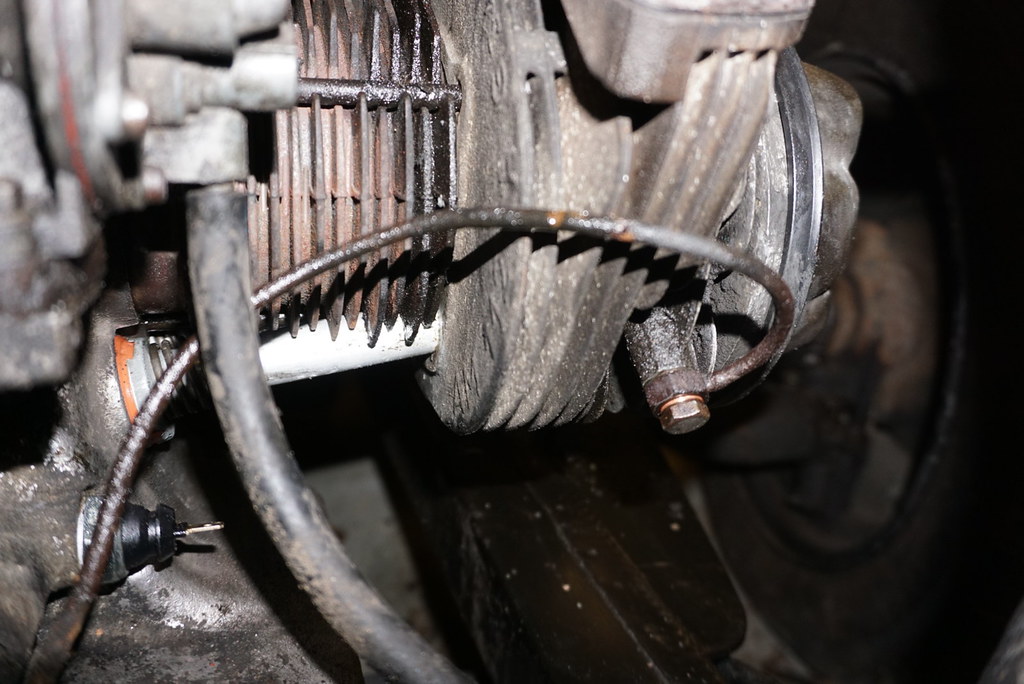
So, that was the timing down. At the same time, I took out the Denso Resistored spark plugs and fitted some new NGKs into the mix of the BP6HS variety. So, it was finally time to do the oil pipes. In theory, this should have been a simple job. But it was not to be. But let's look at why I was changing it. In short, it was shot. It was split, cracking and pretty corroded to boot. It was also leaking oil out at a crazy rate!
 2CV January Sagas by Charlieboy, on Flickr
 2CV January Sagas by Charlieboy, on Flickr
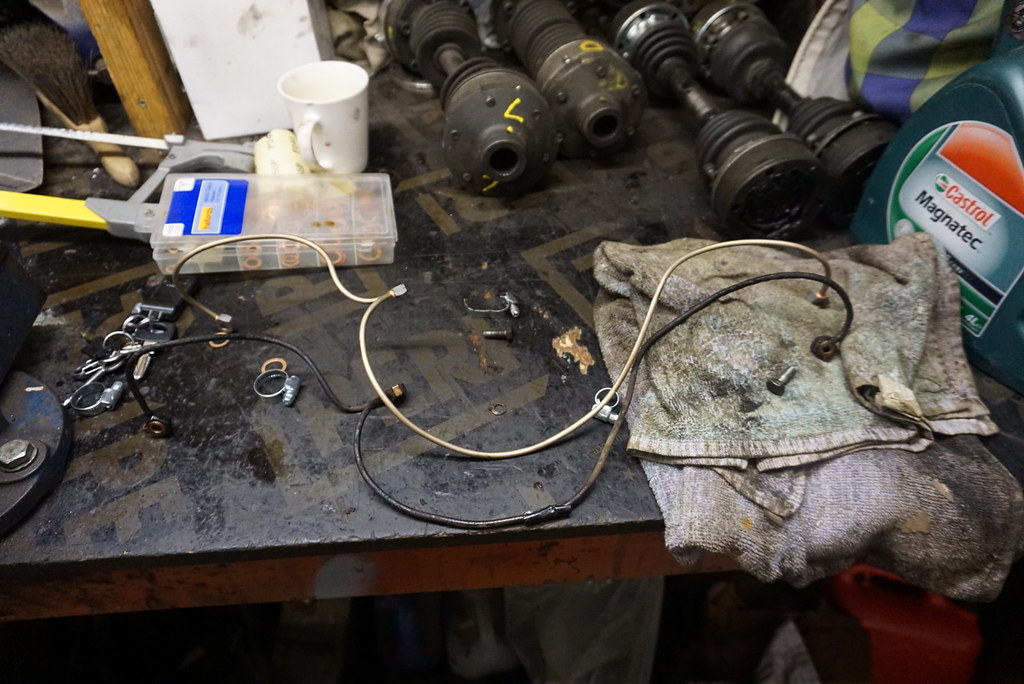
With that in mind, it was time to put the two side by side:
 2CV January Sagas by Charlieboy, on Flickr
Erm, yeah, I'll fit the new one.
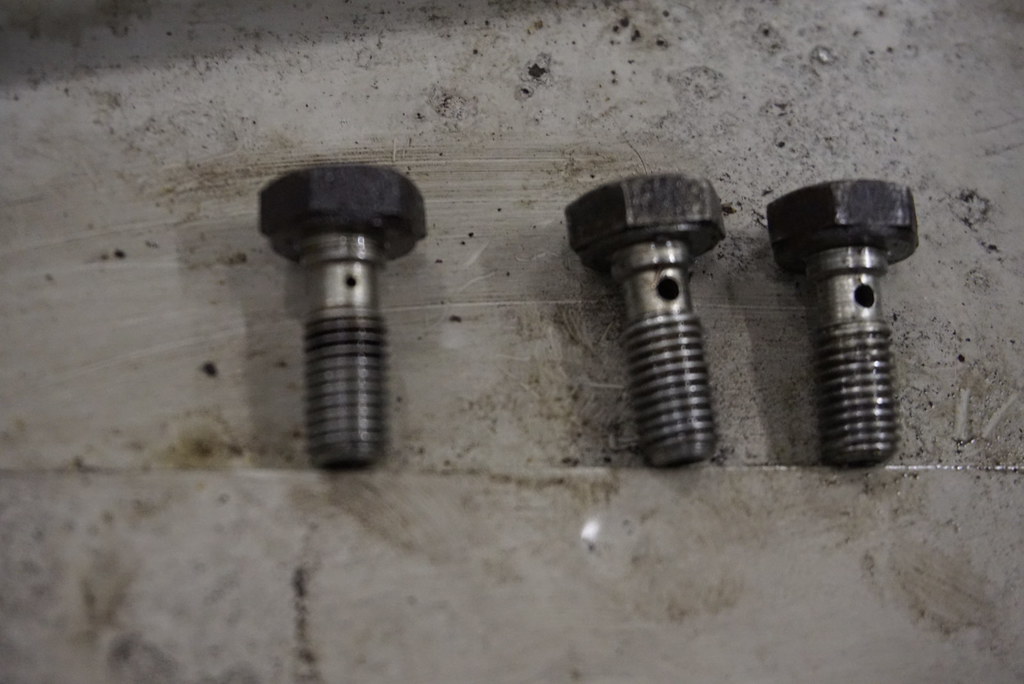
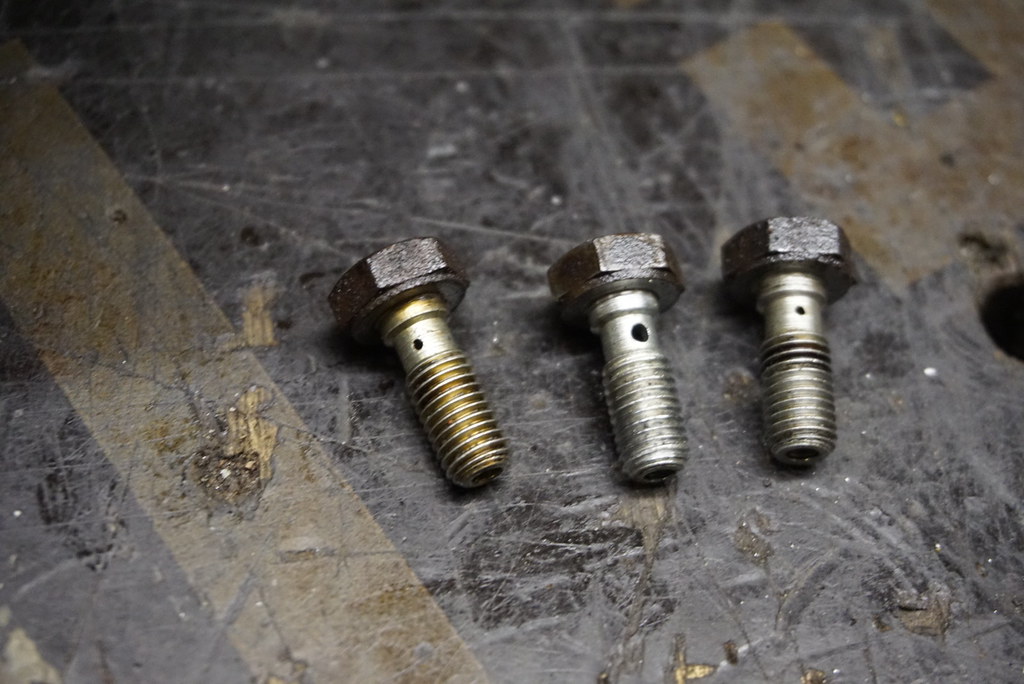
However, this is where things went really wrong! Firstly, as I lined up the banjo bolts, I couldn't help but notice that two the bolts were the same and one was different. They also came out of different locations.
 2CV January Sagas by Charlieboy, on Flickr
-Banjo bolt with the wide holes were in Cylinder head one, and the crankcase
-The smaller holed bolt came out of the offside cylinder head.
That just didn't make any sense to me! I put them in before into their respective heads and not checking the hole diameters, because of course, the car had been enthusiast owned and maintained by a specialist. However, I'm glad I did catch it then. So what did I do? I did what I also do. Check the internet. After checking Der Francoze, ECAs and Burton's website, amongst others, it became clear that I had one large holed bolt too many. So I would need a smaller one. Checking the remains of my spare semi-dissassembled engine also confirmed this. So, with this in mind, I reused a spare smaller holed spot from the spare engine, thus giving me a complete set of correct bolts. Great! I'll get it all back together!
 2CV January Sagas by Charlieboy, on Flickr
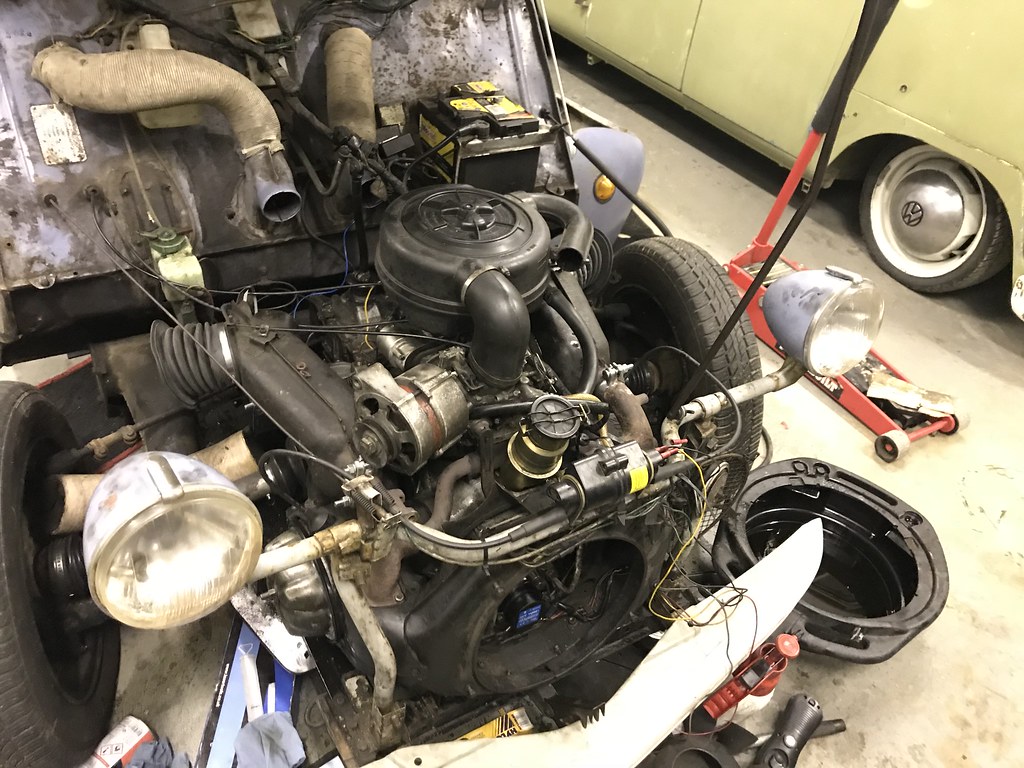
This is where things really started to go wrong. The bolts going into the heads went in fine. Not a problem. I knew they barely need hand tightening. 6Nm I am told, so really, not tight at all. The crankcase banjo? It was stripped. The threads had completely gone from where the Banjo would be. I know when I removed it, some shavings came out which didn't fill me with confidence. Was it me removing it, previous bodgery, or just bad luck.
Either way, I was pretty annoyed. Many thoughts went through my head as did many expletives. With that in mind, I packed up the tools, and headed home, The engine despite being more oil tight everywhere else, was haemorgening oil from the centre banjo feed on startup! This really was a case of going one step forwards, and two steps back.
 2CV January Sagas by Charlieboy, on Flickr
What did someone say about if it ain't broken? Ah yes, don't fix it. Maybe I should have lived with those oil leaks. After all, I ended up being in a situation with no clear outcome.
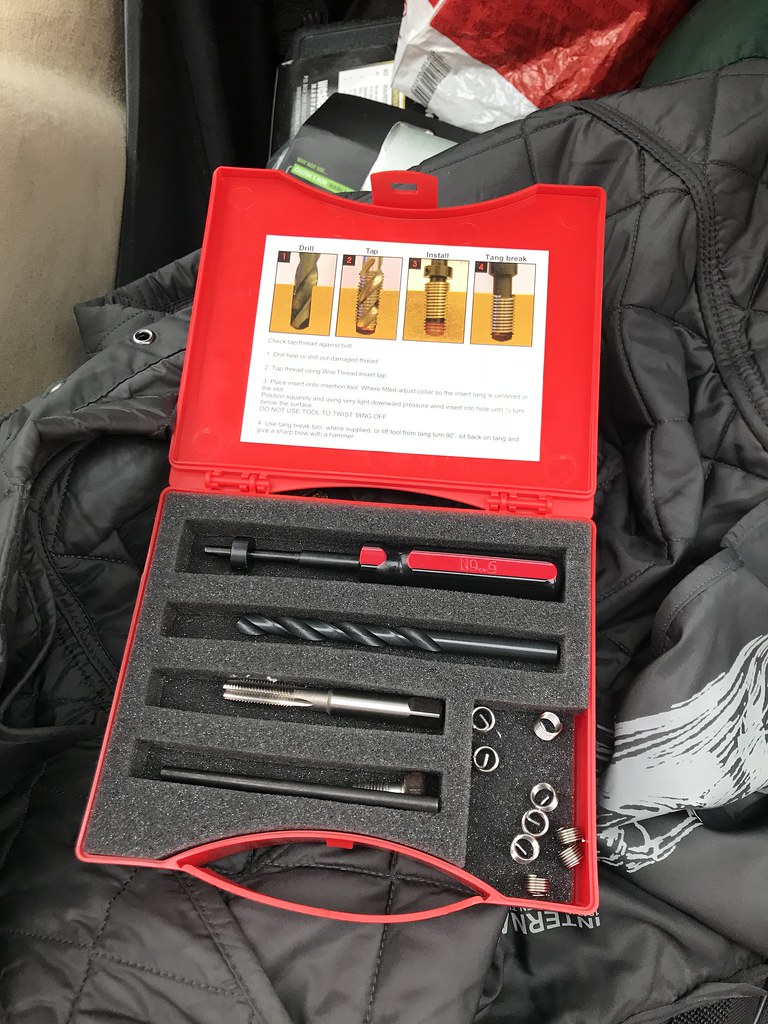
Today, I went away, and I obtained a helicoil kit. Some of you can see where this is going.
 2CV January Sagas by Charlieboy, on Flickr
I would have taken photos, but I was too busy trying to be patient while simultaneously downing myself in Brave pills. I'd need them. First thing was to put a bit of grease down the oil feed banjo, so as to reduce the swarf entering the engine. Next, I'd drill it with care. Then, I'd tap it, going easy all of the way. Finally, I'd add the Helicoil, and snap the tang off with a set of needle nose pliers. Finally, I'd crank the engine over with no banjo bolt, thus letting the oil pressure kick out the grease, and any swarf. At this time, I also had a vacuum cleaner ready to clean up the swarf throughout the process.
I know Helicoils are a bit of a dirty word, but it certainly saved me today! While it still had a minor weep from the bolt after the helicoil, I gently nipped up the banjo bolt, so as to avoid breaking the threads again. I know Helicoils are meant to be stronger than what was there before, but why risk it?
With that in mind, it was time to reclean the front of the engine once more, and check the car for leaks with the engine briefly running. With this done, I made a start on reassambling the ducting, and getting the car back together.
It's not been the quickest progress, with many roadblocks and hurdles along the way, but at least it is step in the right direction.
 2CV January Sagas by Charlieboy, on Flickr
-Assumptions - Don't assume, and I generally don't.
-Parts roadblocks
-Mechanical setbacks
-Double checking things ; Sure, I'm not rebuilding a 2CV but it's had a few things done to the engine.
So, let's digress.
It's a bit of a miracle the old Gammatronix ignition system worked. Not only was the bare wire for earth pushed into the horn mounting, the powered wires were simply pushed onto the coil connections, with the factory connections for other wires holding it in place. It was a bit of a dog's breakfast. I myself thought dissasembly on the front end kept knocking out that earth wire, which took almost no force. After all, it was just pushed in. But with the 123 Ignition box in place, that would also be a distant memory
 .
.I would also clean up the front of the engine bay. The crankcase was full of caked on oil and dirty oil in many places. Thankfully, it would become a thing of the past with some carb cleaner, in addition to me cleaning out the oil cooler. This was very grimy! But the carb cleaner and an airline cleaned this in no time.
After asking around, Peter Sparrow came up trumps for having a Cupro-Nickel pipe. Talk about luck! With that in mind, I set off to Sunny Hereford yesterday in the trusty W124 to pick up the goods. For those who haven't met Pete, he is a real genuine bloke, who does know 2CVs inside out. I thought he was all how 2CVs should have BMW engines! I did not realise he also did 720cc conversions into 2CVs, and I got some feedback about the jetting for my 652cc barrel conversion, despite me having the Burton jets installed. It was all very great, and of course I got my pipes off him!
After all this, I had to get back to the unit. I couldn't wait to get back, now I had the new pipe! However, I struggled with getting a timing rod for my 2CV. I know you can use drill bits etc., but I am also aware that you can bend/damage the dipstick tube as well by trying to force it past it, in addition to also potentially getting the bit stuck in due to it being short. I did have timing marks tipped onto the engine, but was I right to trust them? I'd find out. So first of all, I bought a length of rod. Oi, hush it up in the back!
2CV January Sagas by Charlieboy, on FlickrYup, it really is very long! However, I'd barely need 11cm's worth to get me what I needed. But first, I'd need a diagram, a pattern to work to.
With my hot rolled 6mm rod, I put it into the vice to bend it into shape.
2CV January Sagas by Charlieboy, on FlickrBy the end of it, I ended up with this. I also sanded it down to make it look nicer but to also make it slightly easier to fit:
2CV January Sagas by Charlieboy, on FlickrWith that done, I went to put into position. Despite being near as damnit, 6mm rod, it was tricky to fit! But it was exact and it fitted like a glove. I was also right not to trust the tippex mark. For some reason, the tippex mark aligned with a faint tippex mark on the engine casing, which you can barely see in the picture. Strange as it doesn't really line up as you can see, but the bolt hole for the starter motor lines up fine. With that in mind, I reset the 123 dizzy's ignition light. I didn't actually set it up miles off the mark, but it didn't hurt to get it spot on.
So, that was the timing down. At the same time, I took out the Denso Resistored spark plugs and fitted some new NGKs into the mix of the BP6HS variety. So, it was finally time to do the oil pipes. In theory, this should have been a simple job. But it was not to be. But let's look at why I was changing it. In short, it was shot. It was split, cracking and pretty corroded to boot. It was also leaking oil out at a crazy rate!
2CV January Sagas by Charlieboy, on Flickr2CV January Sagas by Charlieboy, on FlickrWith that in mind, it was time to put the two side by side:
2CV January Sagas by Charlieboy, on FlickrErm, yeah, I'll fit the new one.
However, this is where things went really wrong! Firstly, as I lined up the banjo bolts, I couldn't help but notice that two the bolts were the same and one was different. They also came out of different locations.
2CV January Sagas by Charlieboy, on Flickr-Banjo bolt with the wide holes were in Cylinder head one, and the crankcase
-The smaller holed bolt came out of the offside cylinder head.
That just didn't make any sense to me! I put them in before into their respective heads and not checking the hole diameters, because of course, the car had been enthusiast owned and maintained by a specialist. However, I'm glad I did catch it then. So what did I do? I did what I also do. Check the internet. After checking Der Francoze, ECAs and Burton's website, amongst others, it became clear that I had one large holed bolt too many. So I would need a smaller one. Checking the remains of my spare semi-dissassembled engine also confirmed this. So, with this in mind, I reused a spare smaller holed spot from the spare engine, thus giving me a complete set of correct bolts. Great! I'll get it all back together!
2CV January Sagas by Charlieboy, on FlickrThis is where things really started to go wrong. The bolts going into the heads went in fine. Not a problem. I knew they barely need hand tightening. 6Nm I am told, so really, not tight at all. The crankcase banjo? It was stripped. The threads had completely gone from where the Banjo would be. I know when I removed it, some shavings came out which didn't fill me with confidence. Was it me removing it, previous bodgery, or just bad luck.
Either way, I was pretty annoyed. Many thoughts went through my head as did many expletives. With that in mind, I packed up the tools, and headed home, The engine despite being more oil tight everywhere else, was haemorgening oil from the centre banjo feed on startup! This really was a case of going one step forwards, and two steps back.
2CV January Sagas by Charlieboy, on FlickrWhat did someone say about if it ain't broken? Ah yes, don't fix it. Maybe I should have lived with those oil leaks. After all, I ended up being in a situation with no clear outcome.
Today, I went away, and I obtained a helicoil kit. Some of you can see where this is going.
2CV January Sagas by Charlieboy, on FlickrI would have taken photos, but I was too busy trying to be patient while simultaneously downing myself in Brave pills. I'd need them. First thing was to put a bit of grease down the oil feed banjo, so as to reduce the swarf entering the engine. Next, I'd drill it with care. Then, I'd tap it, going easy all of the way. Finally, I'd add the Helicoil, and snap the tang off with a set of needle nose pliers. Finally, I'd crank the engine over with no banjo bolt, thus letting the oil pressure kick out the grease, and any swarf. At this time, I also had a vacuum cleaner ready to clean up the swarf throughout the process.
I know Helicoils are a bit of a dirty word, but it certainly saved me today! While it still had a minor weep from the bolt after the helicoil, I gently nipped up the banjo bolt, so as to avoid breaking the threads again. I know Helicoils are meant to be stronger than what was there before, but why risk it?
With that in mind, it was time to reclean the front of the engine once more, and check the car for leaks with the engine briefly running. With this done, I made a start on reassambling the ducting, and getting the car back together.
It's not been the quickest progress, with many roadblocks and hurdles along the way, but at least it is step in the right direction.
2CV January Sagas by Charlieboy, on Flickr


 .
.