ChasR
RR Helper
motivation
Posts: 10,191
Club RR Member Number: 170
|
|
|
|
I know what some of you are thinking. I've forgotten all about the car! Well, that's a lie! I hadn't! But I had to provide myself with some motivation to sell the W124. That was performed by selling the W124 first! Foolish I know, but you can spread yourself thin with three roadworthy cars! Or at least I do! So, it seems a Northerner took care of that! With the W124 gone I had no excuses!   Damn, I do miss that car a little! Anyway, back on the 2CV! Somehow I've managed to send a no-so-small sum on a number of parts! What will these parts do? Well, I am hoping it can stop the car for poisoning me, make it look better, and cure a few incontinence issues, albeit minor incontinence! Stay tuned for further updates! I'm hoping to have them all done by this week? Ambitious or mad? Hang on! They're both the same thing! |
| |
|
|
|
|
delux
Part of things
 There's treasure everywhere!
Posts: 530
|
|
Oct 13, 2018 15:13:12 GMT
|
|
That is soooooo awesome!
|
| |
|
|
|
|
|
|
|
Stay tuned for further updates! I'm hoping to have them all done by this week? Ambitious or mad? Hang on! They're both the same thing! And..? |
| |
|
|
ChasR
RR Helper
motivation
Posts: 10,191
Club RR Member Number: 170
|
|
Oct 14, 2018 10:30:50 GMT
|
Stay tuned for further updates! I'm hoping to have them all done by this week? Ambitious or mad? Hang on! They're both the same thing! And..? Yes, there are many reasons! There has been progress however. It’s the way of RR though. Expect an update later on today  . |
| |
Last Edit: Oct 14, 2018 10:31:46 GMT by ChasR
|
|
ChasR
RR Helper
motivation
Posts: 10,191
Club RR Member Number: 170
|
|
|
|
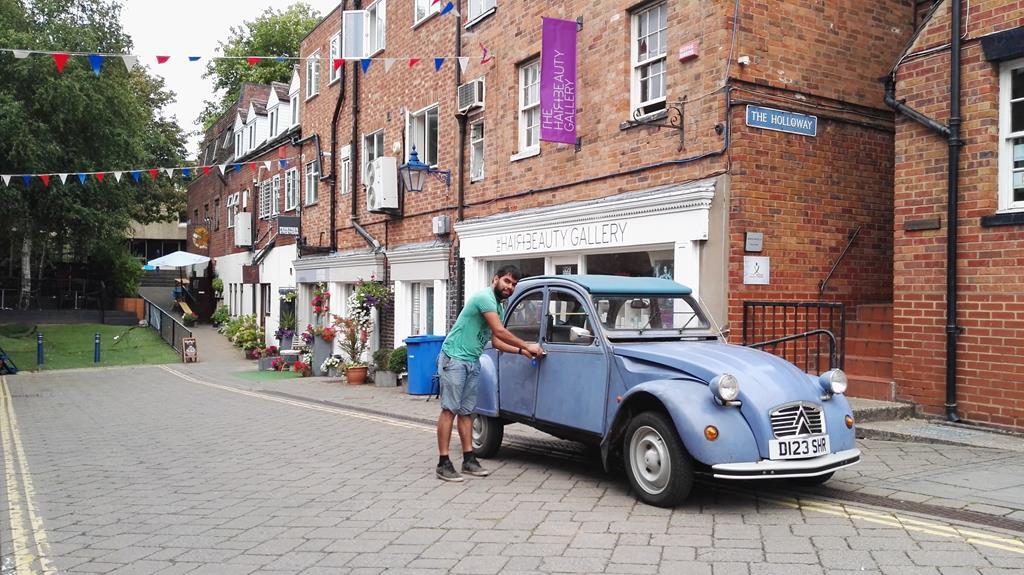
So, this thread out of all of my three threads has been kept quiet. You can almost see the tumbleweed bumbling about within this thread. How did things get here? To put it simply: -The E320 happened. It was a deal the old man setup and much to my chagrin it was a great deal and in many ways did unintentially become the right car at the right time ; my journey went from 75 miles a week tops (think more like 20 with sharing lifts) to now being a minimum of 200 a week. 300 is now the norm. New jobs, who'd have 'em?  . -I went to Porto on holiday. OK, it was a week -Every other weekend I was either sorting things out on car events or weddings etc. ; Since at that time with the S124 requiring recommisioning before my new job came about I ended up burning quite a bit of evening oil just getting that ready. That also ate into my weekend schedule. curse word excuse, I know. It's not right by the Citroen either! But I know it's not the car for doing a 100 mile trip down the M6 and back as well  . That's not to say nothing has happened with it. So, what's happened? Firstly, I cleaned it. It's amazing how much better it looked with all of the grime gone. With this in mind I gave the car a Mini service. This however, didn't go to plan. Normally, the strap tool undoes the oil filter. This time I wouldn't be so lucky. It turned into a nightmare! The clearance between the chassis leg is not great. Since my car had the Purflux filter on I could use a tool. Except I couldn't; it was a Saturday. I almost bought one from ECAS when I ordered the parts for the car too! Hindsight eh? After much screwdriver butchery the car had fresh oil once more in it. Yes, I know I should have waited but in this instance the screewdriver technique did save the day. With that issue of my shoulders it was time to continue on with the service. Next? I decided to give the car a facelift. I loved the look of the car but I couldn't convince myself which was the better look. This is what happened: 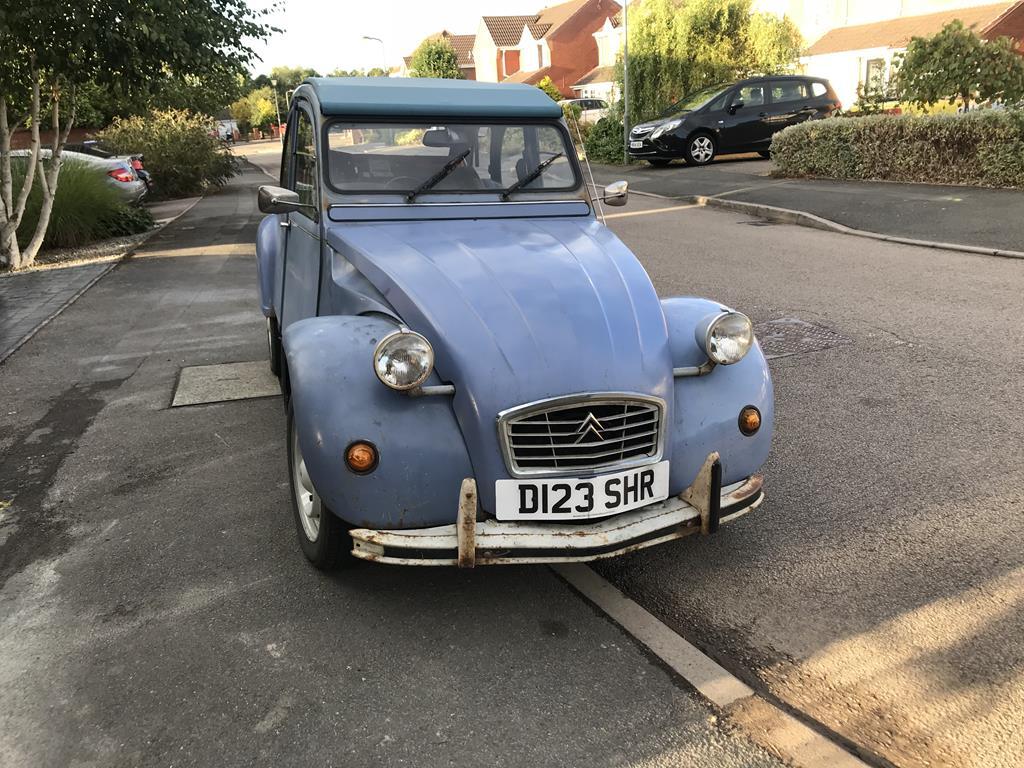 The other shots? They'll come up soon! Got to love FlickR and Mobiles! Or rather not |
| |
|
|
ChasR
RR Helper
motivation
Posts: 10,191
Club RR Member Number: 170
|
|
Oct 17, 2018 16:53:31 GMT
|
Right, I've sorted my act out. Where was I? Ah yes, the mini Makeover. Above as you know is what the car started out as. Since I bought a large number of spares here is how I went about it: Firstly, I'd have to get the car out of the unit. The issue? A certain bus was in the way and given I didn't know what was wrong with the bus I didn't want to move it. But I had to get the car out for a few reasons: -A mate's dad wanted to see it -I fancied driving it anyway! Firstly, I did some measurements to see if the car would even get out of the unit, using a trusty broomstick obviously! Trigger would be proud, wouldn't he? 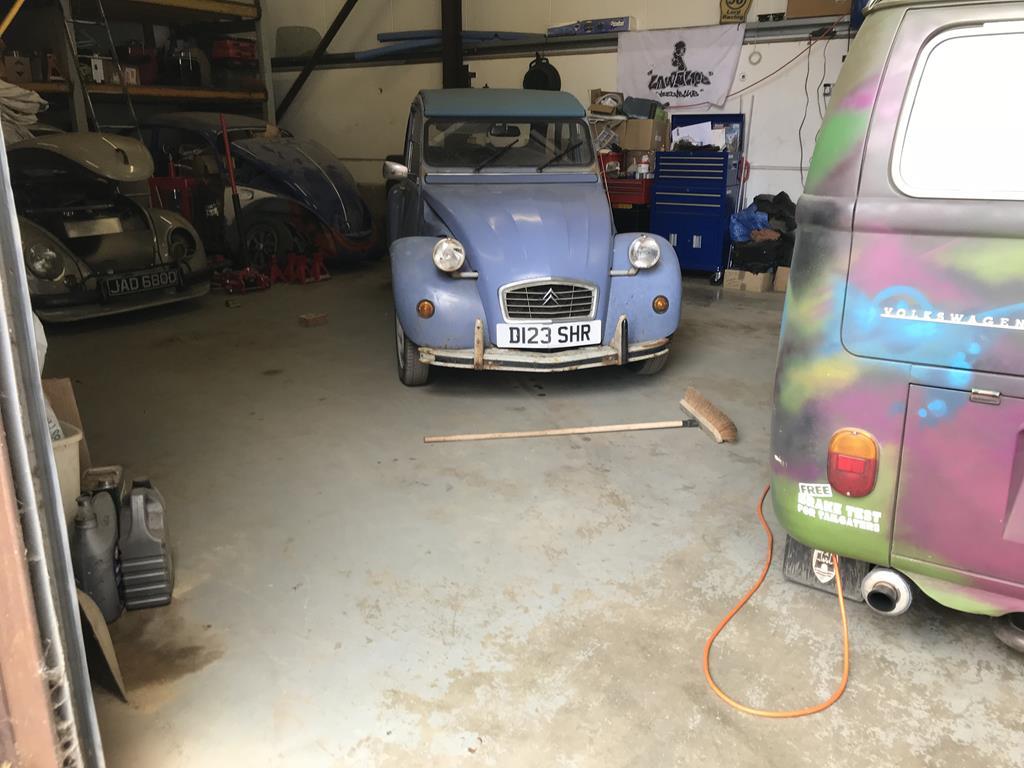 Eventually, I got the car out of the unit! Of course, I had to do the obligatory dual car shot. 2 Blue cars, with two very different purposes in life! Both are fun in their different ways however. 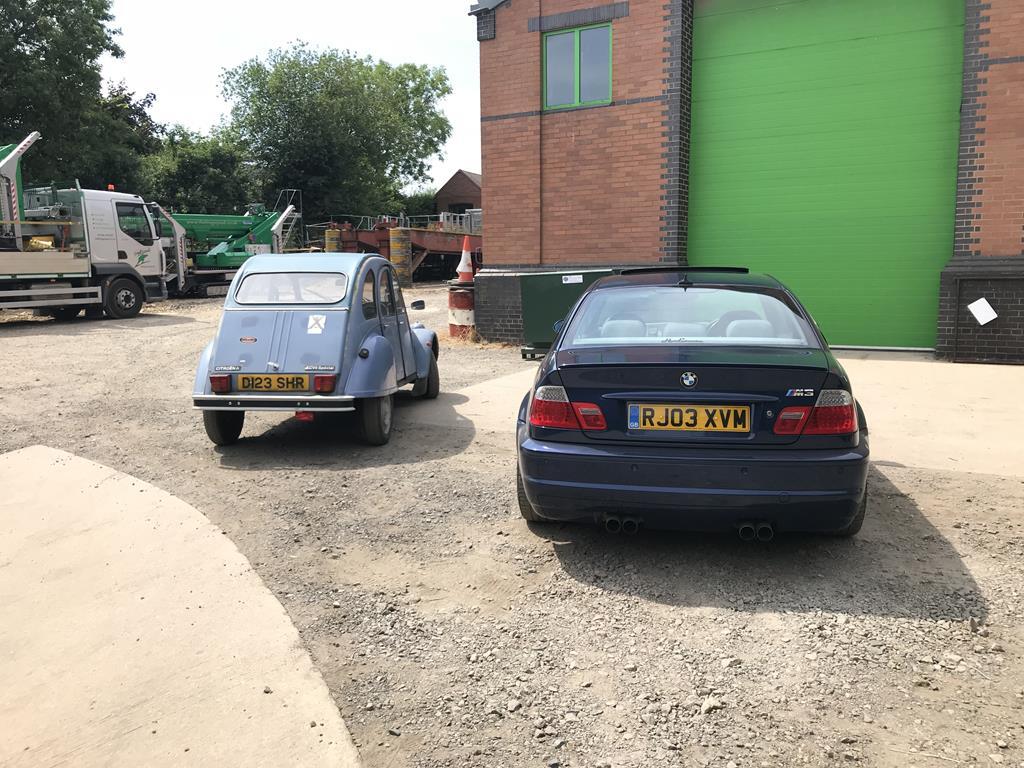 Naturally, I wanted to get the M3 into the unit. It's fair to say that this wasn't going to happen! Was I ambitious? Definitely! 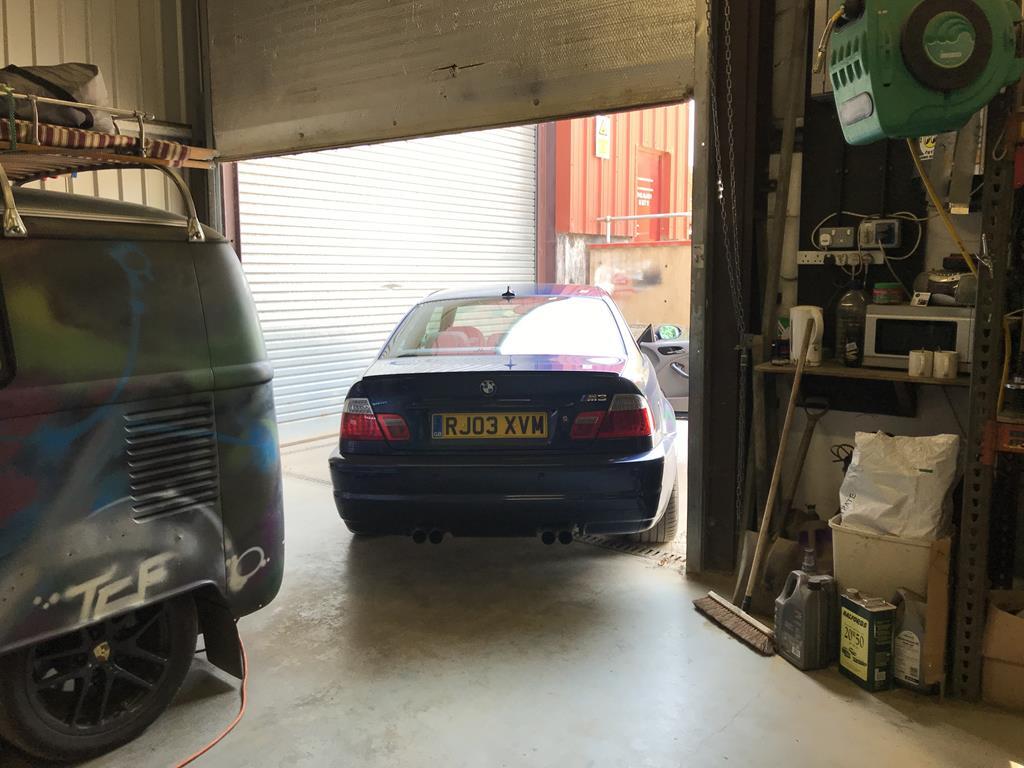 So, I made it out! Wahey. It's fair to say I made the most of the speed! Since I had the phone strapped on in various places of the car (and me) I decided to get a few moving shots using the timer, because car photos! 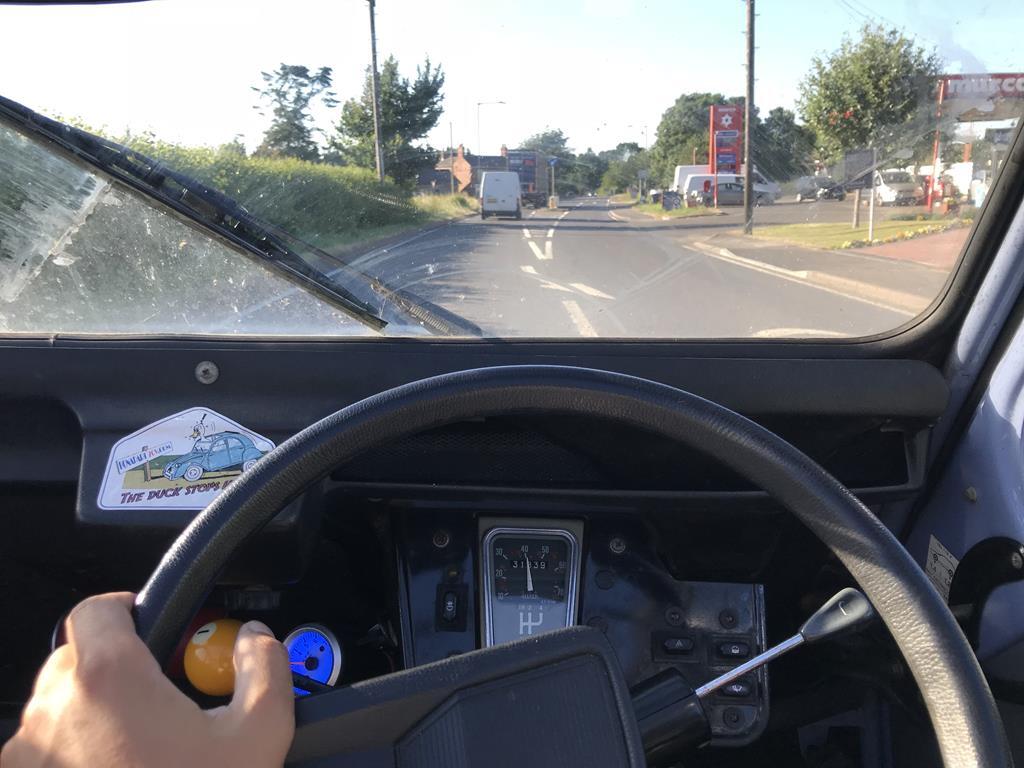 It looks idyllic eh? 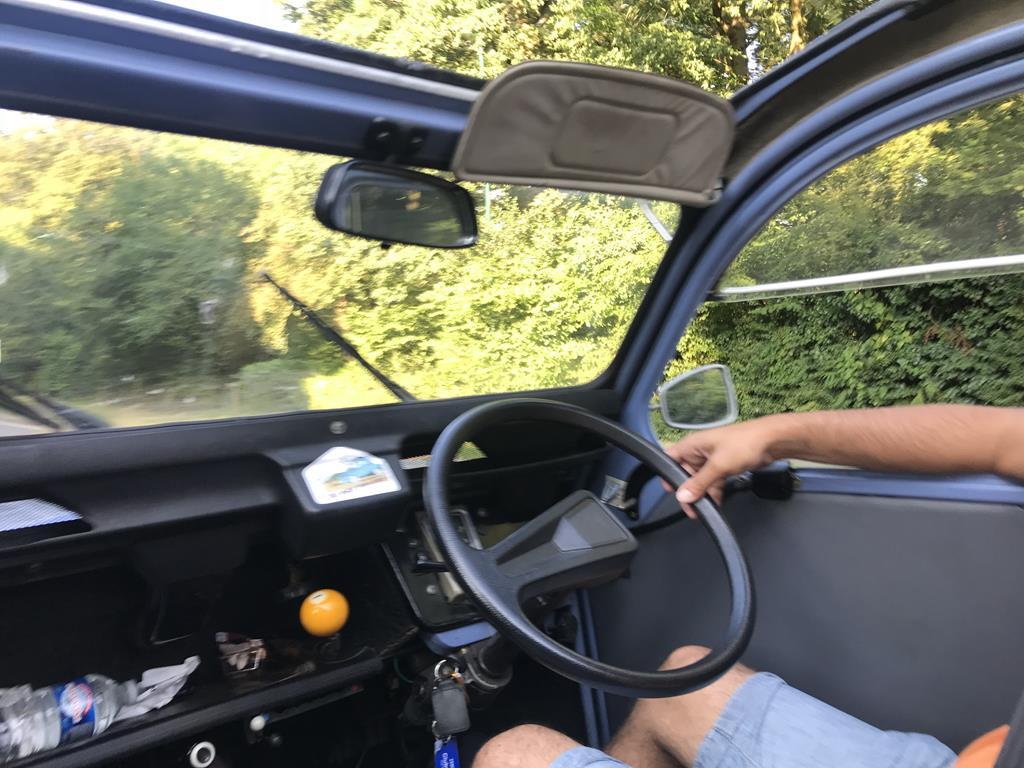 In the summer, this car makes alot of sense of so many levels! On a motorway? Yes, the shot is curse word, I know ; I really need to buy another lens for my SLR besides the Prime ; it's just too long a length to use for indoor shots! Stop sniggering in the back you innuendo bingo fans! But it's fair to say it's not quite the same experience on the motorway. It's not like I do a 100 mile commute once or twice a week. Oh wait, I do! Sense, I do it very well don't I? Just look at my car collection now. It's fair to say I've covered the sensible bases eh? Or rather not... But the 2CV would prove it's worth. Not only did the car take a barbeque to a mate's house, the rear seats would end up proving to be superb furniture for the rear garden! It's a real shame I didn't get a shot of this, but until next time eh? Where was I again? Ah yes, the makeover. As shown above, that's how I started with the car. But the bodywork had issues. No, I'm accounting for the patina  . The bumper had been weakened by being ground down to remove the bolts on the front, and it was now catching the bodywork. Not good for longevity. Furthermore, things weren't good with the grille! How, I hear you ask, it looks fine. Well, let me show you. 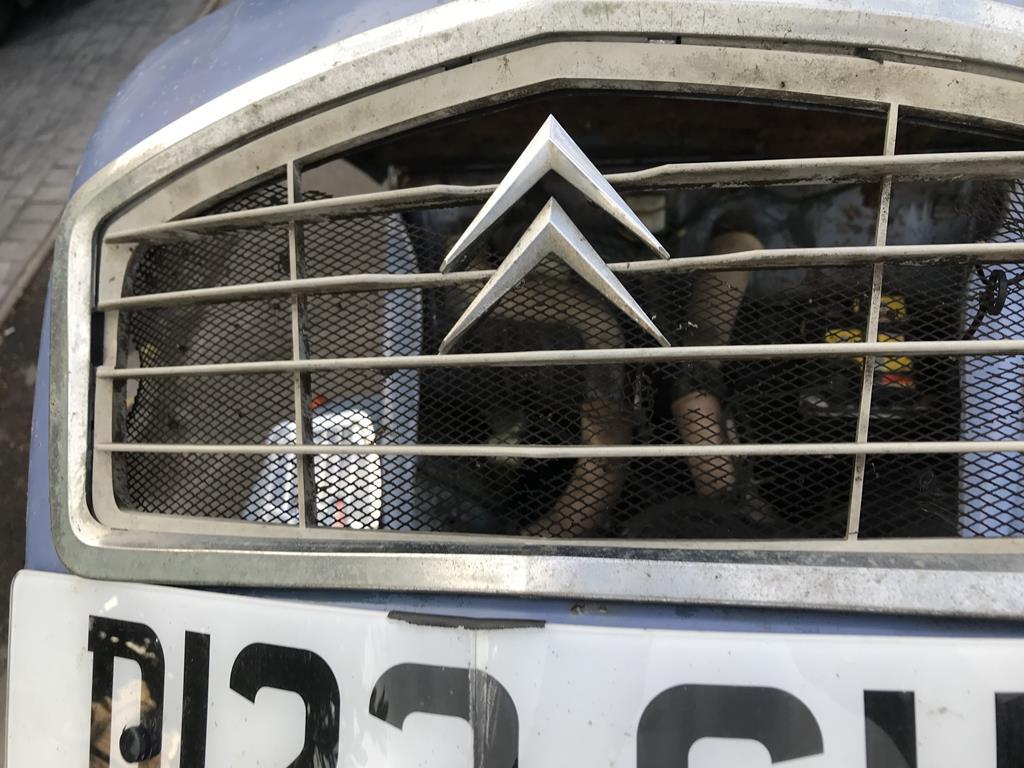 It looks OK there eh? 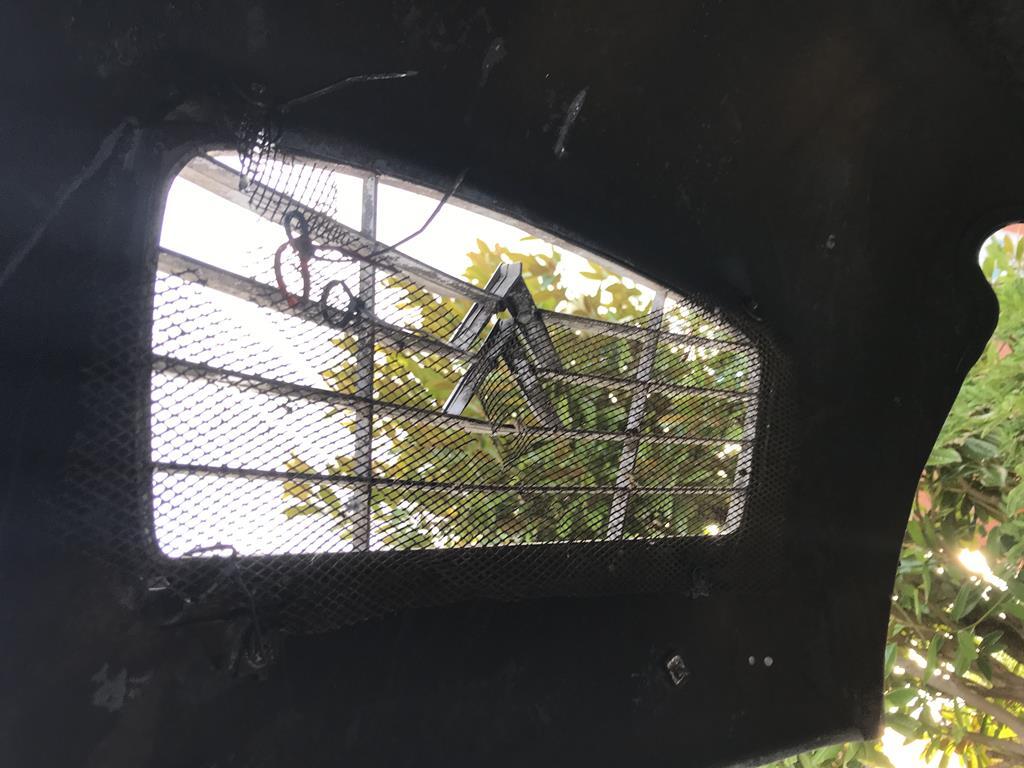 From the rear, things began to look worse. Yes, I know the Roadkill fans here will say "it's all about the zip ties" but having that sitting next to the engine fan with the oil cooler beind that can lead to iffy results. The grille mesh breaking apart isn't going to help there either. So, what was my solution I hear you ask. Enter Stage Left: 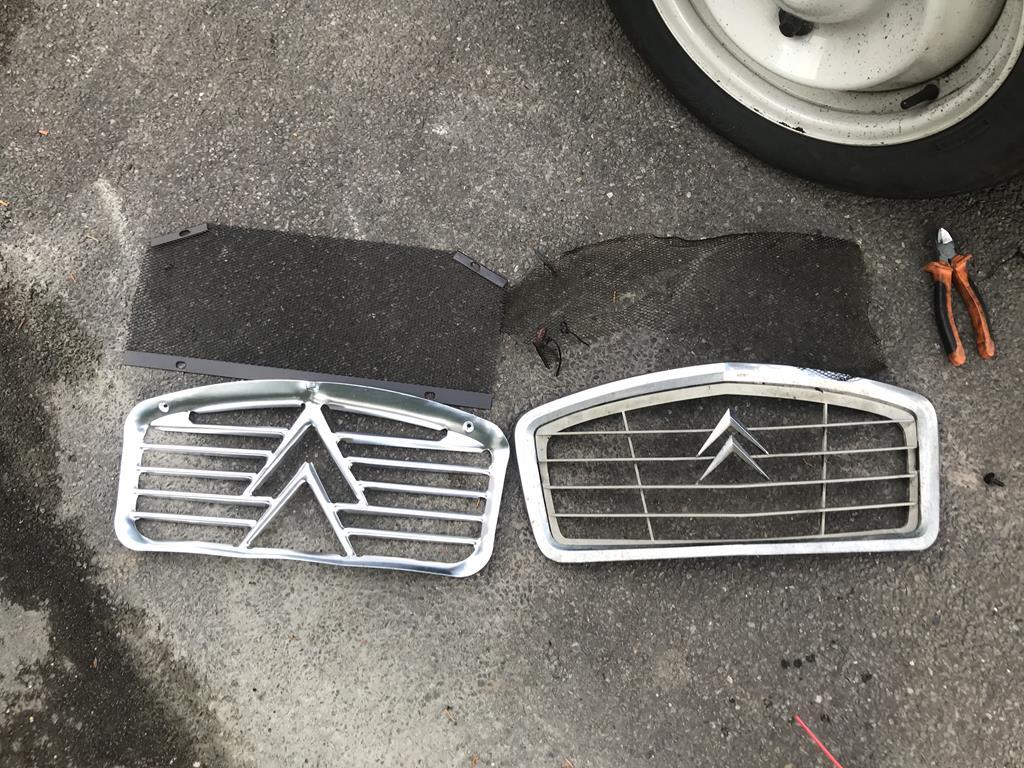 A new grille and original mesh assembly. One with the ends clamped down, to avoid this issue happening again. Here, the new grille doesn't look so bad. But things were about to take an unexpected turn: Firstly, the old fixings were never going to work on the new grille. Why? The old grille had captive nuts built within it. The more observant of you may have realised that the new grille had holes for the bolts to pass through. I did debate butchering the old grille, but I decided not to in the end. You'll see why later. 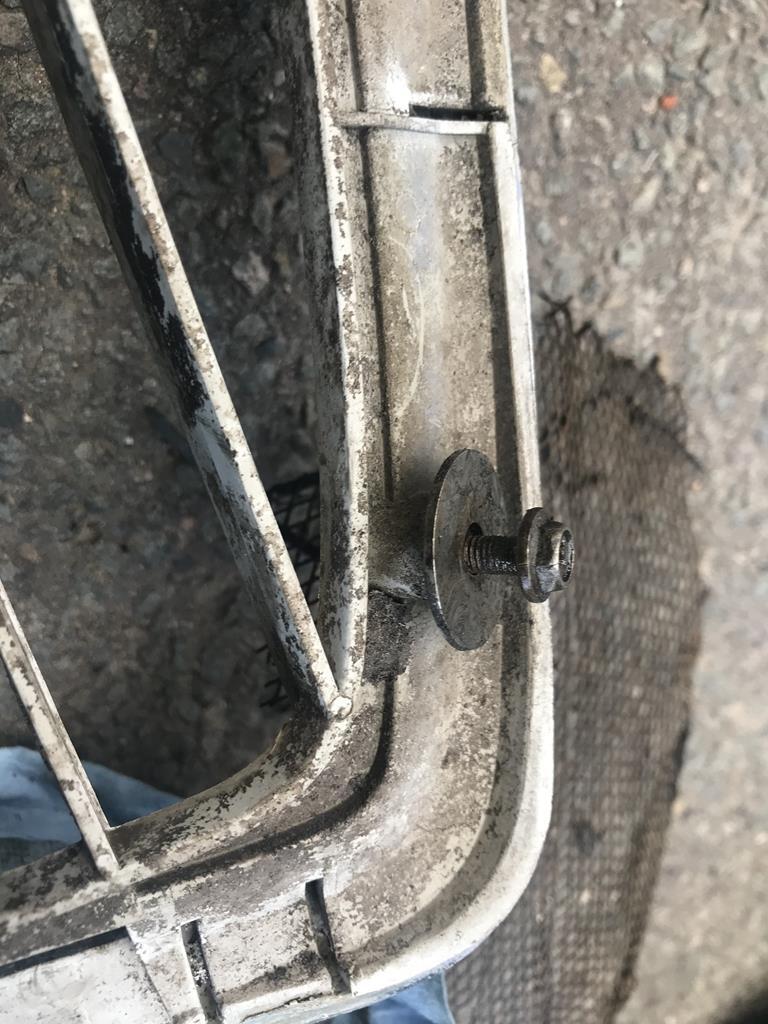 With some new stainless fixings, I was back in business with fitting the new parts! 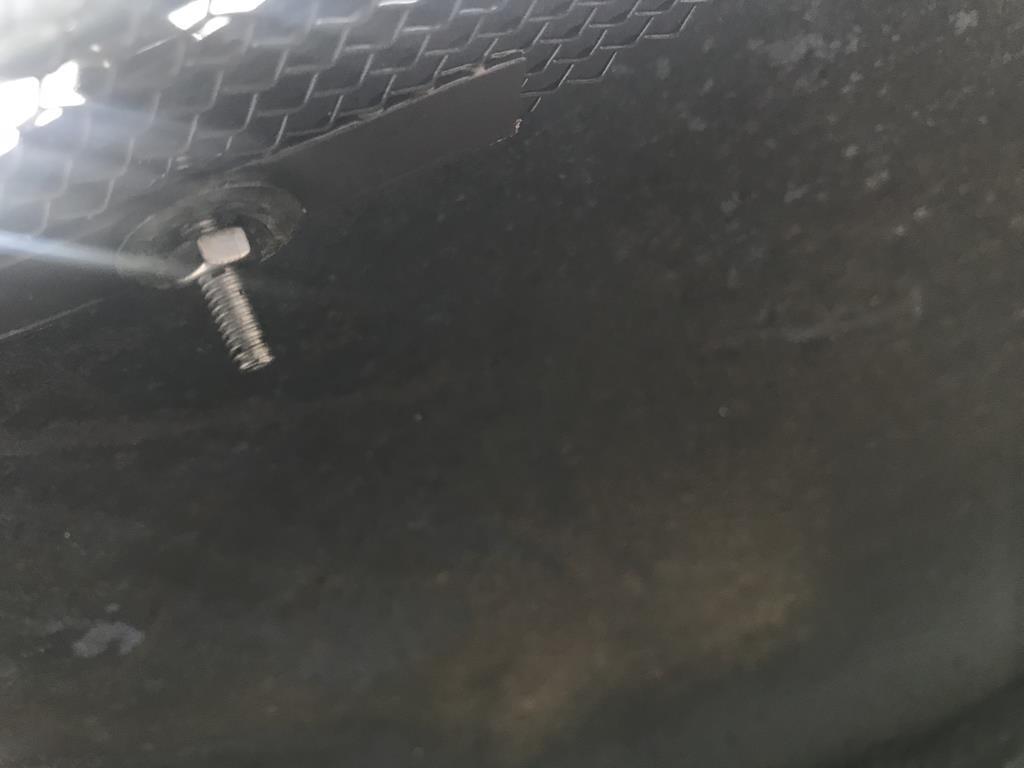 But, how would it look, I hear you ask? Well, You tell me : 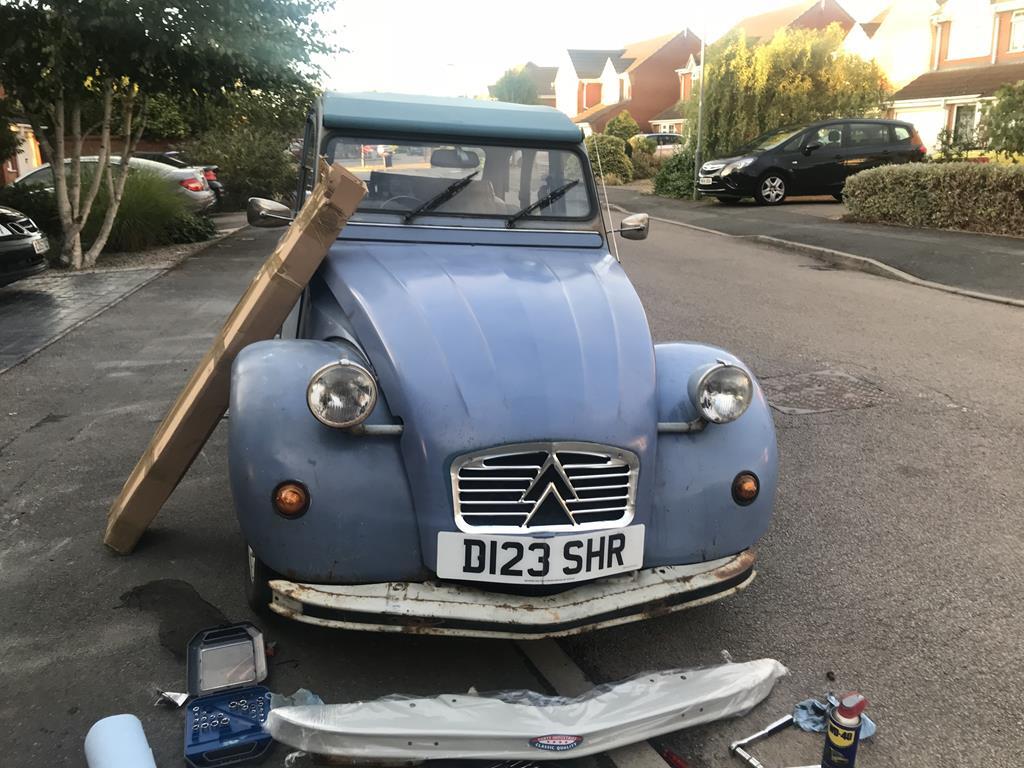 Maybe it was the lack of overriders, but at this point I was wondering why I spent the cash I did on stuff I was unsure of once fitted! When I fitted the bumper on too, albeit without the black strip, I really didn't like the look! 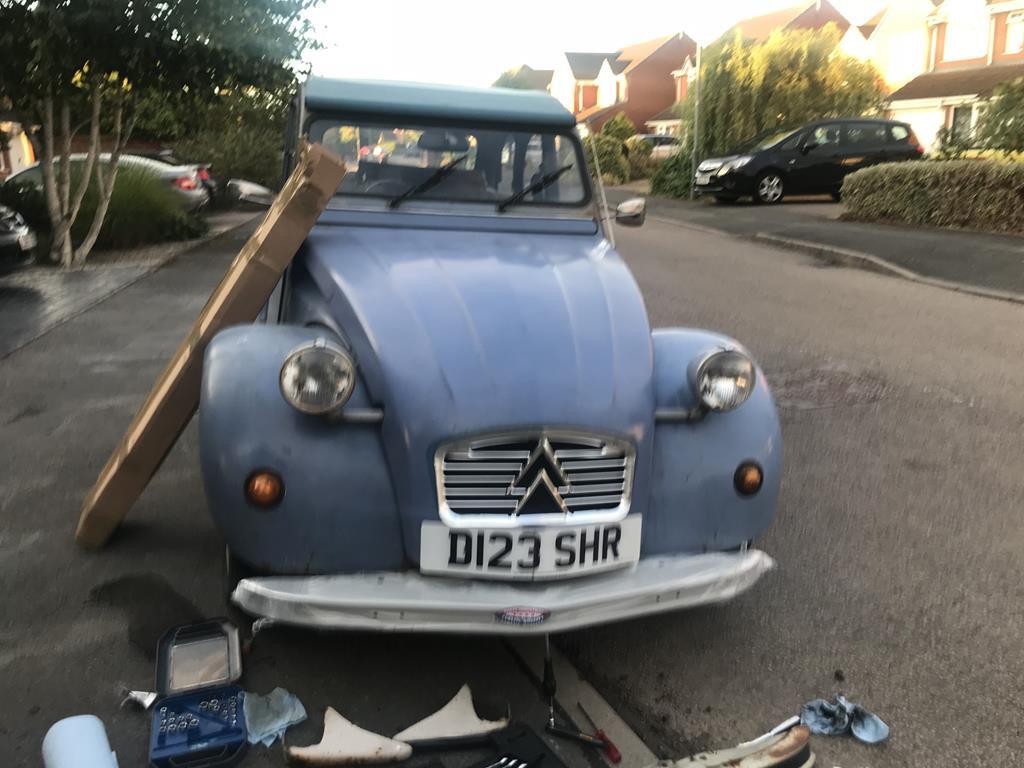 But, at least the dog was happy with his mini-trip to town in the car: 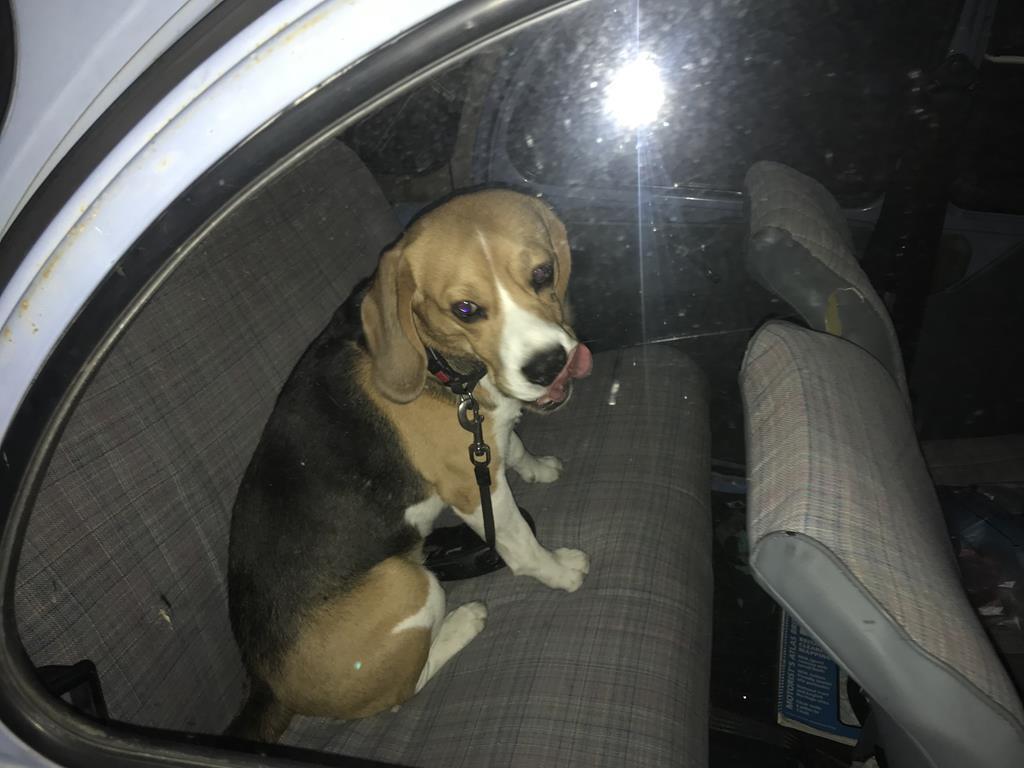 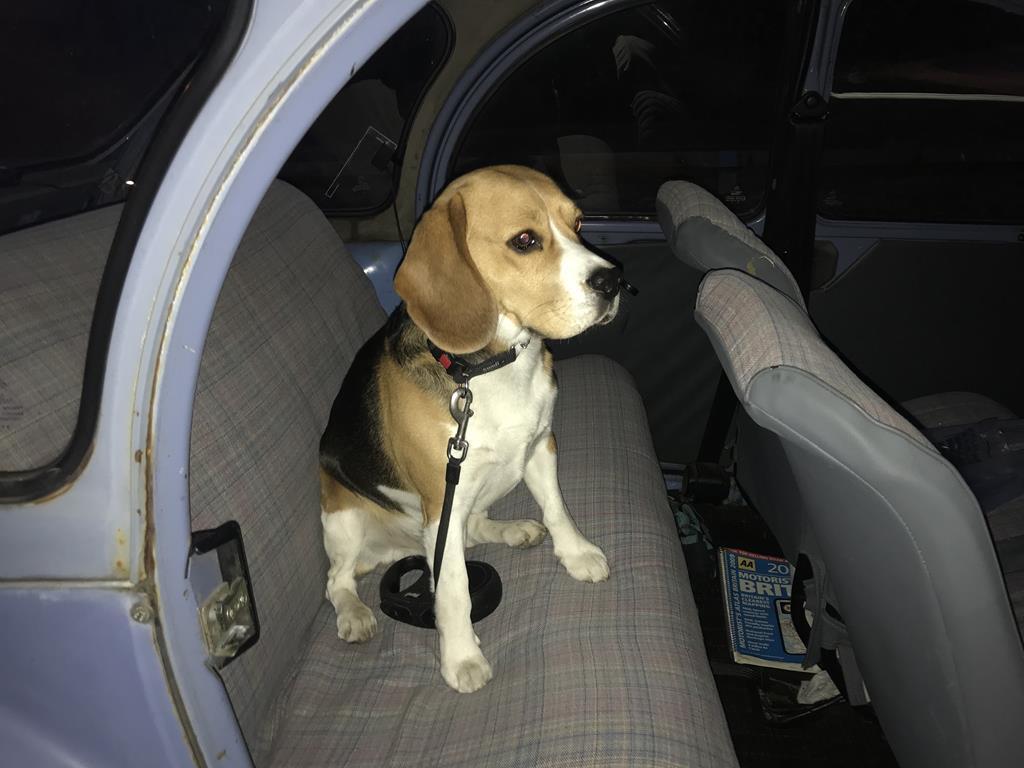 His charming looks however, weren't going to convince me I did the right thing however! I then ended up taking it to RetroWarwicK's show: Completed, I'd say the looks of the car were certainly growing on me now:  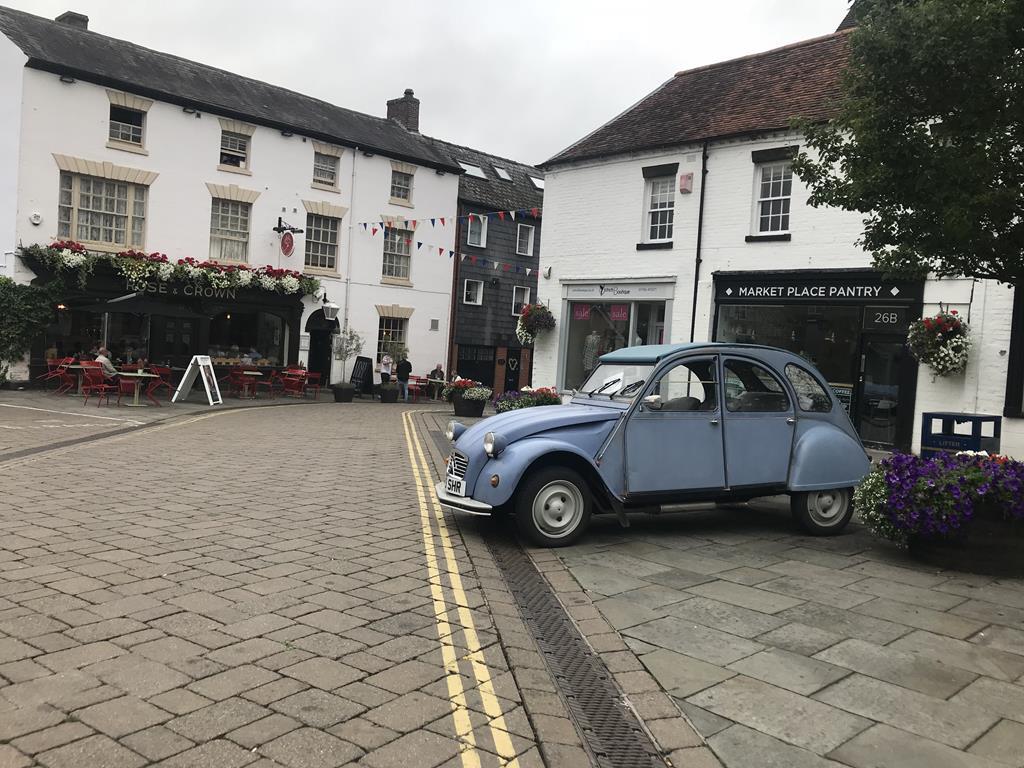 Things were going swimmingly here now! It'll be interesting to hear your opinions on the front. I may go back to the older grille, but the new bumper will be there to stay. I think the lack of overriders work too . But, before I get too far ahead of myself, the car would have another plan in store for me. This is why this thread has halted, and why it's been kept dormant. Getting the M3 ready for its next outing, fixing an S124 that's not run for the best part of two years, in addition to sorting myself out for RRG while trying to keep the family happy (sister's getting married soon) really pushed my timescales to the limit. To make things worse, I did myself out of holiday time this year too, so that ruled out daytime spannering. Starting out in a new job never helps here either. I know this sounds like I can't be bothered, but I really have been far too busy. It's one reason I didn't almost buy the S124 ; it was almost too much to take on at the time. But one day, I'll be back. One day, I'll resolved the issue that the car now has, which shall arrive in the next update. |
| |
|
|
|
|
|
Oct 17, 2018 17:44:13 GMT
|
|
|
| |
|
|
|
|
|
|
|
|
I like the grill, miss the over riders a little but all up a great car. We had a few in Holland. They are so expensive here in Australia it's not funny. But I would love to own one again.
Thanks
|
| |
|
|
79cord
Posted a lot
Posts: 2,607
|
|
Oct 18, 2018 10:09:14 GMT
|
|
New grill does look a lot cheaper with excess metal around the edges of the grill bars.
Worth painting those edge bits black to visually thin those bars & chevrons, & separate them from surround?
Black strip certainly improves bumper.
Great to see progress despite distractions.
|
| |
Last Edit: Oct 18, 2018 10:15:36 GMT by 79cord
|
|
|
|
|
Oct 18, 2018 11:39:58 GMT
|
Things were going swimmingly here now! It'll be interesting to hear your opinions on the front. I may go back to the older grille, but the new bumper will be there to stay. I think the lack of overriders work too . Let me just sit outside the Rose and CROWN for a while, and ponder... Aye, prefer it without the overriders. Mine's a pint, please. |
| |
Last Edit: Oct 18, 2018 11:40:31 GMT by georgeb
|
|
|
|
adam73bgt
Club Retro Rides Member
Posts: 4,864
Club RR Member Number: 58
|
|
|
|
No overriders looks good, grill looks ok-ish to me, wasn't sure at first but the more I look the better it looks The numberplate looks a bit out of place to me, not sure what I'd do about it though.. |
| |
|
|
ChasR
RR Helper
motivation
Posts: 10,191
Club RR Member Number: 170
|
|
Nov 26, 2018 22:07:22 GMT
|
Well, the car's gone away for intensive car and the news isn't looking good! I knew there was a reason why I procrastinated! 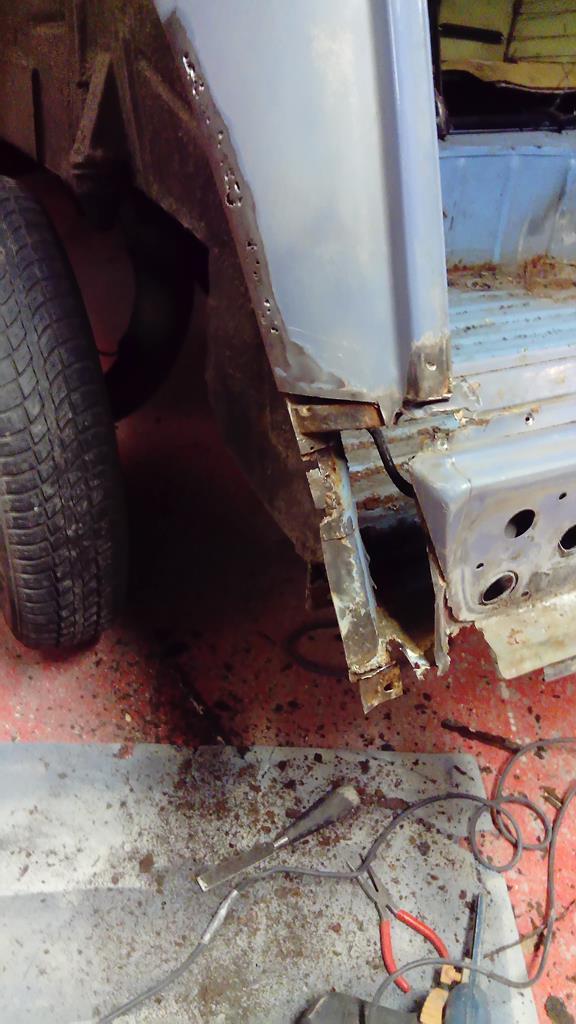 Damn, will you just look at that! This French car is looking more like an onion! That singer lied in the 90s! Things can't get better! 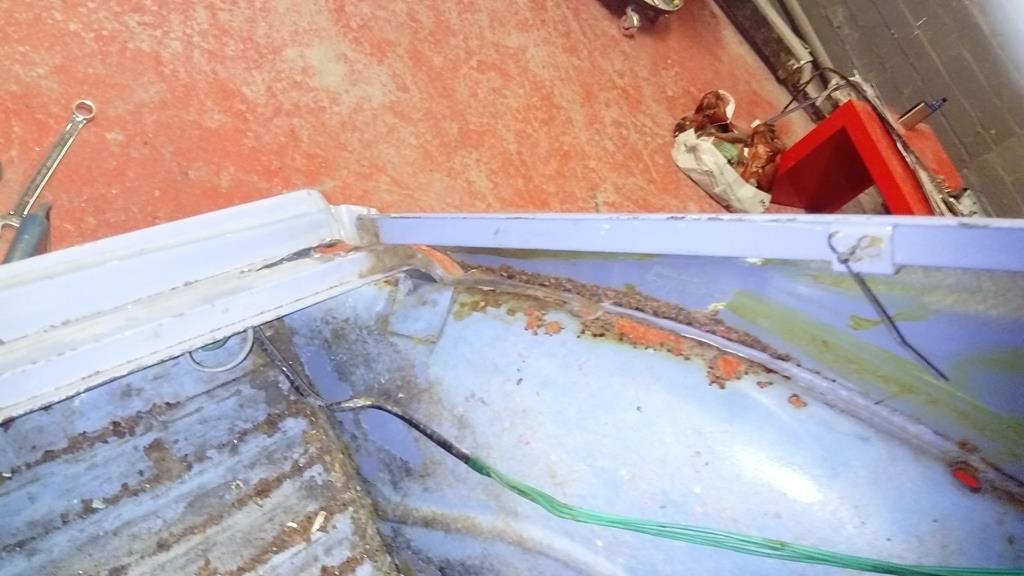 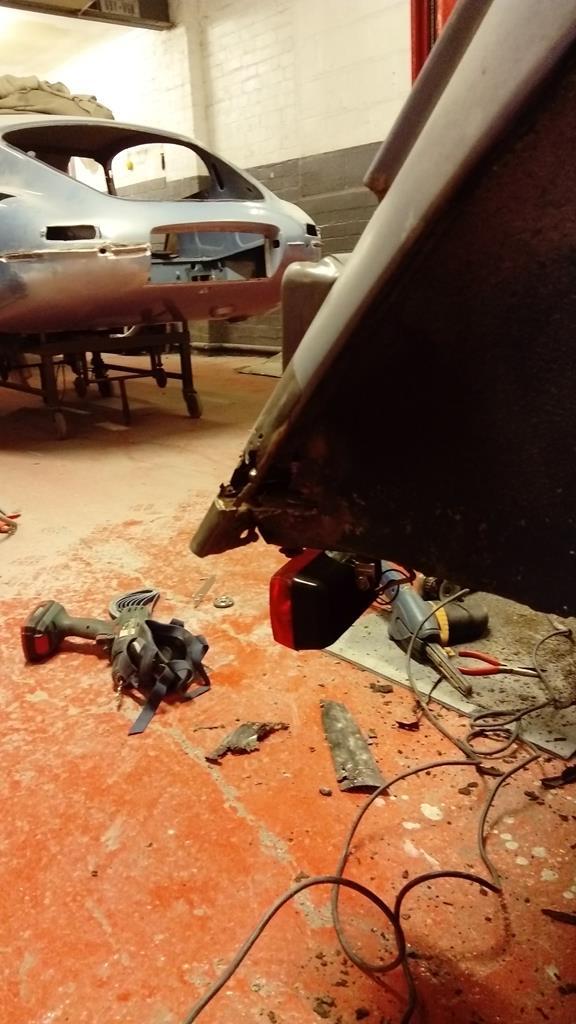 Or maybe they can. The passenger side wasn't as bad to be fair. It sure is a long road for the Citroen but it is getting there! Do I wonder if I should have taken it in? Yes, but as they say, it's better out than in right? |
| |
|
|
ChasR
RR Helper
motivation
Posts: 10,191
Club RR Member Number: 170
|
|
Dec 16, 2018 19:47:58 GMT
|
So, at the moment, it's not been a great time in ChasR towers for cars. The M3 has gone to being a daily again in these not-so-pleasant conditions. It's just as well E46s are known for not rusting-oh wait! The Mercedes from being a 1-2 week job has now been in the workshop for the best part of a month. Some may say here that I really shouldn't have put my daily into the bodyshop over winter, but then, c'est la vie! The Citroen? Well, things had changed with that! As always, more rust was found than we both expected. But to be fair to Lyell, he pressed on and got it done. From a week of me dropping the car off, it came back! But not without having new metal let into place! 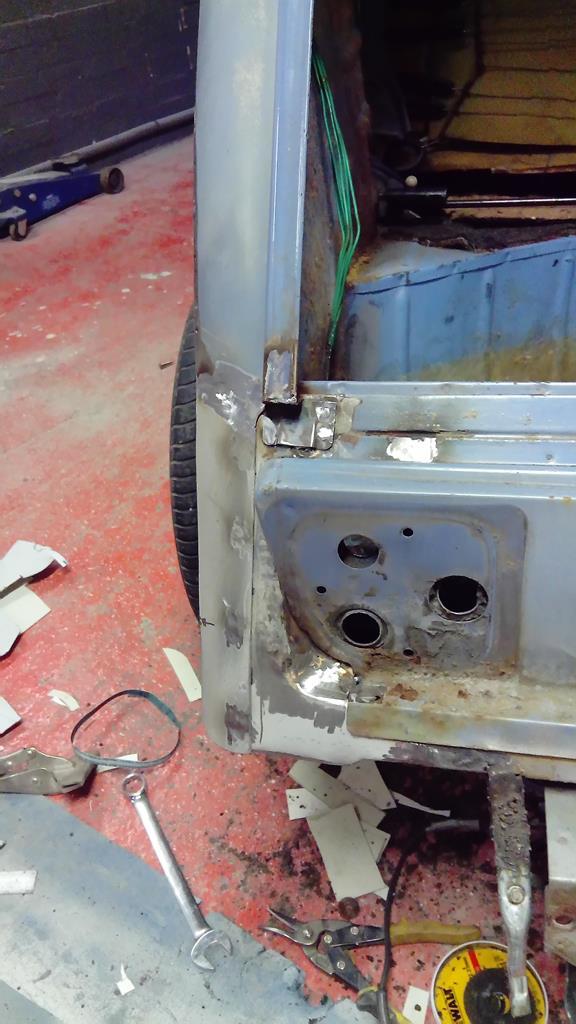 I was going to await for me to do a grand reveal of the car with it all finished to how I wanted with a couple of other minor parts added on. Seeing as that may well be in the New Year, here's a picture to cheer is. We all love seeing what a difference looks like! 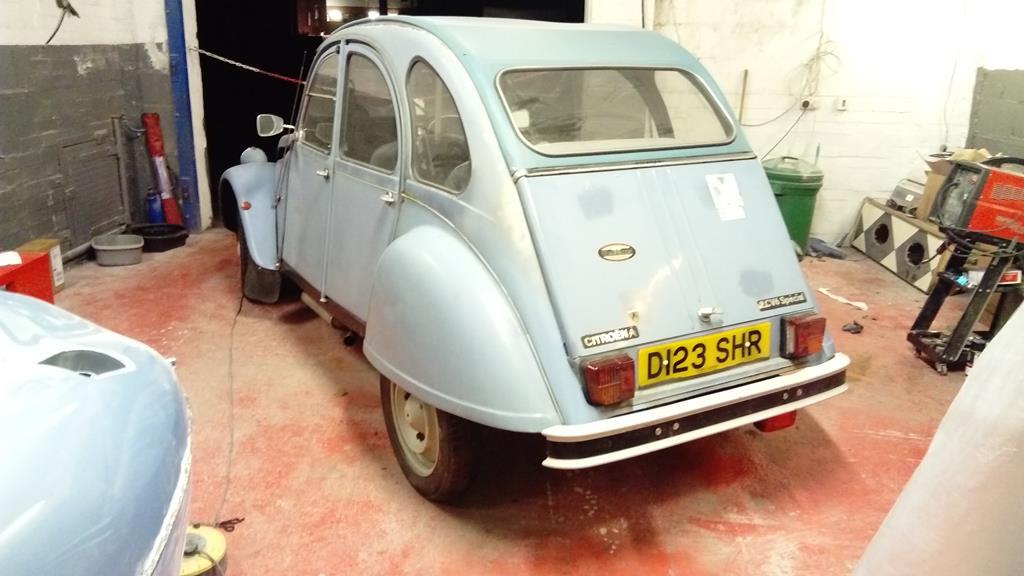 The difference isn't an obvious one, but that crack was terrible in the N/S panel previously! But the patina was kept however, So I finally had a car back that was solid. Unfortunately, it still leaked exhaust fumes inside the car. Even Lyell commented on how down a short trip down the road, he found the fumes to be pretty strong! With a car in that state, I can't really daily it. But with the Merc not back yet, and the Citroen at a mate's I cannot really take it back to the unit to do work on; I need a means to get back home after all! With that in mind, I ordered more bits! Some of these parts are down to greencarfritz 's doing as well as a known local friend of mine and dickdasterdley 's! 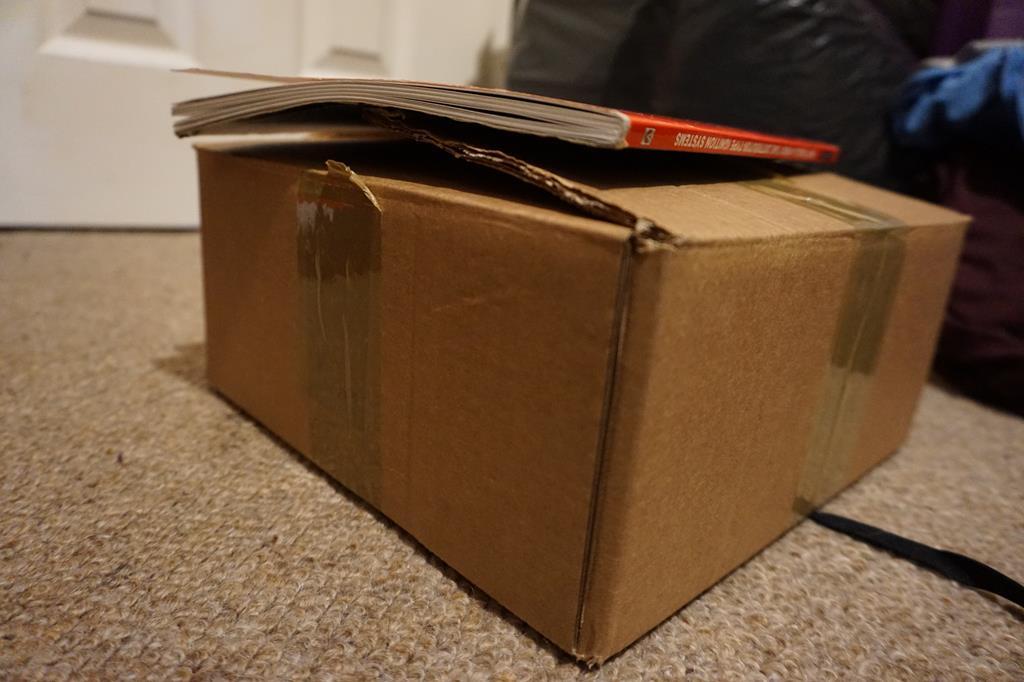 OK, so the book on top of the box is relevant. But what is within the boxes. Well, here is a little glimpse into them. 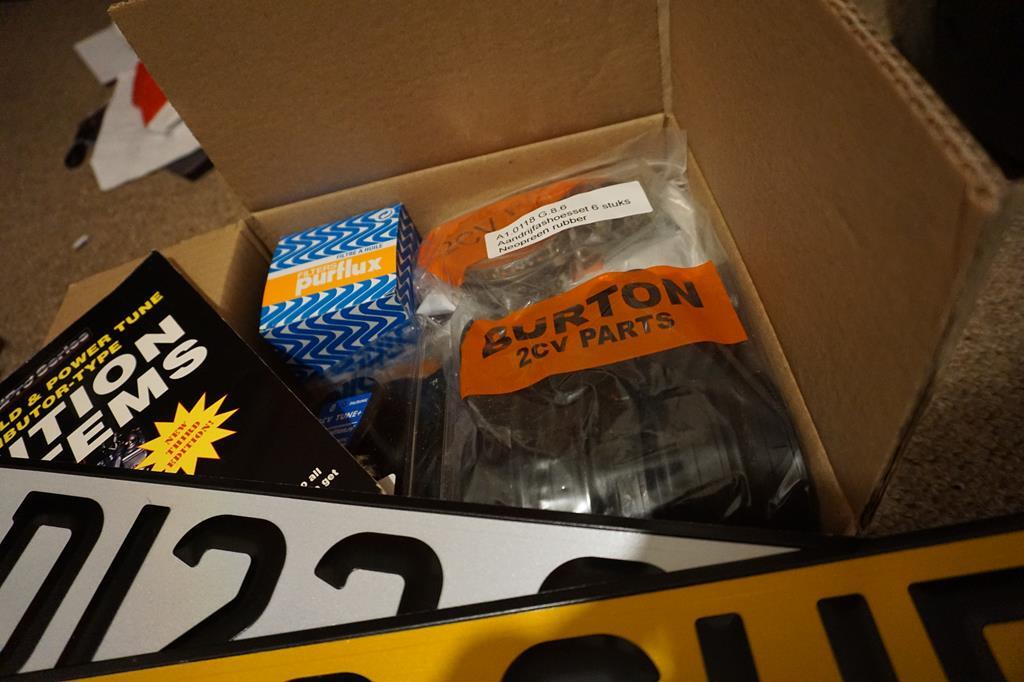 It probably makes more sense as to why I want my Merc back; I have alot of bits to fit, but without a car to fit them onto! Plus working on a hot engine to only take the car back can get a little dangerous! Ah well. Hopefully at one point, the car mojo will be restored. |
| |
|
|
|
|
|
Dec 20, 2018 22:24:42 GMT
|
Oooooo what did you order down to me?! BMW....  |
| |
1987 Supercharged BMW R1150 Citroen 2cv Hillclimb Monster
1995 Renault Master Mk1 Race Transporter
1994 Mazda MX5 Mk1 / NA Road Going Class Hillclimber
1991 UMM Alter II Crew Cab OM606 SuperTurbo Diesel MegaUMM Overlander
1992 UMM Alter II Station Wagon
1980 UMM Cournil - survivor - resto project
1979 Lomax 224
2014 VW T5.1 Transporter Kombi Highline
|
|
ChasR
RR Helper
motivation
Posts: 10,191
Club RR Member Number: 170
|
|
Dec 23, 2018 22:24:25 GMT
|
Oooooo what did you order down to me?! BMW.... You have no idea how much I debated throwing a BMW engine into this! I know the 652cc conversion is frowned upon, but it really gives the 2CV a 'nice' amount of pace. But no, it's not a BMW conversion. If you look carefully in that box, you'll see what I'm adding to the car on your recommendation . OK, maybe not entirely yours, but it's something I've wanted to put into a retro, and it's something a friend has used in another car with great results. All will become clear in time. Am I holding out for the timebeing on info, or well, being vague? I certainly am! So, the 2CV came back from Lyell's looking lovely. but it was not free of its faults. These could be summarised as follows: - Semi awkward to start if left for a month. If it's a daily runner it will always start on the button. That could be normal to be fair- The stench of exhaust fumes inside- The wetness and what I think sometimes is grease around the CV joints- A gauge to wire into the car- A shot wheel bearing on the rear-Handbrake shoes to adjust -A brake pedal which always stops, but seems to reduce slightly in travel on the second pump. - Amend and change the ignition system . - Almost doneNot a great list i admit, but it should keep me out of trouble right? With the Merc back, and with me having some time off work due to the Christmas showdown at work plants, I decided to go full steam ahead and get the 2CV back to the unit now the W124 had returned from paint. Today would be the day that I started work. But what would I tackle first? That's simple. the driveshaft boots. People may ask why I did these first. The truth is I still want to keep the car moble, but I'm aware that one or two of the issues above could very well cause issues for me, regarding the running of the car. That includes the wheel bearing, and the exhaust leak. I'm hoping it's just a heat exchanger gone bad (I have a spare) or the exhaust manifold gasket is blowing that badly so as to make the car stink of exhaust fumes inside (one is blowing to be fair), but I am preparing myself for the worst; pulling the heads off The first thing to do, was to strip the front of the car down. This really then does make it very easy to work on a 2CV:  This will be a familar look to many 2CVers out there! The next plan of attack was to assess which boots to change. I knew one intemediate gaitor was leaking, but then I spotted a load of grease on the inside of the wheel and could have sworn there was a pinhole. Today, I couldn't find it! Madness or a fair point? However, two of the gaitors were very soft to the touch, with one of them showing signs of perishing. It seems that a couple of these may have been changed in the past; both intermediate boots had differences present! Seeing as I had ordered a Neoprene CV boot set from ECAS anyway, I decided to change the lot: With that in mind I cracked on.  Yes the photo is curse word. In my defence however, I was dripping in CV grease! It's messy greasy and seemes to get everywhere! Before I knew it, the inner driveshaft was on the bench, ready for the old grease now-turned-into-oil, to be removed and wiped away, with fresh CV grease to go in. With that in mind I cracked on, with a friend to assist. Within a few ours, I had both sides of the car done, and some cleaner looking driveshafts! It's nice not to have an inconcinent car for once!  ![]() scontent-lhr3-1.xx.fbcdn.net/v/t1.0-9/49274268_10155730681570843_3422025982045847552_n.jpg?_nc_cat=105&_nc_ht=scontent-lhr3-1.xx&oh=f5a998d11d7603d35cc758b252ae4e0e&oe=5CA06683/img] scontent-lhr3-1.xx.fbcdn.net/v/t1.0-9/49274268_10155730681570843_3422025982045847552_n.jpg?_nc_cat=105&_nc_ht=scontent-lhr3-1.xx&oh=f5a998d11d7603d35cc758b252ae4e0e&oe=5CA06683/img] ![]() It's fair to say that the job went more smoothly as planned. Now to tackle whatever job I decide to do next .  |
| |
Last Edit: Dec 29, 2018 21:19:34 GMT by ChasR
|
|
ChasR
RR Helper
motivation
Posts: 10,191
Club RR Member Number: 170
|
|
Dec 26, 2018 19:34:34 GMT
|
Well, as Charlie Croker said "You're only supposed to blow the bloody doors off! That would be apt for what happened with me today! It all started with me going over to the unit to change the rear wheel bearing. After removing the grease cap and knocking off the anti-slip tab, I was greeted with this:  DSC00716 DSC00716 by Charlieboy, on Flickr Yup, it was greasy in there! I was told by the previous owner to let the bearing warm up, as it would quieten down then. To be honest, I wonder if there is any grease left in it! Rotating the drum confirmed my supicions; it sounded rough upon rotation, but there was no play present and it didn't feel especially rough. It was then time to undo the nut. I gave it a try with my 1/2" breaker bar on the special socket bought from ECAS. In short, the knucle of my long breaker bar developed play. When I put another bar onto the breaker bar, it was bending so much that I wonder if it would snap. Not what you want, especially being alone in a unit on Boxing Day, i.e there is a chance I could get injured etc. I then tried my Kielder rattle gun, and TBH, despite its claimed 450Nm torque rating, it didn't want to know. So, I was back to square one with that part. With that in mind, I reassembled the rear wheel and moved onto the front, the exhaust leak. After getting some spare tube, I wondered around the front with it, and managed to deduce that the heat exchangers were fine. However, I could hear some blowing from the left hand side exhaust gasket. Damn, I'd have to dissamble the engine. Not entirely a bad thing, as I had been meaning to deal with an exhaust leak anyway. 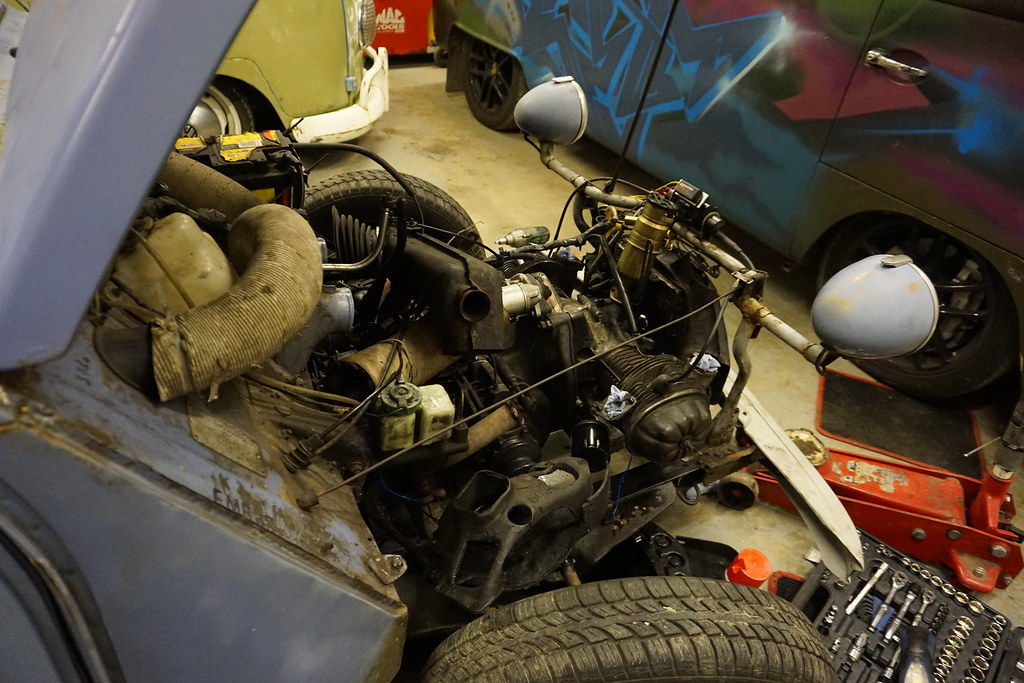 DSC00718 DSC00718 by Charlieboy, on Flickr Yup, that escalated quickly! Because the 2CV inlet manifold and exhaust manifold are one, the entire lot had to come off. However, once I had it off, I was able to see the exhaust leak in the face: 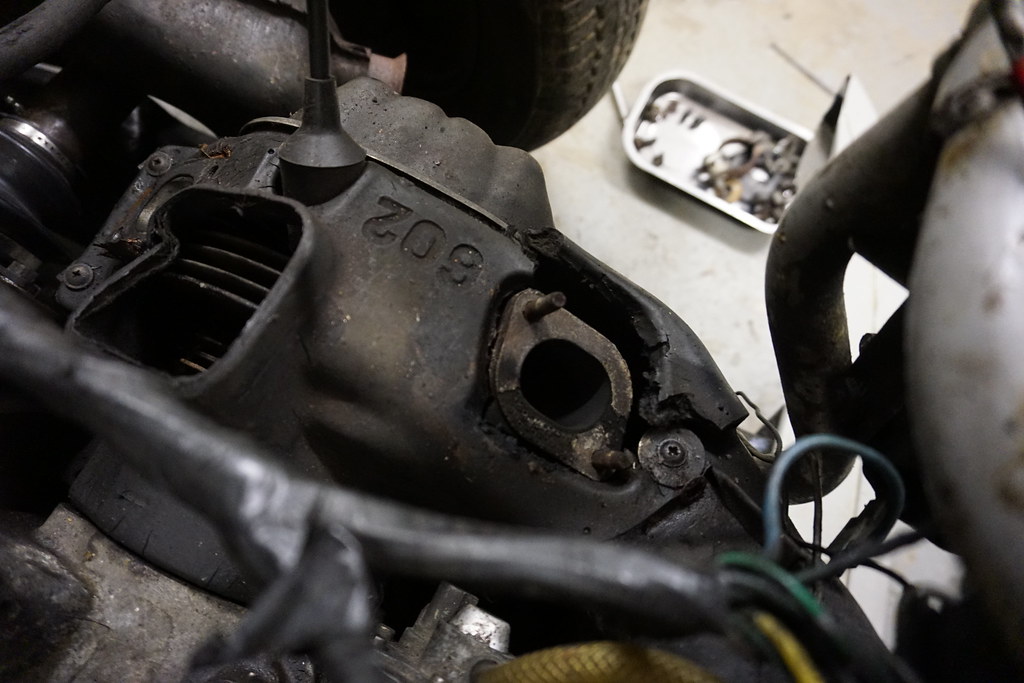 DSC00717 DSC00717 by Charlieboy, on Flickr The exhaust gasket had blown itself clean out! It's strange, as I'd have expected the seal to have blown on the other side, given that the head can come loose on the passenger side. Saying that, both inlet manifolds had signs of external sealant applied. 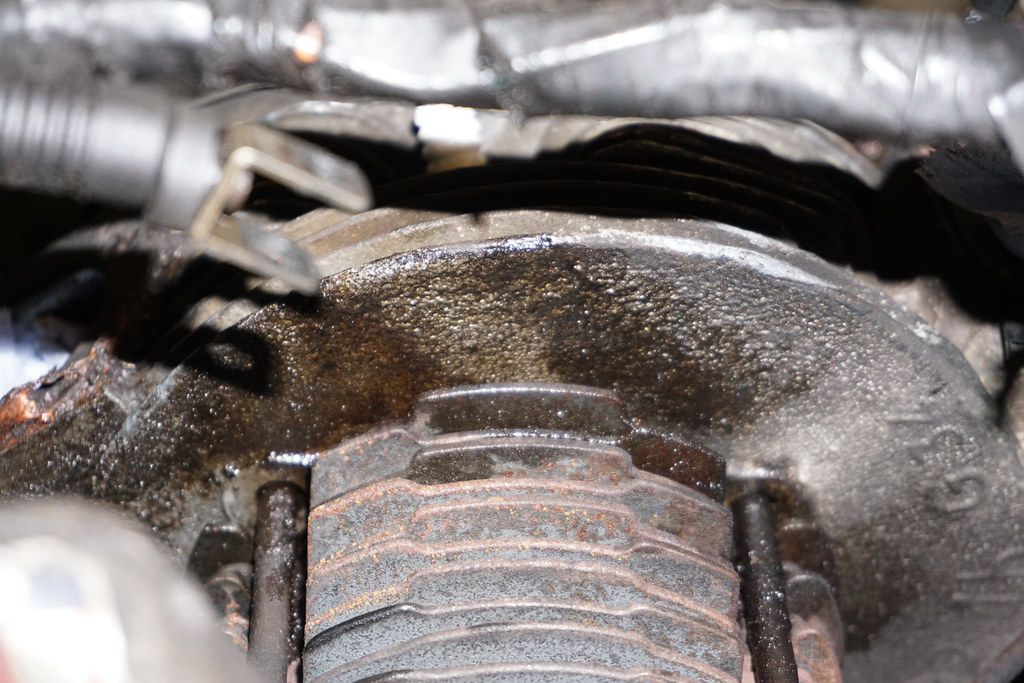 DSC00720 DSC00720 by Charlieboy, on Flickr As you have noticed, the heads are wet. it's hard to say whether the wetness is coming from the pushrod tubes or inlet manifold gaskets. Given that the inlet manifolds are at the back of the engine, I do wonder if it is the pushrod tubes. It may well explain the wetness of the engine too ; maybe the heads are undertorqued. 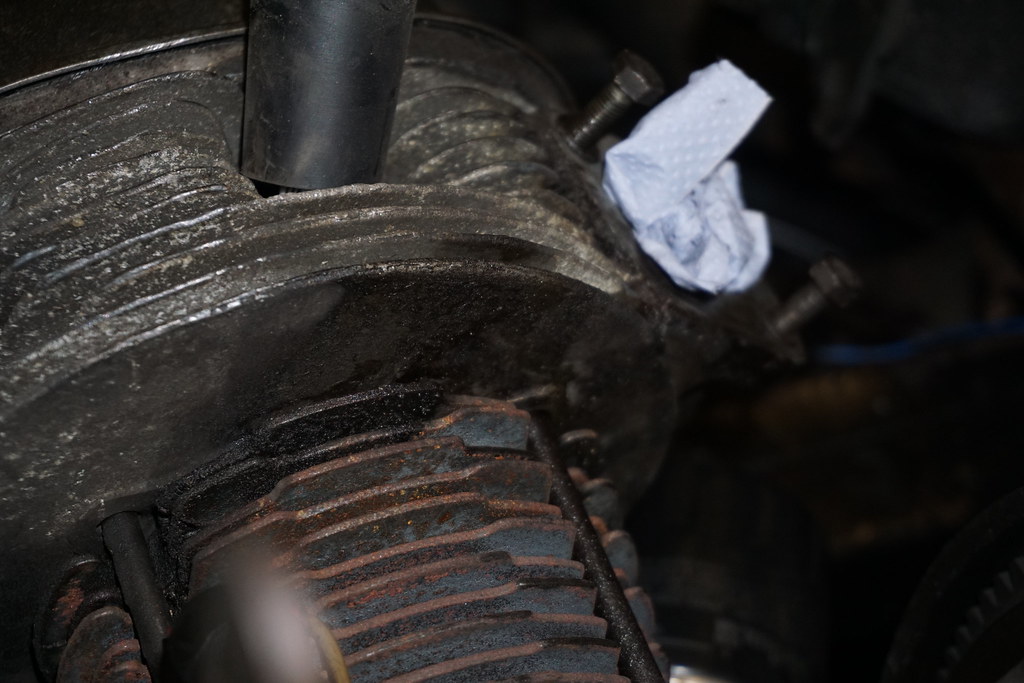 DSC00722 DSC00722 by Charlieboy, on Flickr I also found another source of the engine oil leak; the filler tube to crankcase tube. This if I understand how a 2CV engine works has quite a job. If so, I am surprised this is lacking any form of jubilee clips etc. as it can well make a mess. I did once make the mistake opening up the oil filler cap as the engine was running. That was a mistake! 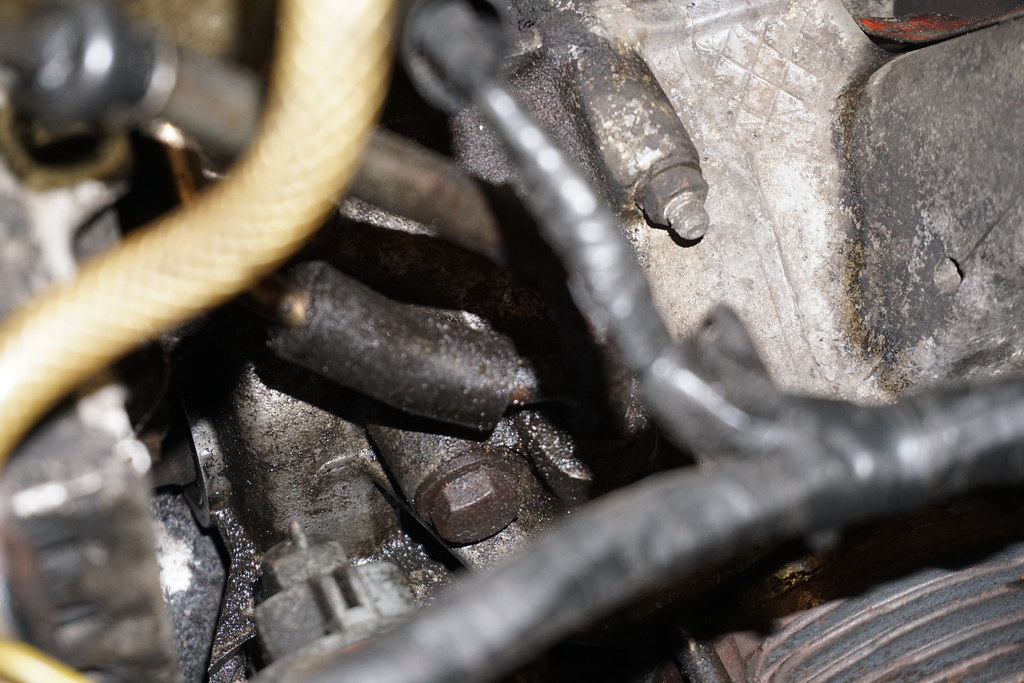 DSC00723 DSC00723 by Charlieboy, on Flickr However, given how the above had escalated in an afternoon, I decided to change one part of the car which had bugged me; th engine mounts. This engine really enjoyed moving around, and it's something others were keen to point out to me! With that in mind, I switched out the old mounts for some new items. On first impressions, if I rock the engine by hand, it doesn't seem to move at all now unlike above, and the mounts do seem harder than the original items, albeit an almost insignificant amount. We shall see how the engine behaves upon running again. 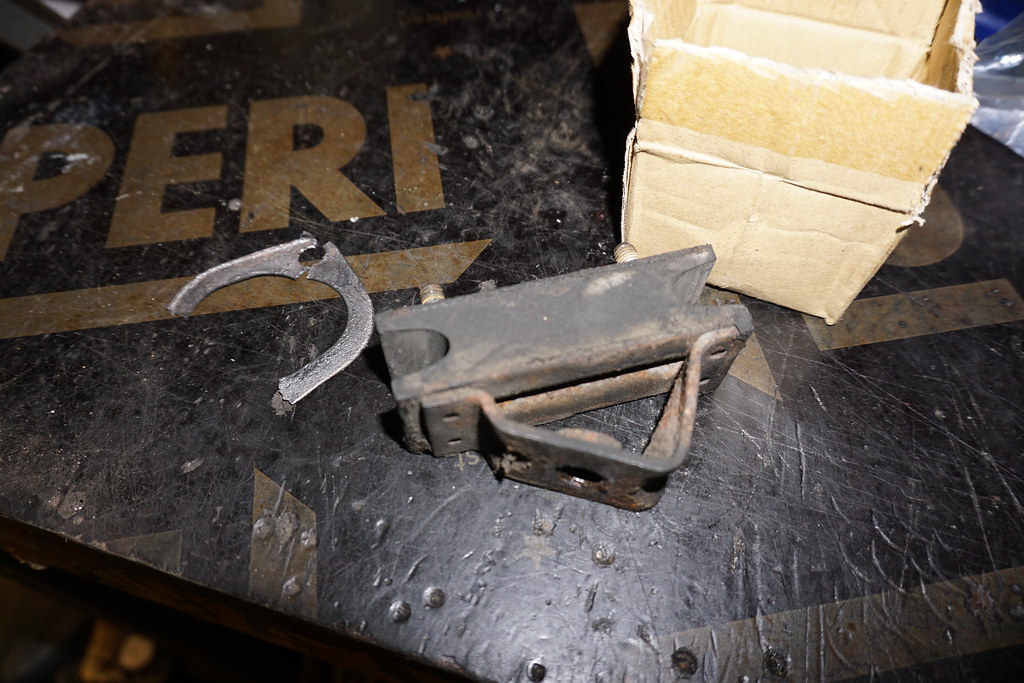 DSC00725 DSC00725 by Charlieboy, on Flickr 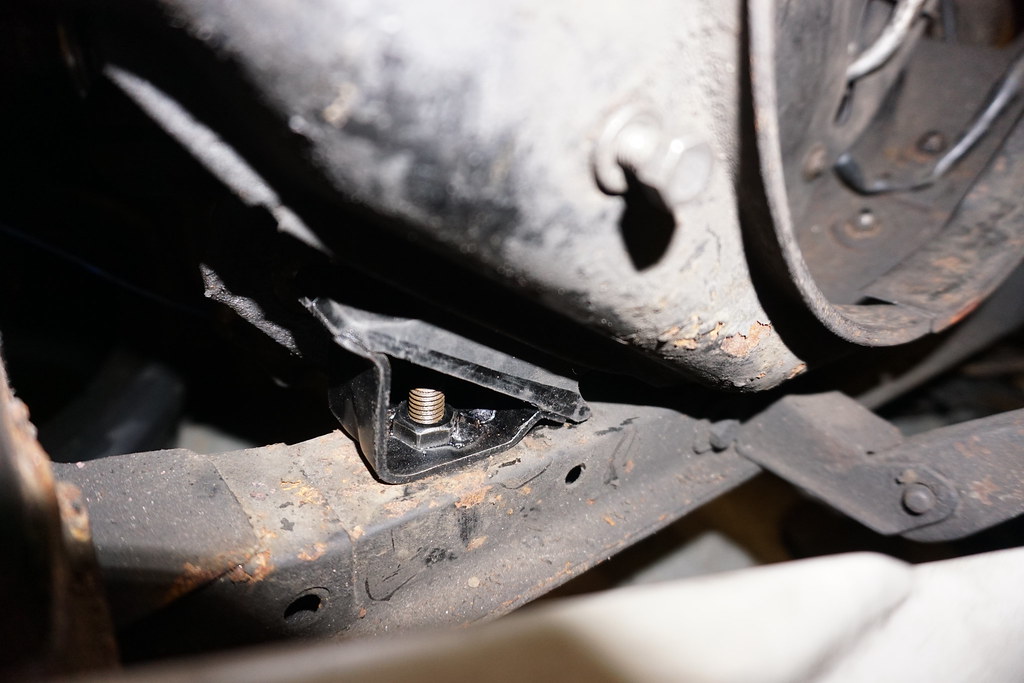 DSC00726 DSC00726 by Charlieboy, on Flickr So, as it it stands, the car is not looking great. But on the other hand I am almost halfway there with two of the car's biggest issues; exhaust fumes in the cabin, and it leaking oil. The plan for the week is: -Remove the heads -Lap the heads using a spare barrel I have from a donor engine -Replace the pushrod tube seals with Viton items; They are weeping slightly -Refit the heads along with new oil head seals for the oil pipes -Clean up the mating faces to within an inch of their life -Refit the new and improved gaskets onto the heads -Fit the new 123 Tune + Dizzy -Hope for the best! So as it stands, the car is looking like this:  DSC00719 DSC00719 by Charlieboy, on Flickr it's looking a little sorry for itself, but it is getting there, albeit slowly. It seems that greencarfritz was right about the exhaust leak. It's surprising how many exhaust fumes just the gasket going can let in! |
| |
|
|
ChasR
RR Helper
motivation
Posts: 10,191
Club RR Member Number: 170
|
|
|
|
Sometimes, you have to laugh at others misfortune, and also poverty in this case. But yesterday was a day of mixed blessings. I aluded previously to how the rear wheel bearing put up a fight. I decided that I would foolishly tackle it again. Foolish as that 44mm nut seemed to have a pretty smug smile on it face with my; -1/2" breaker bar bending alot and failing to touch it, even with scaffolding on it. The bar did bend very comically however! -My Kielder rattle gun. Despite it's impressive 450Nm rating, the nut would not move. So, my local mechanic took pity on me, and lent me one of these: 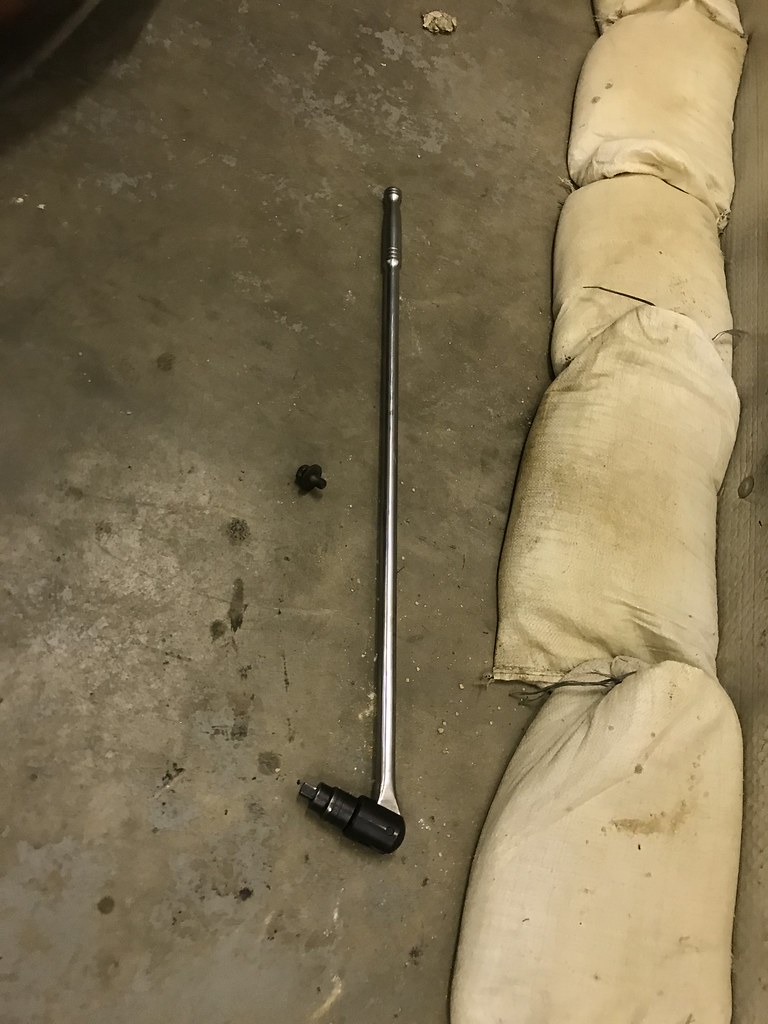 2CV Overhaul Boxing Day 2CV Overhaul Boxing Day by Charlieboy, on Flickr Yup, a 3/4" breaker bar. Finally, the hub nut would come off! Would that put me out of the woods? No chance, not even close. I then noticed I had a retainer to move. Even with my special retainer tool, the drum being mounted in the vice, then with a bar on the drum-non-rotation tool, and a mate holding it nothing would touch it. The scaffolding poll was employed once more. 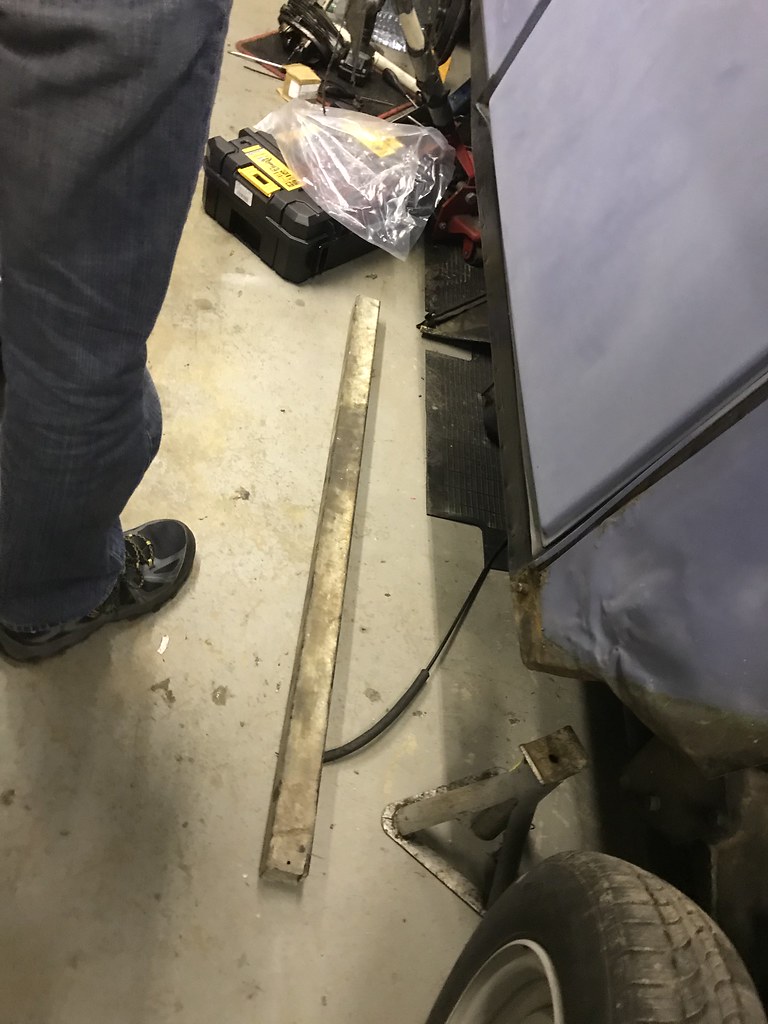 2CV Overhaul Boxing Day 2CV Overhaul Boxing Day by Charlieboy, on Flickr Annoyed, and dejected, I went out and spent a small fortune buying one of these: 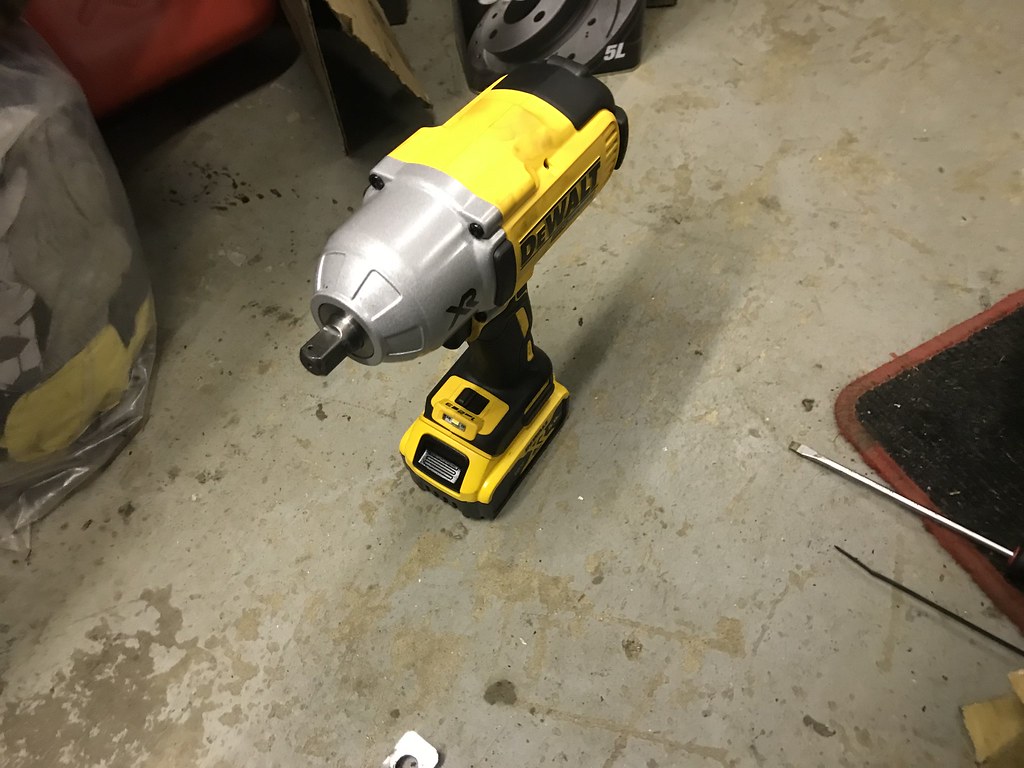 2CV Overhaul Boxing Day 2CV Overhaul Boxing Day by Charlieboy, on Flickr 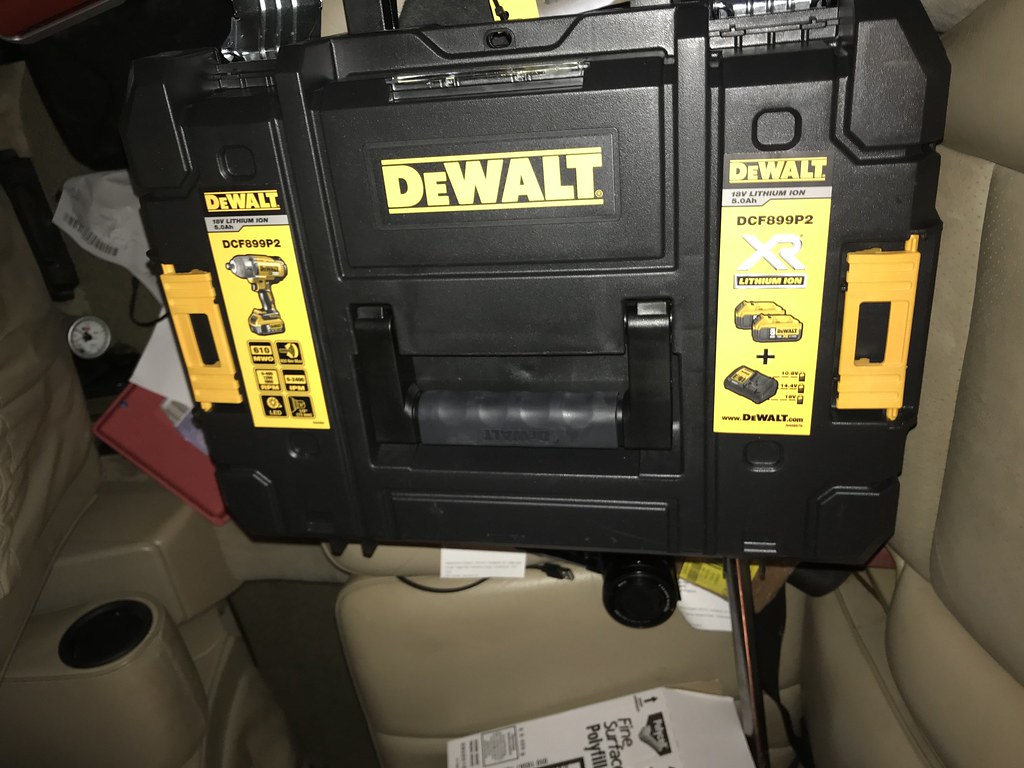 2CV Overhaul Boxing Day 2CV Overhaul Boxing Day by Charlieboy, on Flickr However, this did get the retainer out. Even when I went back to attempting to use the 1/2" breaker bar after loosening it, that retainer was in the drum TIGHT! It really wasn't budging that easily! So it does seem that this rattle gun was very handy! I probably saved a small fortune on labour too! All that was left to do was to press the old bearing out. Thankfully, I have access to a 6 tonne press in the unit. In no time at all, the old bearing was out and the new one fitted. 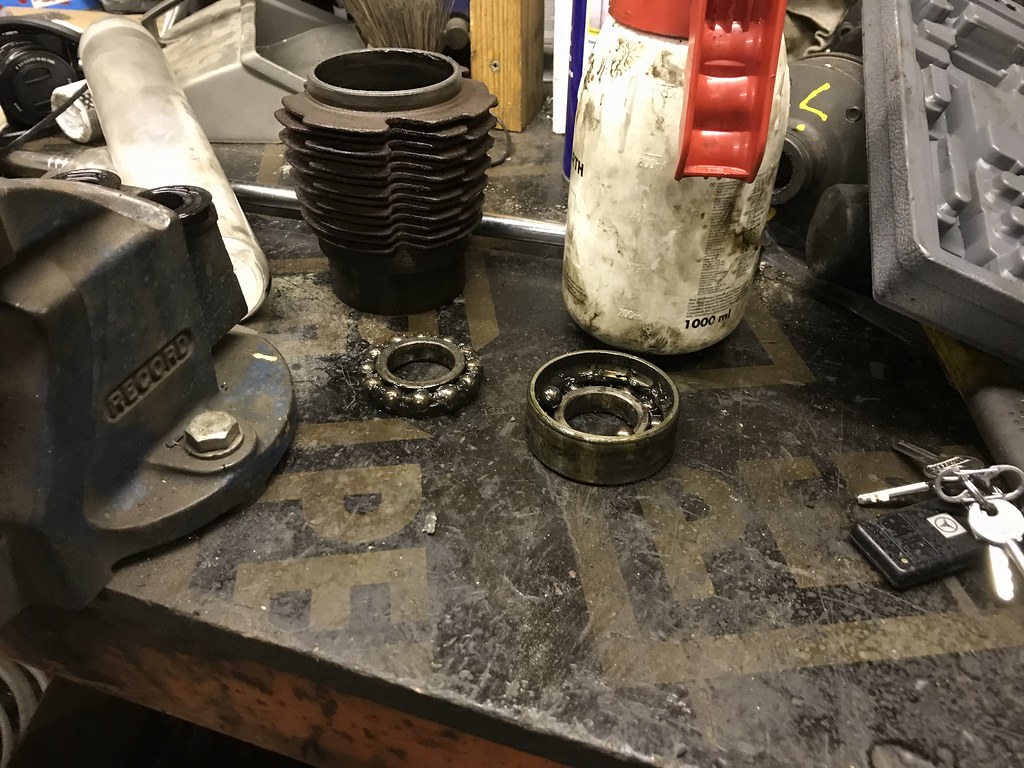 2CV Overhaul Boxing Day 2CV Overhaul Boxing Day by Charlieboy, on Flickr 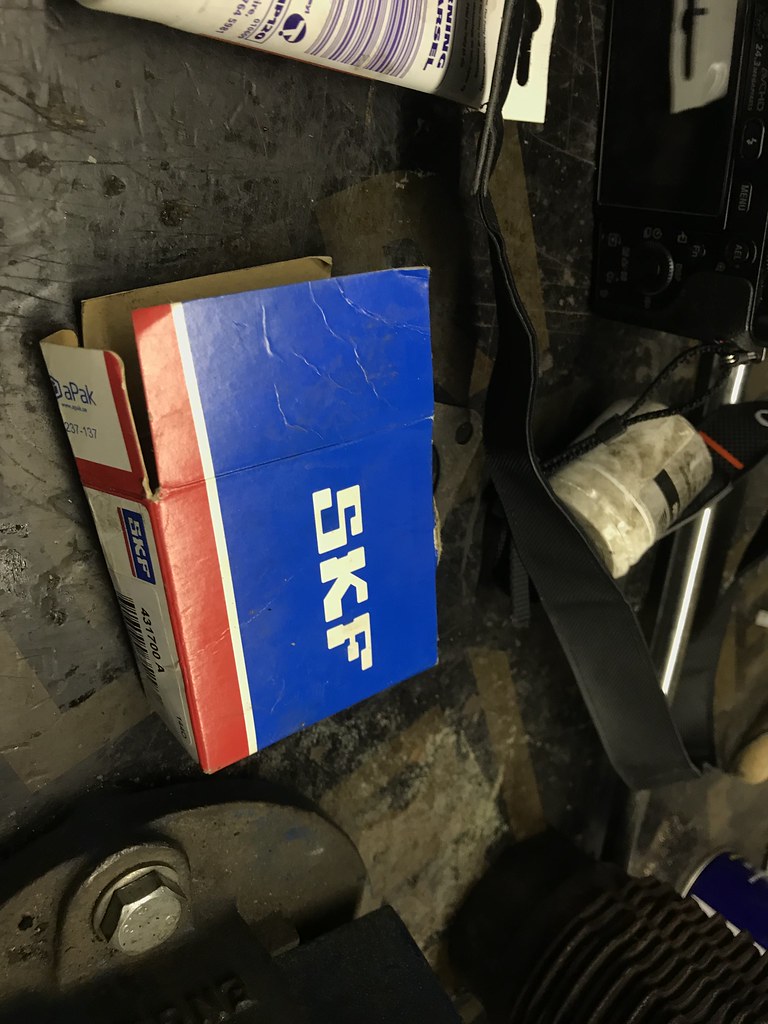 2CV Overhaul Boxing Day 2CV Overhaul Boxing Day by Charlieboy, on Flickr 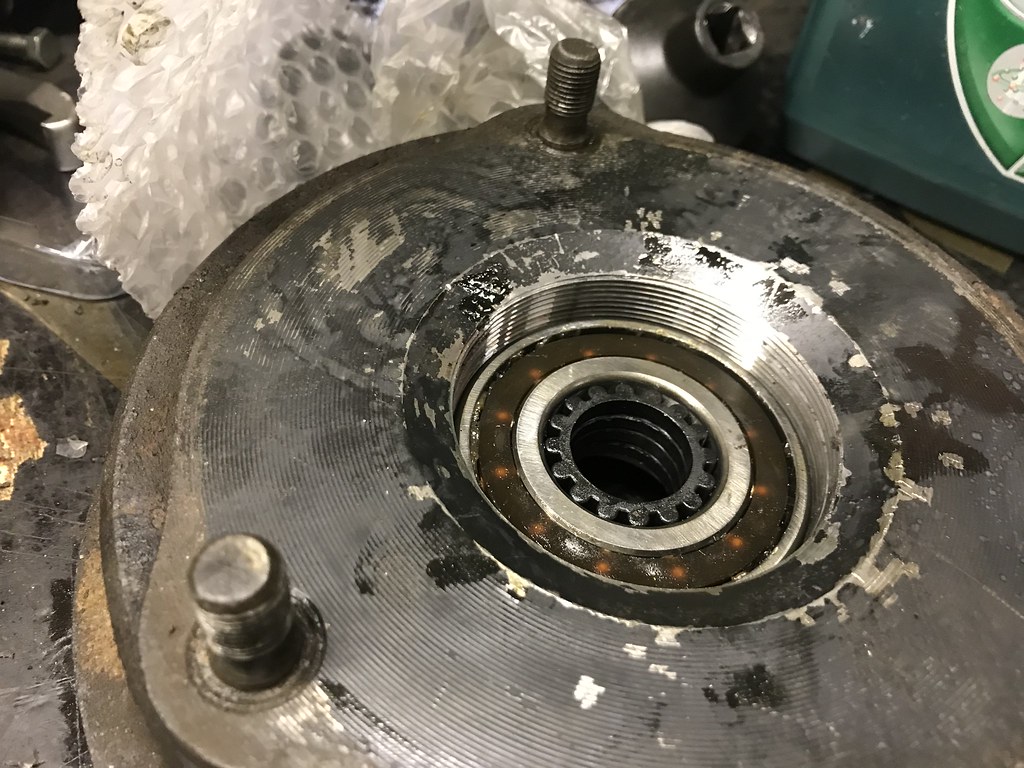 2CV Overhaul Boxing Day 2CV Overhaul Boxing Day by Charlieboy, on Flickr All that was then left to do was to clean up the black marks on the rear spindle, fit the new bearing seal, and throw the lot back together again. That would be the rear bearing done and dusted thankfully! With my friend on side, we then proceeded to remove the cylinder heads, lap the head surfaces using an old barrel, fit the new Viton pushrod tube seals, and whatever other seals I could think of. This would include the head oiler seals, oil pressure switch and seal and so on. I also cleaned the gasket surfaces to within an inch of their life. So, there is alot to do still, but I am getting closer and closer to having it running once more 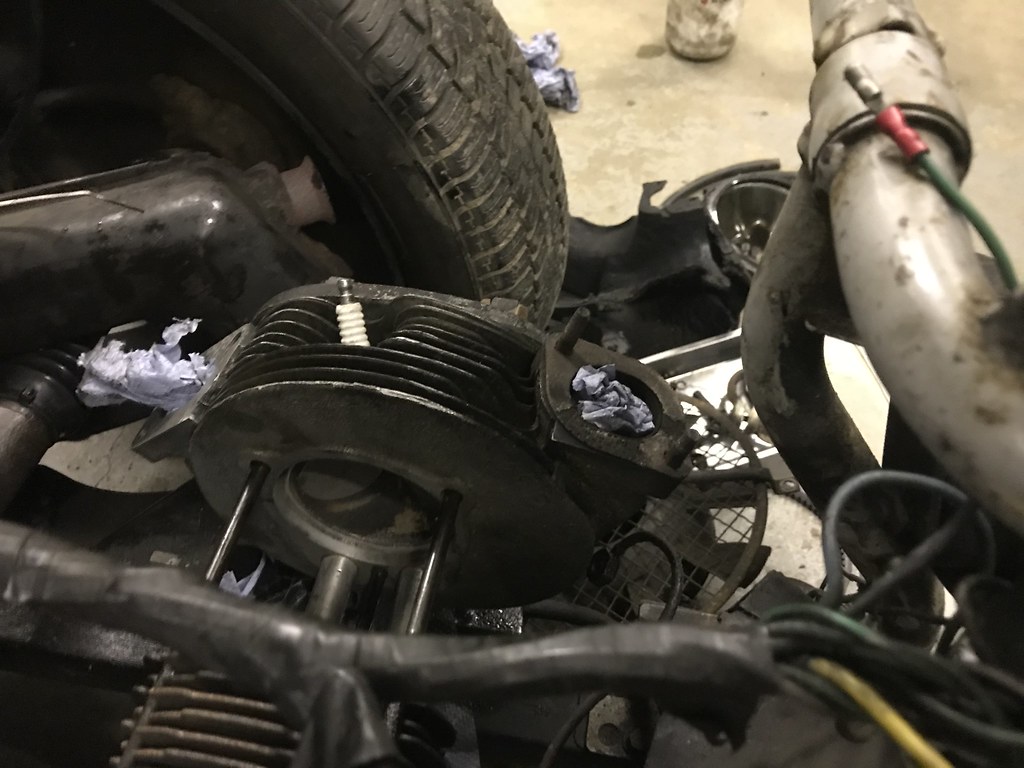 2CV Overhaul Boxing Day 2CV Overhaul Boxing Day by Charlieboy, on Flickr 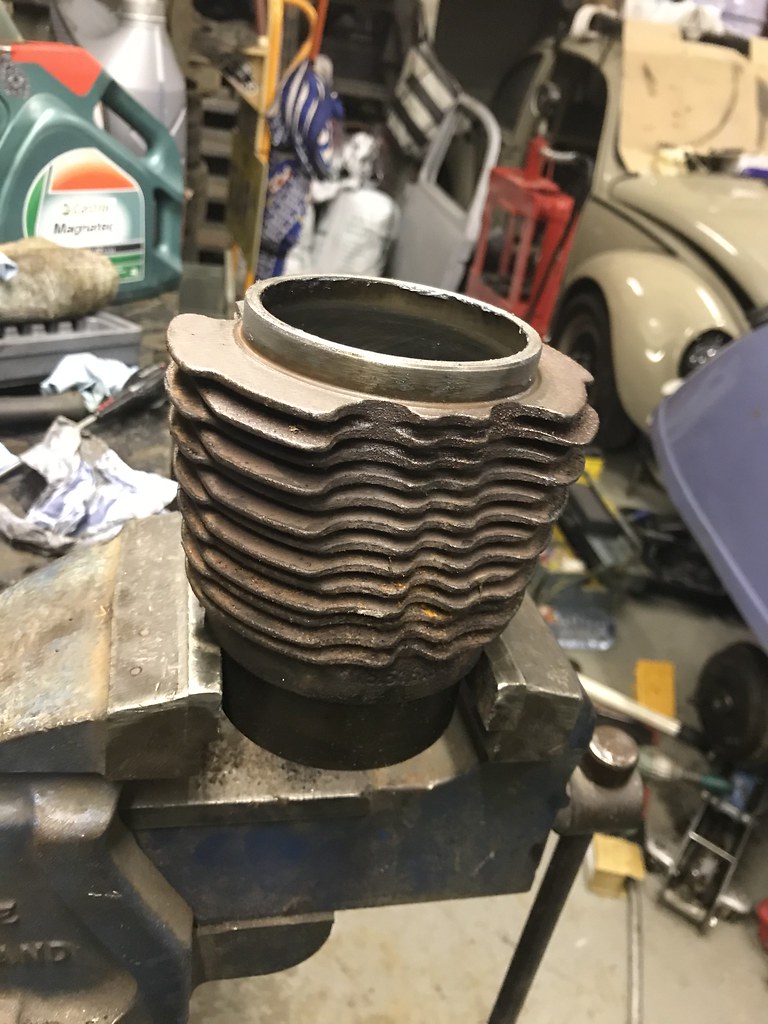 2CV Overhaul Boxing Day 2CV Overhaul Boxing Day by Charlieboy, on Flickr |
| |
|
|
ChasR
RR Helper
motivation
Posts: 10,191
Club RR Member Number: 170
|
|
Dec 28, 2018 23:57:15 GMT
|
So, if Yesterday was a day of progress, today felt like a day of failure, which seemed to go from bad to worse. It will feel more like that as the day went on! I was hoping to get the Citroen ready for Bicester Heritage... Upon coming back to the unit, I was greeted by this sight: 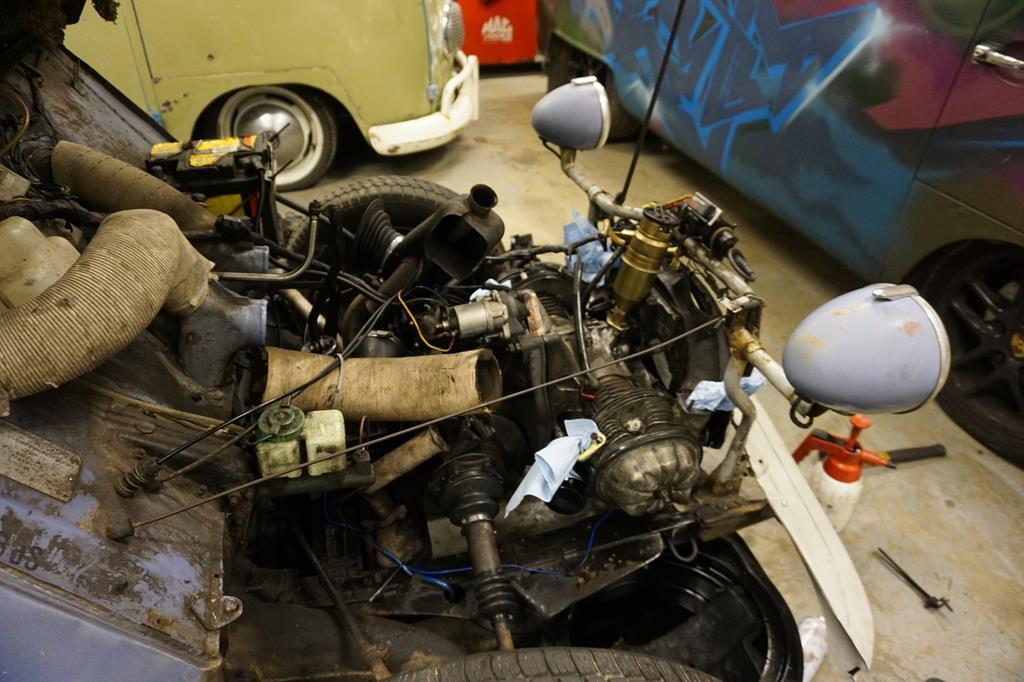 Yup, I was still a fair way away from having a running engine again. But let's concentrate on the good things. For instance: 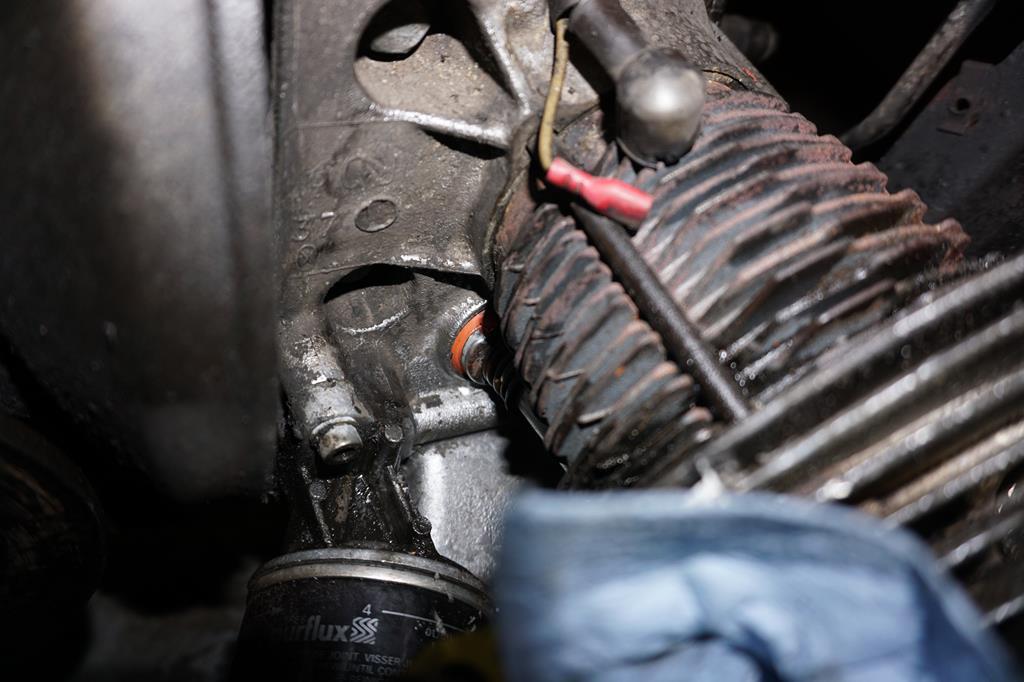 Viton pushrod tube seals had replaced the new, yet slightly hardened rubber items. 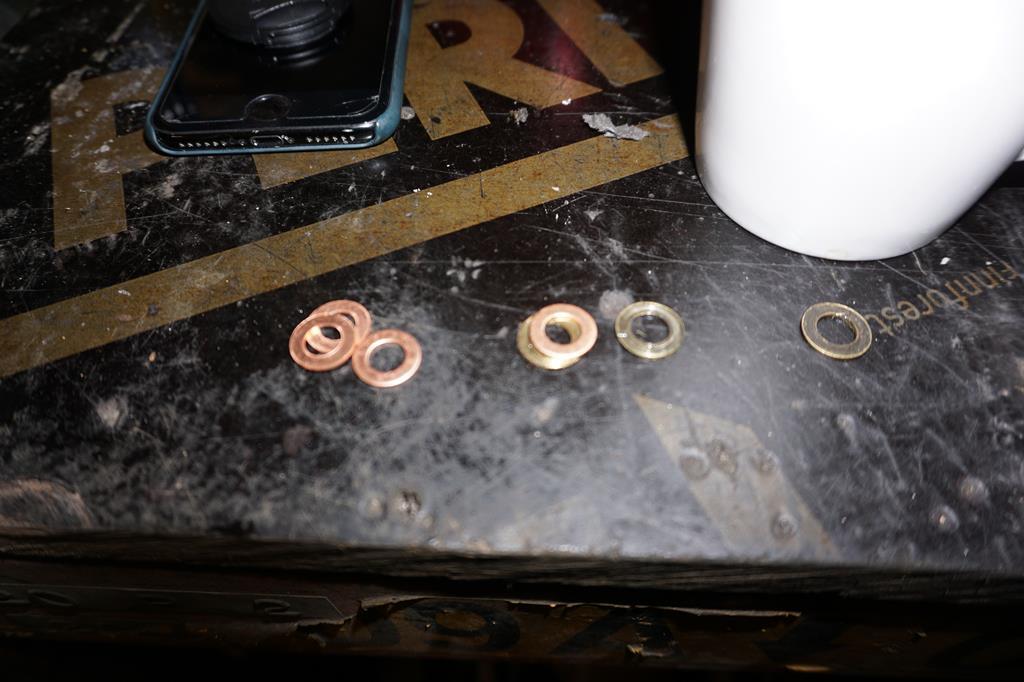 I noticed that the brass/copper washers were looking past their best for the cylinder head nuts. These are crushable by design, and it may have explained the smell of exhaust fumes previously. I changed them for new copper items as a result. 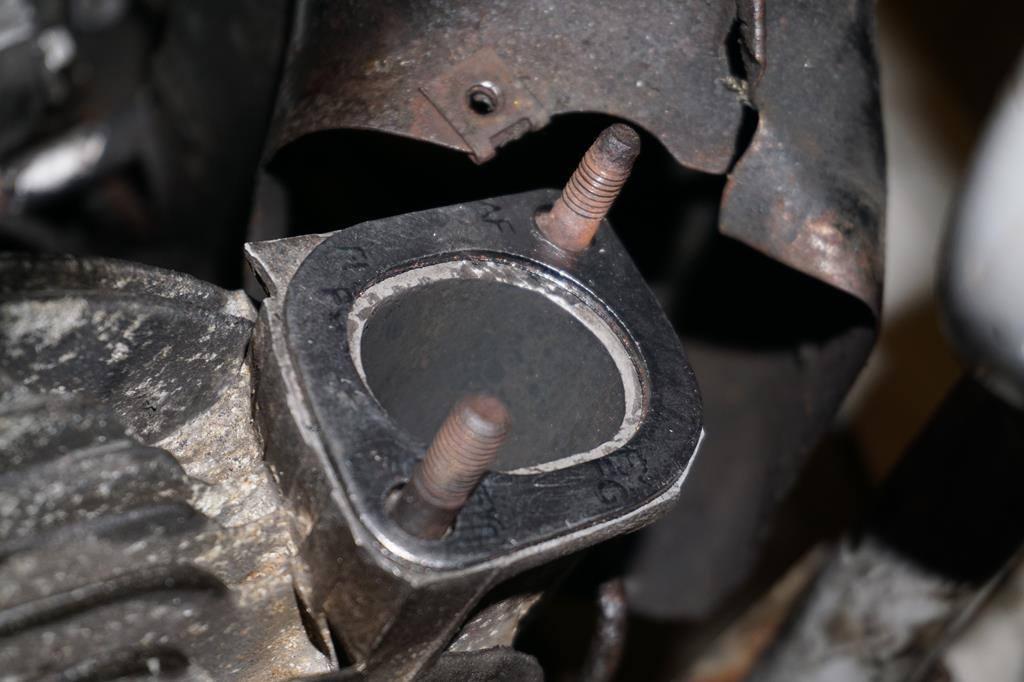 New improved exhaust gaskets were fitted 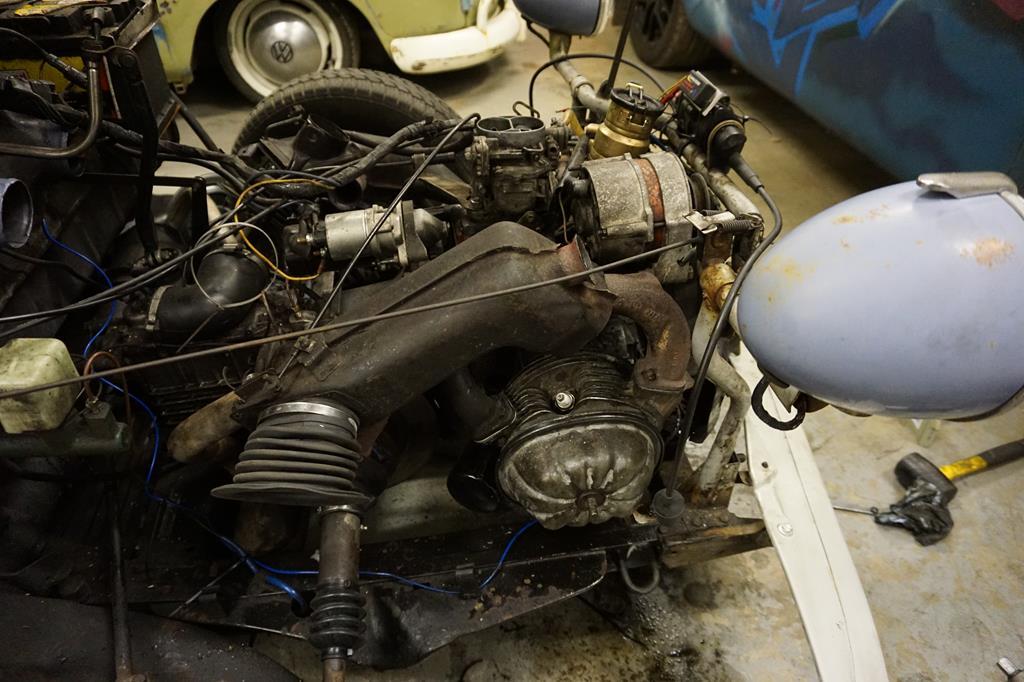 So I fitted everything back together. The keen eyed here will spot a mistake. Yes, I fitted the manifold back on without fitting the cowling!. I really did kick myself for this for around 15 minutes. But, that was not going to acheive anything. Next, I went up and decided to fit the heat exchangers. OK, I couldn't run the engine for long without the cowling but at least I could check for leaks: 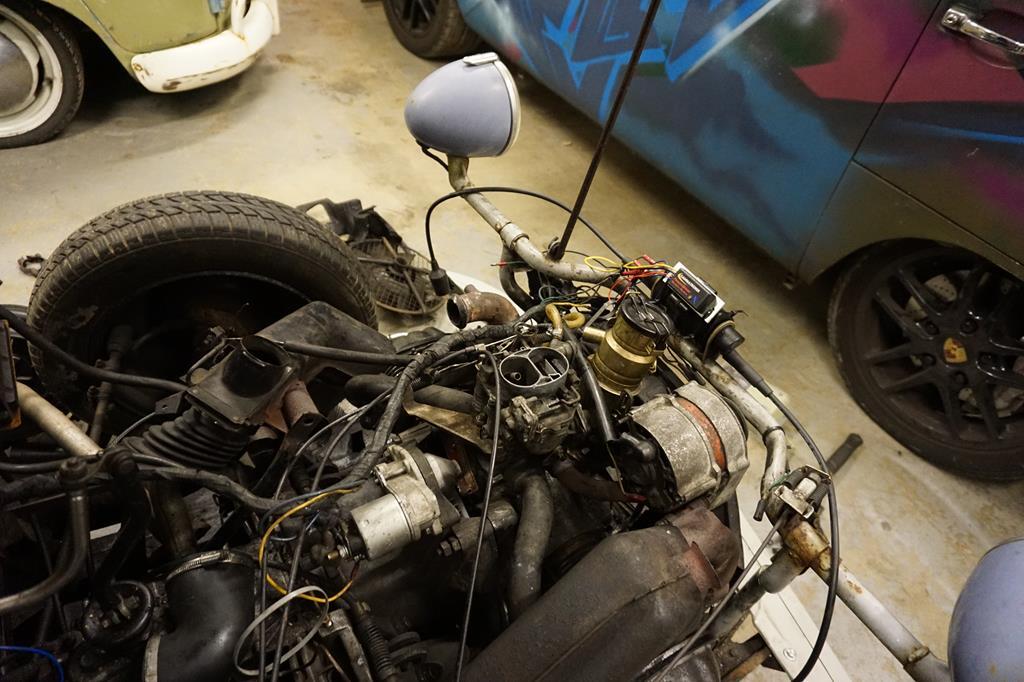 What was the result? Well, let's start with the good news. -The heads no longer seem to leak and there is no smell of exhaust fumes in the engine bay. For me, that's a big win! The bad? Well, there had to be bad news. The cylinder head oil feed tubes have cracked badly, with both sides now leaking oil onto the floor with the engine running. I do wonder if it was me, but it would explain the fumes to some degree, the dampness around the right hand side head, in addition to why I found it tricky to find the oil leak previously. The pipes don't look that great at all. This leaves me with a few choices: -Fit a spare set I have. Both of my spare sets look no better than what is on the engine, and to be honest, given I'll have to bend them into place to fit them, I suspect they will crack as well -Order a set from ECAS : However, they are shut until New Year's day. De Francoze are closed even later than that. -Burton are out of all of all variants So yes, any chance the car had of making it to Bicester next week evaparated the moment I fired the car up. Am I annoyed? Yes. Do I feel like my exercise above was futile? Partly. Maybe I was heavy handed despite trying to be careful ; those mild steel pipes are known for breaking. But, there's no point worrying it about it now. With that done, I was planning to fit the 123 device later. Seeing as the car won't be going anywhere for a while, I figured I may as well make a start on fitting that. Note how the front of the engine bay now looks tidier with the Gammatronix ignition box removed. When I checked the timing previously, the Gammatronix was idling at 12 degrees before TDC but advancing to 27 degrees BTDC all in. That sounds fine, but the 2CV is mean to run at 8 degrees at idle and around 30 on full tilt. So at leas the 123 can sort that out and allow me to play with the curves more. I'll be honest, it seems happier idling at 12 degrees than it does at 8 degrees. 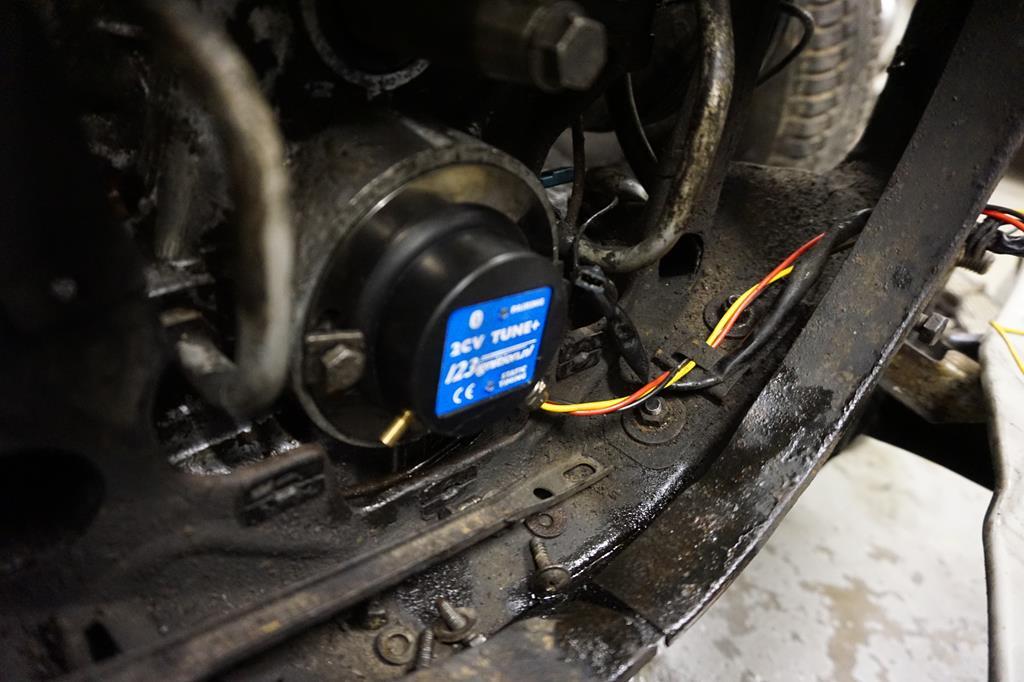 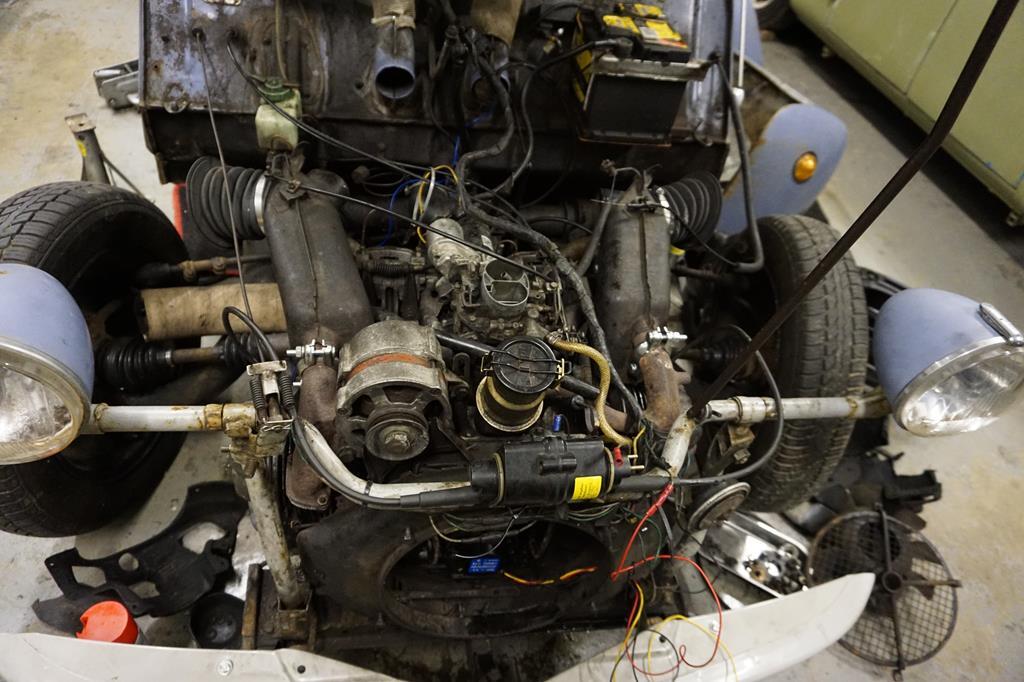 So yes, today has been a curse word day. With that in mind, I tided and cleaned up all of my tools, left the unit and will return back with renewed vigour. But without sound oil feed pipes in sight, that won't be for a while. A shame really. It's crazy to think that 4mm of semi-corroded mild steel pipe has bought this 2CV project to a halt. But these things do happen.  |
| |
|
|
|
|
|
Dec 31, 2018 21:23:54 GMT
|
|
|
| |
1987 Supercharged BMW R1150 Citroen 2cv Hillclimb Monster
1995 Renault Master Mk1 Race Transporter
1994 Mazda MX5 Mk1 / NA Road Going Class Hillclimber
1991 UMM Alter II Crew Cab OM606 SuperTurbo Diesel MegaUMM Overlander
1992 UMM Alter II Station Wagon
1980 UMM Cournil - survivor - resto project
1979 Lomax 224
2014 VW T5.1 Transporter Kombi Highline
|
|
ChasR
RR Helper
motivation
Posts: 10,191
Club RR Member Number: 170
|
|
|
|
They were going to by my first choice. After all, they will get around all of the problems, never die again and they are not that much more to buy either I've checked Burton, and they are out of stock for a while . Bonapart have been interesting to contact. Maybe I'm being too impatient by trying to get the car done for Bicester but going by ECAS's comments about there being a 5 month wait until further notice, I doubt they'll have them for months . Given ECAS open up on Thursday and will probably have alot of orders, I find it very unlikely I'll see them before the weekend, maybe not even next weekend, as I'm aware he is a little short on people for now . Pete Sparrow has decided to help me out with a new set thankfully on Cupro-Nickel items. So they should be an improvement from old mild steel or copper pipes . Here's a question for you. When I did the mini-rebuild, I did the following: -Put heads on with new washers ; Torqued in 10Nm -Put manifold on ; torque to 10Nm -Retightened heads ; Torqued to 21Nm. This is what the Autodata book suggests and also a 2CV manual I found. Can I get away with doing the manifold removal and leaving the heads alone, or will they still require retorquing? |
| |
|
|
|
|


 .
. .
. .
. . The bumper had been weakened by being ground down to remove the bolts on the front, and it was now catching the bodywork. Not good for longevity. Furthermore, things weren't good with the grille! How, I hear you ask, it looks fine. Well, let me show you.