|
|
|
Jan 20, 2019 21:19:48 GMT
|
With most of the weekend chores out the way I looked around for other things to - now my mind works in a odd way that is difficult to explain but I will give it a go - so I have the boring chores list - bits round the garden that SWMBO cant do - grass cutting / mundane leaf raking / daft things that SWMBO doesn't sort or do - recycling bins / washing the modern car / stupid stuff around the house / cleaning the roof gutters out and finally the stupid stuff that only I do in the village like the litter pick half a mile either side of the house (doing battle with the Parish Council over this at present) - I always set myself a target and if I achieve 75% of that target then the rest can be carried through to the following weekend and I can go & play in the workshop with the chores that I enjoy. So at the 2018 Restoration Show I started on some fabricated repairs for Sam Glover's (Technical Editor for Practical Classics) Javelin on the Jowett Car Club stand. I completed one rear wing and started on the other - at the end of the show I brought the unfinished wing back with me - and Sam said just complete it in your own time Chris - No rush ! - well with the 2019 show less than 9 weeks away I had better finish what I started at last years show. Sam had not said anything to me but I thought he might have started to drop stubble hints to shame me into getting my finger out - If you check out Sam's 'Opinion' page for the last 3 or 4 editions of 'Practical Classics' there will be pic of a car that is the subject of that months opinion / topic - the latest edition has a Volvo 740GL - BUT - in the background every time - there it is for all to see Sam's Javelin with one rear wing done and the other not! 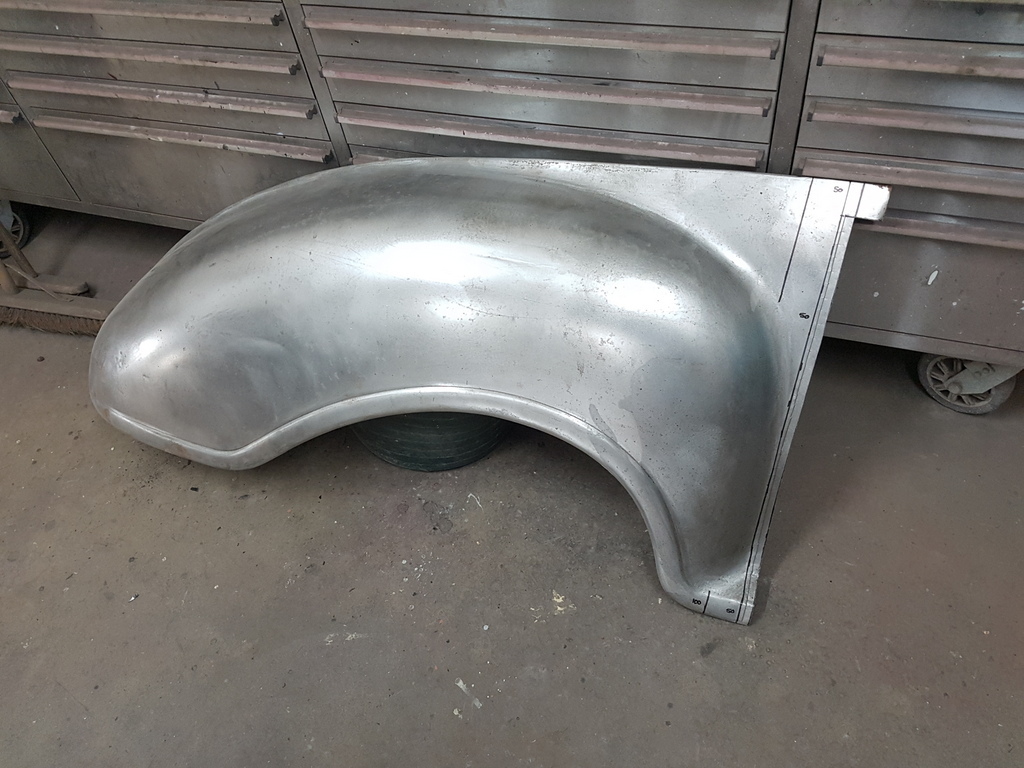 Dug the wing out of the loft - pretty sound apart the front leading edge where all the grot gets thrown up by the road wheel - I had previously had the wings dipped to bare metal by the ever so helpful 'Envirostrip' at Tamworth - I had cut out the perforated / rotten metal, joggled the wing edge and repaired the leading edge bracket at the show 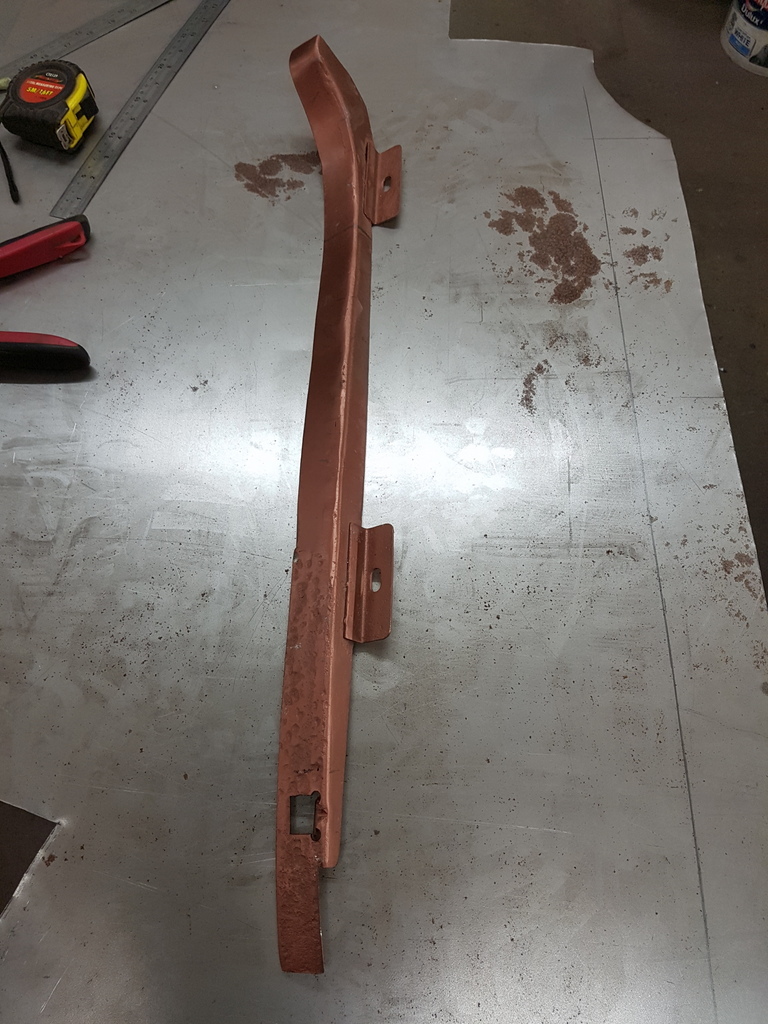 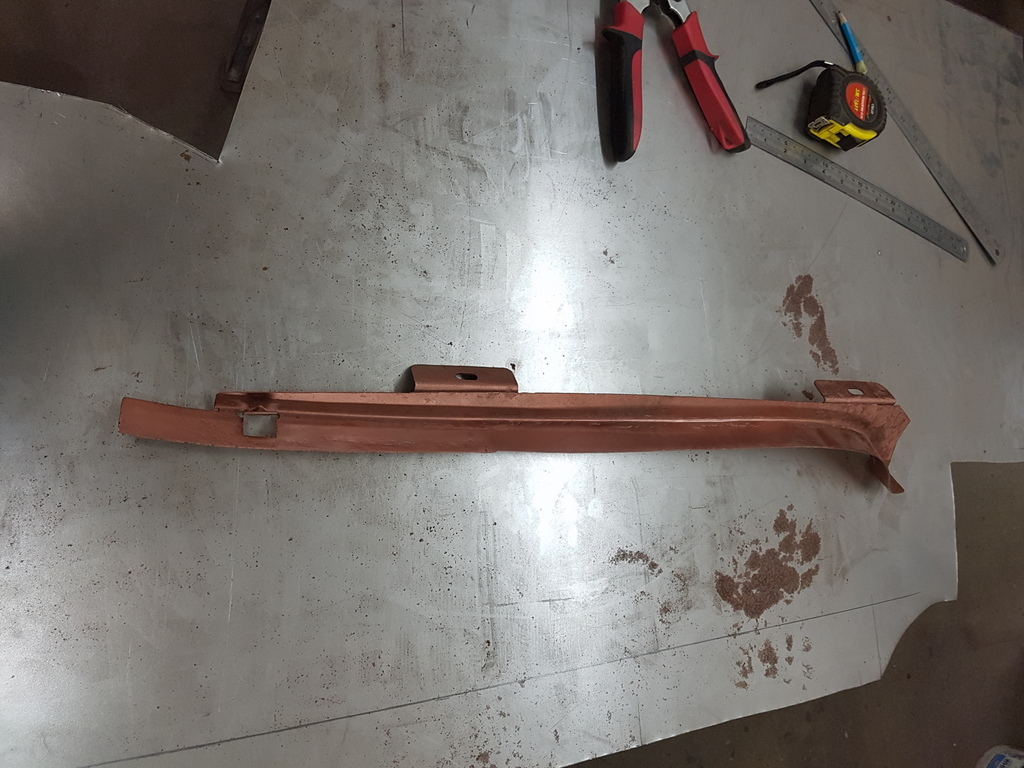 What I really wanted to do was replicate this bracket with a new one and retain the old one has a master pattern for future repairs on other wings  Put a right angle in to a overwide piece of sheet and then used the shrinker to form the radius curve 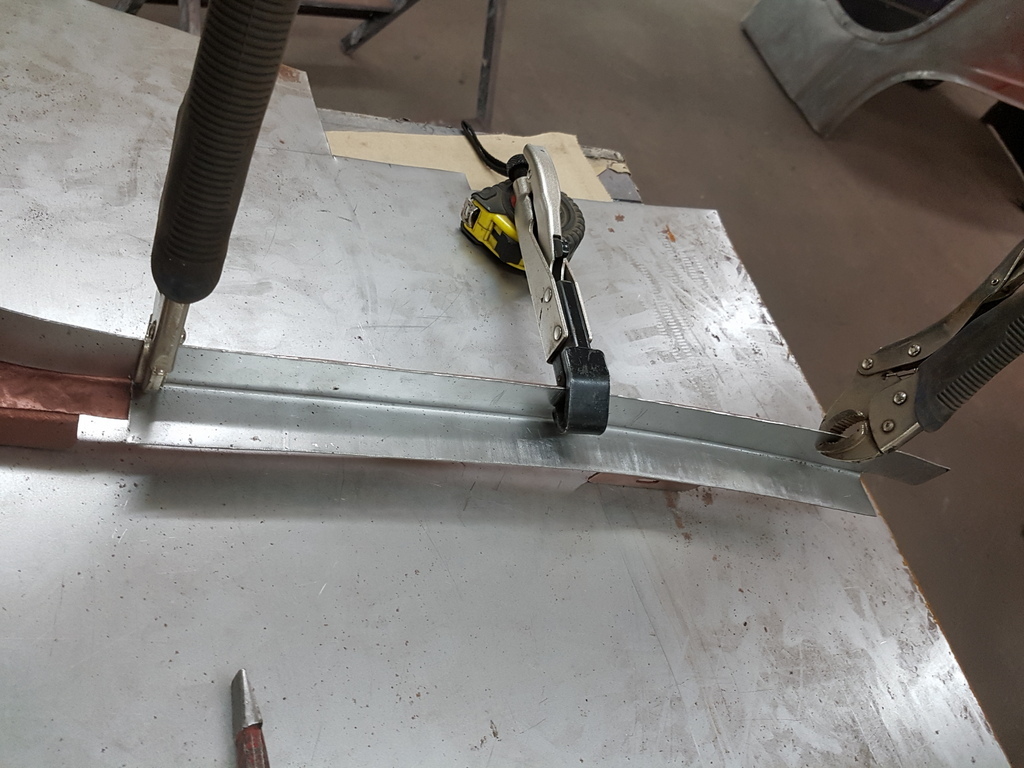 Then I could trim the oversize to suit 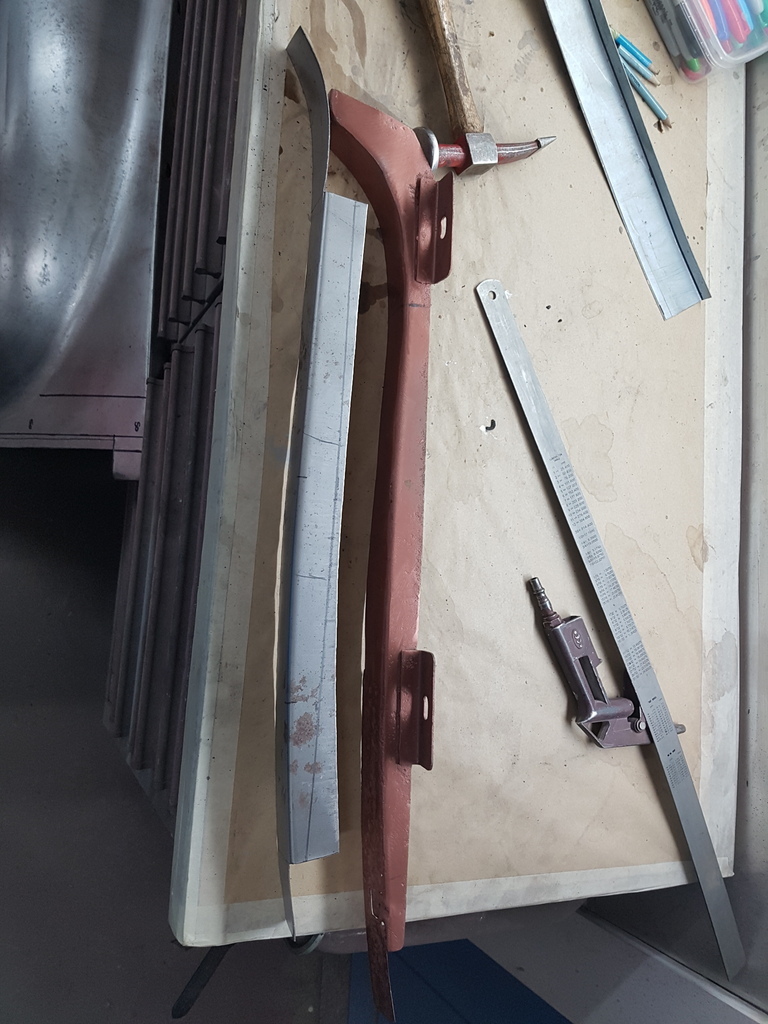 Templated the lower section and used the original bracket has a jig with the new one clamped to it to ensure the correct shaping was achieved whilst I tacked it together 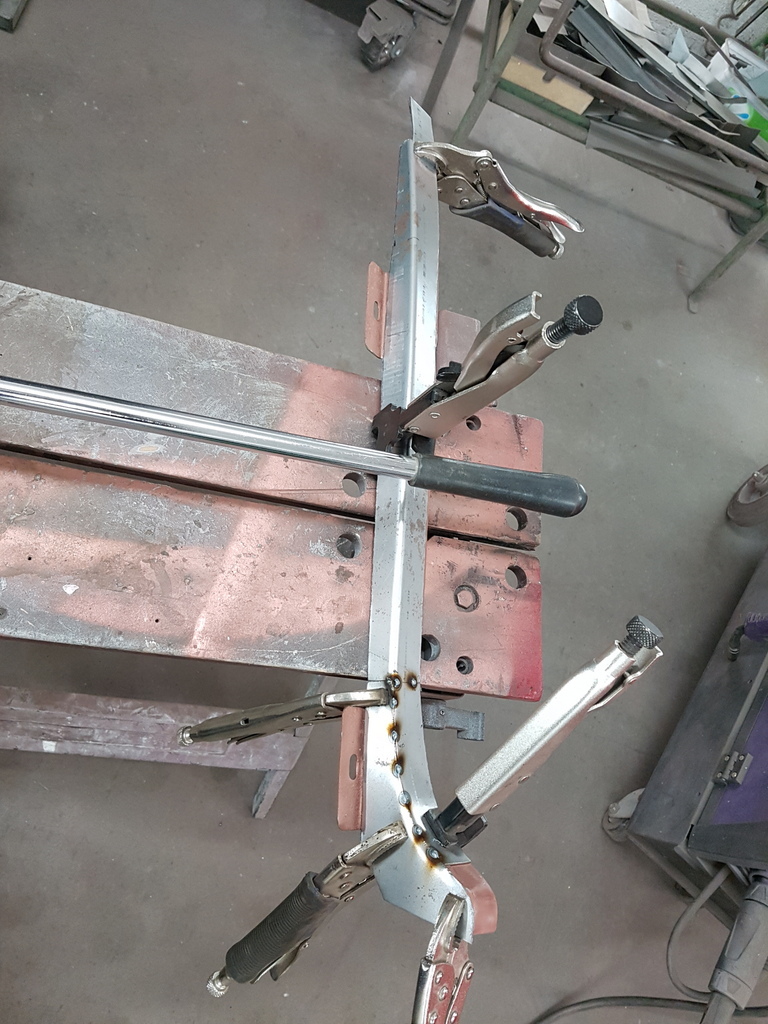 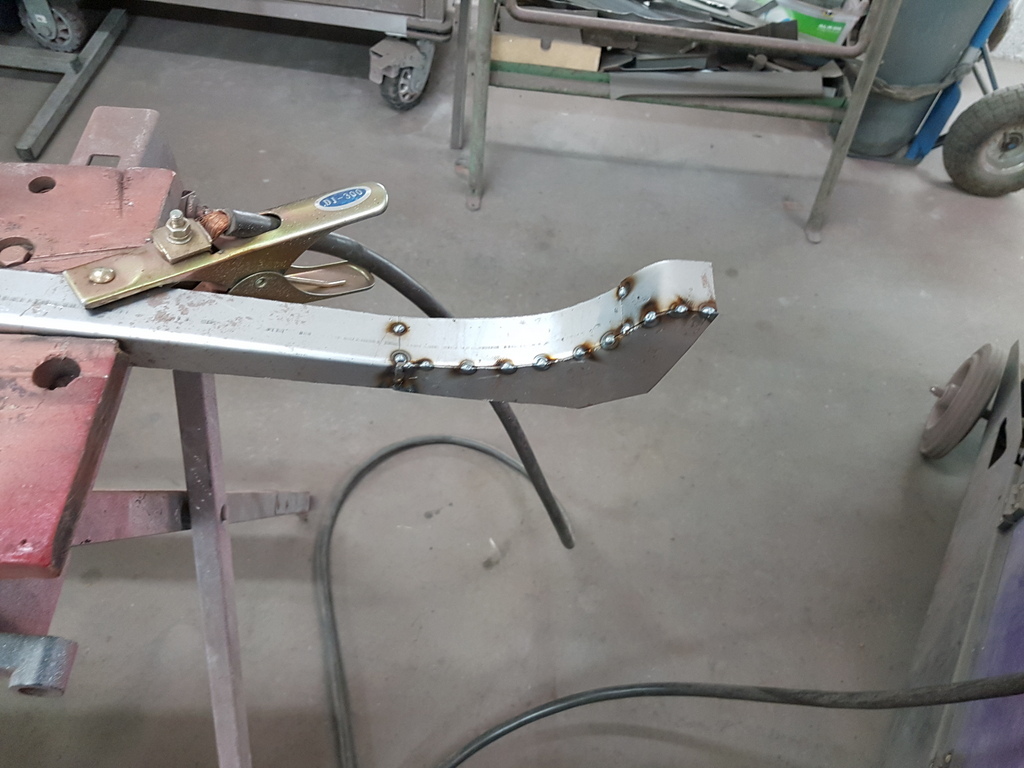 Fully welded, dressed back with new retaining tabs made up & spot welded on - these then secure the outer wing to the D post / inner wing of the car 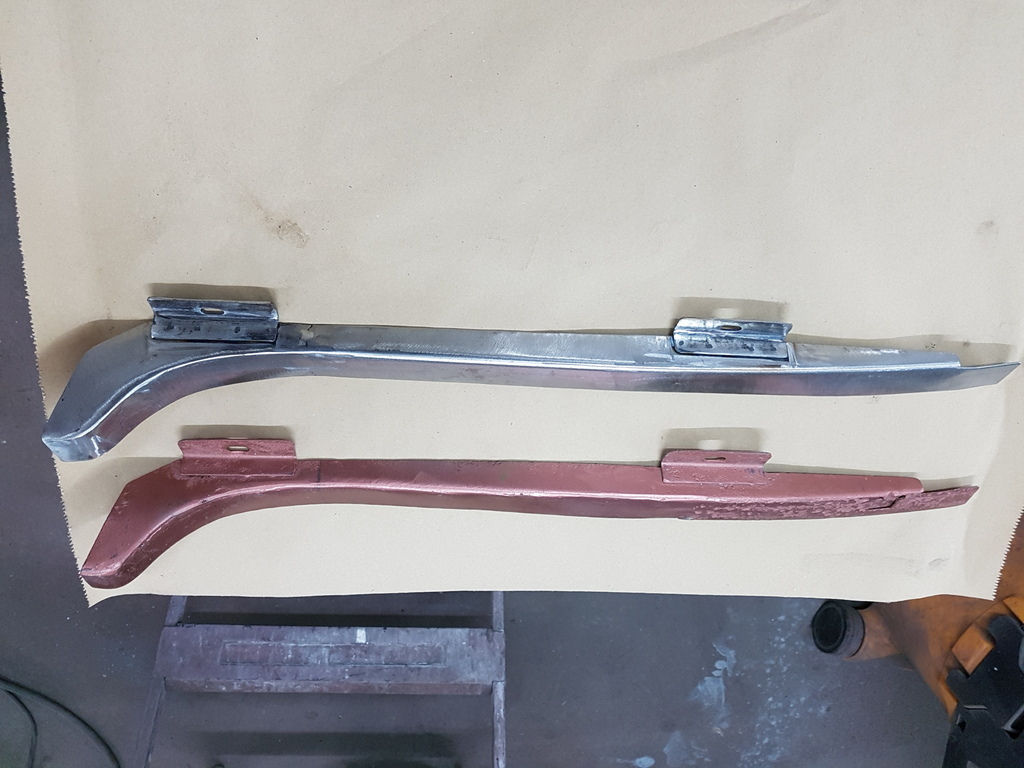 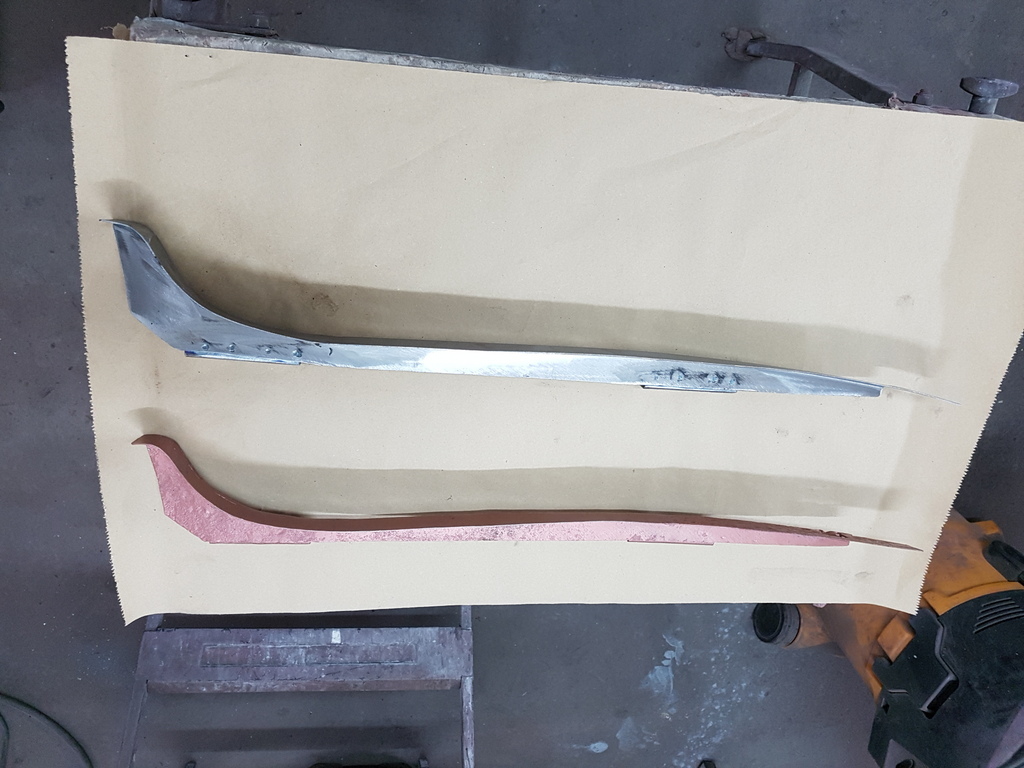 Then the acid test - would the outer repair skin that I made up follow the curvature & fit of the new bracket 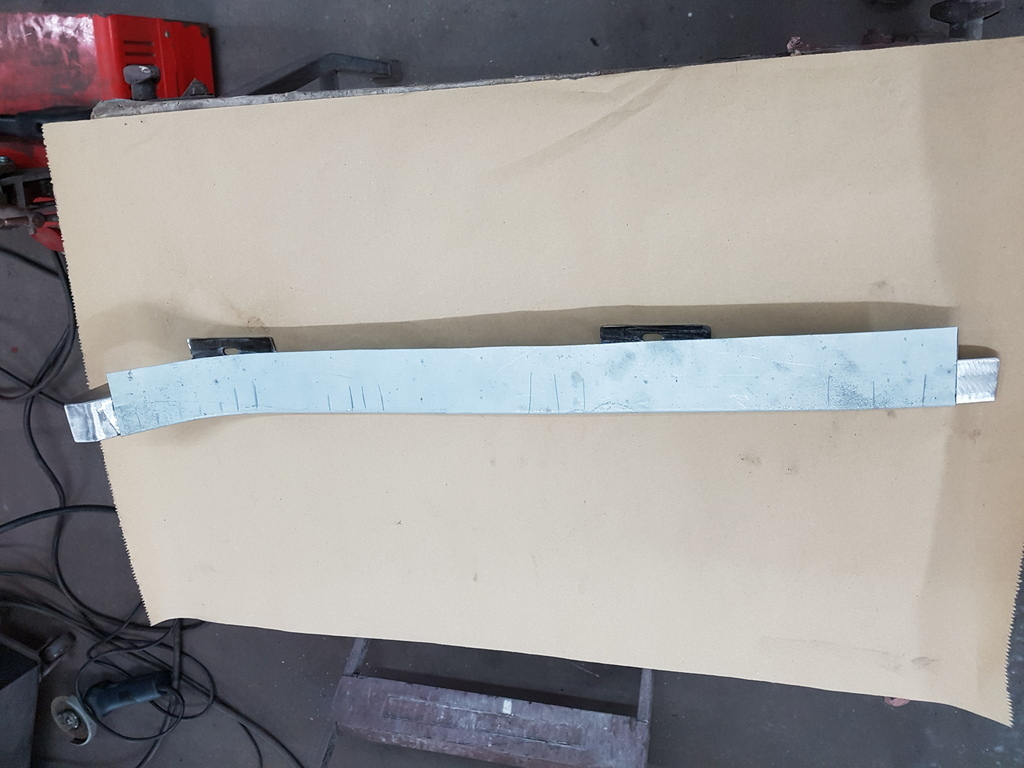 Well - just how I like it - the prefect use of an hour in the workshop 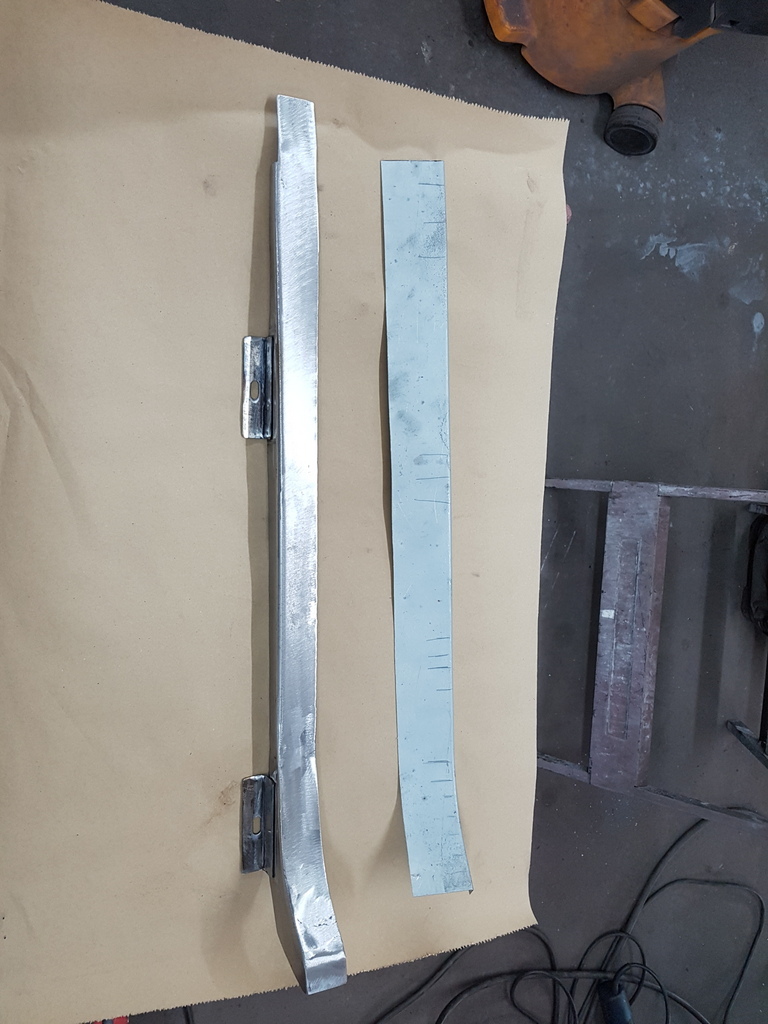 Just might be able to find an hour this coming week to put it all together and then give Sam a call |
| |
Last Edit: Jan 22, 2019 21:07:19 GMT by Deleted
|
|
|
|
|
|
|
Jan 21, 2019 11:48:48 GMT
|
|
Show off
Not far off perfection as usual.
|
| |
|
|
|
|
|
Jan 21, 2019 16:40:35 GMT
|
|
Lister marine engines are known for running different handed (opposite rotation to conventional - clockwise looking at the flywheel), so this stationary one could do too.
|
| |
|
|
|
|
|
Jan 22, 2019 10:50:00 GMT
|
Maybe just hold on to it, and then demand to know why you can't fit it to his car at the show?  |
| |
Last Edit: Jan 22, 2019 10:50:25 GMT by varelse
|
|
|
|
|
Jan 22, 2019 20:28:40 GMT
|
So in-between some drying times over the past few days  I started to make up a second outer repair skin for the wing that would act has a pattern for future wing repairs 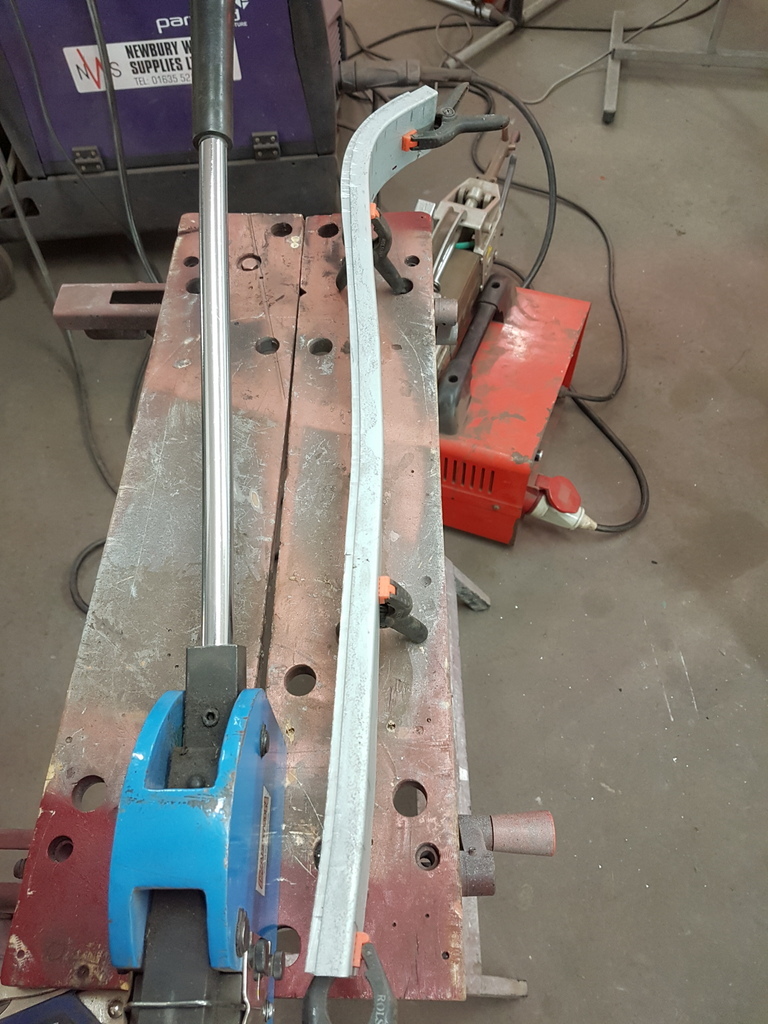 Done with a right angle piece of steel to form the flange edge and then worked with the shrinker / stretcher to form the radius / curvature to the panel 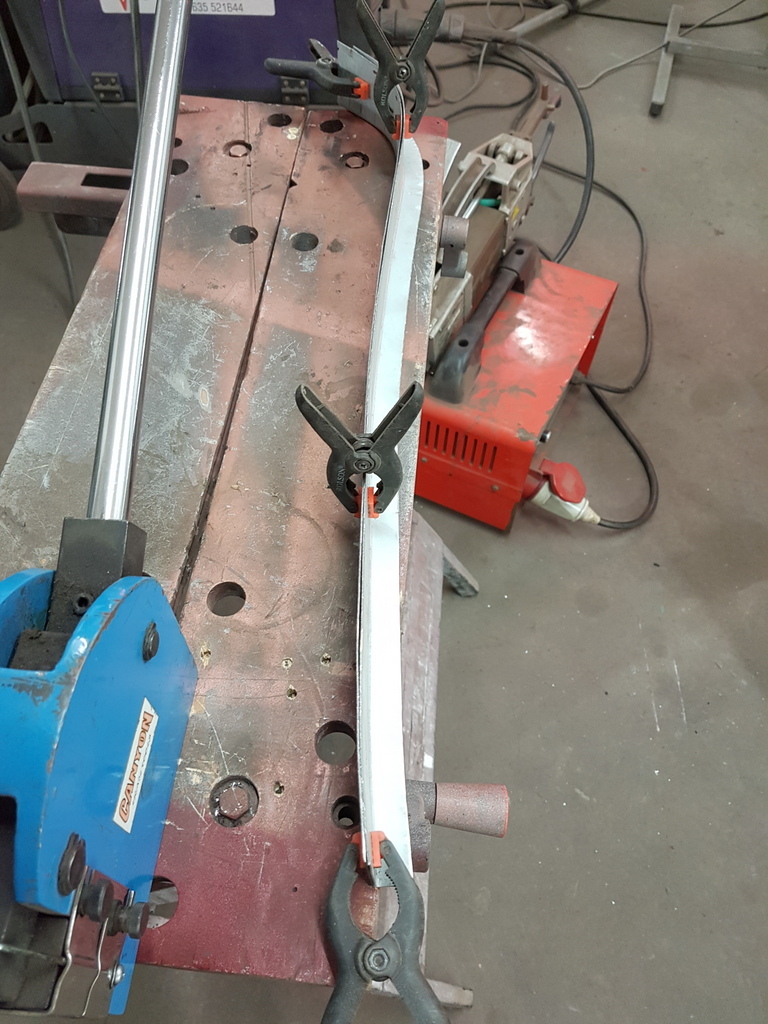 And with this done I now have the master patterns for the outer skin and the retaining bracket 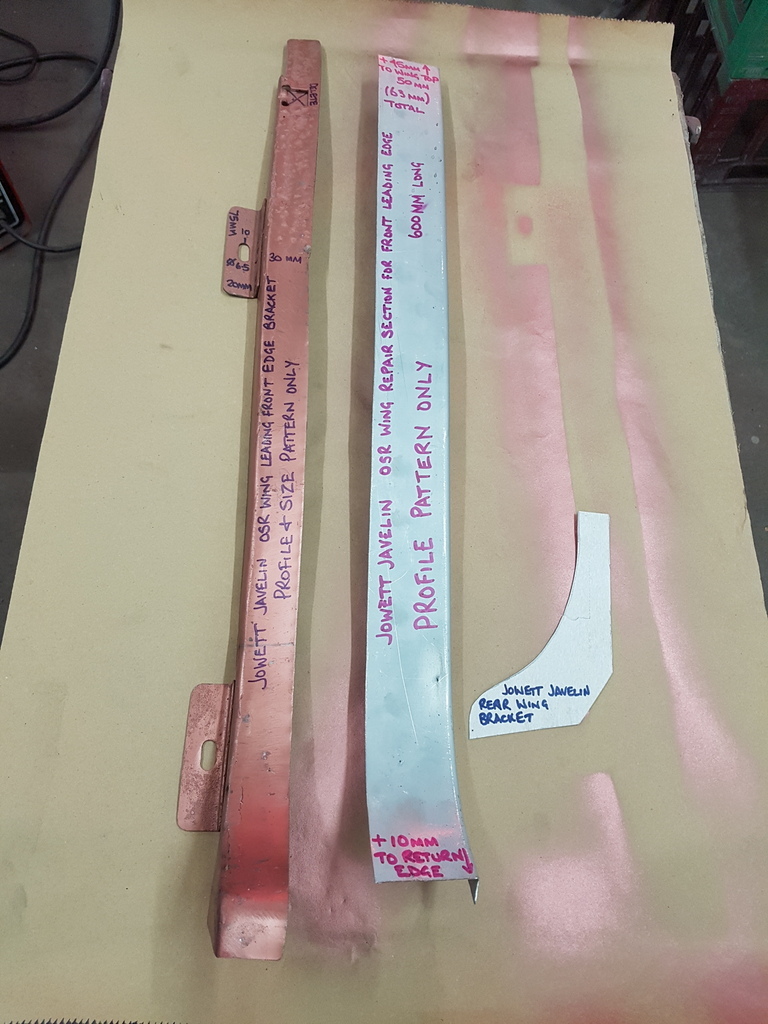 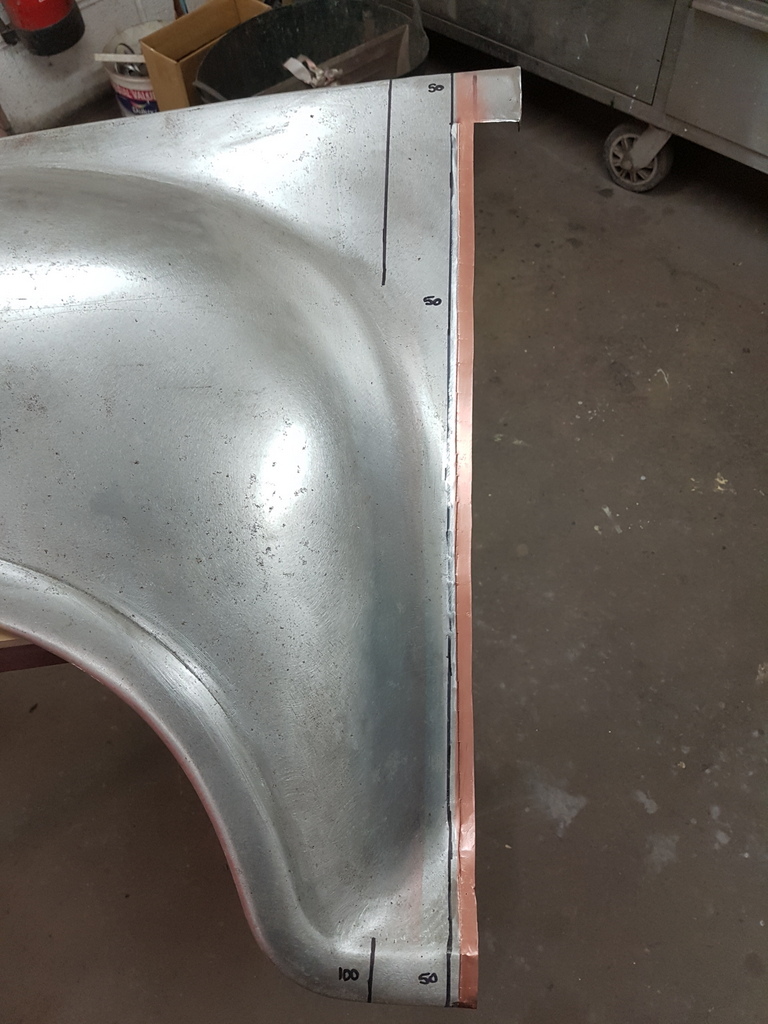 Back to repairing the wing - prepped the joggled edge of the wing with some weld through primer 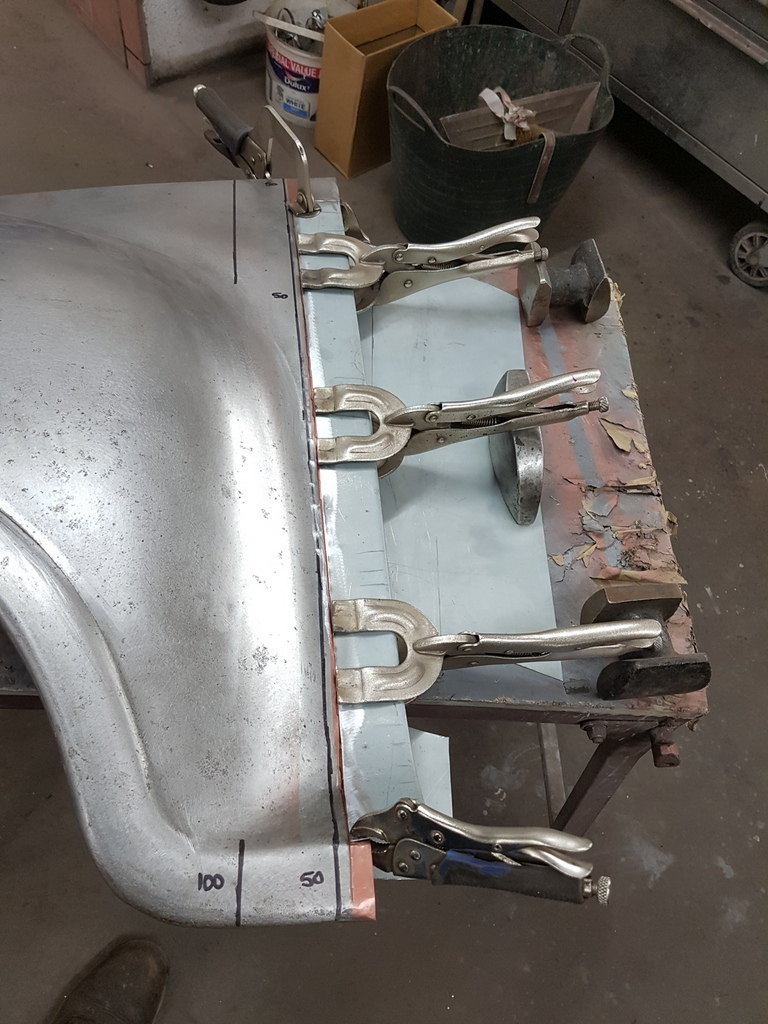 Outer skin clamped on and checked against the offset markers 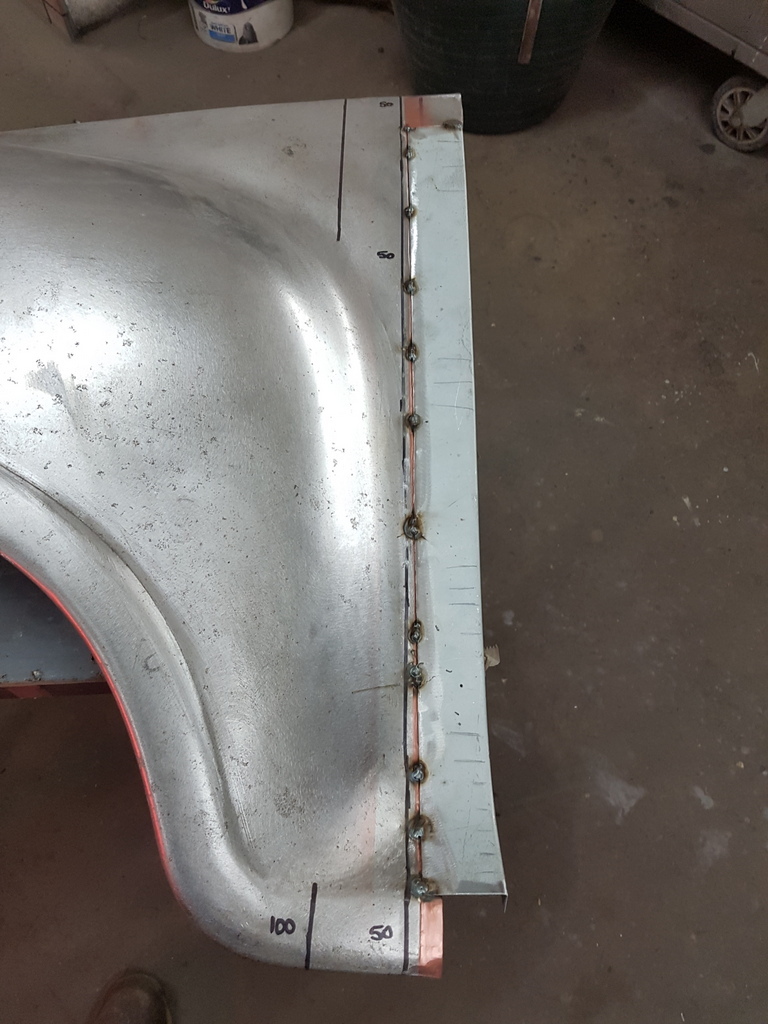 Tacked on 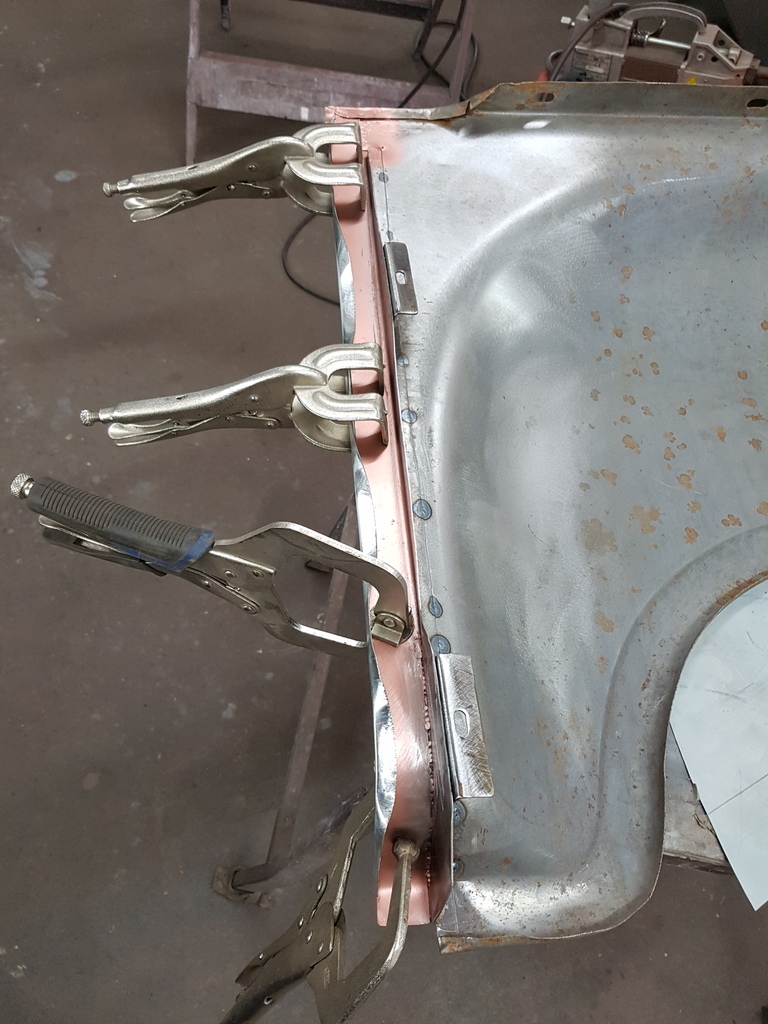 Retaining bracket trial fitted / clamped in place 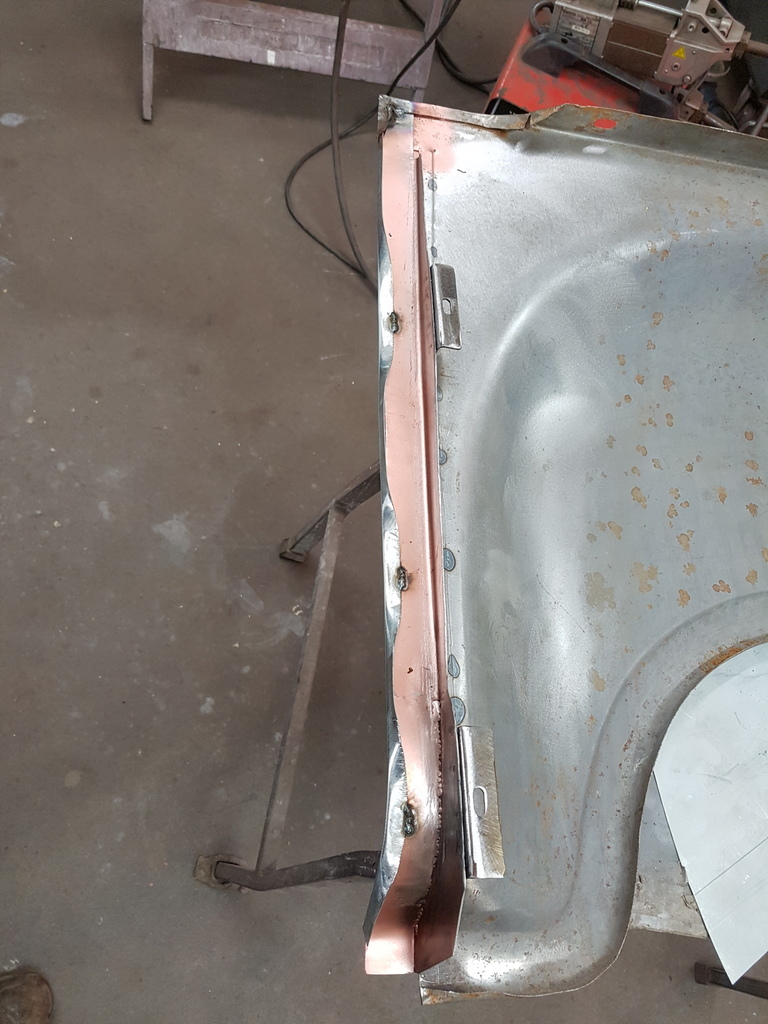 Tacked 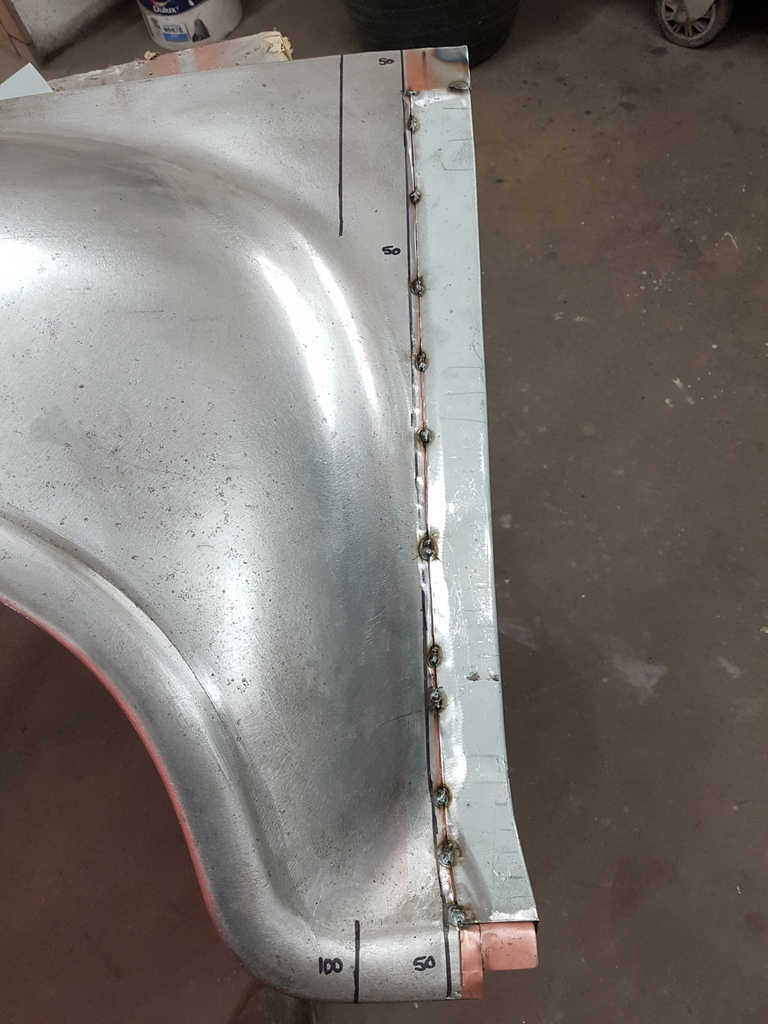 Outer skin rechecked for fit & alignment 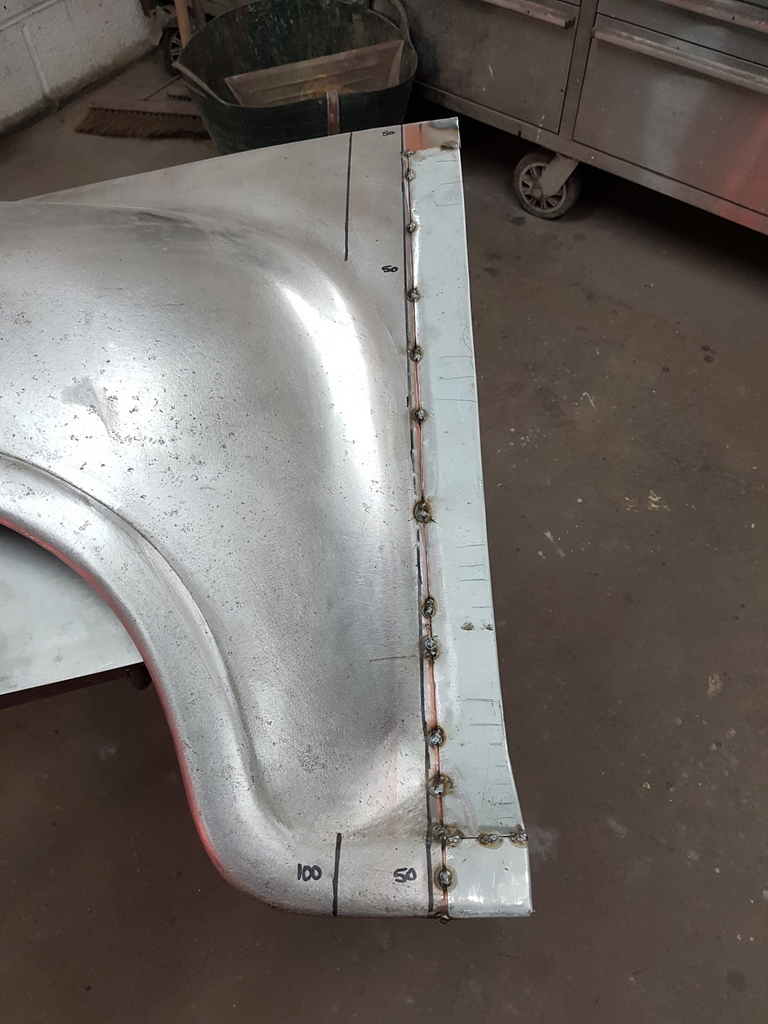 Lower return section made up & tacked in situ 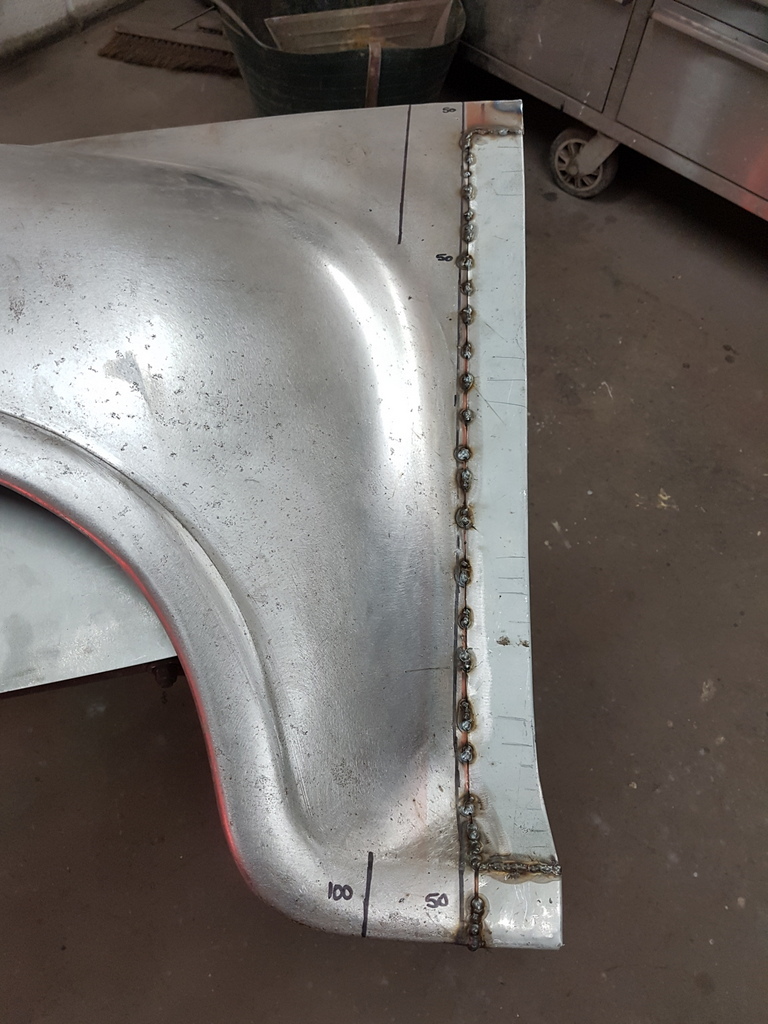 More of the tacking & cooling cycle Then dress the flange edge over the retaining bracket 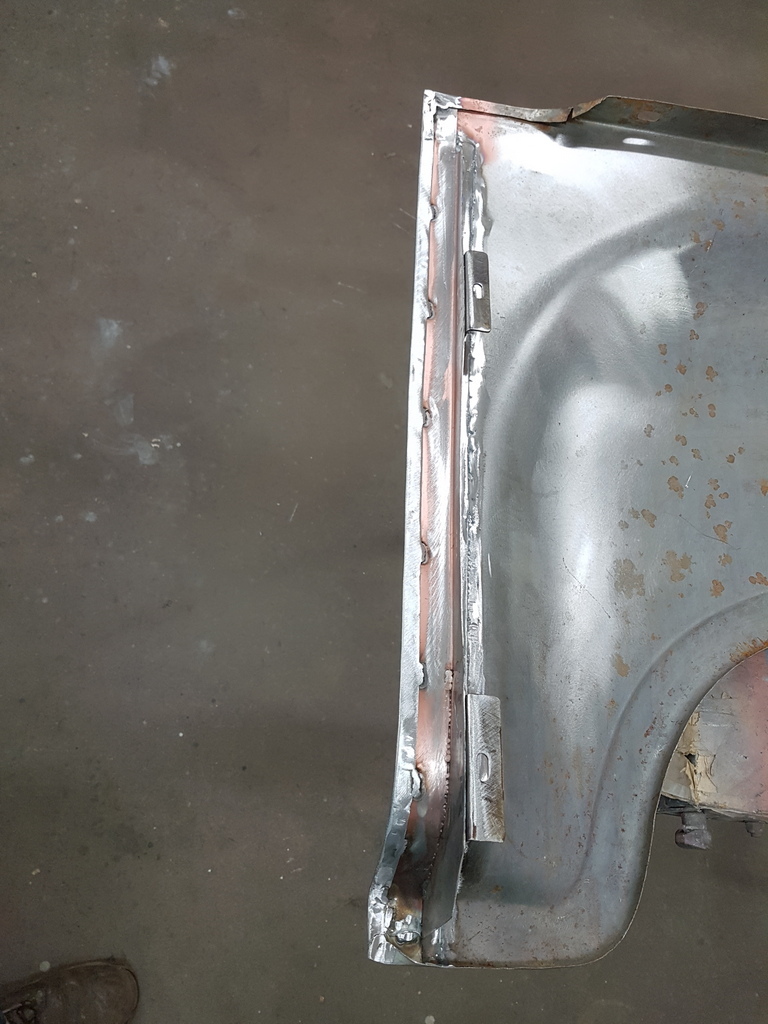 A few more welds and dressed back 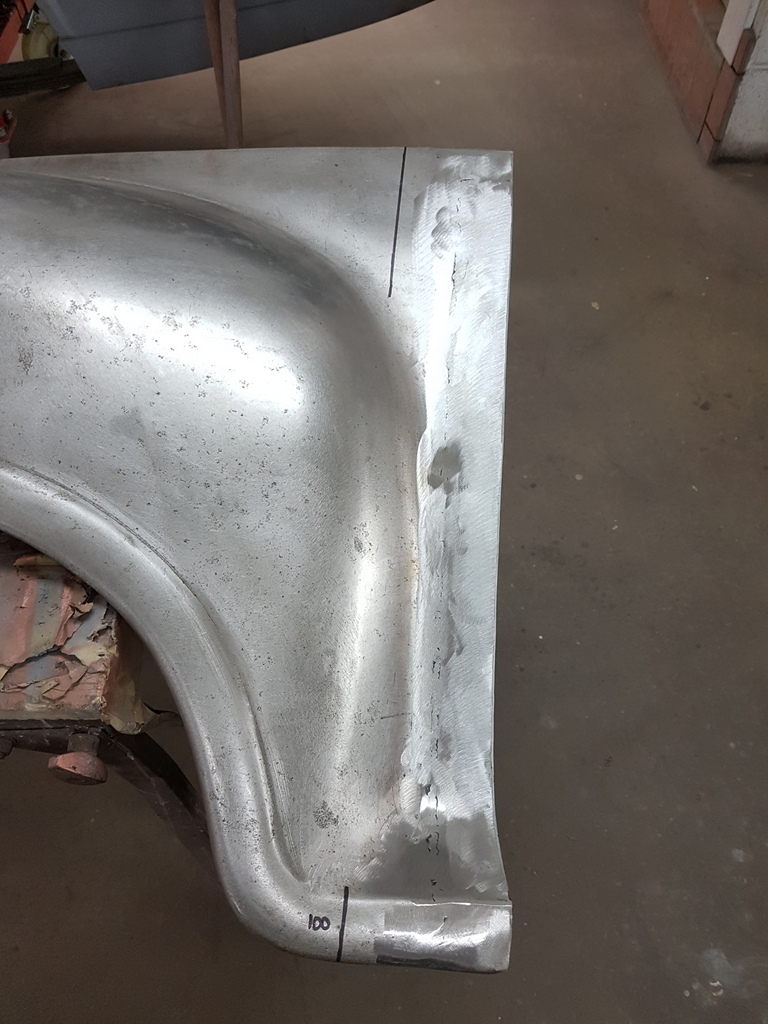 Like wise for the outer face 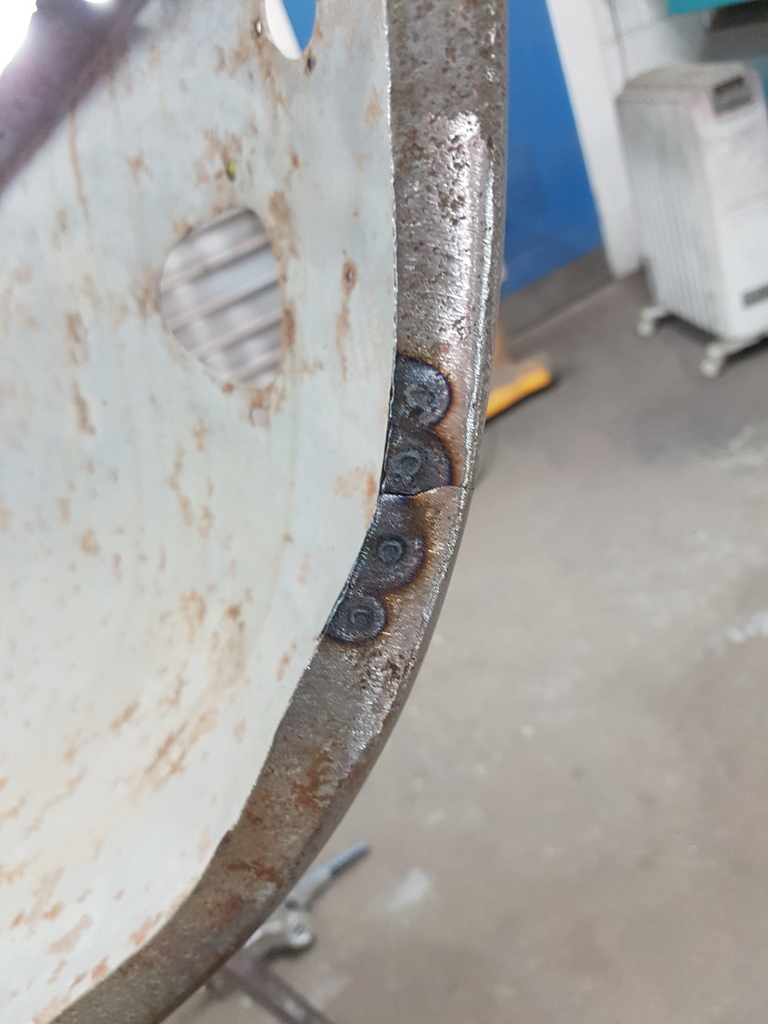 Reinforcing to lower flange where the rear wings always split - spot welded on 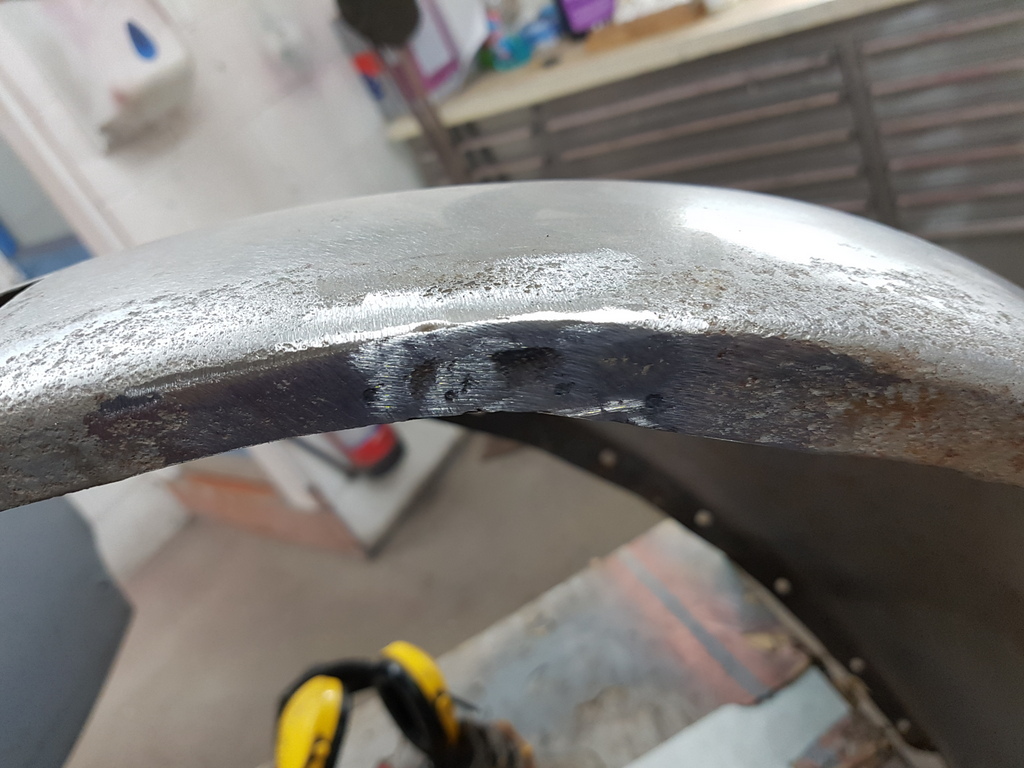 Welded the split up and cleaned it back 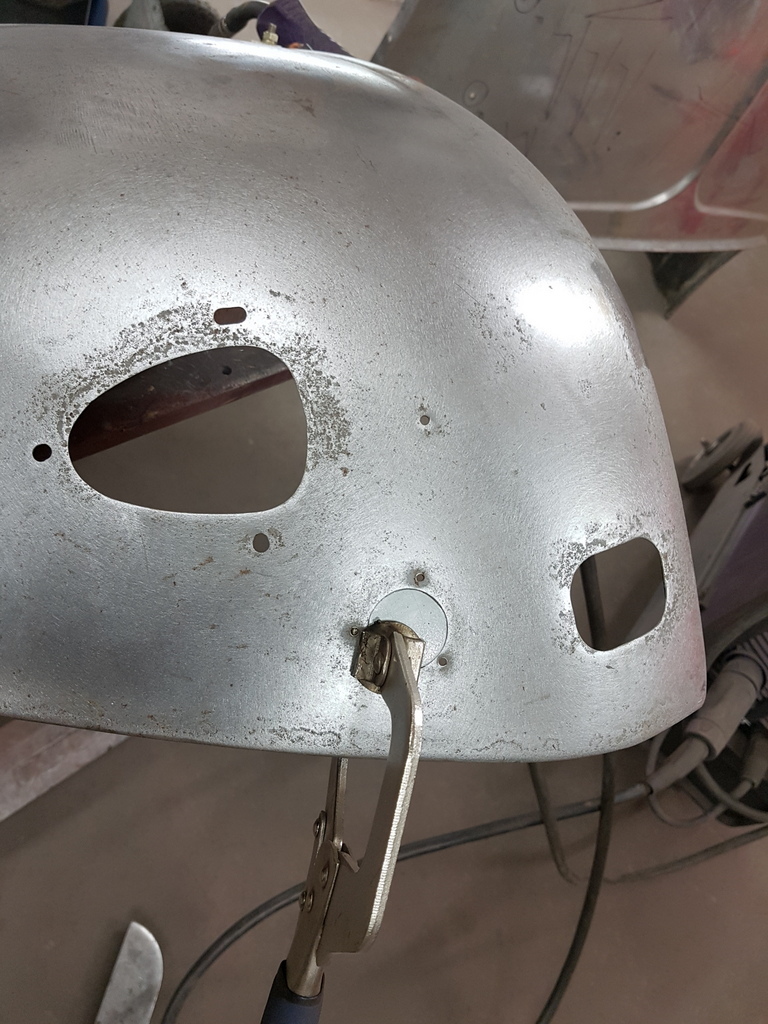 A few non original apertures required sorting 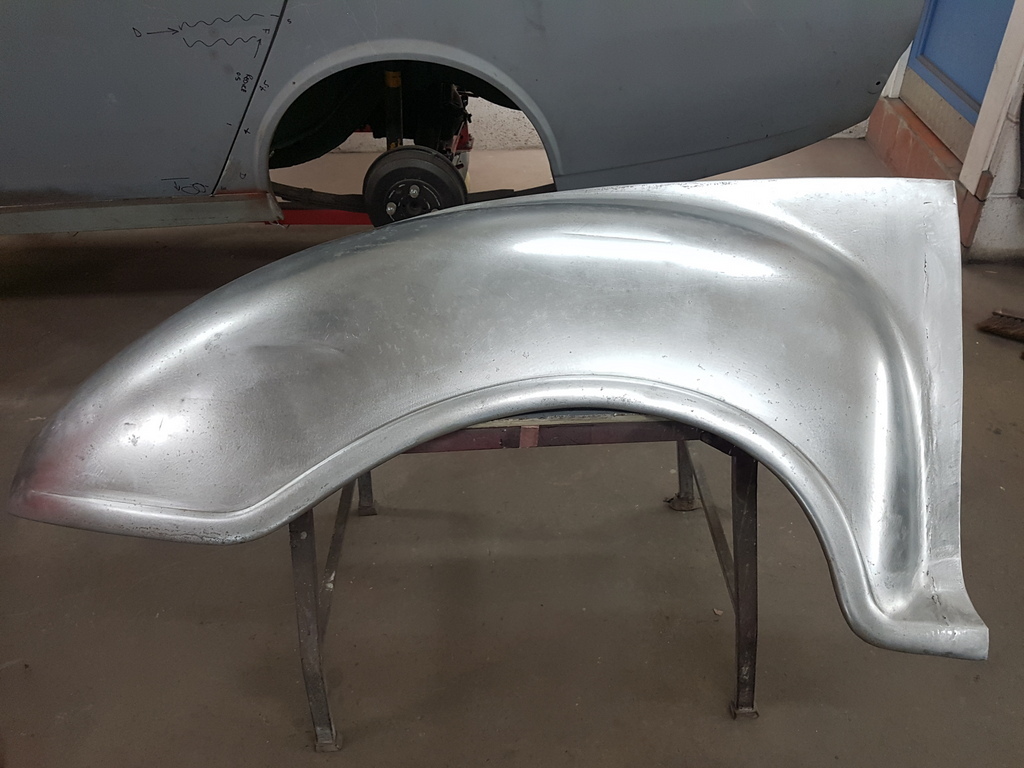 And a quick DA back with some 80's 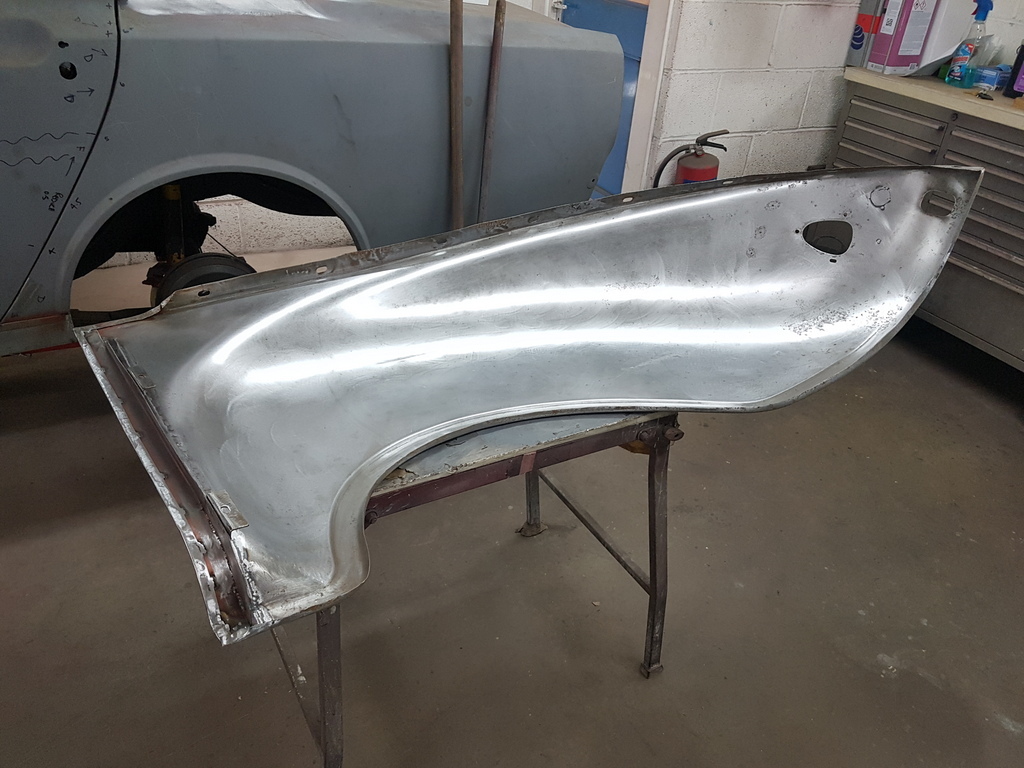 And done for now - trail fit next - there are a few minor dents & scrapes that are better sorted once the wing is on the car and is held in place securely Just has I finished the wing someone visited the workshop admired the work and said it's easy when you have all the right tools & equipment - well is it - all my stuff for panel fabrication is pretty primitive 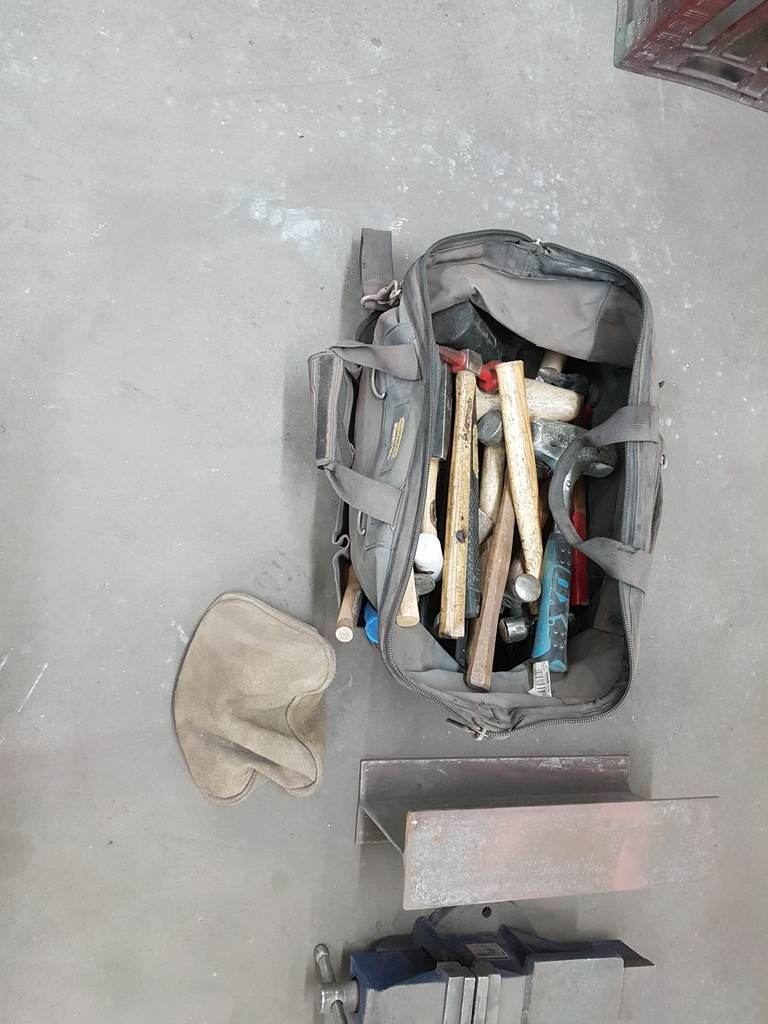 A bag of hammers, mallets & dollies along with a couple of formers made from scrap metal 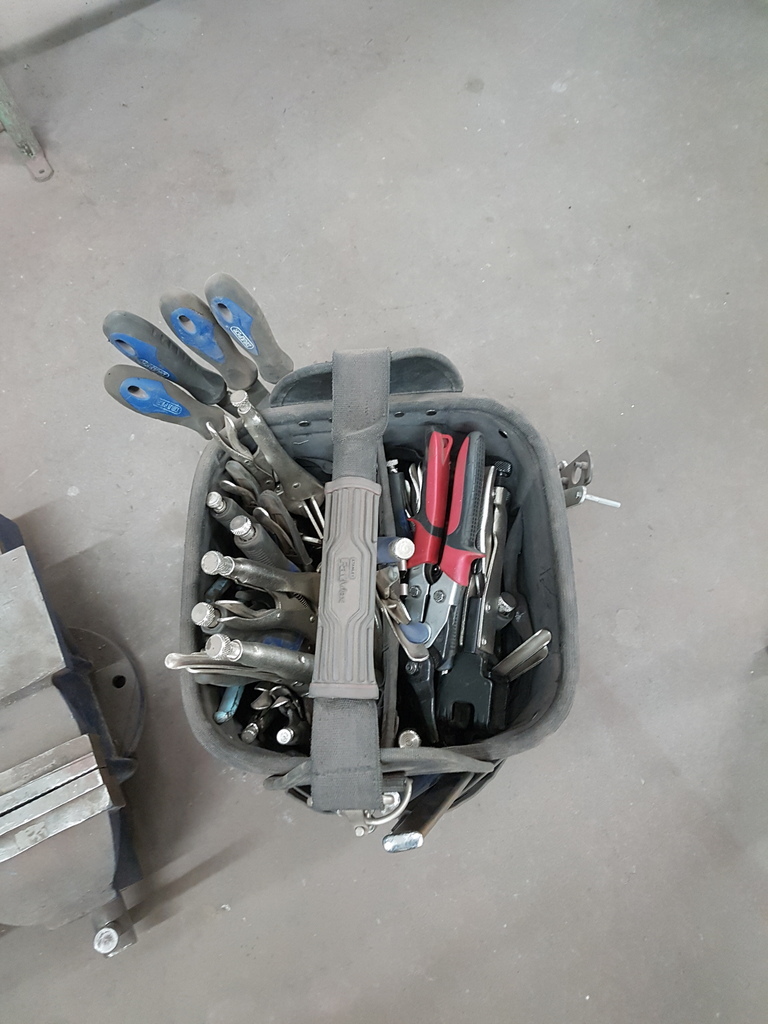 A bag of clamps, snips, files & cold chisels 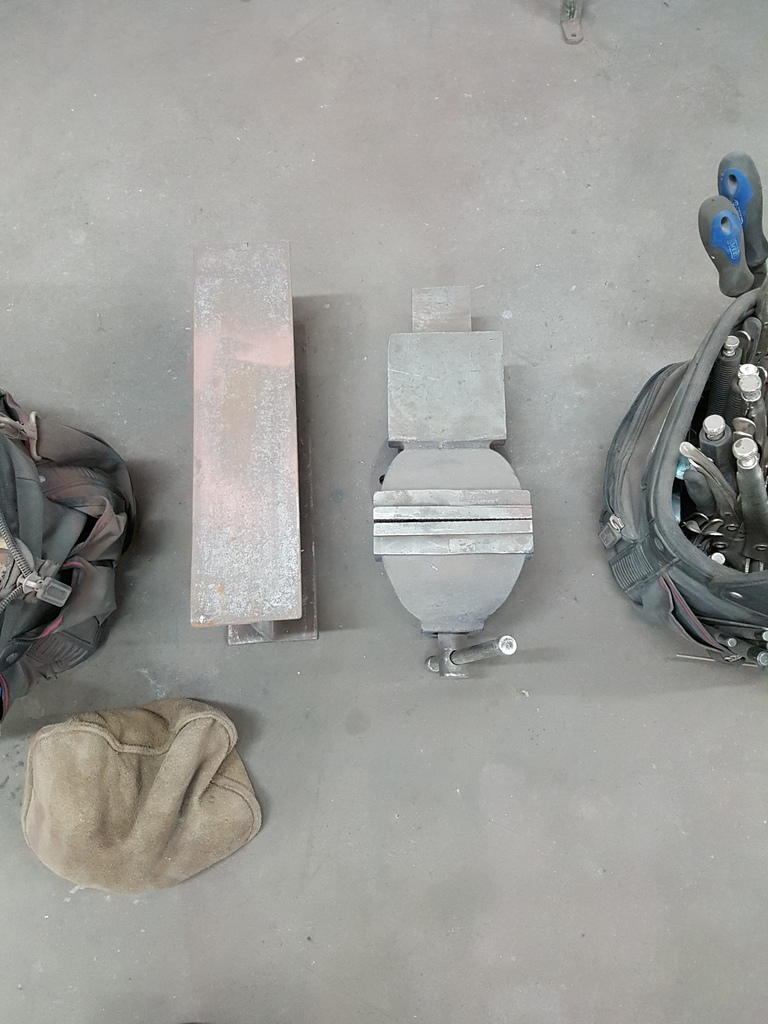 A loose vice, a piece of RSJ for a anvil / former & a sandbag 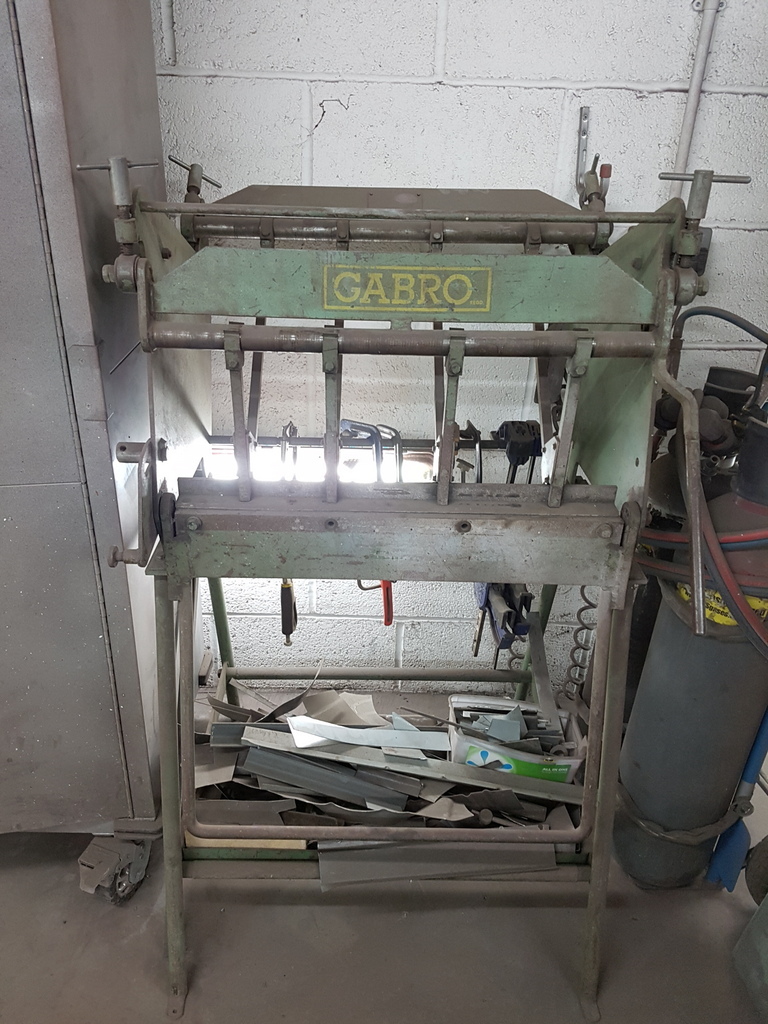 A metal folder - quite old - nothing fancy and its restrictive on length to 600mm 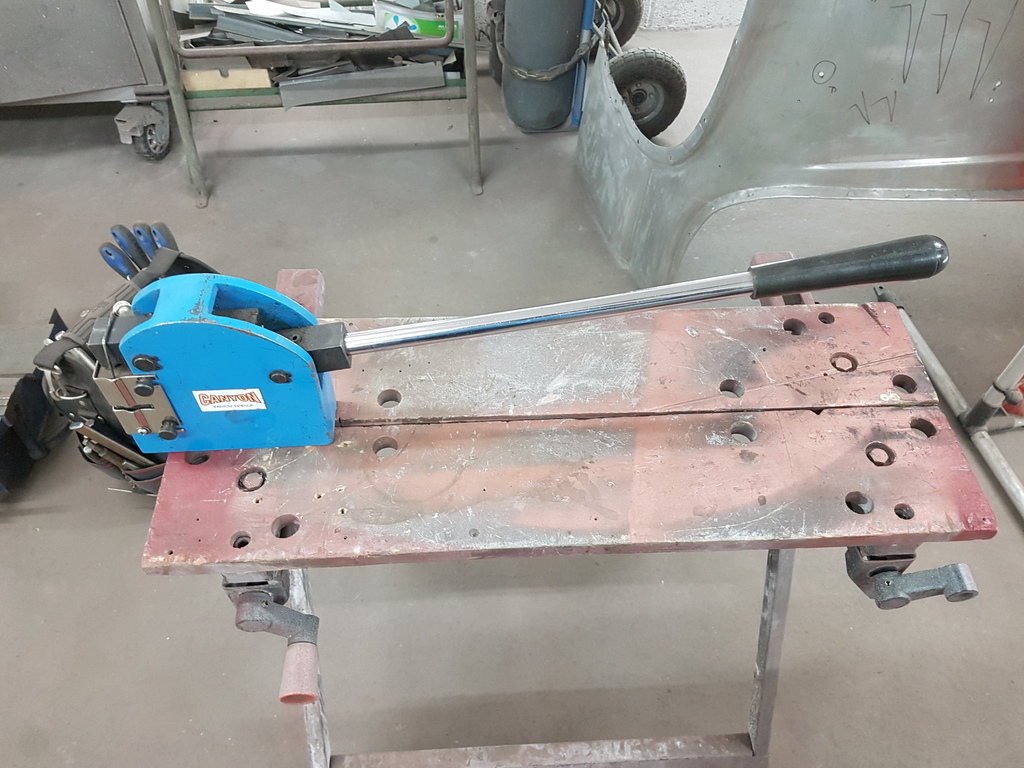 A shrinker / stretcher - a invaluable piece of kit if fabricating panels After that its just some simple things like straight edges / measures / markers & a small angle grinder - the joggler that I have is air powered but again inexpensive - point being anyone can put this kit together on an affordable budget - what you do need though is the knowledge - the old boy that I had for a teacher limited his time and only shared his knowledge with those that wanted to learn - for that I count myself very lucky |
| |
Last Edit: Jan 22, 2019 21:08:18 GMT by Deleted
|
|
|
|
|
Jan 22, 2019 21:16:17 GMT
|
Called on my good friends at Wessex Scooters today for a CC (Chat & Coffee) 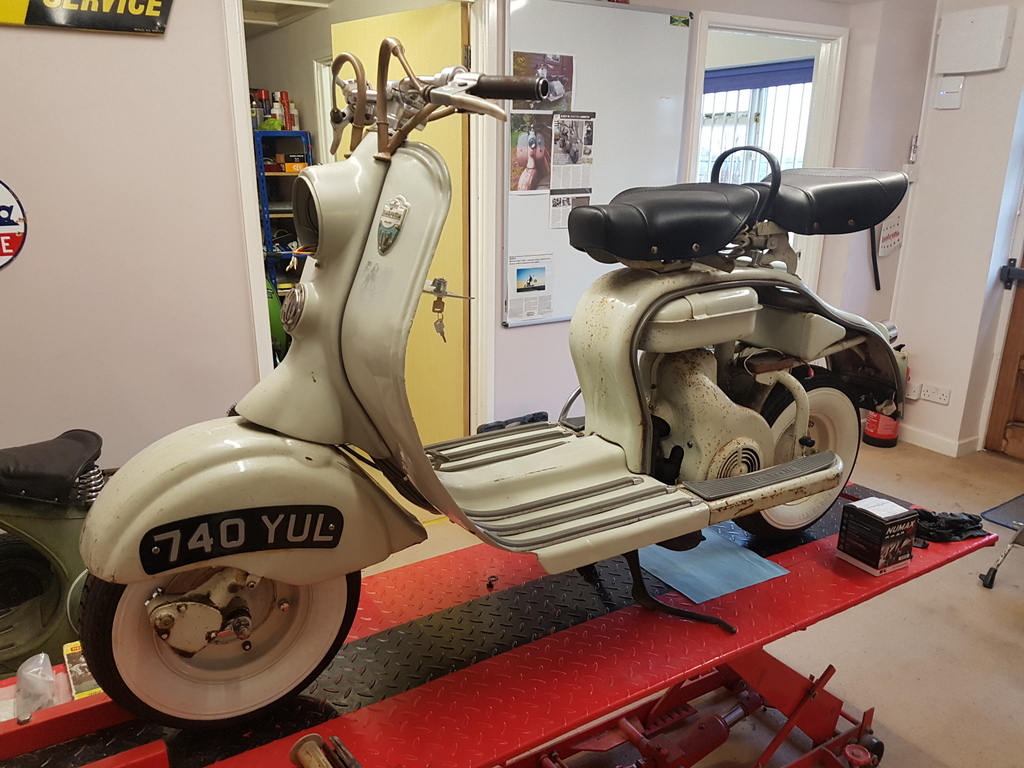 This patina special is all but done just awaiting some minor odds 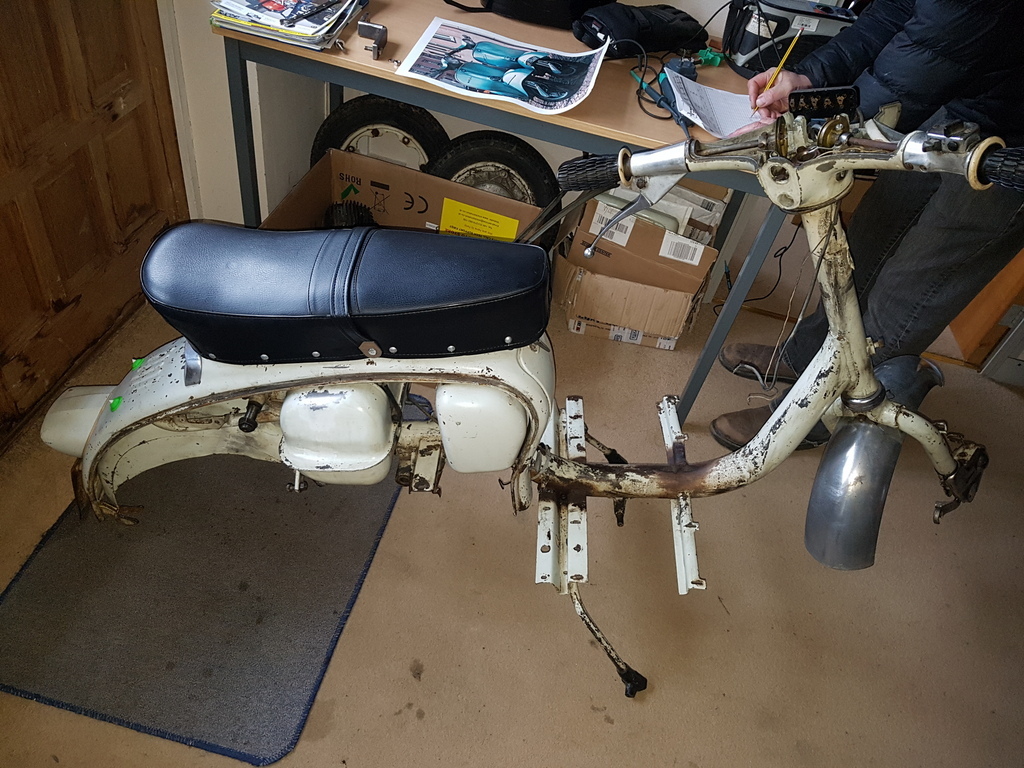 Latest project through their doors |
| |
Last Edit: Jan 22, 2019 21:16:37 GMT by Deleted
|
|
jamesd1972
Club Retro Rides Member
Posts: 2,835  Club RR Member Number: 40
|
|
|
|
|
"Just has I finished the wing someone visited the workshop admired the work and said it's easy when you have all the right tools & equipment - well is it - all my stuff for panel fabrication is pretty primitive"
Skills and patience might help too !
Mere mortals just watch with wonder...
Anyway daft question I'm bringing an empty van from Bristol to Reading on Sunday - is there anything I could collect and drop off ?
James
|
| |
|
|
|
|
|
|
|
"Just has I finished the wing someone visited the workshop admired the work and said it's easy when you have all the right tools & equipment - well is it - all my stuff for panel fabrication is pretty primitive" Skills and patience might help too ! Mere mortals just watch with wonder... Anyway daft question I'm bringing an empty van from Bristol to Reading on Sunday - is there anything I could collect and drop off ? James James that's a very kind offer but nothing at present - however if you want to PM me your number I can find loads of running about for you to do over the next 12 months or so  Equally if you want to call in for a coffee - you'd be very welcome |
| |
|
|
|
|
|
|
|
|
Re-bookmarked as your thread seems to have dropped off my feed.
|
| |
|
|
|
|
|
Feb 15, 2019 20:27:04 GMT
|
The workshop that never sleeps (well that's what it feels like at times) 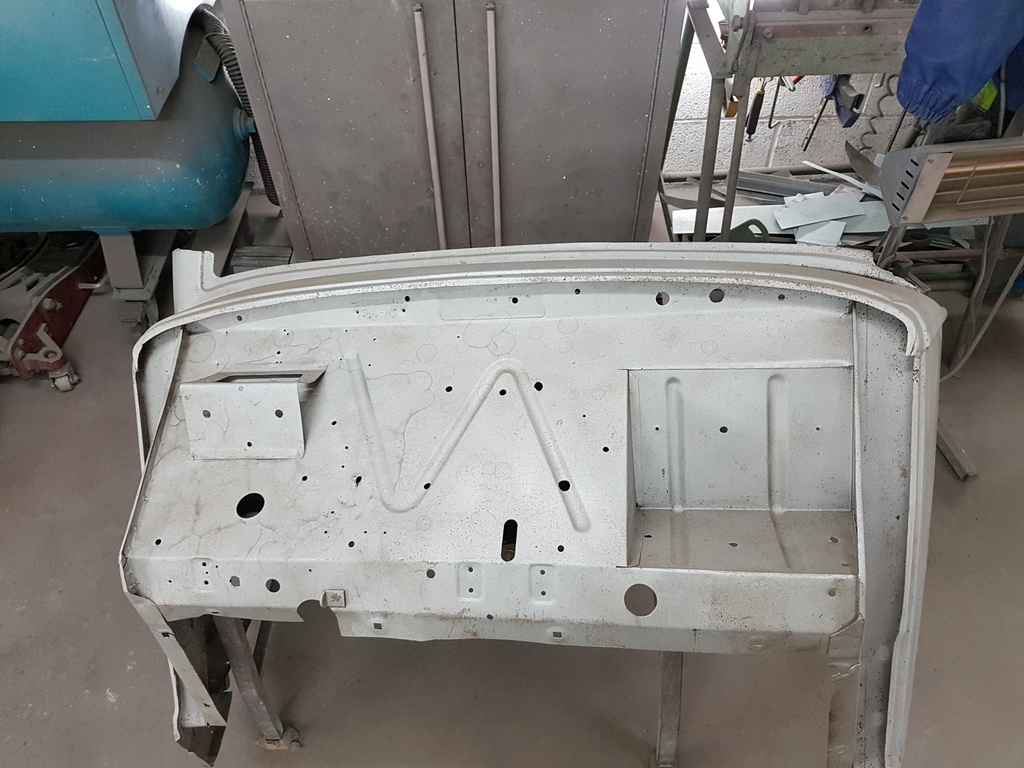 So an early start to avoid the work & school run traffic in order to get to my shot blasters to drop some wheel rims off but to also collect this 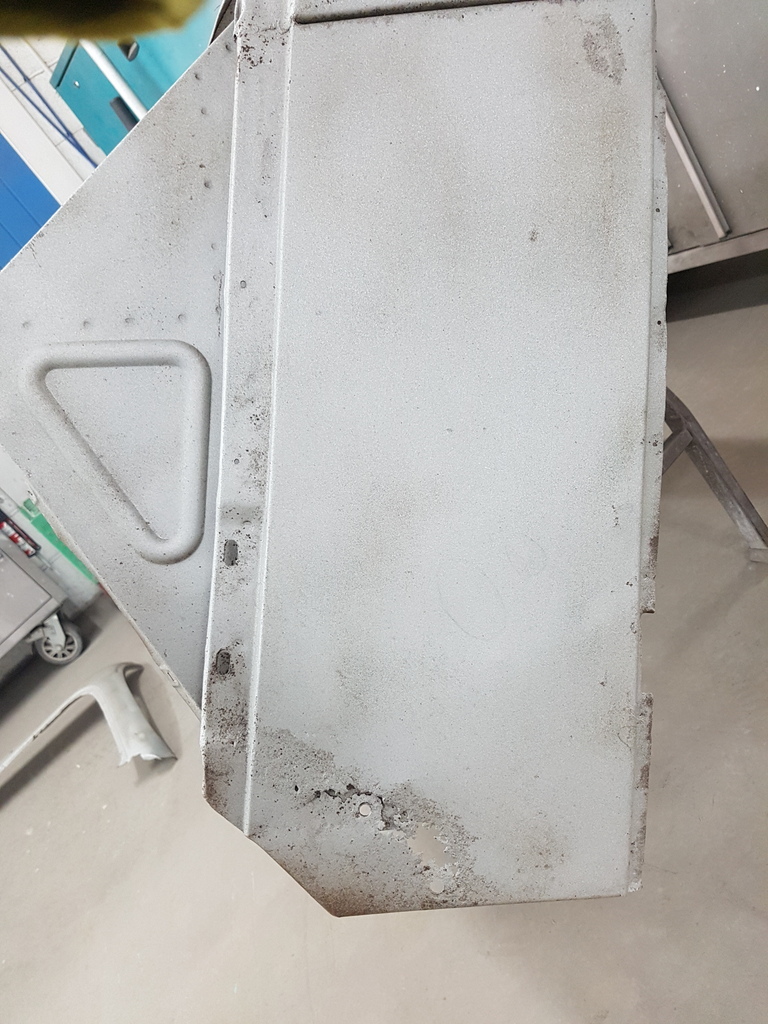 Its a bulkhead off a 1949 Jowett Bradford van 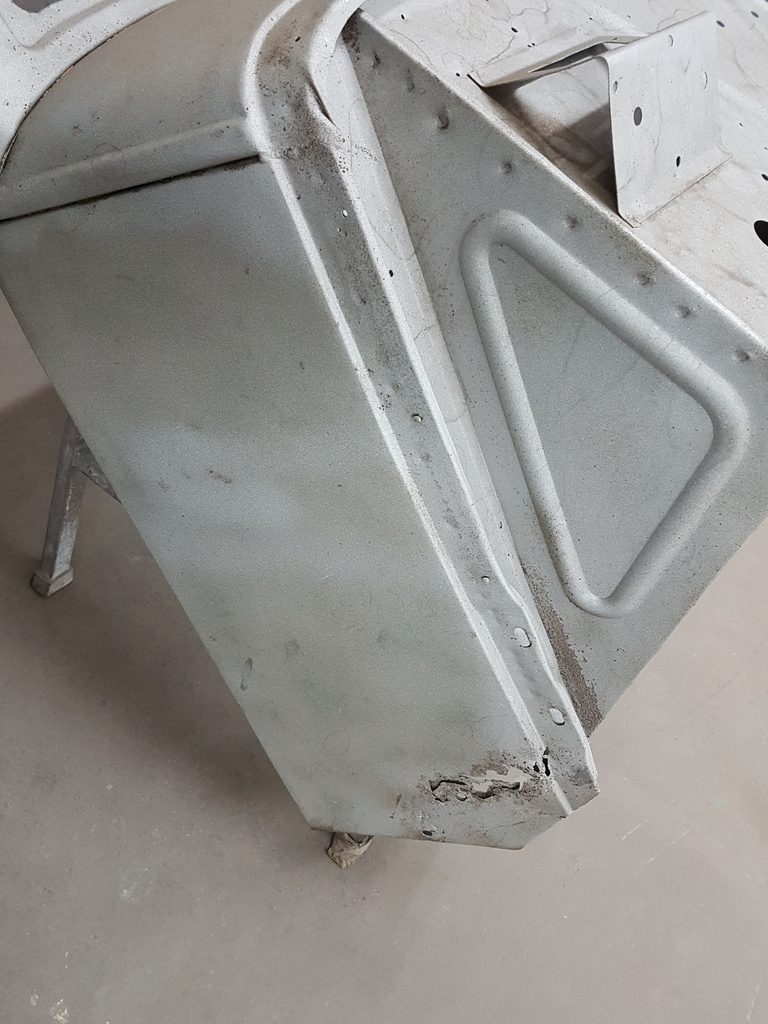 Largely all there but requiring some straightening up & fabrication to the rust perforated areas 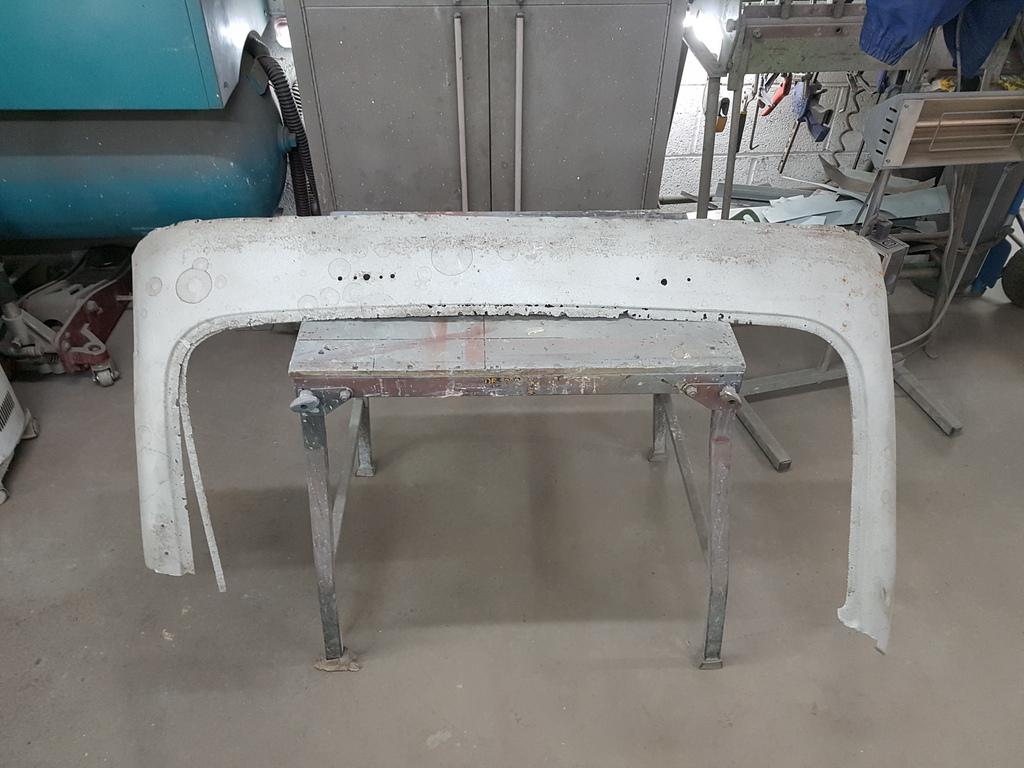 Main challenge will be sorting the windscreen aperture out has that is fairly rotten and has been chopped off the bulkhead structure 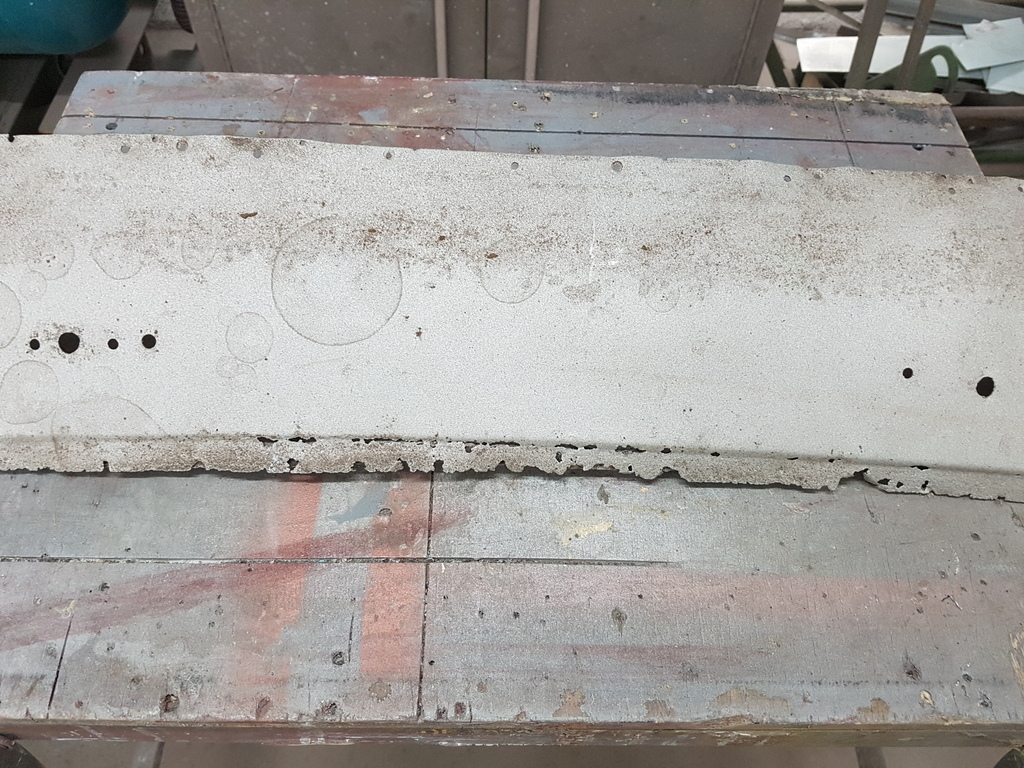 So come and see how I do it - it & myself will be on the Jowett Car Club stand - Hall 3 - stand 338 at the NEC Restoration Show - March 22nd - March 24th 2019 www.necrestorationshow.com/ |
| |
|
|
|
|
eternaloptimist
Posted a lot
 Too many projects, not enough time or space...
Posts: 2,578
|
|
Feb 15, 2019 20:33:10 GMT
|
|
Where do you go for your blasting?
|
| |
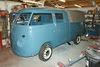
XC70, VW split screen crew cab, Standard Ten
|
|
|
|
|
Feb 15, 2019 21:17:27 GMT
|
|
|
| |
|
|
glenanderson
Club Retro Rides Member
Posts: 4,101
Club RR Member Number: 64
|
|
|
|
|
I’m coming up to the NEC on the 24th March. I’ll make a point of trying to say hello if you don’t look too busy. 😀
|
| |
My worst worry about dying is my wife selling my stuff for what I told her it cost...
|
|
eternaloptimist
Posted a lot
Too many projects, not enough time or space...
Posts: 2,578
|
|
|
|
|
|
| |
XC70, VW split screen crew cab, Standard Ten
|
|
|
|
|
|
|
I’m coming up to the NEC on the 24th March. I’ll make a point of trying to say hello if you don’t look too busy. 😀 Come & say hello anyway - regardless of how busy I am  |
| |
|
|
|
|
|
|
|
|
Will you have sealed it with something, or is it going to be covered in flash rust by the time it gets to the show?
|
| |
|
|
|
|
|
|
|
Will you have sealed it with something, or is it going to be covered in flash rust by the time it gets to the show? I was going to put a quick coat of a specialist weld through primer on it - problem with that is that most onlookers think that you are working with / modifying a new old stock panel - so I am tempted to leave it bare metal - if its kept in the workshop which is heated it should be fine but I can always just give a buzz over with the DA with a 80's disc if needs be before the show |
| |
Last Edit: Feb 16, 2019 8:12:21 GMT by Deleted
|
|
iain42
Part of things
Posts: 107
|
|
Feb 19, 2019 21:27:51 GMT
|
Will you have sealed it with something, or is it going to be covered in flash rust by the time it gets to the show? I was going to put a quick coat of a specialist weld through primer on it - problem with that is that most onlookers think that you are working with / modifying a new old stock panel - so I am tempted to leave it bare metal - if its kept in the workshop which is heated it should be fine but I can always just give a buzz over with the DA with a 80's disc if needs be before the show An option you may not have come across - a thread on another forum I was reading, another equally talented metal manipulator uses lanolin on his bare metalwork to keep it clean of rust - quick spray, non sticky and removes with a quick wipe with thinners or similar |
| |
|
|
|
|
|
|
|
So has March draws closer so does the deadline for NEC Restoration Show - I have committed to rebuilding the bulkhead for the Bradford van that will be on the Jowett Car Club stand - however there is part of it that I cant do at the show due to power supply problems - my spot welder draws a decent current which in turn trips the power to the stand (ask me how I know) - so that rules out use of the spot welder 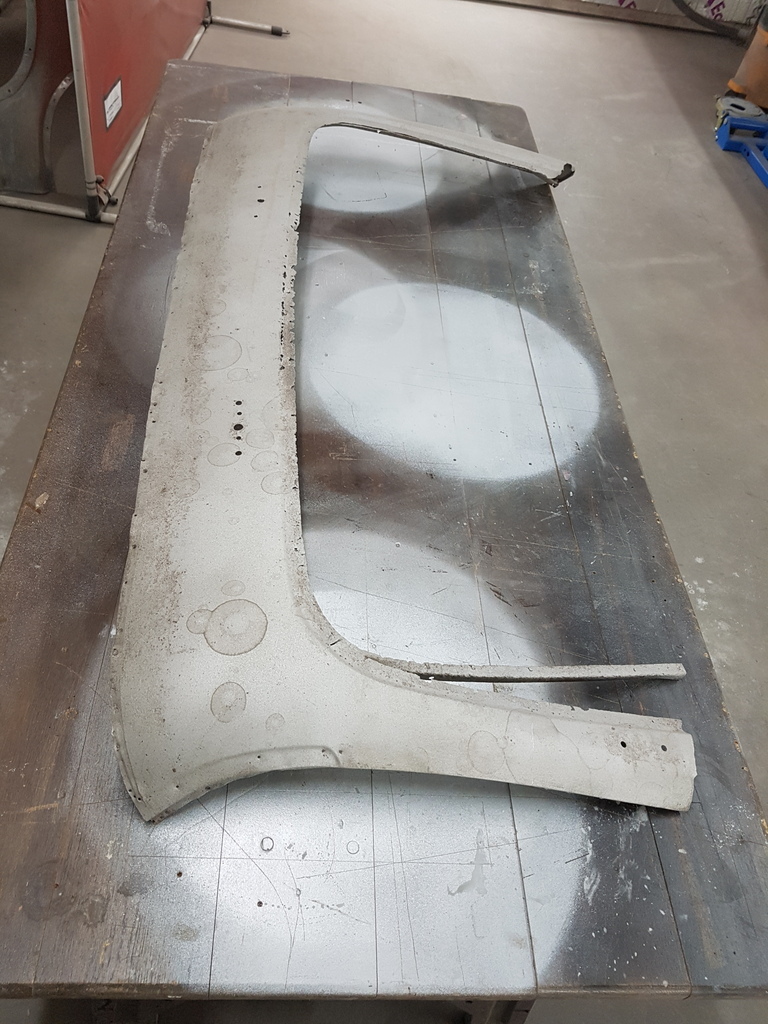 The windscreen aperture has a flange spot welded to it that retains the aperture to the ash frame of the van - I don't want to plug weld the flange has it would cause no end of distortion  I am going to have to replace the edge of the windscreen aperture 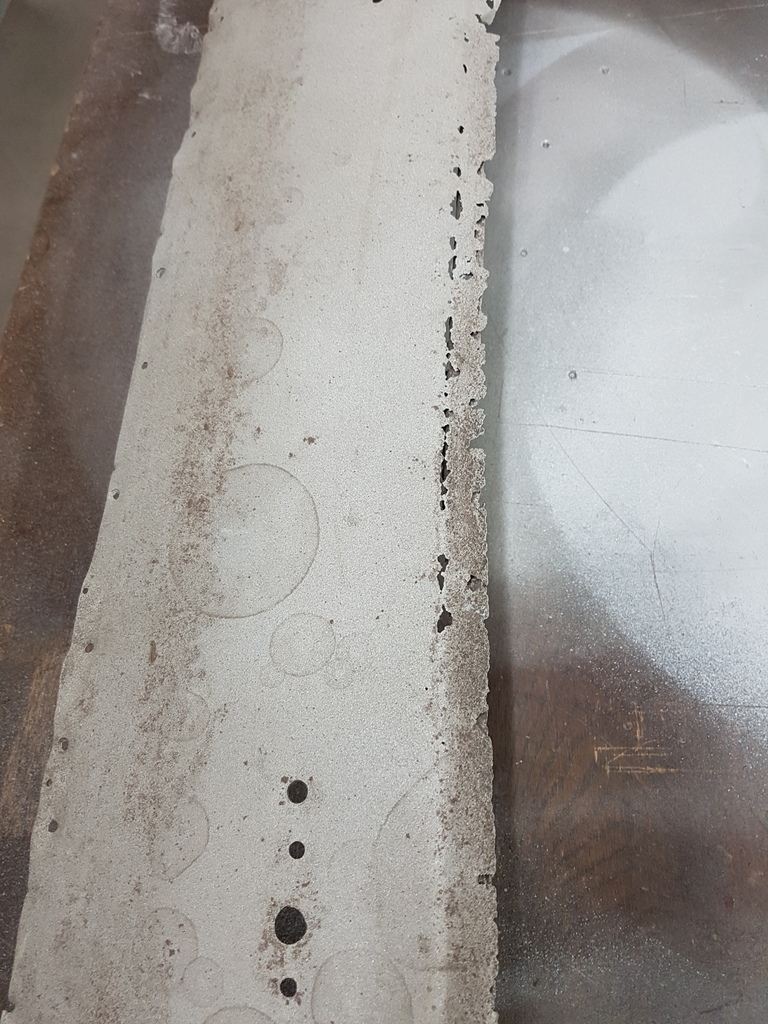 This side may go again though 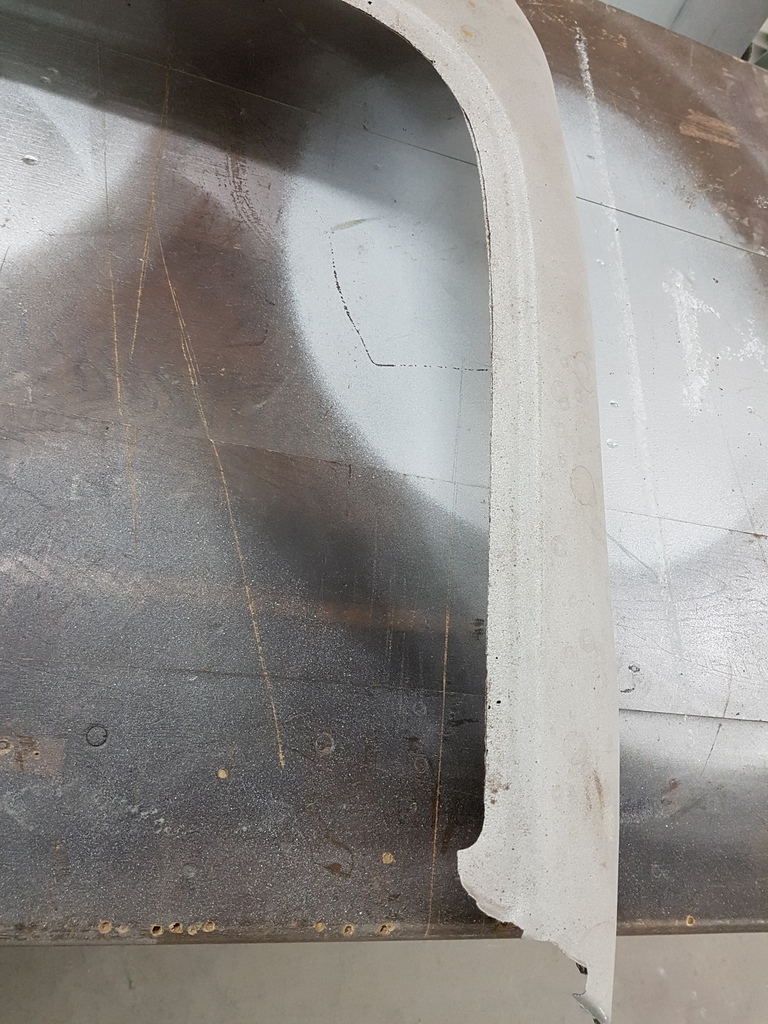 The flange edge is certainly dead 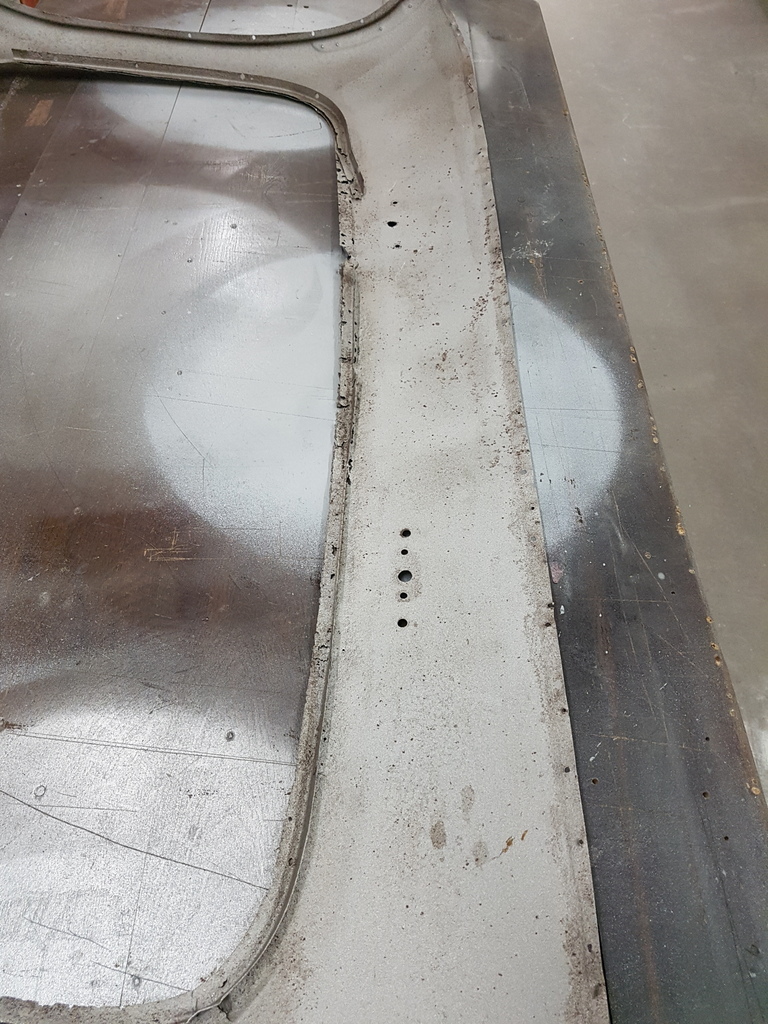 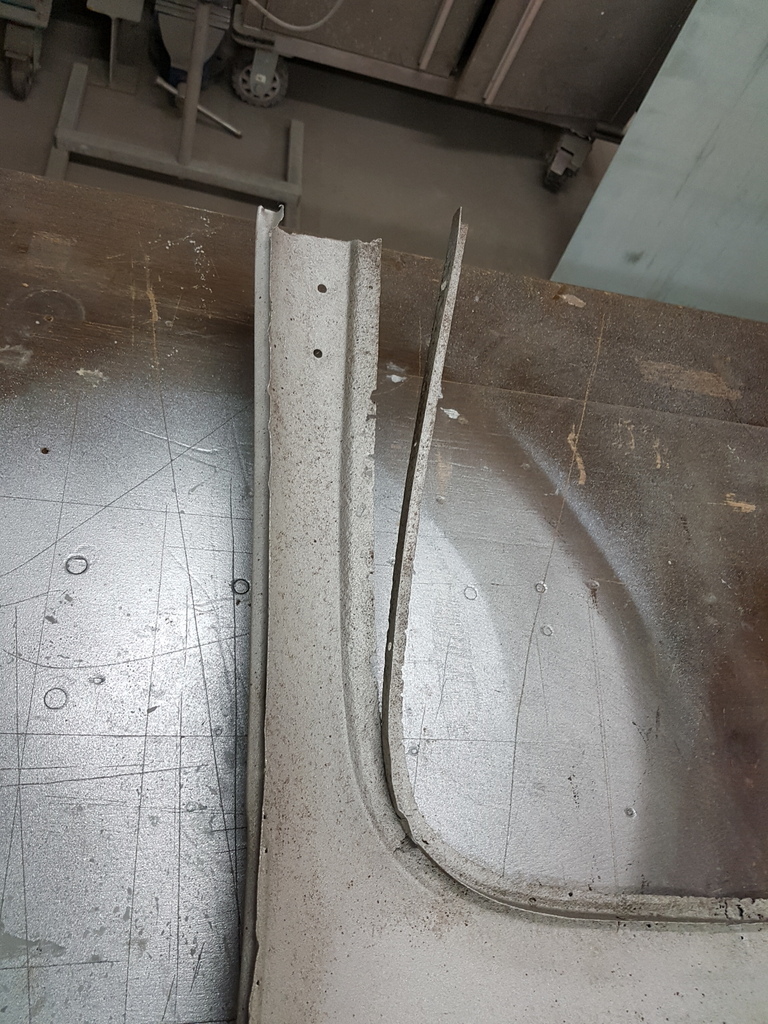 First things first - put some temporary strength into the top of the panel with a brace - this can be bolted straight through windscreen wiper mounting apertures for the wheel boxes 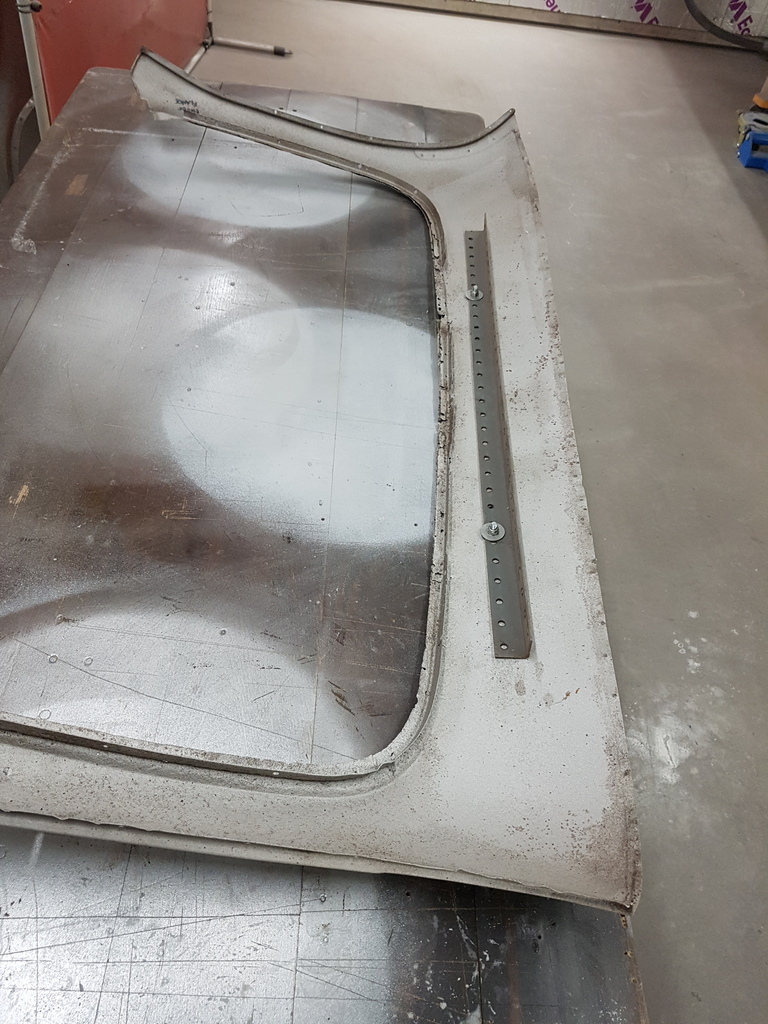 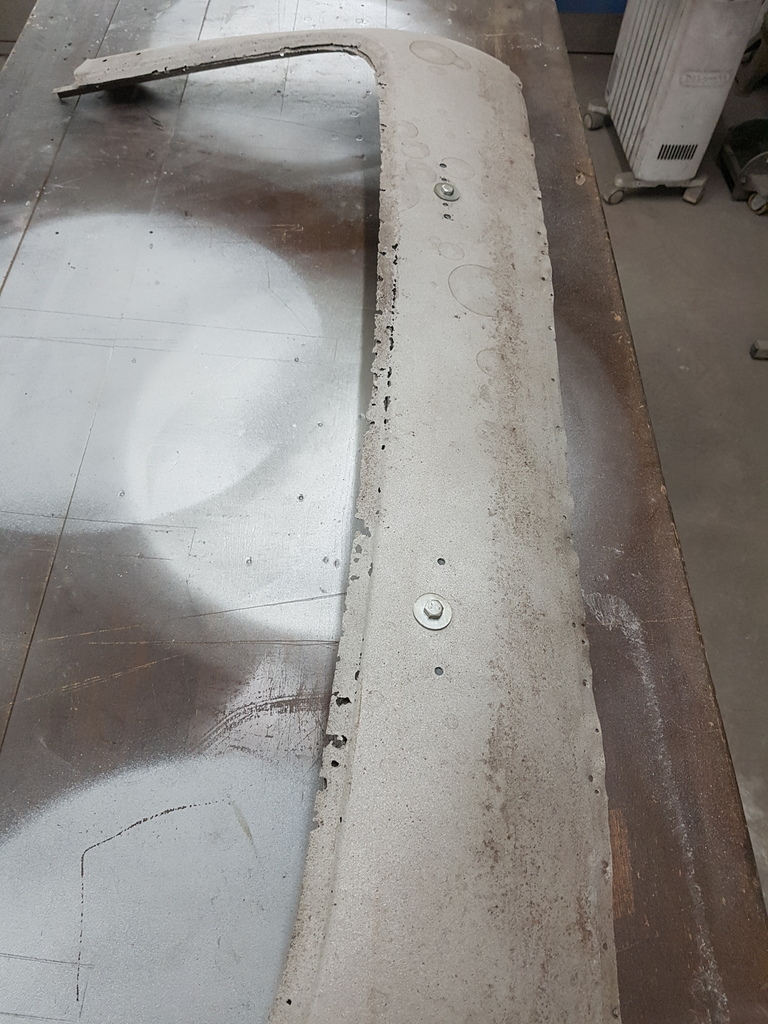 Made up some angle up first on the folder (it's great piece of kit but I am limited to a 620mm bed length so the next decent sized fabrication job that is in the workshop will see it being moved on - I have something else in mind for future fabrication requirements) 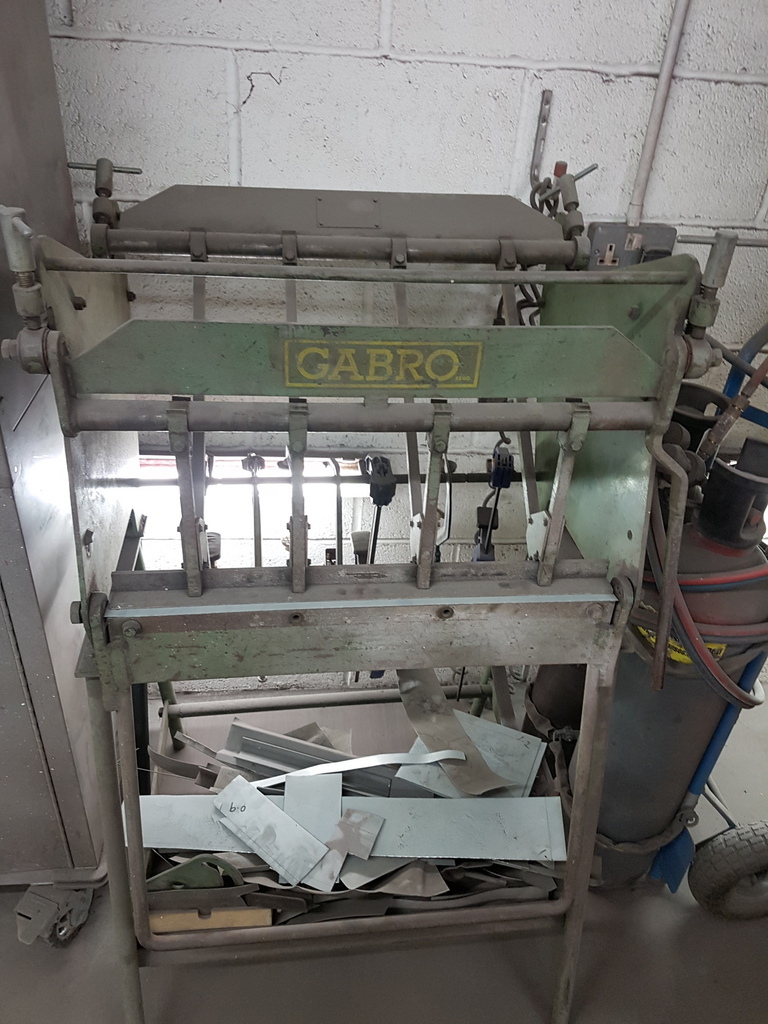 Then used the shrinker to form the radius for the corners 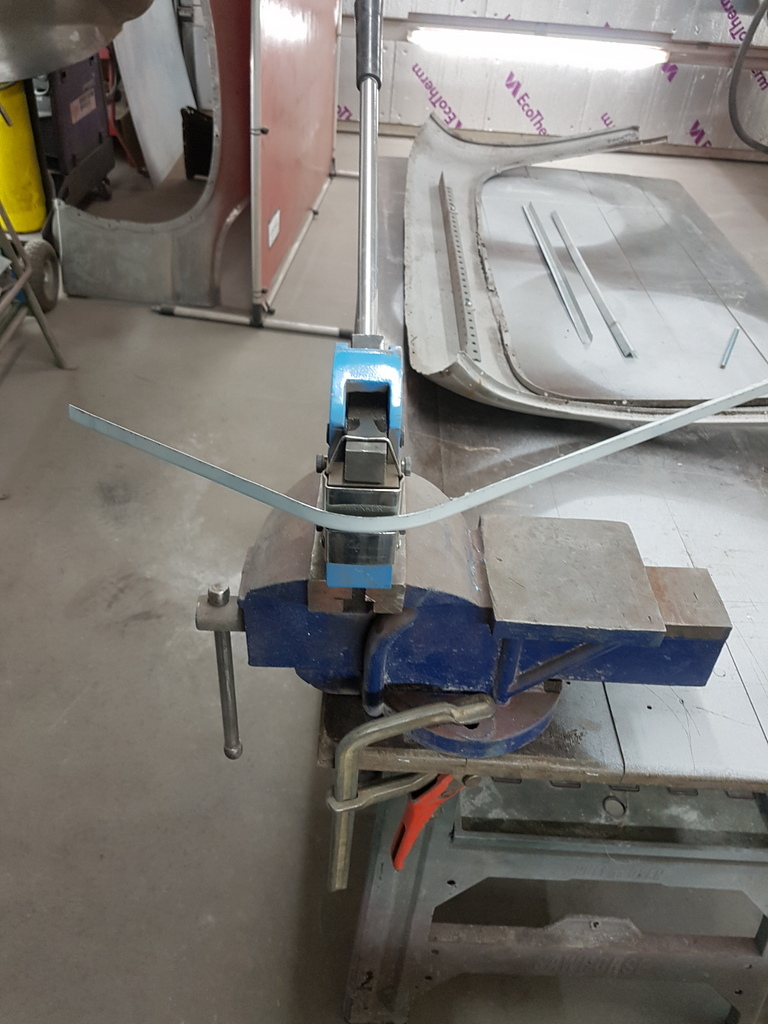  By leaving the old flange edge on I could just utilise it for pattern for the new one 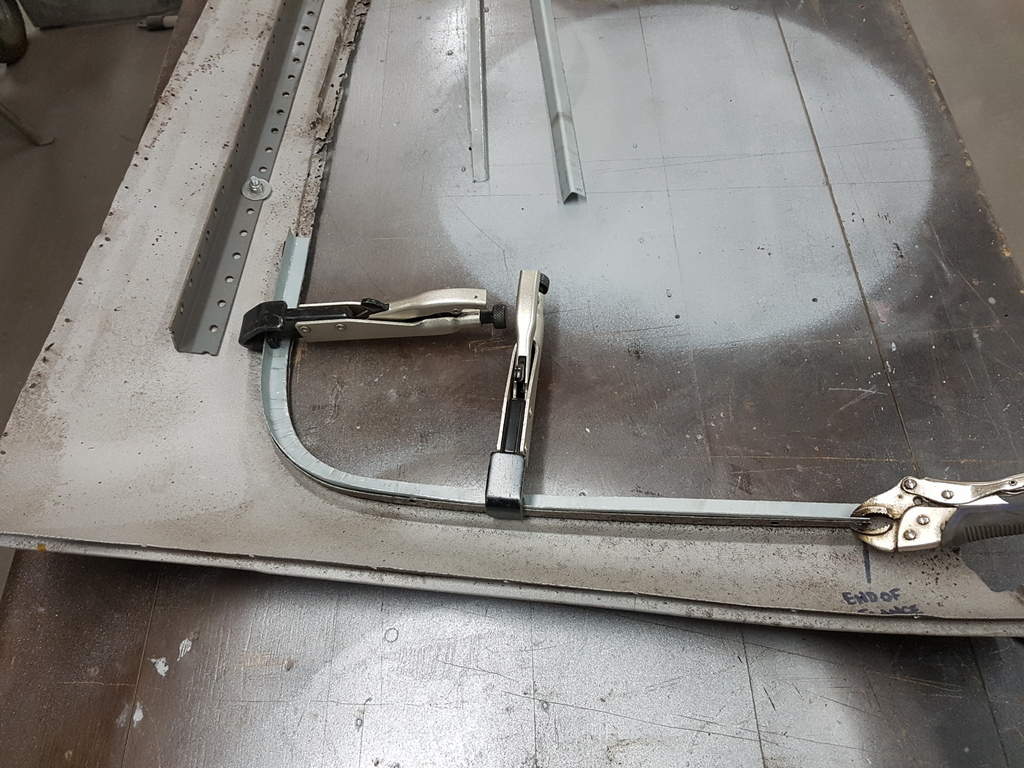 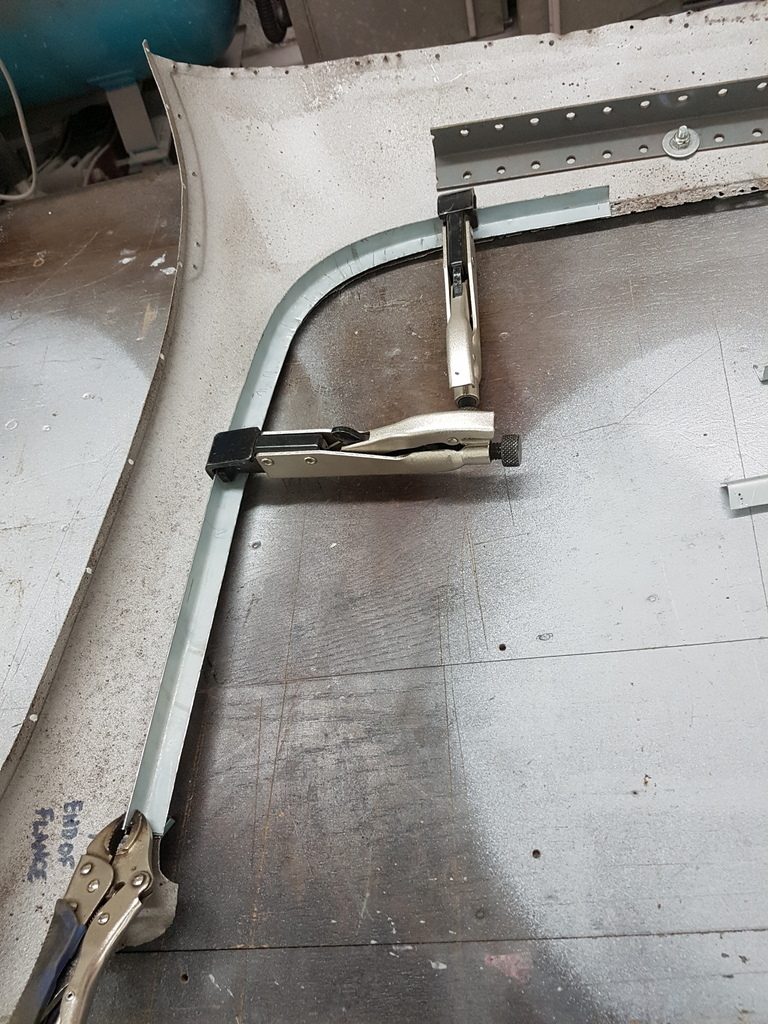 Replicated the process for the other side 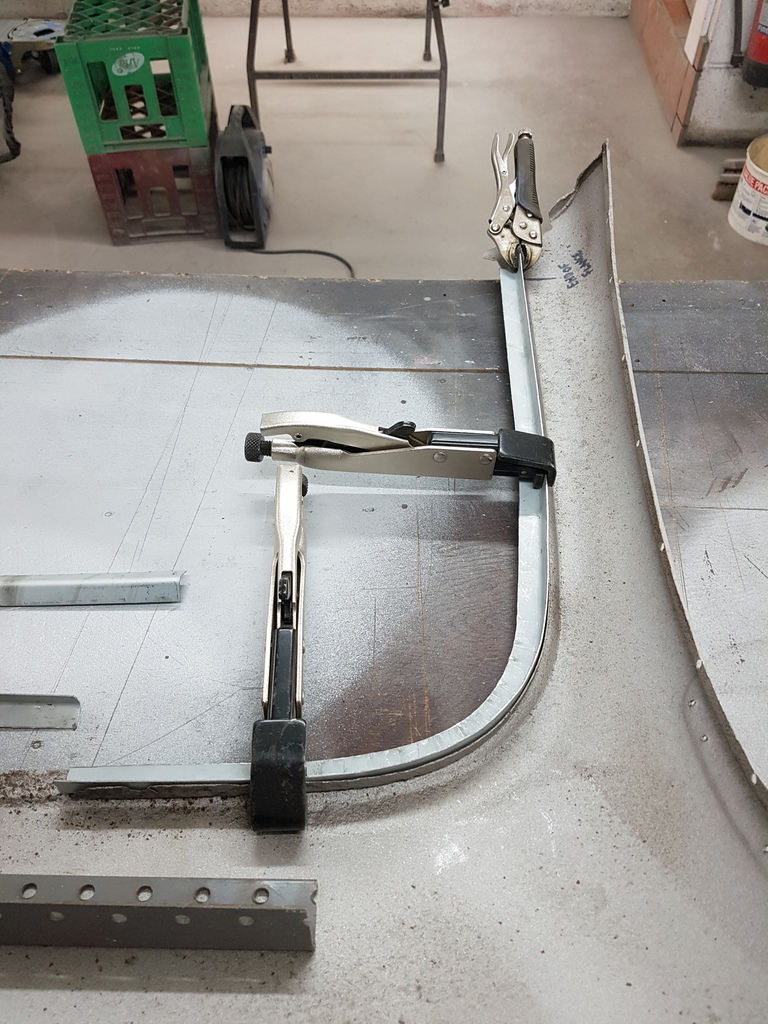 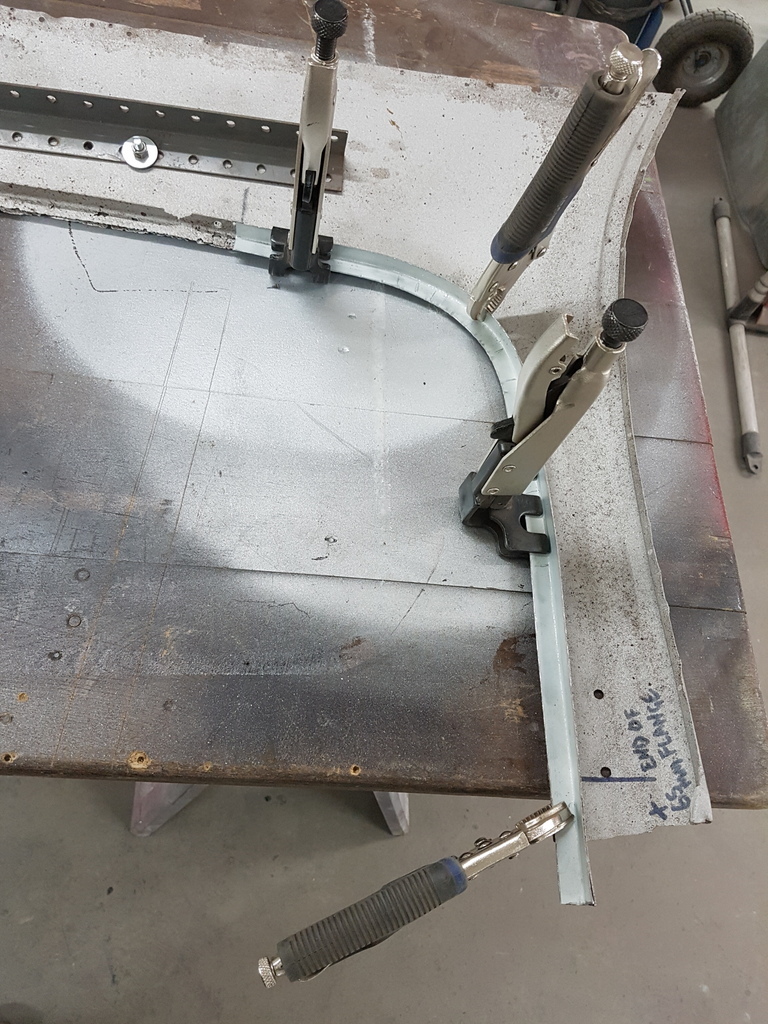 Then formed the top section - this also carries a curvature to its but sorted in seconds with the shrinker 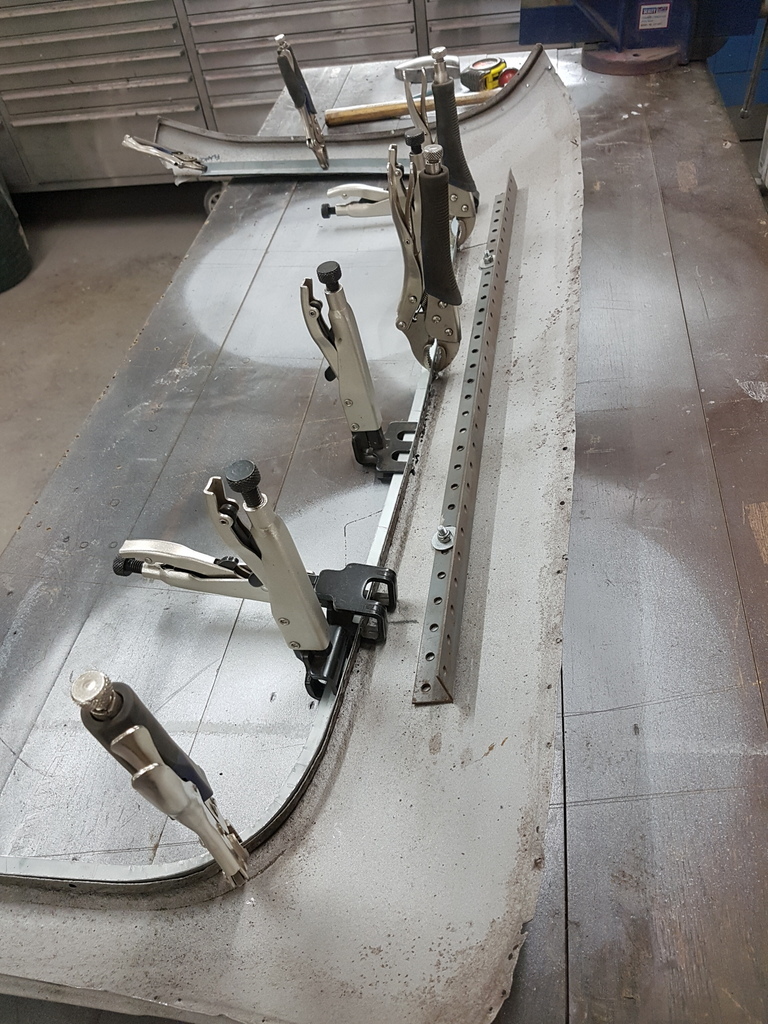 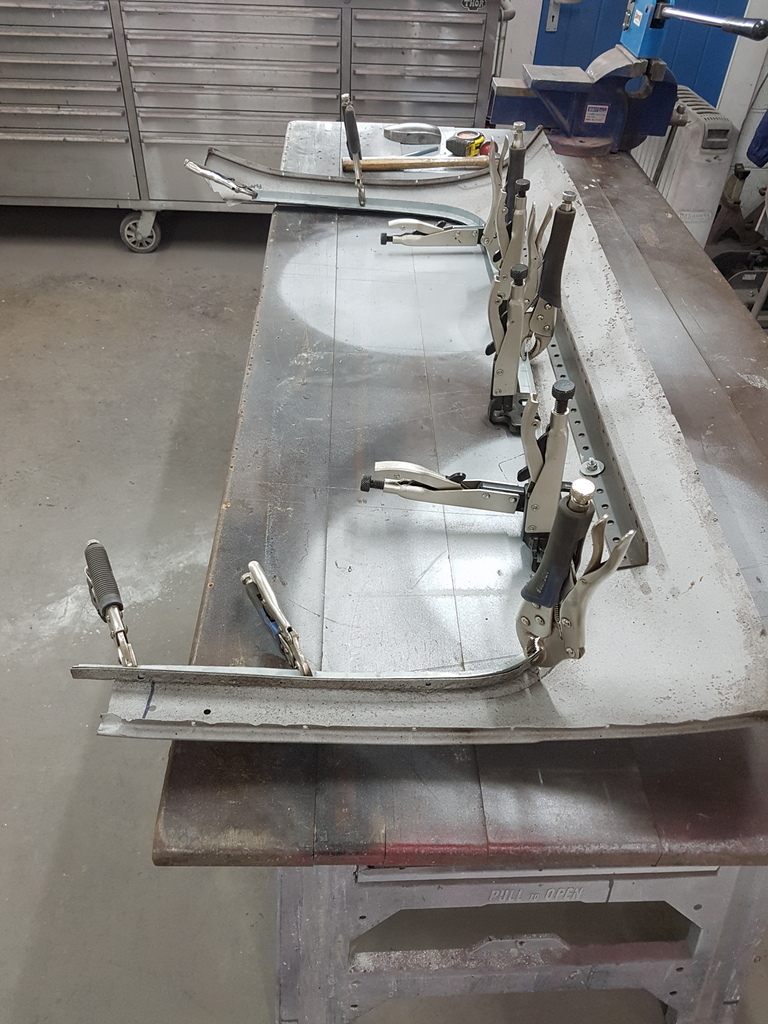 I could now remove the old flange edge and commence the repairs to the aperture flange 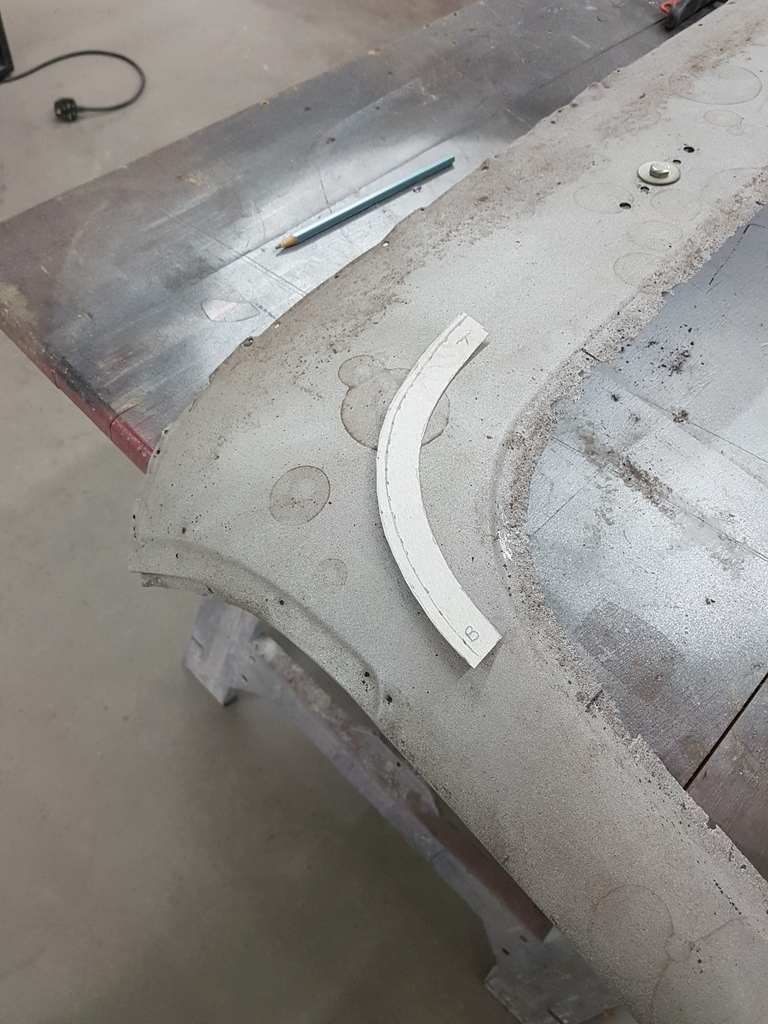 Calls for a little CAD 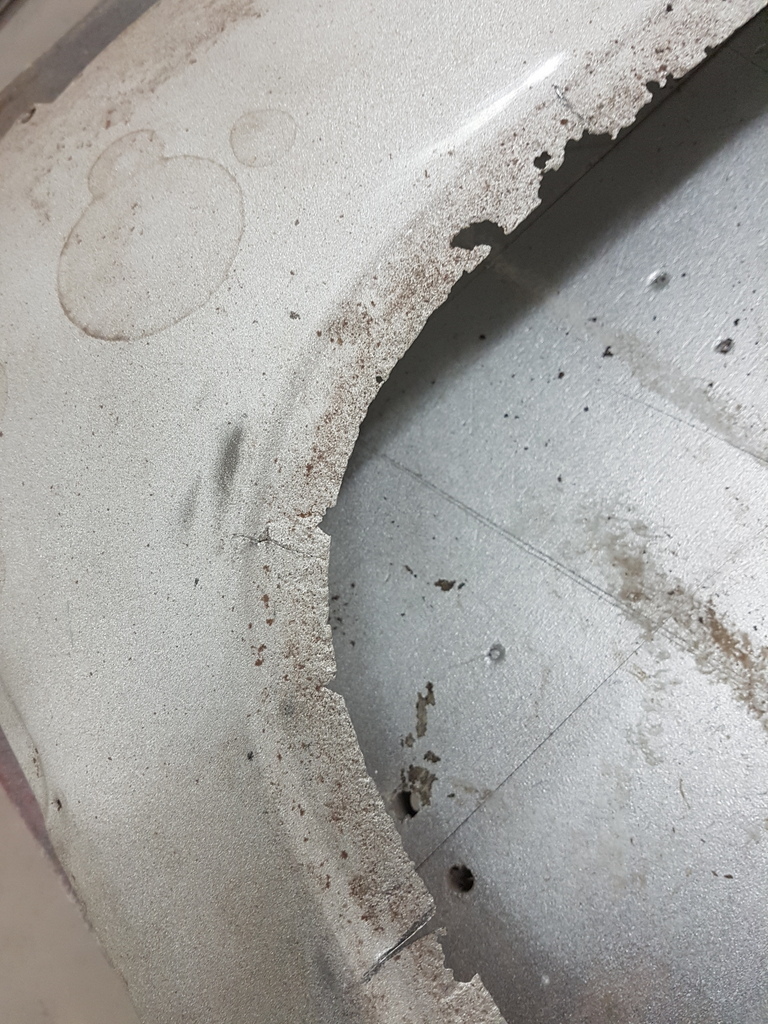 Flange return reduces on the upstand towards the top of the radius 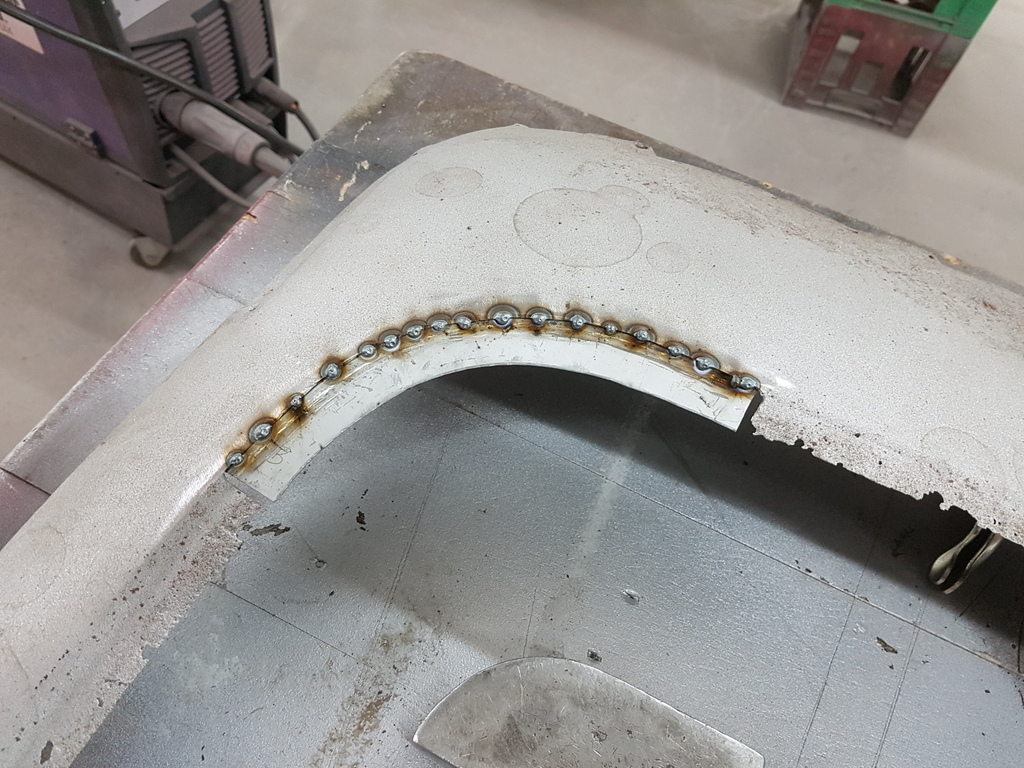 First section cut out and fresh tacked back in 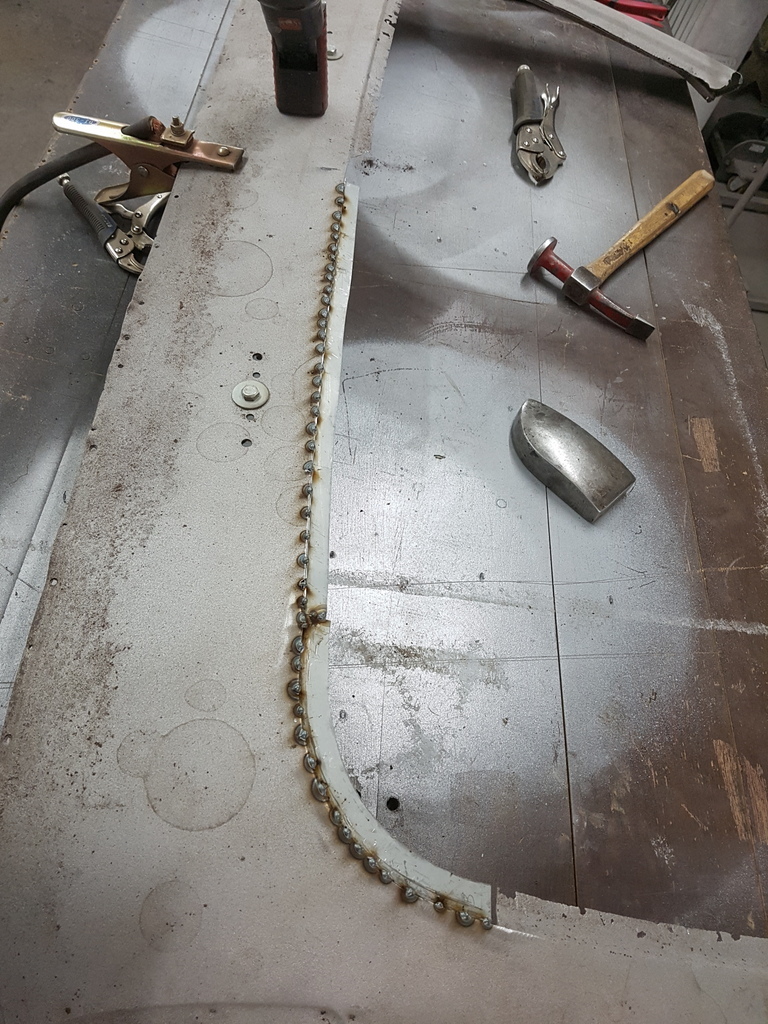 And just keep going 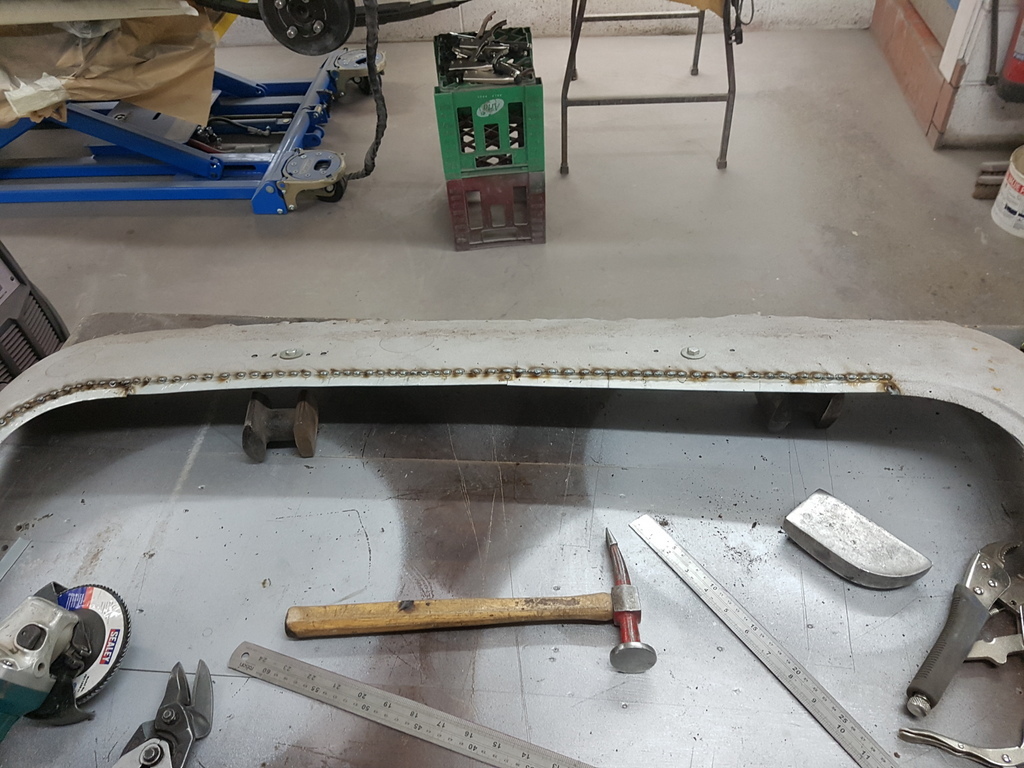 Final section ready for going in but I then ran clean out of workshop time 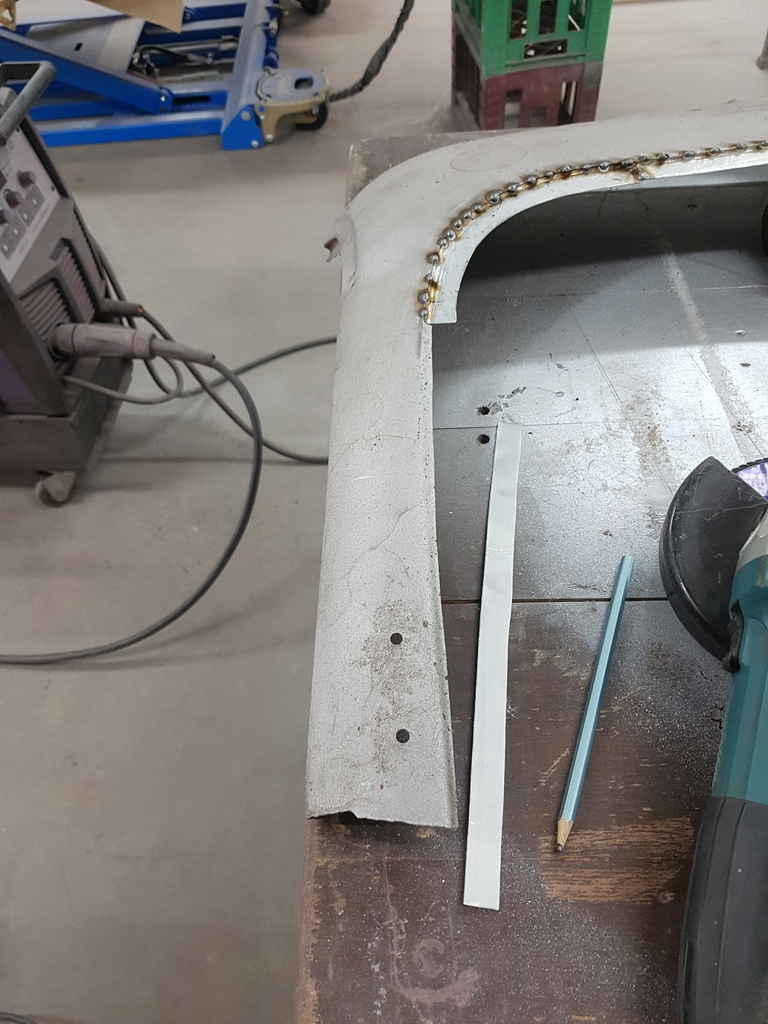 I will find a few hours in the week to get this completed and the inner flange spot welded on - the rest can be done at the show |
| |
Last Edit: Feb 24, 2019 9:46:06 GMT by Deleted
|
|
|
|
|
Feb 26, 2019 19:34:22 GMT
|
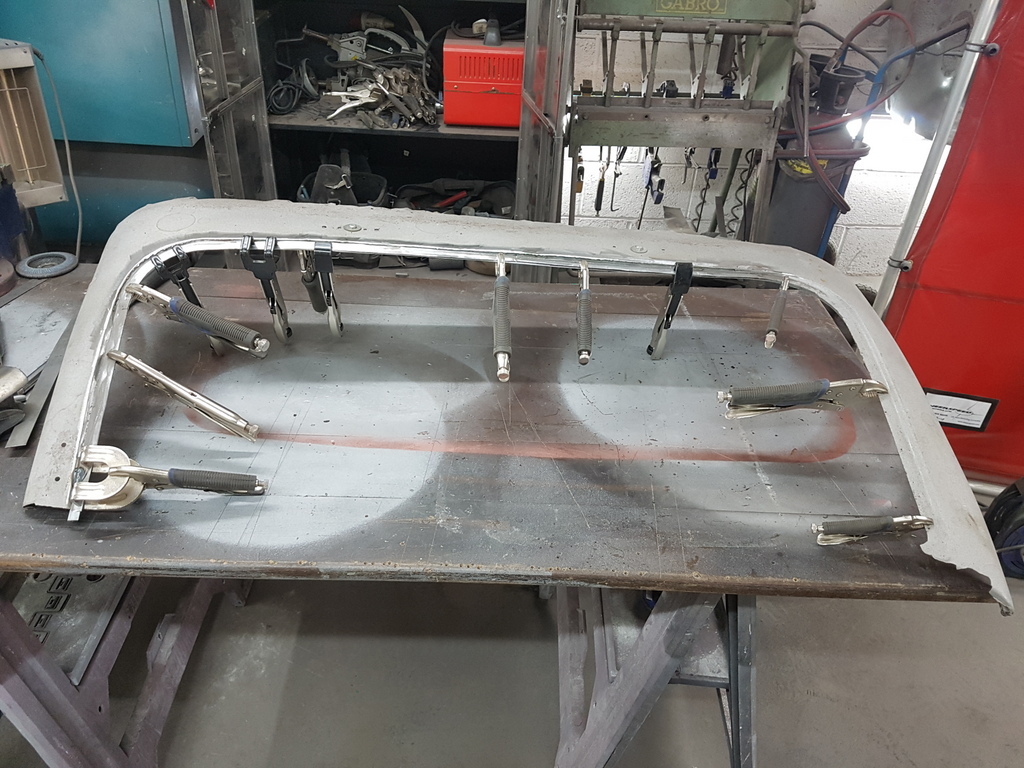 Got the rest of the windscreen aperture fitted & welded up 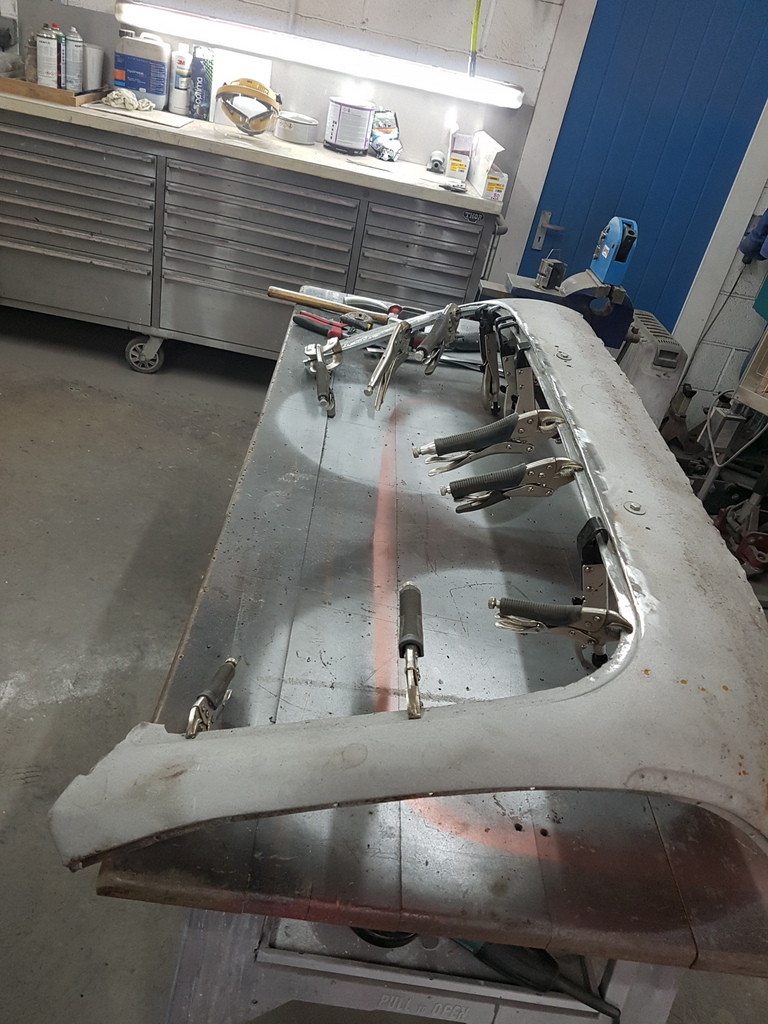 Then clamped the flange edge up ready for spotwelding 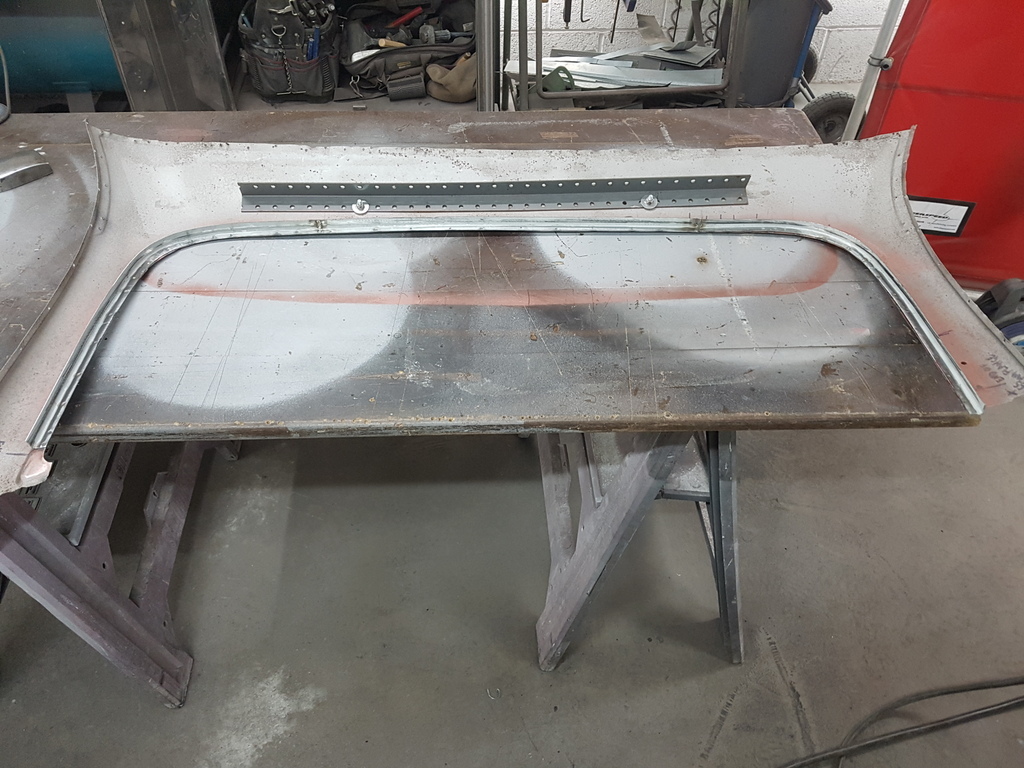 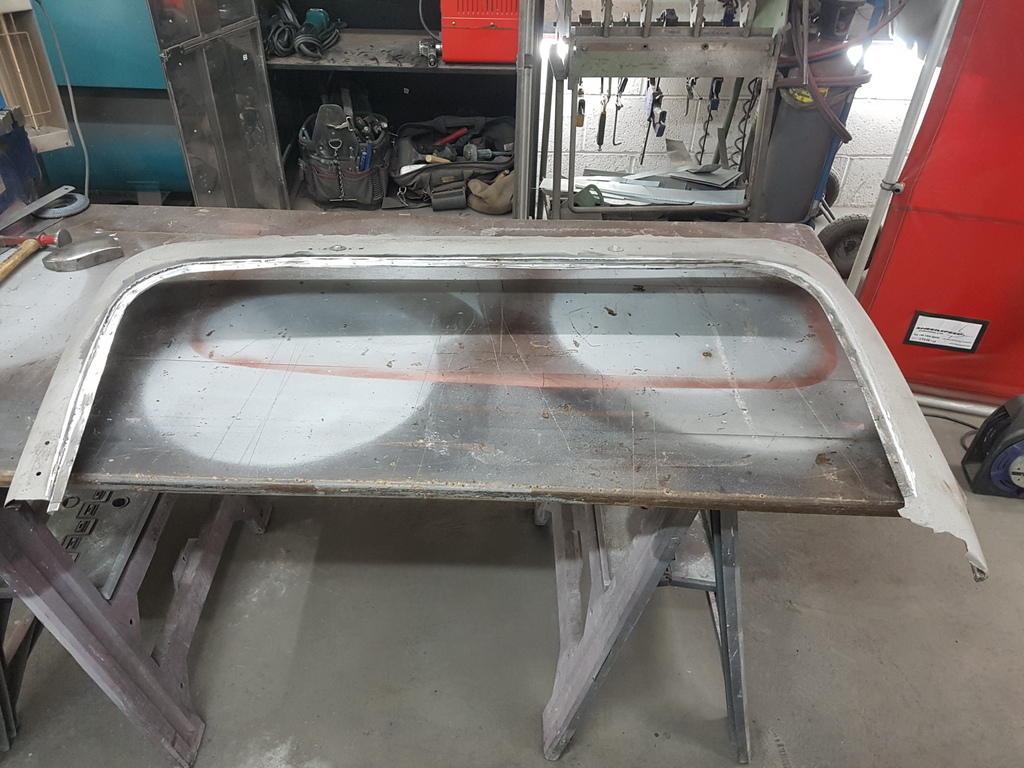 And once cleaned up I could apply a little construction primer around the worked pieces 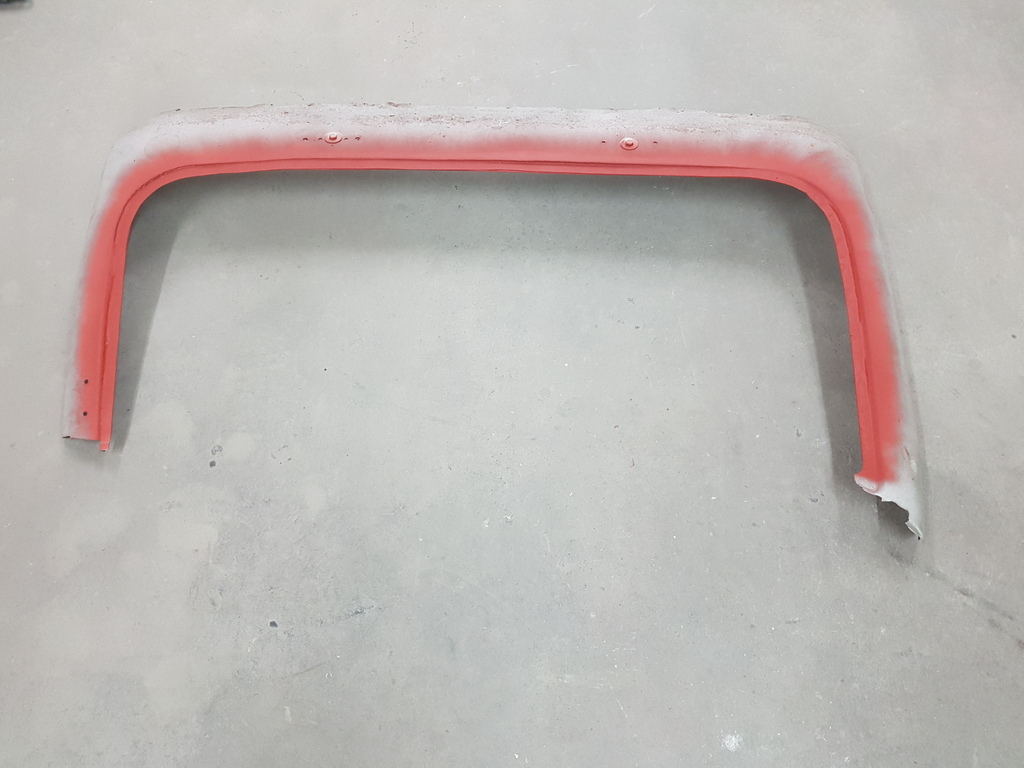 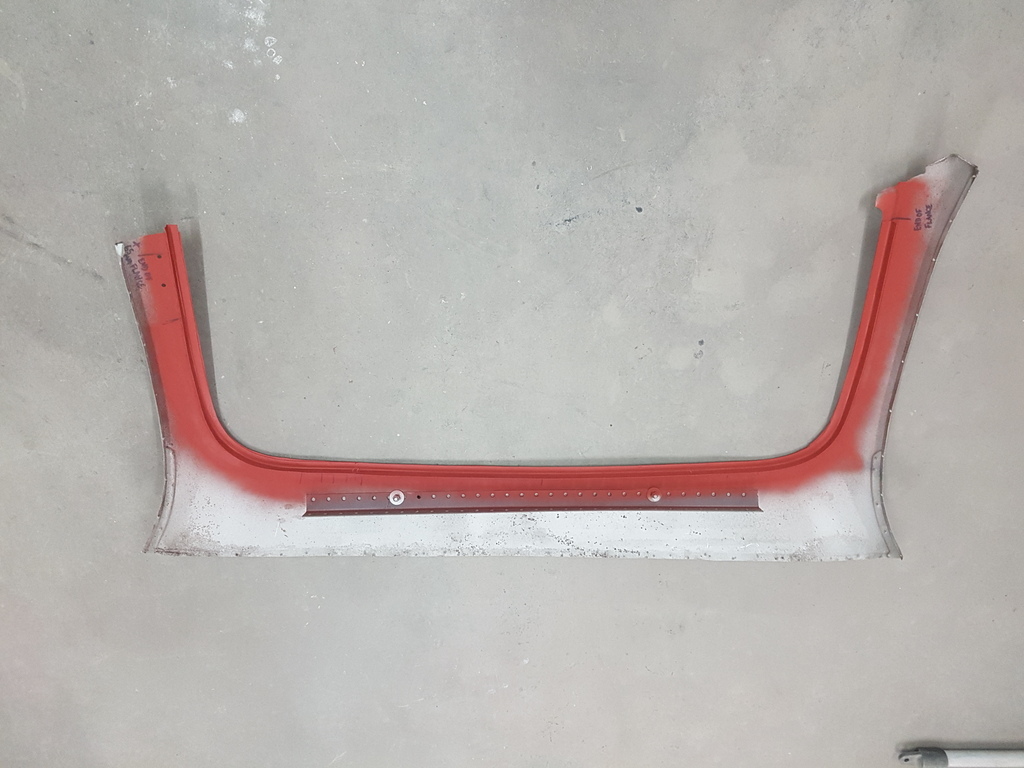 And the rest will get done at the show has I don't need the spotwelder for that work - it still requires a little straightening up with the hammer & dolly but this is better done once it is reattached to the bulkhead and back on the chassis |
| |
Last Edit: Feb 26, 2019 19:36:44 GMT by Deleted
|
|
|
|