adam73bgt
Club Retro Rides Member
Posts: 4,862
Club RR Member Number: 58
|
|
Oct 30, 2015 22:45:43 GMT
|
I'm a fan of the ST spoiler (albeit biased  )   It looked a bit like there was a huge void beneath the bumper before I fitted it, but now the space is filled in. Being quite a fair bit lower than standard has meant its suffered on speed bumps though.. |
| |
Last Edit: Oct 30, 2015 22:45:49 GMT by adam73bgt
|
|
|
|
Al3x
Part of things

Posts: 105 
|
|
Oct 30, 2015 23:39:22 GMT
|
I'm a fan of the ST spoiler (albeit biased ) It looked a bit like there was a huge void beneath the bumper before I fitted it, but now the space is filled in. Being quite a fair bit lower than standard has meant its suffered on speed bumps though.. Looks Awesome that Adam can i ask how you fitted it did you just drill the spoiler and bolt it on? and it looks low like just how i like it cars looking splendid by the way Cheers Alex |
| |
|
|
Al3x
Part of things
Posts: 105
|
|
Oct 30, 2015 23:45:54 GMT
|
Well i thought i would try my latest addition on the car today with the intention of fitting it tomorrow i think it looks absloutley amazing and will match my new St style front spoiler perfectly i apologize for the poor photos was using my old phone  . 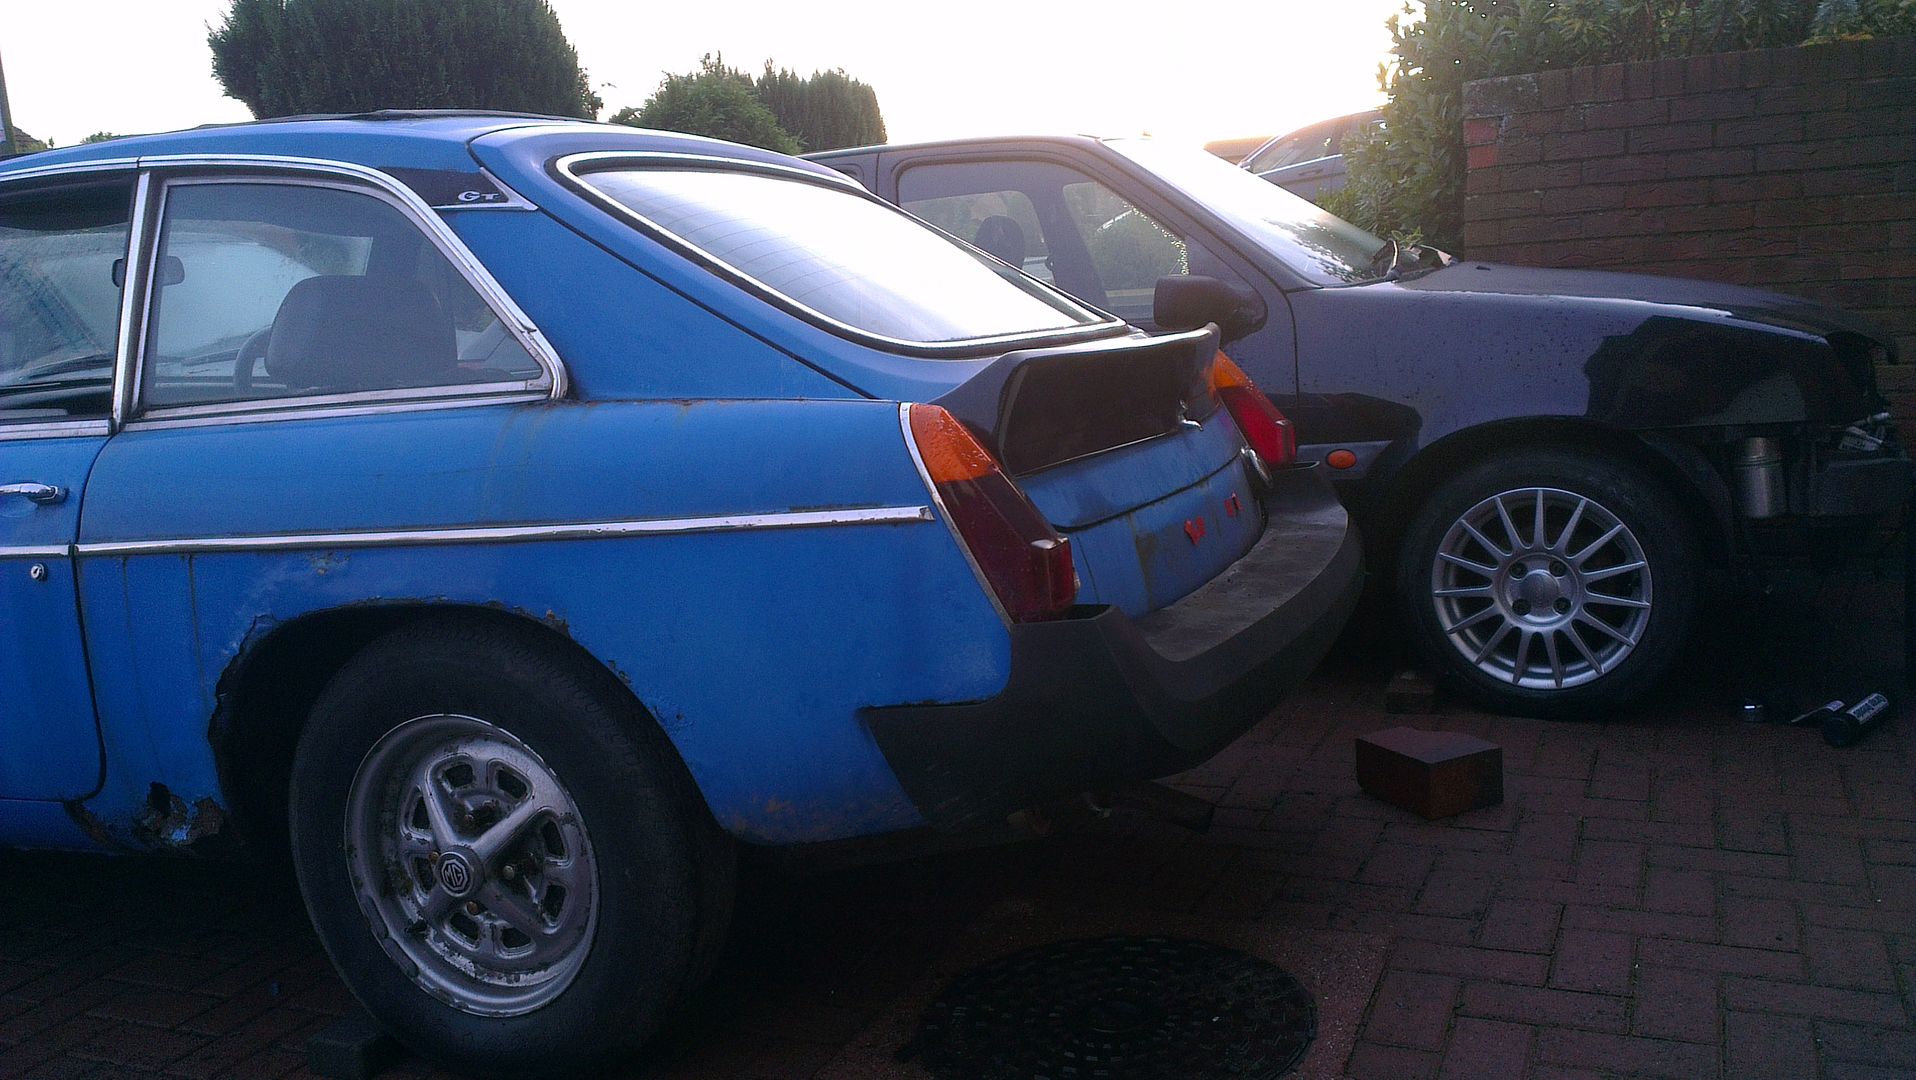 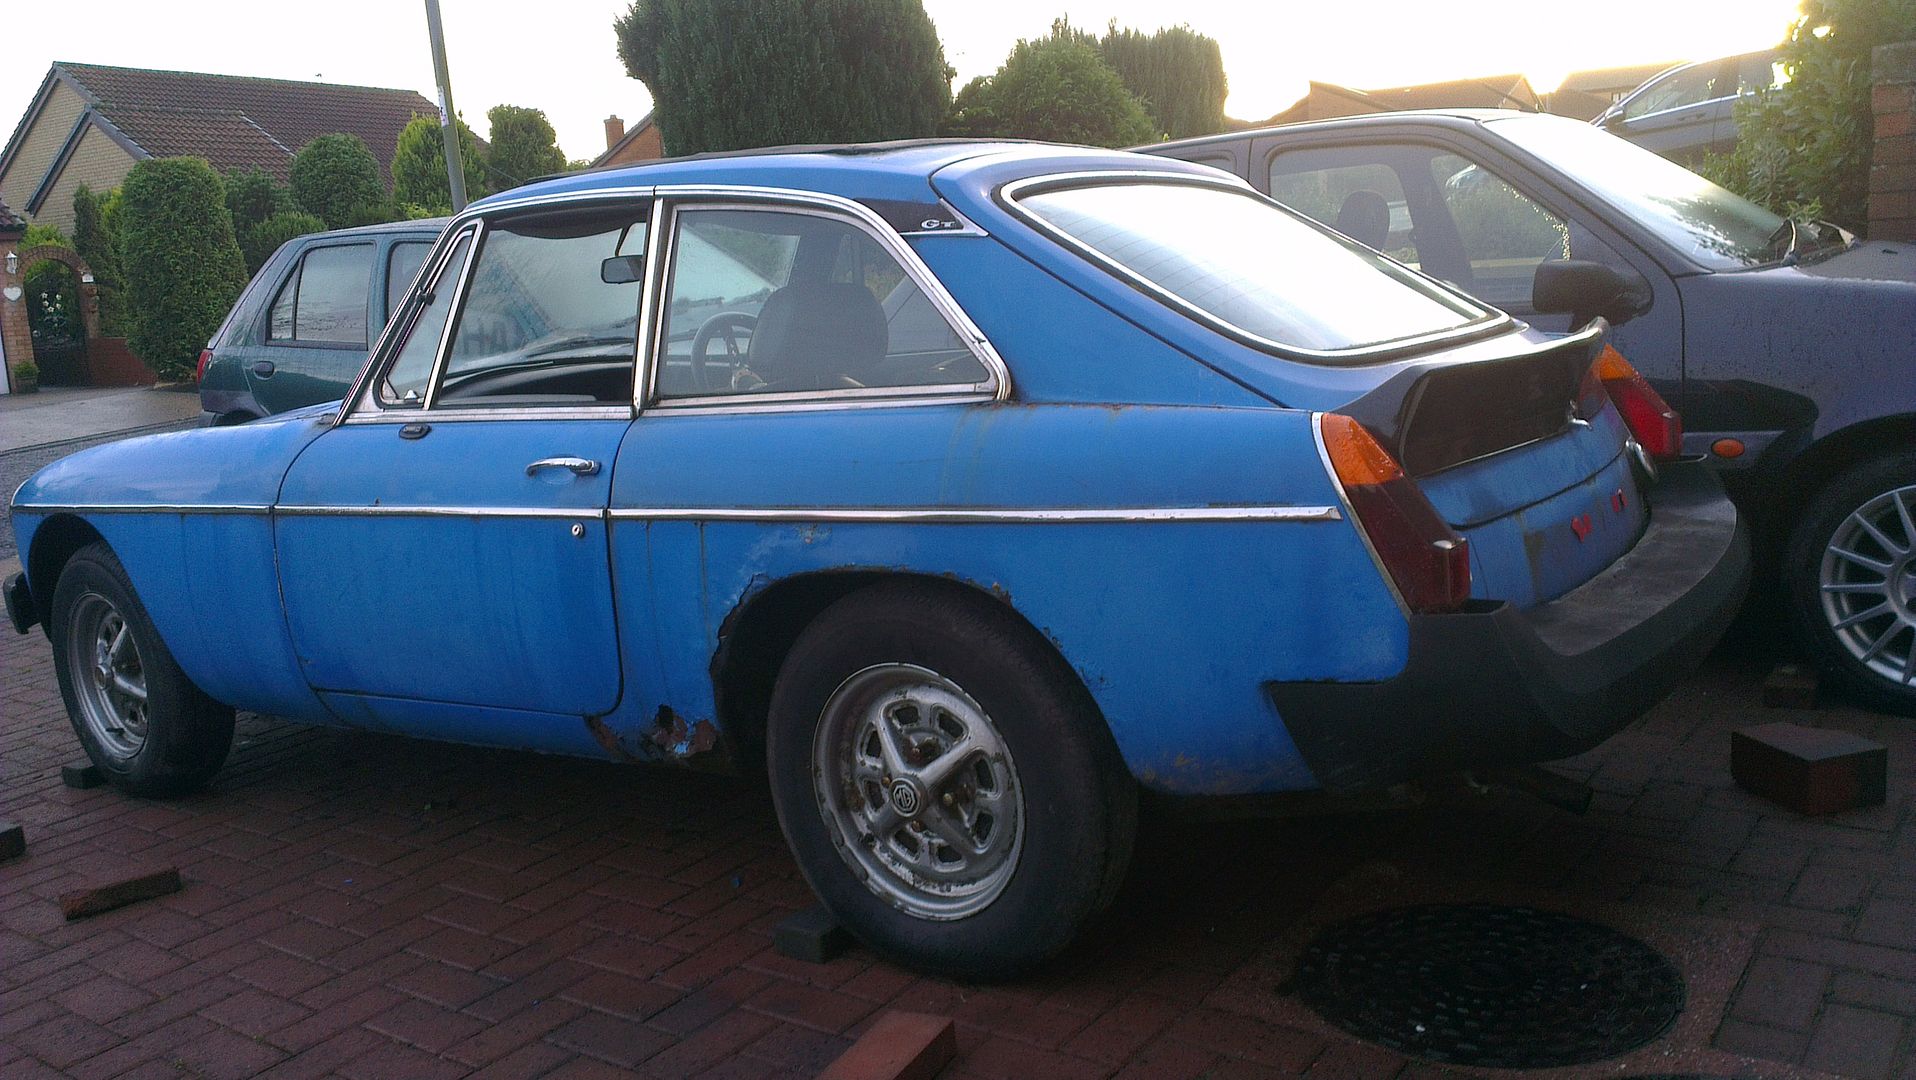 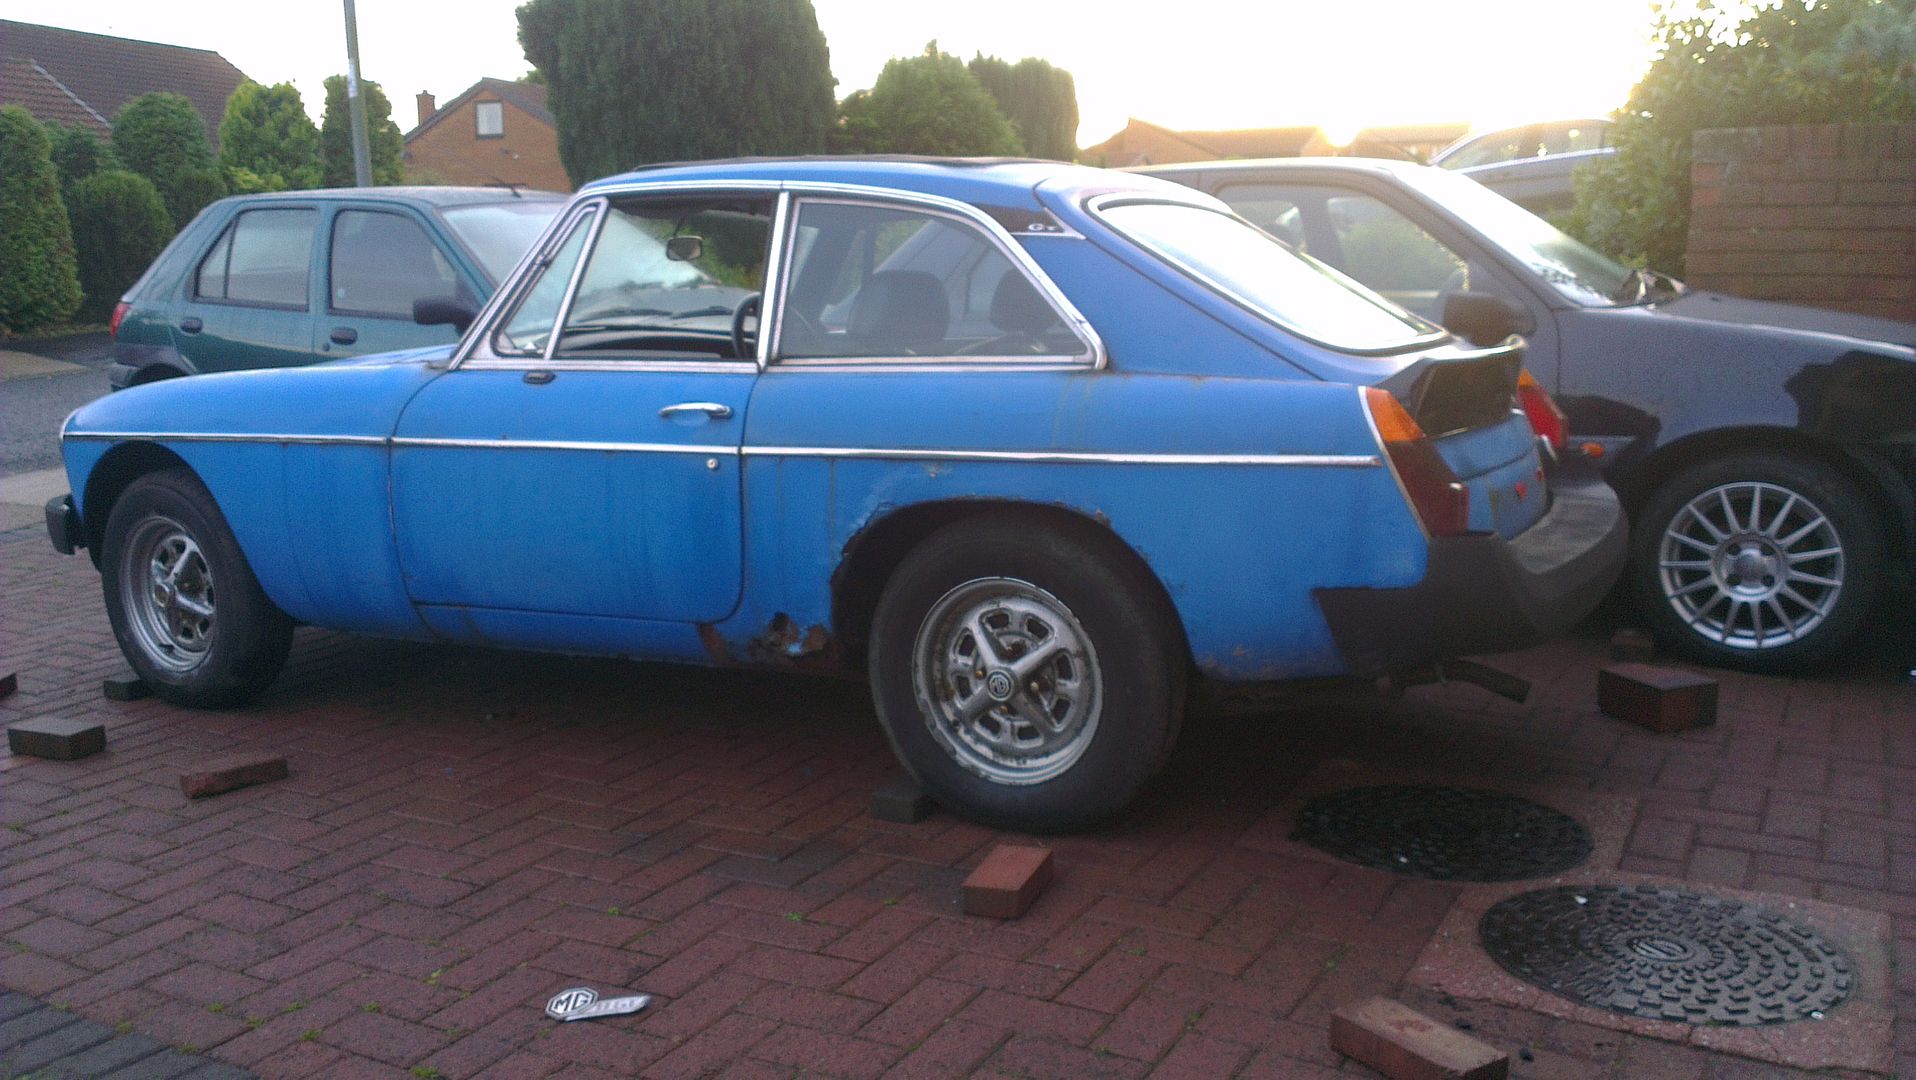 Cheers Alex  I look forward to seeing the ST spoiler fitted, I don't ever recall actually seeing one fitting and noticing it if that makes sense. Mine is an LE rubber bumper one. It had a horribly botched glass fibre one on when we bought it but I replaced it with a ABS plastic one which stands up to knocks and scrapes better. Mgb GT touring car (style) spoiler, I have one on mine as well. Aye Rich i bought the Fiberglass one as it was miles cheaper i regret it like as it feels so flimsy and easy breakable but it will do for now gonna have a go at fitting it tomorrow as well as the rear spoiler ive seen a few debumpered cars with the st style front lip i really like so hopefully mine looks good. any tips for fitting the rear spoiler? Cheers Rich Cheers Alex |
| |
Last Edit: Oct 30, 2015 23:46:57 GMT by Al3x
|
|
adam73bgt
Club Retro Rides Member
Posts: 4,862
Club RR Member Number: 58
|
|
Oct 30, 2015 23:58:23 GMT
|
Looks Awesome that Adam can i ask how you fitted it did you just drill the spoiler and bolt it on? and it looks low like just how i like it cars looking splendid by the way Cheers Alex Thanks  Yeah some holes along the top edge of the spoiler, fitted to the same mounting holes as the standard valance. It also needed a couple of holes cutting out to get around the bumper mounting brackets but its all pretty well hidden by the bumper when its fitted |
| |
|
|
Rich
Club Retro Rides Member
Posts: 6,234
Club RR Member Number: 160
|
Vanessa The 1979 MGB GT- Dat RustRich
@foxmcintyre
Club Retro Rides Member 160
|
|
|
I look forward to seeing the ST spoiler fitted, I don't ever recall actually seeing one fitting and noticing it if that makes sense. Mine is an LE rubber bumper one. It had a horribly botched glass fibre one on when we bought it but I replaced it with a ABS plastic one which stands up to knocks and scrapes better. Mgb GT touring car (style) spoiler, I have one on mine as well. Aye Rich i bought the Fiberglass one as it was miles cheaper i regret it like as it feels so flimsy and easy breakable but it will do for now gonna have a go at fitting it tomorrow as well as the rear spoiler ive seen a few debumpered cars with the st style front lip i really like so hopefully mine looks good. any tips for fitting the rear spoiler? Cheers Rich Cheers Alex Does the rear spoiler have studs or captive nuts? I drilled the wrong place first of all because mine has studs on. Suffice to say it's just a game of eyeing it up, checking, checking again and carefully drilling the holes in the rightish place. I went a bit oversize and used 'repair' washers to give a few mm of adjustment, and put a strip of double sided foam trim tape along the top edge where it touches the body to stop water running under it, and throughly sealed the back of the studs/nuts with copious amounts of seam sealer. My front spoiler is held onto the valance with A2 stainless cap-head bolts. Start fitting in the middle when you are happy with the fit, and work round to the sides |
| |
|
|
Al3x
Part of things
Posts: 105
|
|
|
|
Looks Awesome that Adam can i ask how you fitted it did you just drill the spoiler and bolt it on? and it looks low like just how i like it cars looking splendid by the way Cheers Alex Thanks Yeah some holes along the top edge of the spoiler, fitted to the same mounting holes as the standard valance. It also needed a couple of holes cutting out to get around the bumper mounting brackets but its all pretty well hidden by the bumper when its fitted Ahh Okay Cheers for the info Dude i appreciate it Cheers Alex |
| |
|
|
Al3x
Part of things
Posts: 105
|
|
|
|
Aye Rich i bought the Fiberglass one as it was miles cheaper i regret it like as it feels so flimsy and easy breakable but it will do for now gonna have a go at fitting it tomorrow as well as the rear spoiler ive seen a few debumpered cars with the st style front lip i really like so hopefully mine looks good. any tips for fitting the rear spoiler? Cheers Rich Cheers Alex Does the rear spoiler have studs or captive nuts? I drilled the wrong place first of all because mine has studs on. Suffice to say it's just a game of eyeing it up, checking, checking again and carefully drilling the holes in the rightish place. I went a bit oversize and used 'repair' washers to give a few mm of adjustment, and put a strip of double sided foam trim tape along the top edge where it touches the body to stop water running under it, and throughly sealed the back of the studs/nuts with copious amounts of seam sealer. My front spoiler is held onto the valance with A2 stainless cap-head bolts. Start fitting in the middle when you are happy with the fit, and work round to the sides Mine has Bolts with the captive nuts being part of the spoiler and mine was supplied with some rubber seal to put along the top edge. and thanks for the info about the valance I'm unsure whether I'm going chrome Bumper or debumpered yet . i will get some stainless bolts as the ones that are on there now are just basicly dust Thankyou for the Info Rich Cheers Alex |
| |
|
|
GoJo372
Part of things
www.gojoflocking.co.uk
Posts: 552
|
|
Oct 31, 2015 21:15:31 GMT
|
Well i thought i would try my latest addition on the car today with the intention of fitting it tomorrow i think it looks absloutley amazing and will match my new St style front spoiler perfectly i apologize for the poor photos was using my old phone . Cheers Alex I look forward to seeing the ST spoiler fitted, I don't ever recall actually seeing one fitting and noticing it if that makes sense. Mine is an LE rubber bumper one. It had a horribly botched glass fibre one on when we bought it but I replaced it with a ABS plastic one which stands up to knocks and scrapes better. Mgb GT touring car (style) spoiler, I have one on mine as well. Cheers Alex lol |
| |
|
|
Al3x
Part of things
Posts: 105
|
|
Oct 31, 2015 22:01:05 GMT
|
|
|
| |
|
|
CaptainSlog
Part of things
Posts: 506
Club RR Member Number: 180
|
|
|
|
|
Can chrome bumpers be fitted to replace those awful rubber things - the US has a lot to answer for with those hideous things!
|
| |
|
|
|
|
|
|
|
|
|
|
Can't help but wonder if your efforts and funds should not be aimed at the sill remediation project before spending money on the shinny bits? That is a proper amount of rust repair in front of you and I would have to see the money wasted.
|
| |
|
|
|
|
|
|
|
|
Wise words from Bjornagn!
|
| |
|
|
GavinJ
Club Retro Rides Member
MGB 3.9 v8 Sebring
Posts: 927
Club RR Member Number: 209
|
|
|
|
Well i thought i would try my latest addition on the car today with the intention of fitting it tomorrow i think it looks absloutley amazing and will match my new St style front spoiler perfectly i apologize for the poor photos was using my old phone . Cheers Alex The spoiler is a bit of a pig to get sitting right and mark up, but your right two pairs of hands make it easier!! mine had to be re-shaped slightly to get it sitting nicely but nothing a tickle with a file will not sort out. Here's mine fitted   Keep at it but like the others has said start looking at that rust, first thing i'd do is start compiling a list repair panels.... |
| |
Last Edit: Nov 9, 2015 12:24:37 GMT by GavinJ
|
|
|
|
|
Jan 31, 2016 13:57:39 GMT
|
|
Any progress on this one?
|
| |
|
|
Al3x
Part of things
Posts: 105
|
|
Jun 29, 2016 13:51:14 GMT
|
Well FinallyFirstly i would like to apologize for my lack of updates on Vanessa the main reason for this is basically i didn't do anything with it however thats all changed now as i have bought a sill and plan on getting the drivers side done this week and also making a start on the passenger side and other rust repair. so the first step was to strip the fuel tank out and asses the condition of the tank and the surrounding areas. So up she goes 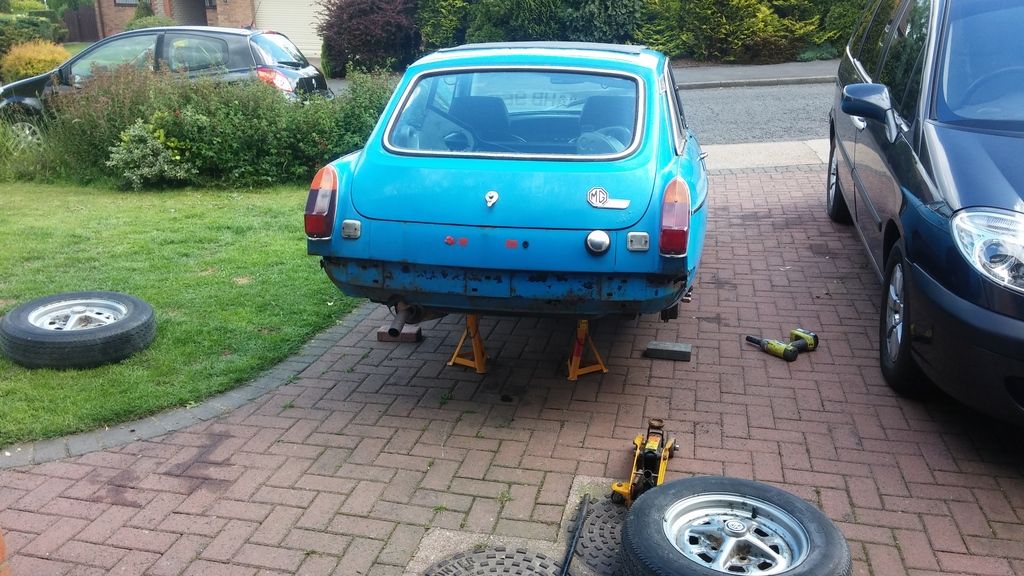 A few pics of the suspension and underneath not to bad just mainly surface rust and dirt 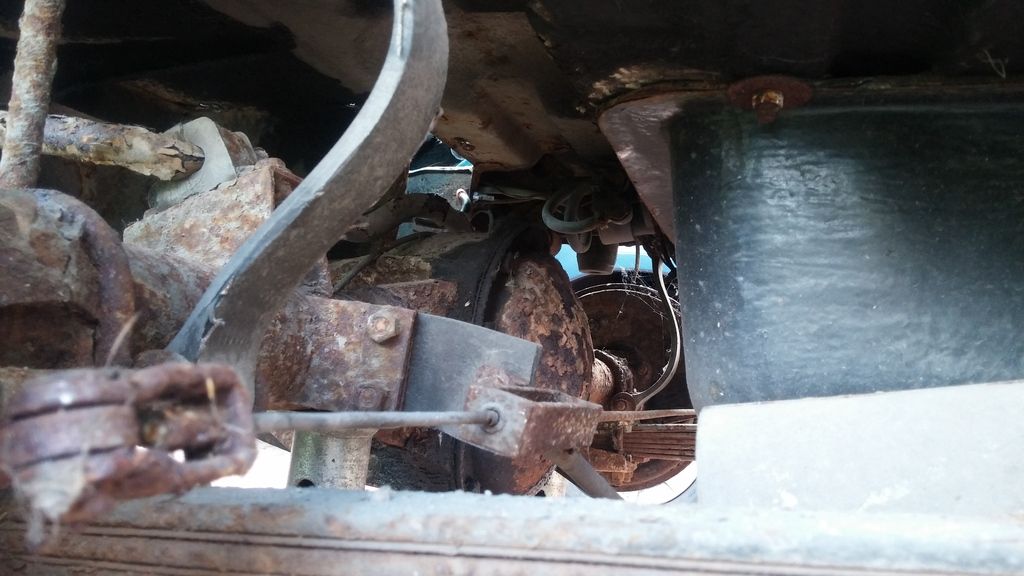 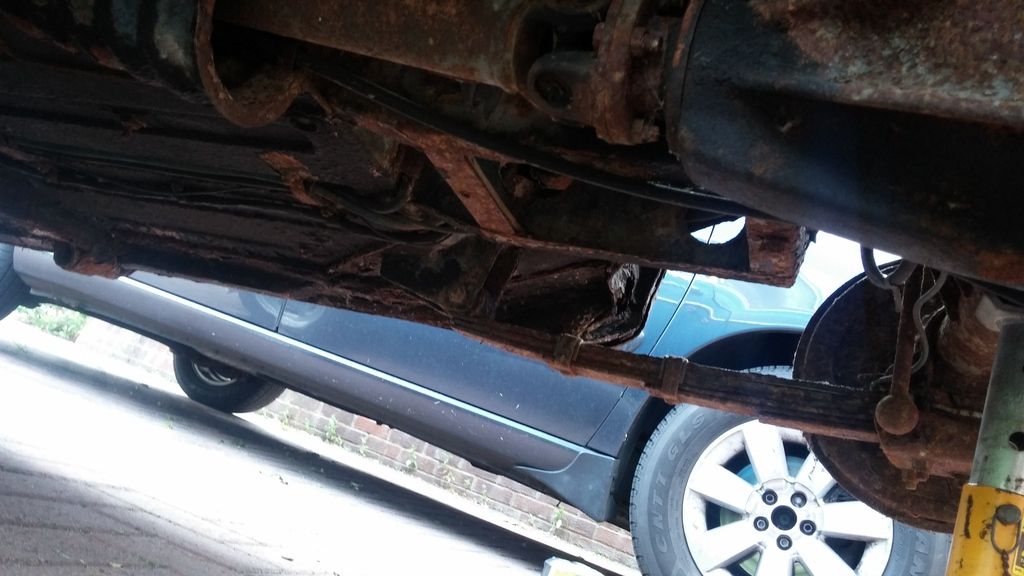 Then out came the tank and the very brown coloured fuel that came out if it it smelt disgusting  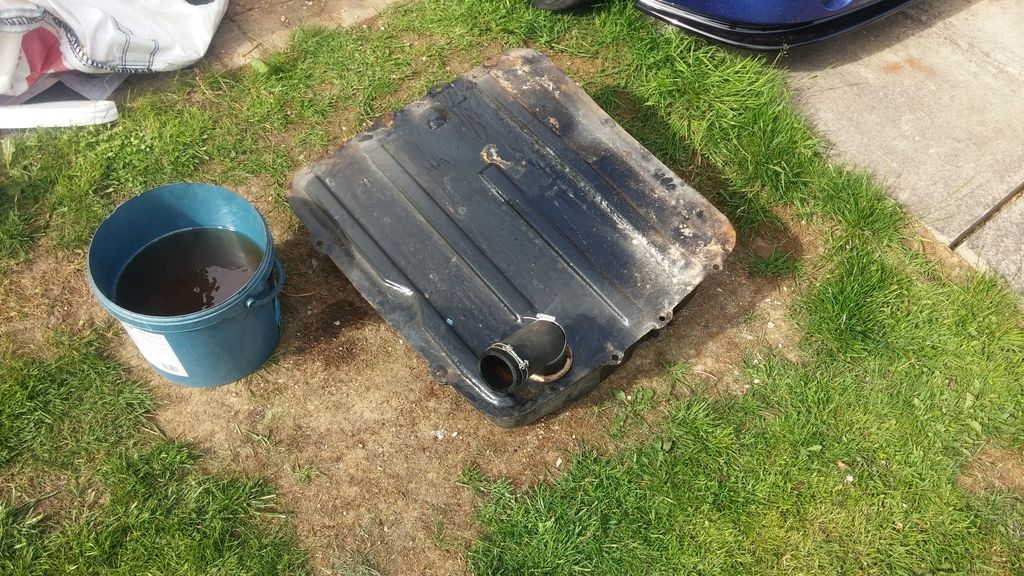  Boot floor in good nick 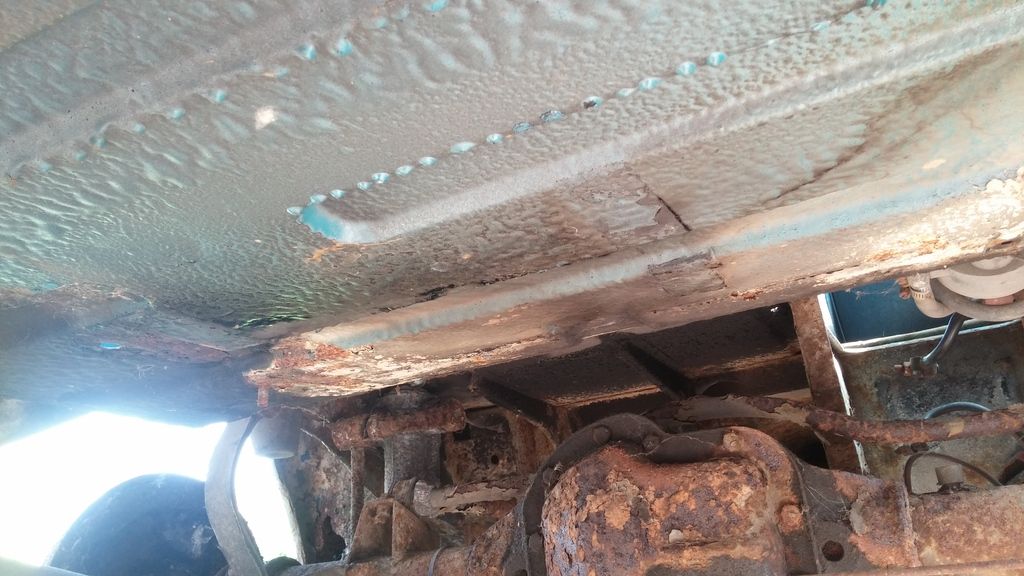 My next job is interior out so i can start cutting the drivers side sill out Cheers Alex
|
| |
|
|
|
|
|
Jun 29, 2016 16:12:57 GMT
|
|
Got you bookmarked and standing by in case you need help. If you follow the plan I gave you and ask when stuck, you should be fine.
If you want to go over it step-by-step before you start cutting, just ask.
I would allow a bit more time for the fist side since it will be new to you. The second side is always easier.
The above phrase worries me: What panels do you have on hand for the sill job? You are going to need the outer sill, middle membrane and a full inner sill from BMH.
What tools do you have on-hand?
Angle grinder with 1/16" cutting wheels?
Wire wheel for angle grinder?
Sawzall?
Welder?
Drill?
Bench grinder to sharpen bits?
three or four 1/8" bits
One 5/16" bit ( you want to re-shape the tip for spotweld removal)
|
| |
Last Edit: Jun 29, 2016 16:17:51 GMT by bjornagn
|
|
Al3x
Part of things
Posts: 105
|
|
|
|
|
|
| |
Last Edit: Jul 1, 2016 15:21:36 GMT by Al3x
|
|
Al3x
Part of things
Posts: 105
|
|
|
|
Got you bookmarked and standing by in case you need help. If you follow the plan I gave you and ask when stuck, you should be fine. If you want to go over it step-by-step before you start cutting, just ask. I would allow a bit more time for the fist side since it will be new to you. The second side is always easier. The above phrase worries me: What panels do you have on hand for the sill job? You are going to need the outer sill, middle membrane and a full inner sill from BMH. What tools do you have on-hand? Angle grinder with 1/16" cutting wheels? Wire wheel for angle grinder? Sawzall? Welder? Drill? Bench grinder to sharpen bits? three or four 1/8" bits One 5/16" bit ( you want to re-shape the tip for spotweld removal) Hiya mate i really appreciate the help i really do I'm going to follow your step by step on doing the sills and with regards to the sill i got the whole kit from moss which has all the parts of the sill in it including outer sill, inner sill, castle section, jacking point, strengthener & sill end filler plates. and i have basic tools such as a grinder and the right cutting discs and have the welder and a drill and a big selection of drill bits i just need a spotweld removal bit or to make one Cheers Alex |
| |
|
|
|
|
|
|
|
|
You wont actually need a spot-weld cutter for most (if any) of this if you follow my instructions. Pretty much everything is going to be a through hole.
Get the front wing off and start at the front by cutting around the castle rail where it wraps around the bulkhead behind the tire. Then move to the side where the sill and the outer footwell are joined.
|
| |
|
|
Al3x
Part of things
Posts: 105
|
|
|
|
You wont actually need a spot-weld cutter for most (if any) of this if you follow my instructions. Pretty much everything is going to be a through hole. Get the front wing off and start at the front by cutting around the castle rail where it wraps around the bulkhead behind the tire. Then move to the side where the sill and the outer footwell are joined. Thats good then mate i should have the wings off this week and ill get cracked on with the sill following your instructions. Cheers Alex |
| |
|
|
|
|


 )
)


 .
.


 Yeah some holes along the top edge of the spoiler, fitted to the same mounting holes as the standard valance. It also needed a couple of holes cutting out to get around the bumper mounting brackets but its all pretty well hidden by the bumper when its fitted